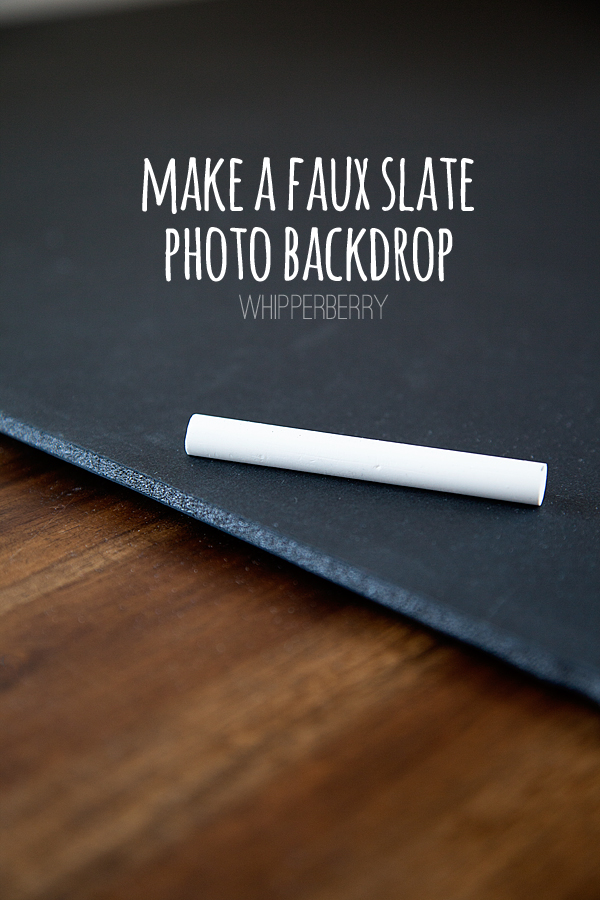
DIY Faux Slate Chalkboard Photo Background // When I first started blogging, one of my main goals was to learn how to take good pictures. If you were to go back to the beginning of WhipperBerry from the summer of 2010, You can see my photos were not exactly Pinterest worthy. Luckily Pinterest hadn’t opened it’s virtual doors quite yet.
One of my favorite things about bloggin is that I am constantly learning and developing new skills. I am constantly dissecting photos that I love, to figure out how I can create the same effect. Now, with Pinterest as a major player in our social media world… Photography is EVERYTHING. One of the easiest ways for a post to go viral these days is for it to be pinned and repined on Pinterest. A post can develop some strong legs on Pinterest and really bring in some major traffic for your site. The bottom line is… If you don’t have a good photo, you are missing a huge chunk of the successful blog post equation.
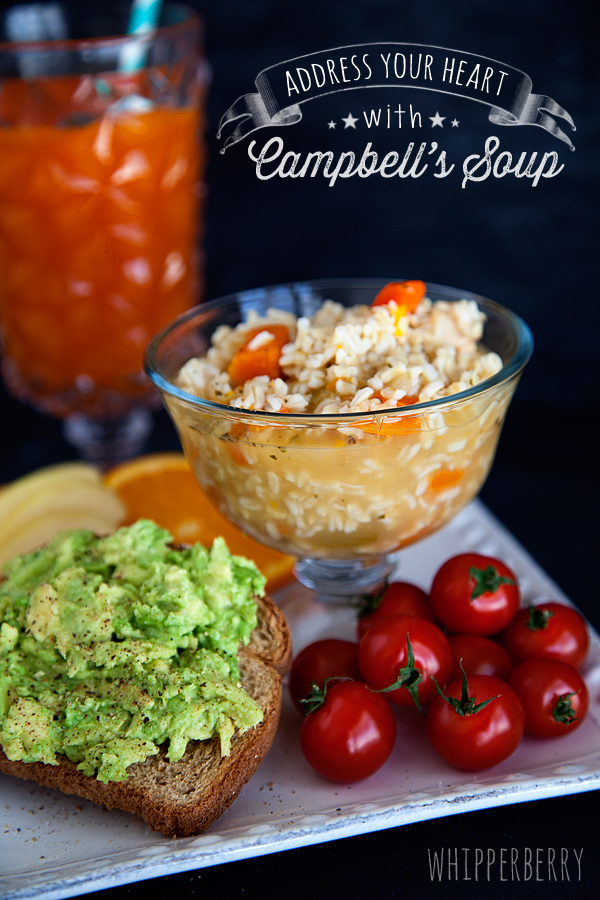
One of my favorite styles of photography right now is, the dark slate chalkboard look. We’ve seen it everywhere on Pinterest. Not only is this chalkboard look popular for printables, it’s super popular for pictures as well. Here are a few examples of photos that I’ve created for WhipperBerry with this look…

I love how the black backdrop helps to make colors pop and it also has a bit of texture which in turn helps the image have more depth. It also creates a fun chalkboard look when adding text to your image. I just love it!!
Want to know how I made my background? It’s super EASY and cheap! Here is what you will need…
Supply List
- Black foam board – Any size will work, I have a couple of sets of various sizes. They range in price from just a few dollars for a small board up to about $15 for a large 20×30 depending on where you purchase them. Still nothing to sneeze at when compared to other photo backdrops.
- Chalk
- Old rag
Chalkboard Photo Background Instructions
Now, this couldn’t be easier. Take your foam board and a piece of chalk…
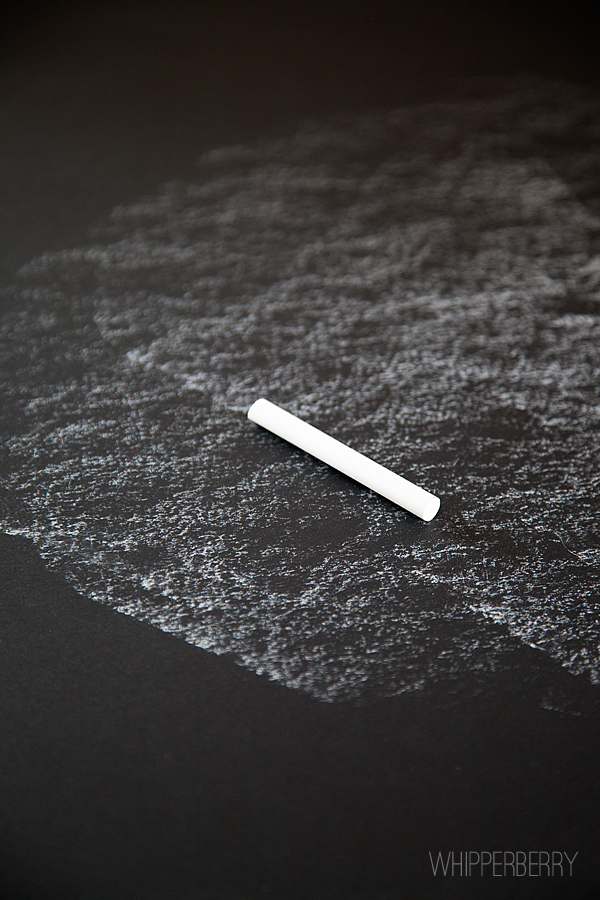
Take the side of the chalk and gently rub circles around the surface of the foam board. Don’t press too hard, it will dent or scratch the surface of the foam board and you don’t want that to happen.
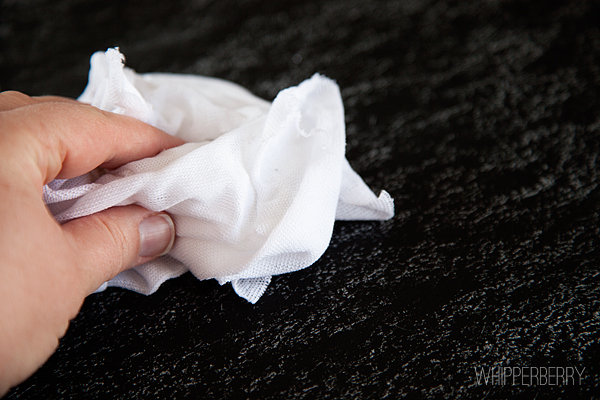
Once you’ve covered the entire surface of the foam board with the chalk, take an old rag and use it to blend the chalk over the surface of the board. This will give the board the look of slate when photographed.
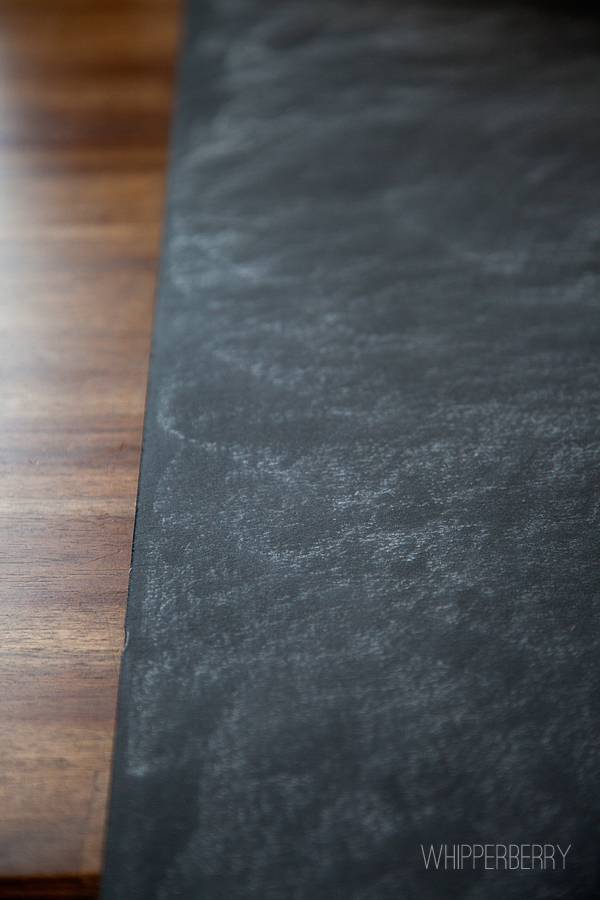
Here’s how it should look once you’ve blended the chalk…
Because they are so inexpensive and easy to make, I’ve made several of them of them and use them for not only the background but the base of my photo set-up. I’ll let you in on a little secret, Here is how I photograph all of my photos…
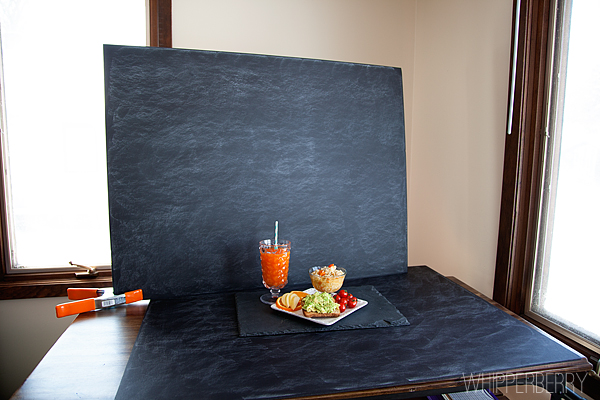
This is actually my daughter’s bedroom, but she has graciously offered to share it with me as my photo studio as well. It has the best natural light in the house and with windows on two sides of the room I have all kinds of fun playing with the light. This set-up was for yesterday’s Campbell’s post, here is how the picture turned out…
I am just in love with this look right now! So… I’ve been thinking about doing a few more posts on how I create the images for WhipperBerry, but I’m going to leave that up to you. If you are interested in more posts like this, leave a comment on this post and tell me what you would like to learn about. If there is enough interest, I will work up a whole new blogging series… So ask away!
74
What a great tip! Always adore your pics!
Yes! Please do more posts like this! I love these ideas. I want to go get some black foamcore right now. Thanks!
Genius! Thanks for sharing your bloggy secrets. Keep them coming!
Thank you so much for sharing this tip! I appreicate the insider tip.
Have a great week ~ Mary Beth
Heather I love this, and great tips! xo Bridgett
Oh Heather! That would be great if you could share everything. I feel like I'm really hopeless at taking good food pictures. I'd love to know more about styling, how you go about selecting colours, props (ie cups, plates, colours etc) and any info you'd like to share about the actual photo taking itself, camera settings that sort of thing. Also, how do you go about the light if you're photographing at night? That's my biggest problem. If I've cooked something for dinner I want to blog about, I have to use the flash to take the picture, all while trying to get the dinner on the table and its more often a bit of a nightmare. I'd love to hear everything.
Thanks, Anne xx
Oh please please please do a series on chalkboards! They are so much fun and just this one post has taken some of the mystery out of them. As a newbie, I would love top have you do as much as you can about them. Thanks!
barb
I have really been trying to take my pictures up a notch. This has included making some DIY backdrops which is so fun!
Needless to say I would read a series like this with interest!
What's that big clippy-thingy? Is that just helping the vertical board stand up?
–Elena
acasarella.net
Your photos are always so beautiful, Heather! I would love to learn more from you! Thanks for the tip! I'm excited to try it out!
Yes girl!! I am in love with your photography, so teach me! Thanks for sharing this tutorial : )
Liz
Yes, yes and yes- there is major interest. You do a spectacular job at photography! I would love to know how you decide what to incorporate into the photo when staging it- like your soup photo- you added tomatoes and the sandwich. Just curious as to how you decide.
YAY!!!!!!!!!!!!! I am so excited about this. Yes, I would LOVE to hear more of how you do pics…it's something I have been trying to figure out for a long time. One thing I would like to know is how to make the background that looks like wood…mostly I just want to know if it is wood or fake. THANK YOU!!
oh Id love to see more if what goes into it!
please – more tips PLEASE – your photos are always stunning
I am LOVING this idea, so I'm off to the craft store ASAP
Pure genius! Thanks so much for sharing this tip, Heather! Definitely pinning this! 🙂
brilliant. love it.
Thank you so much for the tip. I am going to go get some foam board right now. I would love some input on the font and layouts you add to the photo back drop. Do you use photoshop? How do you get your inspiration?
-Dani Chu
PS Love the blog
You rock my world. That’s all. I miss you.
xo
Thanks so much for this post!! I'm always looking for new things to use as backgrounds for my images, can't believe it's so easy to do, I've been wondering how you do it as your pictures always look amazing! Going to buy me some black foam board!!
A black foam board was on my "to-buy" list and now it is an ASAP purchase! Now, I just need to find some light like yours 🙂
Thank you for this wonderfully easy technique.
I am also interested to learn what program you use to create the wording "Adddress Your Heart With Campbell's Soup".
Pretty please share? 🙂
Happy Wednesday!
I would definitely be interested in more photography posts!!
Yes please do….Have always loved your photos.
This is brilliant! Yes, please share more photography posts. They're very helpful.
That is the best tip of the week! Thank you so much for sharing this awesome idea.
I am so doing this! I just painted some chalkboard tiles a couple of weeks ago for a post I did on a chalkboard painted tile cheeseboard! I can totally do this! I love the look!
What a fabulous tip! Yes, I'd love to see more photography tips. Thank you for sharing. laurie
Thank you so much for sharing your secret, Heather!! I have always loved the backdrop for your crepe cake photograph, and wondered how you did it! You're site is one of my favorites, partly because your photos, backdrops, designs, and fonts always look amazing. I would love to learn more from you about other types of backdrops you use, how to create the cool banner you used in the Campbell's photo, your favorite fonts, photo staging tips, etc… basically, everything 🙂
I know I'm interested. Great post. Thanks for sharing.
This is brilliant! Thanks so much for sharing!! 🙂 I would love to see more of your tips on photography. I'm trying to work on getting mine better!
Nancy
Thanks for sharing your processes.Your photos are always so nice.
Seriously gorgeous photos there… thanks for sharing your magic! And yes, more please!! (BTW-found you from a share on Blogtalk from Donna over at Funky Junk Interiors. I too will spread the love and Pin!)
Well I for one LOVE post like this and would love more of them 🙂
Funny thing I picked up white and black foam boards at the Dollar Tree yesterday. They are 20×30 and yes only $1 each!
Can't wait to try this!!!
heather, your photos are gorgeous!! this is such an amazing idea…we may have to try this! thanks for all of your amazing inspiration!!! xx
Thanks bunches for sharing this tip. Your photos are always gorgeous!!
Beautiful, Heather. Your photos are always gorgeous. I'd love to learn more. Bring it on! 🙂
Are you kidding me? I use a black foam board in a lot of my pictures, but I never thought to coat it with chalk! You are a genius Heather!!! Definitely keep the photo tips coming! I heart every picture you share on your blog!!!
yes please!!! more tutorials 🙂
Thanks for sharing the secrets behind your beautiful images. Would love more posts like this.
Yes please, more tips 🙂 Thanks for this one!
Ummmm TOTALLY,,,, this is awesome. I'm also in love with beautiful pictures, and learning how to do them. I don't have ANY fancy equipment, usually just my iphone, but I'm sure that even then, just having a lovely backdrop, and being more consistant with the lighting, and planning just a little better, will give me incredible results.
I will try this out, it looks amazing. I love a dark background too!!
Thanks so much for sharing your very inexpensive, and incredbly effective tip with us, and I'm all over any future posts you do on the subject 🙂
Have a wonderful day, and stop by anytime to say hello if you can.
P.s. After coming back from an extended blogging break, I've started a 40 day challenge to get HEALTHY by my birthday. If you get a chance to check it out, I could sure use the support!
Hugs, Bella 🙂
<a href="https://bellabeforeandafter.blogspot.com/search/label/40%20day%20challenge">Bella's 40 Day Challenge </a>
I appreciate this so much! I had no idea it was this easy!
Love this!!! Such a great idea! Thank you for sharing it! I photograph using pretty much the same set up, and rarely use black, but this is such a beautiful way to soften it a bit. I'll have to give this a try for sure. Your photos are always so gorgeous, I'll have to see if I can give it a try too!
Just finished two of these. SO simple and inexpensive. Thanks for sharing, Heather!
You are a genius. You get extra points for it being so cheap and easy!
Fabulous tip! I'm such a green photographer and have a house with less than ideal lighting so I'm always looking for ways to make things look better. You are so right about the background making the colors pop – they all look great and that boot pic is AMAZING! Going to get one asap (and pin this of course!)
Such a great tip, I always love seeing the 'behind the scenes' look at how things are photographed! keep these posts coming!
Would this work with black poster board? I have some handy and was curious before I do it.
Ginny-
It totally would, however it will be a little flimsy, but that’s not a deal breaker at all.
kisses // heather
That is brilliant! Pinning 🙂
<3 Christina @ I Gotta Create!
Wildly Original link party is open.
This is so awesome! I love your photos! Thanks for this wonderful tip!
I'd love to read more posts about how you photogrpah things for your blog!
This one is great! I am wondering, though, what camera settings you use. I have a hard trouble photogrpahing black things, like if I am making something chocolate, or cooking in a black pot. I just got a macro lens and haven't tried it yet with black but maybe it will help.
PS. Did you add your words with Photoshop?
Love your idea to use foamboard! I'm pretty good with photoshop and I stood on a ladder and photographed my asphalt driveway to drop into backgrounds and use as a chalkboard. It's worked great for me, but I'm going to give your idea a try.
This is so smart! Thank you for sharing. I'm always looking for new ways to photograph for my site too, so this kind of information is much appreciated. Your photos are beautiful.
Love this idea! I need to head to the store to get more foam boards and some chalk. I'm in the early stages of learning food photography and this is a great! Thanks a million!
What a great idea! I use big tiles from Lowes which are beautiful but harder to move. Where do you get the foam board?
Great post. thanks for sharing. I love your photography for your posts and would love to see more behind the scenes as you mentioned above. I would love to be able to take better photos for my blog.
Thanks for sharing this great idea. I've been looking for an easier way ( I too shot some asphalt) to try this technique. Looking forward to utilizing the idea. Thanks again. kjs
Love this! I would like to see more posts like this with ideas for inexpensive backgrounds. I would also be interested in posts about props and styling. Thanks (off to go buy some foamboard)!
The more I find cheap ways to get great food photography pics the more inspired I am. Thanks for posting I'm doing to do this really soon.
It is people like you that make a better place. Thank you for your chaulk board idea. Reasonable and I can't wait. I probably don't have a fancy schmancy camera like yours… I have a Nikon CoolPix P510. I have done photography basics for over 30 years. Just can't seem to remember alot of the ISO and aperature stuff; brain fog. Can you help me remember those things and also, what are the standard settings I can do manually with my camera using a black setting like yours or a pure white setting. Also, do you only use natural light or do you use lights and if you do use lights, how many do you use, what brand, and where do you place them. Thanks for answering my million questions, and "yes" you should do a series.
Love this idea & would enjoy more posts like it. I'm pinning!
Warmly, Michelle
Thank you very much for sharing!!!! I've tried to follow your tutorial and here you'll find the first results: https://not2latetocraft.blogspot.com.es/2013/03/salsa-de-calcots-roasted-tomatoes-sauce.html
I would love to see more posts on backgrounds, styling and so on!! Thanks again!!
Talking about the power of Pinterest, I just discovered your blog from this image. I would be interested in more posts like this…I know I am a little late lol!
Thankyou for sharing! xoxo!
Where do you purchase the black foam board?
Lindsay, I found mine at my local craft stores like Michaels, Hobby Lobby and Jo Anns.
kisses // heather
Your photos are awesome. I am trying your idea, thank you for sharing, so very cool of you!
Karen
You are so talented and I would LOVE to suck more of your mad skillz out of you! So, more is my vote. Thanks for sharing! 😉
Fabulous tutorial! Thank you so much for posting this. I can't wait to make my faux slate background!
awesome idea, I just bought some black foam board at the dollar store the other day and now I'm going to find some chalk and try this! Thanks!
Fantastic idea! I'm always on the lookout for new and interesting ways to improve my photography 🙂
https://cafecraftea.blogspot.com
LOVE this. Pinned. Shared. Making.
Thank you! This is a great idea!
I love this idea! I’ve been looking for some different color tiles that I can use in my photography and hadn’t found the perfect dark one. I went with my son to pick up my chalk and foam boards last night so I can make these today. They are so much easier and lighter to set up and move than my 18 x 18 inch tiles! 🙂
Thanks for the inspiration.
Thank you Heather for this very great idea! I’m going to use it 🙂
love this idea.. have to try
OMG You’re awesome, thank you!
I have a very cute kitchen, but I hate taking pictures with it in the background.
I will definitely try this!! 🙂
Such a good tip! I love that. I currently use something similar for a white background. I love the texture in this.
I’m late to this post, but SO happy to have found a link to it from The Bojon Gourmet. You are genius! I can’t wait to try this for some upcoming shoots. I was just thinking the other day that I need to get a few more backdrops. Thanks so much for sharing this awesome idea!
I am going to the craft store right now to grab foam board! Thank you so so much for the DIY!!
Yes please. I need all the help I can get.
Thank you for the tips. They will be very helpful
thank you so much for this tutorial..it would be so kind of you,if you could make a post regarding artificial lighting for food photography:-)
Thanks Heather! This is a great idea.
OMG! Thank you so much for the solution to my upcoming photograph mini sessions. I’m a portrait photographer and thought a chalkboard valentines Session complete with valentine’a card was a cute idea but didn’t want to commit to having a huge actual chalk board. Heading to get foam board now!! Thanks again!
Great idea! Thank you so much. Needing a creative backdrop for a winter formal I am in charge of for my daughter’s homeschool group. This is very clever. Cute blog too. I will definitely be back. 🙂