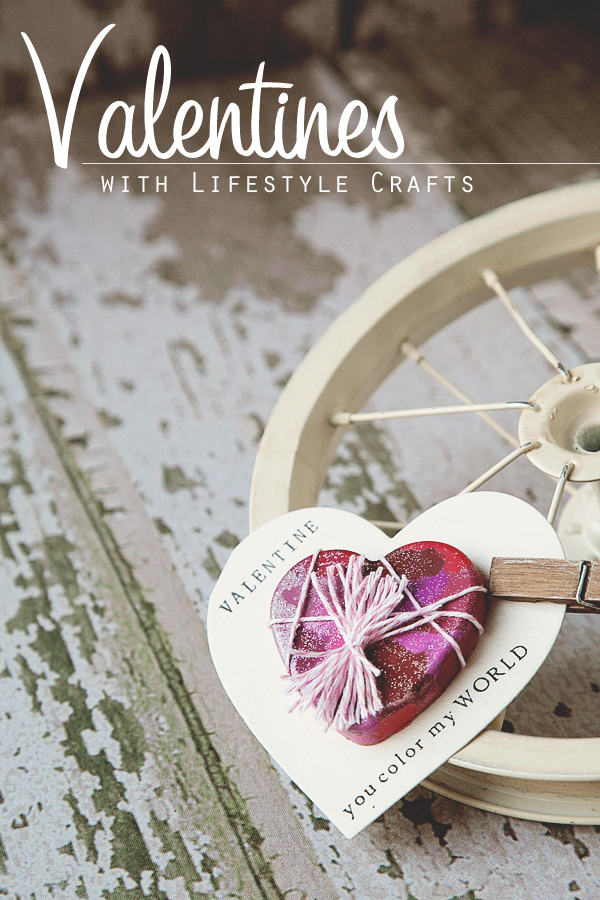
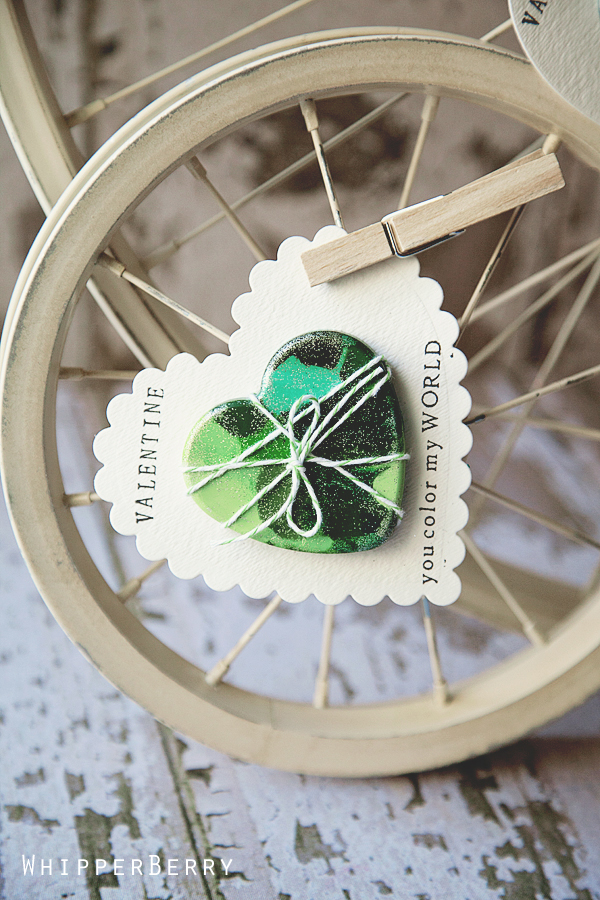
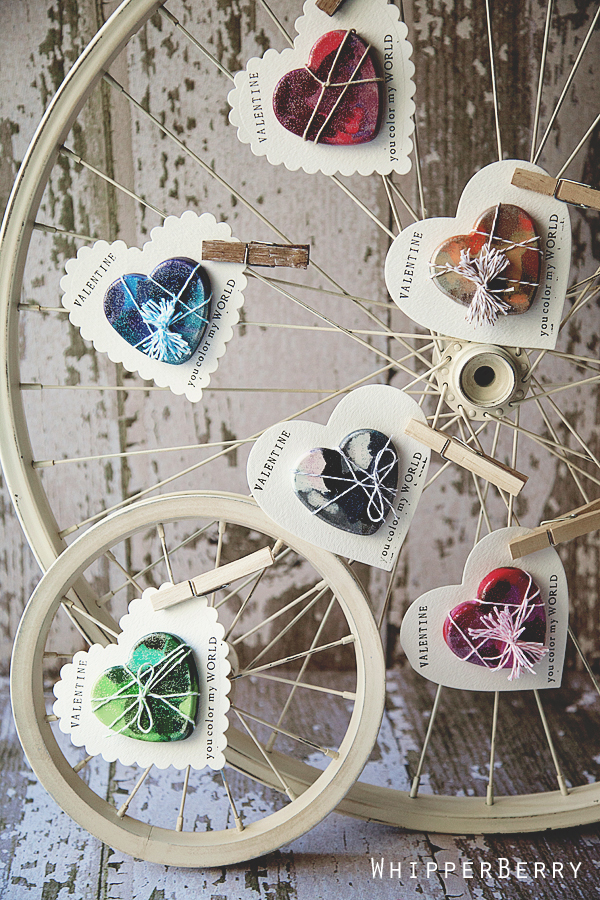
Valentine's Day is right around the corner and today I thought I would share my "you color my WORLD" Crayon Heart Valentines, made with the new Sweetheart die collection from Lifestyle Crafts and heart shaped crayons made with melted Crayola crayons.
Isn't that fun? I am always a fan of homemade Valentines for the kiddos classes every year. It's also a bit of a challenge to make valentines that are fun, colorful and easy on their sugar intake for the day.
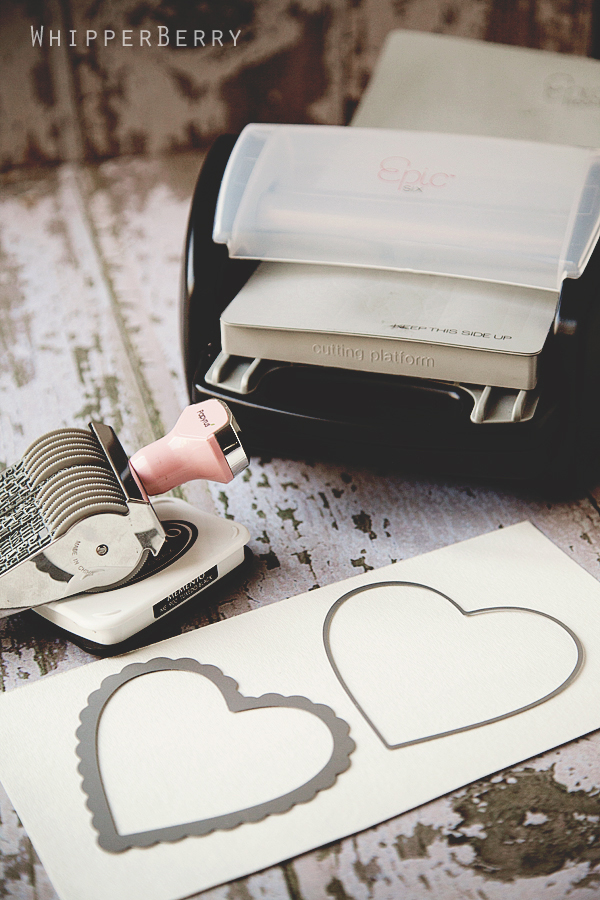
I know this isn't a new idea by far… My neighbor made these heart shaped crayons several years ago after finding this fun idea in Family Fun magazine, but I thought it would be a perfect fit for the new Sweetheart Nesting Hearts from Lifestyle Crafts. Cutting the hearts was super simple using my Epic three in one tool from Lifestyle Crafts. The Epic tool cuts, embosses and can create beautiful letterpress projects as well.
But I am getting ahead of myself! Before we can make the cards we need to make the heart shaped crayons…
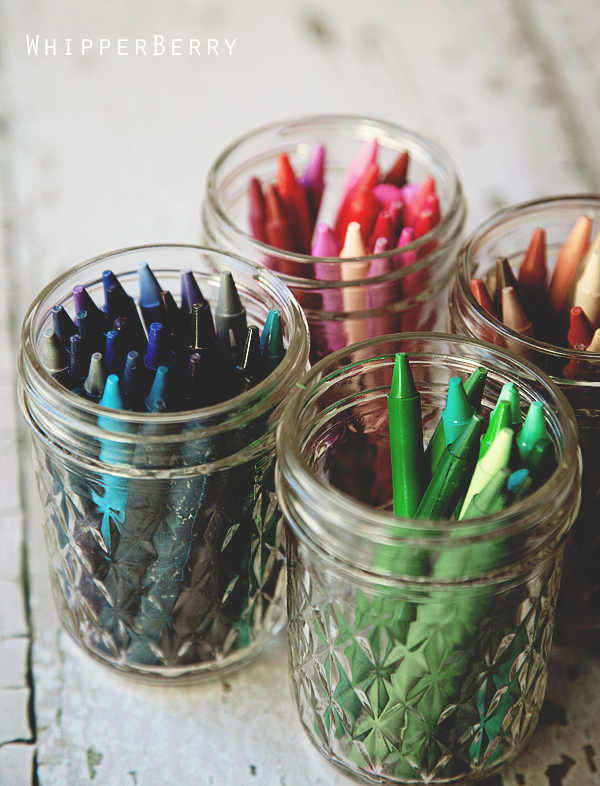
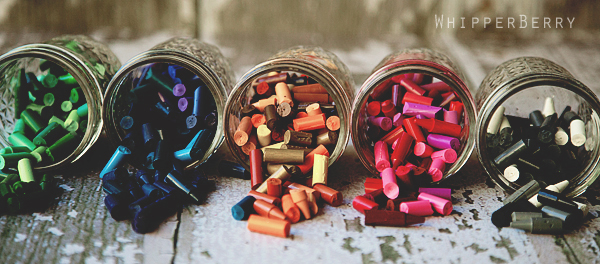
You will need to gather all the old crayons in the house… if your house is anything like mine, that won't be a problem. You can also purchase new crayons as well. I will have to admit, the new crayons were easier to remove the labels from. I used an X-ACTO knife to make a slit down the length of the crayon to easily remove the labels. The older crayons took a little more coaxing.
Once you've removed all of the labels, break the crayons into small pieces. The smaller the better…
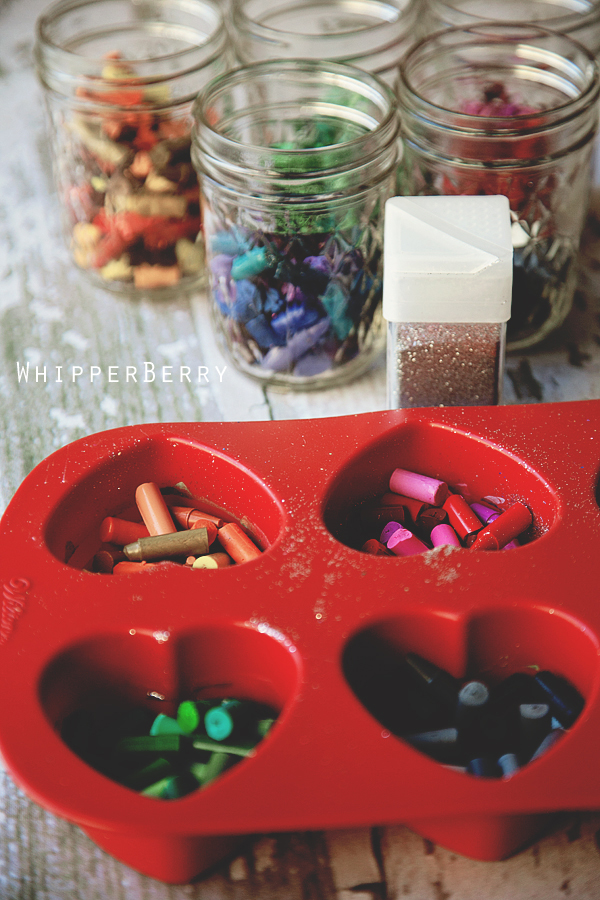
I also found that separating them into color families made for the best looking crayons, but that is completely up to you!
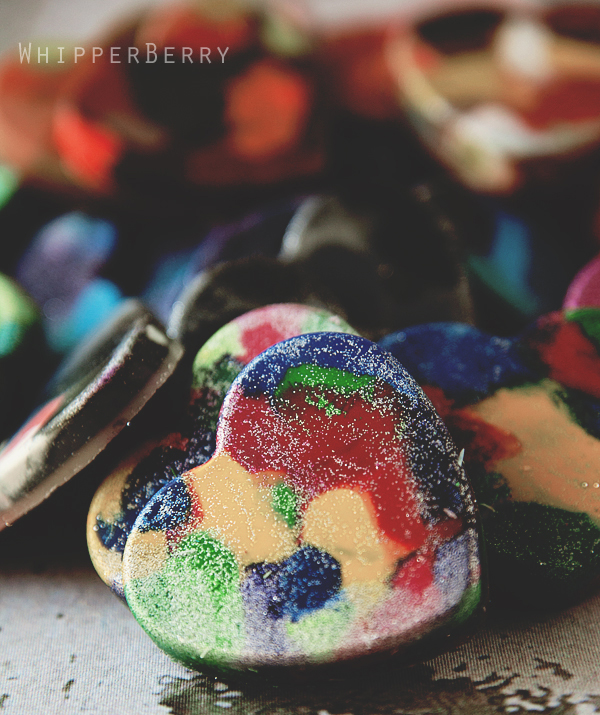
You will need to use a heart shaped silicon baking mold to melt your crayons in. I found mine at Michaels in the baking section and it worked like a dream. The girls and I decided that we wanted our crayons to be a little glittery so we added about 1/2 a teaspoon of silver glitter to the bottom of the baking mold. Then we filled the baking mold with the crayons about 1/3 full. The mold I used was pretty deep so depending on what you use you will have to play around with this.
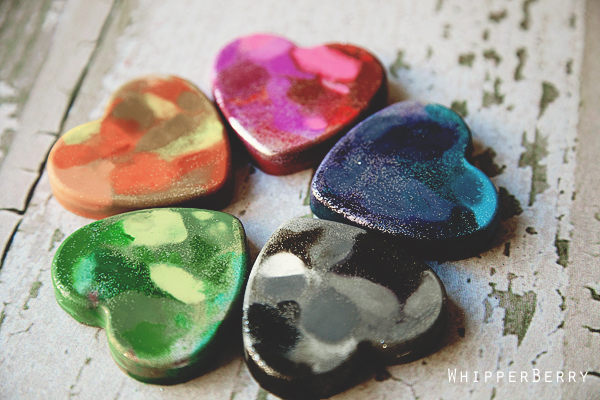
Place in your oven that has been pre-heated to 300 degrees and baked for 15 minutes. The crayons will become completely liquefied so be careful when you pull them out of the oven. Carefully place them on the counter to cool. You want to make sure that you don't move them around too much and mix the colors more than you want. Wait for about 20 minutes or until the crayon is solid again and then gently remove it from the mold and let cool completely.
I made 57 hearts with the Wilton Mini Heart Mold using approximately 200 crayons.
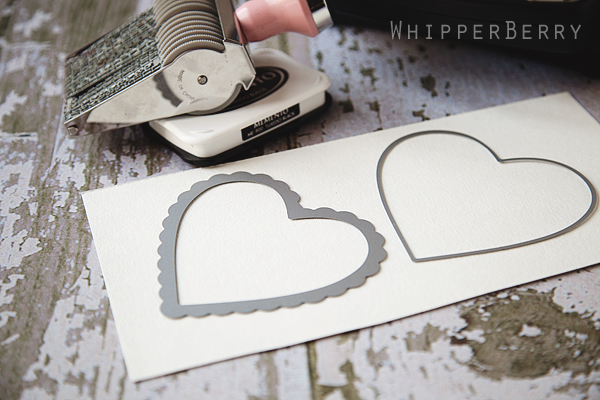
Now it's time to pull out your Epic Tool to make the heart shaped cards for you to place your new crayons on. I used two different dies from the new Sweetheart line for this project. The Nesting Heart and the Nesting Scallop Hearts work beautiful for this card.
I decided that since I wanted the focus to be on the crayons I used a basic white watercolor paper for the base of the card.
Once I cut out the heart shapes, I used my rolling alphabet stamp to create the fun saying on the card. "Valentine… you color my WORLD" I just LOVE that look!!
Of course I had to dress up the heart crayons with some Divine Twine from Whisker Graphics. I just wrapped the hearts randomly and tied with a bow or made little twine bundles for the decoration…
This is such a fun project to do with the kiddos. My girls and I had ball gabbing while we were prepping the crayons. After that it was a perfect opportunity to have a color class while we created our crayon concoctions. From start to finish this is an easy and elegant Valentine treat that your little ones {or big ones} will love to share with their friends this Valentine's Day!!
Come back tomorrow I have another fun Anthro inspired Valentine project made with my Sweetheart dies from Lifestyle Crafts!
Here are some more WhipperBerry Lifestyle Craft projects…
Party favors, bakery boxes & bubble party favors
84
![WB 003 copy[6]](https://whipperberry.com/wp-content/uploads/2012/01/WB-003-copy6-200x300.jpg)
Clever, pretty and this looks like a lot of fun.
I recently, while clutter cleaning, found oodles of broken crayons from our children.
I hope they’ll look as pretty as yours, our children are grown so the crayons are really old.
Thank you for a very fun and pretty idea.
Adorable!!! I’ve had crayons and molds ready in my craft room forever but never got around to using them. Might have to use this idea!
Heather, I am just amazed at your creativity and your fabulous photography and staging. You inspire me!
Beautiful work!! Love em’, those would make great valentines! xo
These are adorable, love the addition of the glitter! We have made these crayons in the past and the kids LOVE them. Thanks for sharing!
So cute! We did this when my daughter was young, but I love the idea of making them into Valentines!
I love these Heather! They are precious and so sweet! The perfect valentine! I think my son’s friends would love these! Thanks for sharing!
Ginger
Those are just too cute!!! I love how you added the glittery touch to them. And pinned to the bike wheel…swoon!!!!
You took a classic and made them look beautiful! I love your pics and styling! I actually won a LetterPress over at Today’s Creative Blog *squeal* but I haven’t tried it out yet.
I love reading your blog and I love, love the alphabet stamp you used. Do you know what brand/where I can purchase one like that?
How did you affix the hearts to the card?
Love these, they will be perfect for my daughters preschool since they don’t allow candy of any kind! YAY! Great idea!
Oh sooo sorry! I just use some of the large glue dots to affix the crayons onto the card. Thanks Nichole for asking a great question!
kisses
heather
You are so talented, Heather. Love these!
How adorable! I have seen homemade crayons before, but I love the hearts! What are you using for a background, and what camera do you use?
I just adore everything you make! Your styling is so awesome and your pictures are such a treat! ♥ it!
These are so cute, I was wondering if you can use the molds for food after making these in them. Thanks.
you know carol… I’m going to say no. I bought my specifically for this project and I don’t plan on using it for food from this point on. You may be able to clean it completely but I don’t know how. Great question!
kisses
heather
Thanks, better safe than sorry.
I’d also say no. I haven’t had any luck getting my mold completely clean. There still seems to be some crayon residue on it. I’ve washed/scrubbed it by hand and run it through the dishwasher.
Valentines I’m ready for! Crayons be ready for me! This is awesome!
Wow, your heart crayons are adorable!! We had these on our site last year too. They’re such a fun idea. I LOVE how yours turned out 🙂
LOVE this idea! I like to send my niece a special gift every Valentine’s day because we live far apart and I never want her to forget how much I love and adore her (she’s 10 so I can still get away with mushy). She is incredibly creative/crafty so these are perfect perfect perfect!
You are so talented! Thanks for another great idea! =)
I’m so making these! My nieces will love this!
Such a great idea, and so pretty. I love your staging and photography!!! 🙂
Darling idea! Where can I purchase a rolling alphabet stamp? I live in a rural area and craft supplies are sometimes difficult to locate! Many thanks and I love your blog!
Dale-
I found mine on Etsy. Click on the link in the post and that will take you to an Etsy site that sells them. I haven’t seen them at any of the craft stores that I shop at yet. I hope you get one. You’ll LOVE it!!
kisses
heather
I searched the Etsy Website for the rolling alphabet stamp and couldn’t find it. Could you email me the specific site? I would love to have one!!! Thanks, Suzanne
Suzanne here is a link to the etsy website for the rolling (alphabet) stamp
http://www.etsy.com/search?search_submit=&q=rolling+stamp&order=most_relevant&ship_to=US&view_type=gallery
If for some reason this doesn”t work i went to the etsy website typed in rolling stamp and changed “homemade” to “all items” and then clicked search. A couple different alphabet rolling stamps popped up for me. I see one on there for $20 at the moment.
Hope this helps!!!!
love the idea (and your website)! The glitter was a great touch. I hope you don’t mind, I’ve shared this idea on my blog.
I love this idea! Shared at http://creativityunmasked.blogspot.com/2012/01/six-for-saturday-or-sunday.html 🙂
Oh these are wonderful!!!! My daughter and I are SOOOo making these for her classmates!
Thanks for posting the details 🙂
Love this idea! So well done & beautiful!
What a darling idea! YOU color our world, just by being in it! Thanks for sharing!
New follower here..
These are adorable! You did a great job, and it is a nice change from a a candy 🙂
Hi! I found you while Stumbling. I’ve done this before, but melted the crayons in a pan on the stove. Your way is so much BETTER! I totally adore your bike wheel display, too. Nice!
heather,
Did you make the piece that you are displaying them on. I love it and would like to see a larger picture of it.
Absolutely love this project. I wonder if it doesn’t make your molds a bit toxic?
This is perfect for my daughters class she’s 6. I love the added glitter. And Heather I agree sticking with the same color group looks a whole lot prettier/better. Thanks for the idea…
Gosh, I love these so much! In my old preschool teacher days I did the melting of crayons to make new ones, but never this pretty or in such a cool idea!
Heather, where oh where did you get, make or buy the bike wheels the crayons are on?!!!
Thank you, Suzy
I just made these and they came out lovely! Today is my birthday and I’m planning on giving these attached to Thank You notes for all the people who helped make this week so awesome maybe I’ll make a few more for Valentines Day as well. Thank you so much for the adorable idea!
LOVE these! How fun!
What an awesome idea!! I don’t have children yet, but I am an elementary teacher and would LOVE to do this for my students. So creative!!
Color-coded?? That’s genius!! They look so pretty that way and especially with the glitter added in. Thanks for this amazing (and candy-free) idea.
Catherine Denton
I just want to let you know that I am 22 years old, and I made these tonight with my boyfriends Mom. We are in LOVE!! They are the simplest, and most adorable valentines gifts ever!!! Who doesn’t love to color?? We made girly hearts, and boy hearts too! The girly ones were a mix of pinks, purples, sparkle green, and white. The boys were blues, greens, oranges, and white. Thank you so much for the wonderful idea!!!! =]
oh how FUN!!! I LOVE IT!! see it’s a fabulous project for all ages…
thanks for sharing!
kisses
heather
Functional, affordable, easy to make and so, so cute! These are great, and I love that you’ve included a tutorial! Would you mind if I include these in my annual valentines post on various crafts around blogland? It would feature a photo and a link back to your blog! Such a great little gift!
Thanks Carmen! I would be honored!!
kisses
heather
I just ordered my own stamp {which I am sure will be used for a million other things} and I used 40% coupons at Michaels today for the heart trays. I guess you could say I am inspired by you!! 😉 Thanks!
Oh Gabby, that makes my heart go pitter-pat. You are going to LOVE your stamp and the heart crayons are going to be a HIT!! Thanks for letting sharing…
kisses
heather
What a great idea!! Love these!
These are the cutest valentines ever!!!!
Just an fyi……if you soak your crayons in water for a few minutes…..the paper comes right off! It’s SO SO SO much easier than anything else I’ve tried. You’ll be amazed!
Cute idea. I might make these with my nephews for their class. I bet they would be cute paired with an inexpensive coloring cook or printable page.
Brillant! Since it has that whole “world” theme, im thinking of doing mine all blue and green to look like the world 🙂
wow nice one,i learned from it,very creative work of art!
These are all so darling! I’d love for you to submit this to the M&T Spotlight http://www.makeandtakes.com/spotlight
This is such a fantastic idea. Thanks for sharing. I can’t wait to do this project. It is perfect for my daughter’s Pre-K class.
I have a silly question. What color glitter did you use? I know it is something so easy, but I am afraid if I use something with to much silver or what not it will overpower the cute crayons! I LOVE these and cannot wait to make them!
great question! I used silver glitter and I actually used quite a bit for each one and they turned out lovely!!
kisses
heather
Good!!!!!
I just made these and the wax separated on the top, so there is a white/clear layer on the back of all of them… Any way to avoid this? I didnt use Crayola but they are not the cheapest crayons either…
Hi Brooke – I have no idea how to avoid the white layer … but just wanted to let you know that if you use Crayola you'll get it as well! I just made the hearts tonight and used Crayola crayons … and found that on the back of all of them.
Found you on StumbleUpon – making these today !!! Yours look beautiful !! Getting the paper off all of those crayons was a chore though 🙂
Get the kids involved. After 36 years in elementary schools, I found they love to peel off the paper!
Just soak the crayons in water for 5 minutes and the paper will come right off (on most of them, anyway).
i just used an x-acto knife to get the papers off , quick slice and they practically fell off! 🙂
Wow! What a great idea! I love love love it. 🙂 Thank you so much for sharing. I love you epic tool! It is kind of like those other cutters, but way smaller and a three in one! I have to look in to it more!
Hi there –
Super cute idea and amazing photography – love your site! I have a question about the melting process – I’ve tried this twice (once w/ cheap crayons, the second w/ crayola only) and seem to be having a problem w/ the wax separating from the pigment in the finished product. Do you have any tips on how to avoid that in the future? I’m up for trying a third time, but think that’ll be it if it doesn’t pan out. Thanks!!
I’m having that same problem, with the wax separating and having that milky layer on top, did you ever figure out how to fix this??
I had a little bit of that issue but not bad enough for it to bother me. You may want to try a slightly lower temp and shorten your baking time by a minute. See if that may work.
kisses
heather
I read on another site that "washable" crayons do this. It was recommended that only the original type of Crayola should be used for this project. Not sure if it's entirely accurate, but the original Crayola brand is what I used and they turned out perfect.
I do mine at 250* for about 10-15 minutes. Keep an eye on them and take them out just after they have melted down otherwise, if you bake them too long, the color will separate from the wax
Love these!!! My five year old and I are going to make them. 🙂
What did you use to attach the heart to the card?
Great question Julie! I just used a glue dot.
kisses
heather
Thank you! Was wondering that myself!
Hey there, I just featured these on my blog! Hope that’s okay, here’s the link if you would like to check it out:
http://lifeofahomeschooledteenager.blogspot.com/
🙂 Hope you like it!
Sincerely, Katie
LOVED these…….Made 70 for two of my favorite gals, my daughter and her best friend. They LOVE them and they were pretty easy..question how did you get them to stick on the paper heart? I just wanted the kids to re-use these so did anyone find anything good to use?
I used glue dots. It may cost a little more but I want them to be able to use the crayons to.
kisses
heather
Can I get glue dots at michaels? any other alternative?
Yep, that’s where I get mine. I find the larger 3d dots work the best for the crayon hearts.
kisses
heather
fun project! I will make it with kids
thank you 🙂
Absolutely fabulous!
So neat. What kind of a stamper is that??
I read through the comments looking for more info about your rolling stamp. The rolling stamps on Etsy seem to only have Uppercase letters. Does your stamp have both uppercase and lowercase? Thanks. Love these and I am planning to make some.
trying these out today 🙂 wish me luck!! they are too cute 🙂
I made these for my daughter”s preschool class today and they turned out great! Crayola crayons worked the best (I used cheaper crayons for the first ones and had to toss them…they were very dull and didn’t write well. When I took mine out of the oven I put them right in the freezer and when they cooled they popped out so easily! Thank you!
I love this idea. But I did have a little problem. Maybe you could help me out with a answer. I used Crayola Crayons and everything was working great. Let cool for 20 mins but when I went to take them out they broke into pieces. I used a little larger heart mold could that have been the problem.
Looking for your answer.
Oh Bummer Bunny! My guess is that with the larger mold you may have needed to let them cool a little longer.
kisses
heather
I made them last night using a mixture of crayons brands and the larger mold, but I filled them 1/2 full instead of 3/4. They needed a little longer than the 20 minutes to cool. Next time I’m going to try putting them in the freezer to cool.
Does it need to be a silicone pan? I only have a metal pan.
Sarah, I haven’t tested a metal pan. Keep in mind the pan will no longer be able to be used with food, so I wouldn’t want to use something that you want to keep in your kitchen arsenal.
kisses
heather
I just made these with my 5 year old for his class party next week and they are adorable! I used the Wilton mold like you did and am wondering how you got the crayon remnants out once you were done 🙂 I’ve tried scraping it but just can’t get it totally clean. Any tips or is this going to be purely a craft mold from now on 🙂
Unfortunately you won’t be able to use it for food after the crayons are melted into it.
This was so fun to make! 8D Thank you so much.
Where did you get that rolling alphabet stamp?!? Love it!
We’re making these tonight…wish us luck!
I did mine at 250 degrees for 15 minutes. I also added metallic crayons to add some sparkle in place of glitter. Look awesome!
Wow!! This is really gorgeous..perfect gift for your valentine!
I made these tonight. The hardest part was peeling the crayons. I set my oven at 250 F and it took about 10 minutes. After they came out of the oven, I used a toothpick to swirl the colors together. They turned out beautiful!! Thanks for the inspiration!!
Love the bike rim painted. I think i will use that to hang in my craft room and use it as a bulliten board.
Just stopping by to let you know that I’ve featured your craft on Family Fun Crafts! You can see it here:
http://funfamilycrafts.com/crayon-heart-valentines/
If you have other kid friendly crafts, I’d love it if you would submit them. 🙂 If you would like to display a
featured button on your site, you can grab one from the right side bar of your post above.
LOVE the idea! My 5 year old and I peeled about 170 off brand crayons and set out to making using same silicon heart mold, but have run into tiny problem…I’ve noticed that the “wax” is floating to the top making on the bottom portion not able to be written with…have u had any express same problem and if crayola brand fix this problem from this “separation that is occurring within the oven? I tired cooking at lower temp (230 degrees this last time but still same problem). And I was hoping for the whole crayon to write! Thanks in advance!
made these for my family for valentines 🙂 didnt turn out as well as yours, but they still look pretty good! 🙂
did this in junior high. i loved the look with glitter or glitter crayons but when my friends attempted to color with them they found it was darn near impossible to color with the glitter. just thought it would be a helpful hint if the kids really would use them. (i know my friends did. if you live in a colder region when you do them it is faster to put them outside for a couple of minuets if it is cold out.
Super cute! I’ve Pin’d you. 🙂
I love making things with crayons!:) Where did you get your rolling alphabet stamp? I love the way it writes! Beautiful idea!
Super cute idea! I can't wait to make them for my daughter's first grade class. Thanks!
Exactly why wouldn't you be able to use a silicone mold again for food after making crayons? Crayola crayons are non-toxic and they're just wax. Is there something else I should know about?
I'm wondering the same thing.
Hi!
What a wonderful idea and beautiful work.
Can the mold be used for baking after it is used with crayons?
My son Liam is in 5th gd and is 10yrs old , do you think that to old to make for his class Vday gift?
Hi Ann, my daughter actually requested to make these for her 4th grade class. She will be 10 in April and most her classmates are alreayd 10 or 10 1/2 so it seems totally cool to them. Part of it is the appeal of the "science" end of it mixing etc. I hope you made them too 😉
love this idea for my preschoolers valentine's day exchange. Making them tomorrow! Thank you for sharing!
Beautiful! Creative! Pinning and sharing on Facebook!
<3 Christina @ I Gotta Create!
Wildly Original link party is open.
hi thanks for the idea so CUTE – can you tell me where you purchased the drying bicycle wheels in the photos? so adorable!
Blessings, Maggie
hi super cute where can i ask did you find the bicycle wheels for display and drying?
I love it whenever people come together and share opinions.
Great blog, stick with it!
Hi there, its nice paragraph regarding media print,
we all know media is a wonderful source of data.
This is awesome! What is a rolling stamp and how is it used?
I made these today as well and ended up with some wax on the top edges of mine as well, in spite of using Crayolas. I heated up an empty cookie sheet to 300* with a piece of parchment paper on it and then pulled out the pan, placing it on the counter. I placed the the hearts on top, 2 at a time for about 10-12 seconds then wiped them across a second piece of parchment that was on the counter – room temp. I was able to wipe off most of the wax evenly this way! I had to place a couple of them back on the heated pan for a second time. This worked out well for me, getting rid of the white waxy residue. Hope it helps!!
Love these! My kids would enjoy making them as well! Too CUTE!!
Love these! I love the glitter, too! We were using a cheaper crayon that was impossible to peel, so I ended up baking them with the labels and then plucking the labels out. I did it both ways and there was a little more mixing of the colors when I had to pull out the labels but it may be worth the while for someone doing a lot. We wanted to have our kids help and they were not excited after peeling the first batch…:) We used a lower temp and did not have a problem with the waxy build up…maybe that will help?
Great idea! Shared here http://siayla.blogspot.ca/2014/01/got-hearts-try-these-heart-craftsjust.html
I saw this last week, ordered the silicon heart forms and made them this evening. They came out wonderful. I had a mixture of crayons from different companies and had no problem with a white wax layer. I did 6 different hearts in the mold to test runs before I do this craft with others and did 2 with all red, pink & purple crayons, 1 with all shades of blue crayons, 1 with all shades of green crayons, 1 with all shades of green crayons, and 1 where I just put in any colors – this one was actually my least favorite heart since it turned out to be too dark. Then I cut out a heart shape on my Cricut to mount them on. Great !!!
These are so darn cute and they look super easy to make. We’re not one of those couples that celebrates Valentine’s Day either
Love these Crayon Heart Valentines , Lifestyle Crafts. seems amazing and unique. Super excited to try these crafts, amazing one.
Wonderful project classroom valentine cards and much more! VERY easy to make if directions were followed and silicon pans were easy to clean with hot, soapy water. Love this!! 🙂