I LOVE my Cricut Maker! I use it so much that I end up having to change the rotary blade.

For every Cricut Maker user, there comes a time when you will need to change out your rotary blade. This is something that is relatively new to the Cricut world and is super easy to do following the proper instructions. If you are new to creating with Cricut, the Cricut Maker Rotary Blade is the magical blade that cuts fabric when using the Cricut Maker machine! With its gliding, rolling action, it cuts virtually any fabric quickly and accurately – without backing material. It’s pretty fabulous! After you’ve cut to your heart’s content, you will eventually have to change out your blade, here’s a tutorial for how to replace a Cricut Rotary Blade. And, if you’re not sure if a Cricut or a Silhouette is right for you then make sure to read that article first. Ok so, scroll down for the tutorial on changing your Cricut blade.
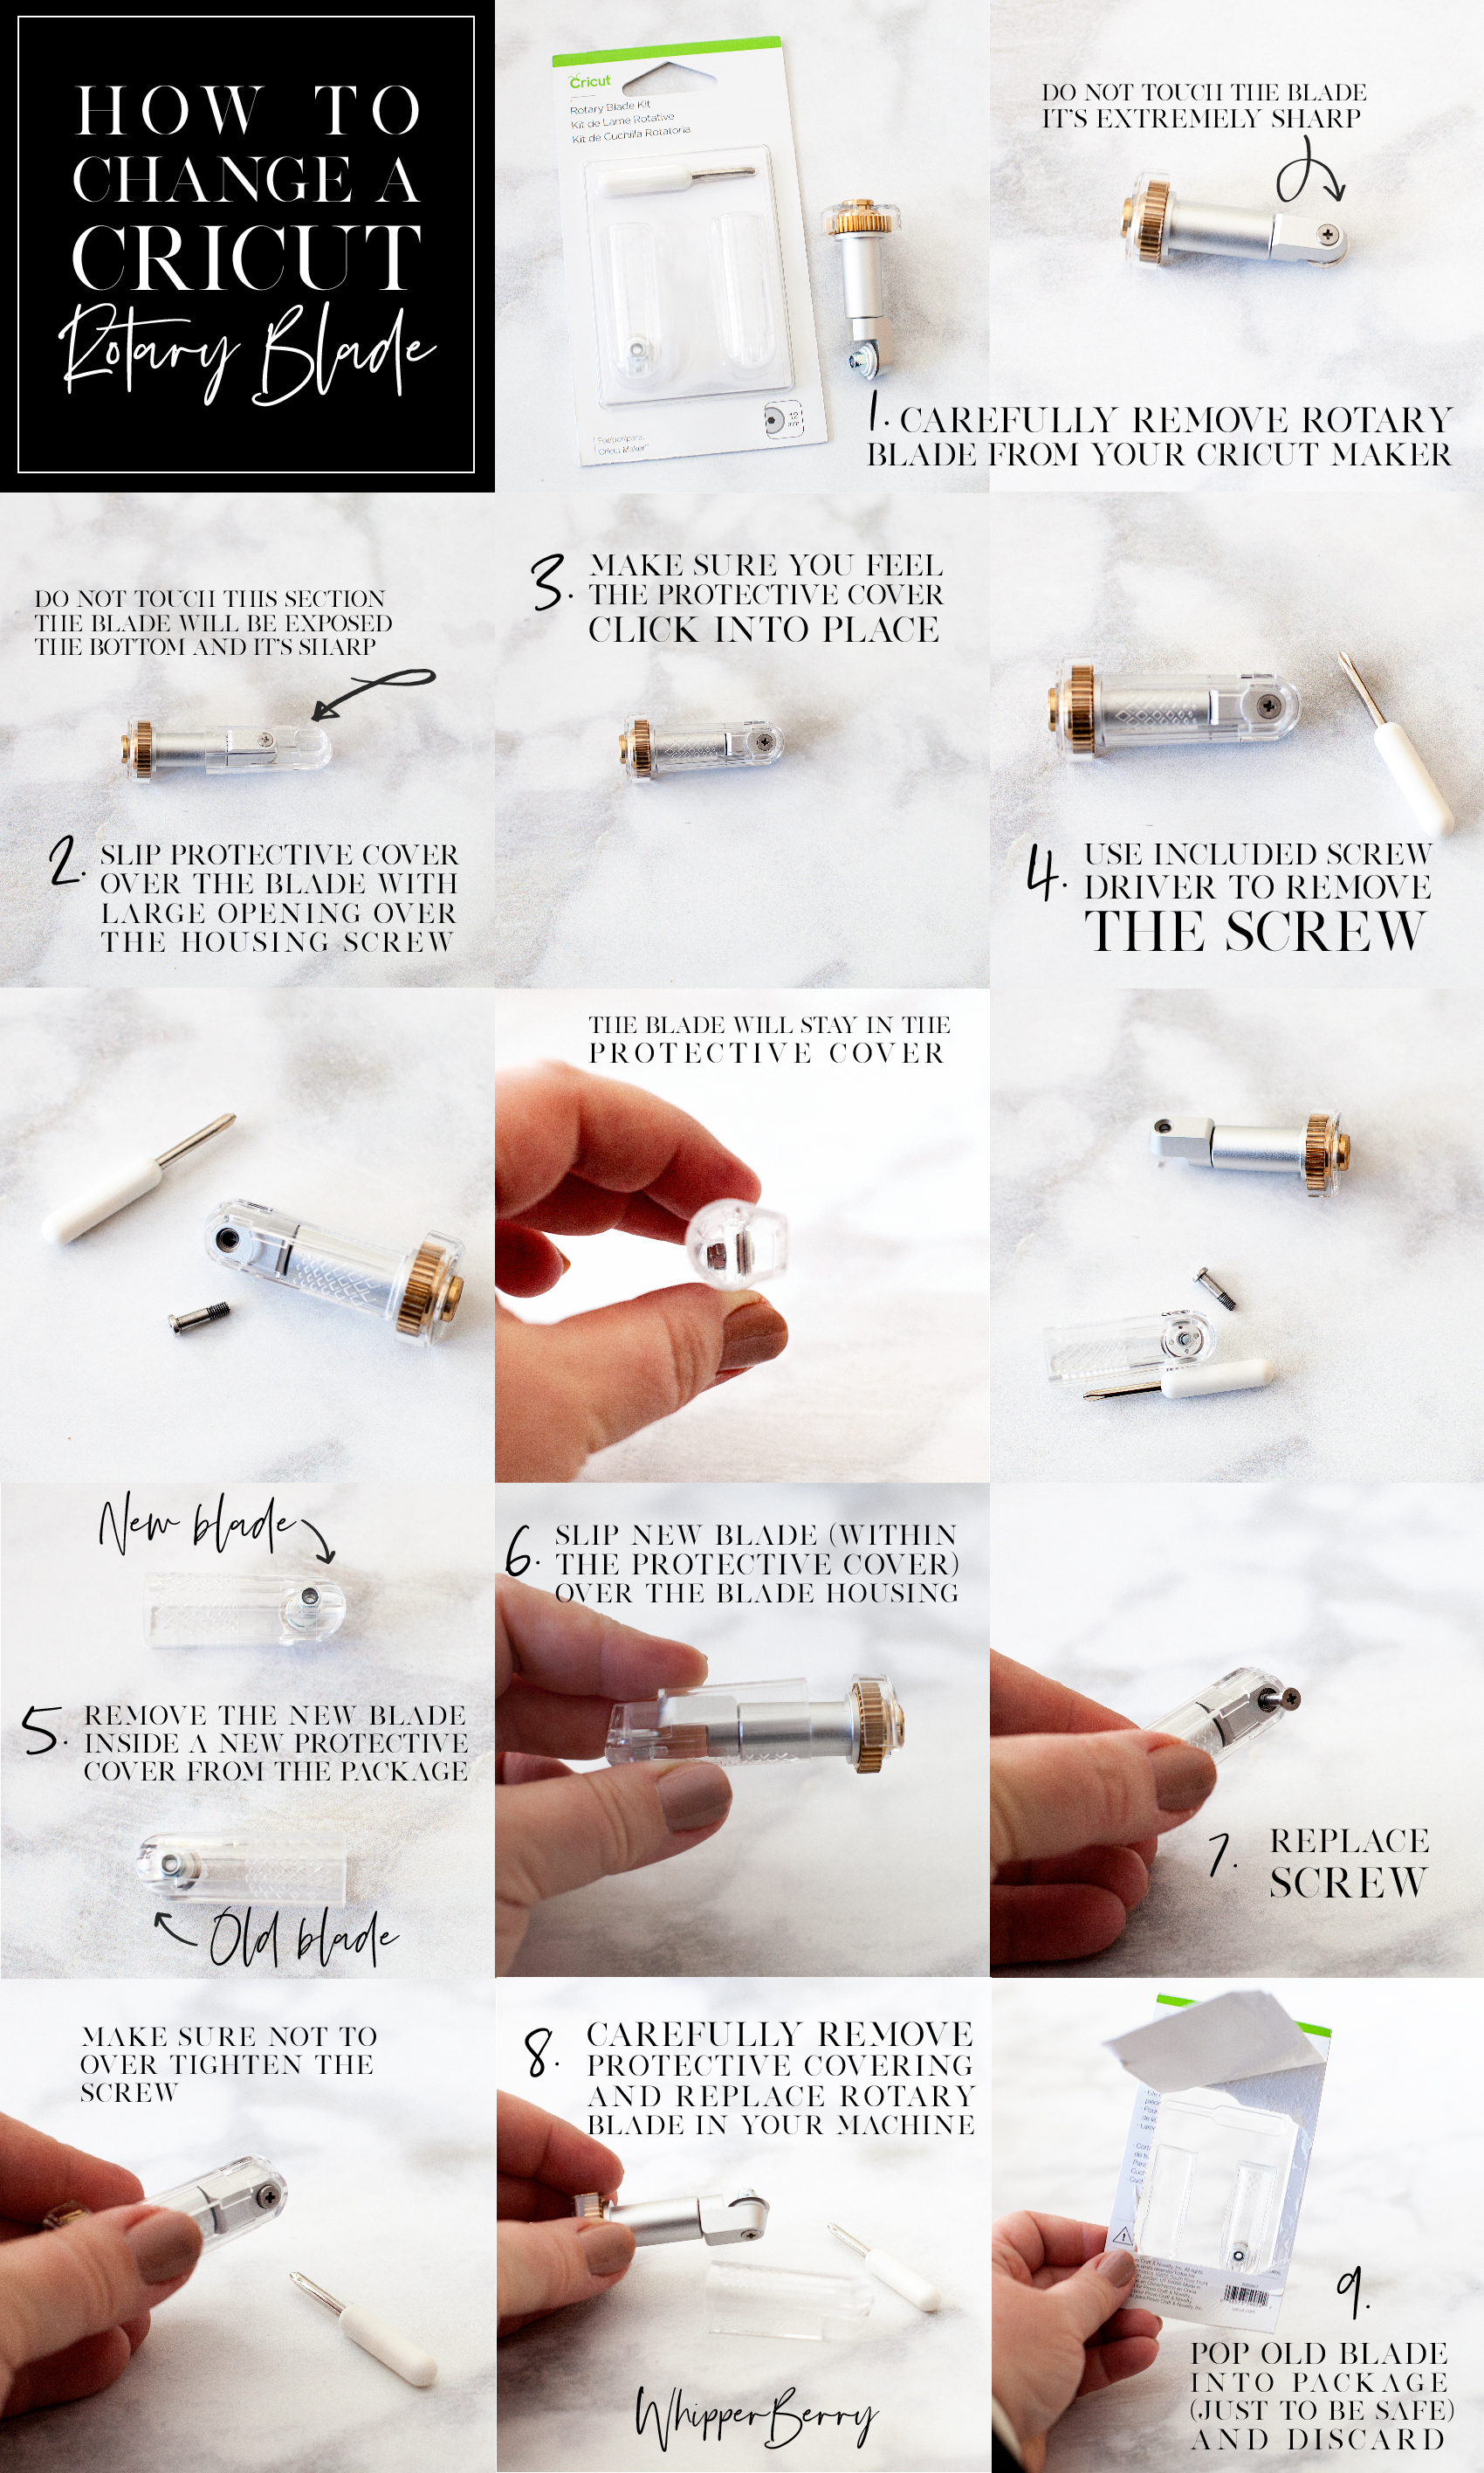
Below is a quick Pinable graphic that you can save so that you can reference it later on how to change your Cricut rotary blade. You can even print a PDF version of it HERE if you’d like.

How to Change the Rotary Blade on a Cricut Maker
Before you begin, you need to make sure you remember you are working with a VERY SHARP blade and to be safe while working with it at all times. You can pick up a rotary blade kit from Amazon here.
- Carefully remove the rotary blade from your Cricut Maker.
- Slip protective cover, from the Rotary Blade Kit over the blade with the large opening over the housing screw. View graphic to view safety warning.
- Make sure you feel the protective cover click into place.
- Use provided screwdriver to remove the screw from the housing. View graphic for step-by-step photo instructions. Keep in mind that the blade is meant to stay within the protective cover. This is a great feature created by Cricut to protect their Cricut family of users. I think it’s genius!
- Remove the new blade, already in a new protective cover, from the package.
- Place over your housing like before.
- Using the provided screwdriver, replace the screw making sure not to overtighten.
- Carefully remove the protective covering and replace the rotary blade in your machine.
- Just to be safe, I place my old blade, still in the protective cover, back into the packaging before I toss it in the trash.
That’s it, you’re ready to rock’n roll again. Looking for some inspiration on what to make with this fabulous new cutting tool? Jump over to the 12 Cricut Maker Project Ideas.
40
Leave a Reply