Looking to paint your kitchen cabinets but not sure which paint to use? You’re in the right place. If you’re short on time I’ll give you my top pick now. Just remember, while some paints are better than others for your kitchen cabinets, it really does come down to preference.
Overall Best Paint for Kitchen Cabinets
My top pick for cabinets overall is Rust Oleum Milk Paint. The reason for choosing milk paint is its durability and the fact it has great coverage, while still having that chalky-looking finish. Now, this isn’t for everyone because you may want a different look. It’s also not the easiest way to paint your cabinets because there’s a lot of prep and follow upw work.
Get It Here
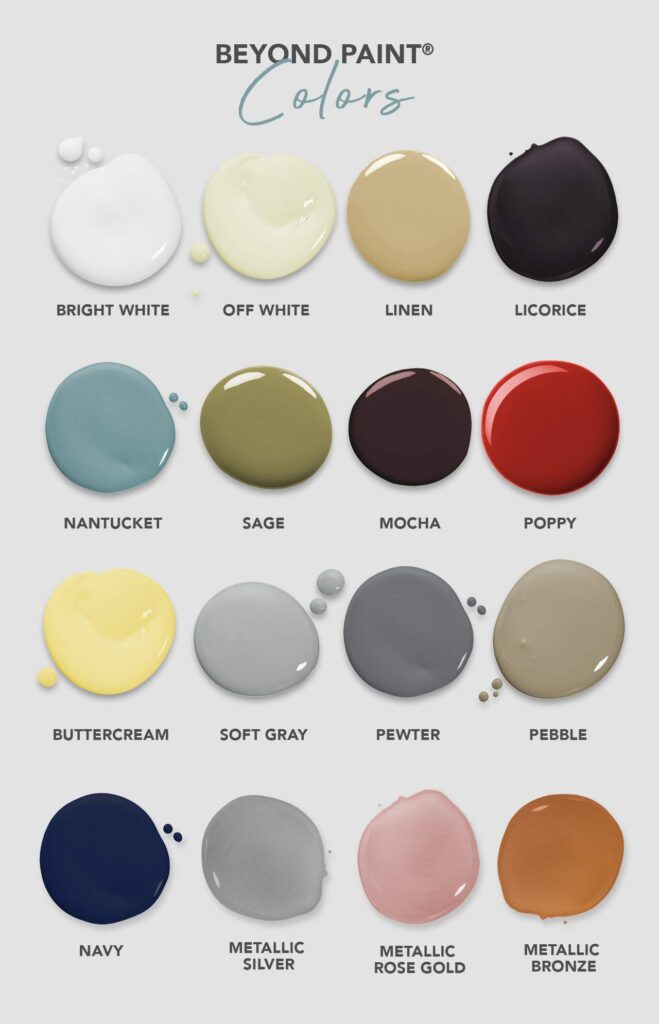
A close runner-up is Beyond Paint Furniture, Cabinets and More All-in-One. This is one of the most user-friendly paints on the market. It’s perfect for anyone who is a beginner at home painting and wants the job to be the quickest and easiest. It has a great finish too but I just prefer the milk paint look a little more. They have some great colors to choose from but it’s a bit more on the expensive side. The upside here is there’s very little sanding or prep needed and it’s almost impossible to mess it up.
View It Here
Why Using the Best Cabinet Paint is Important
Painting your kitchen cabinets is a great way to change the style of your kitchen. You can make outdated cabinets look sleek and modern, or transform plain cabinets into striking focal points. Cabinet painting is a major job, and not using the best paint or taking the time to do it correctly can lead to some awful results.
Several years ago, my husband and I were house hunting. At that time, many of the homes we looked at were being sold by “flippers”. These were usually older homes that someone bought & remodeled; hoping to “flip” them for a profit. Most of these homes had some kind of remodeling done in the kitchen.
Many of these remodeled kitchens turned out beautifully, but there were more than a few that had badly painted cabinets and doors.
There’s just no other way to describe it; they were bad. From a distance, it wasn’t really noticeable, but if you looked closely you could see plenty of mistakes. It was enough to turn us off as potential home buyers.
I remember noticing cabinets that had uneven paint coverage, small paint spots on the wall and inside edges where it hadn’t been taped properly, and in one case…a hair that had been painted over! It was obvious some of the paint jobs had been done hastily, as the latex paint was lifting up on some edges, or had teeny bubbles in some corners.
Using the right paint and proper techniques is so important. There’s a saying that the kitchen is the heart of any home. If that’s so, the kitchen should be taken care of in the best possible way, even if that simply means picking out the best paint for a cabinet makeover.
Important Things to Consider When Picking The Best Brand of Paint for Your Kitchen Cabinets
When trying to decide which brand of paint you should use for your kitchen cabinet transformation, you should keep a few key things in mind.
First, make sure that the paint you like is suitable for kitchen cabinets. Many brands make paints that are specifically for cabinets and doors.
You should also compare the prices of different paint brands. A gallon of paint in similar colors can vary widely in what it will cost you, depending on the brand. Paints branded by famous home designers will undoubtedly cost more, but a mass-produced brand might do the job for you just as well.
Finally, read online reviews when deciding which brand of paint to choose. I really can’t stress this enough.
Even if, at first glance, a particular paint has a lot of five-star ratings, browse through the less-than-favorable reviews, too.
If you notice that many users are having similar issues with the product, don’t rush to buy it right away. It’s also good to look at reviews on multiple websites such as Amazon, Google, and the paint manufacturers’ websites.
What is the Best Type of Paint for Cabinets?
Some types of paints are much better suited for cabinets than others. You want to be sure that your paint will hold up to lots of touching/movement, will be resistant to dirt and stains, and will be easy to clean. Paints that are formulated with built-in primer are a good choice, although in some instances you might want to use a separate primer anyway.
Here are brief descriptions of the types of paint you might find, and how well they’ll work for your kitchen cabinets.
Oil-Based Paints
Oil-based paints are durable, and the colors look rich and vibrant when the paint dries. They come in just about any color you can imagine, and are fairly resistant to dirt and stains.
However, there are some significant drawbacks to oil-based paints. They take a really long time to dry.
Waiting for the paint to dry between coats could add a couple of days to your painting projects. Oil paints also have a high amount of VOC (volatile organic compounds).
This means it is imperative that you have good ventilation in the room while you’re painting, and you should absolutely wear a filtered mask while painting. Unfortunately, the “new paint” smell of oil paints can take a week or more to go away.
Lastly, oil-based paints need to be cleaned up from your tools/work area with mineral spirits, and leftover paint is considered a hazardous material and needs to be disposed of properly.
Latex Paints
Latex paints are acrylic pigments in water-based paint. Latex is the most common type of paint you’ll find for any interior painting project.
The colors and finish are comparable to oil-based paints. The biggest difference between latex and oil-based paints is the drying time.
Latex paint dries pretty fast. In fact, it can seem like it dries almost too fast; making it difficult to get the paint applied perfectly smooth without streaks or uneven spots. Usually, this can be remedied with a second coat of paint, though.
Latex paints have a much lower VOC content, so they don’t smell as strong as oil-based paints. You’ll still need to have good ventilation in your workspace, but the paint odor won’t linger much once the paint is completely dried.
Hybrid Alkyd Enamel Paint
Somewhat new to the world of home renovations, hybrid alkyd enamel paints bring the advantages of both oil-based and latex paints together.
Hybrid alkyd paints are water-based (like latex paint) but still contain alkyd resins (like oil-based paint). The result is a type of paint with the rich colors and durability of oil paints, but that dries quickly and has low VOC levels like latex paint.
Hybrid Alkyd paint also cleans up easily with soap and water and is virtually odorless. The durability makes this type of paint an excellent choice for kitchen cabinets, trim, and doors.
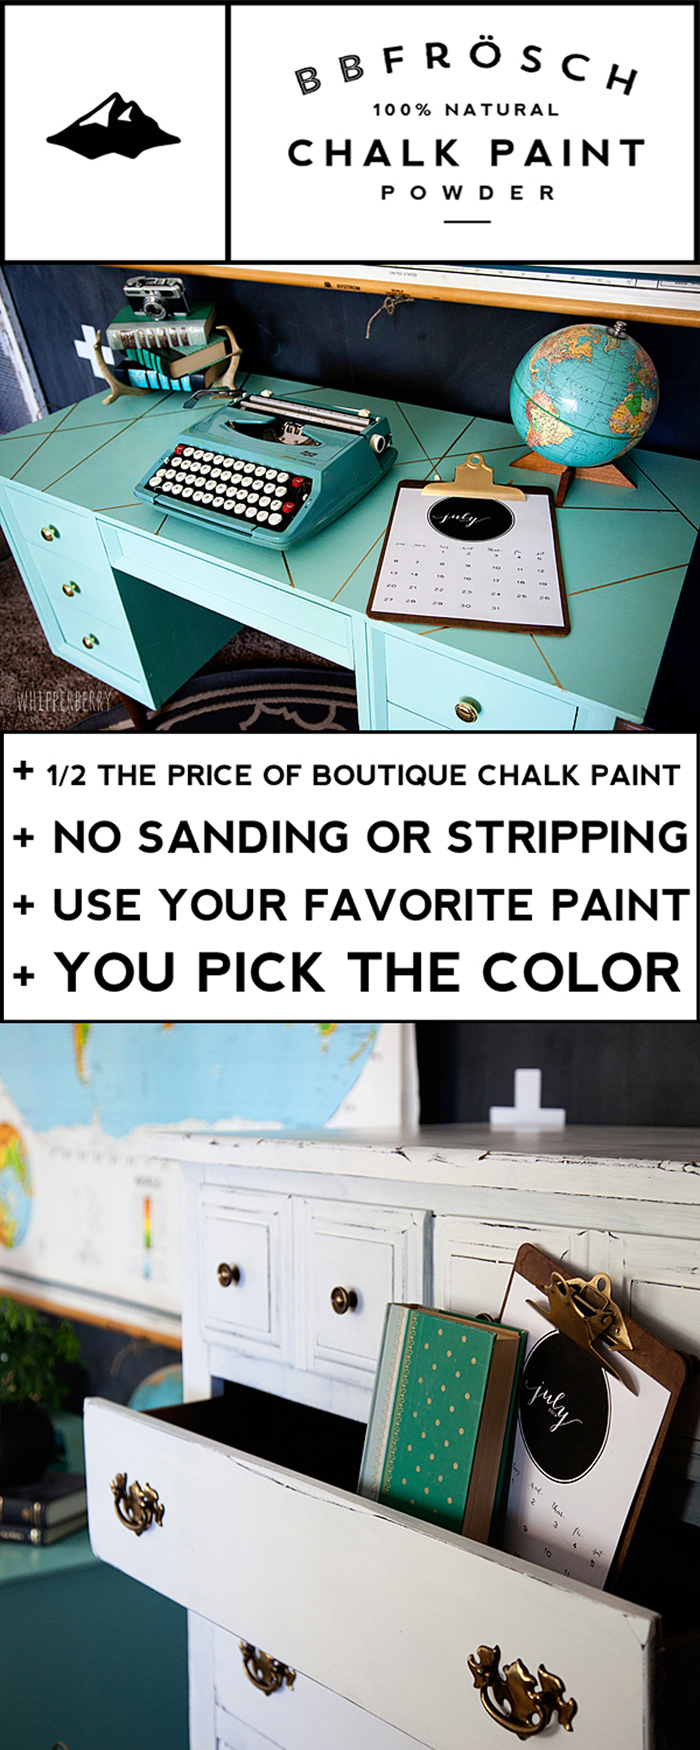
Chalk Paint
There are quite a lot of opinions about whether or not chalk paint is a good choice for kitchen cabinets. The matte finish and soft colors of chalk paint look absolutely gorgeous if your kitchen has a “farmhouse” or “country chic” style. Personally this is my favorite type of look.
Because chalk paint is a fairly thick paint, it can produce better coverage with few coats.
However, there are a few downsides to using chalk paint on your cabinets. Most importantly, chalk paint is prone to chipping.
That’s perfect for furniture that you want to have a distressed appearance, but it’s not a good idea for kitchen cabinets. Also, the matte finish of chalk paint will absorb any crumbs, dust, or grease from your normal kitchen use.
For these reasons, it is absolutely necessary to finish chalk-painted cabinets with a coat or two of wax sealant. Your cabinets will have a slight sheen but will be much better protected. Eventually, you’ll have to touch up the wax sealant to keep your cabinets looking as good as they did when you first painted them.
Milk Paint
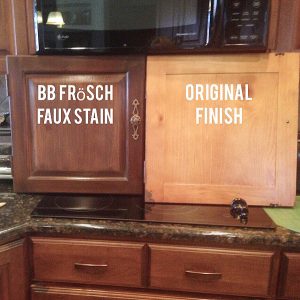
Milk paint will give you a smooth matte finish similar to chalk paint, but it’s a more durable choice for kitchen cabinets. I’ve written a full blog post covering milk paint vs chalk paint.
You can find milk paint in colors very similar to chalk paint colors, but the finish has a very slight satiny sheen to it.
This makes it a good choice for surfaces like cabinet doors, which will need frequent cleaning. Even though it is known to be a strong, long-lasting paint, you will still need to apply a protective top coat once your painted cabinets are fully dry.
Milk paint is sold in powder form and then you mix it with water to achieve the desired consistency. You need to be sure it is free of lumps after mixing to get a perfectly smooth finish.
While milk paint is known to be durable, it can still be a little bit prone to chipping on anything that will be touched or moved frequently. You can prevent chipping and scuffing by mixing in a bonding agent to make the paint more adhesive and long-lasting.
Milk paint can be a good value since you can mix the powdered form in just the quantity you need for your project. It’s practically odorless and cleans up easily with just mild soap and water.
Which Paints Have the Best Coverage?
If you’re looking for a smooth, opaque coverage for your cabinets you’ll get the best results with latex or hybrid alkyd paints. Both of these paints will dry with vibrant colors and a smooth finish if applied carefully.
Of these two, the hybrid alkyd paint is easier to get an even finish in just one or two coats. Latex paint will need at least two coats to achieve an even appearance.
Another great option is any paint that is a “paint and primer” formula. You can find these from most major latex paint brands. In some cases, you might still want to do a primer coat, but the paint-and-primer formulas do a great job of providing even full coverage.
Do You Need a Special Paint for Wood Kitchen Cabinets?
Any of the types of paint already described in this article will work just fine on wood cabinets, whether they’ve been painted before or not.
You don’t need any special paint for your wood cabinets, but you might need to do a little bit of extra prep work to get the best results.
Wood cabinets are likely to have a light varnish or polyurethane top coat. In order for the paint to adhere evenly, you should clean the cabinets thoroughly and then lightly sand the top coat.
You don’t need to sand completely down to bare wood. The sanded surface is simply so the paint will be able to “grip” onto your cabinets.
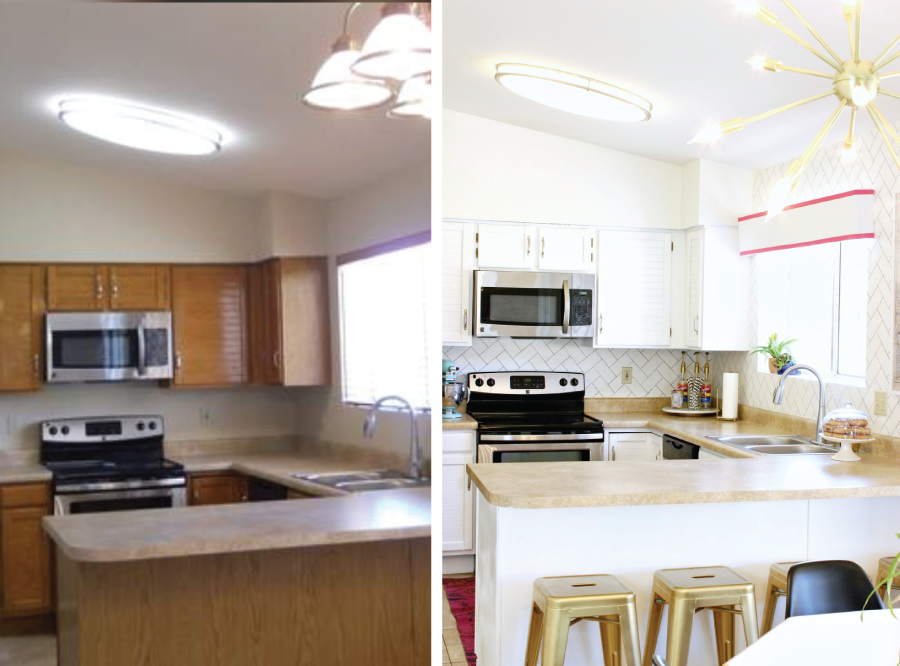
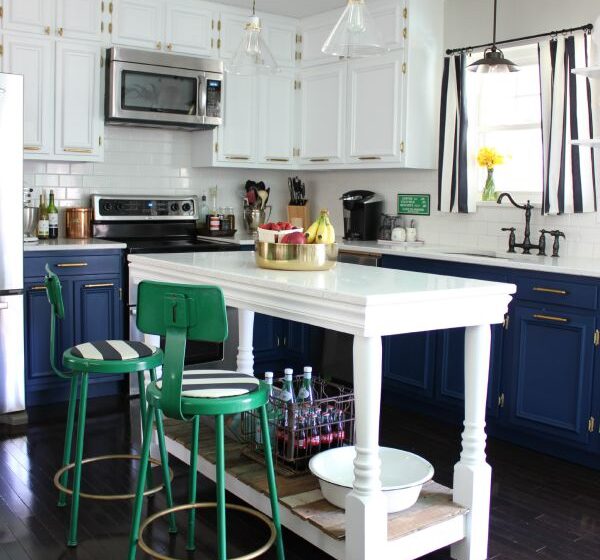
Can You Make Old Cabinets Look Modern?
Updating old cabinets is one of the most striking ways to make your kitchen look modern and stylish.
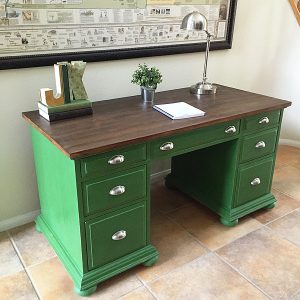
Changing the color of your kitchen cabinets is a simple way to update their look. This is especially true in older homes.
Even what was once a bright white paint job can appear yellowed and dingy over time. Kitchen cabinets that are still painted avocado green or sunny yellow (all the rage several decades ago!) can look brand new simply by changing the color to something more modern.
Muted shades, earthy colors, classic whites, and soft gray tones are all very popular colors for kitchen decor right now. Glossy finish paints look good if your kitchen has modern stainless steel appliances. The shiny finish will give your kitchen a contemporary designer look.
The other way to make your older cabinets look brand new is to change the hardware. This is an easy fix, but once it’s done you will be amazed at how it transforms the overall look of your kitchen.
Opt for sleek, minimalist hardware designs for the most contemporary style. Hidden hinges, as opposed to visible or ornate styles, are also a good way to update the look of your cabinets.
Can You Make New Cabinets Look Rustic?
Transforming new cabinets to have a rustic, or antiqued appearance is an easy and fun way to change the look of your kitchen.
Changing the paint color to a soft, lighter shade is a great way to get that “farmhouse” style that is so popular right now. Many paint brands even offer shades that are marketed as “farmhouse” or “country”.
Soft pastel hues and creamy shades of white are perfect to get a rustic aesthetic in your kitchen.
Painting your cabinets with chalk paint or milk paint, then sanding lightly for a “distressed” look can add a rustic appeal. However, you should only do very light distressing for anything in your kitchen, and you’ll definitely need to have a strong protective top coat over your paint.
Choose a top coat with a satin finish to keep your cabinets protected while preserving as much of the matte finish as possible.
Switching out your cabinet hardware is an easy way to transform your modern kitchen. Look for hardware that has a brushed or satin finish as opposed to anything shiny.
Oil-rubbed bronze, antiqued brass, and brushed nickel hinges and handles all have an attractive antique appearance. There are even companies that sell reproductions of antique hardware, right down to matching screws.
To complete the look, you could change your kitchen sink fixtures to match the new cabinet hardware.
How Much Money Do You Save By Painting Cabinets Yourself Instead of Hiring Someone?
Repainting kitchen cabinets sounds like it should be a simple DIY job. Unfortunately, that just isn’t the case.
It’s time-consuming and isn’t something that can be done by yourself over a long weekend. Realistically, prepping and painting your cabinets can take up to a week before your kitchen is fully usable again.
You can save a lot of time by hiring professionals to paint your cabinets, but it will cost considerably more.
On average, the cost of having kitchen cabinets repainted can range from $900 to $1500, depending on the material costs, the size of your kitchen, the number of cabinets, and how much prep/minor repair work needs to be done.
If you decide to tackle the job yourself, you can spend as much as $150 to $500 on paint and supplies.
This, of course, depends on the price of the paint you choose, how much you need, and what additional supplies you need to purchase.
So you can conceivably cut the cost of your kitchen cabinet painting by half (or maybe more) by doing it yourself. However, when you hire professionals you will have the job done in much less time, and it will be done properly.
Kitchen cabinets that are painted professionally can last decades without needing much more attention than regular cleaning.
Best Paint Finish For Kitchen Cabinets
Another consideration when choosing paint for your kitchen cabinets is deciding what type of finish will be the best choice.
Gloss or semi-gloss finishes are really optimal for any painted surface in the kitchen. The glossy finish helps to repel dirt and makes the painted surface easy to clean.
Although they look great, matte finishes aren’t always the best choice for the kitchen. That doesn’t mean you can’t use chalk paint or milk paint on your cabinets; you’ll just have to apply a protective top coat of wax or polyurethane.
The top coat will have a soft satiny sheen, so the paint won’t have the velvety matte look that these paints are known for.
Without the top coat, dirt, crumbs, and kitchen grease will stick to the paint, and it won’t be easy to clean without scuffing or chipping the paint.
Best DIY-Friendly Cabinet Paint
Beyond Paint Furniture, Cabinets and More All-in-One is one of the most “user-friendly” paints on the market. It’s perfect for anyone who is a beginner at home painting. It has a great finish and is the easiest to use.
The product description states there is no sanding or priming needed with this paint. It comes in a variety of colors that are perfect for any style of kitchen. It’s a thick paint that applies easily with a roller and dries to a smooth, semi-glossy finish. Beyond Paint has some great colors to choose from too.
User reviews indicate that it lives up to the boast of needing little to no prep work, with a high rate of satisfaction.
View It HereThe Best Oil-Based Paint For Cabinets
Rust-Oleum Protective Enamel is an oil-based paint that is a great choice for almost any home painting project.
The colors are rich and vibrant, and they look fresh and glossy after the paint is dry. Even though this is an oil-based paint, it has a relatively quick drying time of 3 to 4 hours.
Rust-Oleum is known for being one of the most durable home paints on the market, which makes it a good option for high-touch areas such as kitchen cabinets. However, I don’t think this is the best option.
The Best Chalk Paint for Cabinets
Rust-Oleum Chalked Ultra Matte Paint is available in a variety of contemporary colors at a budget-friendly price.
It applies easily with a brush or roller and dries to the touch in approximately 30 minutes. The final appearance is a velvety matte finish. You can read more about the best chalk paint brushes here.
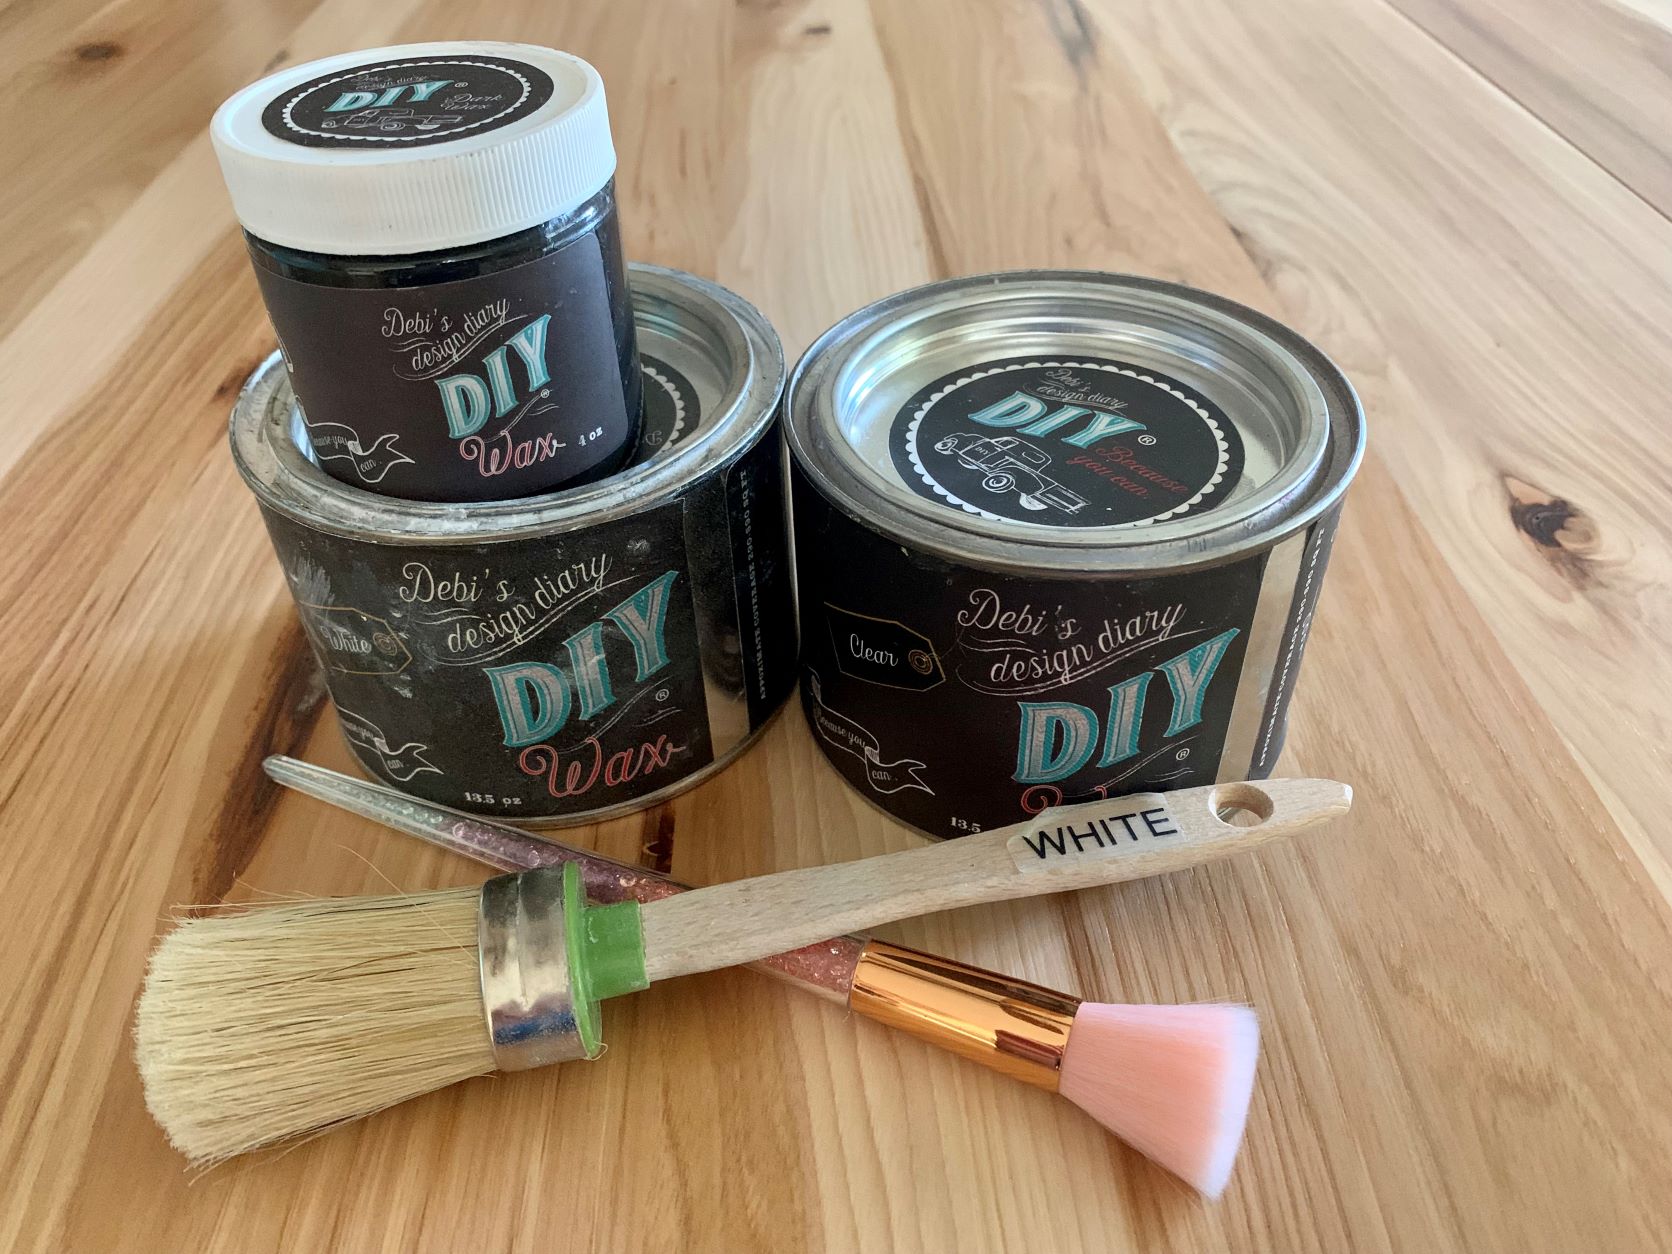
Like any chalk-style paint, you will need to apply a protective top coat if using this on kitchen cabinets. You can seal this with a wax coating or with the Rust-Oleum brand clear top coat. I wrote a whole post about the best chalk paint waxes here.
Rust-Oleum produces a matte finish clear top coat, but a semi-gloss or satin finish will be easier to keep clean in the kitchen. You can read more about the best chalk paints here.
I’ve mentioned this a few times already but I don’t think chalk paint is the best option. If you’re set on chalk paint though, then Rust-Oleum is the one to go with.
The Best Milk Paint for Cabinets
Old Fashioned Milk Paint Powder is an excellent choice if you want a rustic or farmhouse look for your kitchen. This powdered paint can be used as a semi-transparent wash (with one coat), or as a full matte finish paint (with two to three coats).
The colors are rich and won’t fade over time. Old Fashioned Milk Paint also produces a bonding agent that can be mixed in, to add more durability and adhesion to this paint. One of the nice features of any milk paint is that it is non-toxic and virtually odorless.
Like chalk paint, you will need to apply a protective top coat over this paint for the best results. It’s also important to mix the paint powder thoroughly and let it sit for a few minutes before painting to minimize bubbles in the paint.
The Best Paint and Primer for Kitchen Cabinets
Prestige Interior Paint and Primer is available in over 40 colors. These neutral shades are perfect for modern kitchen designs.
The semi-gloss finish allows for easy cleaning and keeps the paint looking fresh. This is an acrylic latex that has a low VOC content, so there is very little odor and it cleans up easily with soap and water.
Best Kitchen Cabinet Paint From Sherwin Williams
For a professional-looking finish to your painted cabinets, you can’t go wrong with Sherwin Williams’ ProClassic Waterborne Interior Acrylic Enamel.
It is available in high-gloss, gloss, semi-gloss, and satin finishes, and you can get any of the Sherwin Williams paint colors.
This is a thicker paint that is formulated to stand up to heavy-use surfaces. It goes on smoothly with either a brush or roller and dries to show no brush marks at all. It is important to use a primer coat with this paint for the absolute best results.
The Best White Paint Colors for Kitchen Cabinets
Classic white cabinets look great in any kitchen decorating style. Picking out white paint can be trickier than you might think, though! Basically, whites can be “neutral”, “cool”, or “warm”.
The neutral, or true whites will be the most “white”. They’re bright, reflective, and probably best suited to modern decor.
Cool whites have undertones of blue, gray, or even greenish hues. You don’t really notice the undertones, but they’ll look best in a kitchen with cooler complimentary colors.
Warm whites will have undertones of yellow, pink, or even pale orange. You have to be careful if you choose a warm white paint color because it can look yellow very easily.
Paints described as “off-white” or “cream” usually have warm undertones.
Here are a few popular white paints that are suitable for kitchen cabinets:
Sherwin Williams Alabaster White-Best Warm White
This paint has warm undertones of pale yellow and gray. It’s a lovely soft shade that looks especially pretty in natural light. Be aware that fluorescent lighting does bring out the yellowish tones in this paint.
Benjamin Moore Decorator’s White-Best Cool White
This cool white is a favorite with interior designers as well as DIY home painters. This is almost a pure white, with very subtle cool undertones that look beautiful in any light.
It always looks crisp and modern and has absolutely no yellowish cast to it.
Sherwin Williams High Reflective White-Best True White
This absolutely bright white paint is probably the closest you can buy to a pure white. It has an LRV (light reflective value) of 95, which means that it is so bright it can reflect 95% of light off of its surface.
With decorative light fixtures and even candles, this can produce some dramatic light effects in your kitchen. While this true white paint looks bright and clean, it looks best in a kitchen that has some touches of color in it as well.
Without touches of color to accent the room, using this paint could make your kitchen look a little bit sterile.
Top Techniques for Painting Kitchen Cabinets
Now that you’ve read through some suggestions on the best types of paint, you’re probably wondering how to get started! Using a good technique is just as important as choosing the best paint for the job. I have a full blog post on this where I go into detail. You can read about how to paint kitchen cabinets here.
The first thing you need to do is make sure your cabinets are clean and dry. Then you should give them a light sanding, and clean them again to get rid of any sanded dust.
A primer coat is a good idea at this point, even if the paint you’re using is the kind that is described as “paint and primer in one”.
Once your primer coat is dry, you’re ready to apply your first coat of paint. Brushing with a 2.5-inch fine bristle brush will give you great results.
If you prefer using a roller, you’ll have better control with a mini roller than with a full-size one. Apply your first coat all over, then leave it to dry fully. Even if it feels dry to the touch after a couple of hours, it’s best to let it dry fully for several hours to overnight.
Then, you’ll want to sand it very lightly before applying a second coat and possibly a third coat. Thin coats of paint are better than thick coats. The thinner layers will provide a stronger, more long-lasting bond.
If you’re applying a protective sealant coat, be sure your paint is absolutely dry before you apply. In fact, making sure you allow enough drying time at all steps of your painting is crucial to achieving a professional look.
The last technique that should be mentioned is using a paint sprayer. This can make the job of actually painting go quickly, but it does require quite a bit of prep work to protect everything from any overspray.
If you opt to give a paint sprayer a try, be sure to wear goggles and a face mask for your own safety.
Make sure your kitchen and/or workspace are well-ventilated, especially if you’re working with oil-based paints.
How to Get a Smooth Finish When Painting Kitchen Cabinets
If your goal is to have a perfectly smooth finish, there are a couple of tricks that can help you achieve this.
The first tip to getting that beautifully smooth look on your cabinets is sanding. You’ll want to sand lightly with 220-grit sandpaper before applying your primer.
Then, you’ll want to lightly sand with your 220-grit between each layer of primer, paint, and top coat. This helps each layer adhere perfectly and level out to a smooth appearance. Be sure to lightly clean up any dust after sanding, so you’re not painting the dust into your surface!
The next tip for a smooth look is to use a foam paint roller. Foam rollers spread paint with almost no texture in the finished project.
You’ll probably still need to use a small brush for tight areas, but a 4-inch foam roller will make the job go quickly and give you great results.
How to Paint Over Oak Cabinets White Without The Grain Showing
Oak cabinets are lovely if you want the look of natural wood grain and color. They’re also very sturdy. If you are considering painting over oak cabinets and don’t want the appearance or texture of the wood grain to show, you’ll need to take a couple of extra steps.
First, you’ll need to sand and fill in that wood grain. The grain on oak is deeper than a lot of other hardwoods.
You should use a medium sandpaper, and sand in the direction of the woodgrain using even pressure. Use a damp cloth to clean up any sanding dust before the next step.
Next, you’ll need some wood putty and a spackle spatula. Apply a very thin coat of the wood putty on the cabinet, and spread it over the surface.
You’re trying to just fill in the grain so you’ll have an even surface all over. Use the spatula to spread it evenly. You can sand any uneven spots after it is fully dry, but it will be easier if you can get it even while the putty is still wet.
Let this dry overnight, then get your light sandpaper and give it a light sanding again. You’ll need to wipe up any sanding dust again, of course.
The final step before painting is to apply one or two primer coats. The coats will act as a final barrier to prevent the wood grain from showing, as well as help your paint to adhere evenly.
Be sure to allow plenty of drying time between your primer coats, then you’re (finally) ready to paint your oak cabinets.
How Much Paint do You Need for a Cabinet?
Many paint manufacturers will have an estimate on the paint can that will tell you how many square feet the container of paint will cover.
As a general rule, one gallon of paint should cover 350 square feet, which is approximately enough to paint a bathroom or small room.
Two gallons of paint is considered enough for an “average” home painting project and should cover approximately 800 square feet. If you keep that in mind, a gallon of paint should be enough to paint your kitchen cabinets with multiple coats.
How To Prep Cabinets To Be Painted?
There’s no easy way to say this: painting kitchen cabinets requires a lot of prep work! Not just prepping the cabinets, but also prepping your entire kitchen.
Before you even get started, you’ll need to remove everything from your kitchen countertops. You might want to move any furniture out of the kitchen also.
Cover your countertops, appliances, and floor with heavy paper or plastic sheeting.
Remove any curtains from nearby windows, and cover the windows with plastic. If you’re going to use a paint sprayer, you should hand some plastic sheeting to block off the entrance to the kitchen.
It’s easier to paint cabinet doors if you remove them from the cabinet boxes. Be sure to organize the hardware in small containers or plastic bags, and label them in a way that makes sense to you.
Now it’s time to clean! You’ll need to scrub the doors and outside surfaces of the cabinet boxes on the wall with soap and water.
Kitchen cabinets are going to pick up dirt, grease, and dust from daily use. You don’t want to paint over even tiny amounts of dirt, so making sure they’re spotlessly clean will help make your cabinets look wonderful.
Finally, it’s time to begin taping/masking off so you can get started with the paint!
How To Tape Cabinets To Be Painted
Personally, I find taping to be the most tedious part of any home painting project. But, I also know that taking the time to carefully tape off before painting can make the difference between a professional-looking job, and a less-than-wonderful-looking job!
In addition to masking tape, you’ll need some heavy brown paper. You can usually find rolls of it at most home improvement stores, as well as online. Tape several inches of the paper to the walls and ceiling all around the cabinet boxes.
You’ll also need to tape along the interior edge of the cabinets. Take your time and be sure to get the tape and paper right up to the edge of the cabinets.
It’s not the most fun part of the job, but doing it correctly will save you from doing unnecessary touch-ups and cleaning later.
If you’re going to use a paint sprayer, you should tape a sheet of plastic across the open cabinet boxes so you don’t get paint inside.
You should also tape the paper over the backsplash, countertops, floors, and most of the walls to avoid getting any overspray on them.
Wrapping Up on The Best Kitchen Cabinet Paints
Painting your cabinets is a great way to dramatically transform your kitchen. With the right paint, you can create a cozy “farmhouse chic” space or a crisp modern one.
It’s a big undertaking to try yourself, so doing some research on what paint you should use is worth the time. It’s also important to remember that a great paint job starts with great prep work, and kitchen cabinets take a lot of preparation.
In the end, though, you can have a stunning kitchen that reflects your personality and style.