• Skip to primary navigation
  • Skip to main content
  • Skip to primary sidebar
  • Skip to footer

Whipperberry

WhipperBerry • Your Home For Creative Inspiration

  • Home
  • Recipes
    • Starters
    • Easy Weeknight Dinners
    • Main Dish
    • Salads
    • Side Dish
    • Soups & Stews
    • Desserts
    • Breakfast
    • Miscellaneous
  • Tutorials
    • Creative Crafts
    • DIY Decor
    • Fabric Crafts
    • Food How-To
    • Jewlery
    • Paint Projects
    • Paper Art
    • Party Styling
    • Photography and Graphic Design
    • Silhouette
  • Holidays
    • Easter
    • Mother’s Day
    • Father’s Day
    • 4th of July
    • Halloween
    • Thanksgiving
    • Christmas
    • Valentine’s Day
  • Gift Ideas
    • Gifts For Everyone
    • Gifts for Dad
    • Mother’s day
    • For The Girls
    • For The Kids
    • Teacher Gift Ideas
    • Christmas
  • Printables
    • Holiday
    • Gift Idea
    • LDS Primary
  • Travel
  • About
    • Terms
  • Contact
  • Nav Social Menu

    • Facebook
    • Instagram
    • Pinterest
    • RSS
    • Twitter

classroom goodies

Silhouette CAMEO GIVEAWAY & Vinyl Promotion

4 · Aug 5, 2013 · 323 Comments

Silhouette Affiliate Post // It's Silhouette Promo time again and this month it's a DOOZIE!! It's a fabulous deal on my favorite Silhouette products, the CAMEO & their Premium Vinyl. As an added goodie, I'm giving away a Silhouette CAMEO to one lucky WhipperBerry friend!

I made a quick little chalkboard with the Silhouette Chalkboard Vinyl that literally took me 20 minutes to make, start to finish. 

Silhouette Chalkboard Vinyl To Do List from WhipperBerryEasy Chalkboard to do list with Silhouette Vinyl copy
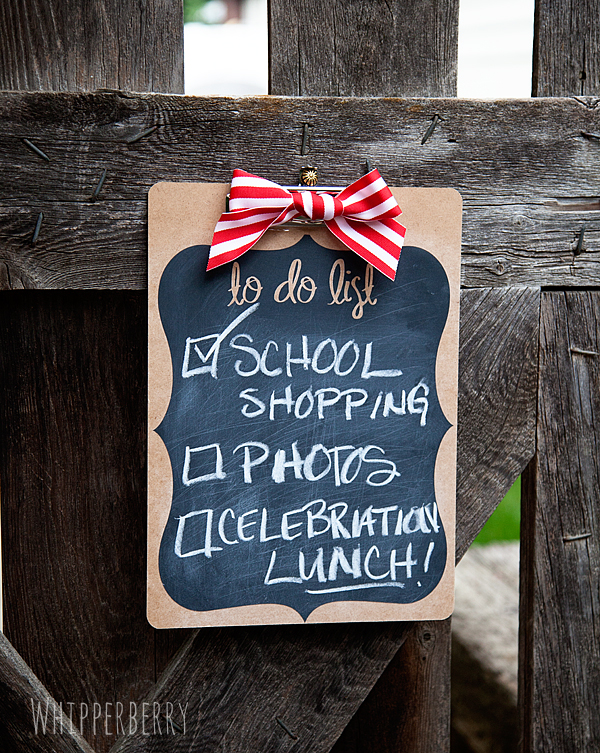
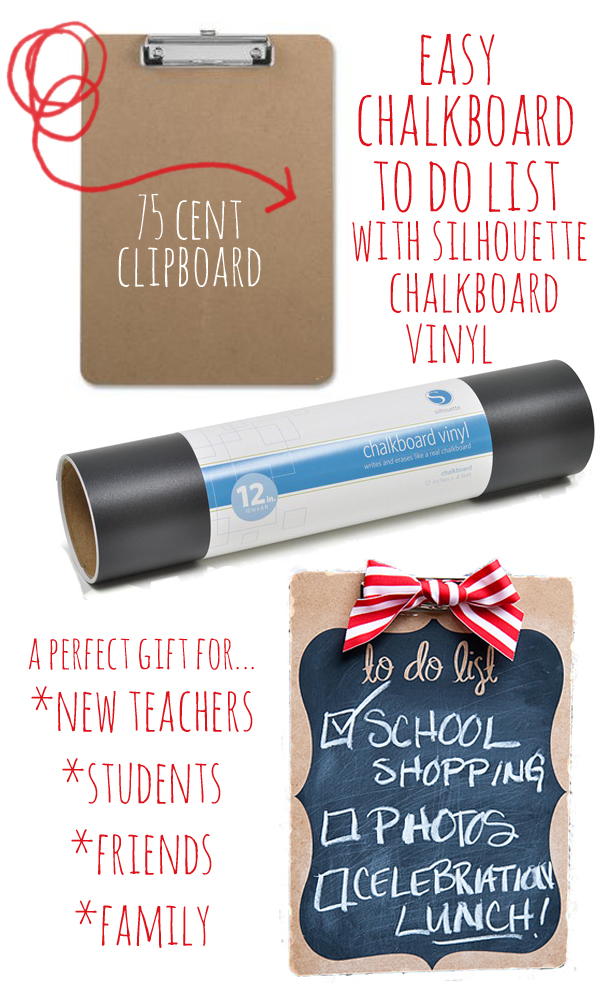
All you need is an inexpensive clipboard that you can find at most major retailers, some Silhouette Chalkboard Vinyl & a Silhouette CAMEO. I designed my chalkboard using a classic frame shape from the Silhouette Store and then I added the cut-out "to do list" using the SNF Miss Molly font. 

Silhouette Screen Shot

Make a fun chalkboard to do list with Silhouette Chalkboard Vinyl

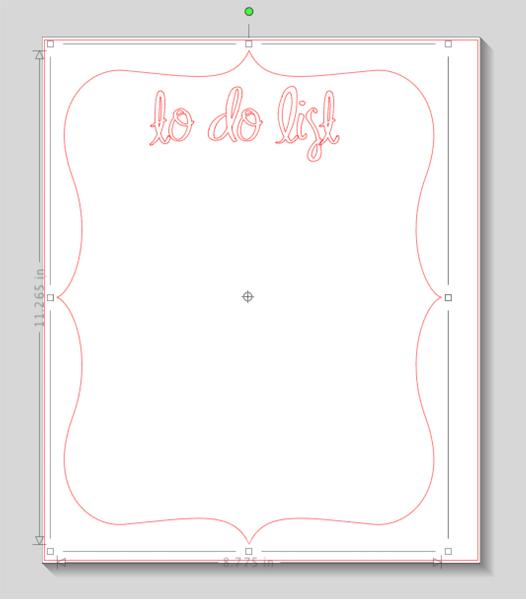
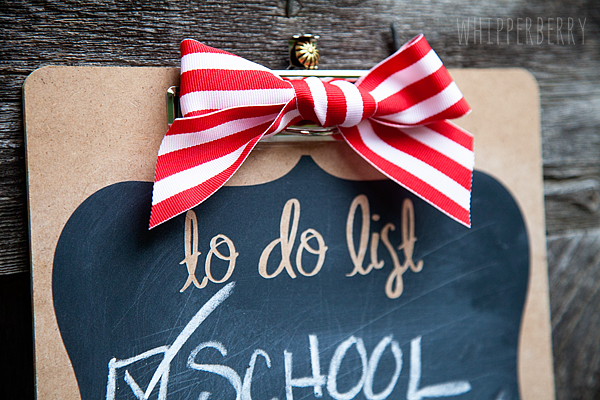
I love the peak-a-boo lettering! This whole project is SUPER simple and would make a great gift for new teachers, new students, new friends… basically anyone!  I cut out the vinyl on my CAMEO and then using the Silhouette Transfer Tape, transferred the vinyl to the clipboard, added a cute bow and voilá, it was finished.

Need a CAMEO? Need to stock-up on some vinyl? This is the week to do just that! Silhouette is running an amazing promotion for all our vinyl loving friends out there…

WhipperBerry August Silhouette Promotion and Giveaway

Click here to visit the Silhouette Shop to cash in on this great deal!!

If you're feeling lucky, you can enter to WIN a SILHOUETTE CAMEO!

Follow the directions in the Rafflecopter box below to enter. This giveaway is open from August 6-11 with the winner announced via Facebook and email on August 12th. This giveaway is open to anyone with a shipping address within the United States.

a Rafflecopter giveaway

Disclaimer // I am a Silhouette affiliate. I was not paid for this post, but I will receive a percentage of the sales made from this post. 

Vanilla Bean Heart Doughnuts | Recipe

0 · Feb 2, 2012 · 18 Comments

Ahhhhh… can you feel it? Love is in the air.  As promised I have the recipe for the Vanilla Bean Heart Doughnuts that I featured last week with our Gift Gloss post.  These little gems are perfect for any Valentine goodie or gathering.  Don't worry, you don't have to make them heart shaped.  Any good donut baking pan will do.

I found my heart doughnut pan at Target if you want to make the heart shaped variety or you can find a good ole' round doughnut pan large or small at your local baking store or online. Here is the recipe that I used.

Vanilla Bean Doughnuts

2 1/2 cups cake flour

1 cup sugar

2 1/2 teaspoon baking powder

1 teaspoon salt

1 cup buttermilk

1 teaspoon vanilla extract

1 vanilla bean

2 eggs slightly beaten

3 tablespoons melted butter

Preheat oven to 425 degrees and spry pan with non-stick cooking spray

In a large mixing bowl sift together the flour, sugar, baking powder and salt. Add buttermilk, vanilla, eggs and butter. Cut the vanilla bean length wise and using a knife scrape out the vanilla seeds and add to the mixture.  Mix just until combined. Fill each doughnut cup 1/2 full and bake accordingly.

large doughnut pan or heart shaped pan 10-12 minutes

mini doughnut pan 4-6 minutes

The top will only slightly brown and the doughnut will spring back when touched.  Let doughnuts cool in pan for a few minutes and then place on a wire rack to cool completely.

Now my little secret is… I dip the doughnuts in melted chocolate to create that lovely glazed look.  The funny thing is I now prefer my doughnuts with a chocolate topping!  I used the red colored candy melts along with some white jimmies from Sweet baking & candy making supply. I prepared the chocolate according to package directions and then added a tablespoon of canola oil to the chocolate to thin it out a bit.  You'll have to check the consistency of the chocolate and may need to add a little more.  Just start slow until you get your desired consistency.  Don't worry, the chocolate will still set-up with the oil.  Carefully dip the doughnuts into the chocolate and then sprinkle the top with the jimmies.  Put doughnuts into the fridge or freezer for a few minutes until the chocolate sets-up. The lovely thing about the chocolate is that it makes it super easy to package your goodies without making a huge mess and they taste aaaaaamazing!!

What kind of goodies are you making this year? Here's another fun Valentine idea from WhipperBerry…

Heart shaped cookies with a free packaging printable.  Yes… I have a thing for heart shaped goodies!

Crayon Heart Valentines | Lifestyle Crafts

84 · Jan 10, 2012 · 132 Comments

Valentine's Day is right around the corner and today I thought I would share my "you color my WORLD" Crayon Heart Valentines, made with the new Sweetheart die collection from Lifestyle Crafts and heart shaped crayons made with melted Crayola crayons.

Isn't that fun?  I am always a fan of homemade Valentines for the kiddos classes every year.  It's also a bit of a challenge to make valentines that are fun, colorful and easy on their sugar intake for the day. 

I know this isn't a new idea by far… My neighbor made these heart shaped crayons several years ago after finding this fun idea in Family Fun magazine, but I thought it would be a perfect fit for the new Sweetheart Nesting Hearts from Lifestyle Crafts.  Cutting the hearts was super simple using my Epic three in one tool from Lifestyle Crafts.  The Epic tool cuts, embosses and can create beautiful letterpress projects as well.

But I am getting ahead of myself!  Before we can make the cards we need to make the heart shaped crayons…

You will need to gather all the old crayons in the house… if your house is anything like mine, that won't be a problem.  You can also purchase new crayons as well.  I will have to admit, the new crayons were easier to remove the labels from. I used an X-ACTO knife to make a slit down the length of the crayon to easily remove the labels.  The older crayons took a little more coaxing.

Once you've removed all of the labels, break the crayons into small pieces.  The smaller the better…

I also found that separating them into color families made for the best looking crayons, but that is completely up to you! 

You will need to use a heart shaped silicon baking mold to melt your crayons in.  I found mine at Michaels in the baking section and it worked like a dream.  The girls and I decided that we wanted our crayons to be a little glittery so we added about 1/2 a teaspoon of silver glitter to the bottom of the baking mold. Then we filled the baking mold with the crayons about 1/3 full. The mold I used was pretty deep so depending on what you use you will have to play around with this.

Place in your oven that has been pre-heated to 300 degrees and baked for 15 minutes.  The crayons will become completely liquefied so be careful when you pull them out of the oven.  Carefully place them on the counter to cool.  You want to make sure that you don't move them around too much and mix the colors more than you want.  Wait for about 20 minutes or until the crayon is solid again and then gently remove it from the mold and let cool completely.

I made 57 hearts with the Wilton Mini Heart Mold using approximately 200 crayons.

Now it's time to pull out your Epic Tool to make the heart shaped cards for you to place your new crayons on.  I used two different dies from the new Sweetheart line for this project.  The Nesting Heart and the Nesting Scallop Hearts work beautiful for this card.

I decided that since I wanted the focus to be on the crayons I used a basic white watercolor paper for the base of the card. 

Once I cut out the heart shapes, I used my rolling alphabet stamp to create the fun saying on the card. "Valentine… you color my WORLD"  I just LOVE that look!!

Of course I had to dress up the heart crayons with some Divine Twine from Whisker Graphics. I just wrapped the hearts randomly and tied with a bow or made little twine bundles for the decoration…

This is such a fun project to do with the kiddos.  My girls and I had  ball gabbing while we were prepping the crayons. After that it was a perfect opportunity to have a color class while we created our crayon concoctions.  From start to finish this is an easy and elegant Valentine treat that your little ones {or big ones} will love to share with their friends this Valentine's Day!!

Come back tomorrow I have another fun Anthro inspired Valentine project made with my Sweetheart dies from Lifestyle Crafts!

Here are some more WhipperBerry Lifestyle Craft projects…


Party favors, bakery boxes & bubble party favors  


Valentine Cookie Cartons

0 · Feb 2, 2011 · 8 Comments

heart shaped chocolate chip cookies

I am in love with Valentine’s Day this year.  I just can’t get enough of it and all the fun creations that come with it. 

Again… packaging is everything!!  I made some fun heart shaped chocolate chip cookies the other day, and thought this would be a fun Valentine goodie, but what should I put it in?

WB 026

I found these lovely cartons at a restaurant supply store here in Vegas, they were super-cheap and I knew I could dress them up!

WB 047

I designed a logo for the front of the carton which I printed on sticker paper,  basically one large label. You can find them at your office supply store. I then created a topper for the lid, and voila, done.  A perfect little container for my sweet little heart shaped delights!

Oh… and just because I {heart} you, I am going to share my printable for the Valentine cartons!! {Click on the image to download.}

Sweet label

Carton topper

  • « Go to Previous Page
  • Page 1
  • Page 2
  • Page 3

Primary Sidebar

Heather from Whipperberry
Hello... my name is Heather and I'm the creator of WhipperBerry a creative lifestyle blog packed full of great recipes and creative ideas for your home and family. I find I am happiest when I'm living a creative life and I love to share what I've been up to along the way... Come explore, my hope is that you'll leave inspired!

Footer

  • Privacy Policy
  • Crafts
  • Food
  • Gifts
  • Holidays
  • Home
  • Mom Life
  • Recipes
  • Travel

Copyright © 2026 · Seasoned Pro