• Skip to primary navigation
  • Skip to main content
  • Skip to primary sidebar
  • Skip to footer

Whipperberry

WhipperBerry • Your Home For Creative Inspiration

  • Home
  • Recipes
    • Starters
    • Easy Weeknight Dinners
    • Main Dish
    • Salads
    • Side Dish
    • Soups & Stews
    • Desserts
    • Breakfast
    • Miscellaneous
  • Tutorials
    • Creative Crafts
    • DIY Decor
    • Fabric Crafts
    • Food How-To
    • Jewlery
    • Paint Projects
    • Paper Art
    • Party Styling
    • Photography and Graphic Design
    • Silhouette
  • Holidays
    • Easter
    • Mother’s Day
    • Father’s Day
    • 4th of July
    • Halloween
    • Thanksgiving
    • Christmas
    • Valentine’s Day
  • Gift Ideas
    • Gifts For Everyone
    • Gifts for Dad
    • Mother’s day
    • For The Girls
    • For The Kids
    • Teacher Gift Ideas
    • Christmas
  • Printables
    • Holiday
    • Gift Idea
    • LDS Primary
  • Travel
  • About
    • Terms
  • Contact
  • Nav Social Menu

    • Facebook
    • Instagram
    • Pinterest
    • RSS
    • Twitter

Gift Ideas

$2.00 DIY Beach Bag

0 · Jul 25, 2013 · 3 Comments

Hi Whipperberry readers!  It's Jenn from My Fabuless Life back this month to show you a super simple, super affordable little beach bag I threw together for a recent family vacation.  Literally, if you have five minutes and a five dollar bill, you can make this–you don't even need a personal cutter!  And what's extra awesome about this project is that you can use this method to "screen print" just about anything that's fabric!  


Our family recently went on vacation to the beautiful Oregon Coast and this trip meant two things for us: LOTS of time in the car (we drove from Utah to Oregon) and LOTS of time at the beach.  I always pack my 3 year old daughter a road trip bag and a brand new bag to hold all of the goodies is part of the fun.  For this trip, my $2.00 bag pulled double-duty by holding all of her stuff during the car ride and then all of our treasures and toys once we got there and were ready to spend our days on the beach.

To make your own bag you'll need:
Freezer paper
Craft paint + Fabric Medium
A cloth bag (I got mine for $1.99 at Hobby Lobby without the 40% coupon)
Iron

Find the image you want to use: for this one, I just Googled "Whale Silhouette" and found one that I liked.  Click on the image so it shows up on your screen like this (in Google, you can also click "view original image"):


Zoom in or out on the image until it's the size you want and then just lay your freezer paper right over the computer screen and trace GENTLY!  Let's not go ruining any computer screens here, since that would sort of negate this whole $2.00 project thing.  You should be tracing on the freezer paper shiny side down (pencil marks will be on the dull side).

Next, just cut out the image with an Exacto knife.  Make sure to leave plenty of room around your shape to "slop" your paint so it stays on the paper and doesn't smudge all over your fabric.  Make sense?  If not, you'll see what I mean below.


I wanted this to be sort of "kid chic" so I left the cute little face off of the whale–not to mention, it makes it that much easier to cut and paint.  Next, iron your freezer paper onto your fabric shiny side down.  Make sure to iron it down good and tight so your paint doesn't bleed underneath (I do it with my iron on the highest setting).  Also be sure to iron your bag or shirt or whatever you're using prior to painting it.  Painting on wrinkled fabric will not give you pretty results.

Next comes paint: mix the paint and medium according to the instructions on the bottle of fabric medium (which can be found with the craft paints).  I used gold paint (like I said, I was going "kid chic" here and it glitters in the sun–BONUS!) and my fabric medium ratio was 2 parts paint to 1 part medium.  This gives you a softer finish on the fabric once the paint dries.  You can do this without the medium, but your paint will be stiff and won't soften as much in the wash.  YES–you CAN wash it!!

Apply your paint (you can use a brush or a dobber), let the paint dry a little and then pull the freezer paper off and let the paint dry overnight.  DONE & DONE!!
 

This is such a fun easy way to personalize gifts.  Onesies for baby showers, book bags for kids, team t-shirts for little ones…the possibilities are really endless.  Later this week over at MFL, I'll be showing you what I filled this bag with for my little one and my favorite tips for LONG road trips with kids so make sure to stop by!

My Fabuless Life

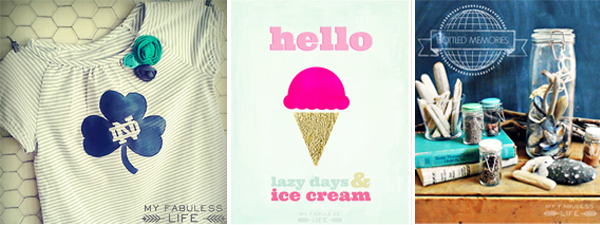
diy screen printed team shirts // summer printable // memories in a jar 

jenn from my fabuless life

Gift Giving with Styled by Tori Spelling

1 · Jan 30, 2013 · 3 Comments

Gift Jar with Styled by Tori Spelling Key Chain // Hello my friends!  We're running slow today with another snow day here in Lincoln. Can't complain at all in my book. Snow days are the BEST!!!! We've settled down with a Harry Potter marathon and I, of course had to do a little creating on the side. With Valentine's day around the corner I thought it would be fun to make some simple little gifts for teachers and such with some of my favorite Styled by Tori Spelling goodies…

Gift Giving with Styled by Tori and WhipperBerry

I thought it would be fun to create a gift jar (of course) and make a little key chain for my daughters teacher this year. For the jar I just took a little 4 oz. jelly jar and cut some craft paper to fit the lid and glued on a gem flower from Styled by Tori on top…

Creating a gift jar with Styled by Tori

Toss in some coordinating tissue paper and you have a simple yet beautiful little gift jar. Couldn't be any easier than that. The jar, quite frankly is also part of the gift. The person who receives it will be able to use it to store little items in and they will adore it!! 

Next, I created a fun peacock key chain for the "gift" in the pretty jar…

gift jar with styled by tori

This one is super simple as well. I found this lovely peacock charm from the Styled by Tori line and then I bought a nice clip to attach to it to make the key chain…

key chain components

You may need to use some needle nose pliers to open the ring up a bit to attach the clasp and peacock. Close the ring and voila, you have a fancy new key chain…

key chain made with styled by tori

Many of the Styled by Tori charms will work perfect to make a fun decorative key chain. Next, all you need to do is to attach your key ring with your keys and you are in business. I always like to have little clip on my keys so I don't lose them in my bag, so that was a must!

key chain with styled by tori and whipperberry

Won't this be a fun little gift for teachers or friends for Valentine's Day, teacher appreciation,  mother's day, birthdays, anything really. You can make up a bunch and keep them in your gift stash and always be ready with a fun gift at hand. 

Sharpie Art Gift Set // Mug A Love Hot Chocolate

4 · Nov 13, 2012 · 26 Comments

I was a guest over at Infarrently Creative a little bit ago and I thought I would share what I created for Beckie and her friends over there.  A Sharpie Art Gift Set.  Check out how to make this fun and inexpensive gift for your family and friends this holiday season…


Hello all my IC friends! I’m Heather from WhipperBerry and I’m over the moon excited to be here with Beckie to share my Sharpie Art Gift Mugs today. I just adore Beckie and all her amazing talents.  She’s one lady I would LOVE to spend a day with, just to hopefully glean from some of her knowledge, talents & energy!! One talented lady I must say…

I love this pennywise presents series she’s running this month and I have a fun one to share…

sharpie art gift mugs copy

arrow design element from Rhonna Designs

Who doesn’t love a good hot chocolate mug during the chilly months and especially if it’s a mug full of LOVE?! That’s how I came up with my “A Mug A Love” gift idea to share. Here is what you will need…

Supplies

  • light colored ceramic mug
  • a Sharpie
  • plastic sandwich bag
  • hot chocolate mix, favorite coffee blend, tea or Choffy
  • Kraft paper gift tag
  • white chalk pencil

Optional Supplies

  • vinyl
  • vinyl cutting tool (I used the Silhouette Portrait)
  • burlap gift bag
  • bag embellishments (ribbon, bakers twine, whatever you would like to use to dress up your bag)

Directions

You can go big or minimalist with this project for sure. It all depends on your style and your budget.  Also, the sky is the limit as far as the design is concerned. I’ve seen some lovely hand written designs that people have created with their sharpies on ceramic mugs, plates and bowls.  I, however am not gifted in the hand writing area.  I have decent handwriting, but I’m too much of a perfectionist and I would blow through 150 mugs, (I’m sure,) trying to get it just right!! I decided to create a vinyl stencil so I didn’t have to go through that headache.  If you are artistically inclined, you can just skip this step and free-hand your design.

I created a design using my Silhouette Designer Edition software and cut the vinyl on my Silhouette Portrait.

Using the Silhouette Portrait

This way I had a custom stencil for my Sharpie art.  I placed the stencil on the mug and then carefully colored in the design…

Using a stencil to create a fun graphic on a mug with a Sharpie

I say carefully because, even with the vinyl the Sharpie ink can bleed through and mess up your crisp lines. What I learned is to press on the marker lightly and trace the edges first.  By doing that your design will come out perfect!

Once your design is complete, place it in a 350 degree oven for 30 minutes to set the ink.  This way your design will become permanent and whom ever you are gifting it to can wash it, run it through the dishwasher, you name it and the Sharpie ink will not smudge!! How fun is that?

I did two different versions… A Mug A Love and Mug A Love, basically because I couldn’t decide which one I liked better. Yep… commitment issues.

Like I said before, it’s up to you and your budget as to how you dress-up your bag that goes inside the mug. You can take the minimalist approach and put your mix in a basic bag with a gift tag which would look lovely, or you could dress it up however you like. I chose to put my hot chocolate mix into a small burlap bag and dress it up with a small crocheted red doily paired with a simply Kraft paper tag. I wrote Merry Christmas on the tag with a white chalk pencil that you can find in any art supply store. It’s has a finer tip than your basic stick of chalk so it looks a little better.

Now all you have to do is fill it with your desired hot beverage mix and voila, you have a personal, yet inexpensive, not very time consuming gift to give to your friends and family.

mug a love hot chocolate

Come on over an join me at WhipperBerry… I have all kinds of simple crafts and fun goodies to share for this holiday season and any time of year really. Plus, I love to make new friends!! Thanks Beckie for having me over today, I had a ball!!

Here are some more gift ideas from WhipperBerry…


homemade vanilla extract /// anthro inspired snow globes /// hot chocolate on a stick

You can also find me over at…

Pinterest /// Facebook /// Twitter /// Instagram

Heather copy

Jack-o-Lantern Juice Halloween Treat with GiftGloss

9 · Oct 23, 2012 · 10 Comments

It’s time to get out your GiftGloss from the FoofQueens for some Halloween fun!!  I know everyone is looking for some fun goodie ideas for their upcoming Halloween parties and I have a cute idea for you today…

Jack-o-Lantern Juice

How about some tasty Jack-o-Lantern Juice in a cute little GiftGloss sleeve? All you have to do is find some orange soda bottles and remove the label. I used my Silhouette CAMEO (I have a great deal on those to if you need one too!) to cut out some vinyl jack-o-lantern faces and then placed them on the bottles… super EASY! Fill it with some sweet candy corn or your favorite little candies along with a matching black & white  straw from Susty Party and you’ll have the cutest little party treat on the block!!

What makes GiftGloss different that just your normal bag? GiftGloss is the original slide’n’tie sleeve… you get to decide how long your sleeve is!!!  All you have to do is select what size sleeve you would like to use. 

WB-009

GiftGloss comes in two widths, 6 inches and 12 inches and with the handy dispenser it’s super easy to measure out your desired length, slide the  cutting tool across the dispenser and voila, you have the perfect treat sleeve! GiftGloss is food grade, so it’s perfect for all your spooky treats for family and friends this Halloween season.

I have made several projects over the last year and packaged them with GiftGloss and everyone is always WOW’d with the presentation!

Gift Gloss 016 Gift Gloss 022WB-0582 gift-gloss-053-1

gift card candy lei /// large snow globe /// valentine donuts

I’m WOW’d with how easy it is to create a stunning gift!!

If your wrapping arsenal is missing some GiftGloss, or you need to stock-up for the upcoming holiday season… Now is the perfect time!  The FoofQueens have set-up an aaaaamazing deal for all of you. 

GliftGloss October Promotion

This is a fantastic deal especially if you stack it on top of their sales going on right now.  Today’s deal is good through November 1st… Visit the GiftGloss site and claim your special Halloween treat TODAY so you have time to make some fun Halloween treats!!

Heather copy

  • « Go to Previous Page
  • Page 1
  • Interim pages omitted …
  • Page 10
  • Page 11
  • Page 12
  • Page 13
  • Page 14
  • Interim pages omitted …
  • Page 18
  • Go to Next Page »

Primary Sidebar

Heather from Whipperberry
Hello... my name is Heather and I'm the creator of WhipperBerry a creative lifestyle blog packed full of great recipes and creative ideas for your home and family. I find I am happiest when I'm living a creative life and I love to share what I've been up to along the way... Come explore, my hope is that you'll leave inspired!

Footer

  • Privacy Policy
  • Crafts
  • Food
  • Gifts
  • Holidays
  • Home
  • Mom Life
  • Recipes
  • Travel

Copyright © 2026 · Seasoned Pro