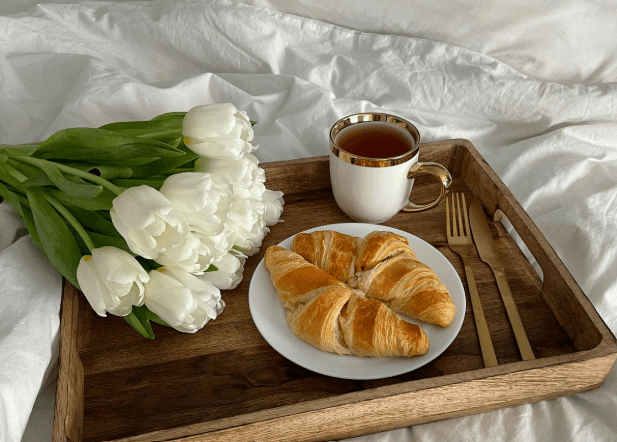
• Skip to primary navigation
  • Skip to main content
  • Skip to primary sidebar
  • Skip to footer

Whipperberry

WhipperBerry • Your Home For Creative Inspiration

  • Home
  • About
    • Terms
  • Recipes
    • ZipList
    • Starters
    • Easy Weeknight Dinners
    • Main Dish
    • Salads
    • Side Dish
    • Soups & Stews
    • Desserts
    • Breakfast
    • Miscellaneous
  • Tutorials
    • Creative Crafts
    • DYI Decor
    • Fabric Crafts
    • Food How-To
    • Jewlery
    • Paint Projects
    • Paper Art
    • Party Styling
    • Photography and Graphic Design
    • Silhouette
  • Holidays
    • St. Patrick’s Day
    • Easter
    • Mother’s Day
    • Father’s Day
    • 4th of July
    • Halloween
    • Thanksgiving
    • Christmas
    • New Years
    • Valentine’s Day
  • Gift Ideas
    • Gifts For Everyone
    • Gifts for Dad
    • Mother’s day
    • For The Girls
    • For The Kids
    • Teacher Gift Ideas
    • Christmas
  • Printables
    • Holiday
    • Gift Idea
    • LDS Primary
  • Travel
  • Contact
  • Nav Social Menu

    • Facebook
    • Instagram
    • Pinterest
    • RSS
    • Twitter

Mother's Day

How to Personalize Your Yeti Cup • Yeti Tumbler Design Ideas

32 · May 21, 2018 · Leave a Comment

Personalized Yeti

I’ve become a little obsessed with my Yeti cup to help me do just that. I’m also a HUGE believer in making everything look as fabulous as possible. Yeti has these WHITE Yeti 30 oz. Tumblers and I ran out and grabbed a few. I knew that it would look amazing when I dressed it up with a stylish design cut out of Cricut Premium Outdoor vinyl. I took off to Michaels to grab some of my favorite vinyl and set to work. Let me show you how to personalize your Yeti.

Here are Some Ways to Personalize Your Yeti Tumbler

This is so fun! Obviously, you can do this with any type of cup, I’m just a huge Yeti fan. I’m also a huge Cricut Fan so if you don’t have one, grab a friend who does and offer to make her a cup as well!

Supplies Needed for This Cricut Yeti Cup Design

  • Your favorite cup
  • Dreamer • Farmhouse Yeti Design
  • Cricut Premium Outdoor vinyl
  • Cricut Transfer Paper
  • Cricut Explore 3

Instructions to Get Cricut Vinyl on Your Yeti

First, you’ll need to open Cricut Design Space with the link provided above to access my design. If you are working with the same type of tumbler all you need to do is click the MAKE IT button on the bottom right of the screen and follow the steps on your machine.

If you are using a different size cup, you’ll need to measure your cup and decide what size to make your vinyl and then resize it in Design Space. Click on the CUSTOMIZE button also in the bottom right. Size the design to fit your cup and then follow the directions in Design Space to cut the design. Keep in mind… Either way, You’ll have to pay 99¢ to have access to the cute face in Cricut Design Space.

Next, you’ll need to apply your vinyl on your tumbler by following these HOW TO APPLY VINYL instructions that I posted not too long ago. Once you apply your vinyl, you’re all set to look FABULOUS this summer carrying around your white Yeti that has been customized just for you!

Are you a @Yeti lover like me? I love to personalize my Yeti Tumblers with my @cricut Maker and some simple Premium Outdoor Vinyl. It works in the dishwasher just great and is my favorite way to Say hydrated this summer! -WhipperBerry


Other Yeti Cup Designs for Ladies

Using a Circut Maker is the best way to personalize your Yeti tumbler. There are so many different designs that you can make. You definitely don’t have to make the farmhouse design but I wanted to show you how it works and well, I liked this design!

Please browse around the website here at WhipperBerry for other Cricut ideas.

Good luck personalizing your yeti cup!

SaveSaveSaveSaveSaveSave

SaveSave

SaveSave

Garden Girl Canvas Zipper Bag Tutorial • Mother’s Day Gift Idea

1 · Apr 28, 2018 · 2 Comments

Hello… Mother’s Day is right around the corner, are you getting ready? I always love to create something fun for my Mom and for all the “Mothers” in my life. My Mom is a true garden girl and I thought it would be fun to create a cute garden girl canvas zipper bag using the new Cricut Patterned Iron-On for Mother’s Day. Have you guys seen this? It’s the cutest stuff!

+ This post brought to you by the amazing crew at Cricut +My Mom is a true garden girl and I thought it would be fun to create a cute garden girl canvas zipper bag using the new Cricut Patterned Iron-On for Mother's Day. Have you guys seen this? It's the cutest stuff! • created by whipperberry

Cricut Patterned Iron-On

You guys… This stuff is so fun to work with! It comes in florals, lace, polka-dots, geometrics, plus more. The Cricut Patterned Iron-On is the next creative wave coming out of the fabulous minds of the crew at Cricut. They are constantly working to make more and even better consumable products for us to use as we create with our favorite crafting machine. This iron-on vinyl is created with the long-lasting Strong Bond™ technology and adheres nicely to many types of fabrics. It works like a dream when using the Cricut EasyPress or even your home iron.

My Mom is a true garden girl and I thought it would be fun to create a cute garden girl canvas zipper bag using the new Cricut Patterned Iron-On for Mother's Day. Have you guys seen this? It's the cutest stuff! • created by whipperberry

Garden Girl Design

Since my Mom loves flowers, I thought the Anna Griffin floral patterns in the Francesca sampler would be perfect. I’ve been crushing on Anna Griffin’s work for years so, this was a natural fit for me as I started to design this Garden Girl bag.

My Mom is a true garden girl and I thought it would be fun to create a cute garden girl canvas zipper bag using the new Cricut Patterned Iron-On for Mother's Day. Have you guys seen this? It's the cutest stuff! • created by whipperberry

The design is pretty simple, it’s a flower that I found in the Cricut Design Space and then sliced the words into the flower and added a couple of leaves. But, no worries… I’ve got you covered. You can click on the link below, in the project supplies section, it will open this project up for you to use in Cricut Design Space.

Supplies

  • canvas zipper pouch
  • Cricut Patterned Iron-On
  • Garden Girl Cricut Design Space Project
  • Cricut machine
  • Cricut EasyPress or home iron
  • Cricut EasyPress Mat or towel
  • Cricut Iron-On Protective Sheet
  • Sharpie

Instructions

Now, that you’ve seen the video, here is the step by step instructions.

  1. Open the project in Cricut Design Space and click on the customize button. You may need to resize the design in order to fit your canvas bag.
  2. Cut the design on your Cricut machine following the steps that Cricut Design Space will walk you through. Make sure that when working with any iron-on material you need to MIRROR YOUR IMAGE and CUT ON THE WRONG SIDE of the iron-on vinyl.
  3. Weed your iron-on material. To “weed” vinyl or iron-on material means that you remove any iron-on material that you don’t want on your bag. For this design, you’ll want to remove the outside of the flower and leaves, then remove the letters from the inside of the flower.
  4. Pre-heat your Cricut EasyPress to 340˚ and set-up your EasyPress Mat.
  5. Place the canvas bag on the EasyPress Mat and prepare the surface by pre-heating the space where you are going to add the design for 15 seconds. This allows for greater adhesion for the Patterned Iron-On.
  6. Place your flower down on the surface of your bag then, slide the leaves under the flower and place them where you would like them. I trimmed the bottom of the leaves a bit since they were going to be covered by the flower.
  7. Remove the flower, cover the leaves with the Protective Iron-On Sheet and press the leaves at 340˚ for 30 seconds and gently pressing down on the EasyPress. First, on one side and then an additional 30 seconds on the other side.
  8. Remove the Iron-On Protective Sheet and then, peel back the clear protective film on the leaves.
  9. Place the flower over the leaves. Replace the Cricut Iron-On Protective Sheet and press again, like before. 30 seconds on one side, then 30 more on the other side.
  10. Let cool for a few minutes and then remove the protective film.
  11. At this point, you can decide whether you want to fill in the letters with Sharpie. I wanted my Garden Girl to stand out a little more so I decided to fill them in. You may have selected a Patterned Iron-On where the words standout just fine and you won’t need to fill them in. This is your call basically.

With that, your bag is finished and ready to gift to your favorite Garden Girl!

What would you like to create with the new Cricut Patterned Iron-On? Leave a comment and let me know, I love to see what you guys are working on!

My Mom is a true garden girl and I thought it would be fun to create a cute garden girl canvas zipper bag using the new Cricut Patterned Iron-On for Mother's Day. Have you guys seen this? It's the cutest stuff! • created by whipperberry

This is a sponsored conversation written by me on behalf of Cricut. The opinions and text are all mine.

How to Paint Buffalo Check Jars

3 · Dec 5, 2017 · Leave a Comment

Love the Buffalo Check trend? Yep, me too! I thought it would be fun to use some of the Ball® Sharing Jars to create some Buffalo Check Jars to use as gifts this Holiday Season. Here’s how you can make some of your own.

+ This post brought to you by the folks at Newell Brands, makers of Ball® Fresh Preserving Products +

Love the Buffalo Check trend? Yep, me too! I thought it would be fun to use some of the Ball® Giving Jars to create some Buffalo Check Jars to use as gifts this Holiday Season. Here's how you can make some of your own.

Ball® Sharing Jars

This project looks a bit challenging, but truly it’s not! All you need are some of those fabulous Ball® Sharing Jars and some paint and you can create this trendy look for yourself.

I love the shape of the Sharing Jars and I love the mission. When you purchase the Sharing Jars your purchase will benefit Feeding America® – the nation’s largest domestic hunger-relief organization. For every package of Sharing Jars purchased, Newell Brands will donate 4 meals*! I LOVE it when I can help support a worthy cause when buying stuff I would normally buy any way.

* Newell Brands® will donate $0.36 per package of Sharing Jars sold, up to $150,000 provided to Feeding America®.  $1 helps provide 11 meals secured by Feeding America® on behalf of local member food banks.

Buffalo Check Jars

I’m a huge fan of the Buffalo Check trend and can’t get enough of it right now. Pretty much everyone I know feels the same way so, I thought a stylish Buffalo Check Jar would be the perfect gift for friends and family for Christmas this year. I’ve filled them with all kinds of stuff; candy, bath scrubs, shower bombs, soup starters, cookie kits, all kinds of stuff. Of course after the jars are painted, you can no longer preserve in them but, they’re great for everything else. Here’s how to make them.

Materials

  • Ball® Sharing Jars
  • Americana Decor Chalky Paint in Everlasting, Yesteryear & Carbon
  • sponge paint brush
  • 1/4″ flat head paint brush
  • 240 grit sandpaper
  • Americana Decor Clear Crème Wax
  • lint free cloth

Instructions

To begin, make sure you have washed and dried your jars. Then paint a couple of layers of the white (Everlasting) chalky paint onto the jar with the sponge brush. You can use your favorite kind of chalk paint here.

Love the Buffalo Check trend? Yep, me too! I thought it would be fun to use some of the Ball® Giving Jars to create some Buffalo Check Jars to use as gifts this Holiday Season. Here's how you can make some of your own.

Love the Buffalo Check trend? Yep, me too! I thought it would be fun to use some of the Ball® Giving Jars to create some Buffalo Check Jars to use as gifts this Holiday Season. Here's how you can make some of your own.

Don’t worry about brush strokes, they will get smoothed out in the finishing process at the end. Let dry, ideally for a few hours or overnight.

Next, you’ll use the 1/4″ flat paint brush to paint the gray (Yesteryear) stripes onto the jar.

Love the Buffalo Check trend? Yep, me too! I thought it would be fun to use some of the Ball® Giving Jars to create some Buffalo Check Jars to use as gifts this Holiday Season. Here's how you can make some of your own.

You will loosely use the lines on the jars as guides. I really didn’t want a precise looking check wanting it to look more free form or hand painted. I didn’t want this project to become to crazy with measuring every little detail and taping the jar to get perfect lines. This to me makes the project so much more enjoyable and I love the look.

Start at the top points of the lines in the Sharing Jar and use your 1/4 inch brush line to create the stripes. Three stripes around the jar and then a vertical stripe in the center of the flat sections of the sharing jar. Let dry completely.

Love the Buffalo Check trend? Yep, me too! I thought it would be fun to use some of the Ball® Giving Jars to create some Buffalo Check Jars to use as gifts this Holiday Season. Here's how you can make some of your own.

Now, you’ll use the black (Carbon) paint to paint on the black section of the check in the intersections of the gray stripes. Again, let paint dry completely. It would be best at this stage to let the paint cure overnight. It will help the paint adhere to the glass much better.

Love the Buffalo Check trend? Yep, me too! I thought it would be fun to use some of the Ball® Giving Jars to create some Buffalo Check Jars to use as gifts this Holiday Season. Here's how you can make some of your own.

Love the Buffalo Check trend? Yep, me too! I thought it would be fun to use some of the Ball® Giving Jars to create some Buffalo Check Jars to use as gifts this Holiday Season. Here's how you can make some of your own.

Once the paint is dry, you will use the sand paper to smooth and distress the paint. Be careful not to attach the jar with a little too much vigor. You don’t want to sand the paint right off the jar. Using a soft hand, smooth the dry paint, (this will remove the brush strokes) and then carefully distress the high points of the jar.

Love the Buffalo Check trend? Yep, me too! I thought it would be fun to use some of the Ball® Giving Jars to create some Buffalo Check Jars to use as gifts this Holiday Season. Here's how you can make some of your own.

Once this step is complete, you’ll want to wipe down the jars with a damp cloth to remove any of the remaining dust. Then you’ll use your lint free cloth to wipe on some of the wax to seal the paint onto the jar. Use the lint free cloth to then wipe off any excess wax and buff the wax.

Now, you’re finished! You have the cutest Buffalo Check Jars ready to fill with whatever you like.

Love the Buffalo Check trend? Yep, me too! I thought it would be fun to use some of the Ball® Giving Jars to create some Buffalo Check Jars to use as gifts this Holiday Season. Here's how you can make some of your own.

I created a fun Holiday Survival Kit and filled the jars with a homemade sugar scrub, some shower bombs and included a Yankee Candle® along with the cutest little match jar ever… You’ll have to check it out. It even comes with free printable gift tags.

Love the Buffalo Check trend? Yep, me too! I thought it would be fun to use some of the Ball® Giving Jars to create some Buffalo Check Jars to use as gifts this Holiday Season. Here's how you can make some of your own.

Disclosure +  I am a paid partner for Newell Brands, makers of Ball® Fresh Preserving Products. However, all thoughts and opinions expressed are entirely my own. 

Homemade Snowball Bath Bomb

15 · Nov 27, 2017 · 1 Comment

In a pinch and need a nice, simple and budget friendly Holiday gift for friends, neighbors, teachers and the list can go on and on. These bath bombs are a fabulous simple way to show your friends a little Holiday love this time of year. With the free printable gift tag, you can’t go wrong with this fun little gift.

snowball-bath-bombs-with-free-printable

When it comes to neighbors, co-workers, teachers and friends, I always want to give them a little something around Christmas to show them how valued they are in my life. I however, don’t want to inundate them with all kinds of sugary treats all of the time. (Don’t get me wrong, I am no stranger to the classic goodie gift plate.) Sometimes it’s nice to receive something that isn’t sweet during the Holidays. With this easy to make Holiday de-stresser, it may quickly become their favorite Christmas goodie this year. All you need are a few simple ingredients…

Snowball Bath Bomb IngredientsSNOWBALL BATH BOMBS Looking for a simple Christmas gift for friends and neighbors? This simple to make snowball bath bomb will quickly become your favorite gift to give this holiday season!

  • 1 cup baking soda
  • 1/2 cup citric acid
  • 1/2 cup epsom salt
  • 1/2 cup corn starch
  • 4 tsp. water
  • 8 tsp. coconut oil
  • 2 tsp. peppermint essential oil
  • spray bottle
  • 3 fillable plastic Christmas ornaments 70 mm
  • 3 fillable plastic Christmas ornaments80 mm
  • black medium oil-based Sharpie
  • 3/8 inch black grosgrain ribbon
  • white card stock paper
  • hole punch
  • scissors
  • printable gift tag via WhipperBerry

Snowball Bath Bomb Instructions

This is one of those projects that is super fun to get the kiddos involved so, gather everyone around the mixer and let them dump away. Here is a quick little video that I put together to show how easy it is to make these little bath time gems.

Snowball Bath Bombs via WhipperBerry from Heather Thoming on Vimeo.

  • Use the 70 mm plastic ornament to mold the bath bomb.SNOWBALL BATH BOMBS Looking for a simple Christmas gift for friends and neighbors? This simple to make snowball bath bomb will quickly become your favorite gift to give this holiday season!
  • Keep spraying until your dry ingredients start to fee like nice wet sand.
  • Turn the mixer on low and spray the liquid ingredients into the bowl. The reason for the spray bottle is so that you add the liquid as slowly as possible. You don’t want to activate your ingredients until you or your friend is in their nice hot bath.
  • Add the liquid ingredients to the spray bottle and shake to mix.
  • It’s helpful to have a stand mixer for this project but, in a pinch, a whisk will do. Add all of the dry ingredients to the mixing bowl.
  • Using the oil-based sharpie, draw little crosses or “x” all over the ornaments.SNOWBALL BATH BOMBS Looking for a simple Christmas gift for friends and neighbors? This simple to make snowball bath bomb will quickly become your favorite gift to give this holiday season!

SNOWBALL BATH BOMBS Looking for a simple Christmas gift for friends and neighbors? This simple to make snowball bath bomb will quickly become your favorite gift to give this holiday season!

  • The following day, place your snowball bath bomb into the 80 mm fillable plastic ornament. It’s funny, they kind of expand a bit when they dry. That’s why you need the larger ornament to use as your gift box.
  • Leave in the mold for 5 minutes. Then remove the bath bomb from the mold and let dry overnight.
  • Let the black paint dry, it only takes a few minutes.
  • Print the free printable gift tag from WhipperBerry and cut out the circle.
    SNOWBALL BATH BOMBS Looking for a simple Christmas gift for friends and neighbors? This simple to make snowball bath bomb will quickly become your favorite gift to give this holiday season!
  • Using a hole punch punch a whole to the side of the snowflake on the tag.SNOWBALL BATH BOMBS Looking for a simple Christmas gift for friends and neighbors? This simple to make snowball bath bomb will quickly become your favorite gift to give this holiday season!
  • Then tie the tag on the ornament and you’re finished!

SNOWBALL BATH BOMBS Looking for a simple Christmas gift for friends and neighbors? This simple to make snowball bath bomb will quickly become your favorite gift to give this holiday season!

SNOWBALL BATH BOMBS Looking for a simple Christmas gift for friends and neighbors? This simple to make snowball bath bomb will quickly become your favorite gift to give this holiday season!

Check out the back…

SNOWBALL BATH BOMBS Looking for a simple Christmas gift for friends and neighbors? This simple to make snowball bath bomb will quickly become your favorite gift to give this holiday season!

Aren’t they cute! And… They are soooo nice in a hot bath sipping some peppermint hot chocolate. I may need to make a few batches to keep on hand for myself.

Here is a quick image that you can pin so you don’t forget the recipe.

SNOWBALL BATH BOMBS Looking for a simple Christmas gift for friends and neighbors? This simple to make snowball bath bomb will quickly become your favorite gift to give this holiday season!


  • Go to page 1
  • Go to page 2
  • Go to page 3
  • Interim pages omitted …
  • Go to page 5
  • Go to Next Page »

Primary Sidebar

Heather from Whipperberry
Hello... my name is Heather and I'm the creator of WhipperBerry a creative lifestyle blog packed full of great recipes and creative ideas for your home and family. I find I am happiest when I'm living a creative life and I love to share what I've been up to along the way... Come explore, my hope is that you'll leave inspired!

Footer

  • Privacy Policy

Copyright © 2023 · Seasoned Pro