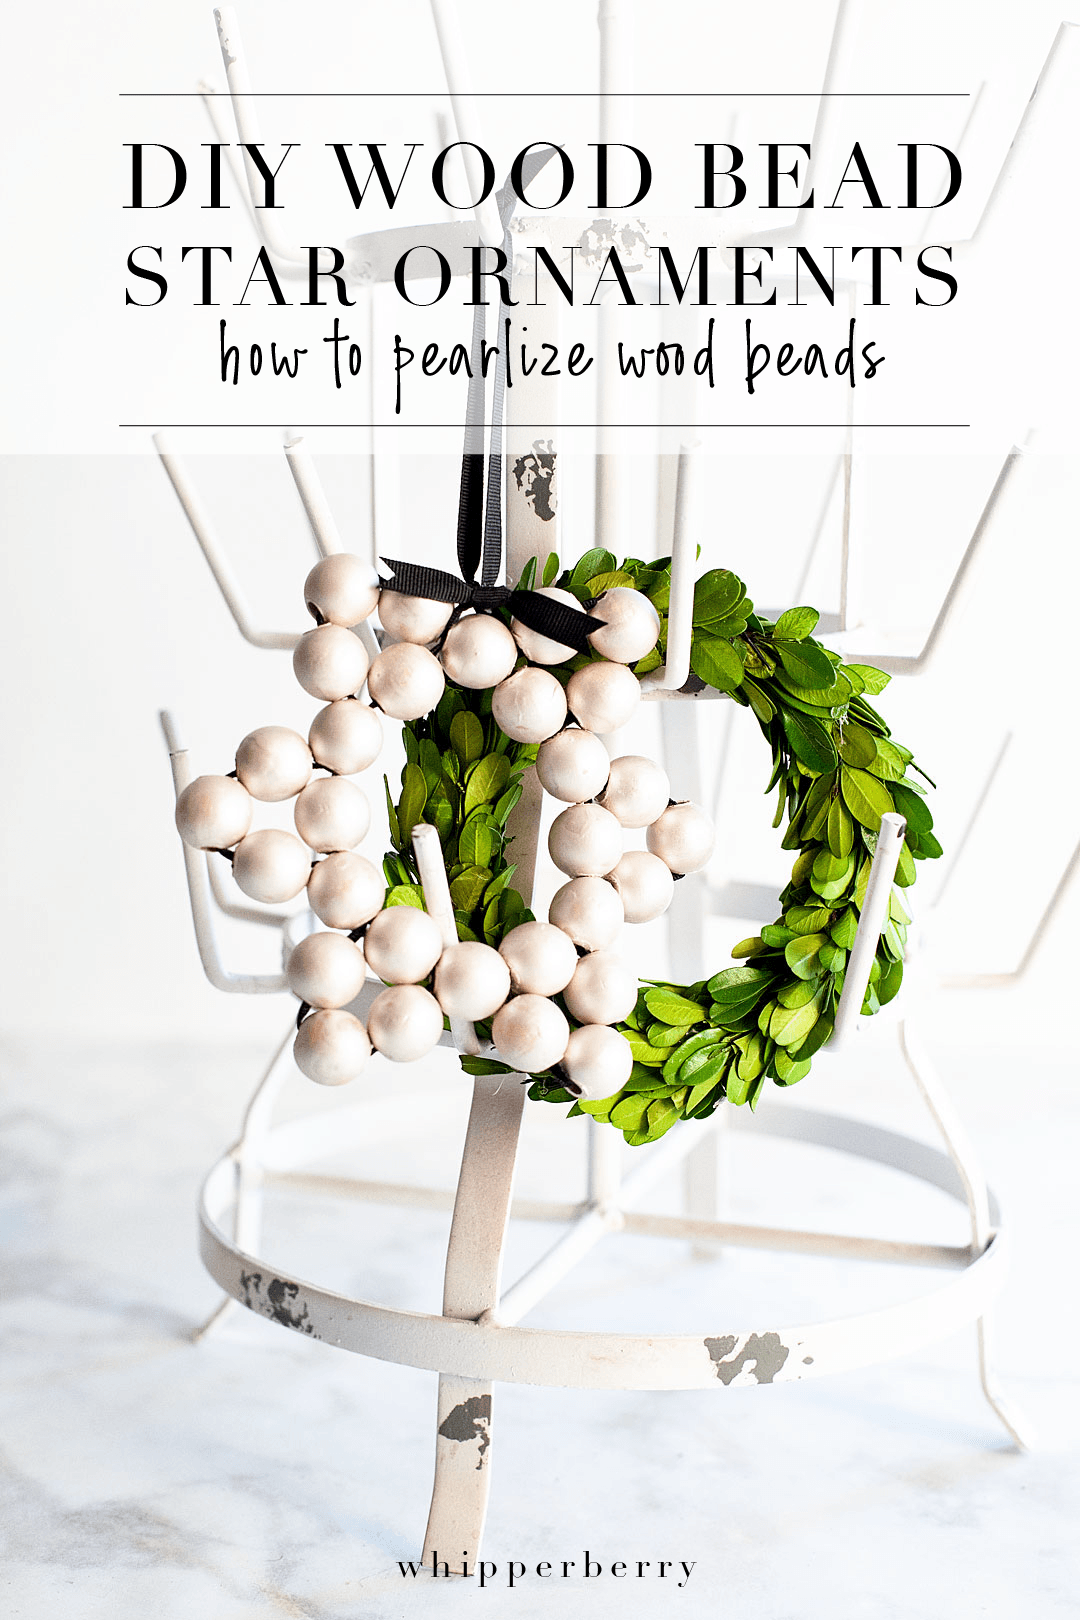
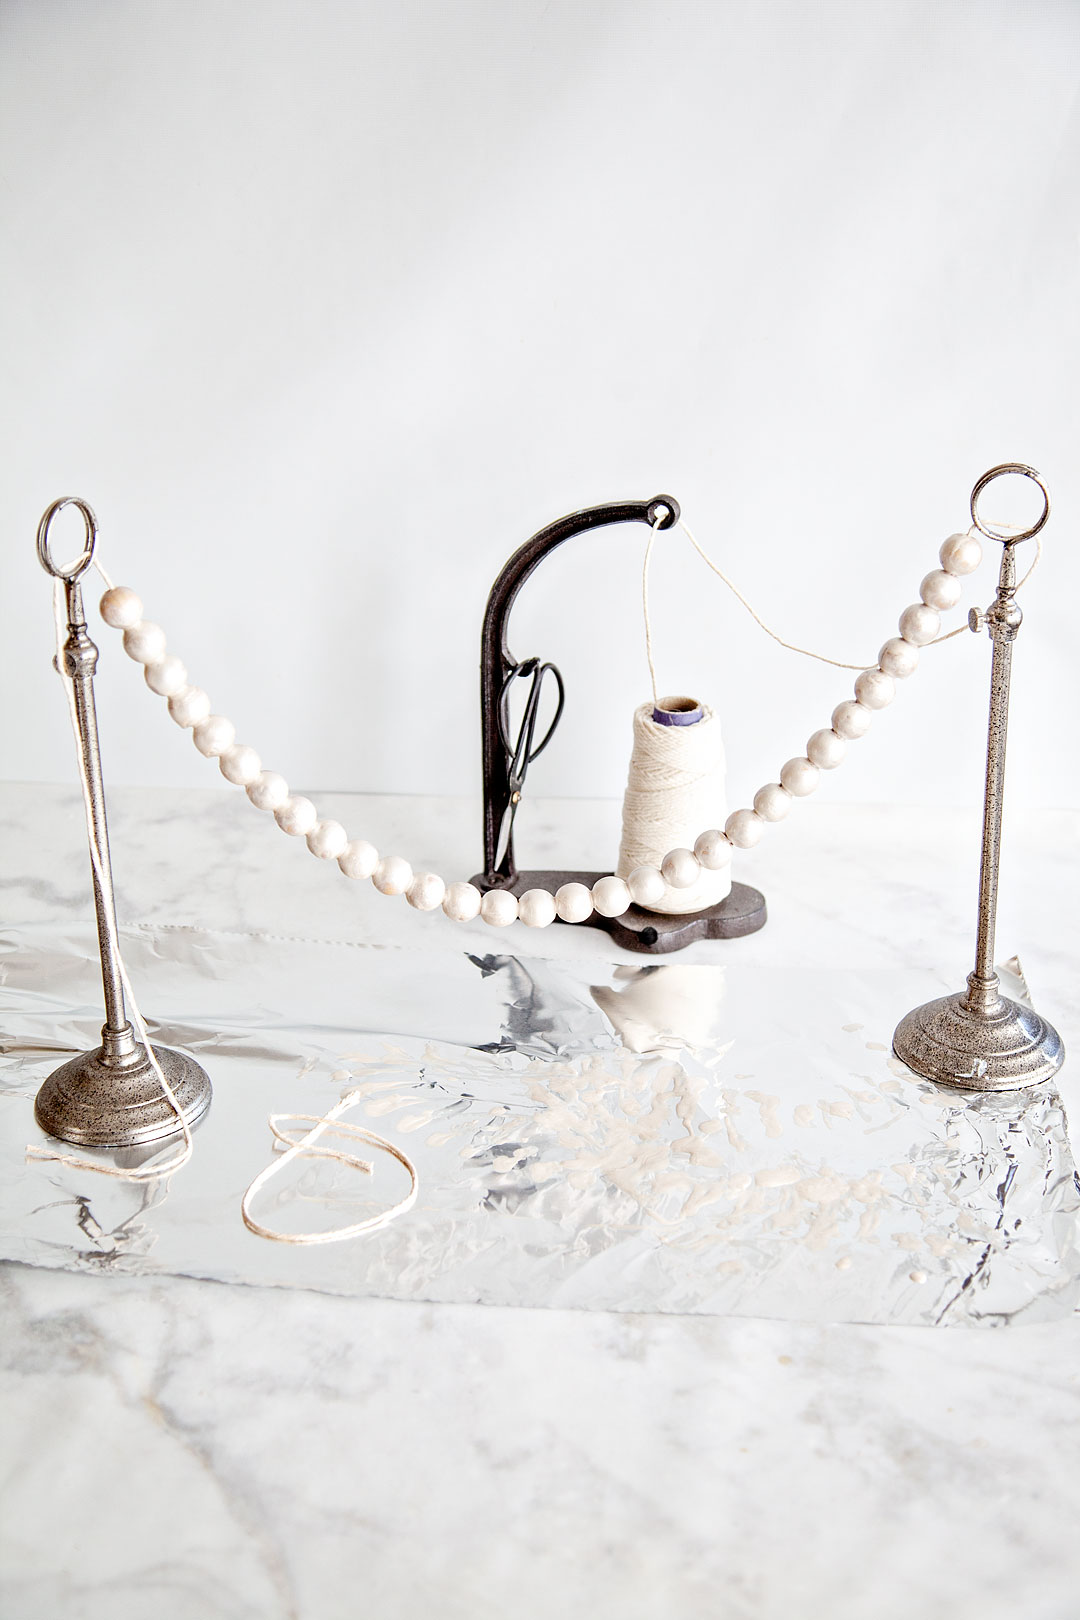
• Skip to primary navigation
  • Skip to main content
  • Skip to primary sidebar
  • Skip to footer

Whipperberry

WhipperBerry • Your Home For Creative Inspiration

  • Home
  • Recipes
    • Starters
    • Easy Weeknight Dinners
    • Main Dish
    • Salads
    • Side Dish
    • Soups & Stews
    • Desserts
    • Breakfast
    • Miscellaneous
  • Tutorials
    • Creative Crafts
    • DIY Decor
    • Fabric Crafts
    • Food How-To
    • Jewlery
    • Paint Projects
    • Paper Art
    • Party Styling
    • Photography and Graphic Design
    • Silhouette
  • Holidays
    • Easter
    • Mother’s Day
    • Father’s Day
    • 4th of July
    • Halloween
    • Thanksgiving
    • Christmas
    • Valentine’s Day
  • Gift Ideas
    • Gifts For Everyone
    • Gifts for Dad
    • Mother’s day
    • For The Girls
    • For The Kids
    • Teacher Gift Ideas
    • Christmas
  • Printables
    • Holiday
    • Gift Idea
    • LDS Primary
  • Travel
  • About
    • Terms
  • Contact
  • Nav Social Menu

    • Facebook
    • Instagram
    • Pinterest
    • RSS
    • Twitter

Holidays

DIY Pearlized Wood Bead Star Ornament

1 · Nov 16, 2018 · 1 Comment

I love wood beads, it’s a classic trend that I can fully embrace and not feel like it’s going to go out of style anytime soon.  Plus, you don’t have to worry about them breaking which is an added bonus as well. This year for the Michaels Dream Tree Challenge I made a large wood bead star for the top of my tree and I fell in LOVE with my new star. Then I thought it would be fun to use some DecoArt Americana Decor Matte Metallic paint to pearlized some wood beads to make a smaller wood bead star ornament for my Christmas tree. As promised in my Instagram story, I also made a video for how to make the star. Let me show you how EASY it is!

+ This post sponsored by DecoArt+How to make a classic pearlized wood bead star ornament for Christmas decorating or for Hanukkah • WhipperBerry

Over the years I’ve fallen more and more in love with making my own Christmas ornaments. It really does add more of a story to your Christmas celebration. If they are ornaments that the whole family can make together, even better. This project can be a bit messy, however, if planned for that’s not a bit deal. It would be great fun for kiddos of all ages to play around with the paint and string some “pearls” during a cozy winter activity together. Here is what you’ll need to make the pearlized wood bead ornament.

Pearlized Wood Bead Ornament Supplies

How to make a classic pearlized wood bead star ornament for Christmas decorating or for Hanukkah • WhipperBerry

  • raw wood beads 
  • Americana Decor Matte Metallic paint – Ivory Pearl
  • string
  • scissors
  • aluminum foil
  • ribbon
  • large needle
  • hot gun
  • hot glue stick

Instructions

You guys, this project can be some messy fun if you’d like OR, you can keep it nice and neat. Either way, it’s a fun project to work on with the family. The first thing you’ll need to do is create your “pearls.”

How to make a classic pearlized wood bead star ornament for Christmas decorating or for Hanukkah • WhipperBerry

To do that, you’ll need to line a dish with aluminum foil and then pour a small amount of paint into your lined paint tray.

How to make a classic pearlized wood bead star ornament for Christmas decorating or for Hanukkah • WhipperBerry How to make a classic pearlized wood bead star ornament for Christmas decorating or for Hanukkah • WhipperBerry

This is the fun part… rather than laboriously painting each and every bead (there are 30.) You will just dump them into the tray of paint.

How to make a classic pearlized wood bead star ornament for Christmas decorating or for Hanukkah • WhipperBerry

How to make a classic pearlized wood bead star ornament for Christmas decorating or for Hanukkah • WhipperBerry

The paint is a little think so you can move them around by moving the tray a bit but, you most likely either need to use your fingers or a tool to spin the beads around in the paint to cover the surface of the bead.

How to make a classic pearlized wood bead star ornament for Christmas decorating or for Hanukkah • WhipperBerry

For this project, I’m using an upholstery needle to string the beads so I used that to move the beads around a bit and then resorted to my fingers. 😉

Next, I threaded the string on my needle and strung the beads onto the string so that they could dry without resting on a surface.

How to make a classic pearlized wood bead star ornament for Christmas decorating or for Hanukkah • WhipperBerry

How to make a classic pearlized wood bead star ornament for Christmas decorating or for Hanukkah • WhipperBerry

How to make a classic pearlized wood bead star ornament for Christmas decorating or for Hanukkah • WhipperBerry

Now, this part can get a little messy, make sure your surface is protected with foil or some other material to cover your surface. Once all of the beads are on the string, you will want to hang it from something you have around the house, even taping it between two soda boxes will work.

How to make a classic pearlized wood bead star ornament for Christmas decorating or for Hanukkah • WhipperBerry

Now, you will need to touch up any bald spots and then let them dry for a couple of hours. Halfway through, when the beads are dry to the touch, pull them apart so that the paint dries between the beads. Once they are dry, you’re ready to make your star. As promised, I created a video to show you how.

How cool is that? So EASY, right? Go grab your supplies and have these ready to go for when you have downtime next week during your Thanksgiving celebration. The family will love it AND, they’ll look fabulous on your tree!!

How to make a classic pearlized wood bead star ornament for Christmas decorating or for Hanukkah • WhipperBerry

DIY Farmhouse Felt Christmas Ornaments

56 · Nov 14, 2018 · Leave a Comment

I am going to label this season at WhipperBerry the felt season. I LOVE all things felt and I love being able to cut and customize my felt designs using my Cricut Maker & my cute little Cricut EasyPress 2. I have been wanting to create a farmhouse style tree that is all black & white so I thought some simple and elegant felt ornaments are a perfect addition to the tree. Farmhouse felt Christmas ornaments are sure to be a classic staple for years to come as you decorate for the holidays, plus they are super easy to store and won’t break! I love it!! Here’s how you can make a set of your own.

+ This post is sponsored by my favorite folks at Cricut +Farmhouse felt Christmas ornaments are sure to be a classic staple for years to come as you decorate for the holidays, plus they are super easy to store and won't break! I love it!! Here's how you can make a set of your own.

What I love about these ornaments is that you can tell your Christmas story right on your tree with these simple word ornaments. If you love Santa and would like to have a tree dedicated to words that evoke fond memories of all things Santa, you can create that!

Farmhouse felt Christmas ornaments are sure to be a classic staple for years to come as you decorate for the holidays, plus they are super easy to store and won't break! I love it!! Here's how you can make a set of your own.

If you would like to tell the story about the birth of our Savior, Jesus Christ you can do that as well. I know that each family is different but that’s what’s beautiful about these simple ornaments. You create your own story.

Farmhouse felt Christmas ornaments are sure to be a classic staple for years to come as you decorate for the holidays, plus they are super easy to store and won't break! I love it!! Here's how you can make a set of your own.

Not to mention the fact that YOU can select the colors. If you are like me and would like to stick with black & white, great. If you want to have a rainbow tree, awesome! It’s all up to you and I LOVE that. Here, let me show you what you need and how to make these simple but elegant ornaments for your tree.

Farmhouse Felt Christmas Ornaments Supplies

Farmhouse felt Christmas ornaments are sure to be a classic staple for years to come as you decorate for the holidays, plus they are super easy to store and won't break! I love it!! Here's how you can make a set of your own.

  • Cricut Maker with Rotary Blade
  • Cricut EasyPress 2  –  6×7 
  • Cricut EasyPress Mat – small
  • Cricut Protective Mat
  • Cricut Fabric Cutting Mat
  • Cricut Everyday Iron-on – white
  • Felt
  • ribbon
  • scissors
  • hot glue gun
  • hot glue

Instructions

First, what you’ll need to do is to click on this LINK to my project in Cricut Design Space.  My design will let you add your own words and customize it how you would like OR, open Design Space and create some ornament designs of your own.

Farmhouse felt Christmas ornaments are sure to be a classic staple for years to come as you decorate for the holidays, plus they are super easy to store and won't break! I love it!! Here's how you can make a set of your own.

Now, if you are using my design, everything is sized and ready to go for you. If you are creating some ornaments of your own design, double check the sizes and make sure everything is prepped and ready to cut. If you don’t know how to do that you can visit this post that has a full video tutorial on how to prep your design for cutting in design space.

Once you are ready to cut, all you need to do is load your felt onto your Fabric cutting mat and follow the directions on the Design Space screen.

Now for cutting the felt, I have been more successful using the rotary blade than the deep cut blade so, you’ll have to manually change that when you’re ready to cut.

How to change the cutting tool in Cricut Design Space • Cricut 101 with WhipperBerry

Here are a couple of VERY IMPORTANT RULES…

  • When cutting felt on the Fabric Cutting Mat, DON’T worry about the fuzz that is left behind. I have been cutting all kinds of felt on just one cutting mat with fuzz and all and it’s not a problem. The more you play around with the cutting mat and try to scrape or wash that felt fuzz off, the more you are damaging your mat. Just keep going and ignore the fuzz. Of course, test to make sure that your felt is secure on the mat. It will after quite a few cuts become difficult to use and at that point, it’s a better idea to dispose of that mat and start using another one.
  • DON’T FORGET TO MIRROR YOUR IMAGES! I’ve done it more than I would like to admit which drives me CRAZY! When you are cutting your designs when using the iron-on vinyl, make sure to mirror your images. Remember, the design is cut on the back side of the Everyday Iron-On. You will flip it over and iron on your design onto the surface of your project.

Farmhouse felt Christmas ornaments are sure to be a classic staple for years to come as you decorate for the holidays, plus they are super easy to store and won't break! I love it!! Here's how you can make a set of your own.

It looks like a crazy bunch of backward letters but, flip it over and cut out your words and it looks just fine.

Farmhouse felt Christmas ornaments are sure to be a classic staple for years to come as you decorate for the holidays, plus they are super easy to store and won't break! I love it!! Here's how you can make a set of your own.

Now that your words are all cut along with your felt ornaments now, it’s time to press the EveryDay Iron-on onto the felt.

Farmhouse felt Christmas ornaments are sure to be a classic staple for years to come as you decorate for the holidays, plus they are super easy to store and won't break! I love it!! Here's how you can make a set of your own.

HANDS-DOWN the best tool to press any type of iron-on material is any of the Cricut EasyPress tools. I love these gems and don’t know what I would do without them in my crafting arsenal. The EasyPress and the EasyPress 2 machines are far superior to a regular iron. If you love to create anything with an iron-on element you need to invest in one or more of these great machines. The heat plate holds a consistent temperature all throughout the plate. With irons, you will have hot and cool spots. Also, the EasyPress 2 heats up super quick! I LOVE all three of the EasyPress 2 sizes. For this project, I’m using the small 6×7 size. CUTEST LITTLE EASYPRESS EVER!!

Farmhouse felt Christmas ornaments are sure to be a classic staple for years to come as you decorate for the holidays, plus they are super easy to store and won't break! I love it!! Here's how you can make a set of your own.

Now, all you need to do is to lay your felt down on your EasyPress Mat, place your words on the felt in the proper place, cover your ornament with the Cricut Protective Mat or a cotton tea towel and press with the small Easypress 2 set to 35o˚ for 60 seconds.

I use the remover tool to save my heat sensitive fingers from the Easy Press Mat and let it cool for about 1 minute.

Then I carefully pull the protective sheet from the top of the Everyday Iron-on material. Always start slow and pull carefully. If you see any lifting, stop and give it another run under the EasyPress 2.

Now, all you need to do is add some ribbon bows if you’d like and some ribbon for the ornament to hang from.


And, that’s it! You have some great non-breakable ornaments for your tree or to use as gift tags or even for a simple gift for neighbors!

Farmhouse felt Christmas ornaments are sure to be a classic staple for years to come as you decorate for the holidays, plus they are super easy to store and won't break! I love it!! Here's how you can make a set of your own.

Farmhouse felt Christmas ornaments are sure to be a classic staple for years to come as you decorate for the holidays, plus they are super easy to store and won't break! I love it!! Here's how you can make a set of your own.

This is a sponsored conversation written by me on behalf of Cricut. The opinions and text are all mine.

White Chocolate Ginger Scone Mix In A Jar 

50 · Nov 6, 2018 · 6 Comments

This post is brought to you by Ball® Fresh Preserving Products by Newell Brands

When it comes to Holiday gifting, I wholeheartedly believe the best friend, neighbor, co-worker, and teacher gifts come wrapped in a jar. Don’t you? Scrumptious jellies, jams, preserved fruit, and veggies. Not to mention; candies, cookies, fudge, cupcakes, rolls… I could go on and on. I LOVE what you can do with a simple Ball® Mason Jar. This year, I’m working on all kinds of fun gifts for the Holidays that will look spectacular gifted inside of a jar. One of my favorites is the White Chocolate Ginger Scone Mix in a jar. It’s really easy to put together a whole bunch of these gifts and really not expensive at all. It’s always a bonus to save a little money during the holidays.

This year, I’m working on all kinds of fun gifts for the Holidays that will look spectacular gifted inside of a jar. One of my favorites is the White Chocolate Ginger Scone Mix in a jar. It’s really easy to put together a whole bunch of these gifts and really not expensive at all. It’s always a bonus to save a little money during the holidays. @ballcanning #giftsinajar #neighborgifts #teachergifts #sconeinajar

To put these together you will need to gather a few ingredients, grab some classic BALL® WIDE MOUTH QUART JARS and in no time you’ll have a bunch of scrumptious gifts to share with your friends and neighbors. Here’s what you need…

White Chocolate Ginger Scones Mix Supplies

This year, I’m working on all kinds of fun gifts for the Holidays that will look spectacular gifted inside of a jar. One of my favorites is the White Chocolate Ginger Scone Mix in a jar. It’s really easy to put together a whole bunch of these gifts and really not expensive at all. It’s always a bonus to save a little money during the holidays. @ballcanning #giftsinajar #neighborgifts #teachergifts #sconeinajar

  • BALL® HOME CANNING FUNNEL
  • 2 tsp Ginger, ground
  • 3 3/4 cups All-purpose flour
  • 2 Tbsp Baking powder
  • 1/4 tsp Baking soda
  • 1/2 cup Brown sugar, packed
  • 1 tsp Cinnamon, ground
  • 1/4 tsp Cloves, ground
  • 1/4 tsp Nutmeg, ground
  • 1/2  tsp Salt
  • 1 cup White Chocolate Chips
  • 3 – Quart size wide-mouth Ball® Jars
  • Printed copies of the baking instructions and labels on card stock paper
  • Ribbon
  • Greenery

Instructions

Now, this project makes 3-quart jars, however, feel free to double, triple… quadruple the recipe to make however many you need. 

This year, I’m working on all kinds of fun gifts for the Holidays that will look spectacular gifted inside of a jar. One of my favorites is the White Chocolate Ginger Scone Mix in a jar. It’s really easy to put together a whole bunch of these gifts and really not expensive at all. It’s always a bonus to save a little money during the holidays. @ballcanning #giftsinajar #neighborgifts #teachergifts #sconeinajar

One tool I find invaluable when creating gifts like this is my handy funnel. I love this thing! It’s specially designed for wide mouth mason jars and it helps so much with keeping the mess down, not to mention wasted ingredients. 

I like to line up my jars like an assembly line and then layer each ingredient. 

This year, I’m working on all kinds of fun gifts for the Holidays that will look spectacular gifted inside of a jar. One of my favorites is the White Chocolate Ginger Scone Mix in a jar. It’s really easy to put together a whole bunch of these gifts and really not expensive at all. It’s always a bonus to save a little money during the holidays. @ballcanning #giftsinajar #neighborgifts #teachergifts #sconeinajar

I start with the flour, baking powder, and baking soda. In a small bowl, I combine those three ingredients and then evenly distribute them into the 3 jars.

Next, I add the brown sugar, then the spices & salt.

This year, I’m working on all kinds of fun gifts for the Holidays that will look spectacular gifted inside of a jar. One of my favorites is the White Chocolate Ginger Scone Mix in a jar. It’s really easy to put together a whole bunch of these gifts and really not expensive at all. It’s always a bonus to save a little money during the holidays. @ballcanning #giftsinajar #neighborgifts #teachergifts #sconeinajarThis year, I’m working on all kinds of fun gifts for the Holidays that will look spectacular gifted inside of a jar. One of my favorites is the White Chocolate Ginger Scone Mix in a jar. It’s really easy to put together a whole bunch of these gifts and really not expensive at all. It’s always a bonus to save a little money during the holidays. @ballcanning #giftsinajar #neighborgifts #teachergifts #sconeinajar

Then, top it all off with the white chocolate chips.

This year, I’m working on all kinds of fun gifts for the Holidays that will look spectacular gifted inside of a jar. One of my favorites is the White Chocolate Ginger Scone Mix in a jar. It’s really easy to put together a whole bunch of these gifts and really not expensive at all. It’s always a bonus to save a little money during the holidays. @ballcanning #giftsinajar #neighborgifts #teachergifts #sconeinajar

Now is the extra fun part, decorating the jar. I have two options for you here. If you are a Cricut owner and would like to use my Cricut cut files for the jars, you can access those HERE.

This year, I’m working on all kinds of fun gifts for the Holidays that will look spectacular gifted inside of a jar. One of my favorites is the White Chocolate Ginger Scone Mix in a jar. It’s really easy to put together a whole bunch of these gifts and really not expensive at all. It’s always a bonus to save a little money during the holidays. @ballcanning #giftsinajar #neighborgifts #teachergifts #sconeinajarThis year, I’m working on all kinds of fun gifts for the Holidays that will look spectacular gifted inside of a jar. One of my favorites is the White Chocolate Ginger Scone Mix in a jar. It’s really easy to put together a whole bunch of these gifts and really not expensive at all. It’s always a bonus to save a little money during the holidays. @ballcanning #giftsinajar #neighborgifts #teachergifts #sconeinajar

The graphics for these labels will be different than the printable labels, however, they are both just as classy.

This year, I’m working on all kinds of fun gifts for the Holidays that will look spectacular gifted inside of a jar. One of my favorites is the White Chocolate Ginger Scone Mix in a jar. It’s really easy to put together a whole bunch of these gifts and really not expensive at all. It’s always a bonus to save a little money during the holidays. @ballcanning #giftsinajar #neighborgifts #teachergifts #sconeinajar

If you would like to print your labels, HERE is the link to be able to download this printable label, jar topper & mixing directions.

This year, I’m working on all kinds of fun gifts for the Holidays that will look spectacular gifted inside of a jar. One of my favorites is the White Chocolate Ginger Scone Mix in a jar. It’s really easy to put together a whole bunch of these gifts and really not expensive at all. It’s always a bonus to save a little money during the holidays. @ballcanning #giftsinajar #neighborgifts #teachergifts #sconeinajar

Now, all you have to do is add your jar toppers to the lid and tie your label on with ribbon along with a sprig of greenery. 

This year, I’m working on all kinds of fun gifts for the Holidays that will look spectacular gifted inside of a jar. One of my favorites is the White Chocolate Ginger Scone Mix in a jar. It’s really easy to put together a whole bunch of these gifts and really not expensive at all. It’s always a bonus to save a little money during the holidays. @ballcanning #giftsinajar #neighborgifts #teachergifts #sconeinajar

Michaels Dream Tree Challenge 2018

23 · Nov 1, 2018 · 2 Comments

+ This post brought to you by the amazing folks at Michaels +

I am beyond honored to be able to participate in the Michaels Dream Tree Challenge again this year. I LOVE getting to put together my perfect tree and share what I’ve created with you guys. This year’s tree is standing majestically in our entryway and it looks beautiful!! I love how Michaels makes it so easy to create a cohesive holiday look. Michaels holiday décor collections make it easy to find your holiday style and bring your vision to life! From the perfect tree and trimmings to creative gifts and DIY supplies, Michaels has all the ingredients to create wonder-filled memories for family and friends.

DIY Farmhouse inspired Christmas Tree for the @michaels Dream Tree Challenge - WhipperBerry

I had so much fun working on this tree! Several of the decorations on the tree were made with inexpensive items that you will find at Michaels that have been crafted into something simple and timeless for the tree. For example, we’ll start at the base of the tree and work our way up. I purchased this bucket at Michaels a little while ago and spray painted it a bronze-like gold and that is what I am using for my tree stand. I removed the official tree stand from the tree and fill the bucket with styrofoam cake rounds from Michaels to secure the tree in place. Then I filled the bucket the rest of the way up with matte white Christmas balls.

I wanted the tree to look nice and full regardless of the fact that it is a pencil tree so I filled in the tree with batting to make it look like it has been out in a glorious winter snowfall.


It’s crazy how the batting can add so much to the look of the tree. I wanted this tree to have a farmhouse style and what’s more farmhouse than some greenery? I wanted to think a little outside of the box and add greenery that isn’t the typical evergreen that you find during the holidays. I opted for different types of eucalyptus and some other basic greenery that you can find in the Michaels floral isles. I also tucked some wood snowflakes in as a base element for the tree.

Now for the extra fun part! This year I made my own clay ornaments out of oven-baked clay that you can find at Michaels.

I rolled out the clay and cut out stars and circles with cookie cutters that I found at Michaels. Then, I used a leather alphabet stamp set to imprint words into the clay. I will have a full tutorial on how to make these fun ornaments in the next few days. Stay tuned!

One of my favorite parts of the tree are the ball ornament clusters.

Instead of just hanging the balls on the tree, I hot glue them together in clusters and then wire them to the tree with floral wire.

This little trick can take your Christmas tree to a whole other level. It makes it look like a professional decorated your tree for you. Also, making ribbon picks by folding a 6-inch piece of ribbon in half and then wiring the ends together also make your tree look professionally decorated.

Then there is the star! I made mine using 1 inch unfinished wood balls that I found at Michaels. I did have to drill holes in them myself but, that was totally fine. I wanted a nice large wood ball for this star tree topper. I will have a post shortly as well for how to make this classic Christmas star.

And, finally… The fabulous Christmas Farmhouse decor that I just HAD to add to my Christmas scene. You guys REALLY need to check this stuff out. They have come up with some fabulous collections for this season! This is the Fireside collection that I used for my tree inspiration.

photo credit | Michaels Instagram

I LOVE the Advent House that is huge and will be a Christmas treasure from now on in our house. the reindeer, the wood presents and the pillows! Michaels has fabulous holiday pillows right now. AND then… there are the signs! You guys, enamel signs!! Metal signs!! So many incredible signs!!


All you need is to stock up on some Command Strips and you can add all kinds of great holiday signs all over the house! Are you excited to start your holiday decorating?! I know that I’m loving my entryway tree corner and can’t wait to put up my main Christmas tree in a few weeks! I can’t wait to see what you guys create this year!


  • « Go to Previous Page
  • Page 1
  • Interim pages omitted …
  • Page 6
  • Page 7
  • Page 8
  • Page 9
  • Page 10
  • Interim pages omitted …
  • Page 46
  • Go to Next Page »

Primary Sidebar

Heather from Whipperberry
Hello... my name is Heather and I'm the creator of WhipperBerry a creative lifestyle blog packed full of great recipes and creative ideas for your home and family. I find I am happiest when I'm living a creative life and I love to share what I've been up to along the way... Come explore, my hope is that you'll leave inspired!

Footer

  • Privacy Policy
  • Crafts
  • Food
  • Gifts
  • Holidays
  • Home
  • Mom Life
  • Recipes
  • Travel

Copyright © 2026 · Seasoned Pro