A backyard should feel like a place where you can relax, not a swampy obstacle course that steals your shoes. If water sits too long in your yard, it can turn small annoyances into bigger home headaches. The good news is that you don’t need to be a drainage expert to spot the trouble early. Once you know what causes soggy spots and what actually helps, you can make smarter choices and keep your yard looking a lot less like a duck pond.
Spot early warning signs
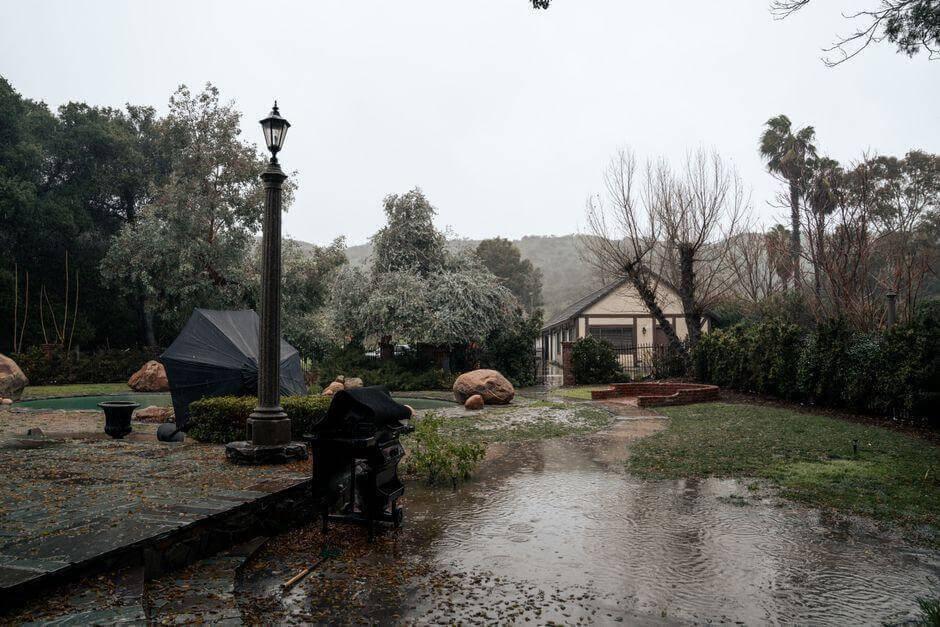
One of the first clues is simple: your yard stays wet long after the rain is gone. If puddles hang around for a day or two, your lawn is trying to tell you something. You might also notice grass that looks patchy, muddy areas near walkways, or flower beds where mulch keeps floating off like it’s making a break for it.
Water near your foundation is another red flag. If soil looks washed out around the house, don’t shrug it off. That kind of drainage issue can get expensive fast. In some cases, homeowners end up looking into French drain installation services when basic yard tweaks aren’t enough to move water away.
Other warning signs are a little sneaky. A musty smell in the basement, mosquitoes hovering over one soggy corner, or fence posts that seem to shift can all point to poor drainage. None of these signs mean disaster right away, but they do mean it’s time to pay attention.
Why water sticks around
Water usually lingers because your yard has a weak spot somewhere. One common issue is poor grading, which means the ground slopes the wrong way or not enough. Instead of guiding water away from your home, the yard lets it gather in the same low areas over and over.
Soil type matters too. Clay-heavy soil drains slowly, so rainwater tends to sit on top instead of soaking in. Compacted soil can do the same thing. If your yard gets a lot of foot traffic or heavy equipment rolled through during landscaping, the ground may be packed down tighter than a suitcase before vacation.
Then there are gutter problems. If gutters are clogged, water spills over the sides and dumps right next to your house. Short downspouts can also send roof runoff into the worst possible place. Add in a low spot in the lawn, and you’ve basically built water a tiny backyard hotel.
Fixes you can try
Before you jump to major solutions, start with the basics. Clean your gutters and check them after the next rain. If water pours over the edge, that runoff is probably feeding the soggy area below. Extending downspouts is another easy win. Even moving roof water a few feet farther from the house can make a noticeable difference.
You can also look at your watering habits. If sprinklers run too often, especially in shady spots, they may be adding to the problem. Dialing them back can help more than people expect. In flower beds, try reshaping mulch so it doesn’t trap water against the house or wash into one low corner.
For minor trouble spots, adding soil to fill a dip may help. Just be careful not to create a new slope that sends water somewhere worse. DIY fixes are great when the problem is small and obvious. When water keeps returning no matter what you try, that’s usually a sign the yard needs a deeper solution.
When drains make sense
A French drain sounds fancy, but the idea is pretty straightforward. It’s a system that helps collect water and guide it away from areas where it keeps pooling. Think of it like giving water a better route so it stops hanging around your yard uninvited.
These drains are especially helpful when you have a soggy patch that never seems to dry, water moving toward your foundation, or runoff sliding downhill into the same messy area every time it rains. They’re often installed underground, so they do the work without turning your yard into a maze of visible trenches.
This kind of solution isn’t for every wet lawn. If your issue comes from one clogged gutter, a drain may be overkill. But when water is following the shape of the yard and naturally collecting in bad spots, a French drain can be a smart long-term fix. It’s one of those behind-the-scenes upgrades that earns its keep quietly.
Choosing the right solution
Not every drainage problem needs the same answer, and that’s where people can get tripped up. It’s tempting to copy what worked for a neighbor, but your yard has its own slope, soil, and layout. What helps one house might do almost nothing for yours.
Start by thinking about where the water begins and where it ends up. Is the problem close to the house or way out in the yard? Does the area stay wet only after heavy rain, or all the time? A small muddy patch in the lawn may need a simple grading fix. Water creeping toward the foundation calls for a more serious plan.
Budget matters too, of course. Some fixes are quick and affordable, while others are more of an investment. The best choice is usually the one that solves the actual cause, not just the symptom. Drying out a puddle today is nice. Keeping it from coming back next month is better.
Keep your yard dry
Once you improve drainage, a little maintenance goes a long way. Check gutters seasonally, especially in fall when leaves love to stage a full takeover. Make sure downspouts still point water away from the house and haven’t shifted.
Walk your yard after a heavy rain a few times each year. You’ll spot small changes before they turn into bigger issues. If mulch keeps moving, a low area starts sinking, or water begins gathering somewhere new, it’s easier to correct early. Think of it as a quick yard checkup.
It also helps to keep an eye on landscaping changes. New garden beds, patios, or edging can alter how water flows. Even nice upgrades can accidentally redirect runoff. A dry yard usually isn’t about one magic fix. It’s about paying attention, making practical adjustments, and giving rainwater a clear path to leave. When that happens, your backyard can go back to being a retreat instead of a splash zone.