It’s good if you are dreaming of creating a European garden in your backyard. Gardening is not just a hobby; it also brings satisfaction, calm, and endless peace to your home. Many people are fond of creating Rhine-inspired gardens at their places.
Bringing this aesthetic idea into your own backyard means designing your space that feels romantic, lively, and deeply personal. This shows your keen interest in the Rhine secret-garden style, which transforms even your little old spaces into a peaceful European-inspired garden and turns them into a space where art and nature slowly meet.
Why Rhine-Inspired Gardens Feel More Charming Than Modern Landscaping
Rhine-inspired gardens are more magical and elegant than the modern ones, as they bring an artistic and vibrant look to your place. They give a healthy vibe to your backyard as they feel romantic and fully luxurious.
Modern landscaping often focuses on neatness, perfection, symmetry, and properly organized layouts. While visually attractive, these spaces can sometimes feel overly furnished or have an emotional lack in their appearance.
Ideas to Create the Rhine’s “Secret Gardens” in Your Backyard
Rhine’s “secret gardens” are well known for their peaceful romance, perfectly designed hidden pathways, high climbing greenery, and timeless beauty. It is just about creating an atmosphere full of peace and calmness. It takes less effort to transform even a simple outdoor space into a peaceful European-inspired garden if you have a creative mind.
In this way, you can create a garden that feels personal, quiet, and fully hidden from the modern world. You can make it more real if you have ever visited the Rhine River by embarking on your journey on a Rhine River cruise that will take you closer to the beauty of nature, and you will be inspired by this place.
Here are a few ideas to create a Rhine-inspired garden at your place.
- Be Realistic
Before starting your task, you need to be more real and a nature lover, as this type of garden is based on feelings, not the furniture. Firstly, you need to think about the mood you want your garden to create. Think of each part of this place as being created in a way that is full of softness and visually pleasing.
Its design should be slightly away from the outside world and romantic without presenting itself as overly formal. Your goal should be to create a space that feels discovered rather than overly designed.
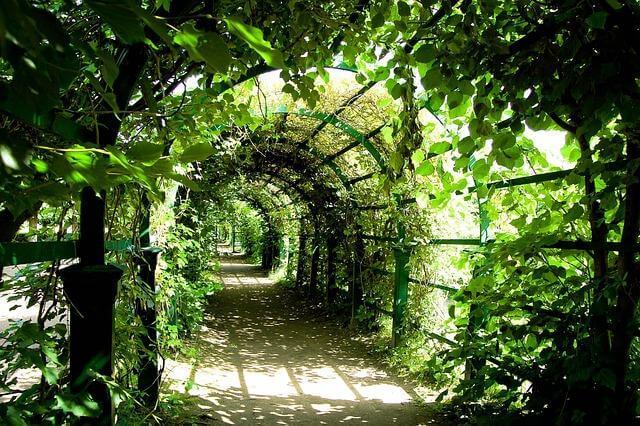
- Create Gravy Pathways
Your garden pathways should be winding ones instead of straight concrete pathways. Your garden movement will play a vital role in its overall look.
Rhine’s gardens have more gravel or stone paths, curving through greenery. This trick adds up to the artistic look of the garden. These winding paths make the garden feel larger and more impressive
- Choose Aesthetic Material
Texture is the most important part of the Rhine art. You need to choose materials that will be long-lasting and develop character over time, rather than looking formal and brand new.
You can choose weather stone, mossy bricks, reclaimed wood, or natural gravel. These would be the ideal materials that will provide both efficiency and beauty as well.
- Add Warm Lighting
Rhine-inspired gardens glow quietly rather than sparking. You can arrange lighting to transform the atmosphere completely after sunset. This will enhance the beauty of your garden at night, where you can arrange parties or events and get the best of it.
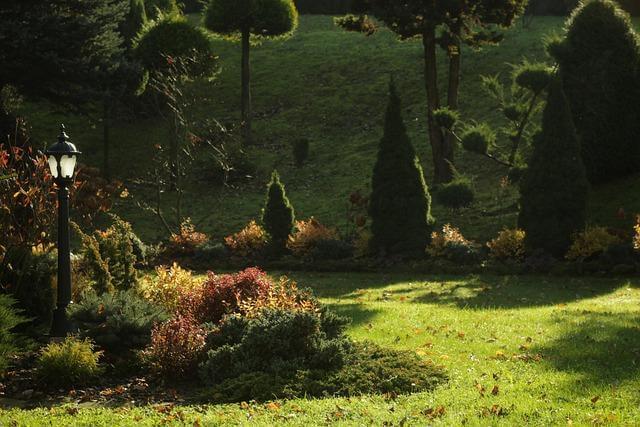
You can use lanterns, candles, string lights, and wall sconces for this purpose. Your garden’s whole look will be changed after lighting it up.
Conclusion
Rather than forgetting nature, these gardens allow softness to be a part of your garden. So, you can say that Rhine-inspired gardens have a totally different approach. These are designed in a creative way that is more ancient and real than being formally designed.