• Skip to primary navigation
  • Skip to main content
  • Skip to primary sidebar
  • Skip to footer

Whipperberry

WhipperBerry • Your Home For Creative Inspiration

  • Home
  • Recipes
    • Starters
    • Easy Weeknight Dinners
    • Main Dish
    • Salads
    • Side Dish
    • Soups & Stews
    • Desserts
    • Breakfast
    • Miscellaneous
  • Tutorials
    • Creative Crafts
    • DIY Decor
    • Fabric Crafts
    • Food How-To
    • Jewlery
    • Paint Projects
    • Paper Art
    • Party Styling
    • Photography and Graphic Design
    • Silhouette
  • Holidays
    • Easter
    • Mother’s Day
    • Father’s Day
    • 4th of July
    • Halloween
    • Thanksgiving
    • Christmas
    • Valentine’s Day
  • Gift Ideas
    • Gifts For Everyone
    • Gifts for Dad
    • Mother’s day
    • For The Girls
    • For The Kids
    • Teacher Gift Ideas
    • Christmas
  • Printables
    • Holiday
    • Gift Idea
    • LDS Primary
  • Travel
  • About
    • Terms
  • Contact
  • Nav Social Menu

    • Facebook
    • Instagram
    • Pinterest
    • RSS
    • Twitter

Home

Home Mold Testing: What DIY Homeowners Should Know

0 · May 27, 2026 · Leave a Comment

A DIY homeowner usually knows their house better than anyone. The damp corner of the basement, the slow shower drain, the smell that shows up only on humid days. Those small signals add up over the year.

A DIY homeowner conducting home mold testing

Photo by Thirdman on Pexels

The question is when DIY observation reaches the point where a professional mold test earns its place. The right test produces the data the next round of home maintenance needs to actually work. A team like Fast Mold Testing handles the kind of inspection that fits cleanly into the broader DIY-homeowner workflow. The framework below covers when to test and how to think about the trip.

Why Has Home Mold Testing Become a Standard Step?

Home mold testing has become a standard step because DIY moisture management can only go so far. Once the homeowner suspects something behind a wall, under a floor, or above a ceiling, the visual inspection cannot answer the question without invasive demolition.

Three structural patterns explain the rising visibility. First, household humidity has crept up. Tighter, more efficient construction traps moisture that older drafty homes used to vent naturally. The Environmental Protection Agency’s mold publications hub covers the broader public-health framework that informs home-testing decisions.

Second, real estate transactions increasingly require documentation. A buyer’s inspection that flags suspected mold prompts a separate mold-testing pass before closing.

Third, insurance claims need data. A homeowner filing a water-damage claim has more standing with a written inspection report than with their own description of what they saw.

What Six Signals Tell a DIY Homeowner It Is Time to Test?

Six signals reliably tell a DIY homeowner that professional testing has moved from optional to worthwhile.

  1. Persistent musty smell that does not respond to airing out. Hidden mold is the usual culprit.
  2. Visible spotting on drywall or ceiling tiles that comes back after cleaning. Surface clean does not address the moisture source.
  3. Allergy or asthma symptoms that worsen at home. Indoor air quality matters here.
  4. Past water damage (leak, flood, slow drip) that was dried but never tested. The lingering moisture may have set the stage.
  5. Pre-renovation due diligence. Opening walls during a remodel can release spores that have been growing undetected.
  6. Real-estate listing or purchase prep. Documented testing supports either side of the transaction.

The tackle-mould-with-kids-at-home guide on whipperberry.com covers the family-side context that informs why so many DIY homeowners reach this decision earlier than they expect.

How Should the Homeowner Approach the Testing Process?

The testing process runs through three stages that map cleanly to most DIY-homeowner calendars.

The first stage is the pre-test inspection by the homeowner. Walk through every room, note any active moisture sources, and photograph the spots that concern you. The Environmental Protection Agency’s basic mold cleanup steps cover the public-health framework worth understanding before the visit.

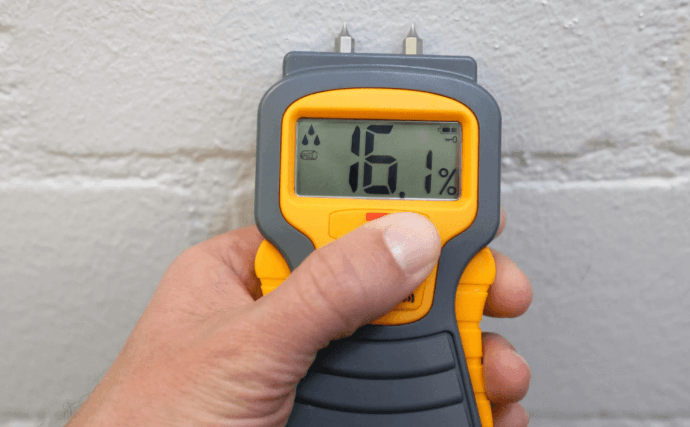
The second stage is the professional inspection. A certified tester walks through the same rooms with moisture meters, infrared cameras, and surface or air sampling equipment. The visit usually takes 1 to 3 hours depending on home size.

The third stage is the report review. A useful mold inspection report describes the findings in plain language, identifies the moisture sources, and offers next-step recommendations. Coverage of the seasonal home maintenance checklist on whipperberry.com gives the broader cadence that the mold-testing follow-up actions fit into.

What Are the Common DIY-Homeowner Mistakes Around Mold Testing?

Five recurring mistakes show up across the DIY homeowner population.

  • The DIY-test-only default. Drugstore mold tests confirm presence but cannot identify type or quantify risk; the result is rarely actionable.
  • The skipped-source habit. Treating the visible mold without finding the moisture source guarantees recurrence in the same spot.
  • The remediation-before-testing pattern. Hiring remediation before a test produces a clean room but no data on what happened.
  • The DIY-removal of large patches. Anything larger than a small visible patch deserves a certified team to handle without spreading spores.
  • The no-follow-up-test step. After remediation, a clearance test confirms the work was actually effective.
A certified mold inspector running tests in a residential home

Photo by RDNE Stock project on Pexels

A Quick DIY Homeowner Reality Check

A short pre-test pass covers the questions worth confirming before booking a certified inspector.

  • Confirm the inspector holds industry credentials (AIHA, IICRC, InterNACHI)
  • Verify the inspector uses an accredited third-party laboratory
  • Ask whether the inspection includes both surface and air sampling
  • Confirm written-report turnaround time
  • Photograph all suspected spots before the inspector arrives
  • Note any past water-damage events in writing for the inspector

The Bottom Line for DIY Homeowners

Home mold testing closes the loop between DIY moisture management and informed remediation. The test answers the question DIY observation cannot. Once the homeowner has the data, the next decision is easier.

A homeowner who tests promptly when the signals appear avoids the larger and more expensive cleanup that delays usually produce. The investment in testing is modest compared with the cost of repeated DIY guesses that never quite solve the underlying issue.

Frequently Asked Questions

How Much Does a Professional Mold Test Usually Cost?

Most home mold inspections run $300 to $700 depending on home size and the number of samples taken. Larger homes or multiple suspected areas push toward the upper end.

How Long Does the Inspection Take?

The on-site visit usually runs 1 to 3 hours. The written report typically arrives 1 to 5 business days after lab analysis completes.

Can a Homeowner Skip Testing and Go Straight to Remediation?

For small visible patches the homeowner can clean with proven methods, testing is optional. For larger suspected areas, hidden mold, or any health concern, testing first produces the data the remediation team needs.

What Should the Inspector Find on a Good Inspection?

A good inspection identifies the moisture source, the affected materials, the type of mold present, and the recommended next steps. The report should read clearly enough that a homeowner can act on it without a follow-up call.

8 Key Features That Define Modern Housing Communities in Florida

0 · May 26, 2026 · Leave a Comment

As a mom, one of the things I noticed while visiting Florida was how much today’s housing communities are designed with families in mind. Beyond beautiful homes and sunny weather, many neighborhoods focus on comfort, convenience, and creating spaces where families can truly enjoy everyday life together.

From safe, walkable streets to relaxing outdoor spaces, modern communities offer features that support both busy parents and growing families. If you’re considering a move or simply dreaming about Florida living, here are some of the key features that make these modern housing communities stand out.

modern housing communities in Florida

Let’s break them down in detail… 

  1. Indoor-Outdoor Living Spaces  

Modern homes in Florida are designed to blend indoor and outdoor living seamlessly. Expansive lanais offer cozy spaces to relax, while fully equipped outdoor kitchens make entertaining a breeze. Between the living room and inviting pools or serene natural landscapes, sliding walls create a harmonious flow. This allows residents to fully embrace the sunshine and warm temperatures year-round. 

  1. Resilient Construction Methods  

In response to Florida’s hurricane-prone climate, contemporary homes prioritize safety and durability. Many structures utilize concrete block construction (CBC) for increased strength, coupled with impact-resistant windows that withstand severe storms. In Florida-based houses, elevated foundations are common. They ensure properties remain safe and dry during heavy rain. 

  1. Open-Concept Floor Plans  

Homes with modern interiors are characterized by high ceilings and open layouts, which embrace spaciousness and light. Such designs often include split-bedroom plans that allow for privacy while enhancing the overall sense of airiness. Housing developers’ thoughtful arrangement optimizes natural light and promotes a relaxed, inviting atmosphere. 

  1. Energy Efficiency & Sustainability  

As community developers increasingly focus on eco-friendliness, new homes in Florida are built with energy-efficient technologies that help lower utility bills. Solar capabilities leverage the abundant sunshine. On the flip side, spray foam insulation enhances temperature regulation in homes. In addition, state-of-the-art HVAC systems and ENERGY STAR-rated appliances enhance sustainability and offer comfort to residents. 

  1. Resort-Style Amenities  

Many housing communities resemble luxurious resorts. They are loaded with amenities that enhance residents’ lifestyles. That’s where community clubhouse complexes serve as social hubs. However, tropical pools provide a refreshing escape. Fitness centers with state-of-the-art equipment and pickleball courts invite both competition and camaraderie among neighbors. 

  1. Smart Home Technology  

If you want to buy a home with modern living, browse Florida new construction communities where houses have smart features. Programmable thermostats optimize energy use, automated lighting enhances convenience, and advanced security systems with smart locks ensure peace of mind. These technologies provide homeowners with greater control over their living environments.

  1. Nature-Focused Landscaping  

In these communities, landscaping is thoughtfully designed to prioritize low-maintenance native plants that thrive in Florida’s unique climate. The focus on Florida-friendly, water-conservative landscaping not only enhances the aesthetic appeal but also contributes to sustainability by minimizing environmental impact.

  1. Pedestrian-Friendly & Active Neighborhoods  

Planned with an emphasis on walkability and activity, modern communities are making all the difference. Residents feel more encouraged to lead active lifestyles due to the availability of meandering walking trails, well-maintained dog parks, and dedicated bike paths. If you want to live a life with a sense of community and connection to nature, explore housing communities that offer all you want. 

Final Words

During my visit to Florida, I could easily see why so many families are drawn to these thoughtfully planned communities. They offer more than modern homes. They create spaces where neighbors connect, children can play safely, and families can enjoy a comfortable lifestyle together.

Many of these communities are developed by trusted builders such as Dream Finders Homes, known for creating neighborhoods that combine modern features with comfort, convenience, and long-term value for homeowners.

6 Simple Steps to Plan a Cost-Effective Move in San Jose

0 · May 21, 2026 · Leave a Comment

When a few of my relatives recently started planning a move to San Jose, one thing became clear very quickly: moving in the Bay Area can get expensive fast. Between packing supplies, mover fees, and trying to coordinate schedules for the whole family, the costs can add up before you even settle into your new home.

San Jose is the largest city in Northern California and one of the most expensive metropolitan areas in the United States. With busy downtown areas, family neighborhoods, apartment complexes, and constant traffic, moving costs often depend on distance, timing, and how easy it is to access your home.

That is why many families take time to compare experienced movers in San Jose before booking a moving date. Working with trusted movers in San Jose can help families stay organized, avoid unnecessary stress, and often save money throughout the moving process.

Planning ahead can also help you find better rates, avoid last-minute scheduling problems, and keep your move running smoothly from start to finish.

If you are preparing for a local or long-distance relocation, a little planning can make a big difference. From creating a realistic budget to packing smarter and choosing the right moving day, these simple steps can help your family have a cost-effective move while making the moving process much more manageable.

If you are preparing for a local or long-distance relocation, a little planning can make a big difference. From creating a realistic budget to packing smarter and choosing the right moving day, these simple steps can help your family save money while making the moving process much more manageable.

cost-effective move

Step 1: Set a Realistic Moving Budget

The first thing you need before planning anything else is a clear number to work with. Your budget guides every decision that follows, from the size of the truck to whether you hire a full-service crew.

Start by listing all possible moving costs so nothing catches you off guard later.

  1. Mover labor and truck rental fees
  2. Packing materials like boxes, tape, and bubble wrap
  3. Storage fees if there is a gap between your move-out and move-in dates
  4. Utility setup costs at your new San Jose address
  5. Fuel or mileage charges for long-distance moves

Step 2: Declutter Before You Pack

Moving fewer items directly lowers your overall moving cost. The less you pack, the smaller the truck you need and the less time your movers spend loading and unloading. Go through every room at least three to four weeks before your move date. Donate, sell, or discard anything you have not used in the past year.

Why Decluttering Saves Money

Movers often charge by weight or by the hour, so a lighter load means a lower final bill. Selling unwanted furniture or electronics before your move also puts extra cash back in your pocket. Even removing a few large items can reduce your truck size and cut costs noticeably.

Step 3: Compare at Least Three Moving Quotes

Never settle for the first quote you receive. Prices between moving companies in San Jose can vary by hundreds of dollars for the same job. Request written, itemized estimates from at least three companies before making a decision. Reliable movers in San Jose will provide a clear breakdown of all charges with no vague line items.

  1. Ask each company if the estimate is binding or non-binding
  2. Check what is included in the base rate versus what costs extra
  3. Look for hidden fees like stair charges, long carry fees, or fuel surcharges
move date

Step 4: Choose the Right Move Date

Your move date has a direct impact on how much you pay. Weekends, end-of-month dates, and summer months are peak periods when mover rates are at their highest in San Jose.

Cheapest Times to Move in San Jose

  1. Weekdays between Tuesday and Thursday
  2. Mid-month dates when demand is lower
  3. Late fall and winter months from October through February

Dates to Avoid

  1. Last weekend of the month when leases typically end
  2. Major holiday weekends when traffic and demand spike
  3. The summer months, from June through August, are when moving demand peaks

Step 5: Pack Smart to Cut Costs

Professional packing services add up quickly. Doing your own packing saves money and gives you direct control over how your belongings are handled. Use free boxes from local grocery stores, bookshops, or community groups online. Wrap fragile items in clothing or towels instead of buying extra bubble wrap.

Step 6: Confirm Everything in Writing

Verbal agreements offer no protection on move day. Always get your final quote, move date, arrival window, and fee schedule confirmed in a written contract before your move begins.

Read every line before signing and ask about anything unclear. This single step prevents most of the disputes that come up between movers and customers.

Key Takeaways

  1. Setting a budget first keeps every moving decision on track and cost-conscious.
  2. Decluttering before packing directly reduces truck size and mover labor costs.
  3. Always compare at least three written quotes before choosing a mover.
  4. Weekdays and mid-month dates offer the lowest moving rates in San Jose.
  5. DIY packing with free boxes cuts costs without sacrificing care for your belongings.

Summer-Ready Homes: Smart Upgrades Every Homeowner Should Make

0 · May 21, 2026 · Leave a Comment

Summer can be hard on a busy family home. Between rising temperatures, higher energy bills, and kids constantly moving in and out of the house, even small home issues become noticeable fast.

A struggling air conditioner, poor insulation, or too much afternoon heat can make everyday routines uncomfortable.

Getting your home ready before summer arrives can make family life easier and more enjoyable. A few smart upgrades can help keep your home cooler, improve energy efficiency, and create more comfortable indoor and outdoor spaces for everyone.

From sealing air leaks to updating windows and refreshing outdoor areas, these improvements help your home stay functional, comfortable, and ready for a season full of family activities.

Upgrade Insulation and Air Sealing

Insulation serves as the first line of defense against summer heat. Attics, crawl spaces, and wall cavities often allow warm air to seep inside, forcing air conditioners to work harder than necessary.

A quick inspection can reveal gaps around ductwork, light fixtures, and attic hatches. Sealing those openings prevents conditioned air from escaping and reduces overall cooling costs.

Attic insulation deserves special attention. Heat rises and collects near the roof, which can warm interior ceilings and increase indoor temperatures. Adding or replacing insulation creates a barrier that slows heat transfer and stabilizes the indoor environment.

Foam sealants and weather stripping around doors and windows further reduce unwanted airflow.

Improve Windows and Exterior Doors

Windows and exterior doors influence indoor comfort more than many homeowners realize. Older units often allow heat to enter through thin glass or worn seals. Replacing them with energy-efficient models improves temperature control and reduces glare.

Double or triple-pane glass with low-emissivity coatings blocks excess solar heat while preserving natural light.

Professional installation ensures the upgrade performs as intended. Proper sealing prevents drafts and long-term structural issues. For example, service providers like ACM Window and Door Design have professionals trained to assess structural efficiency and recommend energy-saving materials.

They also ensure precise installation for lasting performance across varied residential architectural styles. Their guidance gives homeowners clarity when choosing materials that align with local climate demands and complement the home’s architectural style.

High-quality installation protects the investment and supports consistent indoor comfort throughout the season.

Upgrade Cooling Systems for Peak Performance

Air conditioning systems shoulder the heaviest burden during summer. A unit that has not been serviced recently may struggle once temperatures climb. Scheduling a maintenance visit before peak season allows technicians to clean coils, check refrigerant levels, and inspect electrical components. Small adjustments made early prevent larger failures later.

Older systems may require replacement if they consume excessive energy or fail to cool evenly. High-efficiency models provide stronger performance with lower operating costs. Smart thermostats enhance this upgrade by allowing homeowners to control temperature settings based on daily routines. Clean air filters and unobstructed vents improve airflow and indoor air quality.

Enhance Outdoor Living Spaces

Outdoor areas often become extensions of indoor living during summer. Thoughtful upgrades make these spaces more comfortable and functional.

Shade structures such as pergolas or retractable awnings provide relief from direct sunlight. Heat-resistant decking materials prevent surfaces from becoming too hot underfoot.

Ceiling fans installed in covered patios encourage airflow and create a cooling effect. Strategic lighting extends usability into the evening, allowing gatherings to continue after sunset.

Well-defined seating arrangements improve comfort and encourage regular use. Enhancing outdoor spaces transforms them into practical retreats rather than occasional add-ons.

Install Smart Home Technology

Smart technology introduces a level of control that traditional systems cannot match. Connected thermostats learn household patterns and adjust temperatures automatically to maintain efficiency.

Automated blinds respond to sunlight levels, reducing heat gain during peak hours without constant manual adjustments.

Leak detectors placed near plumbing fixtures alert homeowners to hidden issues before they escalate. Smart irrigation systems monitor weather conditions and adjust watering schedules to conserve resources. Real-time energy monitoring provides insight into usage patterns, helping identify opportunities for improvement.

Refresh Exterior Paint and Siding

Exterior surfaces absorb constant sunlight during summer, which accelerates wear and fading. Paint that once looked solid can begin to crack or peel under prolonged heat exposure.

A thorough inspection of siding and trim helps identify areas that need attention before damage spreads. Addressing minor flaws early protects the structure beneath the surface.

Choosing lighter paint colors helps reflect sunlight and reduce heat absorption. Modern exterior paints also include protective properties that resist moisture and UV damage. Siding repairs strengthen the building envelope and prevent water intrusion during seasonal storms.

Maintain Roofing and Gutter Systems

Roofing plays a critical role in shielding the home from direct sun exposure. Shingles can warp or loosen over time, especially after exposure to fluctuating seasonal temperatures.

Inspecting the roof before summer storms arrive reduces the risk of leaks and interior damage. Early repairs tend to be simpler and more affordable than emergency fixes.

Gutters deserve equal attention. Leaves and debris restrict proper drainage, which can lead to water overflow during heavy rainfall. Clearing blockages ensures rainwater flows safely away from the foundation. Flashing around chimneys and vents should also be checked for secure placement. A solid roof and efficient gutter system prevent heat and water from compromising the home’s structure.

Improve Landscaping and Irrigation

Landscaping influences temperature control more than many homeowners expect. Trees positioned strategically around the property provide natural shade that reduces direct sun exposure on walls and windows.

Trimming overgrown branches improves airflow and prevents storm-related damage. Thoughtful placement of greenery supports both visual appeal and functional cooling.

Irrigation systems should operate efficiently to handle dry spells without wasting water. Upgraded controllers adjust watering schedules based on weather patterns, which keeps lawns and gardens healthy while conserving resources.

Adding mulch around plants helps retain soil moisture and regulate ground temperature. Proper drainage around the foundation prevents water buildup that can cause structural concerns.

Final Thoughts

Preparing your home for summer does not have to involve major renovations. Small, smart upgrades can make a big difference in how comfortable and efficient your home feels during the busiest months of the year. From improving insulation and maintaining cooling systems to creating family-friendly outdoor spaces, every improvement helps your home handle summer more smoothly.

Planning ahead also helps reduce stress once temperatures rise. A well-prepared home gives families more time to enjoy summer activities, relax indoors comfortably, and spend quality time together without worrying about unexpected repairs or rising energy costs.

  • « Go to Previous Page
  • Page 1
  • Interim pages omitted …
  • Page 13
  • Page 14
  • Page 15
  • Page 16
  • Page 17
  • Interim pages omitted …
  • Page 90
  • Go to Next Page »

Primary Sidebar

Heather from Whipperberry
Hello... my name is Heather and I'm the creator of WhipperBerry a creative lifestyle blog packed full of great recipes and creative ideas for your home and family. I find I am happiest when I'm living a creative life and I love to share what I've been up to along the way... Come explore, my hope is that you'll leave inspired!

Footer

  • Privacy Policy
  • Crafts
  • Food
  • Gifts
  • Holidays
  • Home
  • Mom Life
  • Recipes
  • Travel

Copyright © 2026 · Seasoned Pro