• Skip to primary navigation
  • Skip to main content
  • Skip to primary sidebar
  • Skip to footer

Whipperberry

WhipperBerry • Your Home For Creative Inspiration

  • Home
  • Recipes
    • Starters
    • Easy Weeknight Dinners
    • Main Dish
    • Salads
    • Side Dish
    • Soups & Stews
    • Desserts
    • Breakfast
    • Miscellaneous
  • Tutorials
    • Creative Crafts
    • DIY Decor
    • Fabric Crafts
    • Food How-To
    • Jewlery
    • Paint Projects
    • Paper Art
    • Party Styling
    • Photography and Graphic Design
    • Silhouette
  • Holidays
    • Easter
    • Mother’s Day
    • Father’s Day
    • 4th of July
    • Halloween
    • Thanksgiving
    • Christmas
    • Valentine’s Day
  • Gift Ideas
    • Gifts For Everyone
    • Gifts for Dad
    • Mother’s day
    • For The Girls
    • For The Kids
    • Teacher Gift Ideas
    • Christmas
  • Printables
    • Holiday
    • Gift Idea
    • LDS Primary
  • Travel
  • About
    • Terms
  • Contact
  • Nav Social Menu

    • Facebook
    • Instagram
    • Pinterest
    • RSS
    • Twitter

Recipes

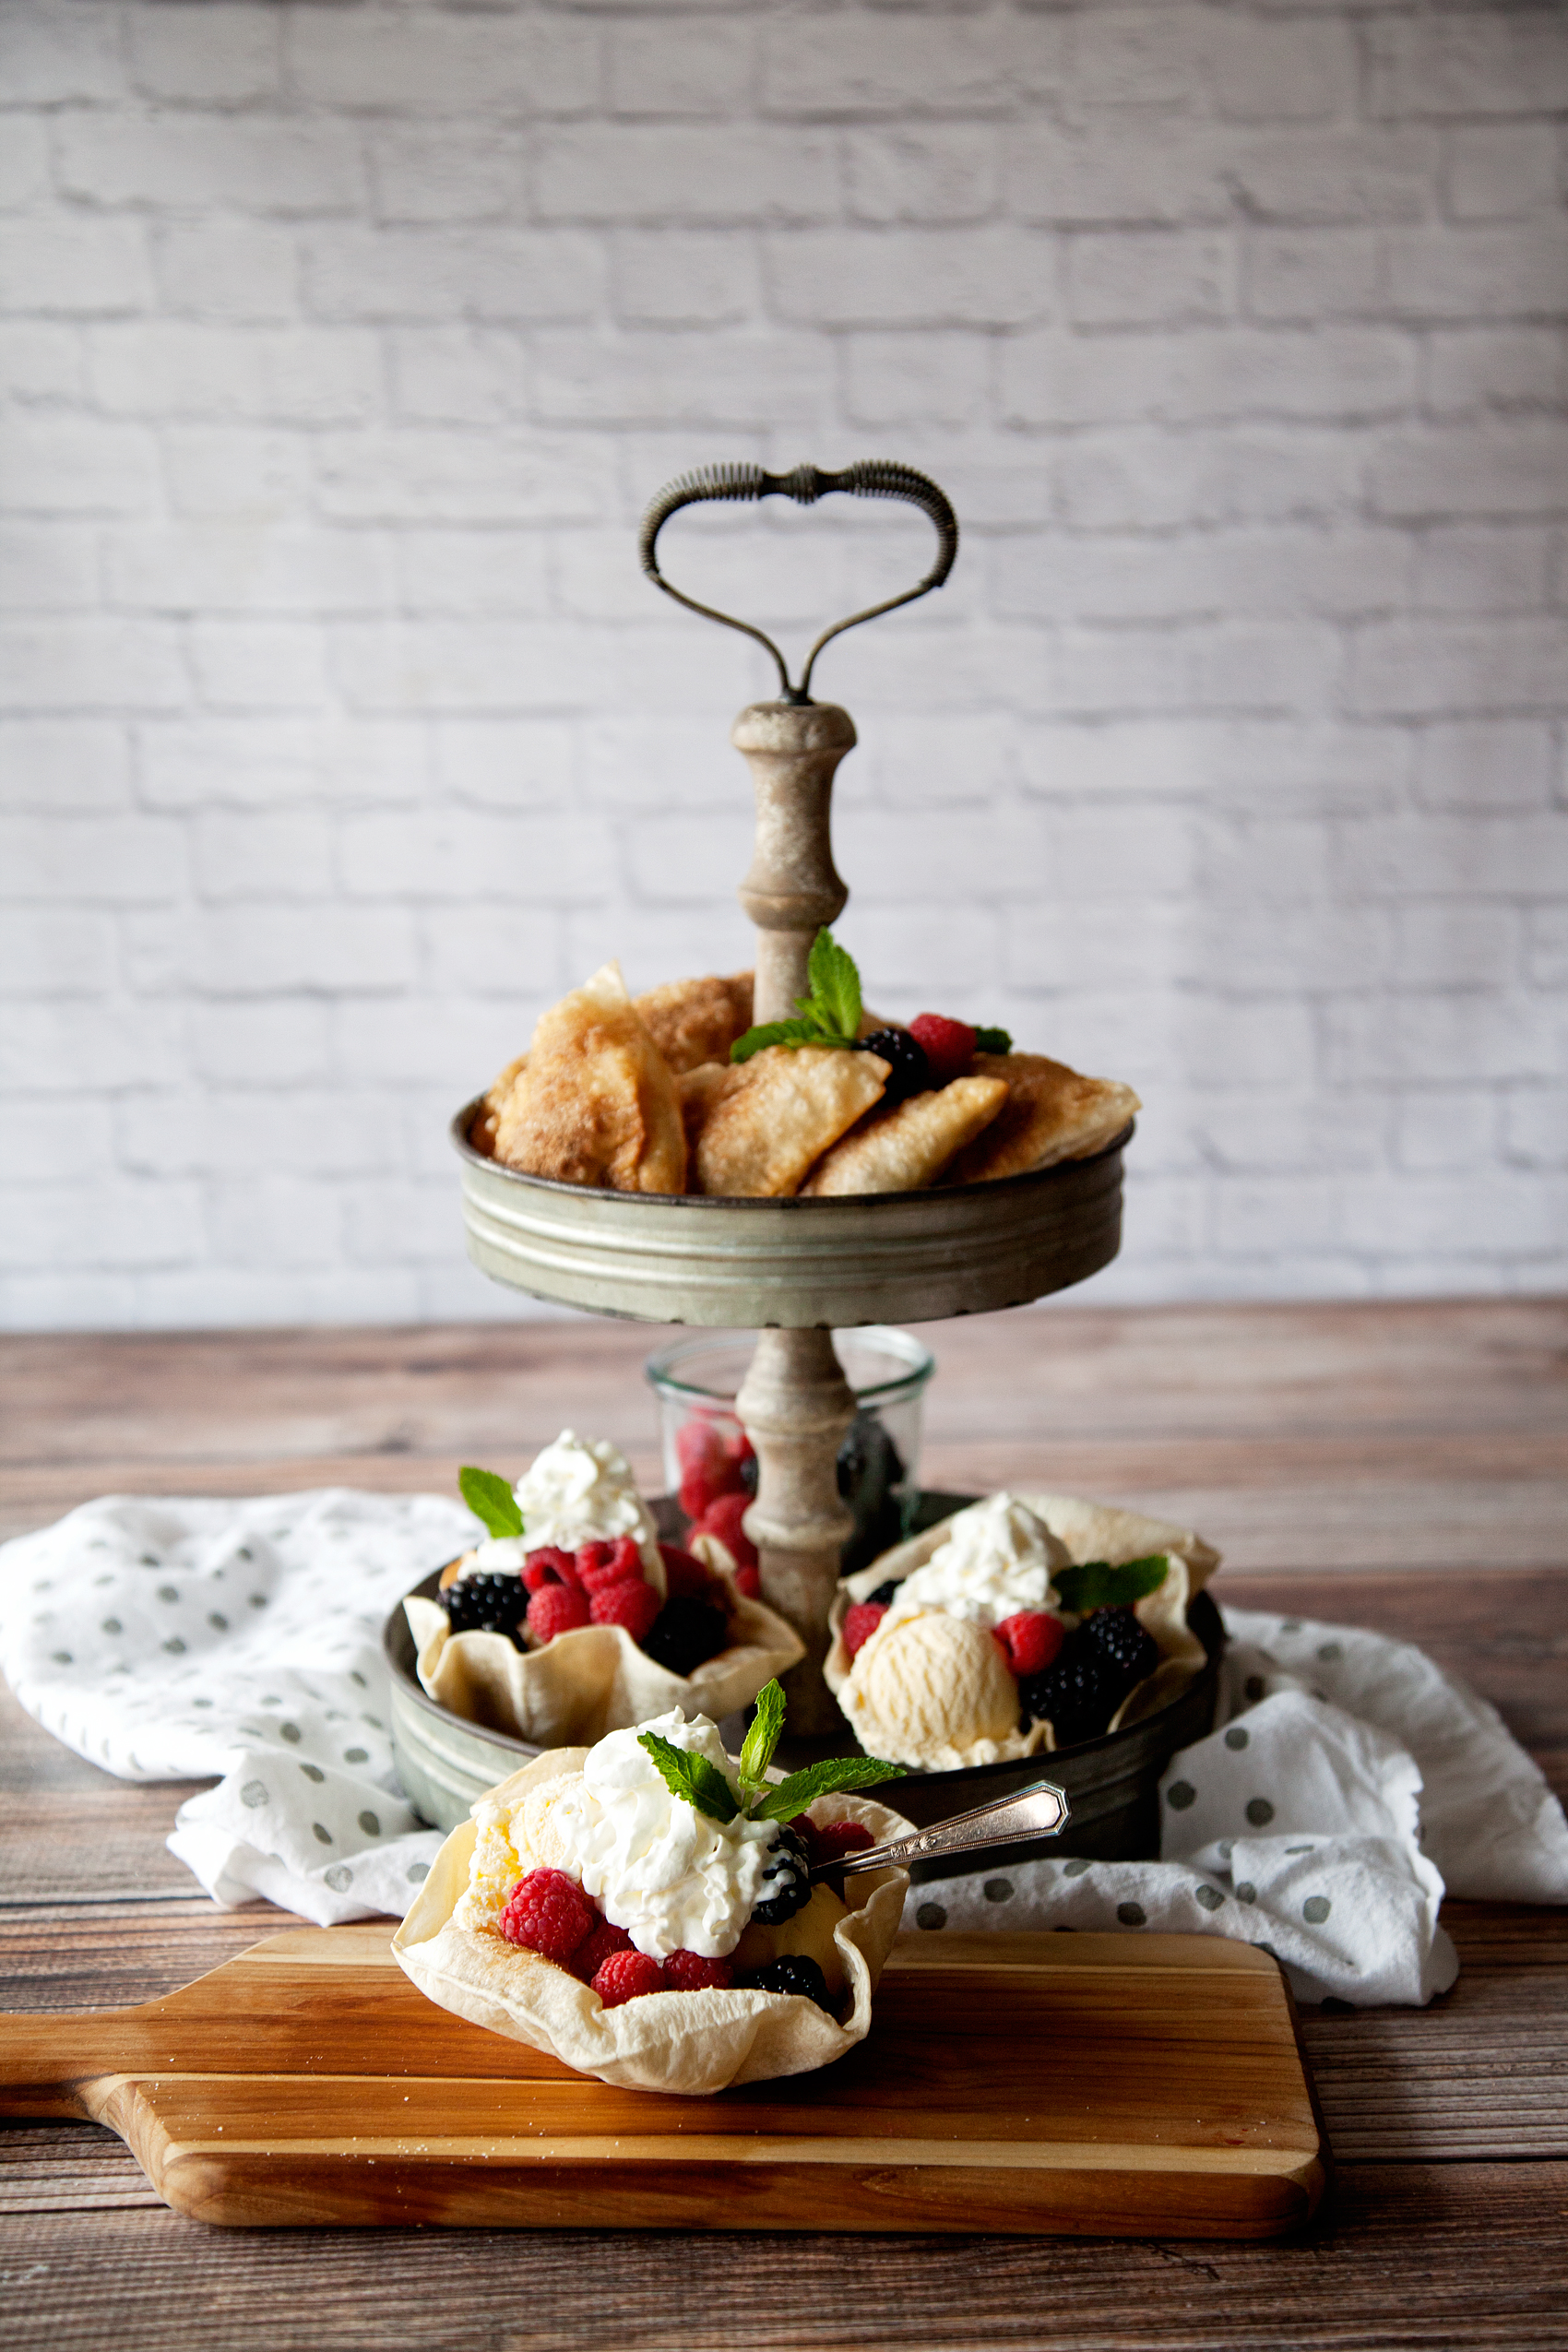
Tortilla Desserts Two Ways • Berry Hand Pies + Baked Tortilla Sundae Bowl

13 · May 5, 2017 · 6 Comments

Find yourself looking for some easy dessert options? Did you know that you can find uncooked tortillas at Costco from TortillaLand®? You CAN, and you can create all kinds of fabulous tortilla desserts with them! Come learn all about the Baked Tortilla Sundae Bowl & Easy Berry Hand Pies…Find yourself looking for some easy dessert options? Did you know that you can find uncooked tortillas at Costco from TortillaLand®? You CAN, and you can create all kinds of fabulous tortilla desserts with them! Come learn all about the Baked Tortilla Sundae Bowl & Easy Berry Hand Pies...

Post brought to you by • TortillaLand®

The Secret to Finding the BEST Tortillas

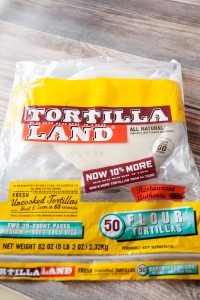
Have you ever hit one of your favorite stores, let’s say Costco (because it’s one of mine) and found a product that at the time seemed a little understated and yet, turned into a magical find? That’s what happened to me several years ago when I was walking through the refrigerated section of Costco and discovered a small little section in-between the bacon and orange juice. What I found truly intrigued me, TortillaLand® Fresh Uncooked Tortillas… What?

Why would anyone have the need for uncooked tortillas? In our fast paced world, doesn’t that mean a few extra precious steps. “Honey, would you like a quesadilla? Hold on for a minute, I need to cook the tortilla first.”  In my mind, I had a hard time figuring out what the benefit would be to buying uncooked tortillas. However, my adventurous self won the day. I wanted to learn WHY someone would go through the trouble of cooking their own tortillas when from what I knew, the already cooked ones were just fine.

Find yourself looking for some easy dessert options? Did you know that you can find uncooked tortillas at Costco from TortillaLand®? You CAN, and you can create all kinds of fabulous tortilla desserts with them! Come learn all about the Baked Tortilla Sundae Bowl & Easy Berry Hand Pies...That’s the key phrase though… JUST FINE. When I prepared my first TortillaLand® tortilla and tasted it, all of a sudden, just fine was no longer good enough. There is magic to cooking your own tortillas. It truly only takes an extra 60 seconds to cook and they taste warm, light, full of the flavor that tortillas are supposed to have. Somehow, unlocking those flavors right before you plan on eating them is the best way to have a tortilla! Whether you are using it for a humble quesadilla or creating some tasty desserts with them, the old saying is true… Fresh is best!
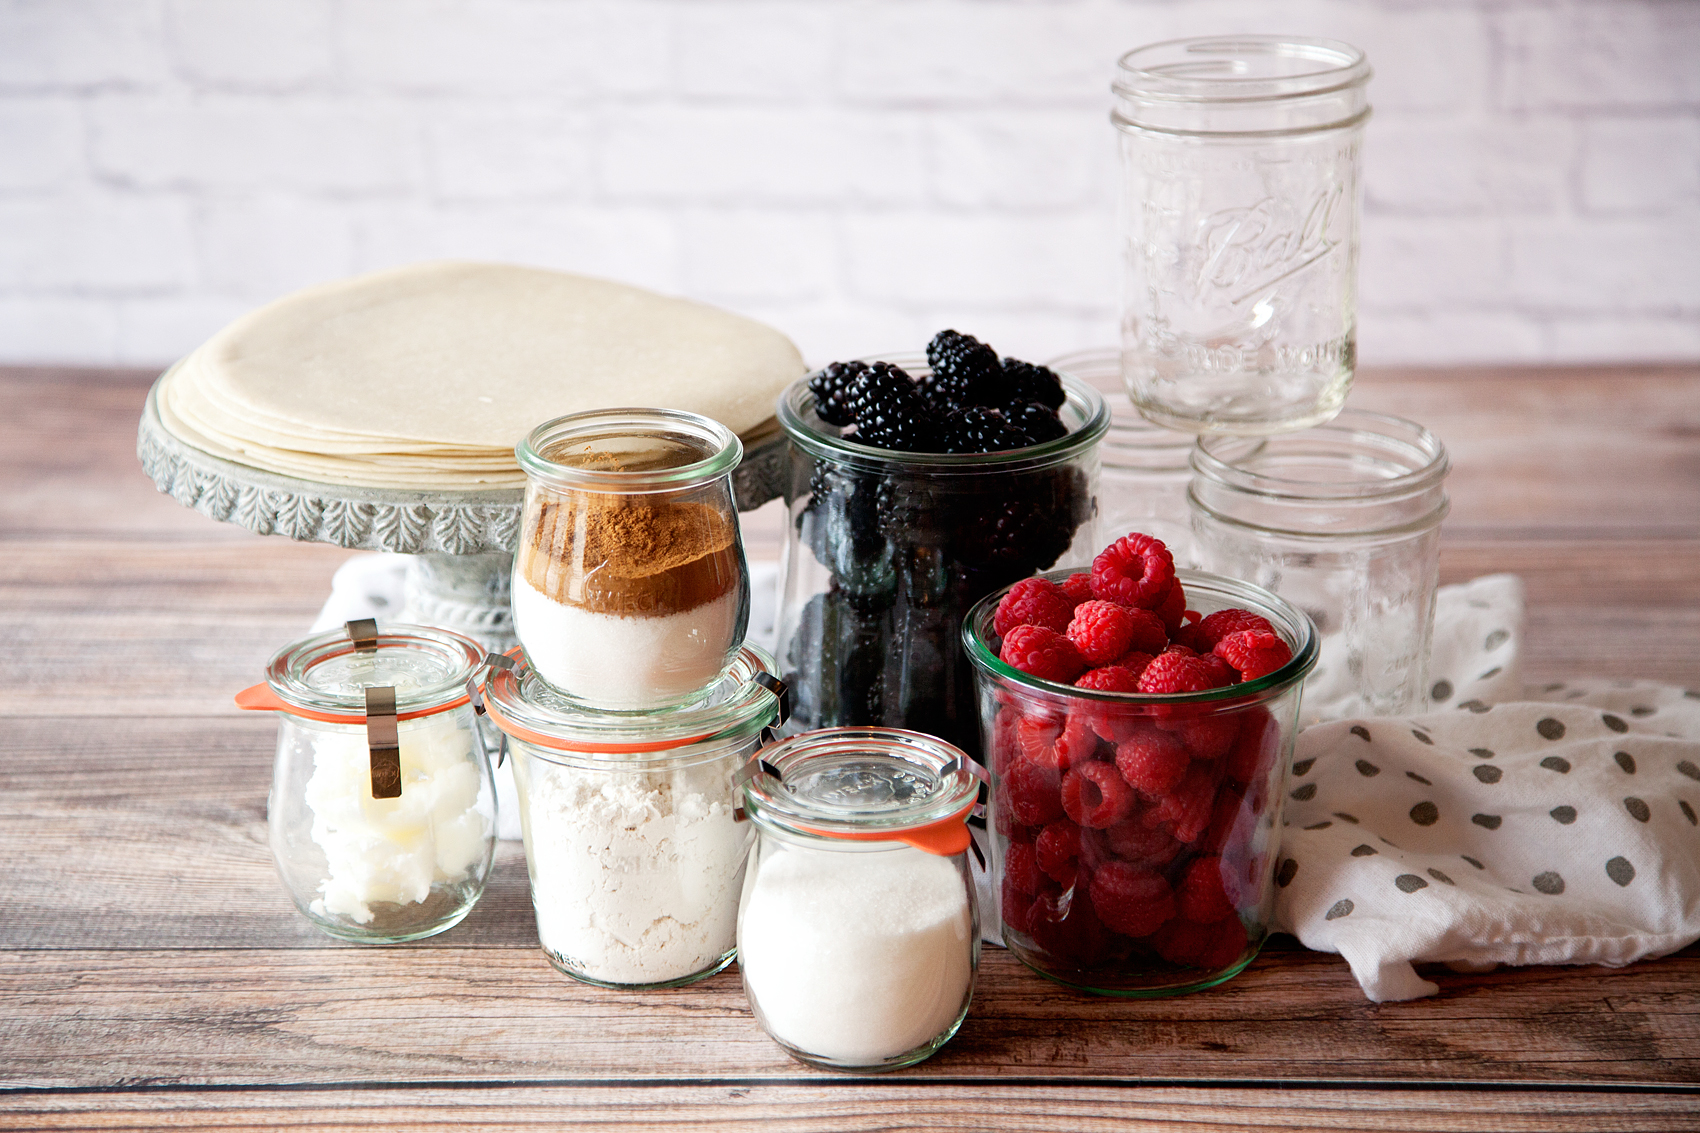


Another thing I absolutely love about TortillaLand® tortillas, they only have 5 simple ingredients. I don’t know if you’ve ever checked out the ingredients on your other tortillas but, they are full of all kinds of crazy stuff like soy for example. Now, I know that the origins of tortillas didn’t not include soy or preservatives. I have been recently diagnosed with several food allergies and soy is on my list of foods I can no longer have, along with yeast. When I found out about the yeast thing I thought, that’s alright, I will just eat tortillas instead. Sadly, when I went to my local markets and started reading the ingredients of all of the prepared tortillas, they ALL contained soy. I was shocked. I was now faced with no longer being able to enjoy bread AND tortillas. It was a tad bit heart breaking.

Years before, when we lived in Vegas, much closer to a Costco, we used the TortillaLand® tortillas all of the time, our family loved them. Right now our nearest Costco is about an hour away so we don’t get to shop there often. (They’re building one close to our house this year and we are thrilled!) Anyway, we drove up to Costco to check things out last weekend. I was curious to see what I would find on the Tortilla Land ingredient list. Sure enough, my beloved TortillaLand® tortillas did not contain soy or any crazy fillers, just FIVE simple ingredients; wheat flour, water, canola oil, salt and sugar. Honestly, that is as close to the original tortilla recipe as you can get. I was over the moon excited!! I gabbed a package (they contain 50 lovely fresh, uncooked tortillas that you can freeze by the way) and ran home to see what I could make with these tasty gems.

Find yourself looking for some easy dessert options? Did you know that you can find uncooked tortillas at Costco from TortillaLand®? You CAN, and you can create all kinds of fabulous tortilla desserts with them! Come learn all about the Baked Tortilla Sundae Bowl & Easy Berry Hand Pies...

Tortilla Recipe Ideas

Now, wrap your mind around this… With fresh uncooked tortillas the sky’s the limit. You are the master of this tortillas destiny. You can cook it according to the package directions and make all kinds of stuff; breakfast burritos, quesadillas for a quick snack, burritos or soft tacos for dinner.

Find yourself looking for some easy dessert options? Did you know that you can find uncooked tortillas at Costco from TortillaLand®? You CAN, and you can create all kinds of fabulous tortilla desserts with them! Come learn all about the Baked Tortilla Sundae Bowl & Easy Berry Hand Pies...

You can make a peanut butter and jelly roll-up for the kiddos after school or make some beautiful pinwheels as an appetizer for your next party. With the nature of the fresh uncooked tortilla, you can now make your own flautas & chimichangas as well. Really, you can cook all kinds of stuff.

Tortilla Dessert Two Ways

Having being limited as to what I could eat due to my new eating challenges, I decided the first item that I would make must be DESSERT! After playing around with a few ideas, I’ve come up with dessert two ways.

I created some beautiful tortillas bowls in the oven that don’t use a drop of oil, just the natural heat from the oven. Then I deep fried some fruity hand pies that turned out like scrumptious filled sopapillas, YUM!!

Find yourself looking for some easy dessert options? Did you know that you can find uncooked tortillas at Costco from TortillaLand®? You CAN, and you can create all kinds of fabulous tortilla desserts with them! Come learn all about the Baked Tortilla Sundae Bowl & Easy Berry Hand Pies...

Tasty Cinnamon Sugar Tortilla Bowl Sundae

The trick for the tortilla bowl is to drape them over an oven safe bowl our jar. I used some canning jars because I know that they are heat tempered and wouldn’t have an issue in the oven. I made sure they were clean, then draped the tortilla over the bottom of the jar. The trick to the bowl holding it’s shape is to not butter or grease the bottom of the jar. You actually want it to “stick” to the bottom of the jar. If it doesn’t it will fill with air in the oven and then fall off of the jar. If it sticks a little bit on the base it will make a perfect bowl for you. Don’t worry, they will come off the jar with just a little help after they have cooled.

When ready to serve, brush them with melted butter and sprinkle with cinnamon sugar if you like. Then fill them with your favorite ice cream and fruit for a fabulous summer treat! Here’s a quick video to show you how I make them…

Scrumptious Tortilla Berry Hand Pies

Now, for our second option… This is dessert is equally as scrumptious and super easy as well. It’s kind of a mix between a sopapilla and a hand pie.

Find yourself looking for some easy dessert options? Did you know that you can find uncooked tortillas at Costco from TortillaLand®? You CAN, and you can create all kinds of fabulous tortilla desserts with them! Come learn all about the Baked Tortilla Sundae Bowl & Easy Berry Hand Pies...

They couldn’t be easier to make, watch this video recipe so see how to make your own tortilla pies. The full recipes will follow the video.

Tortilla Land Berry Hand Pies from Heather Thoming on Vimeo.

Want to win a Costco Cash Card so that you can go load-up on some scrumptious TortillaLand®  Tortillas? Click this link for your chance to win TortillaLand $25 Costco Cash Card Giveaway

Tortilla Dessert Recipes

Find yourself looking for some easy dessert options? Did you know that you can find uncooked tortillas at Costco from TortillaLand®? You CAN, and you can create all kinds of fabulous tortilla desserts with them! Come learn all about the Baked Tortilla Sundae Bowl & Easy Berry Hand Pies...

1 vote

Print

Tortilla Berry Hand Pies

Prep 10 mins

Cook 10 mins

Total 20 mins

Yield 5 people

Nothing better than the sweet taste of summer berries wrapped in a uncooked tortilla a cooked to perfection!

Ingredients

  • 3 cups vegetable oil
  • TortillaLand® Uncooked Flour Tortillas
  • 1 lb. of berries • Strawberries, raspberries & blackberries
  • 2 tablespoons AP flour
  • 2 tablespoons cinnamon sugar
  • small bowl of water

Instructions

  • Prepare your berries by washing, removing leaves and stems. Cut into bite sized pieces if needed.
  • Place berries into a medium sized bowl and mix with flour and 1 tablespoon of cinnamon sugar. Set aside.
  • Pour oil into a sauce pan, and place over medium high heat until it reaches 350˚
  • Cut tortillas in half.
  • In one of the tortillas halves place a large spoonful of the berry mixture. 
  • Dip your clean finger into the bowl of water and lightly we the outside edge of the tortilla.
  • Fold tortilla in half and then crimp with a folk.
  • Place 1-2 of the hand pies into the 350˚ oil and fry on both sides until nice and brown.
  • Remove from the oil and let sit on a paper towel to drain any excess oil.
  • Sprinkle the hand pies with cinnamon sugar
  • Let cool and serve.

Courses Dessert


Disclaimer // This post is written by me on behalf of Tyson Foods, Inc. All opinions are entirely my own. This shop has been compensated by Acorn Influence, Inc. and its advertiser. All opinions are mine alone.

Cheesy Salsa and Green Onion Dip Recipe

10 · Dec 20, 2016 · Leave a Comment

Everyone loves a good party dip and no, I’m not talking about your crazy uncle. I’m talking about those scrumptious treats that go so well with veggies and chips. It’s not an everyday thing, it’s one of those tasty treats that you enjoy when celebrating with family and friends. I’ve even attended parties focused solely on a dip recipe. Ever been to a “12 Dips of Christmas” party? It’s a great way to enjoy all kinds of goodies in one night. I’m a kind of girl that really loves to have a little taste of everything rather than sitting down to one meal so that kind of party really appeals to me. With that in mind,  I thought together, with my favorite Old El Paso friends, I would put together a great dip that everyone will love!

Win the battle of the dips with this scrumptious cheesy salsa dip from WhipperBerry!

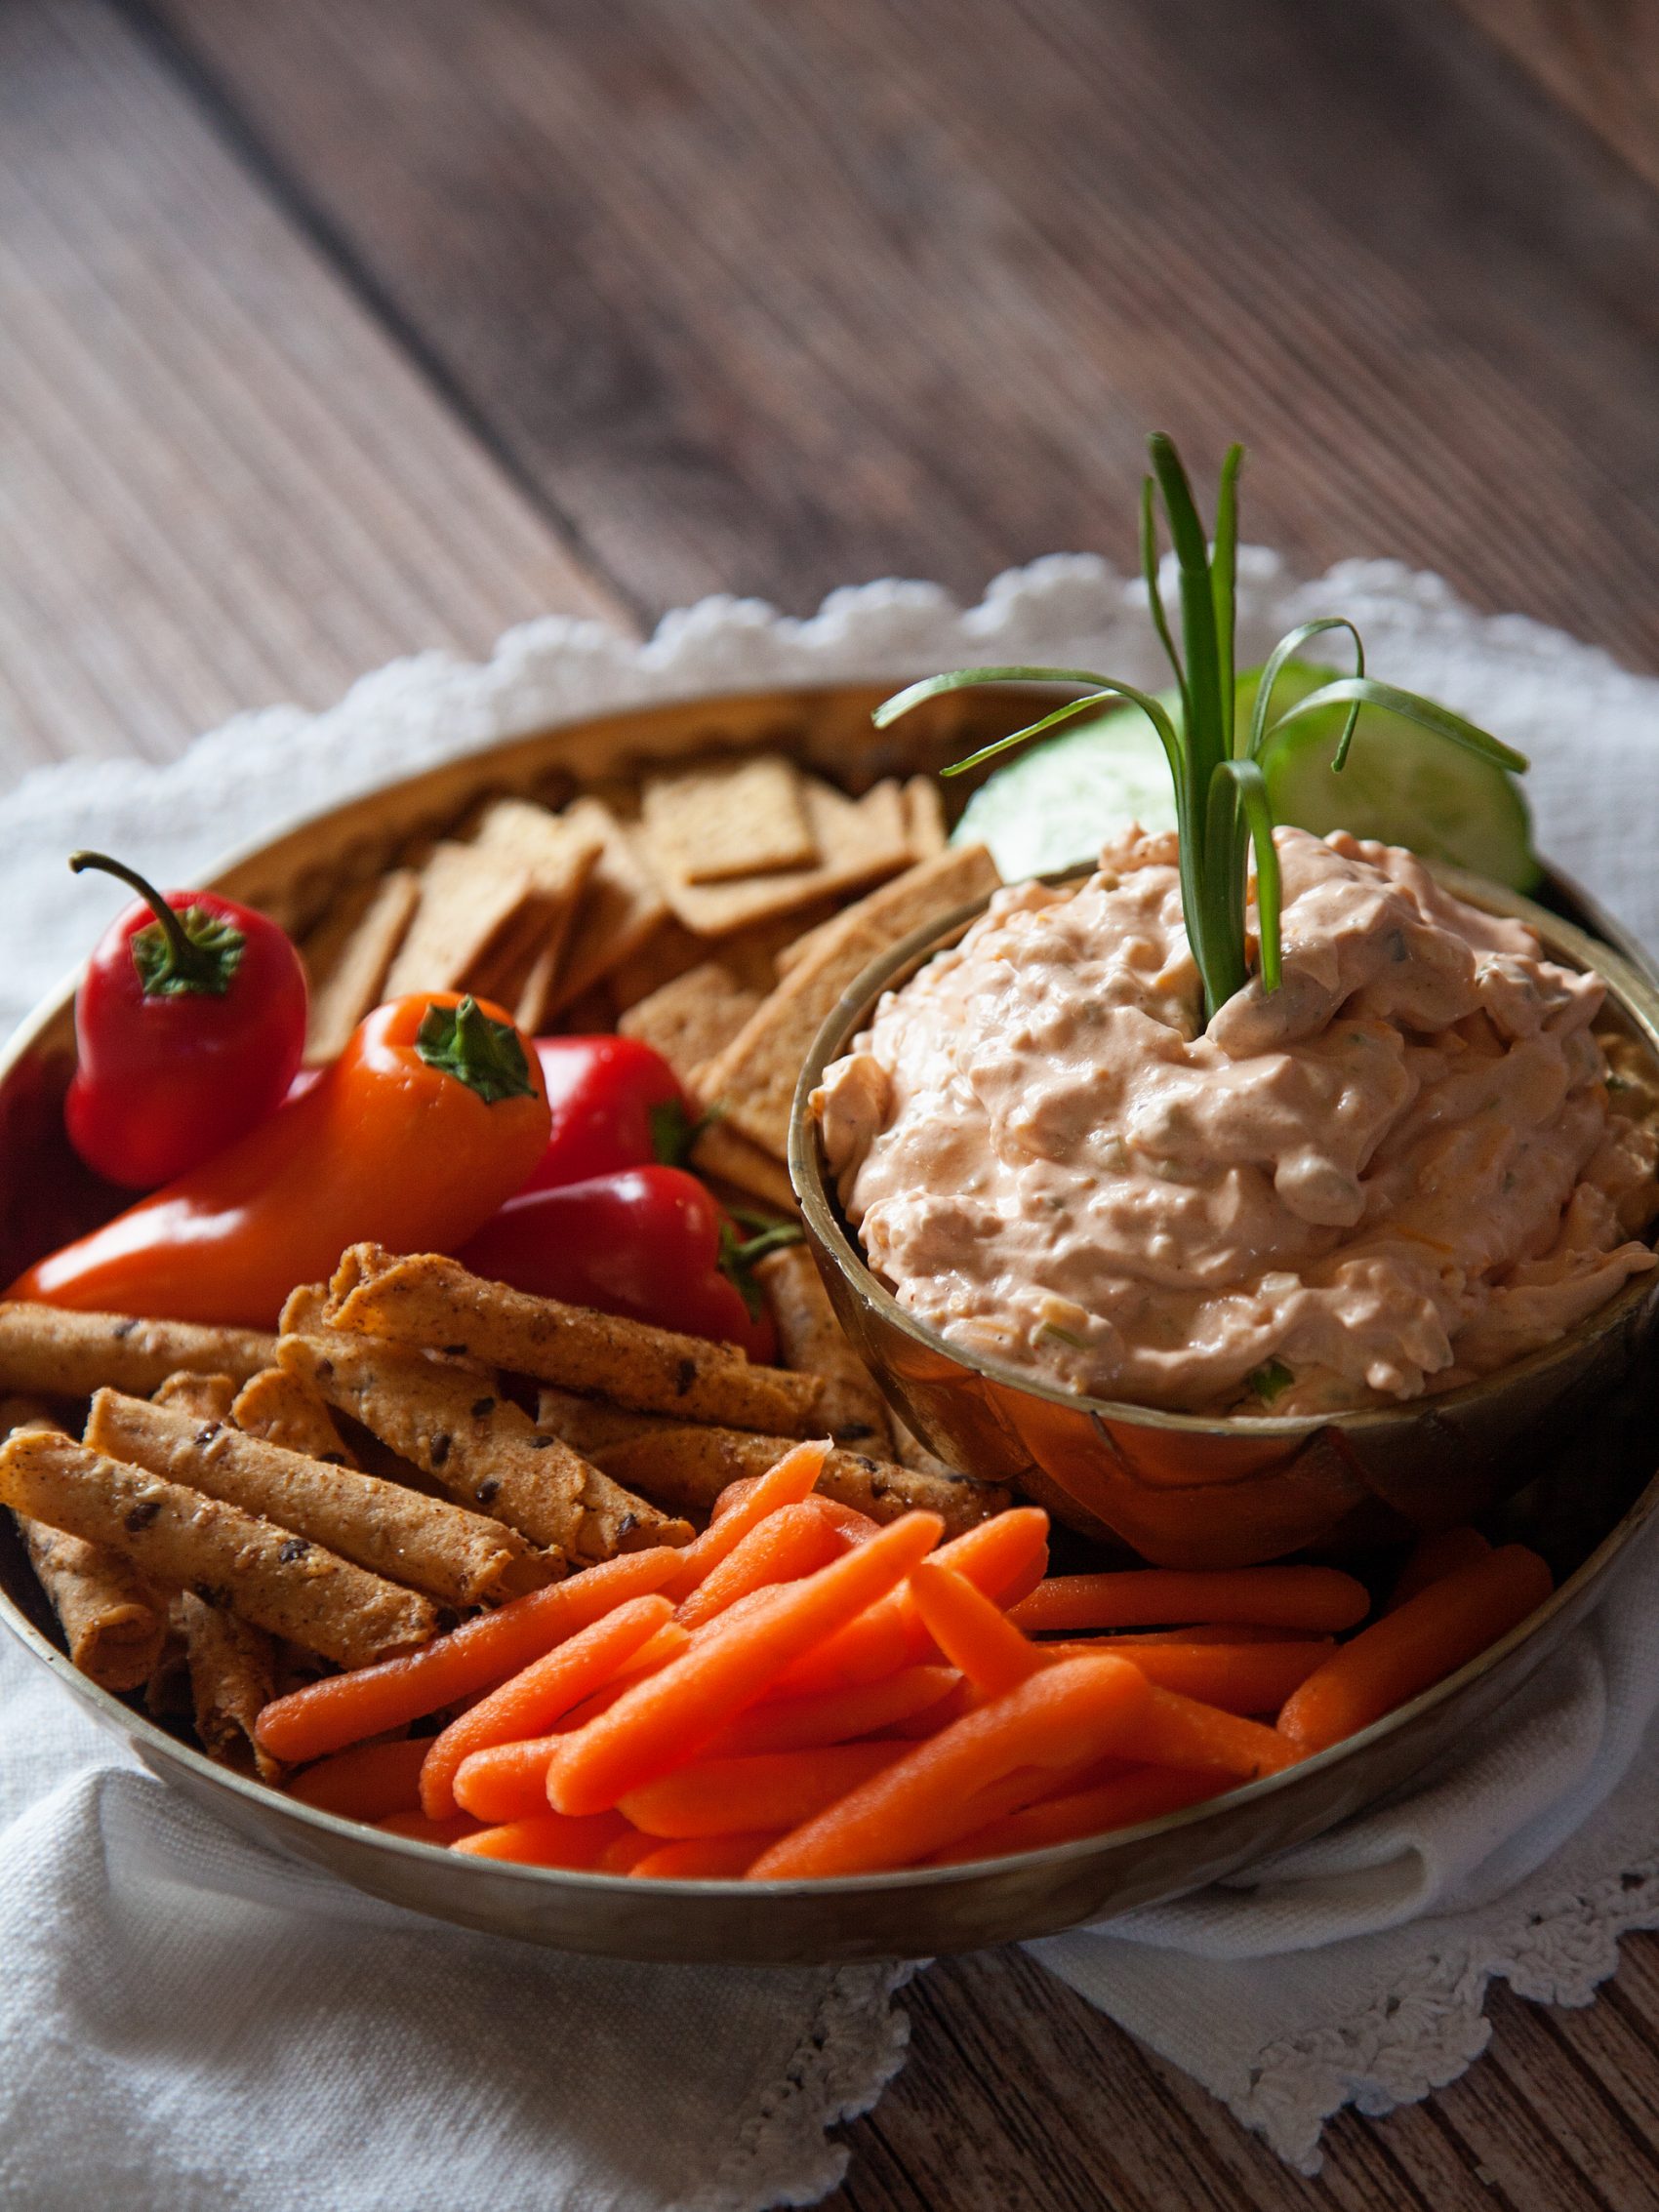
This Cheesy Salsa and Green Onion Dip will be the perfect addition to your next get together! The fact that it’s a cinch to make and you can make it ahead of time is another bonus!

•   You can find the full Cheesy Salsa and Green Onion Dip Recipe at Old El Paso  •

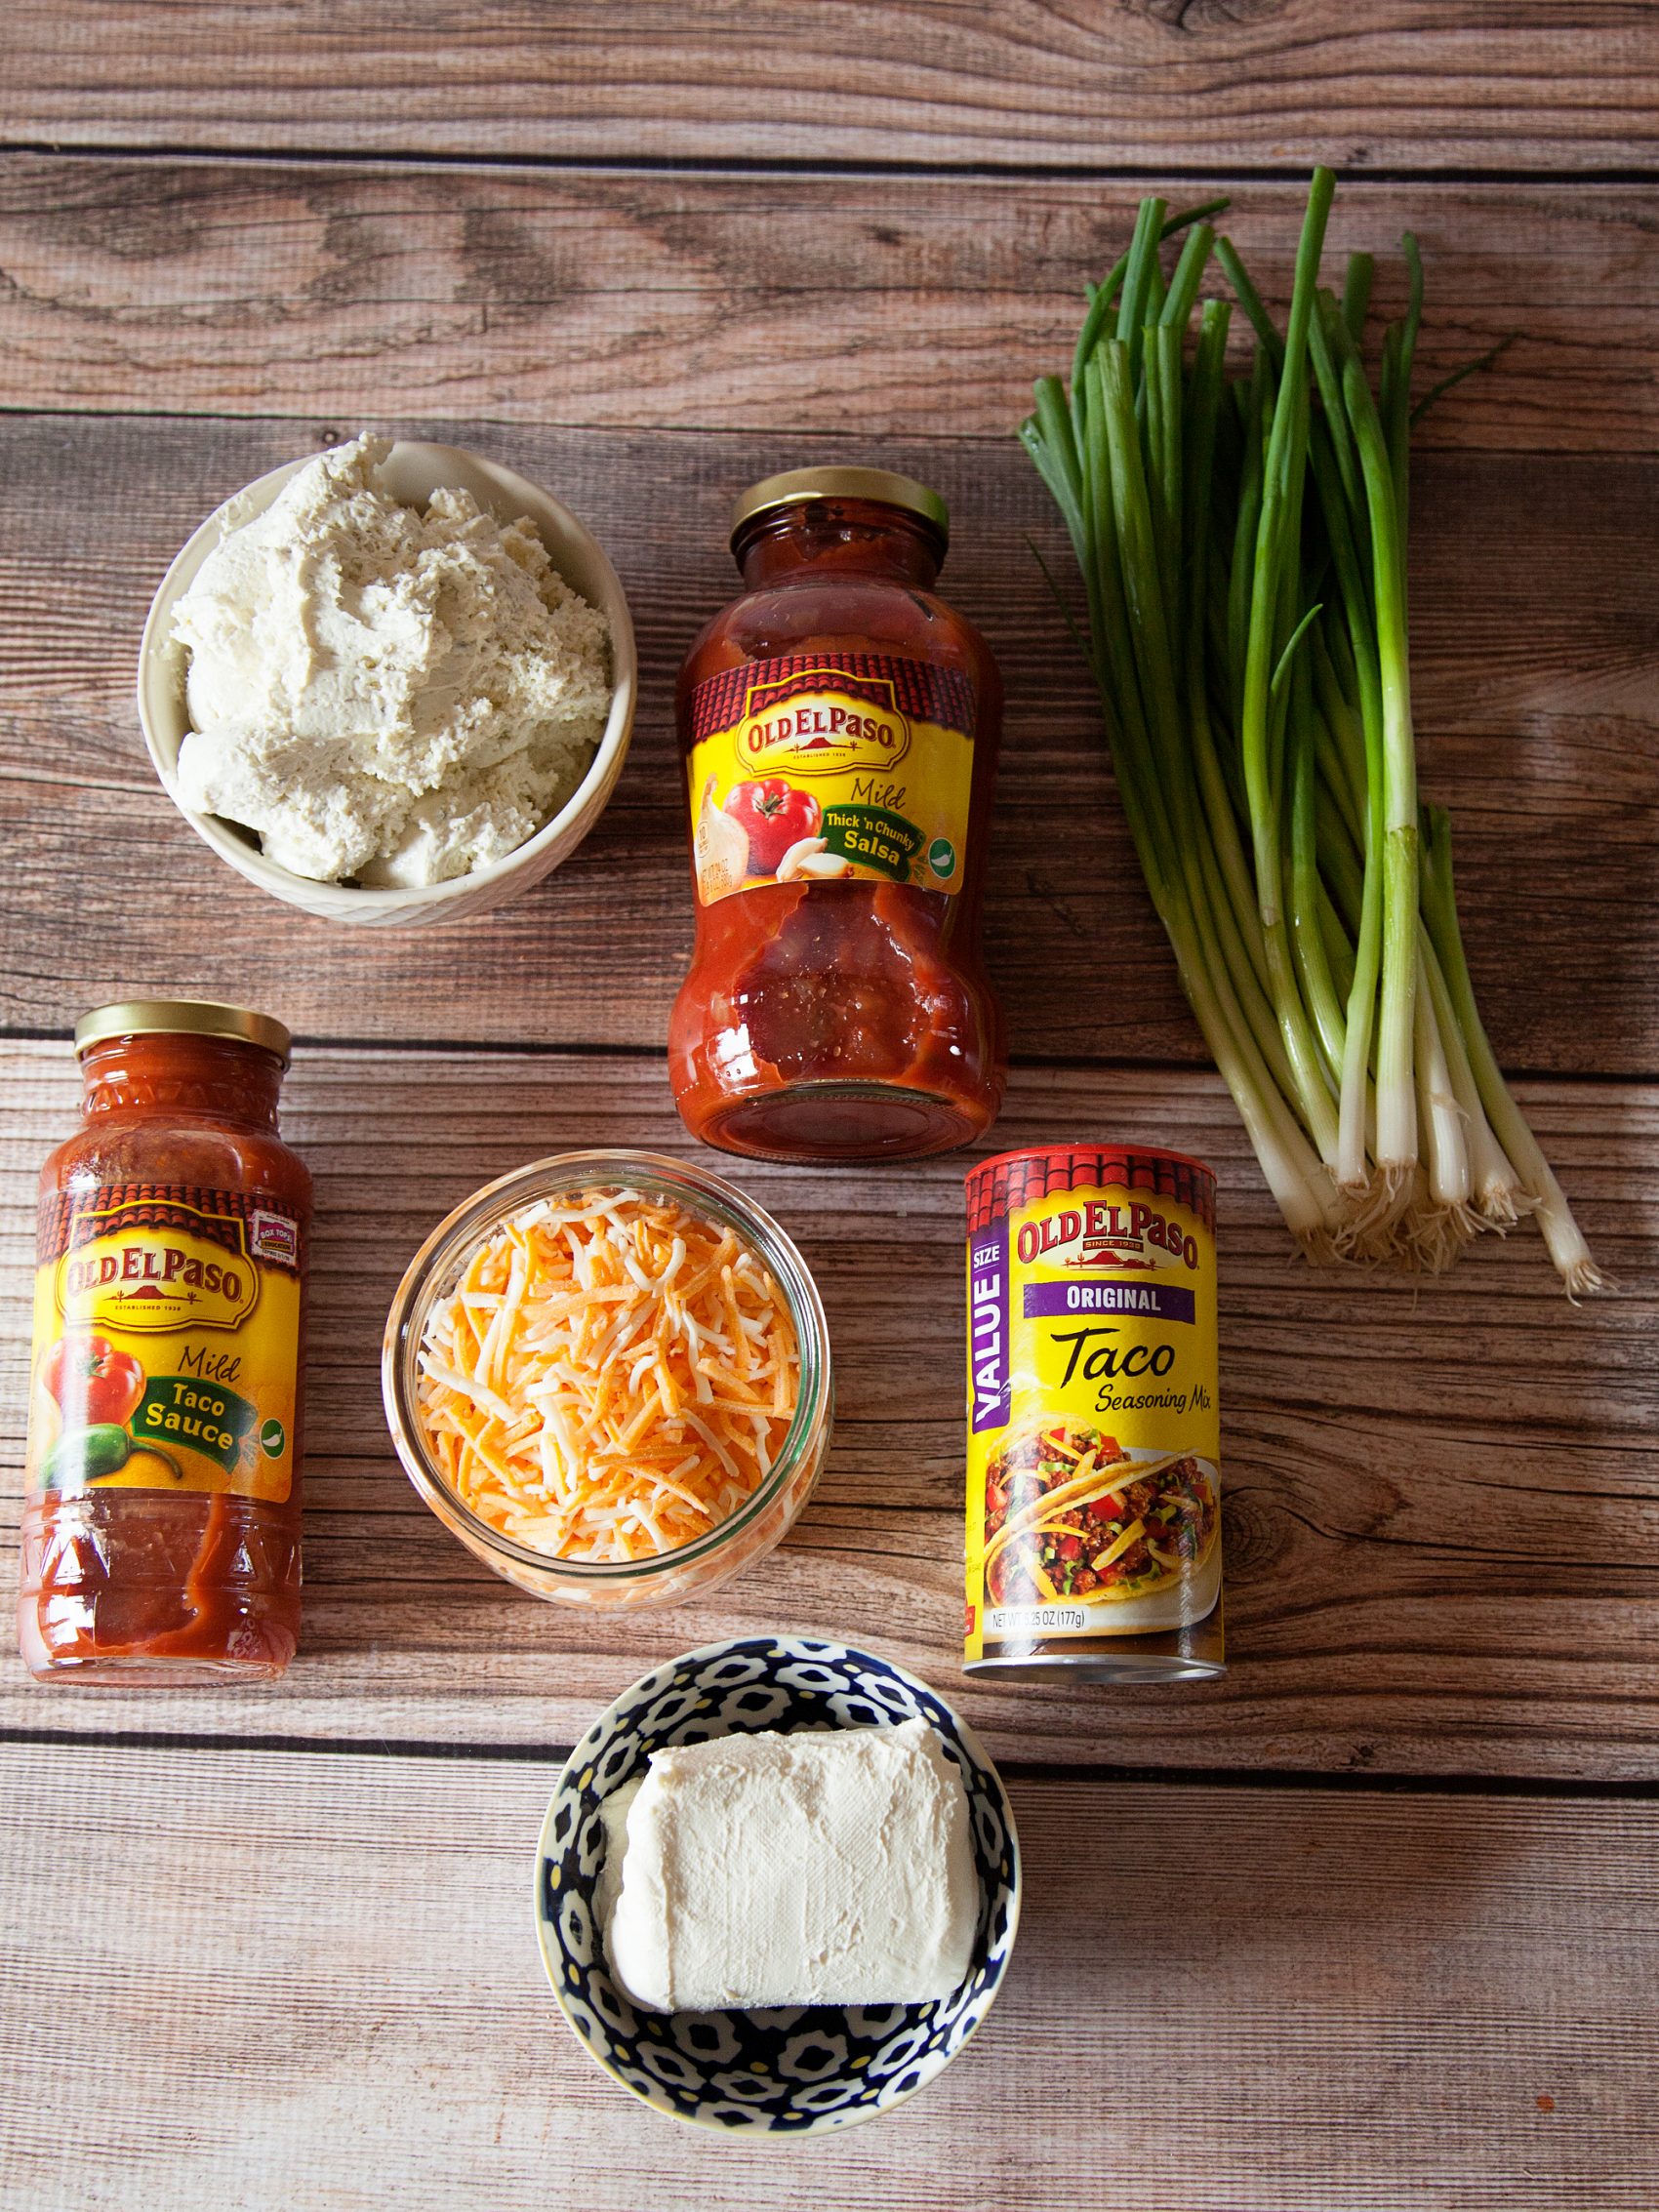
Here’s what you’ll need…

Win the battle of the dips with this scrumptious cheesy salsa dip from WhipperBerry!

You can get the full list of ingredients at the link above.

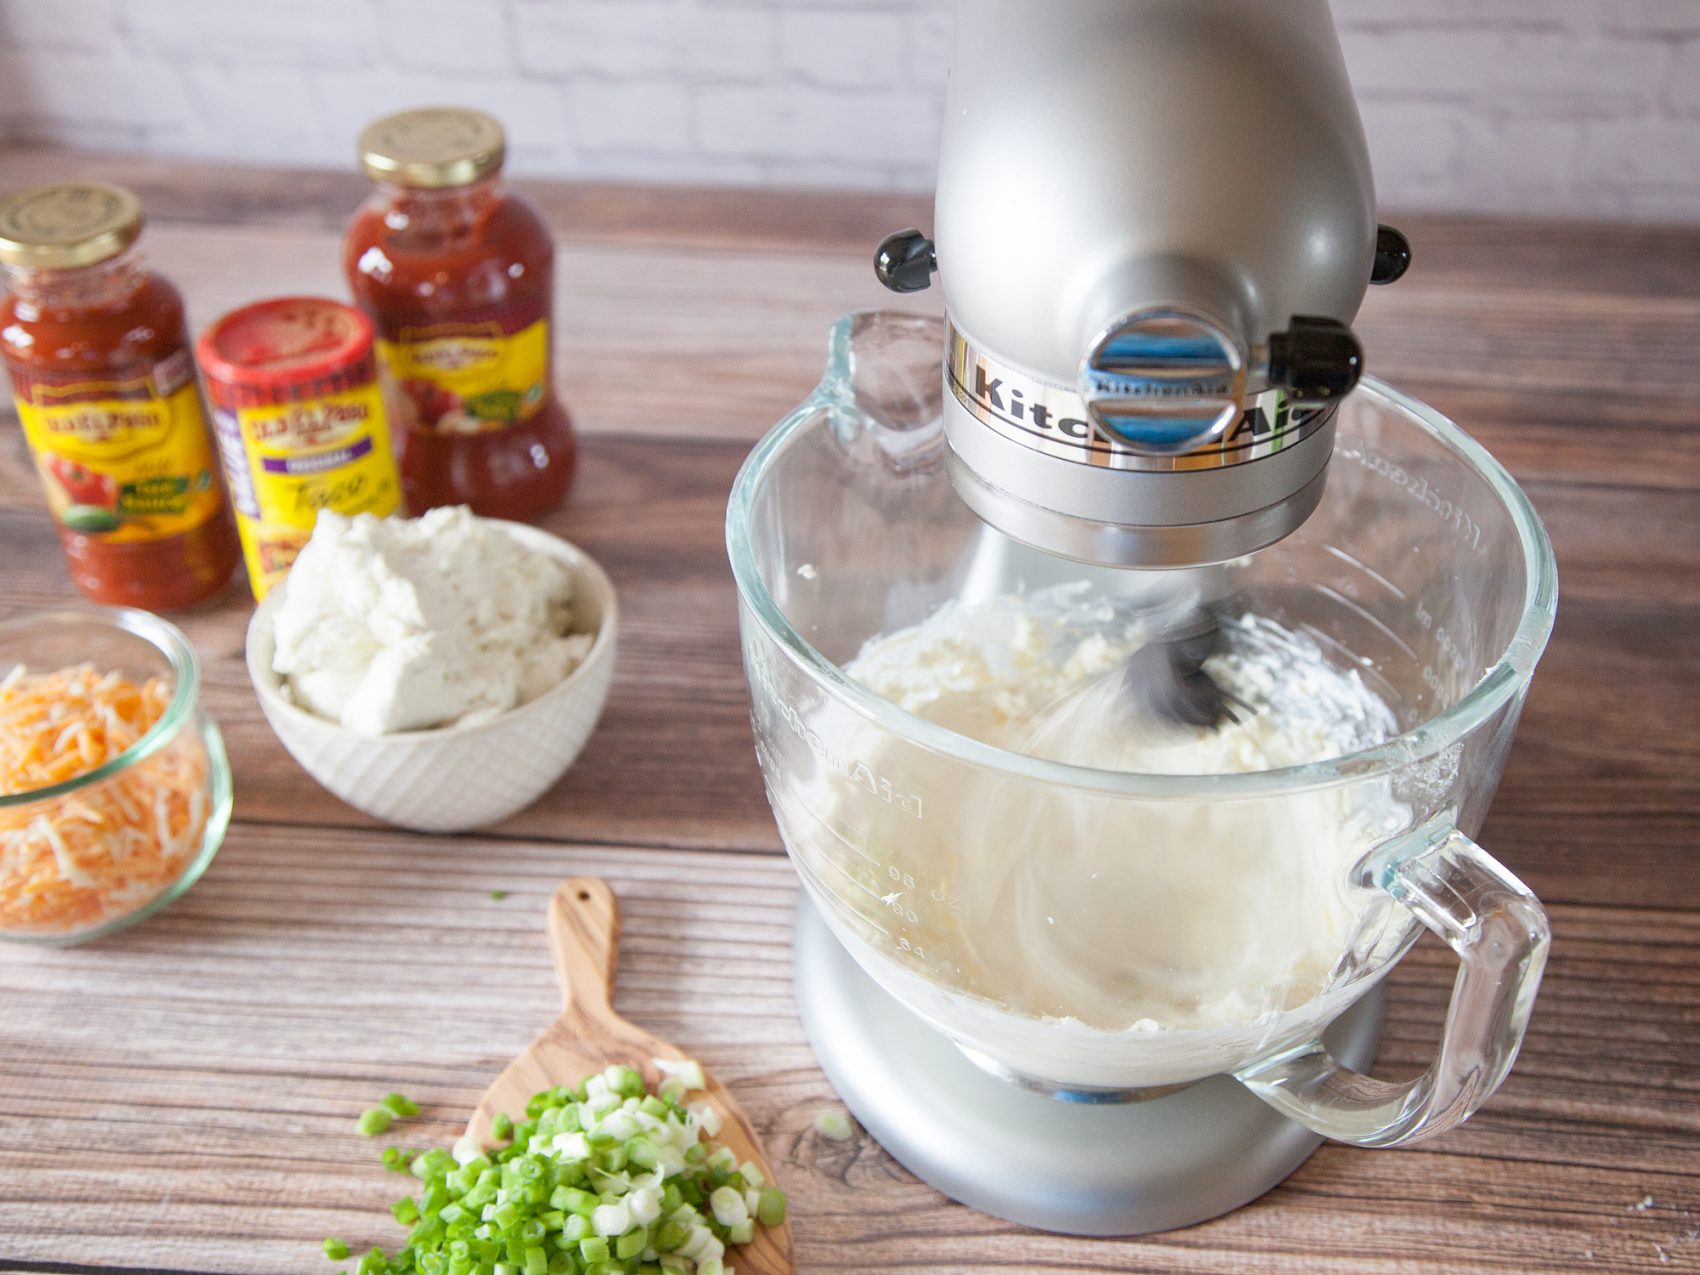
1st important item, make sure your cream cheese is at room temperature. Then add it to your mixing bowl and whisk until nice and smooth.

Win the battle of the dips with this scrumptious cheesy salsa dip from WhipperBerry!

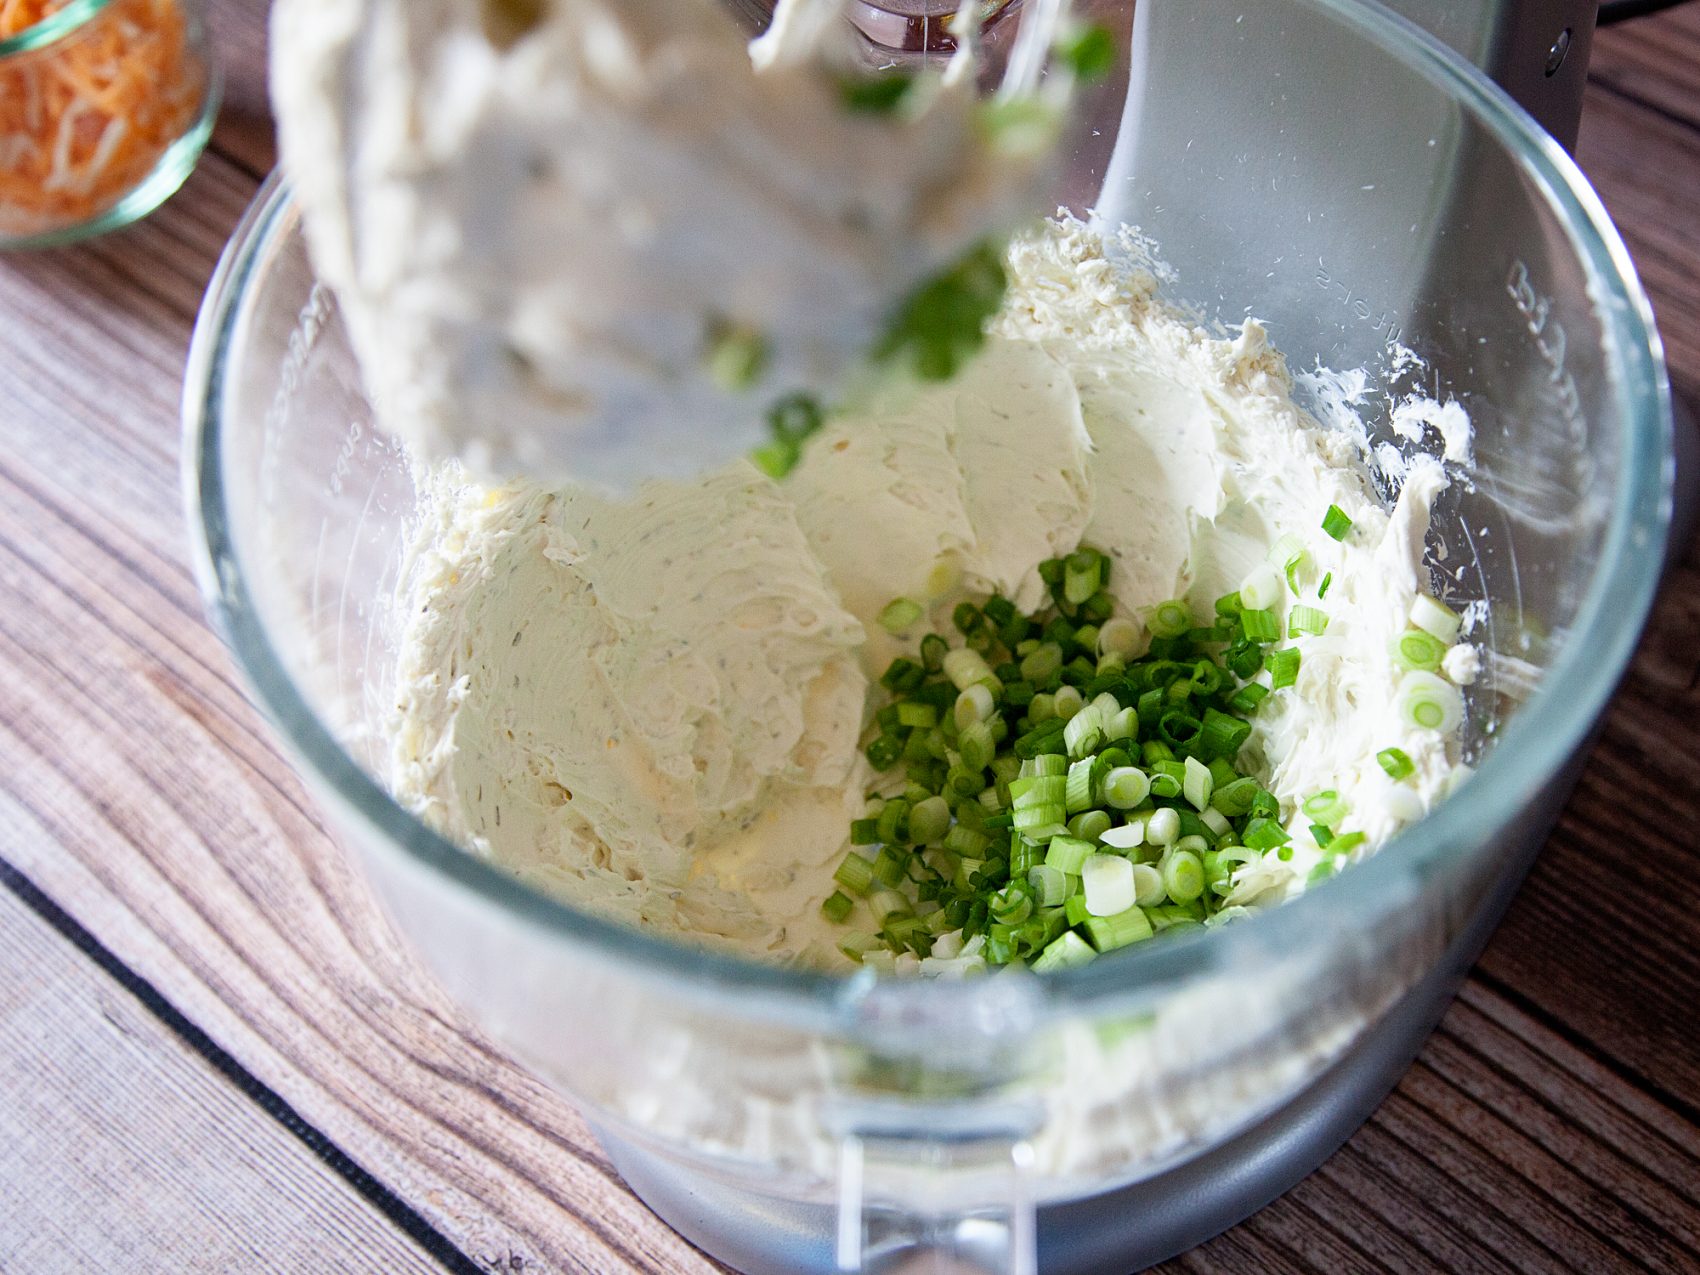
Next, add your green onion.

Win the battle of the dips with this scrumptious cheesy salsa dip from WhipperBerry!

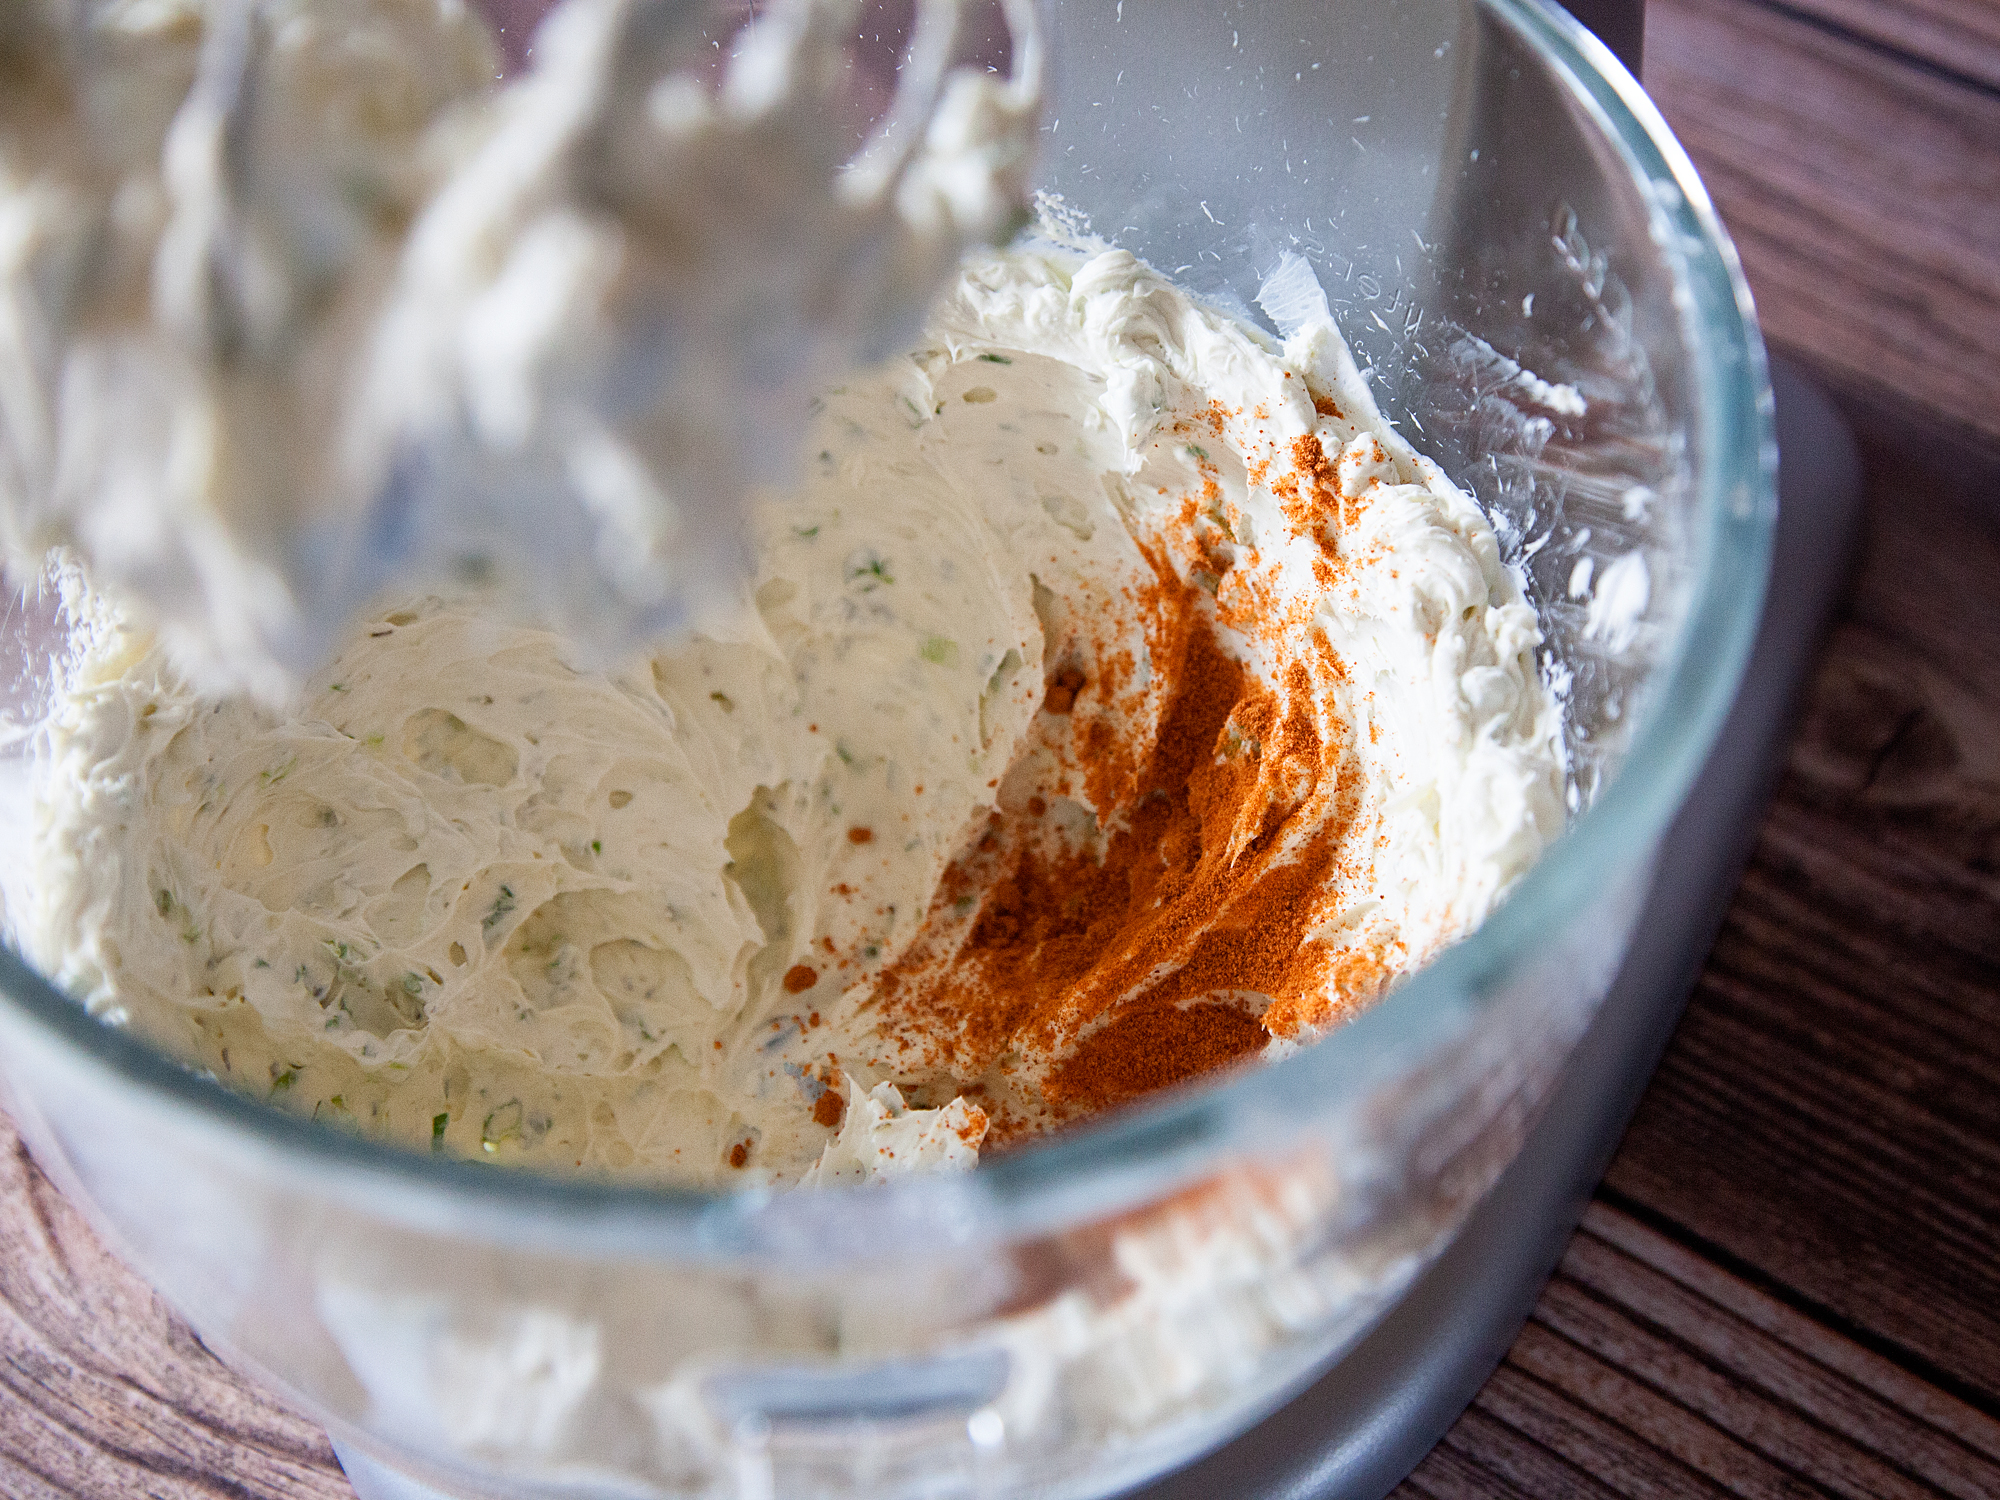
Then add the Old El Paso Taco Seasoning.

Win the battle of the dips with this scrumptious cheesy salsa dip from WhipperBerry!

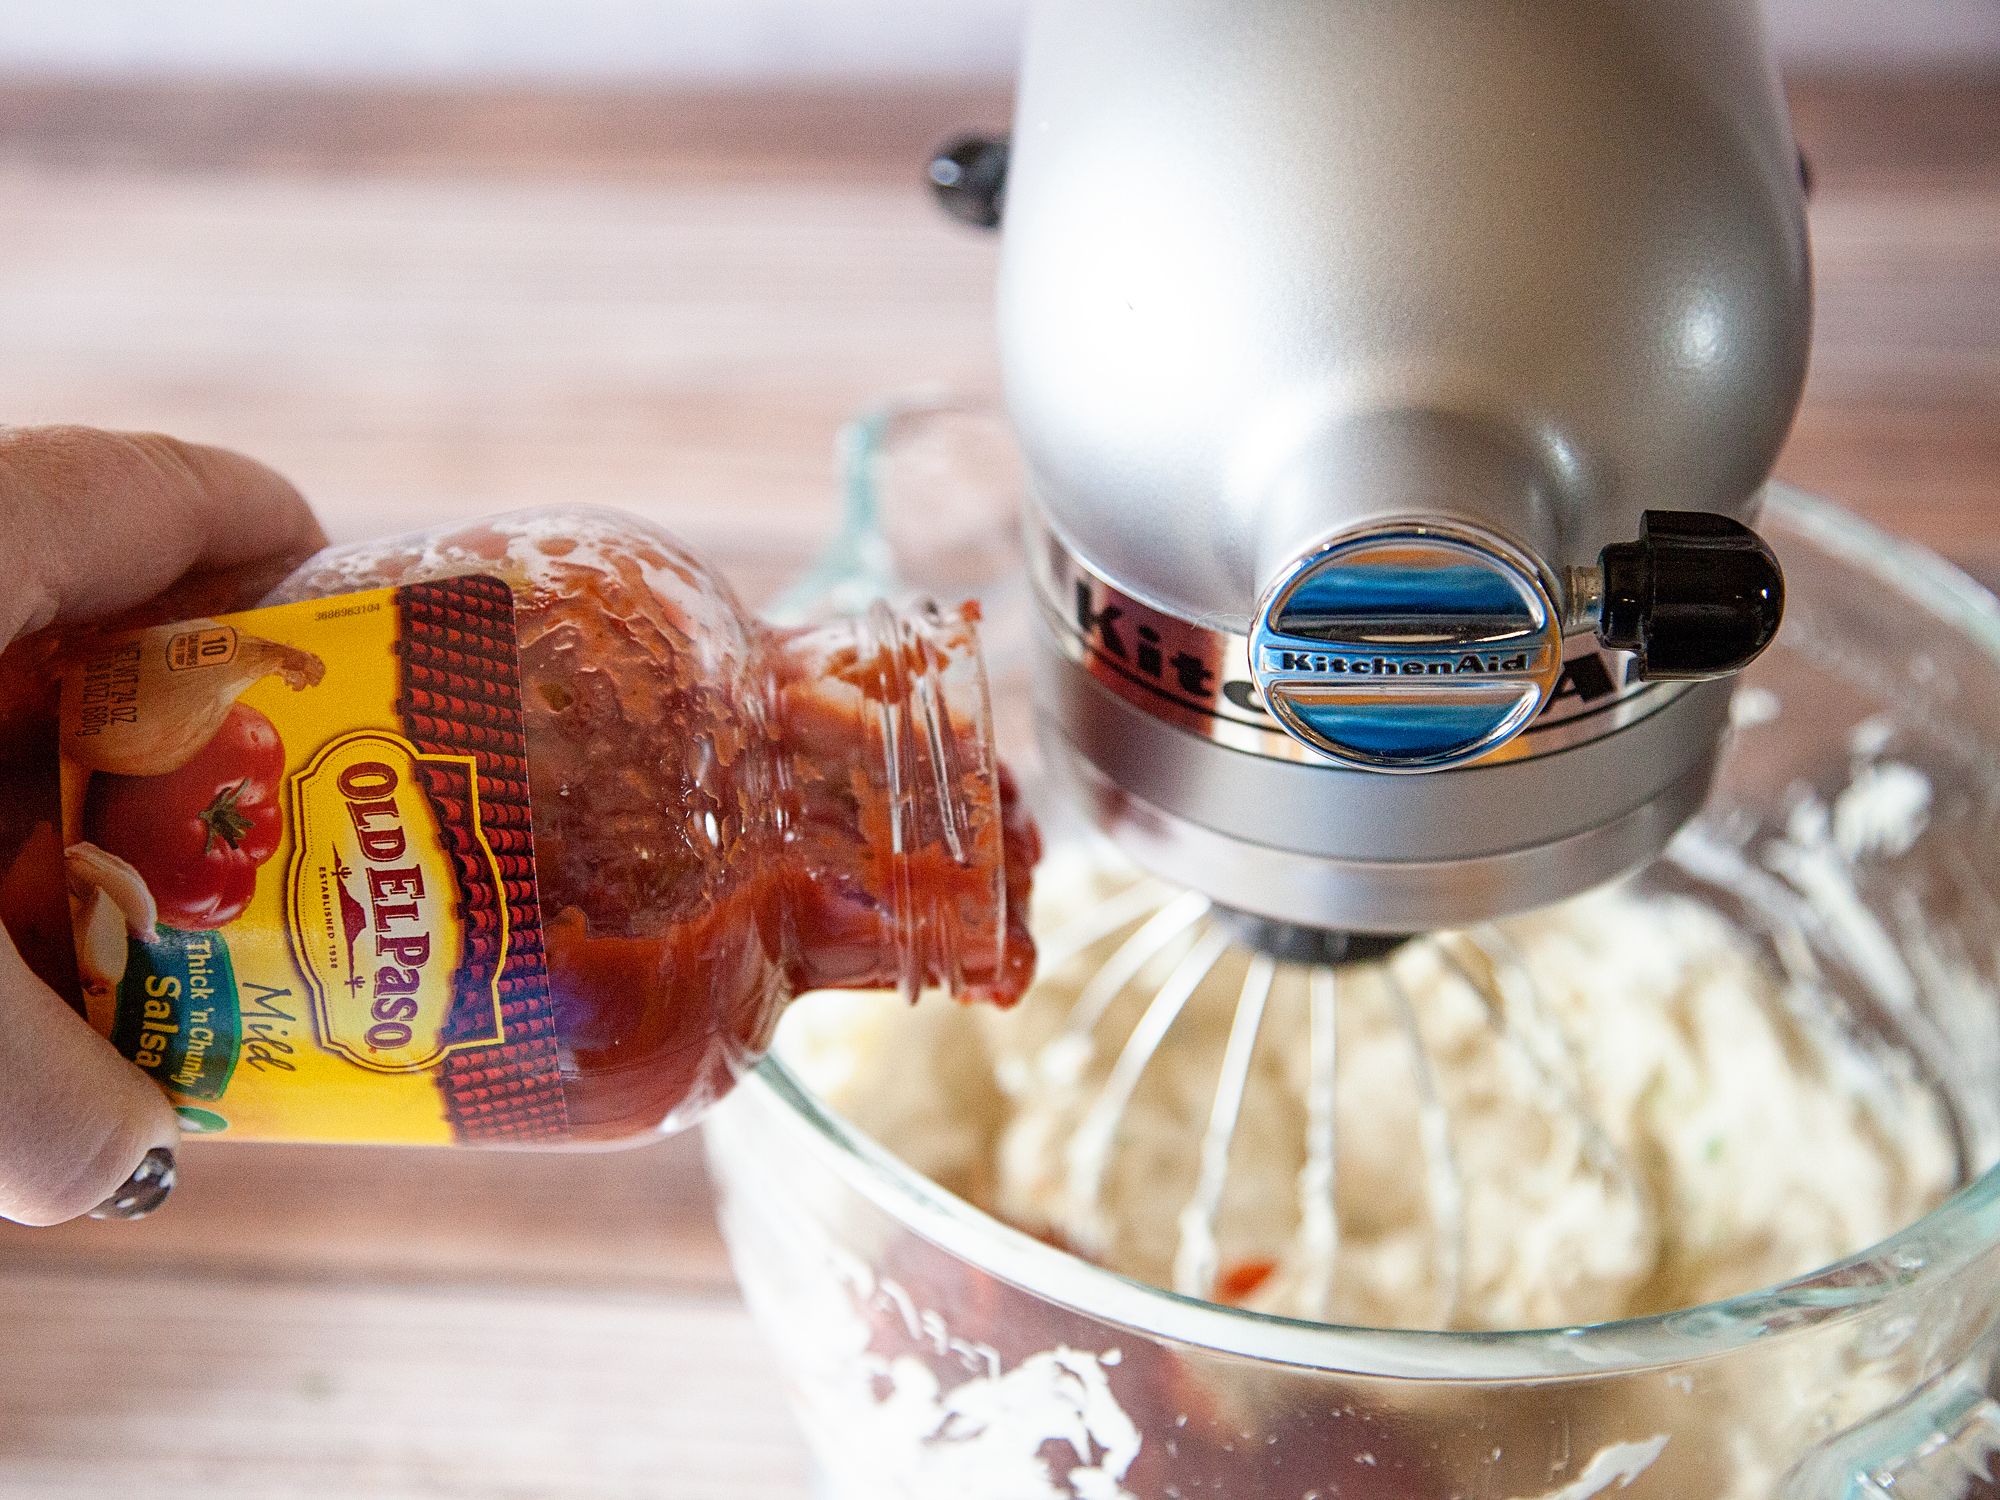
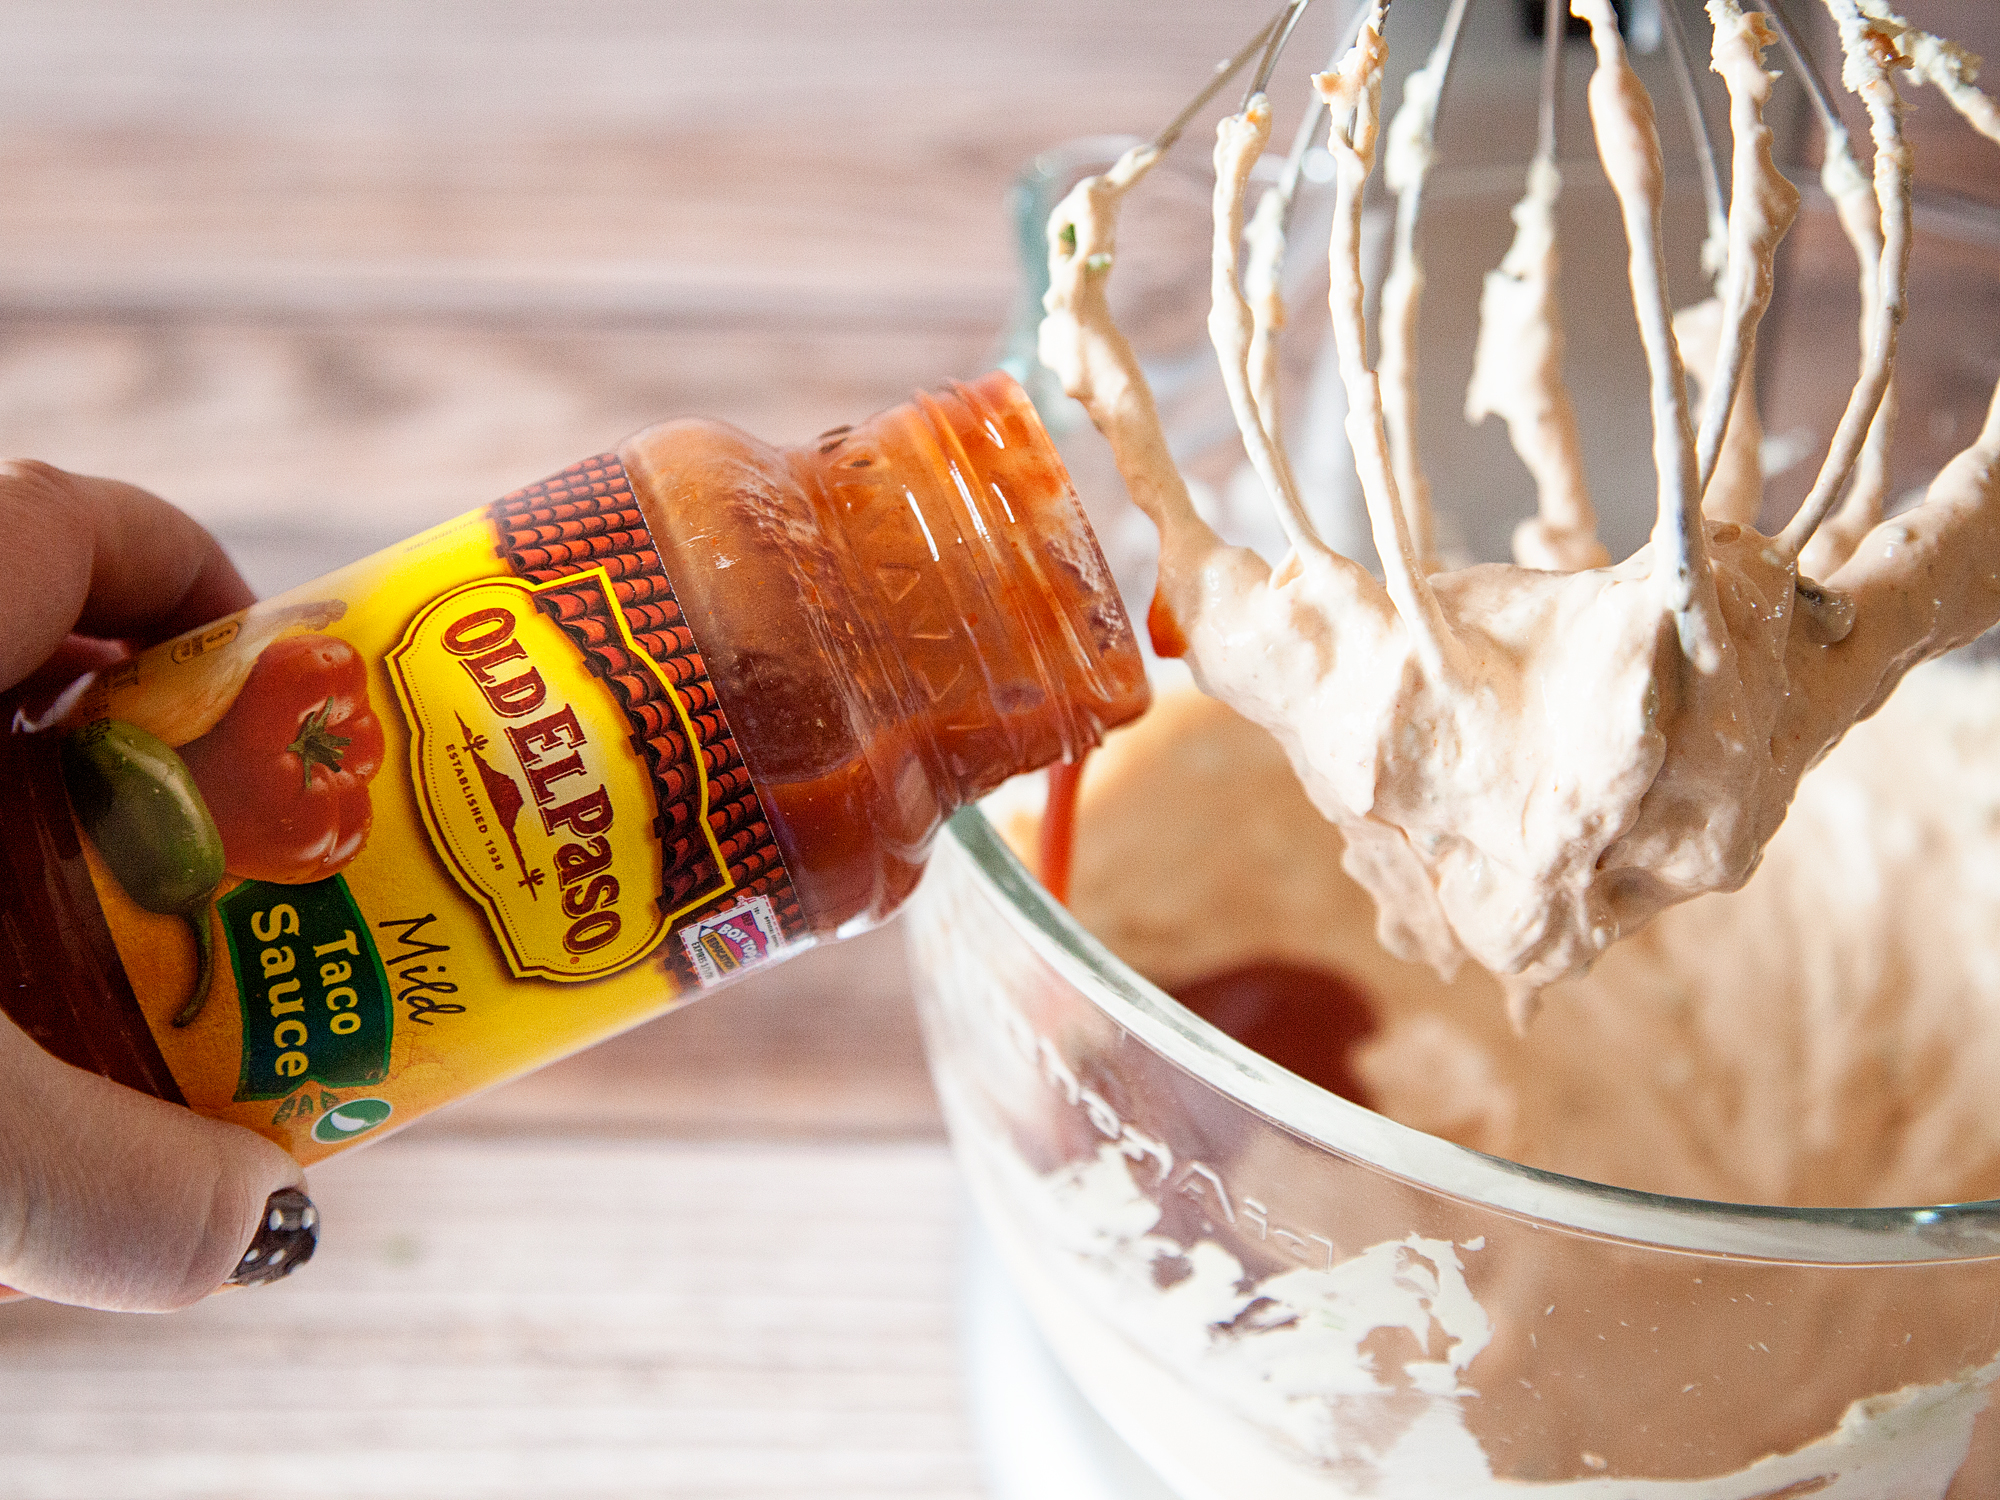
Next up, add the Old El Paso Thick n’ Chunky Salsa & the Old El Paso Taco Sauce.

Cheesy Salsa and Green Onion Dip from WhipperBerry

cheesysalsagreenoniondip-whipperberry-heroshot-horizontal-12

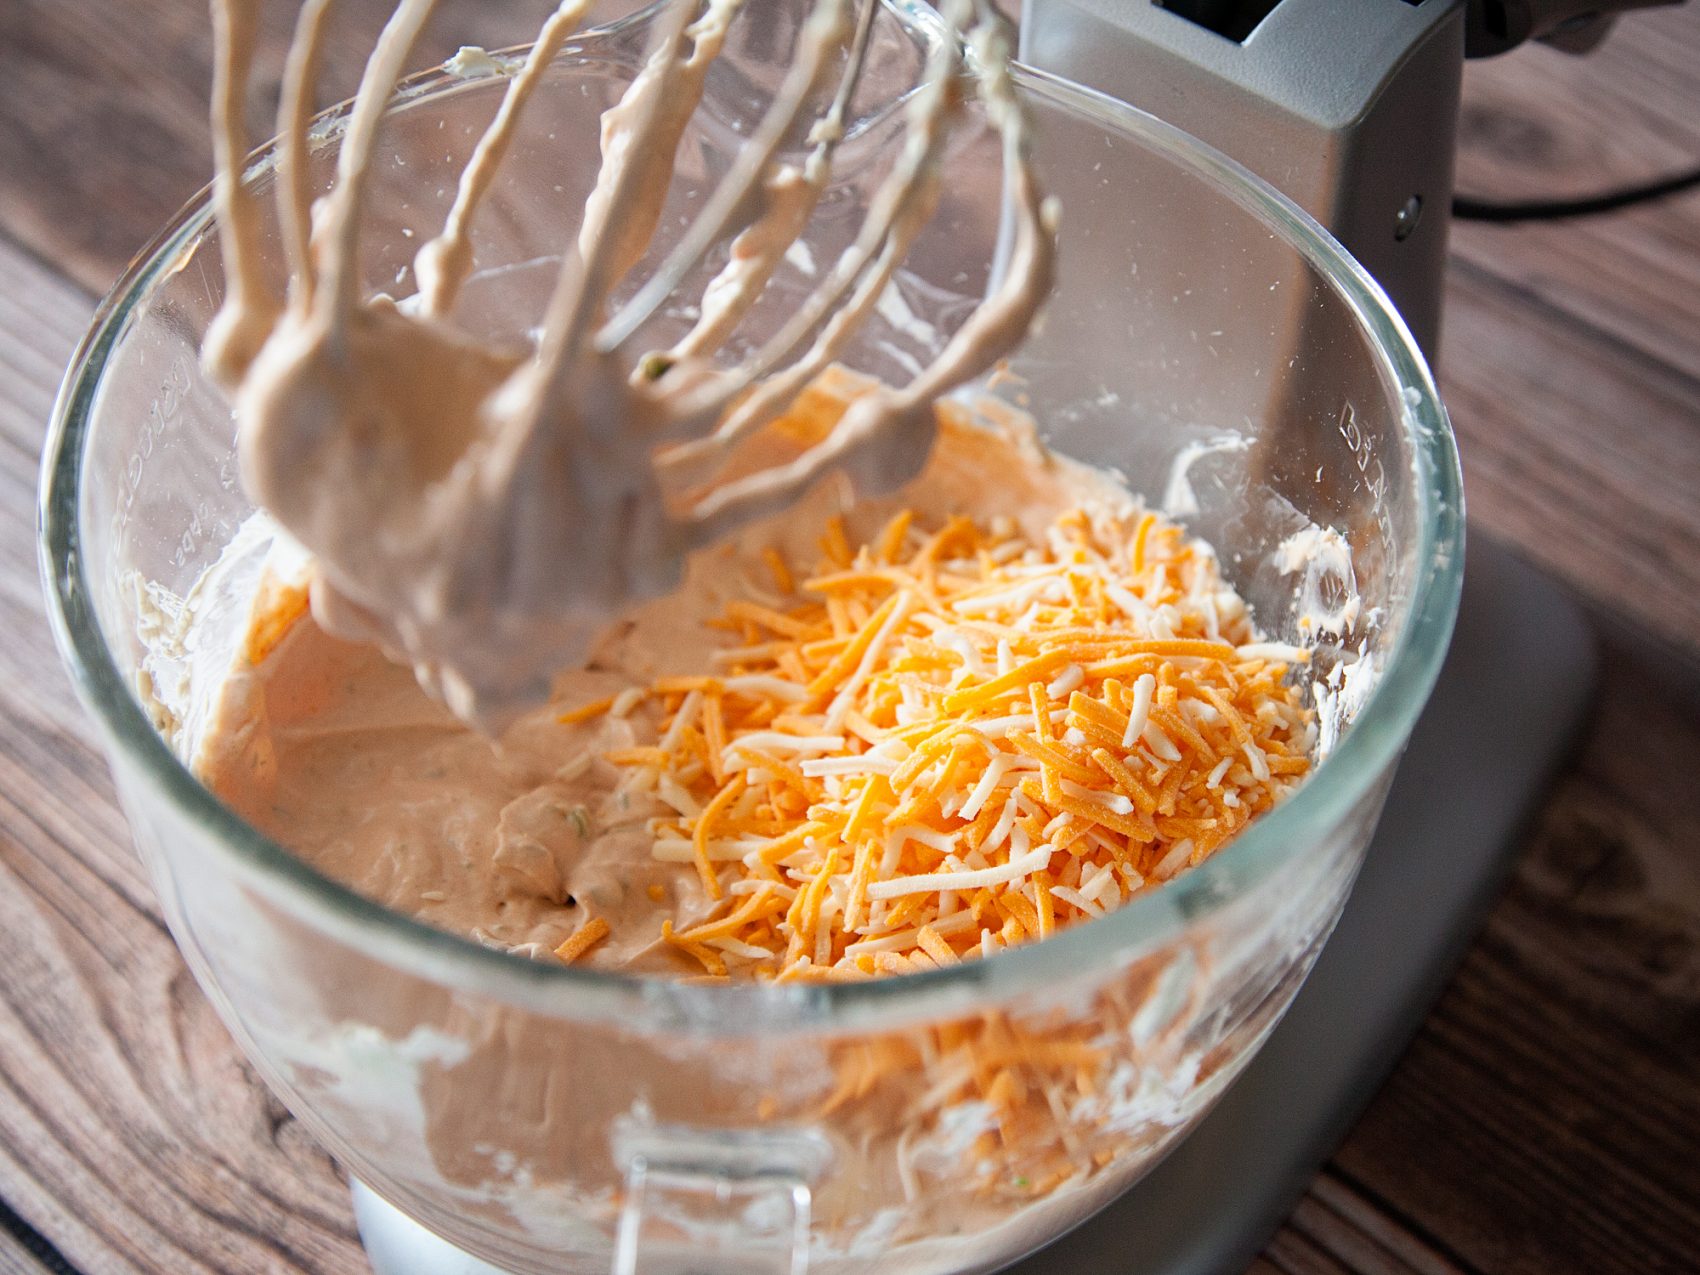
Finally you’ll add the cheese and mix it well.

Cheesy Salsa and Green Onion Dip from WhipperBerry

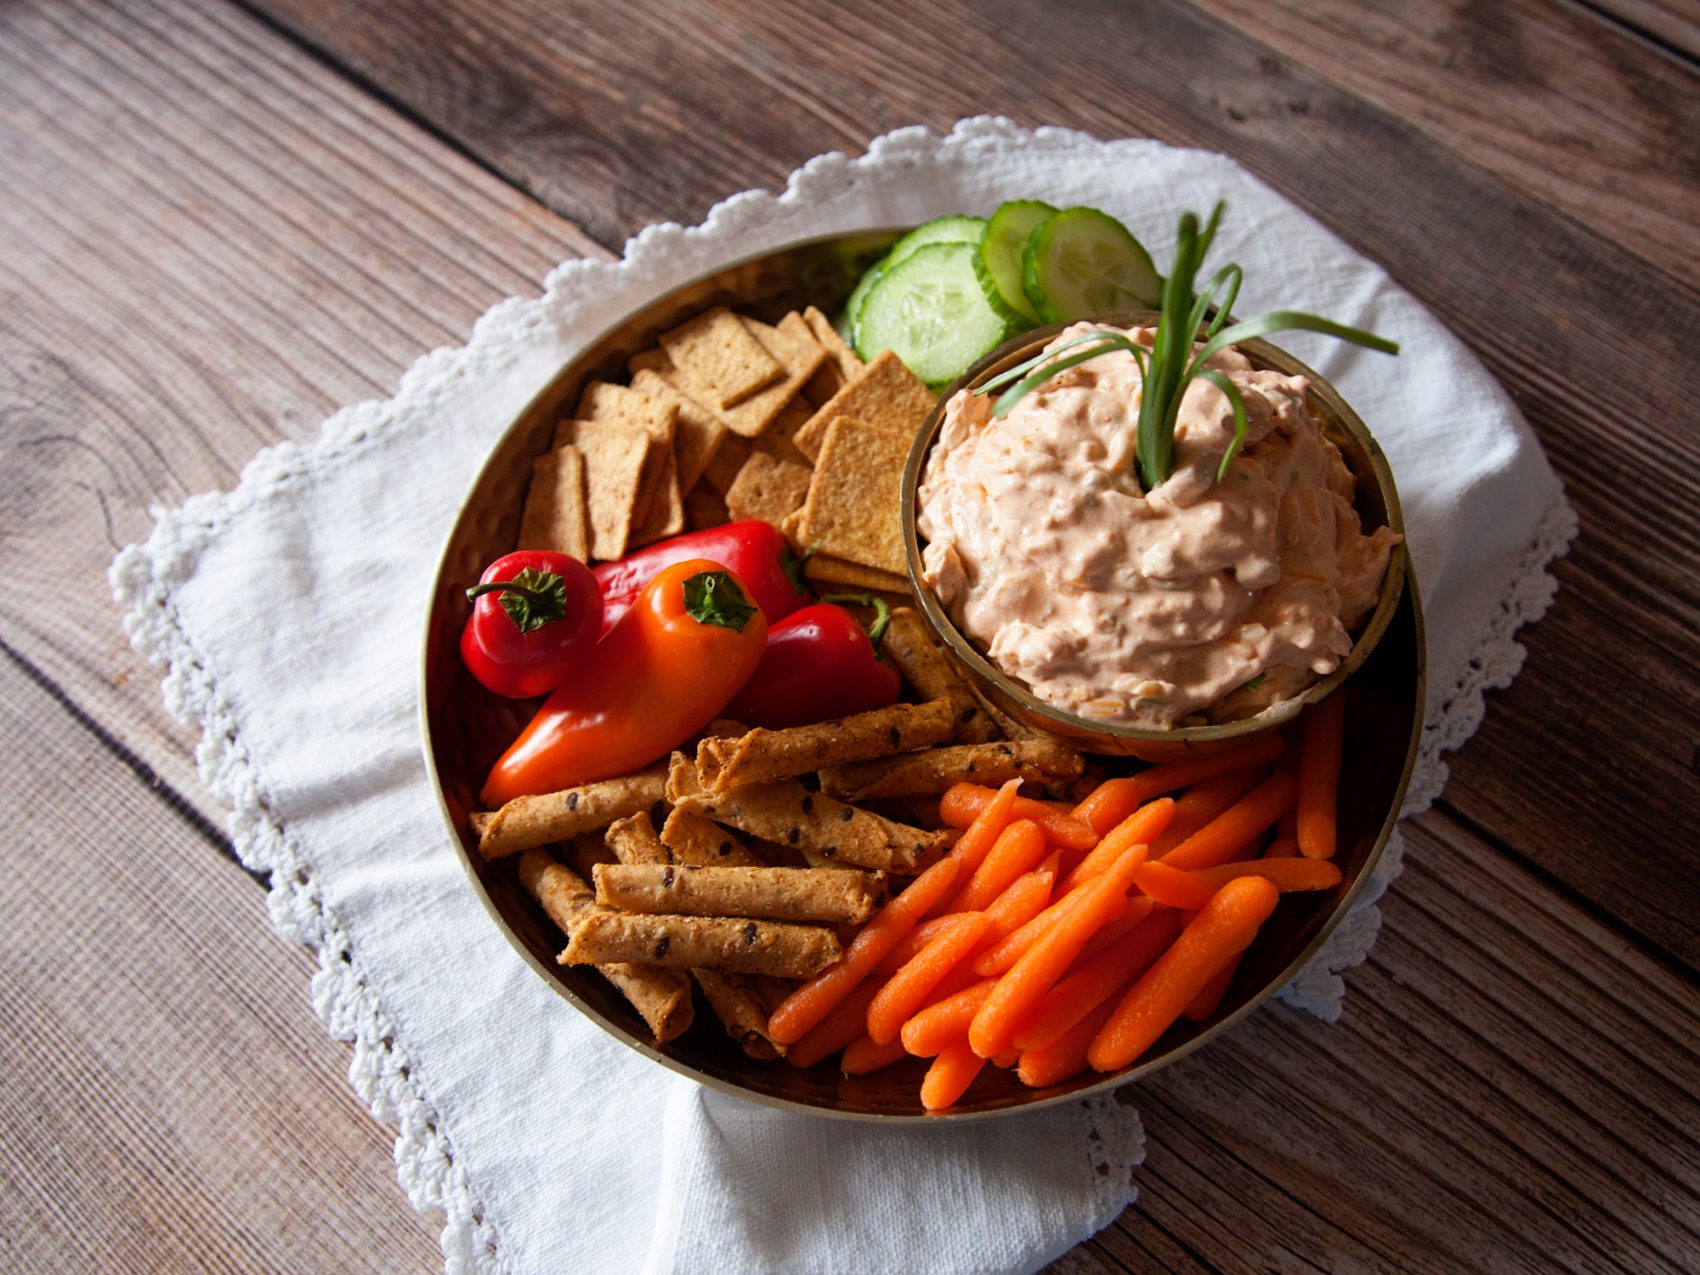
Serve with your favorite veggies and chips!

A scrumptious Cheesy Salsa and Green Onion Dip from WhipperBerry

Disclaimer // I am an Old El Paso Ambassador and this post was sponsored. As always, I will never post about a company or product that I don’t truly believe in!

Peppermint Chocolate Ganache Dip Recipe

13 · Dec 16, 2016 · Leave a Comment

Ahhhh, Peppermint season… We LOVE it here at our house! What goes best with Peppermint? Chocolate of course! Here’s a fun new recipe for Peppermint Chocolate Ganache Dip perfect for Holiday parties.

Sinfully delightful Peppermint Chocolate Ganache Dip for your Holiday parties from WhipperBerry!

The minute the candy canes roll out, we’re hooked on all things peppermint. Peppermint hot chocolate, peppermint shakes, peppermint sugar cookies, peppermint ice cream… If it can handle peppermint, we’ll add it!

With it being the Holiday gathering season, I thought it would be fun to create a Peppermint Chocolate Ganache Dip perfect for all of those Holiday parties we’re truckin’ off to. If you’re like me at all you’re on the hunt to find the perfect goodie to bring to all of those Holiday parties every year. This one is sinfully delicious and will make all of those Peppermint lovers squeal with delight. Yep, I promise!

Think dipping your favorite cookie, pastry or even potato chip into a warm minty fudge delight. It’s a winner in my book!

It’s super easy to make thanks to our friends at International Delight!

Sinfully delightful Peppermint Chocolate Ganache Dip for your Holiday parties from WhipperBerry!

It’s similar to making fudge, but you serve it warm and as a dip rather than letting it set-up into fudge.

AND… it’s scrumptious! Here’s how you make it…

Peppermint Chocolate Ganache Dip Recipe

Sinfully delightful Peppermint Chocolate Ganache Dip for your Holiday parties from WhipperBerry!

 • The full printable recipe is below •

Sinfully delightful Peppermint Chocolate Ganache Dip for your Holiday parties from WhipperBerry!

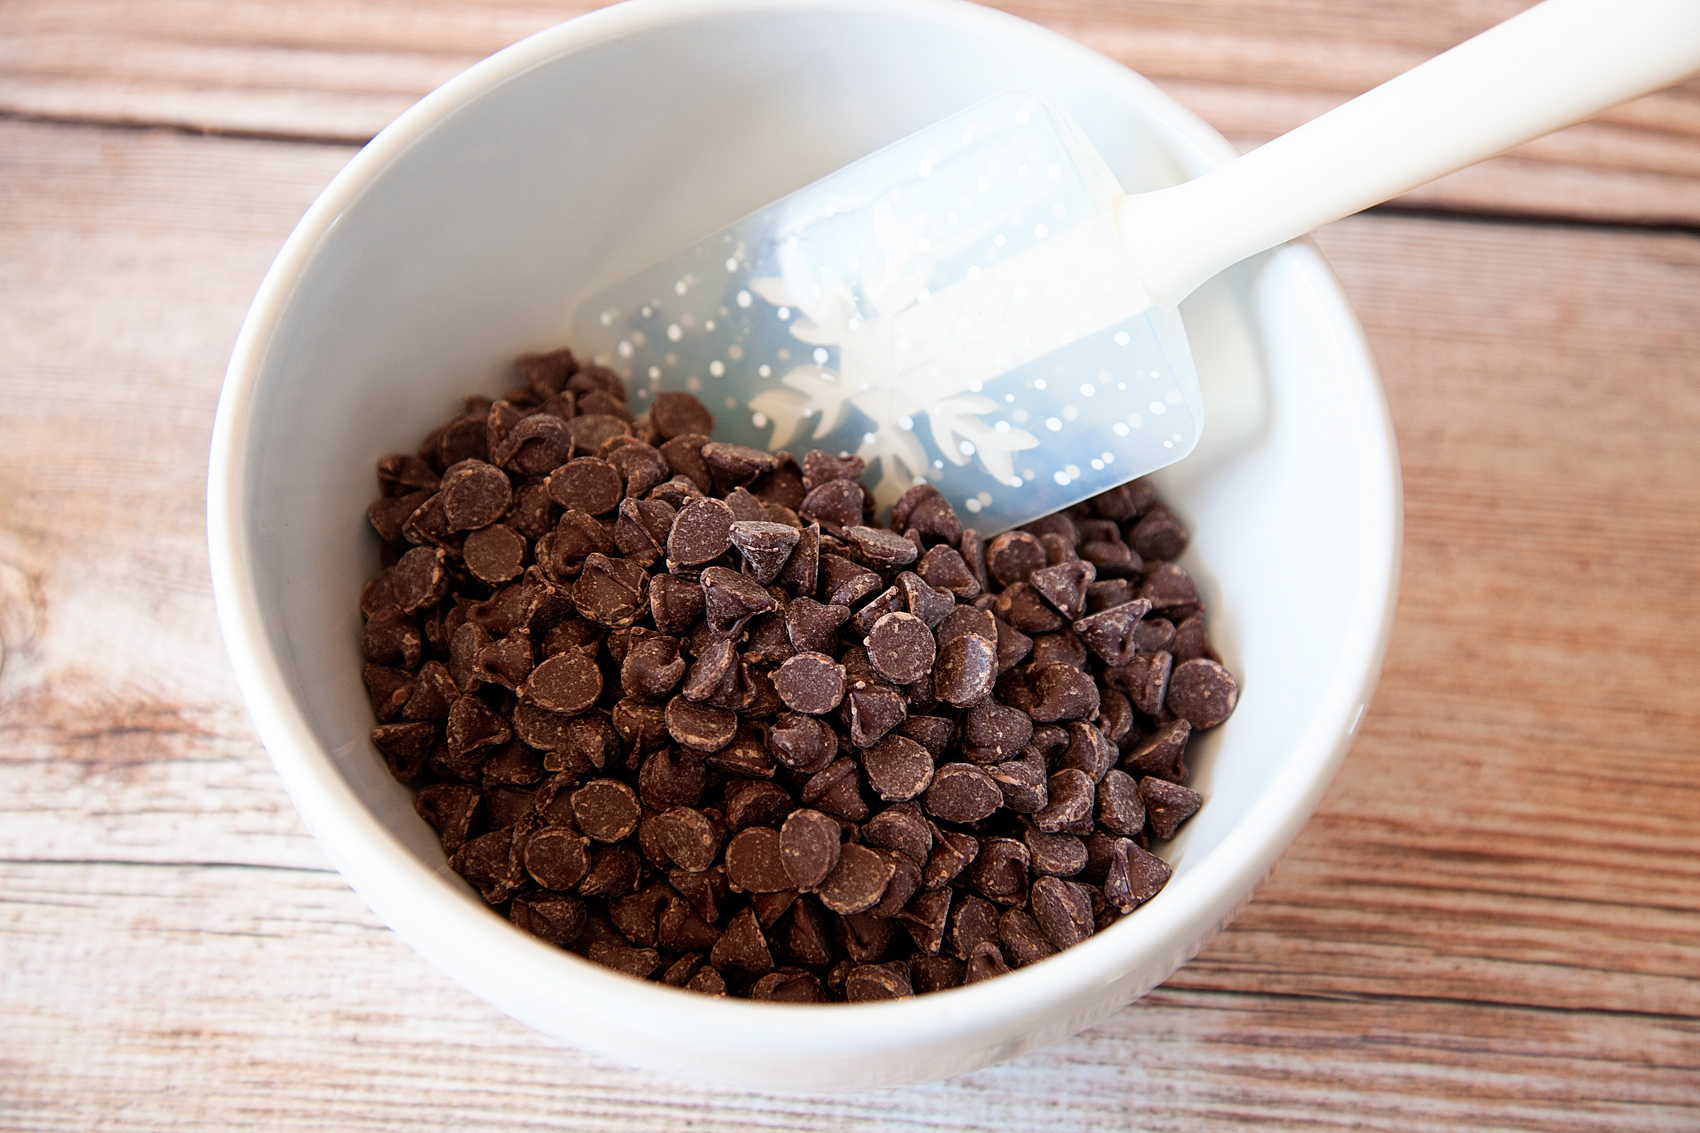
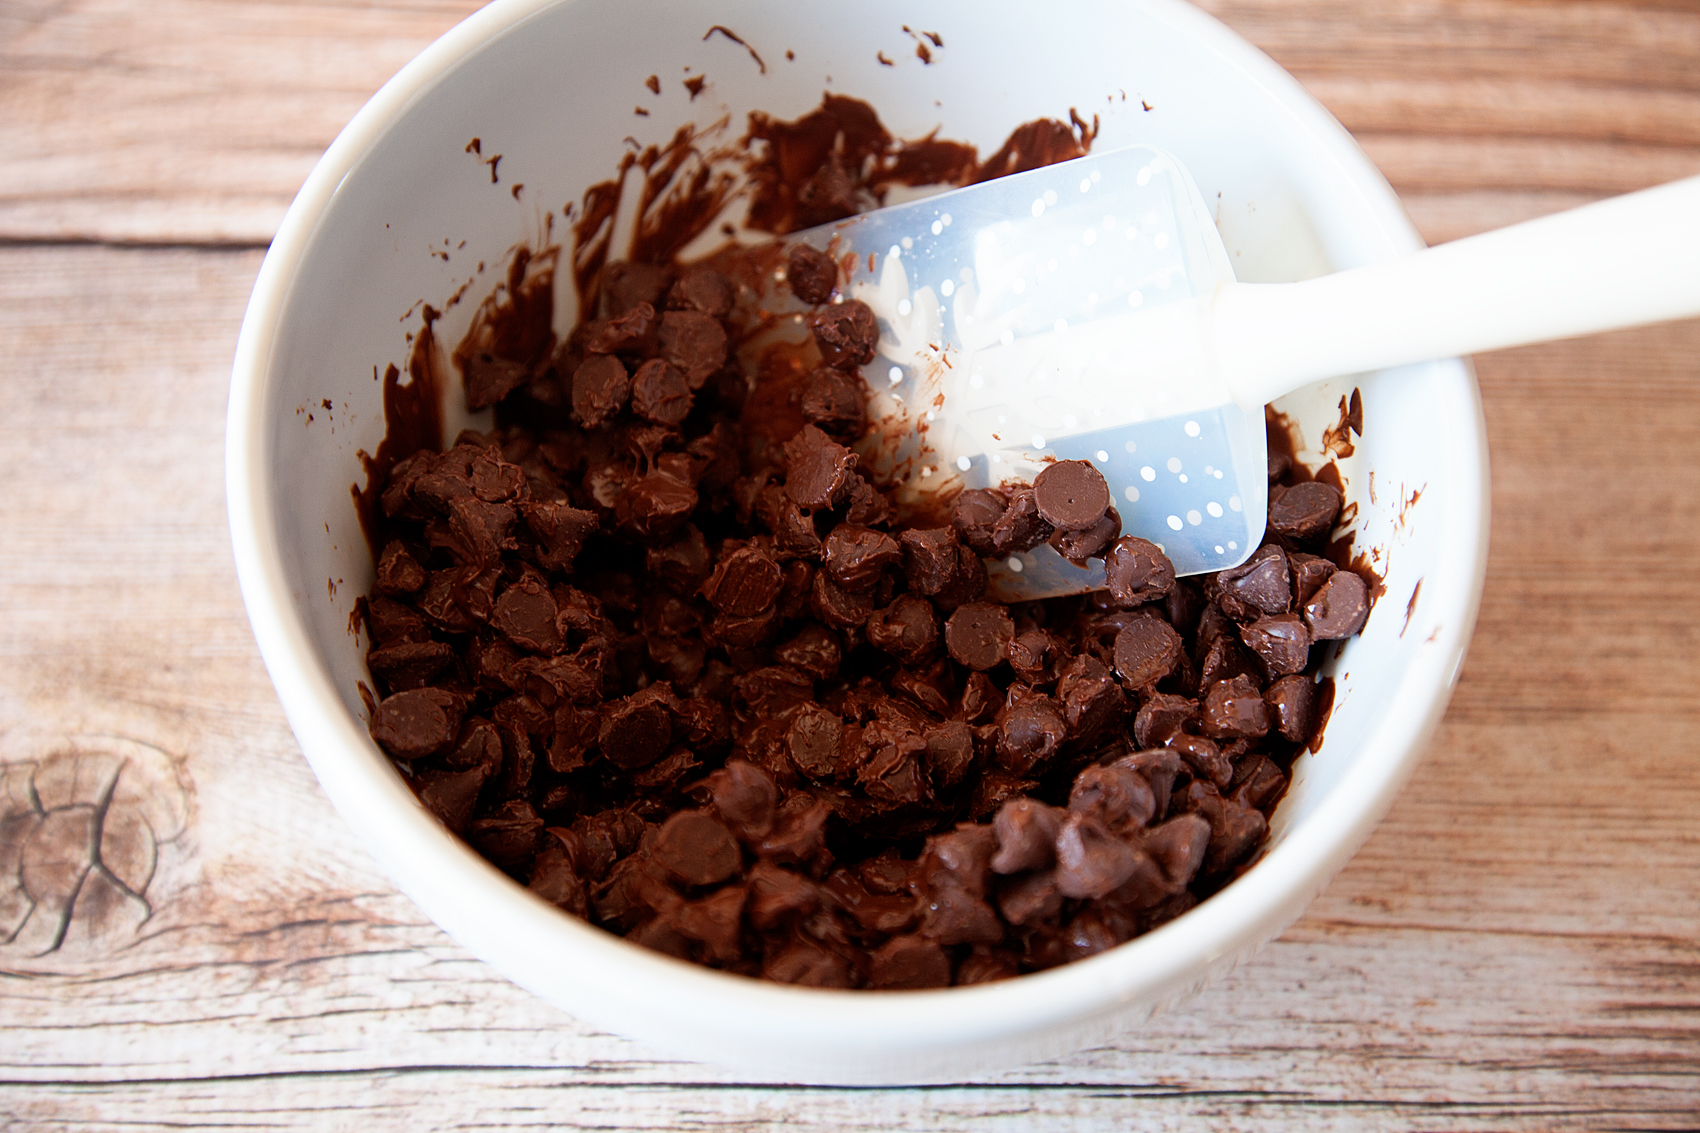
You’ll start with melting your chocolate chips. Using a microwave save bowl, add 2 1/2 cups of good quality chocolate chips. For this recipe I use semi-sweet, but you can use your favorite type of chocolate. Place them in the microwave for 30 seconds and then remove and stir.

Sinfully delightful Peppermint Chocolate Ganache Dip for your Holiday parties from WhipperBerry!

They will just start to melt, stir them around and place back in the microwave.

With chocolate you want to be careful, you never want to cook it for more than 30 seconds at a time. Chocolate can burn or scorch quickly, so you want to make sure to cook it slowly. You can always do this over a double boiler as well.

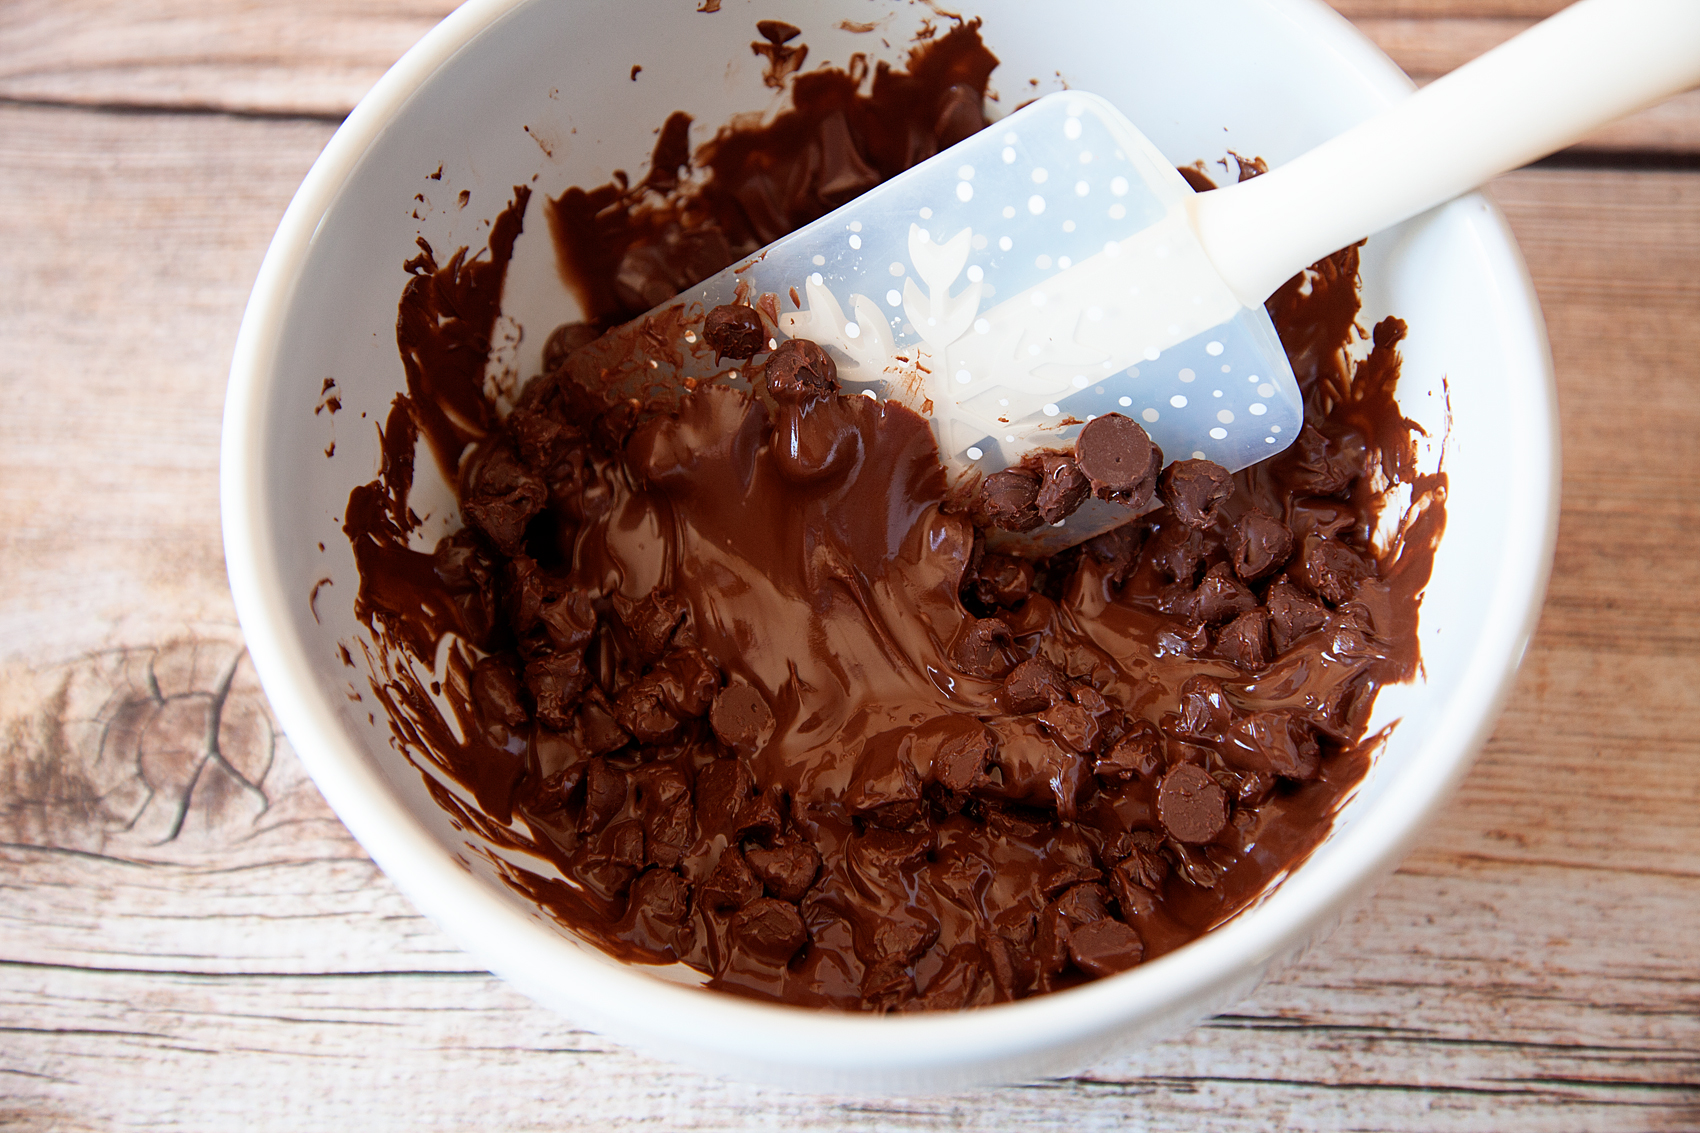
Place back into the microwave for another 30 seconds.

Sinfully delightful Peppermint Chocolate Ganache Dip for your Holiday parties from WhipperBerry!

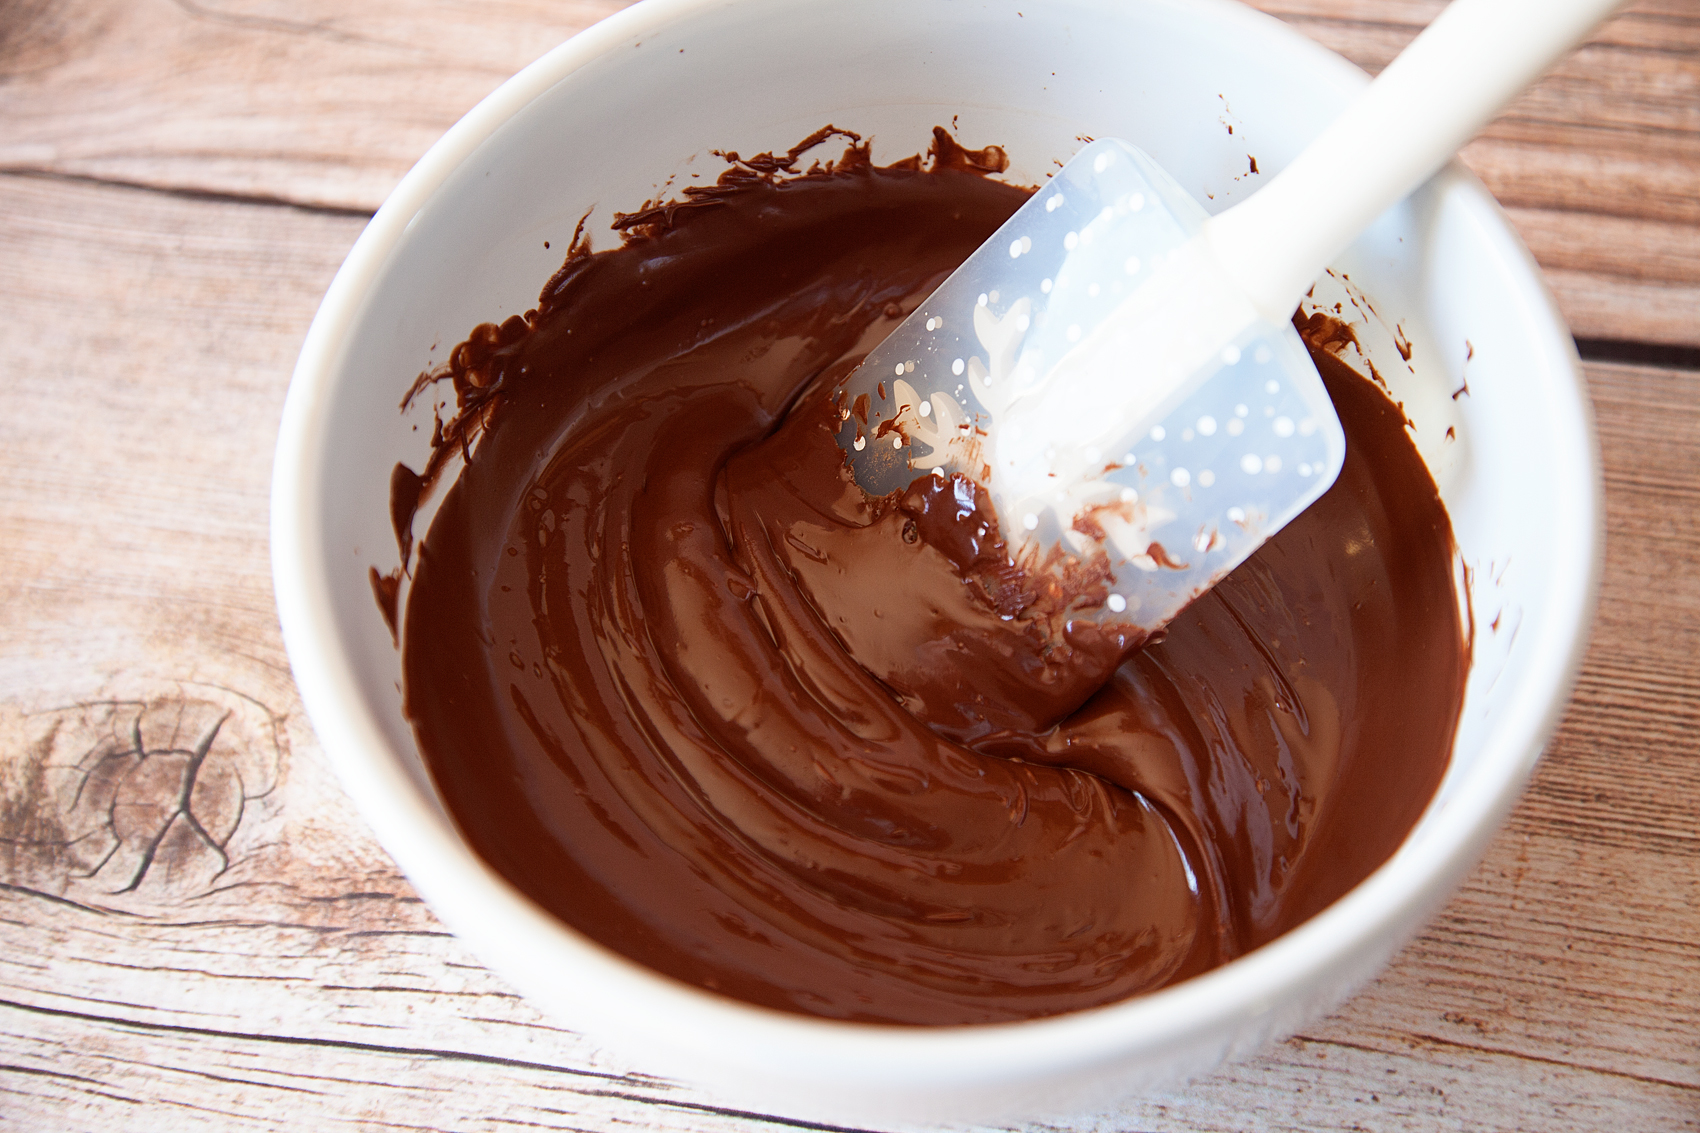
It’s starting to melt and become nice and smooth. If needed add it to the microwave for an additional 30 seconds. Remove and stir until nice and smooth.

Sinfully delightful Peppermint Chocolate Ganache Dip for your Holiday parties from WhipperBerry!

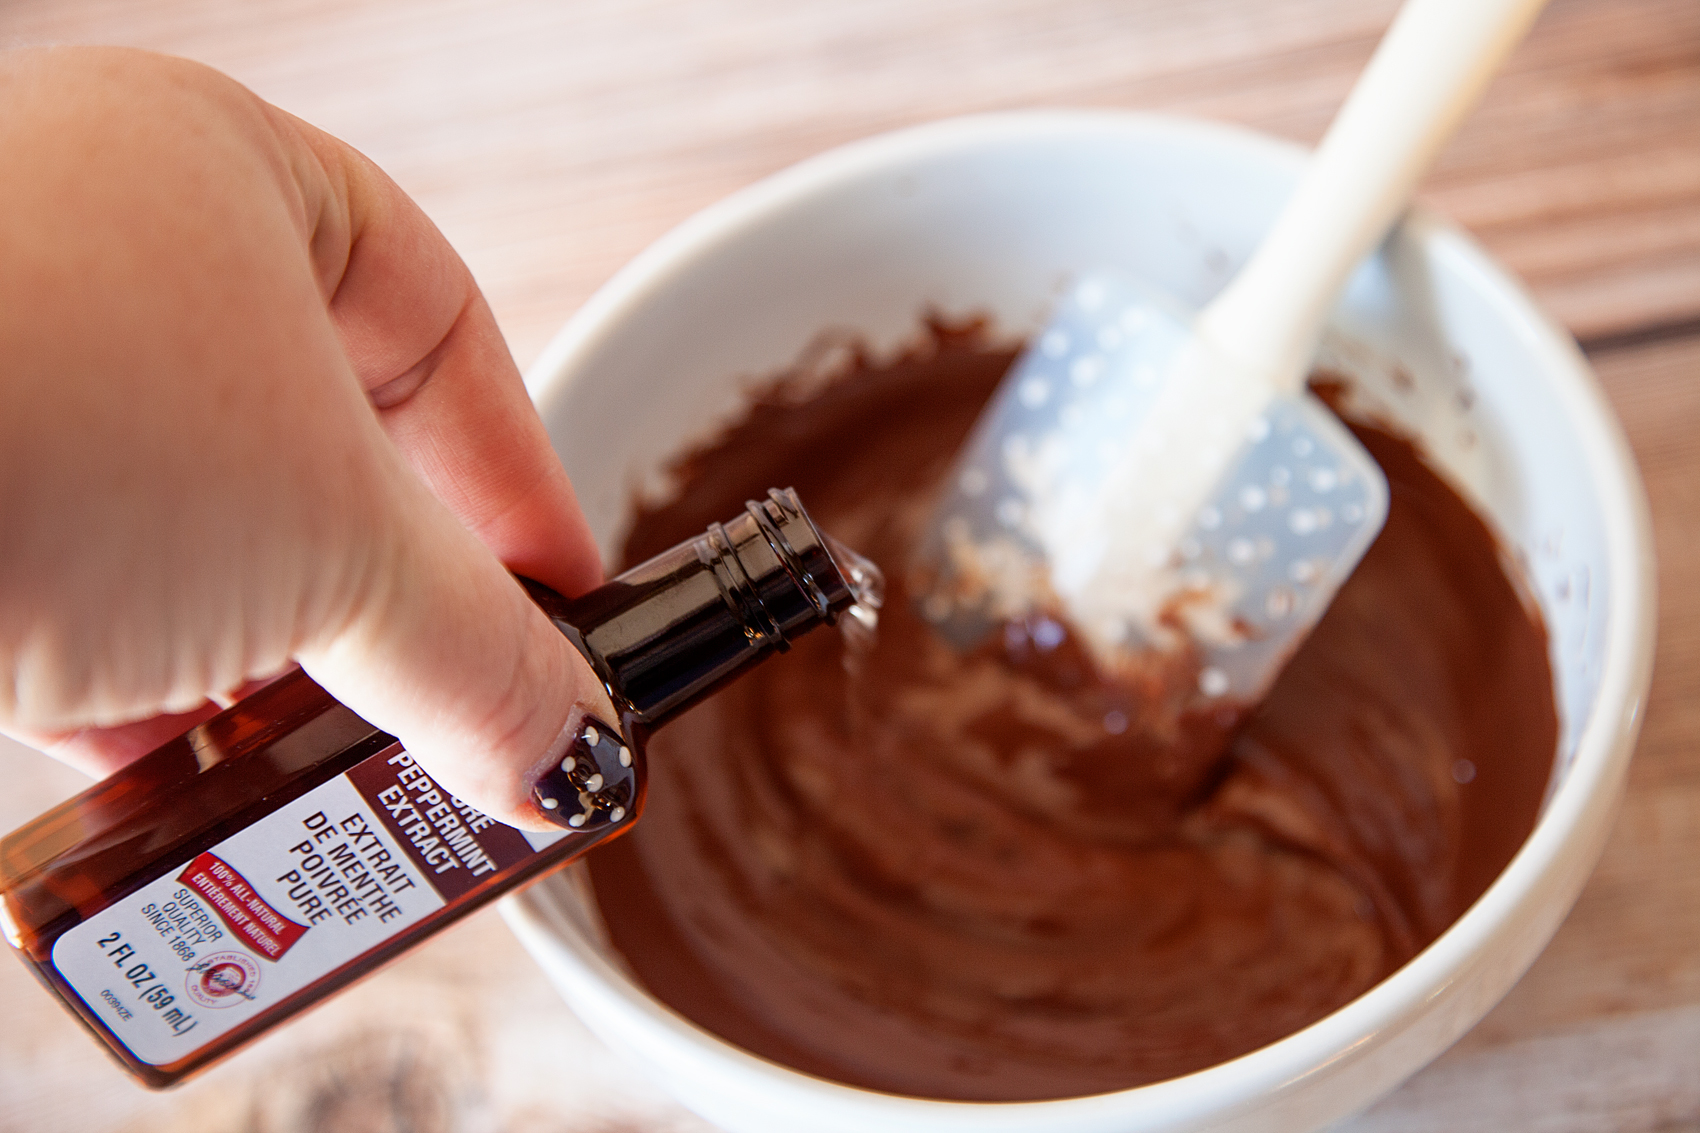
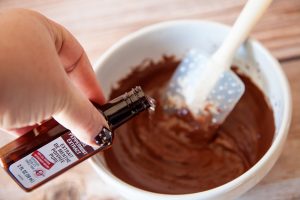
Here is where the fun begins. I want this peppermint chocolate dip to have a nice strong minty flavor so I add a 1/4 teaspoon of peppermint extract first.

Sinfully delightful Peppermint Chocolate Ganache Dip for your Holiday parties from WhipperBerry!

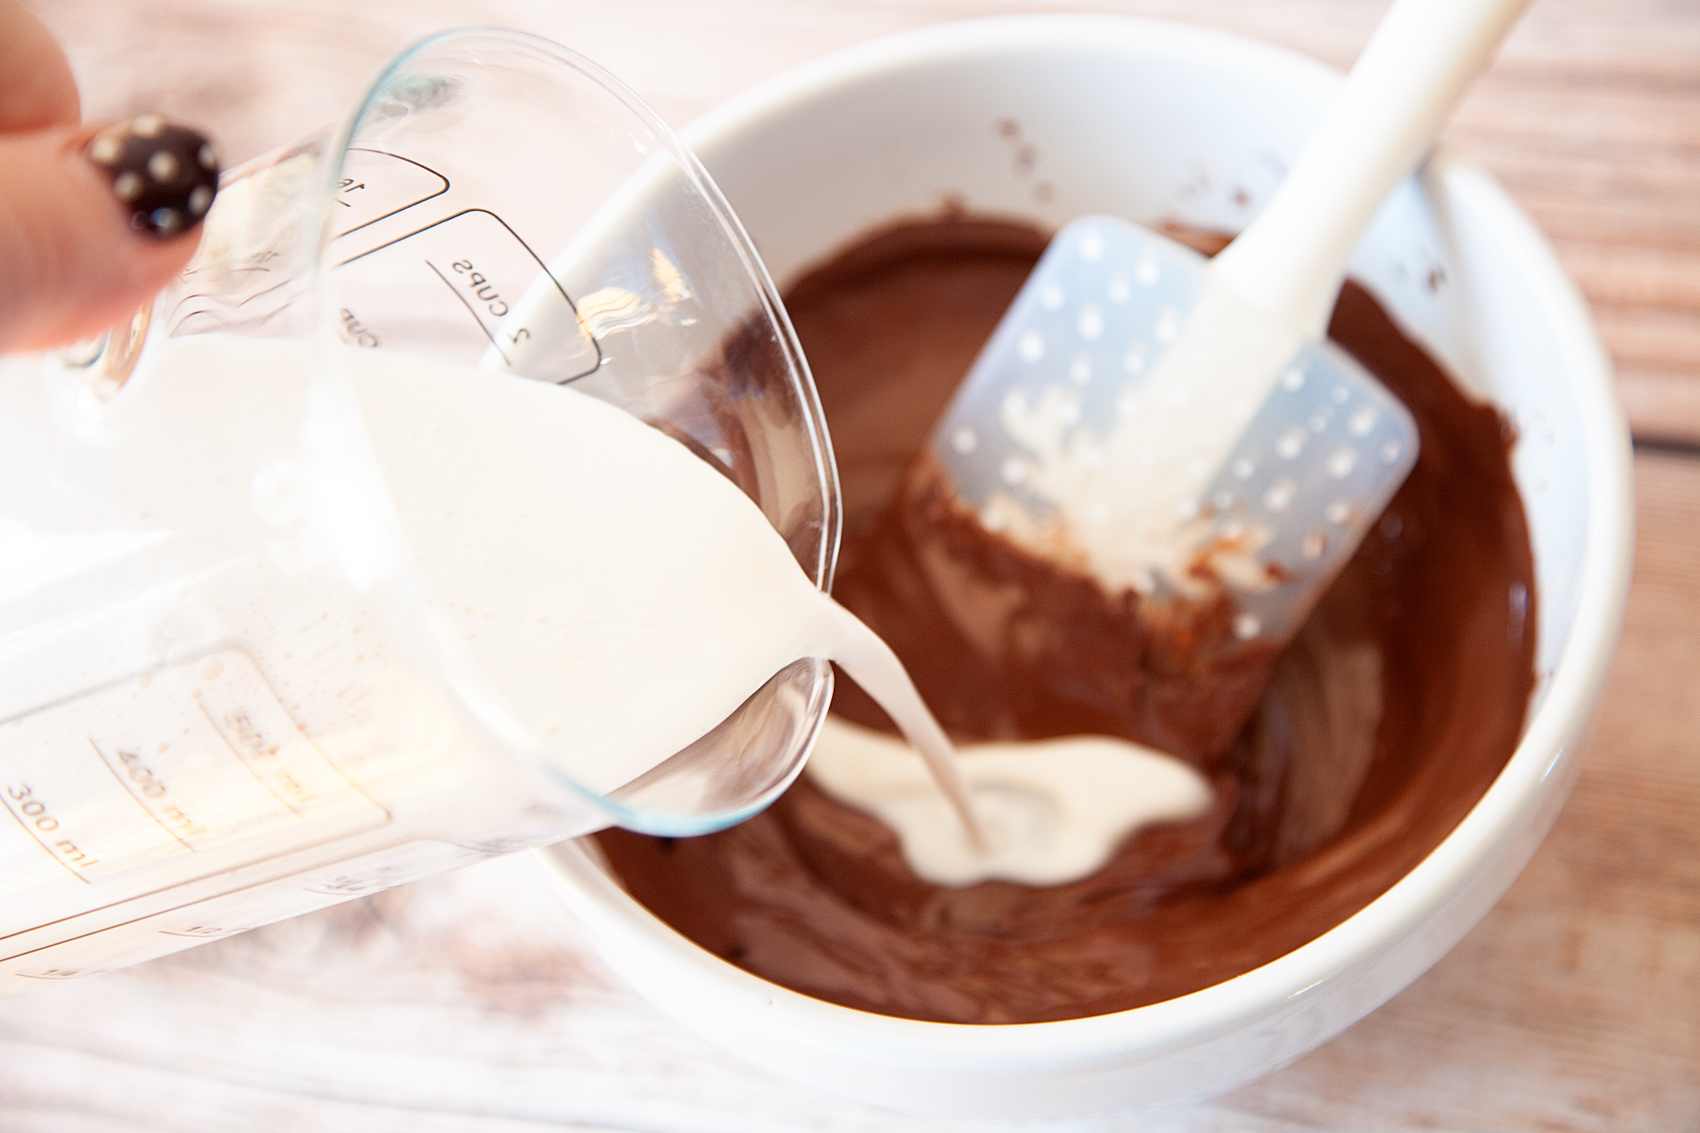
Then I add the International Delight Peppermint Mocha Creamer and sweetened condensed milk.

Sinfully delightful Peppermint Chocolate Ganache Dip for your Holiday parties from WhipperBerry!

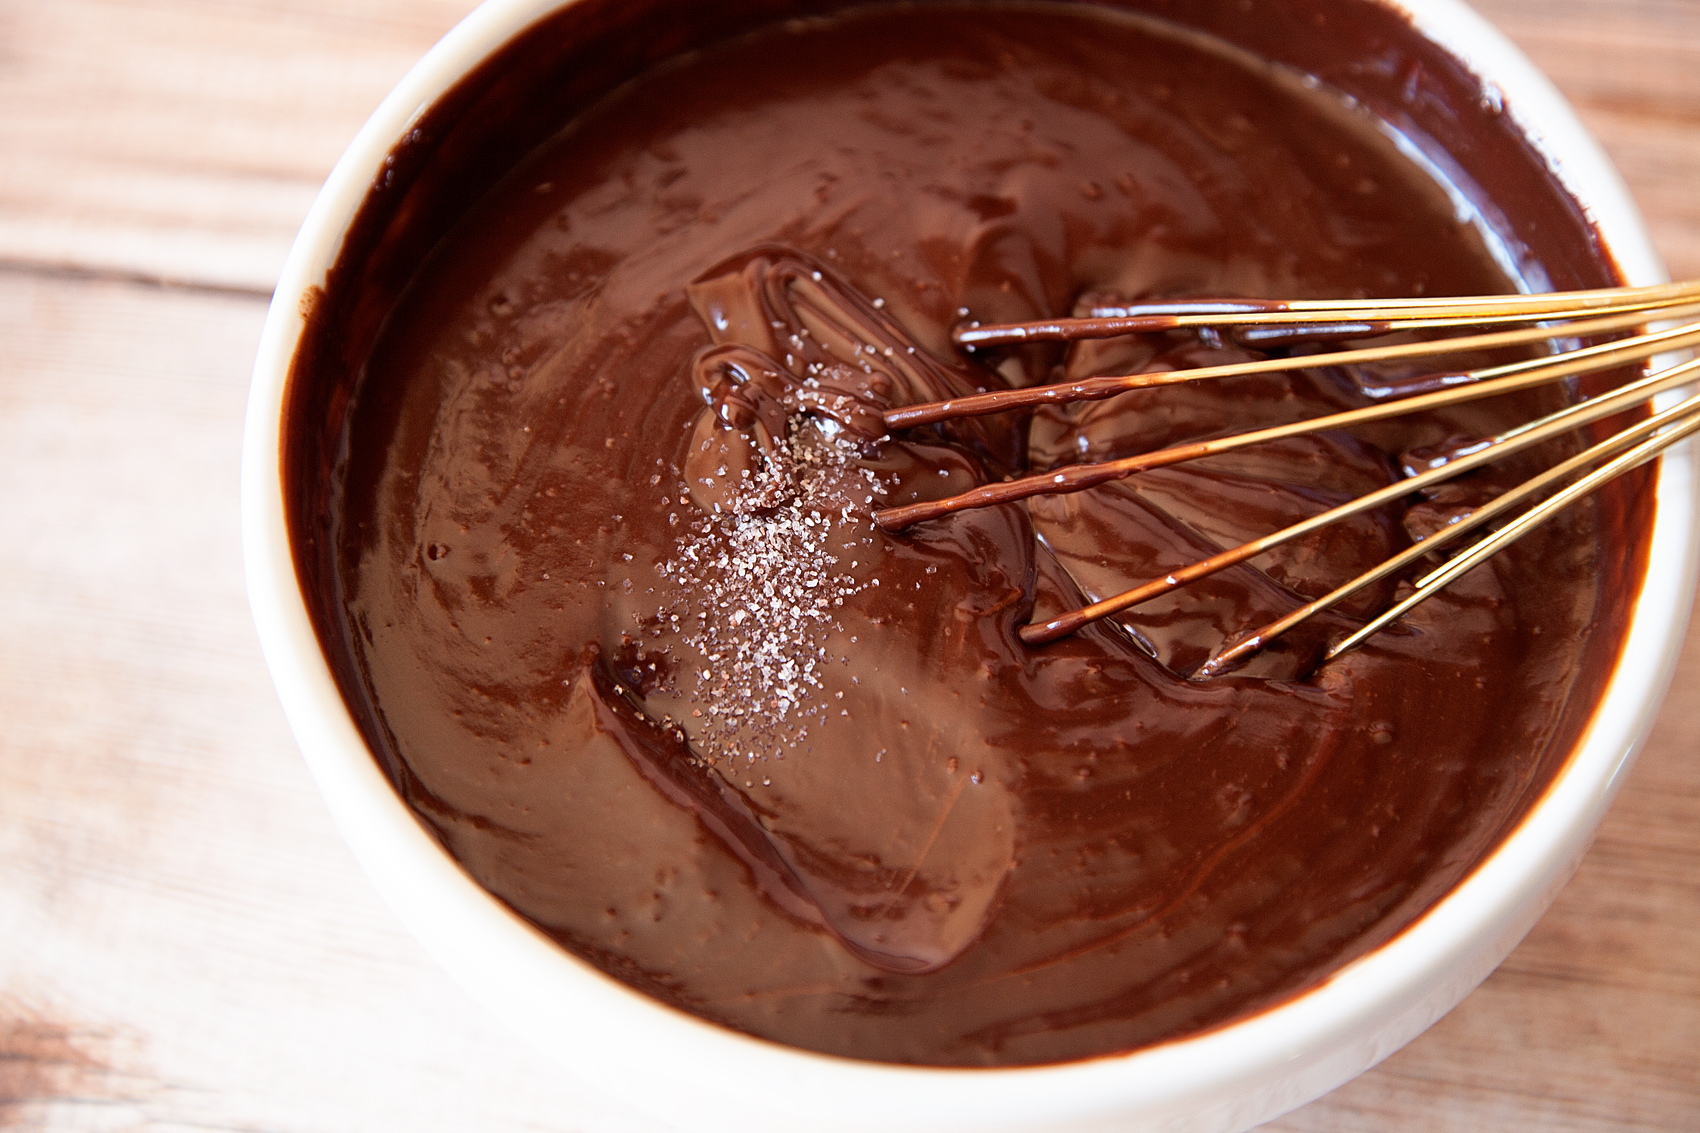
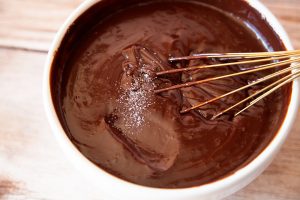
whisk that really well and then added a nice pinch of salt. Salt always makes even sweet things taste so much better. It helps to balance the sweet and make it delicious!

Sinfully delightful Peppermint Chocolate Ganache Dip for your Holiday parties from WhipperBerry!

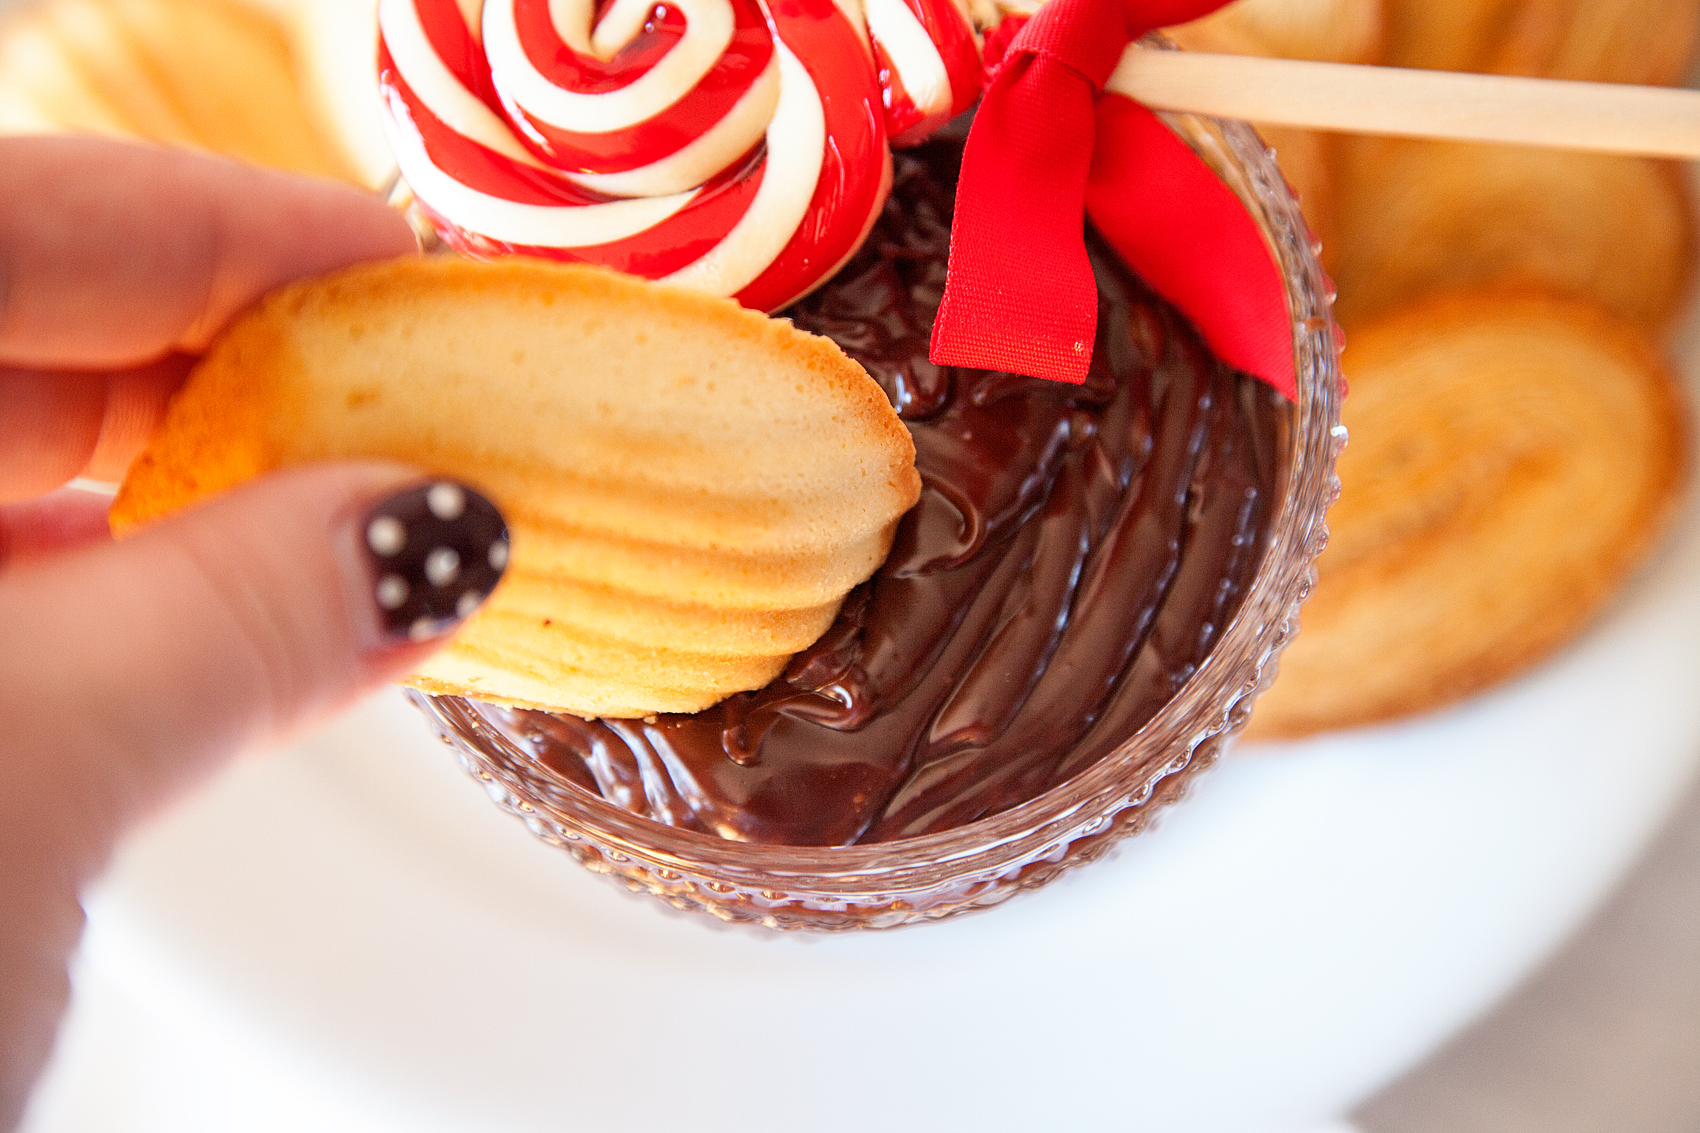
Whisk the salt in and you’re ready to go.  Add your dip to a nice serving dish and serve with your favorite treats.

Sinfully delightful Peppermint Chocolate Ganache Dip for your Holiday parties from WhipperBerry!

Sinfully delightful Peppermint Chocolate Ganache Dip for your Holiday parties from WhipperBerry!

Sinfully delightful Peppermint Chocolate Ganache Dip for your Holiday parties from WhipperBerry!

Ummm, Yum!!

Try dipping potato chips in the Peppermint Chocolate Ganache Dip… it’s crazy awesome with the salty & sweet element!

For more great recipe ideas follow International Delight on Facebook, Instagram, Twitter & Pinterest.

Print

Peppermint Chocolate Dip

Prep 3 mins

Cook 5 mins

Total 8 mins

Yield 20 people

With just a couple of ingredients turn your Holiday party table into the hit of the season!

Ingredients

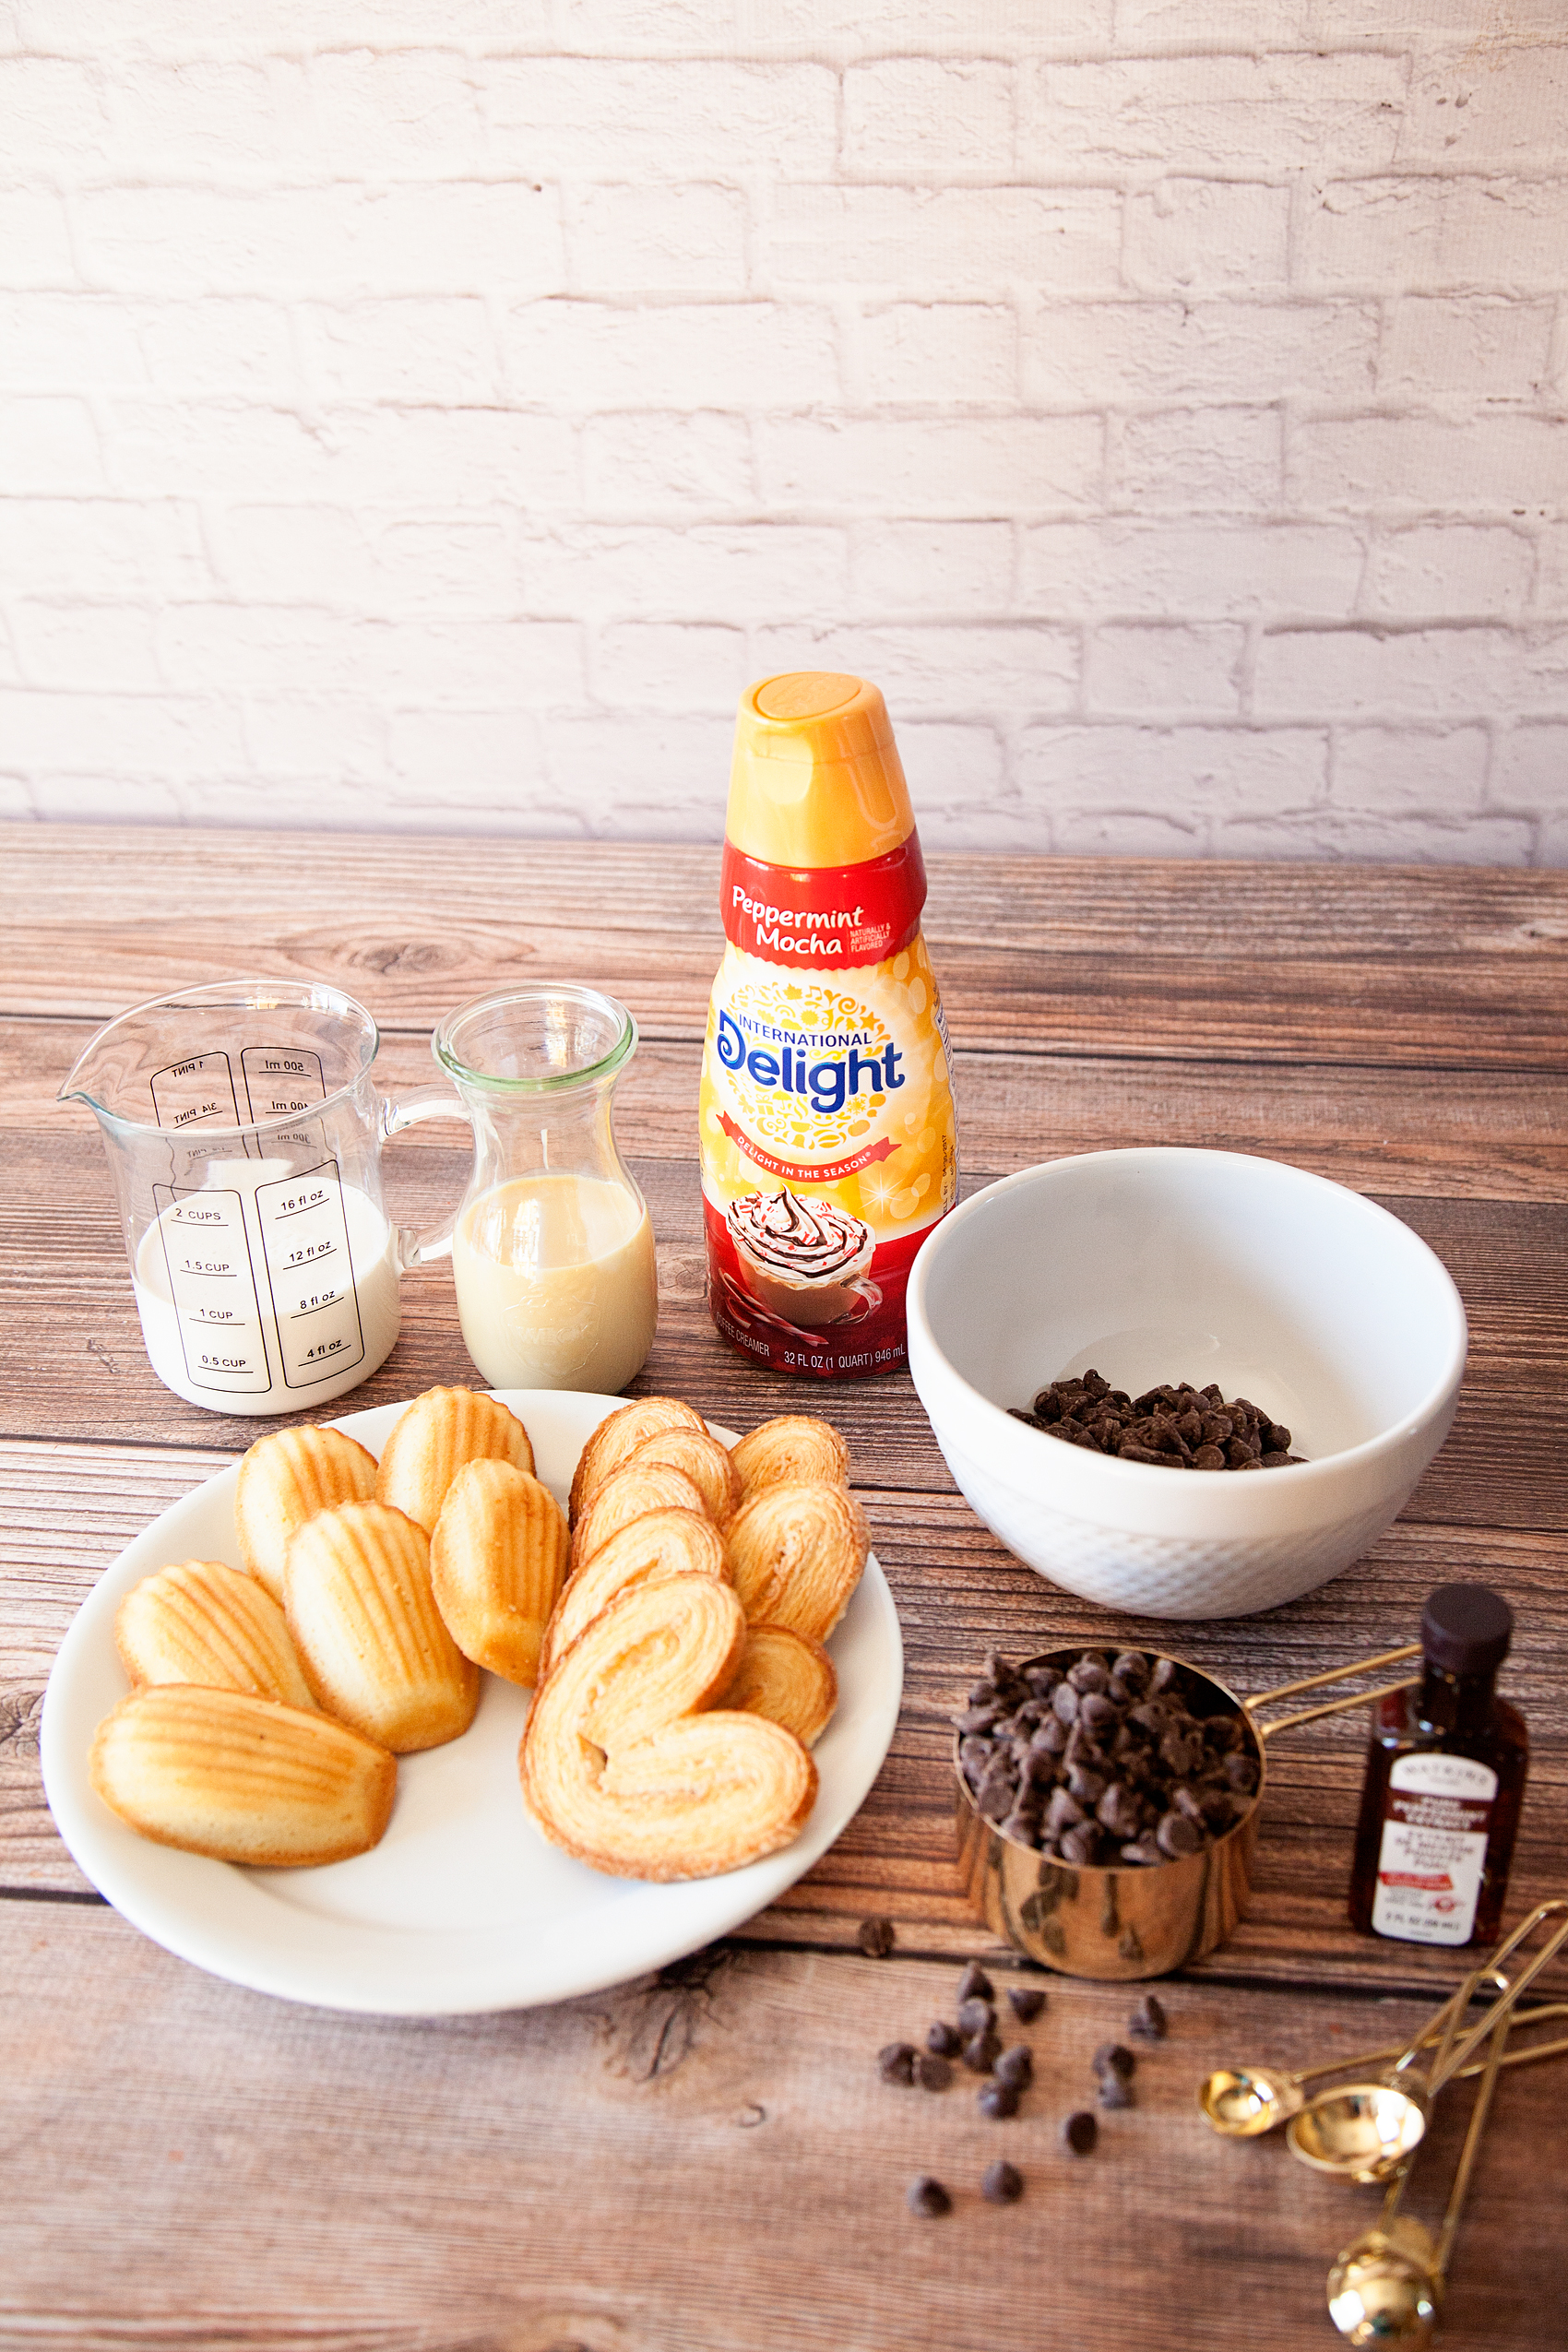
  • 3 cups semi-sweet chocolate chips
  • 1/4 teaspoon peppermint extract
  • 1/2 cup International Delight Peppermint Mocha Creamer
  • 1/4 cup sweetened condensed milk
  • 1/8 teaspoon salt (roughly a large pinch)

Garnish with crushed peppermint and serve with simple cookies, rice crispy treats or potato chips.

Instructions

peppermint-chocolate-ganache-dip-from-whipperberry-2

You'll start with melting your chocolate chips. Using a microwave save bowl add 2 1/2 cups of good quality chocolate chips. For this recipe I use semi-sweet, but you can use your favorite type of chocolate. Place them in the microwave for 30 seconds and then remove and stir.

peppermint-chocolate-ganache-dip-from-whipperberry-3

They will just start to melt, stir them around and place back in the microwave.

With chocolate you want to be careful, you never want to cook it for more than 30 seconds at a time. Chocolate can burn or scorch quickly, so you want to make sure to cook it slowly. You can always do this over a double boiler as well.

Place back into the microwave for another 30 seconds.

peppermint-chocolate-ganache-dip-from-whipperberry-4

It's starting to melt and become nice and smooth. If needed add it to the microwave for an additional 30 seconds. Remove and stir until nice and smooth.

peppermint-chocolate-ganache-dip-from-whipperberry-5

Here is where the fun begins. I want this peppermint chocolate dip to have a nice strong minty flavor so I add a 1/4 teaspoon of peppermint extract first.

peppermint-chocolate-ganache-dip-from-whipperberry-6

Then I add the International Delight Peppermint Mocha Creamer and sweetened condensed milk.

peppermint-chocolate-ganache-dip-from-whipperberry-7

I whisked that really well and then added a nice pinch of salt. Salt always makes even sweet things taste so much better. It helps to balance the sweet and make it so much better!

peppermint-chocolate-ganache-dip-from-whipperberry-10

Whisk the salt in and you're ready to go.  Add your dip to a nice serving dish and serve with your favorite treats.

peppermint-chocolate-ganache-dip-from-whipperberry-13

Notes

If your dip is too thick, add a little more of the creamer a little bit at a time until you get your desired consistency. If it's too thin add a few more chocolate chips.

Courses Dessert, Appetizer

This is a sponsored conversation written by me on behalf of International Delight. The opinions and text are all mine.

Tips & Tricks to Finding Great Cookware + Bonus Shakshuka Recipe

17 · Dec 13, 2016 · Leave a Comment

shakshuka-recipe-video-from-whipperberry-15

Over the years, cooking has become quite a passion for me and I’ve become a bit of an accidental expert on cookware in the process. Nothing feels better than working on creating a meal for your family and then having them melt after taking their first bite. I have so many memories of my Mom in the kitchen working on creating all kinds of tasty combinations for the family. She is a fearless cook and I’ve inherited her spunky way of cooking. No recipe is too daunting & no ingredient is too hard to find (thanks to the internet.) Frankly, most of the time we fly without wires and make up the recipe as we go. We love to experiment and play around with tasty ingredients and come up with something new and exciting.

The thing is, a cook is only as good as their cookware! Over the years, I have found some great tips for finding great cookware. Nothing is going to turn out right when using pots and pans that aren’t truly meant to stand up to the rigors of the kitchen. I remember my first set of cookware and how light it was. I could barely stir anything without holding on for dear life, in fear that the pot was going to go flying off the stove. I would constantly burn dishes because my cookware was about at sturdy as a foil pan. It didn’t conduct heat well and all around it was horrible. After doing some research and going through all kinds of trial and error, I have found the key to finding a good pot, pan, skillet or bakeware. When it comes to cookware here are a few things I try to keep in mind.

  • Don’t be stingy! You don’t need to buy the most expensive pot or pan but, you do get what you pay for. Cookware is an investment. You want these items to last for years and not have to replace them time after time.
  • A good piece of cookware is going to have a nice heavy feel in your hand. You want something that has a nice solid base that is made out of a metal that conducts heat well. Copper is one of the best.
  • Don’t fall for fads. There is a reason that the classics are so good.
  • What is the clean-up like? Are you going to have to spend all kinds of time hand washing your cookware or, can you stick it in the dishwasher? Not all cookware is created equal in this category.
  • If your budget is small, go for a couple of the basics that can get you by as you add to your collection. Here are a few that I would suggest.
    • A set of French skillets 
    • 3 1/2 Quart Saucepan
  • Once you have those few items, then I would invest in,
    • 3 Quart Saute Pan
    • 8 Quart Stock Pot
    • 10 1/2 inch Stainless Steel French Skillet
  • Good bakeware in the kitchen is essential as well. Again, make sure they have a nice heavy feel to them. You don’t want something flimsy standing in the way of great baking. You can start small here as well. Here are a couple of my suggestions. Once you have those you can build up your collection.
    • 12 Cup non-stick Muffin Pan
    • Cookie Sheet
    • Cake Pan

The key to finding Great Cookware

I have used many of the cookware & bakeware items that I’ve listed and I LOVE them!! Like truly, madly, deeply love them.  They come from a fabulous company called Anolon. Anolon makes some of the best cookware for the home and social chef. Whether you’re an experienced home cook or just getting started, these pots and pans are a true gem in your kitchen. They have that nice heavy feel to them, you can tell that with their solid base they are going to cook evenly. I especially love their Anolon Nouvelle Copper line. All of the pots and pans have copper layered in the base of the pans which promotes fabulous cooking. Remember, copper is one of the best metals to cook with.

They are hosting a great sweepstakes! Go check out their Facebook page to enter the Holiday Hosting Sweepstakes!

You can also find all kinds of great info, recipes, and deals on their Facebook, Twitter, Instagram, Pinterest, Youtube & Tumblr.

One of my favorite pots is their Anolon Nouvelle Copper 3.5-QUART COVERED STRAINING SAUCEPAN…

shakshuka-recipe-video-from-whipperberry-6

It’s perfect for all kinds of sauces, small batch soups and it’s lovely to use when needing to drain your pot. Look at that fabulous lid and the handy pour spout. This is truly one of my go-to pots!

Another favorite is my Anolon Advanced Bakeware 12-CUP COVERED MUFFIN PAN…

shakshuka-recipe-video-from-whipperberry-4

It’s nice and heavy to promote even baking and it has silicone handles that provide great grip when removing your item from the oven or carrying your muffins or cupcakes to an event. It even has a nice cover for when you are traveling and it tucks nicely under your pan for storage at your event. No more lost lids!

shakshuka-recipe-video-from-whipperberry-5

Another all-time favorite that I’ve used in my kitchen a bunch is the Anolon Nouvelle Copper 3-QUART COVERED SAUTE PAN WITH HELPER HANDLE. I make all kinds of stuff in this favorite go-to. I know that I can be fearless with any of these pots and pans because they are going to give me the best results. Here is my Sauce Pan in action as I make Shakshuka, a lovely Israeli egg dish perfect for breakfast, lunch or dinner.

Shakshuka Recipe from Heather Thoming on Vimeo.

shakshuka-recipe-video-from-whipperberry-12

This Anolon Nouvelle Copper Nonstick 3-Quart Covered Saute is great for the stove top or in the oven, so it’s perfect for a dish like Shakshuka. It’s truly non-stick but can give a good sear thanks to their premium nonstick technology. You can even use metal utensils on the non-stick surface and not destroy the pan. It’s also oven safe up to 500˚.

So, take my advice. Invest in a good set of both cookware and bakeware and your time in the kitchen will be so much more enjoyable. No more frustration because you don’t have the right tools for the job. You might even discover a passion for the kitchen that you never thought you would have!

Shakshuka
 
Save Print
This simple Israeli dish served with bread will soon become a favorite in your home. It's easy to prepare for any time of the day and packs all kinds of amazing flavor!
Author: Heather // WhipperBerry
Recipe type: Main Dish
Cuisine: Middle Eastern
Serves: 3-4 servings
Ingredients
  • 2-3 teaspoons olive oil
  • ½ of a large white or yellow onion
  • 1 cup of diced sweet peppers
  • salt & pepper
  • 2 tablespoons cumin
  • ½ teaspoon red pepper flakes
  • 2 tablespoons tomato paste
  • 1 large can of plum tomatoes whole, diced or crushed
  • 5 eggs
  • feta cheese
Instructions
  1. In a medium to large oven safe sauté pan over medium-high heat, add your olive oil and let it heat until it starts to shimmer.
  2. Add your diced onion & peppers and let cook for 2-3 minutes stirring occasionally.
  3. Turn down the heat to medium. Add the cumin, red pepper flakes, salt, pepper & tomato paste. Cook for another 4-5 minutes stirring occasionally.
  4. Add the tomatoes. If they are whole tomatoes crush them with the back of your spoon or with a potato masher. Let simmer for 8-10 minutes. Again, stirring occasionally.
  5. Remove pan from the heat and add 5-6 eggs. Place in a 375˚ oven for 7-10 minutes or until the eggs are set to your desired taste. Traditionally they are pretty soft, but it's up to you.
  6. Top with feta and serve with a nice loaf of bread or pita.
3.4.3177

This is a sponsored conversation written by me on behalf of Anolon. The opinions and text are all mine.

  • « Go to Previous Page
  • Page 1
  • Interim pages omitted …
  • Page 11
  • Page 12
  • Page 13
  • Page 14
  • Page 15
  • Interim pages omitted …
  • Page 67
  • Go to Next Page »

Primary Sidebar

Heather from Whipperberry
Hello... my name is Heather and I'm the creator of WhipperBerry a creative lifestyle blog packed full of great recipes and creative ideas for your home and family. I find I am happiest when I'm living a creative life and I love to share what I've been up to along the way... Come explore, my hope is that you'll leave inspired!

Footer

  • Privacy Policy
  • Crafts
  • Food
  • Gifts
  • Holidays
  • Home
  • Mom Life
  • Recipes
  • Travel

Copyright © 2026 · Seasoned Pro