• Skip to primary navigation
  • Skip to main content
  • Skip to primary sidebar
  • Skip to footer

Whipperberry

WhipperBerry • Your Home For Creative Inspiration

  • Home
  • Recipes
    • Starters
    • Easy Weeknight Dinners
    • Main Dish
    • Salads
    • Side Dish
    • Soups & Stews
    • Desserts
    • Breakfast
    • Miscellaneous
  • Tutorials
    • Creative Crafts
    • DIY Decor
    • Fabric Crafts
    • Food How-To
    • Jewlery
    • Paint Projects
    • Paper Art
    • Party Styling
    • Photography and Graphic Design
    • Silhouette
  • Holidays
    • Easter
    • Mother’s Day
    • Father’s Day
    • 4th of July
    • Halloween
    • Thanksgiving
    • Christmas
    • Valentine’s Day
  • Gift Ideas
    • Gifts For Everyone
    • Gifts for Dad
    • Mother’s day
    • For The Girls
    • For The Kids
    • Teacher Gift Ideas
    • Christmas
  • Printables
    • Holiday
    • Gift Idea
    • LDS Primary
  • Travel
  • About
    • Terms
  • Contact
  • Nav Social Menu

    • Facebook
    • Instagram
    • Pinterest
    • RSS
    • Twitter

Recipes

Pomegranate Chia Pudding Recipe // DAIRY-FREE

4 · Mar 8, 2016 ·

+ This Pomegranate Chia Pudding Recipe is brought to you by the lovely folks at SILK +

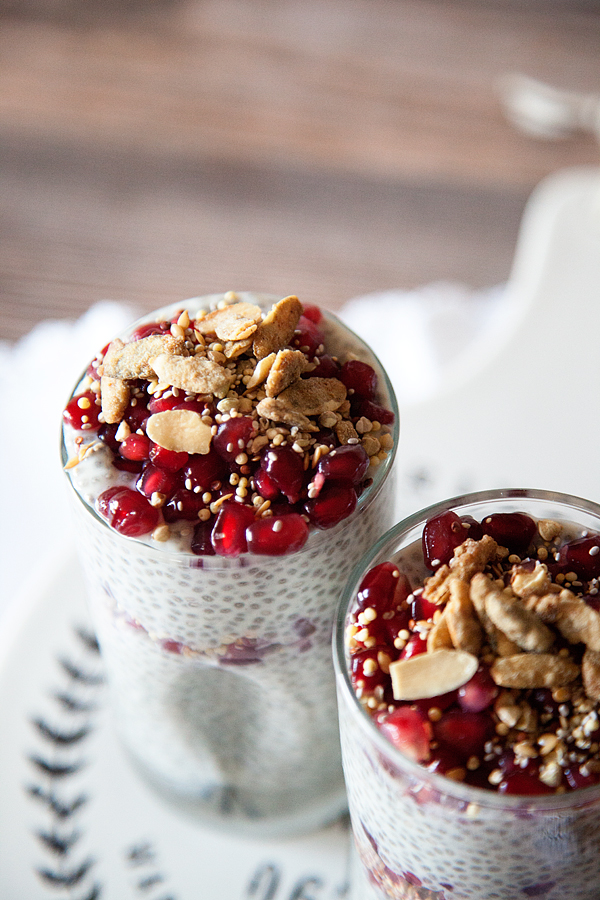
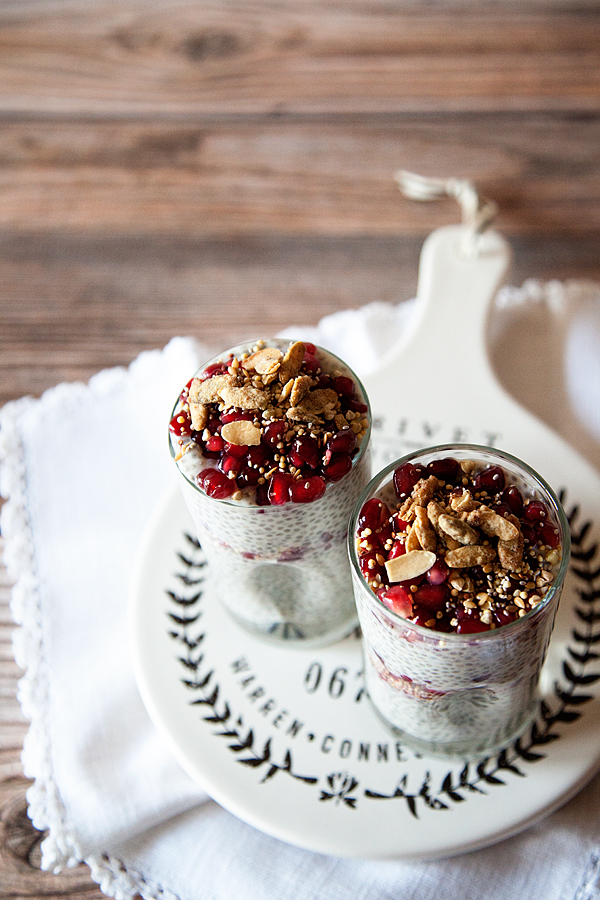
diary free pomegranate chia pudding parfait recipe from WhipperBerry // Breakfast Super Food!

Have you discovered a great Chia Pudding Recipe yet?

It is seriously one of our family’s favorite breakfasts these days. The crazy thing is, I thought for sure my kiddos would want nothing to do with those “alien” chia seeds (they’re kind of picky) but they love this stuff!

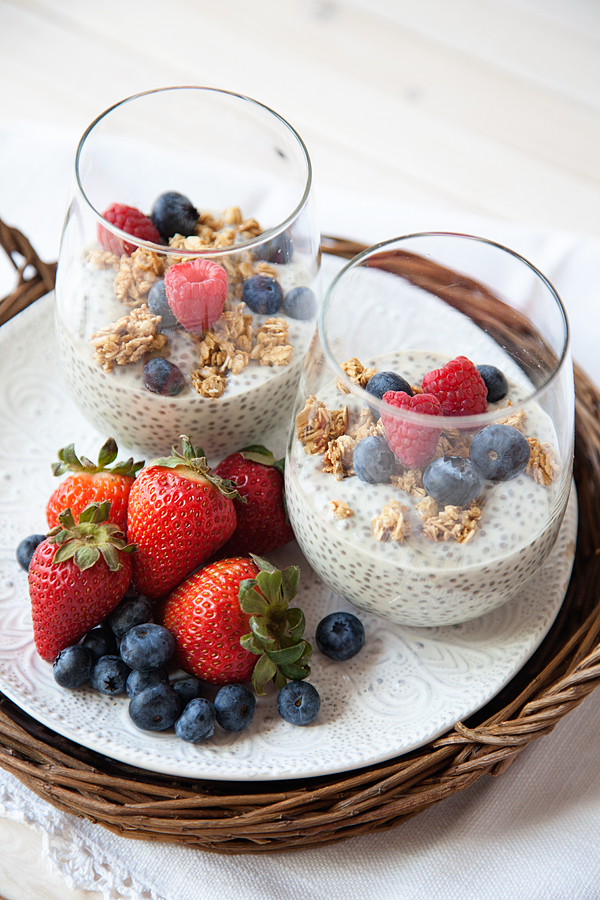
The fun thing is that the Chia Pudding is like a blank canvas that you can top with all kinds of fun toppers. We’ve tried a number of concoctions since we first discovered this treat. We started with a standard Chia Pudding topped with berries and granola with drizzle of honey… super yummy!

Chia Pudding recipe from WhipperBerry // Breakfast Super Food!

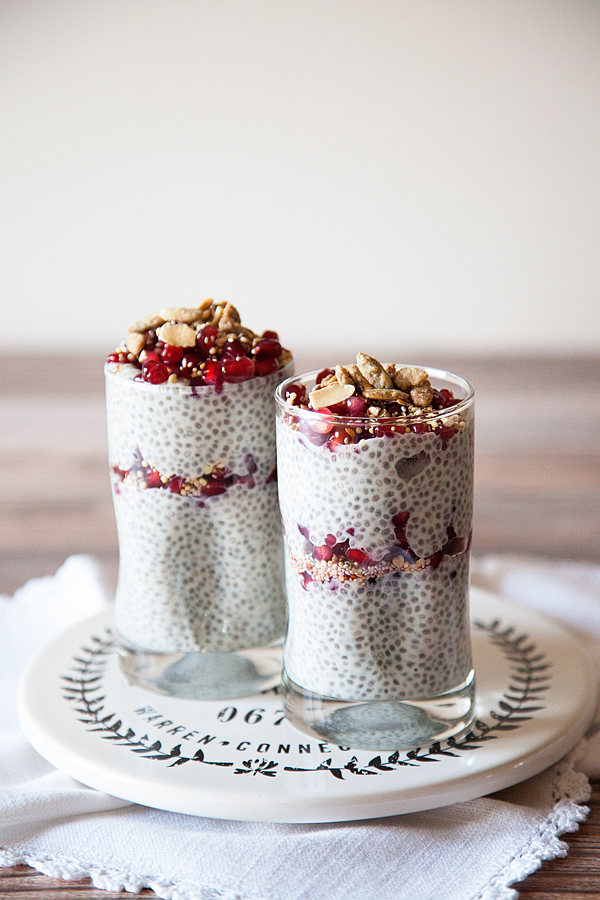
Now we’ve stepped it up a notch and we are making Chia Pudding layered with pomegranate seeds, an ancient grains mixture and pumpkin seeds… simply LOVELY!

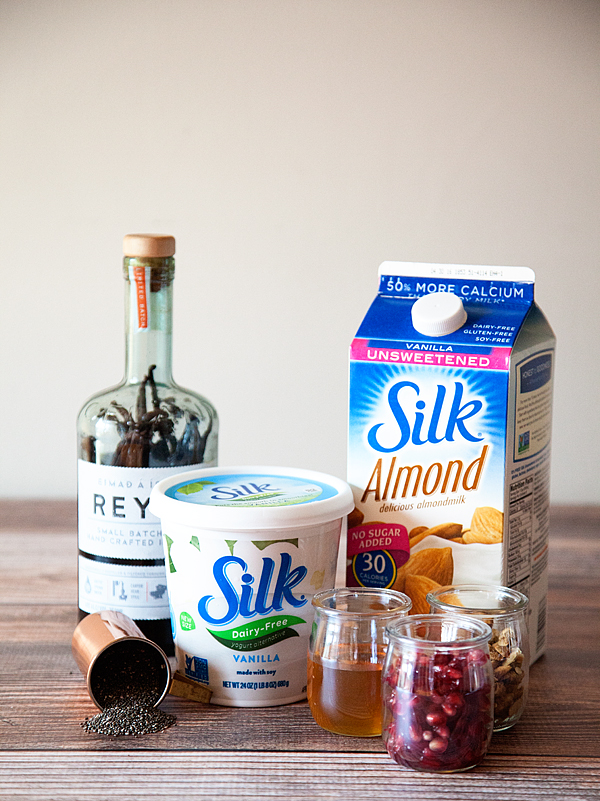
The beauty of Chia Pudding is, typically it is made with dairy, milk & regular yogurt which is fabulous, BUT… Thanks to the folks at SILK, you can also make a dairy-free version with any of the tasty Silk Milks (Soy, Almond, Cashew, Coconut, Nutshell + more) AND their scrumptious Vanilla Dairy-Free Yogurt Alternative. For this recipe, I’ve used the Silk Unsweetened Almond Milk that is only 30 calories per serving (score!) AND Silk Vanilla Dairy-Free Yogurt Alternative. You can now get the Silk Dairy-Free Yogurt Alternative in a large size which is perfect for this recipe. Click HERE for more info on all of the Silk Products.

Pomegranate Chia Pudding Recipe Ingredients

Dairy-Free Pomegranate Chia Pudding Recipe from WhipperBerry // This is a dairy free option, but it works well with dairy as well!

Pair all of that with some Chia Seeds and you’re golden. If you haven’t heard, Chia Seeds are one of natures super foods. They are low in calories but pack a good health punch with tons of antioxidants, Omega-3 fatty acids, vitamins, protein, fiber and more. You can check out their health benefits HERE. That combined with the plant based, non-GMO, low fat Silk products you are starting your day off right!!

Dairy-Free Pomegranate Chia Pudding Recipe from WhipperBerry // This is a dairy free option, but it works well with dairy as well!

The other AWSOME thing is… Chia Pudding is sooooo easy to make! Here’s a quick little video to show you how.

Chia Pudding Recipe Video

Silk Dairy-Free Yogurt Chia Pudding from Heather Thoming on Vimeo.
See, isn’t that simple. Now all you have to do is let it sit over night so the magic can happen.
The next morning, all you have to do is top with your favorite toppings. Today we are going to layer our pudding with pomegranate seeds, an ancient grain mixture that I just love with a few pumpkin seeds. You can pick what ever goodie you want!
So think about that… You’re adding even more nutrition with your toppings as well. This is a power house house breakfast in the super food category. The funny thing is that it really is a treat. We tend to make if for dessert too, it really does feel that decadent. 

Pomegranate Chia Pudding Recipe

Pomegranate Ancient Grain Chia Pudding Recipe // DAIRY-FREE
 
Save Print
Prep time
5 mins
Cook time
24 hours
Total time
24 hours 5 mins
 
Author: Heather // WhipperBerry
Cuisine: Breakfast or Dessert
Serves: 3-4 servings
Ingredients
  • 2 cup Silk® Unsweetened Almond Milk
  • 2 cup Silk® Dairy-Free Yogurt Alternative - Any flavor you like, I used vanilla
  • 1 tsp vanilla extract
  • 1 tablespoon honey
  • ½ cup chia seeds
  • a pinch of salt
  • Pomegranate seeds
  • Ancient Grains or granola
  • pumpkin seeds
Instructions
  1. In a small mixing bowl or jar, add Silk® Almond Milk, Silk® Dairy-Free Yogurt Alternative, vanilla, honey, chia seeds and salt. Mix well.
  2. Cover pudding and place in the refrigerator for at least 4 hours or overnight.
  3. Layer with pomegranate seeds, ancient grains, pumpkin seeds or granola.
3.4.3177

Dairy-Free Pomegranate Chia Pudding Recipe from WhipperBerry // This is a dairy free option, but it works well with dairy as well!

This is a sponsored conversation written by me on behalf of Silk. The opinions and text are all mine.

Learning to RELAX

0 · Feb 2, 2016 ·

relaxing-with-International-Delights-and-WhipperBerry-5

 I don’t know about you, but I have forgotten how to just sit back and RELAX.

Especially during the mad rush that is September thru December.

It seems like school starts and the race is on through the holidays. Toss in two businesses in my case and a girl can get a little worn out.

I found myself this year, the day after Christmas, with a tank on EMPTY.

I had been running 10-12 hours straight every single day with a to-do list a mile long and I felt rotten!

My family was suffering, I was suffering and I knew that something had to give. I needed some mental clarity, I needed to find balance.

For years, I have felt that if I just worked hard enough, all of my dreams would come true. I would have the perfect home, the perfect family, the perfect lifestyle that I had been dreaming of my whole life. And truly yes, to achieve great success you do need to work hard BUT what I had forgotten was…

No matter what kind of success you achieve, if you have forgotten how to slow down and have some down time, you will NEVER be able to appreciate what you have accomplished. You will miss those tender years when your kiddos are young, you will miss that precious time with your spouse that keeps that fragile connection between the two of you strong, you will miss those simple moments of just being present. You know those times when you are physically THERE, but your mind is running through 50 different to-do items, 50 more ideas to take your work to the next level. You are THERE, but you aren’t PRESENT.

For me, this all came to a head the day after Christmas. I had worked my tail-off for months and then felt pressure to create a magical holiday for my family and I was plum tuckered out…

Funny enough I was really struggling mentally and my first thought was, I’m going to run to Home Goods and just wander to see if I can calm my mind. Isn’t it crazy how we women think some times… Let’s run shopping to solve all of my problems. The crazy thing is, this simple shopping trip helped me find a little clarity.

I found this mug as I was wondering through the store…

relaxing-with-International-Delights-and-WhipperBerry-4

And crazy as it sounds, it was the AH, HA moment I truly needed. I realized I had forgotten how to RELAX.

I had forgotten how to calm my mind and take some simple time to myself. Time to relax and recharge. Time to be in the moment with my kids and NOT think about the 50 things on my to-do list. Time to just be with my sweet husband where I focus on HIM and not constantly think about what I should be doing in the back of my mind.

It all started with this mug AND I taught myself to knit…

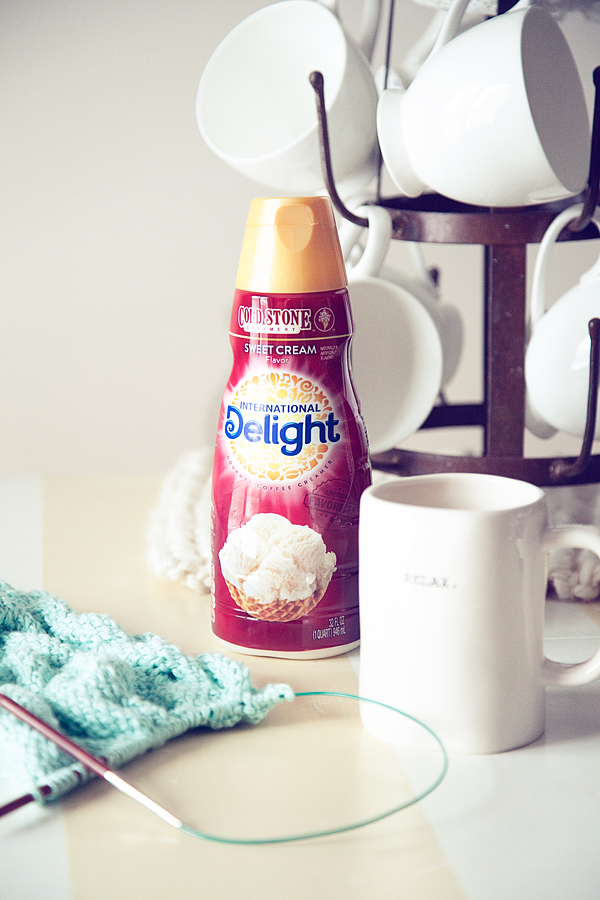
I vowed to take some simple time each morning to have a cup of Choffy (I’m not a coffee drinker, but I LOVE Choffy, it’s brewed Chocolate) with a dash of my favorite International Delights Sweet Cream creamer.

relaxing-with-International-Delights-and-WhipperBerry-1

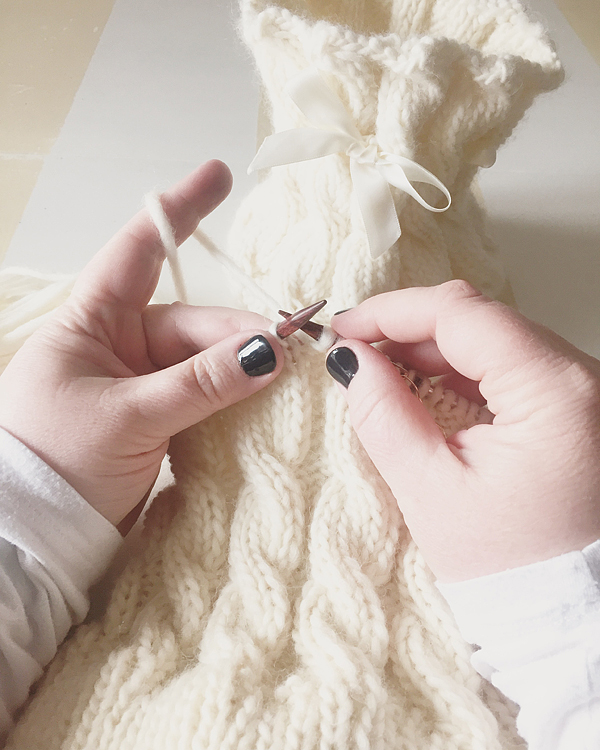
 Then I sit and listen to something that fills my soul, sip my Sweet Cream Choffy and KNIT!

relaxing-with-International-Delights-and-WhipperBerry-3

WhipperBerry-Learning-to-Knit

 I can’t even tell you how grateful I am to that mug…

I feel so much more balanced and connected to those I love AND…

I can make pretty things…

Hannah's-Hat-from-WhipperBerry

How do you find peace and clarity in a busy world? How do you RELAX? Does your morning coffee or Choffy play a little role in that? It sure does for me with a little ID Sweet Cream for sure!

This is a sponsored conversation written by me on behalf of International Delight. The opinions and text are all mine.
Balsamic Chicken Bites Recipe

8 · Jan 21, 2016 · 1 Comment

+ This Balsamic Chicken Bites Recipe is a sponsored post written by me on behalf of Tyson Foods, Inc. All opinions are entirely my own. +

Balsamic Chicken Bites from WhipperBerry

It’s getting EXCITING!!

THE BIG GAME is almost here!

No matter who you are rooting for, the Super Bowl is always a fantastic time to gather with friends and family to enjoy some crazy excitement together and to enjoy some fantastic food!

Whether the game is a wild ride or a blowout, you want to make sure your game time snacks are ON POINT!

The Super Bowl just isn’t the Super Bowl without a scrumptious, tempting spread of all kinds of snackable treats. Just like any event or holiday, you want to make sure you have some great recipes that are tried and true so that you can look like a kitchen ROCKSTAR!

You can find all kinds of fantastic ideas at Talk About Delicious or the Talk About Delicious Game Pinterest Board. It’s packed full of great ideas. Today, I have a tasty recipe for you as well. Our family’s favorite Balsamic Chicken Bites…

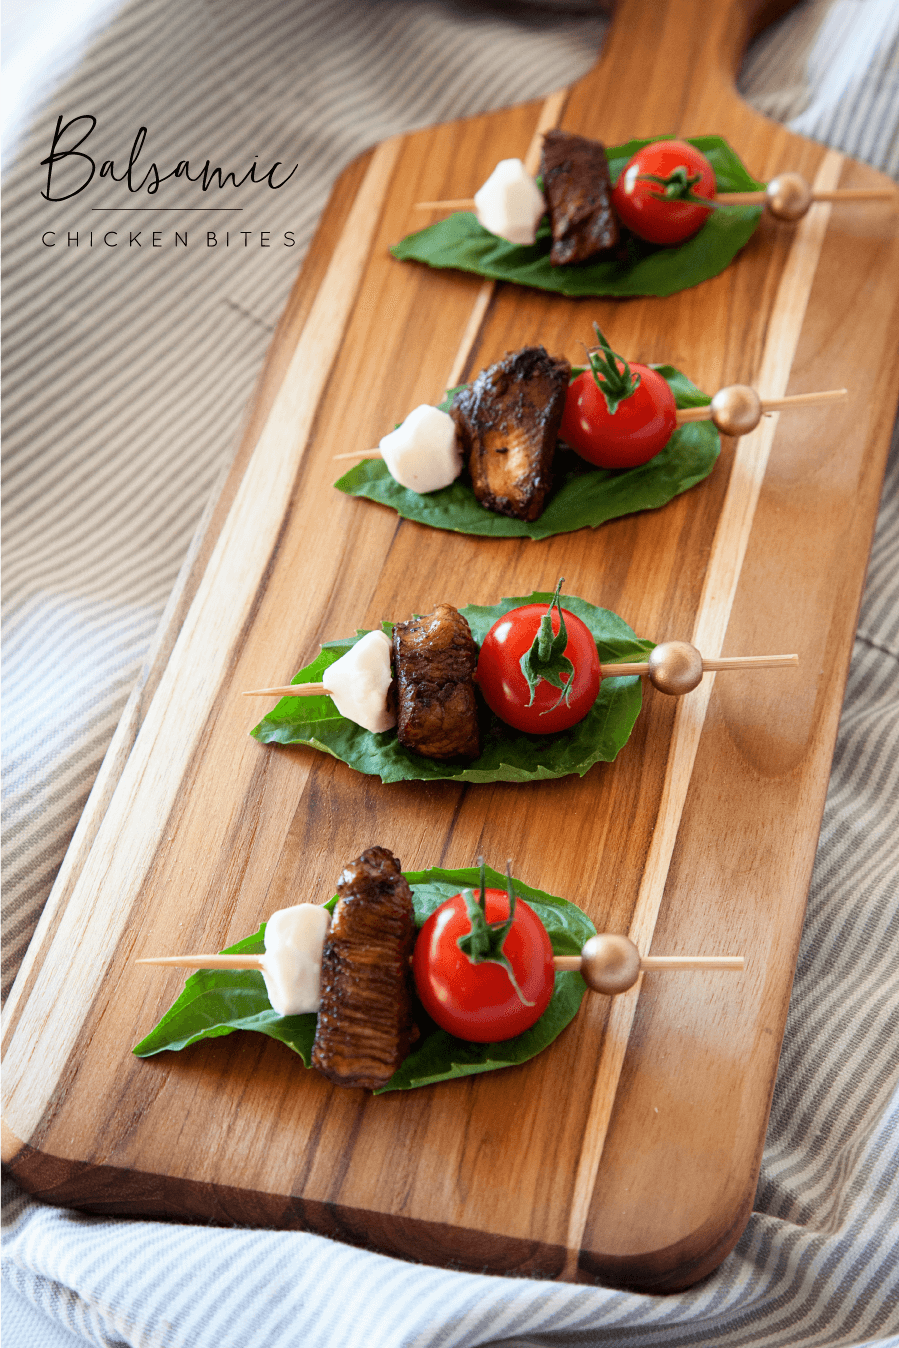
WhipperBerry Balsamic Chicken Bites Perfect appetizer for the BIG GAME!

What I LOVE about this little bite sized treat is that it’s on the healthier end of the typical game time snack spectrum and it’s packed full of flavor. It’s also super easy to make, you can even make it a head of time which is fabulous, since you don’t want to be bogged down with food prep when you’re with your friends and the game is on.

I typically head to Walmart to gather all of my supplies. I love using the fresh Tyson® Chicken found in the refrigerated meat section of the store. Then I grab the rest of the ingredients for my marinade, one of the stars of the show.

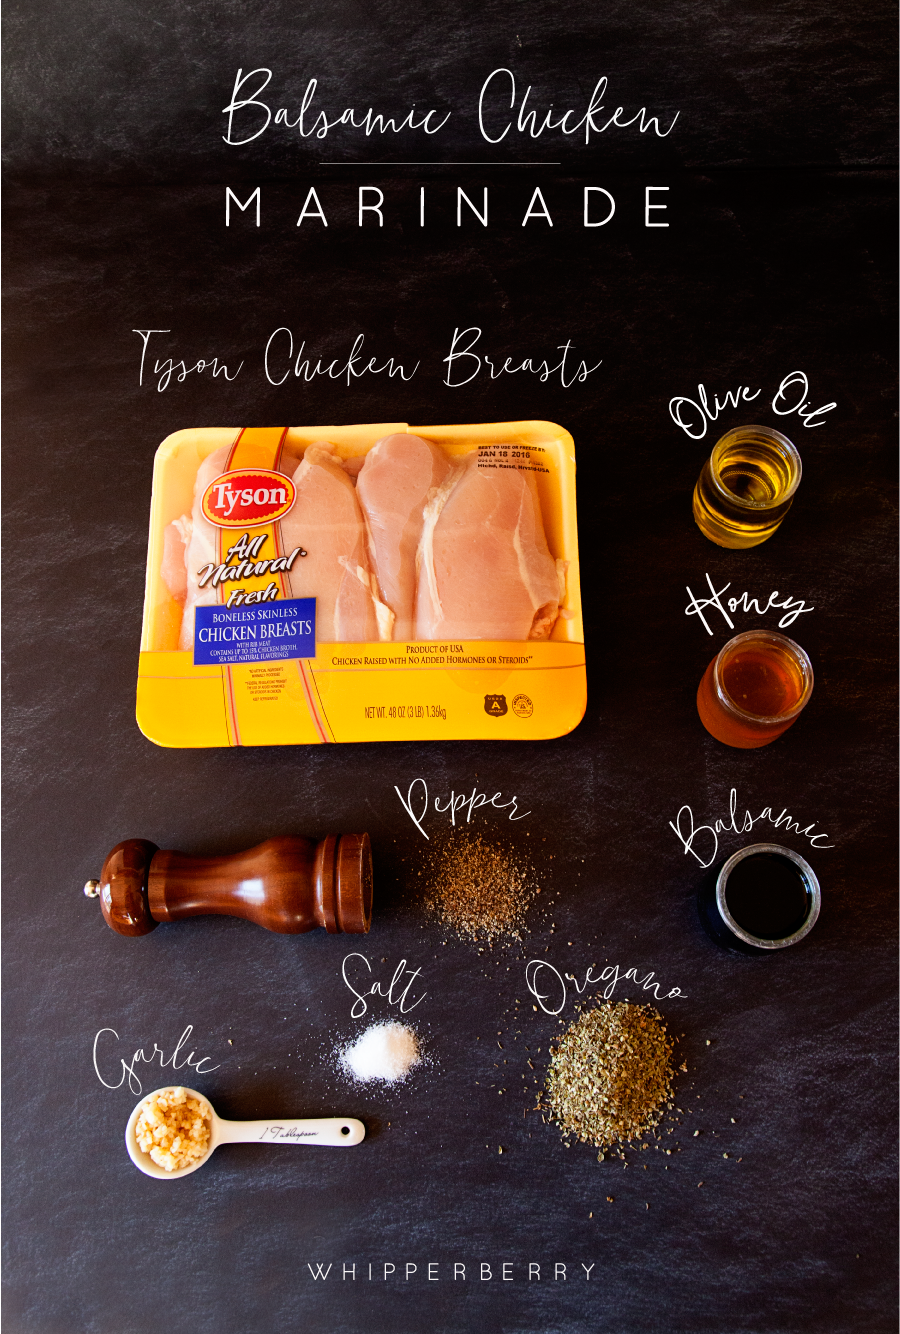
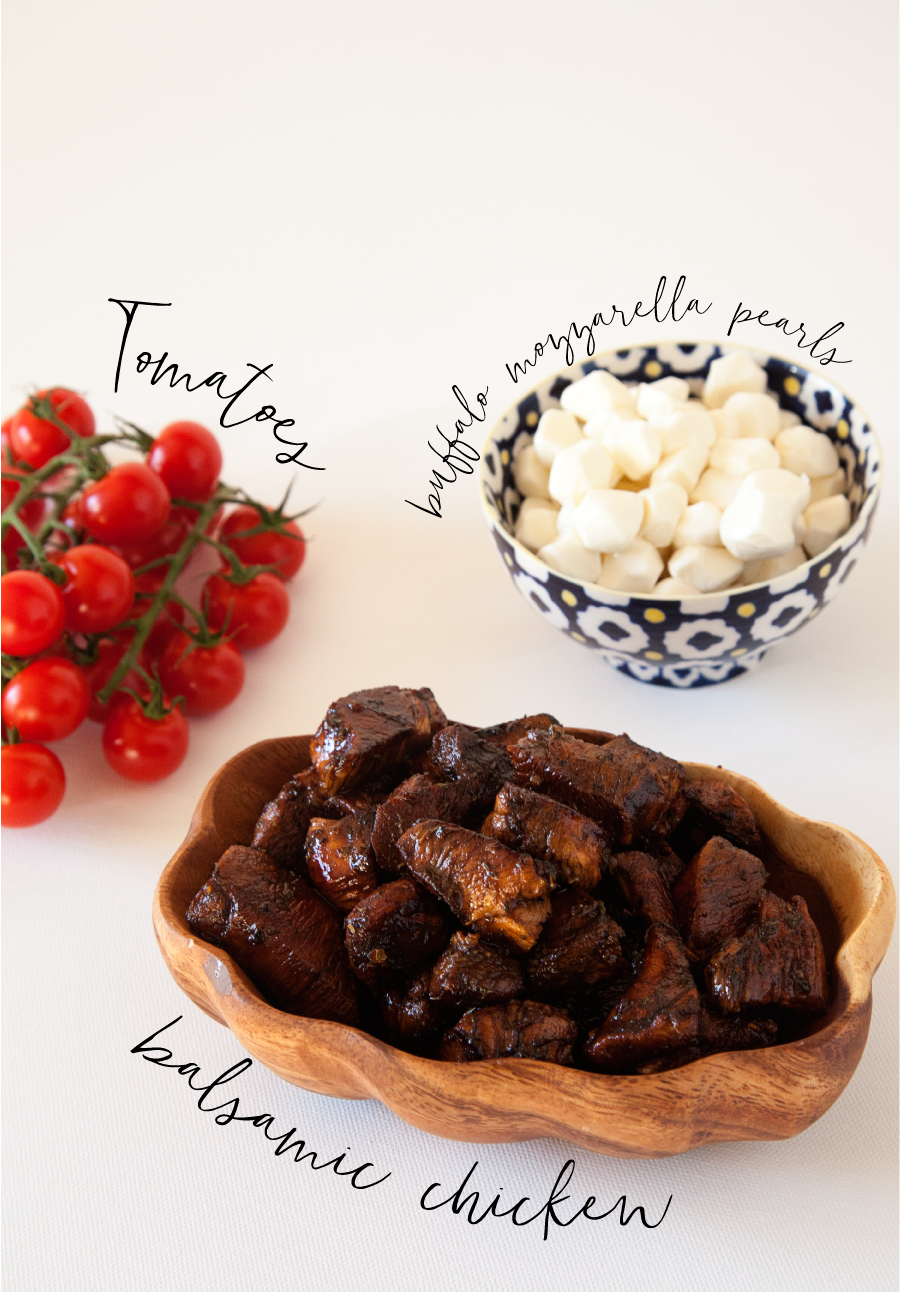
Ingredients for Balsamic Chicken Bites from WhipperBerry

For the chicken marinade you’ll need–

1/4 cup olive oil

1/4 cup honey

1/4 cup balsamic vinegar

1 tablespoon dried oregano

1/4 teaspoon salt & pepper

1 tablespoon minced garlic

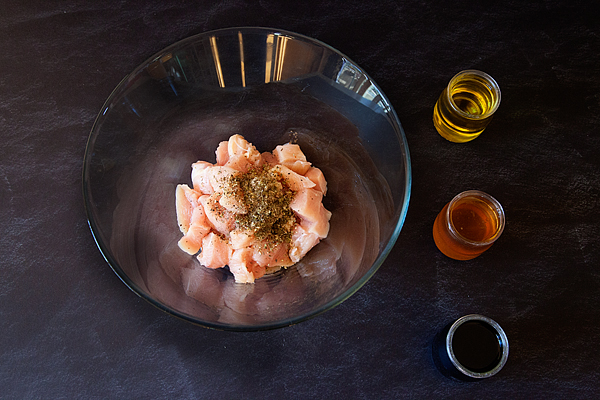
Balsamic-Chicken-Bites-4

Cut two Tyson® Chicken Breasts into bite-sized pieces and add your dry ingredients.

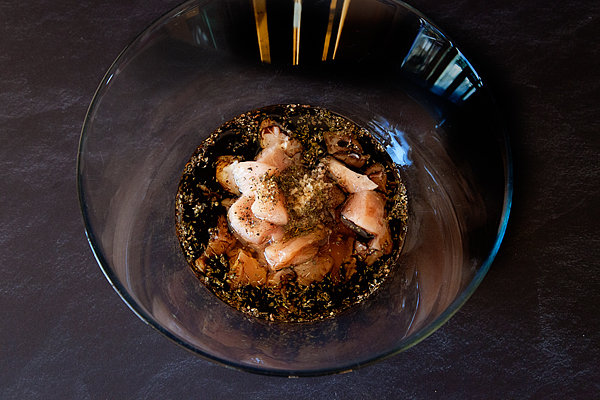
Balsamic-Chicken-Bites-5

Then add your wet ingredients and mix well. Store in an air tight container or Ziploc bag for at least one hour or up to 4 hours. This is a strong marinade and you don’t want to over do it with those bite sized pieces of chicken.

Now, this marinade is one of my go-to recipes when it comes to making scrumptious chicken meals for the family throughout the year.  When I am using it with whole Tyson® Chicken Breasts, I can marinate it overnight and it will be just fine. I normally serve it with a lovely salad and some French bread and you’re good to go.

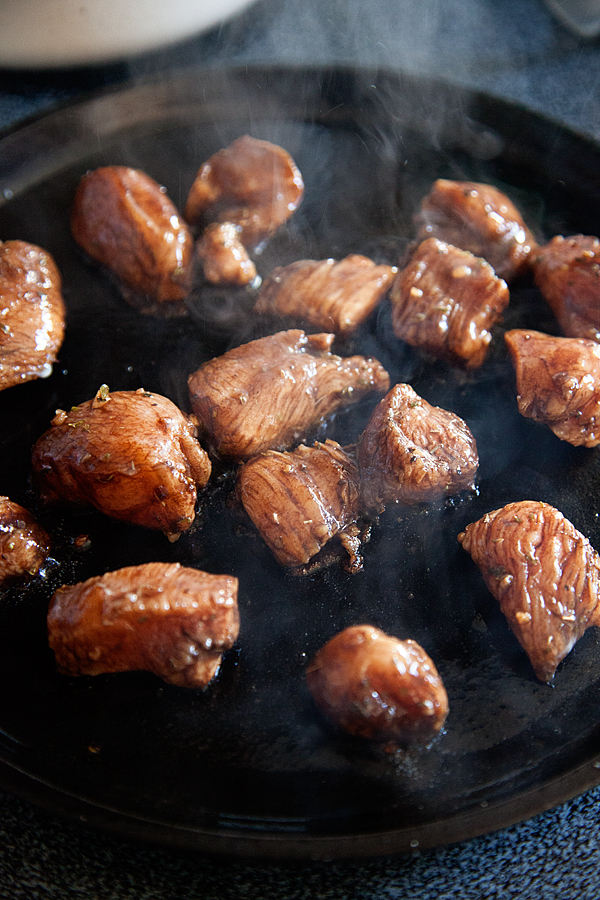
Once the chicken is full of that balsamic flavor, you’re ready to cook your chicken. Typically if I am cooking whole breasts, we grill them BUT, since these little gems won’t really work on the grill AND it’s February… I cook them inside either on a cast iron grill pan or a cast iron pan. I LOVE my cast iron cookware, I’ve grabbed most of my pans at Walmart. They are fantastic and you can’t beat the price. I purchased the pan I’m using in the photo below for less than $15!

Balsamic-Chicken-Bites-6

Now these little gems cook pretty quick. I heat-up my pan until it’s screaming hot and then I turn down the temperature to medium. I add a little olive oil to the pan and then place the chicken into the pan making sure not to over crowd them or add too much liquid to the pan. You want to sear them, NOT boil or steam them. I typically cook them in batches. Turn them after 1-2 minutes and continue to do so until you have a good sear on them. Make sure to keep a close watch on them. Because of the high sugar content, they can burn quickly.

These little balsamic chicken gems cook pretty fast, usually 4-5 minutes but you’ll want to check the temperature to make sure they are fully cooked and are safe at 165Ëš. Remove from pan and set aside until you have finished cooking all of your chicken.

Tyson® Balsamic Chicken Bites

Next, all you need to do is assemble your Balsamic Chicken Bites. You’ll need…

How-to-assemble-Balsamic-Chicken-Bites

cherry or grape tomatoes

balsamic chicken gems

buffalo mozzarella pearls

Now, the key to making this appetizer sing is to pair the Balsamic Chicken gems with some scrumptious bite-sized tomatoes like these cherry tomatoes still on the vine or some lovely grape tomatoes. Either one will work really well.

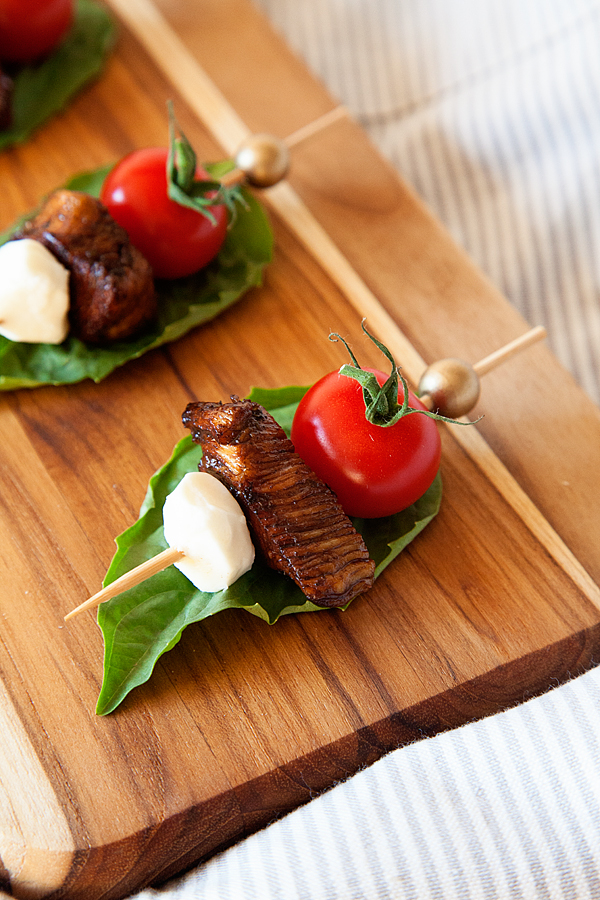
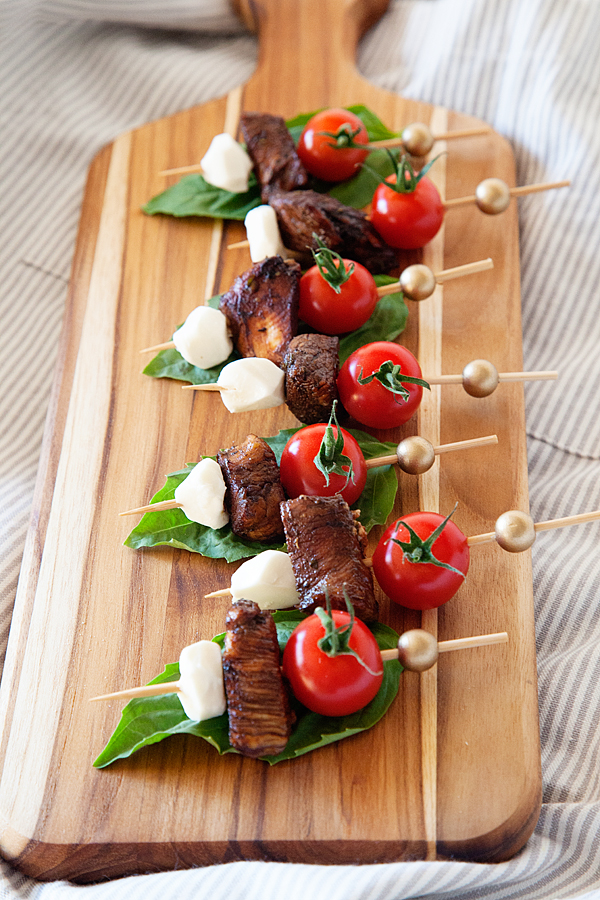
 I use a large toothpick and feed a tomato onto the toothpick followed by a balsamic chicken gem and then cap it with a buffalo mozzarella pearl.

Balsamic-Chicken-Bites-12

It’s super slick. You can either serve the chicken warm or cold. They taste great either way. I like to lay out a few basil leaves to set the Balsamic Chicken Bites on…

Balsamic-Chicken-Bites-13

… I love how it adds some lovely color and some fresh vibrant flavors to your Super Bowl spread!

Looking for more GAME DAY ideas? Don’t forget to visit Talk About Delicious for more fantastic ideas and then visit your local Walmart to stock-up on all your game day goodies!

Chicken Stock 101 – How to Make the Best Chicken Stock Recipe

3 · Jan 20, 2016 · 1 Comment

+ Chicken Stock 101 – Come learn how to make liquid gold +

Chicken Stock 101 - Come learn how to make liquid gold the base for the best soups and stews from WhipperBerry

I am not sure if there is anything better in these cold winter months than a good pot of Chicken Noodle Soup or any of it’s chicken stock based cousins. I’m mean really… YUM!

It’s like a bowl full of love right there.

The issue is that commercially prepared chicken stock is good, BUT… It’s not GREAT.

If you’re really wanting a good chicken stock based soup, stew or gravy. You need to make your own chicken stock.

The good news is… It’s SUPER EASY!!

Here is what you’ll need…

chicken-stock-101-with-WhipperBerry

Chicken Stock Ingredients

Chicken

Carrots

Celery

Garlic

Rosemary

Sage

Thyme

Lemon

Onion

Salt

Whole Pepper Corns

That’s it! Not a crazy list of obscure ingredients. The hardest thing to come by is the chicken carcass if you don’t typically roast your own chicken, but I’ve solved that issue as well.

We’re all running to the market to grab those rotisserie chickens for a quick weeknight dinner, why not put it to work making some stock for your next soup adventure as well! Yep, PROBLEM SOLVED!

First thing you need to do is to remove the meat from the bones if you have not already done so.  DO NOT THROW THE BONES AWAY! That’s the star of the stock show.

Place the carcass into a large stock pot and then add the remaining ingredients…

chicken-stock-101-with-WhipperBerry-3

I don’t really even bother to chop up my veggies or anything. I wash them for sure, but I don’t even bother to peel the carrots or onions. I cut off the ends, give the onion a rough chop and throw them into the pot.

Why do I leave the onion skin on you ask? I’ve learned from several stock experts that leaving the onion skin in the pot is what will give your stock a lovely color.

Using a vegetable peeler, I carefully peal the skin of my lemon and add that to the pot. Make sure to grab as little of the white pith as possible. That white part is bitter and you don’t want to add that to your pot.  I prefer the peel method rather than adding lemon zest. It allows me to easily remove the spent lemon peels when finished.

I tie-up my herbs with a little baker’s twine to keep them contained then I add my salt & whole pepper corns. DON’T be stingy with the salt. This is what will help your stock come to life! Cover the pot with water and set it to boil.

chicken-stock-101-with-WhipperBerry-5

Once you’ve brought your pot to boil, turn down the heat to medium or medium low and let it simmer, uncovered for several hours. I generally let mine simmer for 6-7 hours, checking every once in a while to see if I need to add more water to the pot.

After several hours, remove your stock from the heat and then strain it through a fine mesh strainer. Discard the used chunky bits and place your liquid gold (chicken stock) in an air tight container and place in the refrigerator. Once your stock is fully chilled, you can go back and using a spoon, remove the fat that has come to the surface and solidified. That way, your chicken stock will be almost fat free. Another benefit from making your own stock. YOU control the salt and fat content.

chicken-stock-101-with-WhipperBerry-6

Now you can store this in the refrigerator for a couple of days or in the freezer for 3-6 months. Pull it out when you need a little stock and you’re good to go! Here’s the full recipe…

Chicken Stock Recipe

Chicken Stock 101
 
Save Print
Prep time
10 mins
Cook time
7 hours
Total time
7 hours 10 mins
 
You will never want to use boxed stocks ever again after you try this recipe!
Author: Heather // WhipperBerry
Serves: 1 liter
Ingredients
  • 1 whole roasted chicken - meat removed
  • 2 large yellow onions - cut off the top and bottom but leave the skin on
  • 1 bunch of celery - wash and cut off top and bottom
  • 4-5 carrots - wash and cut off top and bottom, don't bother to peel
  • 2-3 stocks of fresh rosemary
  • small bunch of fresh thyme
  • 5-6 sage leaves
  • 1 lemon
  • 2-3 cloves of garlic
  • 1 tablespoon whole pepper corns
  • 1 tablespoon sea salt
Instructions
  1. Place chicken carcass into large stock pot.
  2. Add celery, carrots, onions.
  3. Tie fresh herbs together and place into the pot.
  4. Using a vegetable peeler, peel the skin of the lemon and add to the pot. Be careful not to add the white pith part of the lemon.
  5. Add salt, pepper corns and garlic.
  6. Fill pot almost the the top with water and set on high heat just until the pot comes to a boil. Once it has started to boil, turn the heat to medium or medium low, what ever temperature that will keep a nice low simmer.
  7. Let simmer for 6-7 hours
  8. Check pot occasionally to see if you need to add more water.
  9. After it has simmered for several hours, remove from heat and strain your stock with a fine meshed strainer. Place in an air tight container and put in refrigerator for several hours.
  10. Once the stock has fully chilled, remove from refrigerator and using a spoon, remove the fat that has solidified onto the surface of the stock.
  11. Store in refrigerator for 2-3 days or in the freezer for 3-6 months.
3.4.3177
  • « Go to Previous Page
  • Page 1
  • Interim pages omitted …
  • Page 18
  • Page 19
  • Page 20
  • Page 21
  • Page 22
  • Interim pages omitted …
  • Page 67
  • Go to Next Page »

Primary Sidebar

Heather from Whipperberry
Hello... my name is Heather and I'm the creator of WhipperBerry a creative lifestyle blog packed full of great recipes and creative ideas for your home and family. I find I am happiest when I'm living a creative life and I love to share what I've been up to along the way... Come explore, my hope is that you'll leave inspired!

Footer

  • Privacy Policy
  • Crafts
  • Food
  • Gifts
  • Holidays
  • Home
  • Mom Life
  • Recipes
  • Travel

Copyright © 2026 · Seasoned Pro