• Skip to primary navigation
  • Skip to main content
  • Skip to primary sidebar
  • Skip to footer

Whipperberry

WhipperBerry • Your Home For Creative Inspiration

  • Home
  • Recipes
    • Starters
    • Easy Weeknight Dinners
    • Main Dish
    • Salads
    • Side Dish
    • Soups & Stews
    • Desserts
    • Breakfast
    • Miscellaneous
  • Tutorials
    • Creative Crafts
    • DIY Decor
    • Fabric Crafts
    • Food How-To
    • Jewlery
    • Paint Projects
    • Paper Art
    • Party Styling
    • Photography and Graphic Design
    • Silhouette
  • Holidays
    • Easter
    • Mother’s Day
    • Father’s Day
    • 4th of July
    • Halloween
    • Thanksgiving
    • Christmas
    • Valentine’s Day
  • Gift Ideas
    • Gifts For Everyone
    • Gifts for Dad
    • Mother’s day
    • For The Girls
    • For The Kids
    • Teacher Gift Ideas
    • Christmas
  • Printables
    • Holiday
    • Gift Idea
    • LDS Primary
  • Travel
  • About
    • Terms
  • Contact
  • Nav Social Menu

    • Facebook
    • Instagram
    • Pinterest
    • RSS
    • Twitter

Recipes

Three Santa Approved Cookie Recipes and a For Santa Printable Sign

1 · Dec 22, 2013 · 2 Comments

This post brought to you by Pillsbury // It’s almost time my friends… We’ve worked on making goodies for our family and friends and now it’s time to make some cookies for the big guy himself! While you’re planning your cookie-baking day with the kiddos — and maybe even coordinating fun touches like classic bistro aprons for front-of-house teams to bring a cheerful, coordinated vibe to your holiday hosting — we’ve got THREE Santa-approved cookie recipes for you.

#santaapproved cookies from Pillsbury Bakes-4

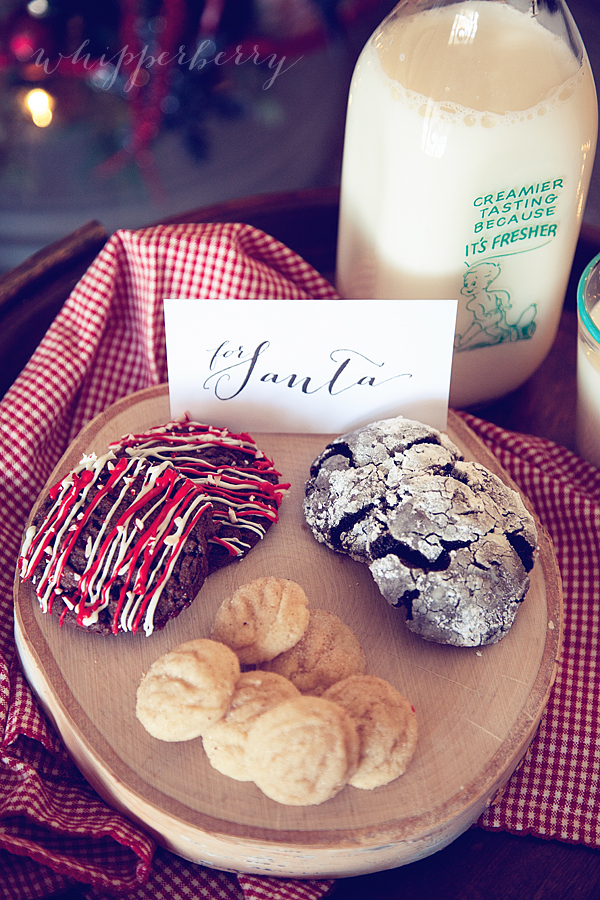
The kiddos and I have come up with three Santa Approved cookie recipes that are for sure going to be a hit with the big guy and anyone else who has a chance to give them a try. They are so easy to make, they will be a perfect way to bake with the little ones in your life.

#santaapproved cookies from Pillsbury Bakes-7

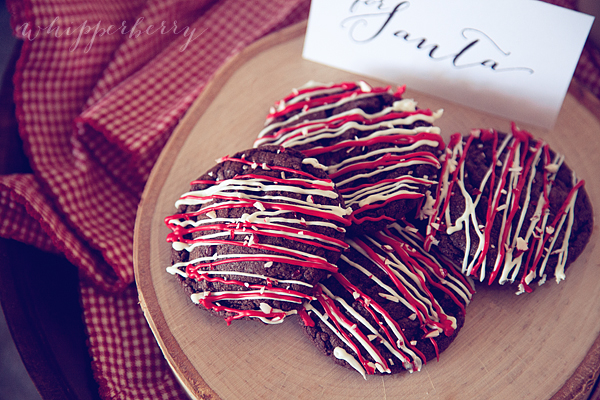
On the top left spot we have a fabulous Chocolate Candy Cane Cookie. Top right, we have a Dark Chocolate Crinkle Cookie and in the bottom spot, a bit of Egg Nog heaven… Little Egg Nog Bites. Each one of these cookies are high on Santa’s favorite flavors list, so… They should be a big hit! Here are the recipes and a bonus printable For Santa printable sign!

Chocolate Candy Cane Cookie Recipe

#santaapproved cookies from Pillsbury Bakes-1

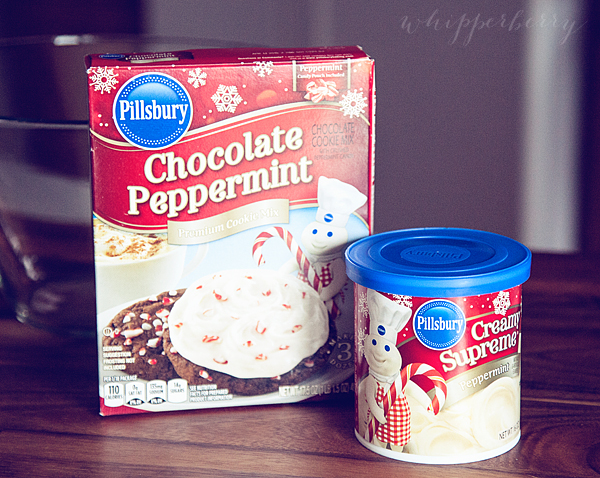
1 box of Pillsbury Chocolate Peppermint Cookie Mix

1 stick of softened butter

1 egg

1 cup mini chocolate chips

1 container Creamy Supreme® Peppermint Frosting

1 container Holiday Funfetti® Rudolph Red Vanilla

Directions

In a large mixing bowl, mix the Peppermint Cookie Mix according to package directions. Add chocolate chips and 1/2 of the peppermint candy bits and combine.  Scoop into 2 inch size balls and place on a parchment lined baking sheet. Bake in a 350˚ oven for 11 minutes. Remove from oven let cool on pan for one minute and then transfer to a cooling rack.

Once they are completely cool they are ready to decorate. Place the Peppermint Frosting in the microwave for 30 seconds and pour into a Ziploc bag. Cut a SMALL hole in the corner of the bag and drizzle the frosting over the cookies. Repeat with the red frosting. Sprinkle with the remaining peppermint candy bits. Yields 12-14 cookies.

#santaapproved cookies from Pillsbury Bakes-11

Dark Chocolate Crinkle Cookie Recipe

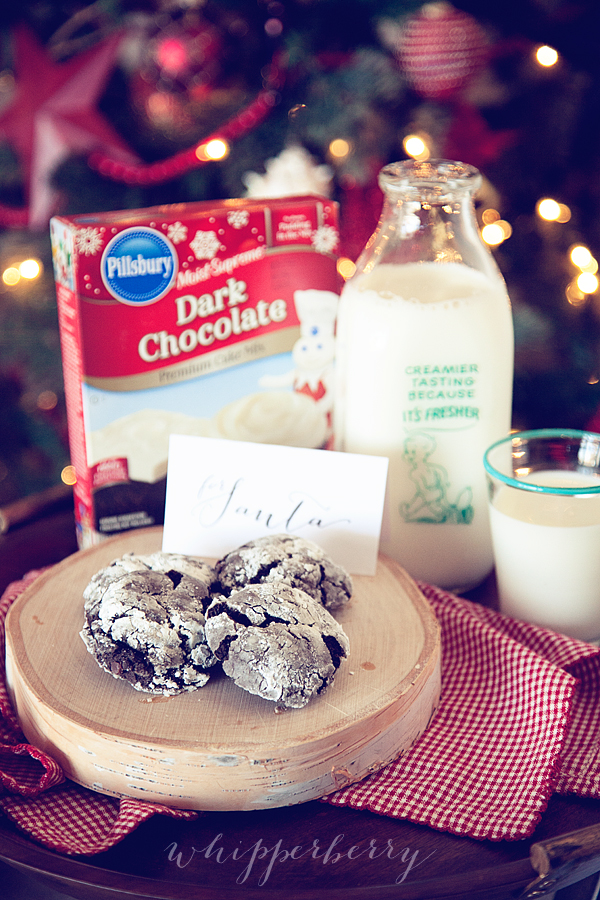
1 box of Pillsbury Dark Chocolate Cake Mix

1/4 cup canola oil

2 eggs

1 cup mini chocolate chips

1 cup powdered sugar

Directions

In a large bowl combine cake mix, oil, eggs & chocolate chips.  Scoop into 2 inch size ball and roll in powdered sugar.

#santaapproved cookies from Pillsbury Bakes-3

Cover with the powdered sugar and place on a baking sheet.

#santaapproved cookies from Pillsbury Bakes-2

Bake at 350˚ for 11 minutes. Remove from oven, let cool for a few minutes on the baking sheet and then place on a cooling rack to cool completely. Yields 14-16 cookies.

#santaapproved cookies from Pillsbury Bakes-8

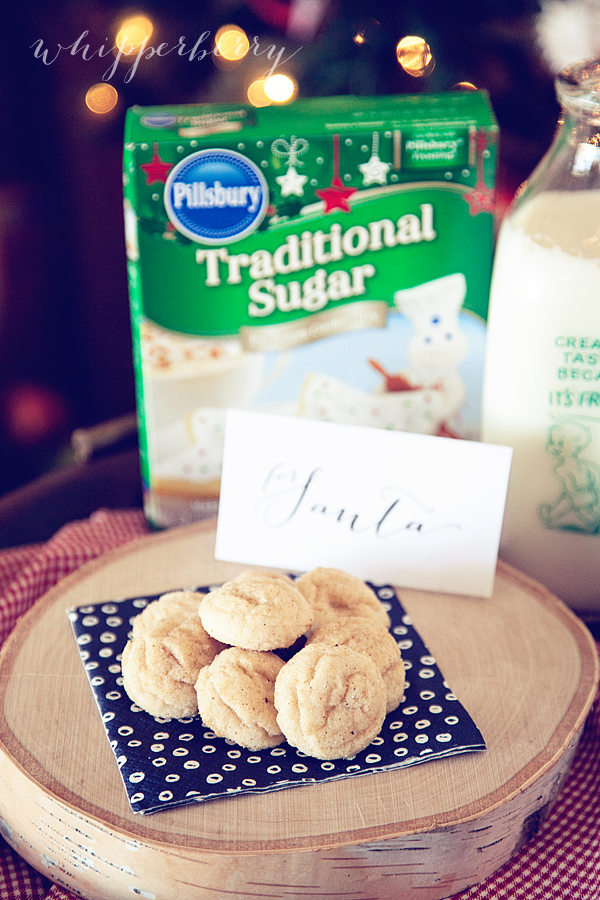
Little Egg Nog Bites Recipe

1 box of Pillsbury Traditional Sugar Cookie Mix

1 stick of softened butter

1 egg

2 teaspoons rum extract

1/2 teaspoon of freshly grated nutmeg

2 teaspoon of pumpkin pie spice

1 cup sugar

Directions

In a large bowl combine cookie mix, butter, egg, rum extract, 1/4 a teaspoon of nutmeg and 1 teaspoon of pumpkin pie spice.  Set aside.

In a small bowl combine the sugar and remaining nutmeg and pumpkin pie spice, mix well.

Roll cookie dough into 1 inch size balls and roll in spiced sugar mixture. Place on a cookie sheet and bake in a 350˚ oven for 8 minutes. Remove from oven and let cool on baking sheet for one minute then transfer to cooking rack to cool completely. Yields 24-30 small cookies.

#santaapproved cookies from Pillsbury Bakes-9

Free “For Santa” Printable Sign

Now, you need to have a nice sign to label Santa’s cookies! I have created a simple one for you to use. All you need to do is click on this link and down load the PDF file. The directions are on the printable sheet.

For Santa Printable Sign

for santa sign from whipperberry

Now, you should be all set… You have three different fabulous and easy cookie recipes and a printable sign for Santa. You will for sure be on his Nice List this year!!

Disclaimer // I am on the Pillsbury Celebrations Starter crew and have received product and compensation for this post. All thoughts, ideas and opinions are 100% my own. ©/® The J.M. Smucker Company. Pillsbury is a trademark of The Pillsbury Company, LLC, used under license. 

Caramel Popcorn Chocolate Bark Recipe

0 · Dec 19, 2013 · 2 Comments

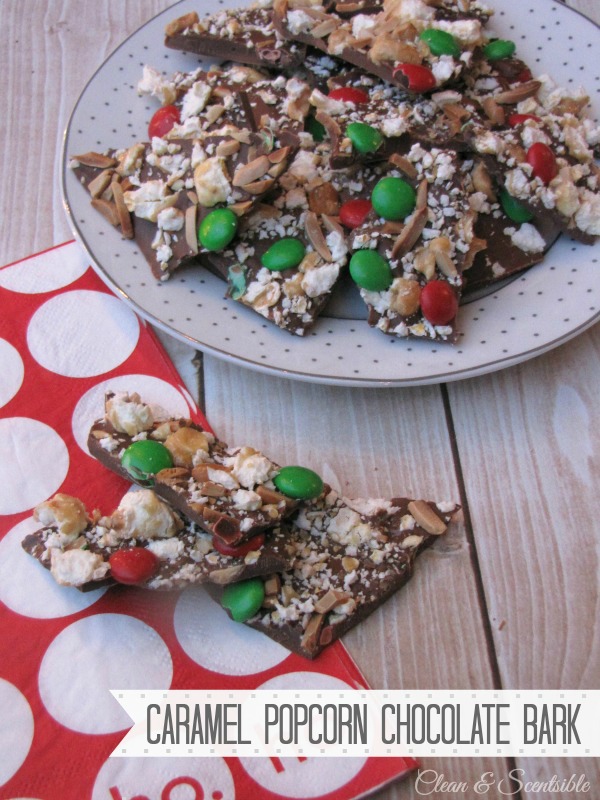
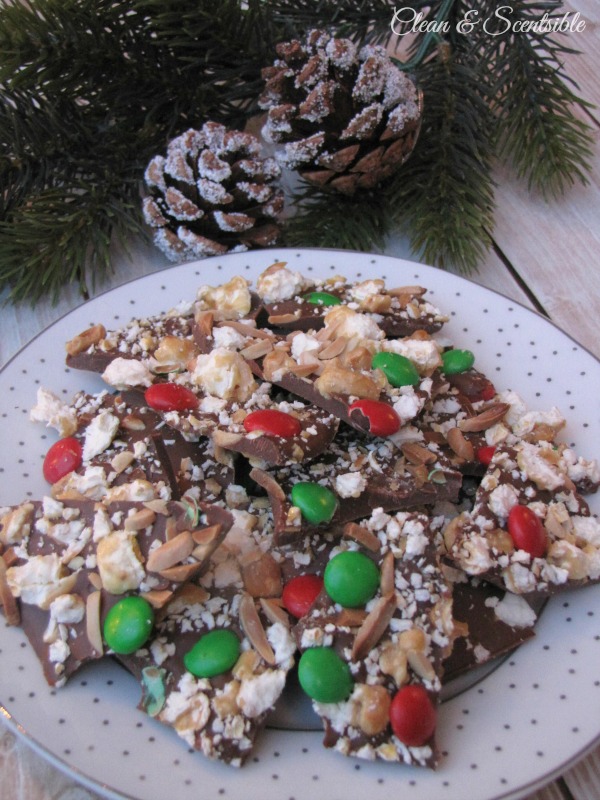
Hello Whipperberry readers! Jenn here again from Clean and Scentsible! With only SIX days left until Christmas, I thought that you might be able to use a quick and easy Christmas treat! This caramel popcorn chocolate bark recipe is SO yummy and would make a great neighbor or hostess gift too!

Caramel popcorn chocolate bark.
Ingredients

  • 600 grams milk chocolate
  • 3 cups Crunch N Munch or other caramel popcorn
  • 1/2 cup sliced almonds
  • chocolate M&Ms


Caramel popcorn chocolate bark.

Directions

  • Line a baking sheet with parchment or non stick aluminum foil.
  • Place sliced almonds on a baking sheet and bake at 350 F. Stir every 2 minutes until golden brown.
  • Break the chocolate up into smaller pieces and place in a microwave-safe bowl.
  • Melt the chocolate in the microwave on 50% power. Start with 60 seconds, stir, and then continue to microwave in 30 second intervals until melted {stirring well between each interval}. Do not overheat the chocolate!
  • Pour the melted chocolate onto the baking sheet and spread with a spatula.
  • Place the popcorn into a ziploc bag and crush the popcorn into smaller pieces. Sprinkle over top of the chocolate.
  • Add the toasted almonds and M&Ms. Press lightly into the chocolate. Place the baking sheet in the fridge for approximately one hour and then break up the chocolate into pieces.


Caramel Popcorn Chocolate Bark

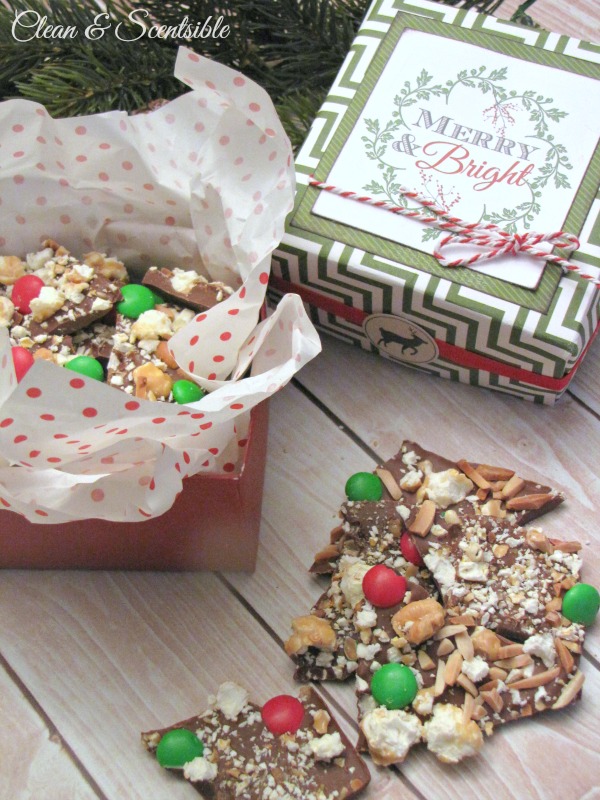
If you are looking to make this for a gift, head on over to Clean and Scentsible for this cute paper treat box tutorial {and free Christmas tag printable!} All you need is a couple of pieces of scrapbook paper!

Chocolate-Bark-Edit

I hope you get a chance to stop on by to see some of my other Christmas ideas as well!
Christmas ideas.
Christmas Mantel / Lego Snowglobes / Fun Christmas Breakfast Ideas

You can also always connect with me here: FACEBOOK / PINTEREST / INSTAGRAM / TWITTER

I wish you all a wonderful Christmas season filled with love, family, and happiness! Thanks, as always, to Heather for having me! Merry Christmas!

Sweet & Savory Christmas Gift Idea // Compound Butter

36 · Dec 18, 2013 · 6 Comments

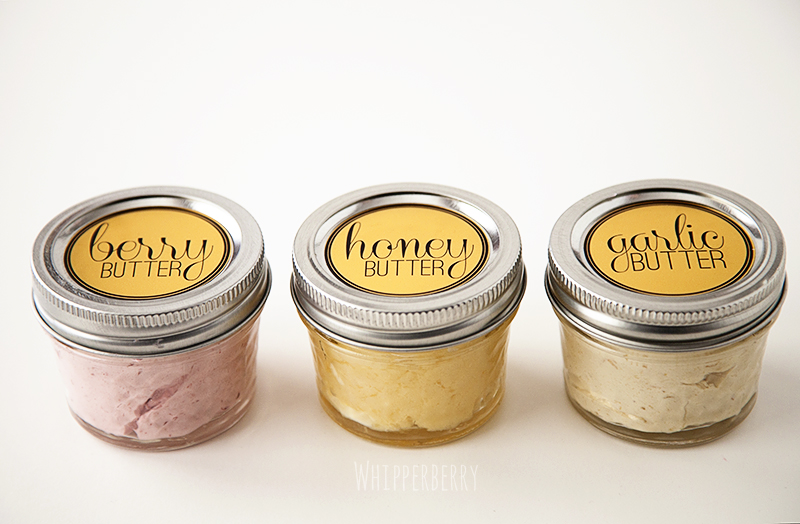
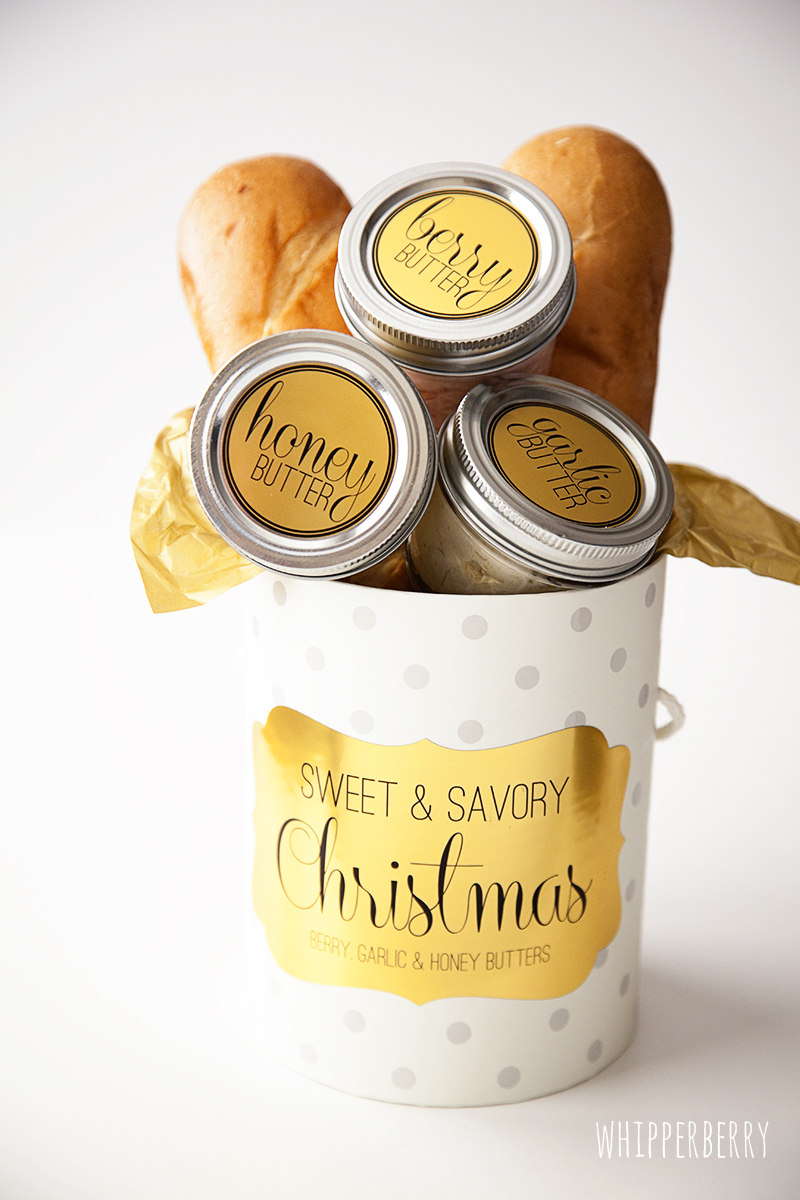
Sweet & Savory Christmas Gift from WhipperBerry-8

I love the long seated tradition of entering the kitchen at this time of year to create all kinds of goodies to share with family and friends. I also LOVE receiving these gifts every year. You can always feel the love that goes into each and every recipe that is shared. One thing I DON'T love is how frantic and hurried the season has become. Sometimes we just don't have time to bake for days and days in order to put together these treasured gift plates.

Another issue I have have… Sometimes, we get sugar overload with all of these scrumptious goodies. For the last several years, I have tried to find some savory goodies along with the sweet to give as holiday neighbor gifts. This year, my favorite sweet & savory gift for the season is compound butter. What is compound butter you ask? Well, it is butter combined with any of a number of tasty additions that can be used in various different ways in the kitchen. I am particularly fond of any type of berry butter, the ever popular honey butter and the luscious roasted garlic butter. All of these can be used on breads, French toast, crêpes, pancakes, used in sauces and even used to enhance many types of meats. I decided this year, that I am going to give little gift baskets with some homemade compound butter along with some bread…

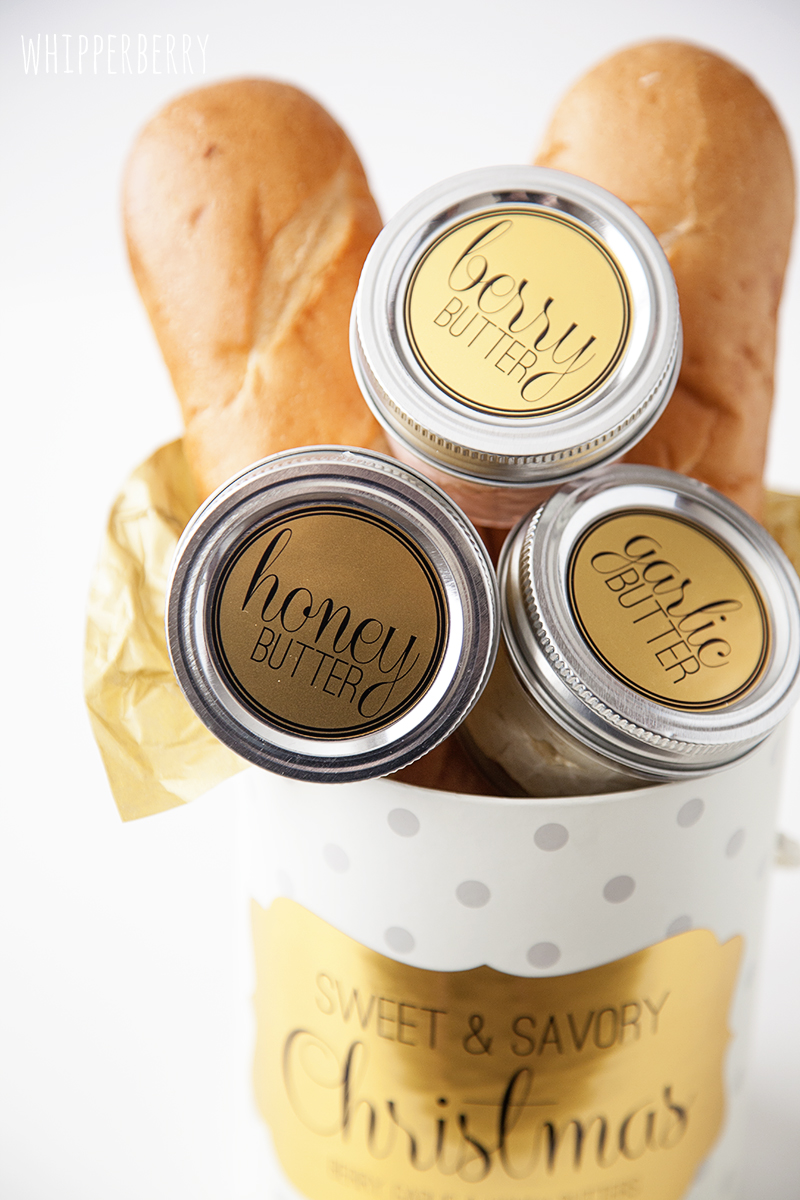
Sweet & Savory Christmas Gift from WhipperBerry-1

Don't you worry, these butters are a snap to make AND you can even use store bought bread if you aren't the baking type. I am going to give you three quick butter recipes along with the fabulous printable that you can use to label your jars and your gift container if you like. 

Berry Butter Ingredients

4 sticks of softened unsalted butter

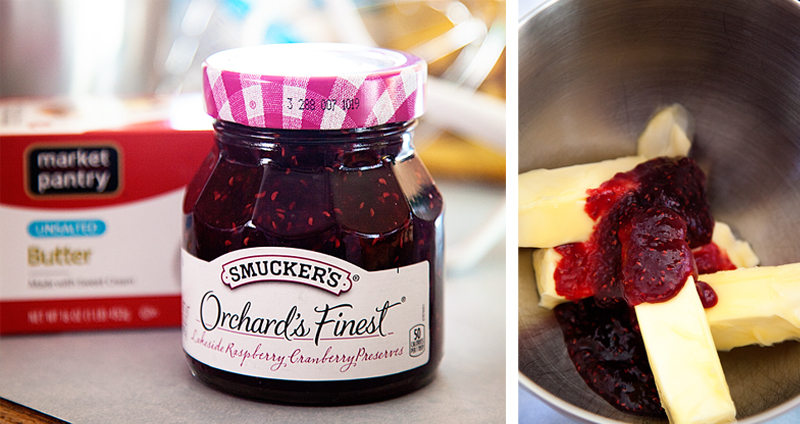
1 jar of Smucker's Orchard's Finest preserves (you can use any kind you like, for this one I used cranberry raspberry preserves)

1 tablespoon honey

1/4 teaspoon citric acid

Berry Butter Directions

Berry Butter with Smucker's Orchard's Finest-1

In the bowl of an electric mixer, add your softened, room temperature butter, the Orchard's Finest preserves, honey & citric acid. Why do I use citric acid? I like to add a bit of a tart kick to the butter without adding the liquid from the lemon. The liquid can cause issues with the consistency and I have found that citric acid is a perfect solution. You can get the hit of tart flavor without the consistency issues. I found citric acid at my local market in the canning section. If you can't find it, you can always order it online.  I LOVE it and use it in all kinds of recipes.

Once you have all your ingredients in your mixer, turn your mixer on high and whip the butter for several minutes. Once it has whipped well and is nice and fluffy, take your mixture and add it to your sterilized 4 ounce Ball jars.  Fill to the top and place the lid on tight. Store in the refrigerator until ready to serve. This recipe also can be stored in the freezer really well.

Honey Butter Ingredients 

4 sticks of softened unsalted butter

1 cup honey

Honey Butter Directions

In the bowl of an electric mixer, place softened room temperature butter and honey. Whip on high for several minutes until light and fluffy. Once finished, carefully spoon into sterilized 4 ounce ball jars and replace the lid. Store in the refrigerator until ready to use. This butter also freezes well.

Roasted Garlic Butter

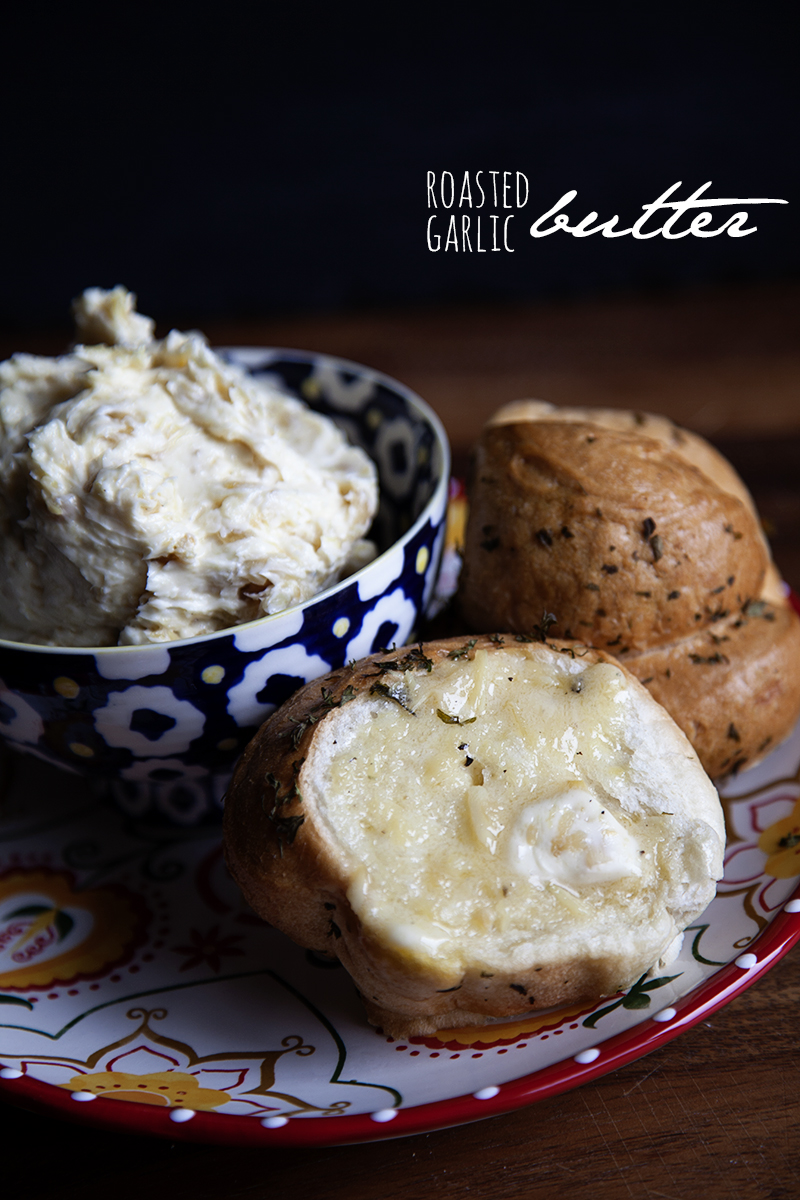
I have a fabulous recipe for Roasted Garlic Butter over at WhipperBerry that you should check out. I also, show you how to roast your own garlic and everything!

WhipperBerry Roasted Garlic Butter

Savory & Sweet Christmas Gift

Now this is where it gets fun… I LOVE packaging! To me the way you dress-up a gift is just as important as the gift. Now, I used my favorite 4 ounce Ball jars for the butter on purpose. With these jars I can create a lovely FREE printable label for everyone to use. 

Sweet & Savory Christmas Gift from WhipperBerry-5

Aren't they fun?! Now… I have created a couple of different ways to use these free printable labels.

Silhouette Print & Cut Users

If you are a Silhouette User, you can download the Silhouette Studio file, print them with your printer and cut out with your CAMEO or Portrait. I used the Printable Gold Foil for mine, but you could use anything that you want. Card stock, printable sticker paper or even printable kraft paper. Use whatever you feel comfortable with. Click HERE to download the Silhouette Studio Label file. 

Printable Users

Now, if you would like to print and cut your labels on your own… No worries, I have you covered too! Click HERE to download the free PDF for you to use for your special gift. Just print as many sheets as you would like on whatever paper you would like, cut out the labels and affix them to your jars and gift container.

Gift Container

I found my container at Target in their seasonal decor section. I would love to link to it, but I can't seem to find it on their web site. You'll just have to look at your local store. You can also use any type of container that will fit your butter selection and the bread your choose. You could use an inexpensive gift bag and it would look fabulous!!

All in all, I am in LOVE with this gift idea and I hope that it sparks some creativity for your holiday gift giving this year.  You know… not all homemade holiday gifts have to be sweet! I know some of us would love some savory treats as well!


Minty Muddy Chex Party Mix // A Fun Holiday Goodie

2 · Dec 16, 2013 · Leave a Comment


WhipperBerry Minty Chocolate Peanut Butter Chex Mix-4

Ahhhh, I love this time of the year! Everyone is starting to focus more on family and getting ready for the holidays. I know in our house with the weather cooling down we are also slowing down and doing more things together like watching movies and playing games together. With all that… We are constantly on the look out for good snacks. One of our all time favorite is the iconic Chex® Party Mix. You can never go wrong when you are snacking on Chex® Party Mix! 

Let's start with the cereal it's self… They have EIGHT different flavors! Seven of them are gluten free (Wheat Chex® cereal is not. For more Nutritional information please visit this site and make sure you read each label.) They have everything from Rice Chex®, Corn Chex® and even some super fancy ones like Chocolate, Vanilla and even Apple Cinnamon Chex® Cereal. All of them are like blank canvases when it comes to making Chex® Party Mix. Seriously… The sky is the limit. Don't believe me, check out the Chex® Party Mix Recipe site and you'll see all kinds of fun ideas. The nice thing about the party mix is that, yes… you get to have some of those scrumptious treats that we all crave but, you also get a nice helping of some good whole grains from the Chex® Cereal. Win / win!

The kiddos and I decided to create our own salty & sweet Chex® Party Mix recipe to have around the house. We call it Minty Muddy Chex® Mix and it's a fun flavor combination of sweet chocolate, Jiff's Whipped Peanut Butter & Chocolate Mint Spread, Peanut butter pretzels and salty Corn Chex® Cereal. It's sweet and nutty all at the same time. The bonus… It only takes 15 minutes to make!

Minty Muddy Chex® Party Mix Ingredients

8 cups Corn Chex® cereal

​2 cups Vanilla Chex® cereal

1 cup butter

1 cup Jiff's Whipped Peanut Butter Chocolate Mint Spread

1 cup semi-sweet chocolate chips

1/2 vanilla

1/2 cup powdered sugar

salt

1 cup mini M&M's

2 cups Rold Gold peanut butter pretzels

Minty Muddy Chex® Party Mix Directions

Start with a small microwave safe bowl. Add a 1/2 a stick of butter, the chocolate chips and the Jiff Whipped Peanut Butter Chocolate Mint Spread. Microwave in 30 second segments until the mixture has melted and is nice and smooth. Remove from Microwave and stir in vanilla. Place 3 cups of Corn Chex® into a large bowl and drizzle chocolate mixture on top. Carefully fold the chocolate mixture into the Corn Chex® Cereal. Place the chocolate covered cereal into a large Ziplock bag and add powdered sugar into the bag. Seal bag and shake the bag until the chocolate covered cereal is covered with the powdered sugar. Pour out onto a wax paper lined cookie sheet. Place in the refrigerator to set.

In another small microwave safe bowl or measuring cup, add the remaining butter. Place in Microwave for 45-60 seconds or until melted. Add the remaining Corn Chex® cereal into a large microwave safe bowl and drizzle the butter over the top. Add a generous amount of salt to the bowl and gently fold in the butter and salt into the cereal. Once the mixture is mixed well, place in the microwave for 3-4 minutes. Remove from the microwave and place in the refrigerator to cool for a few minutes.
Once your salty and sweet mixture is cool and set, place into a large bowl and add remaining ingredients. Mix well. 

Now, this snack is fabulous to share with family and friends during all of your favorite activities. This year I am going to make up several large batches and then bag them up as a fun holiday treat to share with neighbors, friends, co-workers, the mailman… anyone really!

WhipperBerry Minty Chocolate Peanut Butter Chex Mix-2

This post brought to you by Chex® cereal. I have been compensated and given free product for my time & commitment, but all opinions are 100% mine

  • « Go to Previous Page
  • Page 1
  • Interim pages omitted …
  • Page 43
  • Page 44
  • Page 45
  • Page 46
  • Page 47
  • Interim pages omitted …
  • Page 67
  • Go to Next Page »

Primary Sidebar

Heather from Whipperberry
Hello... my name is Heather and I'm the creator of WhipperBerry a creative lifestyle blog packed full of great recipes and creative ideas for your home and family. I find I am happiest when I'm living a creative life and I love to share what I've been up to along the way... Come explore, my hope is that you'll leave inspired!

Footer

  • Privacy Policy
  • Crafts
  • Food
  • Gifts
  • Holidays
  • Home
  • Mom Life
  • Recipes
  • Travel

Copyright © 2026 · Seasoned Pro