• Skip to primary navigation
  • Skip to main content
  • Skip to primary sidebar
  • Skip to footer

Whipperberry

WhipperBerry • Your Home For Creative Inspiration

  • Home
  • Recipes
    • Starters
    • Easy Weeknight Dinners
    • Main Dish
    • Salads
    • Side Dish
    • Soups & Stews
    • Desserts
    • Breakfast
    • Miscellaneous
  • Tutorials
    • Creative Crafts
    • DIY Decor
    • Fabric Crafts
    • Food How-To
    • Jewlery
    • Paint Projects
    • Paper Art
    • Party Styling
    • Photography and Graphic Design
    • Silhouette
  • Holidays
    • Easter
    • Mother’s Day
    • Father’s Day
    • 4th of July
    • Halloween
    • Thanksgiving
    • Christmas
    • Valentine’s Day
  • Gift Ideas
    • Gifts For Everyone
    • Gifts for Dad
    • Mother’s day
    • For The Girls
    • For The Kids
    • Teacher Gift Ideas
    • Christmas
  • Printables
    • Holiday
    • Gift Idea
    • LDS Primary
  • Travel
  • About
    • Terms
  • Contact
  • Nav Social Menu

    • Facebook
    • Instagram
    • Pinterest
    • RSS
    • Twitter

Seasons

Salted Caramel Apple Pie Recipe

2 · Oct 17, 2013 · 18 Comments

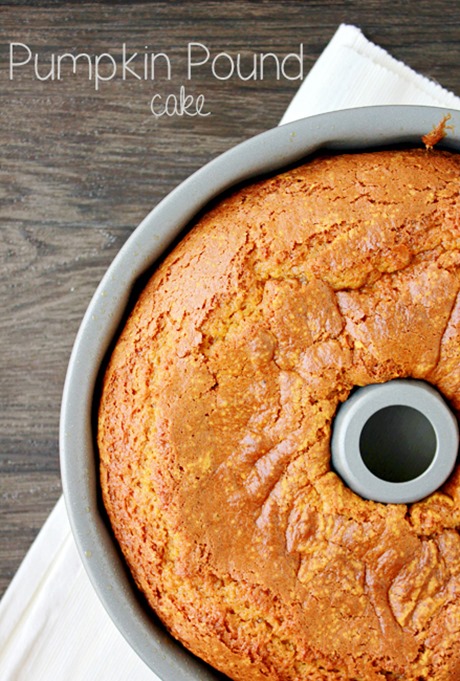
Salted Caramel Apple Pie Recipe // Hello Whipperberry readers!  It's Jenn here from Clean and Scentsible. I'm so excited to be visiting again today and have brought along my new favorite dessert – salted caramel apple pie!  I normally prefer desserts with chocolate so you know this has got to be good! 🙂

Salted Caramel Apple Pie.  SO good!

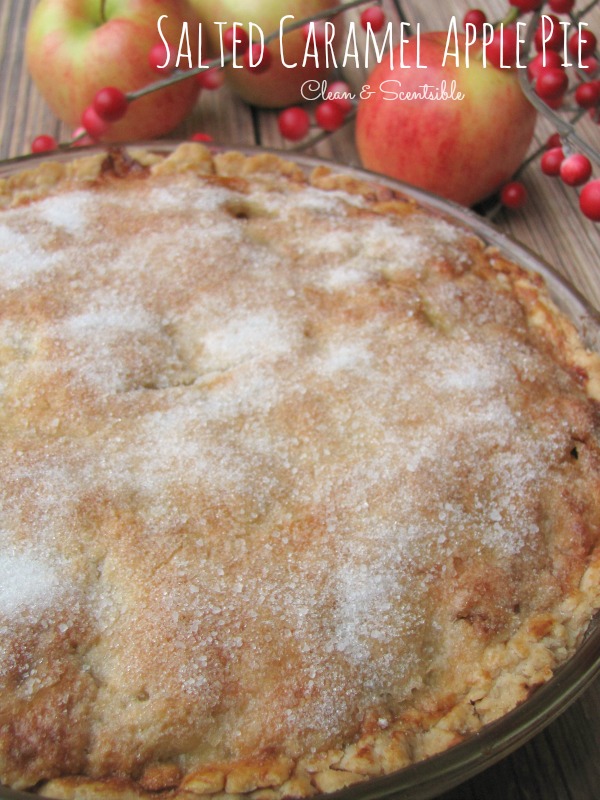
This would make the perfect dessert for Thanksgiving or any other fall dinner party!

Ingredients

Crust

  • 2 cups all purpose flour
  • 1 tsp. salt
  • 3/4 cup vegetable shortening {cut into 1/2 inch cubes}
  • 6-8 tbsp ice cold water

Filling

  • 2 tbsp butter
  • 8 medium apples peeled, cored, and cut into 1/2 inch cubes
  • 1 tbsp. butter
  • 2 tbsp. all purpose flour
  • 1 can Dulce de Leche Caramel sauce {available in the sweetened condensed milk section}
  • 1 tsp. cinnamon
  • 1 1/2 tsp. sea salt

Topping

  • one egg, beaten
  • 1-2 tbsp. sugar
  • 1/2 tsp sea salt

Salted Caramel Apple Pie

Directions

Crust

Combine the flour and salt in a large bowl. Add the shortening, working it into the mixture using a pastry blender until course crumbs form.  Fill a bowl with water and some ice cubes.  Sprinkle about 2-3 tbsp. of the water over the mixture distributing it evenly.  Continue to add water 1 tbsp. at a time until the dough will hold together when pressed.  Divide the dough into two balls, one slightly larger than the other and then flatten into 1/2 inch thick discs.  Chill for at least 30 minutes.

Filling

Cook the cubed apples with 2 tbsp. of butter in a large skillet for 10 minutes over medium heat.  Allow to cool.  In a sauce pan, melt 1 tbsp. of butter with the flour and cook on low for 1 minute.  Add the caramel sauce, cinnamon and salt.  Continue to cook for approximately 3 minutes.  Combine approximately 3/4 of the mixture with the cooled apples.  Save the remaining caramel sauce for the topping.

Putting it Together

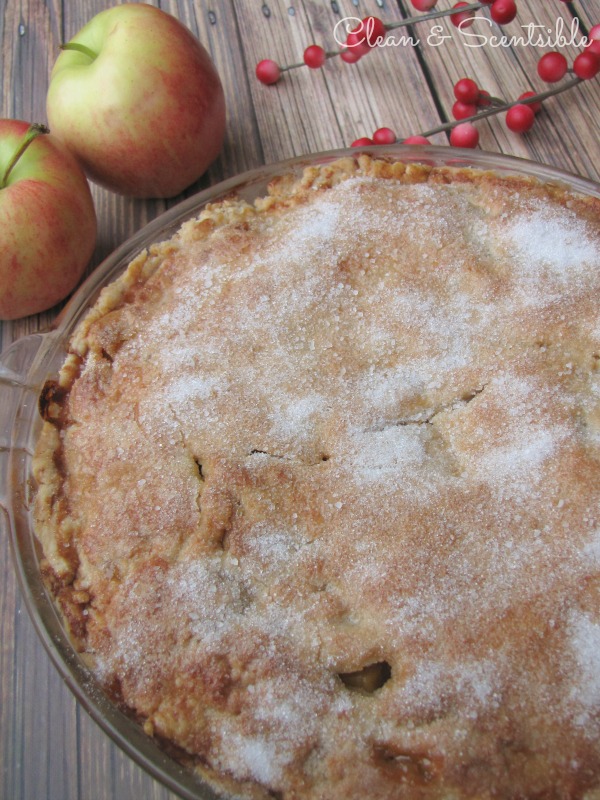
Preheat the oven to 375F.  Lightly flour your workspace and roll out the larger ball of dough into a large circle to line the bottom and sides of your pie plate {approximately an 11 inch circle}.  Place the dough in a nine inch pie plate and fill with the apple mixture.  Roll out the remaining dough to form the top of the pie.  Brush the edges of the pie with the beaten egg and press to seal.  Cut some vent slits in the center of the pie.  Brush the top of the pie with egg and sprinkle with the sugar and salt.  Bake for 55-60 minutes until the crust is golden brown.

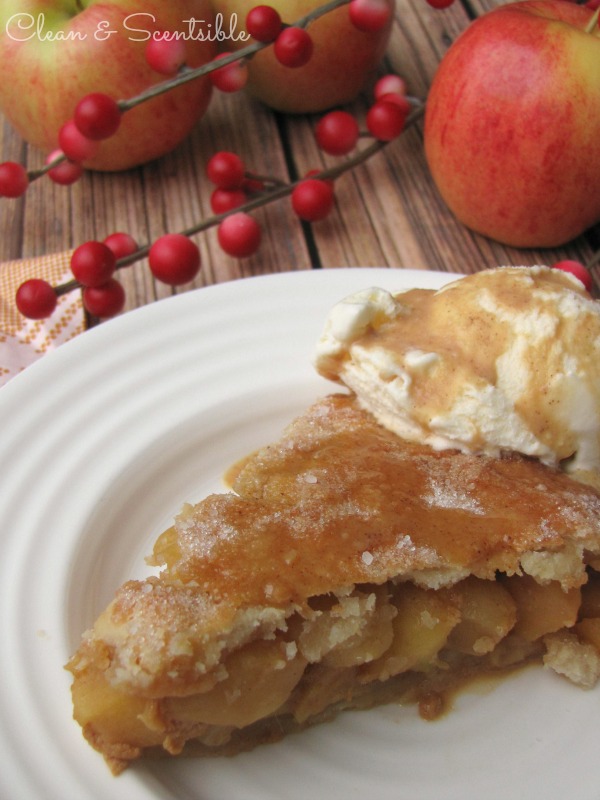
Top with vanilla ice cream and drizzle with the remaining caramel sauce.  Pure deliciousness!  I promise that you won't be disappointed!

Salted Caramel Apple Pie.  SO good!!

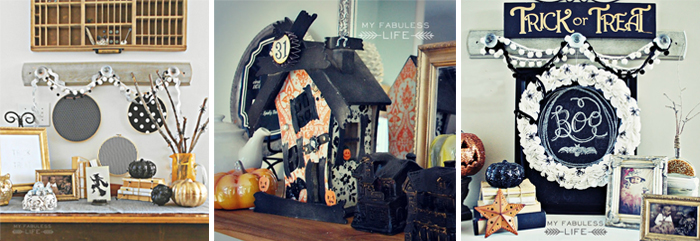
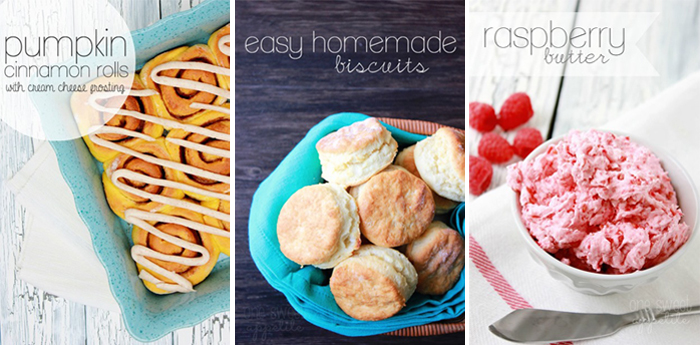
If you are looking for some other Thanksgiving ideas, you might like these posts as well…

Thanksgiving Ideas

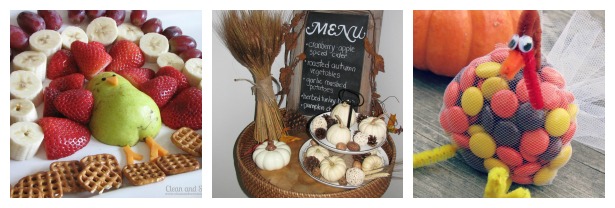
Chocolate Turkey Fruit Fondue / Thanksgiving Decor / Turkey Treats


You can also visit me with here: FACEBOOK / PINTEREST / INSTAGRAM / TWITTER

Thanks so much to Heather for having me! Hope you all have a wonderful day!

Apple Butter Recipe

4 · Oct 1, 2013 · 4 Comments

Apple Butter Recipe // Ahhhh fall. So many great things to look forward to this time of year. Boots, comfy sweaters, Halloween, Thanksgiving, pumpkins, changing leaves, apples…I love all of it! It also seems to be the time of year where we see a lot more of our friends and family, and that means the opportunity to eat and share lots of good food!

So this is the perfect time for me to try out some new recipes, and do some planning for the upcoming holiday season! When I'm putting together appetizer and meal ideas for company I really try to keep things simple, and use ingredients that most people love.

This recipe is one of those dishes! Apple Butter is the perfect thing to keep on hand for a number of different occasions. It's great served on top of Brie for an appetizer, or spread on a ham & Brie sandwich for lunch, or scooped onto ice cream for dessert. It's so versatile!

Apple butter is made in the crockpot over a 10-12 hour period, so that the apples and spices have time to come together and make a smooth apple spread. Don't be afraid of the length of time it takes to make Apple Butter, it's really very simple. All you have to do is put the ingredients into a crock pot and let it simmer during the day or even overnight. Then you have the most delicious treat!

Apple-Butter-{A-Pretty-Life} Apple-Butter-Title2 Ingredients: (Makes 1 – 2 cups) 6 medium/large apples, cored and peeled and chopped 1/2 cup sugar 1/2 cup brown sugar 1 1/2 to 2 tsp cinnamon pinch nutmeg pinch allspice dash salt 1 tsp vanilla (optional)   Instructions:

  • In a crockpot, mix together the chopped apples with the sugars and spices. Mix well.
  • Cook in the crockpot on low for 10 hours, stirring occasionally if you can. Let the mixture cook until it is thick and dark brown.
  • After the 10 hours, remove the lid and blend the apple mixture with an immersion blender until smooth.
  • Then cook uncovered in the crockpot for an additional 1 – 2 hours.
  • Store in sterile jars in your fridge for up to 2 weeks.

  Serving Ideas:

  • Serve on a brie cheese wheel (see below).
  • Make a ham and brie cheese sandwich, and spread on some apple butter. You could cook it like a grilled cheese sandwich. Yum!
  • Serve alongside roast or BBQ'd pork.
  • Serve on vanilla ice cream.
  • Spread on toast.

– – – – – – – – – – – – – – – – – – – – –

Whisk

Now because I have an obsession with anything having to do with Brie cheese, I wanted to give you an option on how to serve some of your Apple Butter. Apples and Brie are a match made in Heaven. Major deliciousness going on here.

Actually the whole inspiration for me to make Apple Butter was just imagining it baked onto some Brie cheese. I thought it would make a perfect fall appetizer…apples, cinnamon & spices with cheese…a delicious seasonal dish. Mmmmmmm!

Apple-Butter-&-Brie-{A-Pretty-Life}

But you may notice in this picture that the apple butter is not smooth. I wanted the mixture to be chunky on top of the brie…I just like the texture better. All I did was take about a 1/2 cup of the apple butter out of the crockpot before I blended the rest. This step of course is entirely up to you.

Apple-Butter-Title

Instructions:

  • Preheat your oven to 400 degrees.
  • Place a brie cheese wheel in an oven proof serving dish. Score the top with a knife, then place it in the oven for about 5 minutes, until the brie is softened.
  • Then mound about 1/2 cup of the apple butter on top of the brie, and bake for about 3-4 minutes more.
  • Serve with crackers or chunks of bread.
  • Enjoy!


I hope you enjoy these recipes for Apple Butter!

– – – – – – – – – – – – – – – – – –

For even more delicious appetizers, come on over!

Whipperberry-Features

Cedar Planked Fruit & Wine Brie Bites | Artichoke & Spinach Dip | Tomato & Basil Bruschetta

– – – – – – – – – – – – – – – – – –

Have a delicious day! Signature

Free Halloween Printables

6 · Sep 18, 2013 · 8 Comments

Free Halloween Printables // Hi it's Jenn from My Fabuless Life and I'm excited to be back this month to share a couple of fun Halloween printables.  Can you believe that it's almost October?!!

I love Halloween!  I admittedly am not much of a dresser-upper, but I love the magic of Halloween, the colors, the chill in the air and smells of fall, decorating (of course)–basically, everything.

I've created a Halloween printable for you in some of my favorite Halloween color combos.  Enjoy!!
 

{DOWNLOAD}
 
{DOWNLOAD}
 
 
 {DOWNLOAD}
 
You can head over to my blog for another Halloween printable (that I used on my Halloween mantel).
 
 
Happy Halloween decorating!
 
My Fabuless Life
halloween mantel // haunted houses // halloween decor

Pumpkin Pound Cake Recipe

493 · Sep 17, 2013 · 43 Comments

Pumpkin Pound Cake Recipe // Show of hands, who here is so ready for fall baking? I have been itching to try out the collection of pumpkin recipes that have been piling up on my counter, and what better time then now?

Pumpkin Pound Cake

I dug through my box of random clippings and came out with one from Taste of Home that sounded too good to be true. Pumpkin pound cake… in a bundt pan.

I’ve had a bundt pan for years but it has sat in the back of my cupboard (in the original plastic) since day one, unused. I was a little ashamed and figured this would be the perfect reason to bust it out.

There is no better way to break in a new pan then with a pumpkin recipe!

Ingredients for Pumpkin Pound Cake

2-1/2 cups sugar

1 cup canola oil

3 eggs

3 cups flour

2 teaspoons baking soda

1 teaspoon Cinnamon

1 teaspoon nutmeg

1/2 teaspoon salt

1 can (15 ounces) solid-pack pumpkin

Directions

Preheat your oven to 350 degrees. Spray a bundt pan with non-stick spray. Set aside. Stir together the flour, baking soda, cinnamon, nutmeg, and salt. Set aside.

Whisk together your sugar, oil, eggs, and pumpkin. Fold in the dry ingredients and stir until combined. Pour into your pan and bake for 1 hour, or until a toothpick comes out clean.

If you were looking for your home to smell like fall, you’ve found the right recipe. My entire house smelled like pumpkin pie for days after I pulled this out of the oven. I topped it with a simple maple glaze, but it’s flavors stand on their own.

This is a great one to share with friends. Especially if you are home alone and might eat the entire thing all on your own (don’t judge).

You could even try making them in mini bread pans for a fun neighbor gift! Thanks Heather for letting me come by again!

Here are some more fabulous recipes from One Sweet Appetite

one sweet appetite


  • « Go to Previous Page
  • Page 1
  • Interim pages omitted …
  • Page 5
  • Page 6
  • Page 7
  • Page 8
  • Page 9
  • Interim pages omitted …
  • Page 15
  • Go to Next Page »

Primary Sidebar

Heather from Whipperberry
Hello... my name is Heather and I'm the creator of WhipperBerry a creative lifestyle blog packed full of great recipes and creative ideas for your home and family. I find I am happiest when I'm living a creative life and I love to share what I've been up to along the way... Come explore, my hope is that you'll leave inspired!

Footer

  • Privacy Policy
  • Crafts
  • Food
  • Gifts
  • Holidays
  • Home
  • Mom Life
  • Recipes
  • Travel

Copyright © 2026 · Seasoned Pro