Pumpkin Pound Cake Recipe // Show of hands, who here is so ready for fall baking? I have been itching to try out the collection of pumpkin recipes that have been piling up on my counter, and what better time then now?
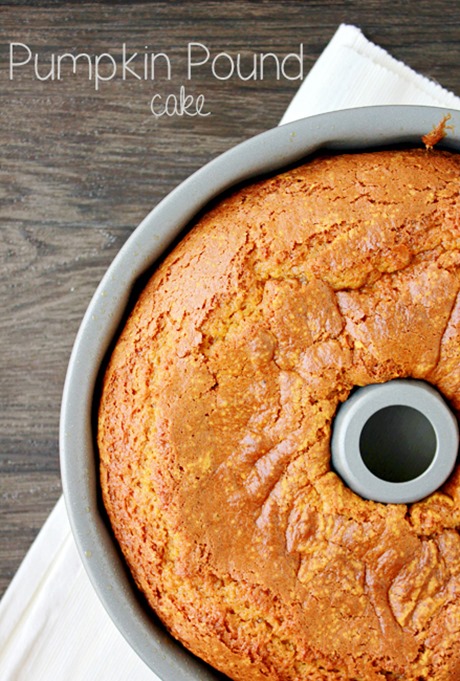
I dug through my box of random clippings and came out with one from Taste of Home that sounded too good to be true. Pumpkin pound cake… in a bundt pan.
I’ve had a bundt pan for years but it has sat in the back of my cupboard (in the original plastic) since day one, unused. I was a little ashamed and figured this would be the perfect reason to bust it out.
There is no better way to break in a new pan then with a pumpkin recipe!
Ingredients for Pumpkin Pound Cake
2-1/2 cups sugar
1 cup canola oil
3 eggs
3 cups flour
2 teaspoons baking soda
1 teaspoon Cinnamon
1 teaspoon nutmeg
1/2 teaspoon salt
1 can (15 ounces) solid-pack pumpkin
Directions
Preheat your oven to 350 degrees. Spray a bundt pan with non-stick spray. Set aside. Stir together the flour, baking soda, cinnamon, nutmeg, and salt. Set aside.
Whisk together your sugar, oil, eggs, and pumpkin. Fold in the dry ingredients and stir until combined. Pour into your pan and bake for 1 hour, or until a toothpick comes out clean.
If you were looking for your home to smell like fall, you’ve found the right recipe. My entire house smelled like pumpkin pie for days after I pulled this out of the oven. I topped it with a simple maple glaze, but it’s flavors stand on their own.

This is a great one to share with friends. Especially if you are home alone and might eat the entire thing all on your own (don’t judge).
You could even try making them in mini bread pans for a fun neighbor gift! Thanks Heather for letting me come by again!
Here are some more fabulous recipes from One Sweet Appetite