This post is being sponsored by The Coca-Cola Company. All thoughts and opinions are my own.
With the Holidays soon upon us, it’s time to start thinking about what to make for all of our family gatherings and what to stock-up on to keep our pantry full for the season. For me, I’ll be heading to Sam’s Club and stocking up on several items. Good cheeses, pickles, olives, bread, puff pastry, seasonal fruit, nuts, spices and of course plenty of Diet CokeⓇ! Come see what we will be making at our house…
A table full of seasonal goodies is what really makes the Holidays for my family and I. The kitchen, especially the table is the center of the season with all kinds of scrumptious goodies. We have several food traditions in our home… Of course the typical cookie and candy making, the traditional meals for Thanksgiving and Christmas and some not so traditional like a dinner that is made up of a whole spread of yummy appetizers for New Years.
Friends and family are always dropping by and I’ve learned that it’s super important to keep the pantry stocked at all times so that we are prepared for unexpected guests. Here are some of my pantry staples from Sam’s Club.
Holiday Pantry Staples
- Tiny Pickles
- Olives
- Cranberries
- Fancy Cheese
- Crackers
- French Bread
- Puff Pastry
- Seasonal Fruit
- Holiday Spices
- Diet CokeⓇ
- Nuts
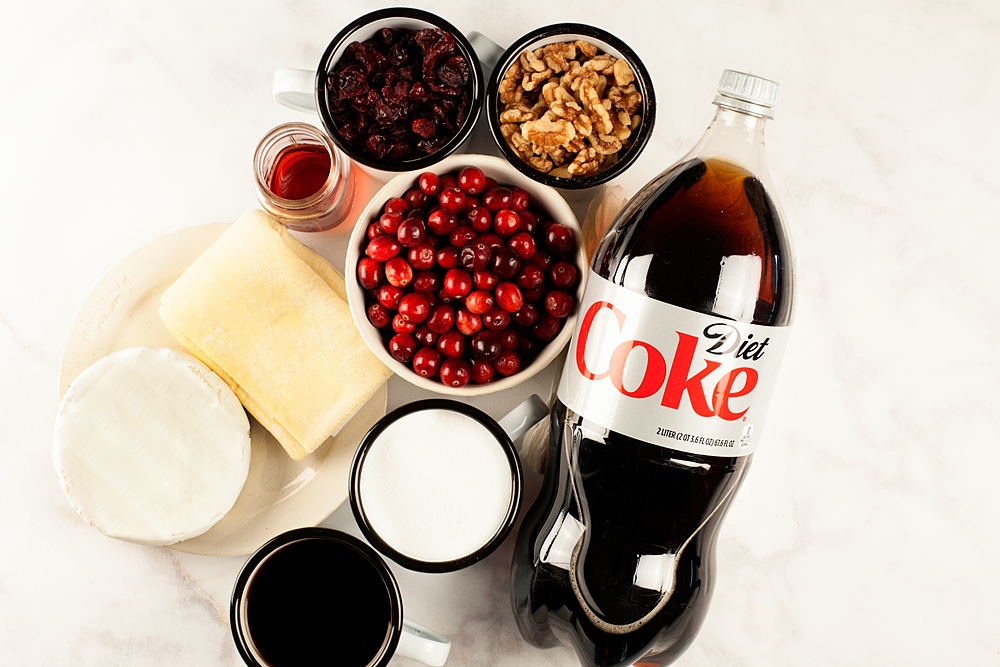
It’s always good to have those quick appetizers or snacks on hand like the pickles, olives, cheese and crackers. The Sam’s Club French Bread freezes beautifully and is easy to pull out to go with soup or to slice up to use with a dip. Their seasonal fruit is exceptional and is great to give as a quick gift. You could even make a gift out of holiday spices… Wouldn’t that be fun! It’s good to keep nuts on hand for baking along with snacking and we CAN’T FORGET the Diet CokeⓇ! It’s perfect for serving to guests, for helping you get through the craziness of the season AND for baking or cooking.
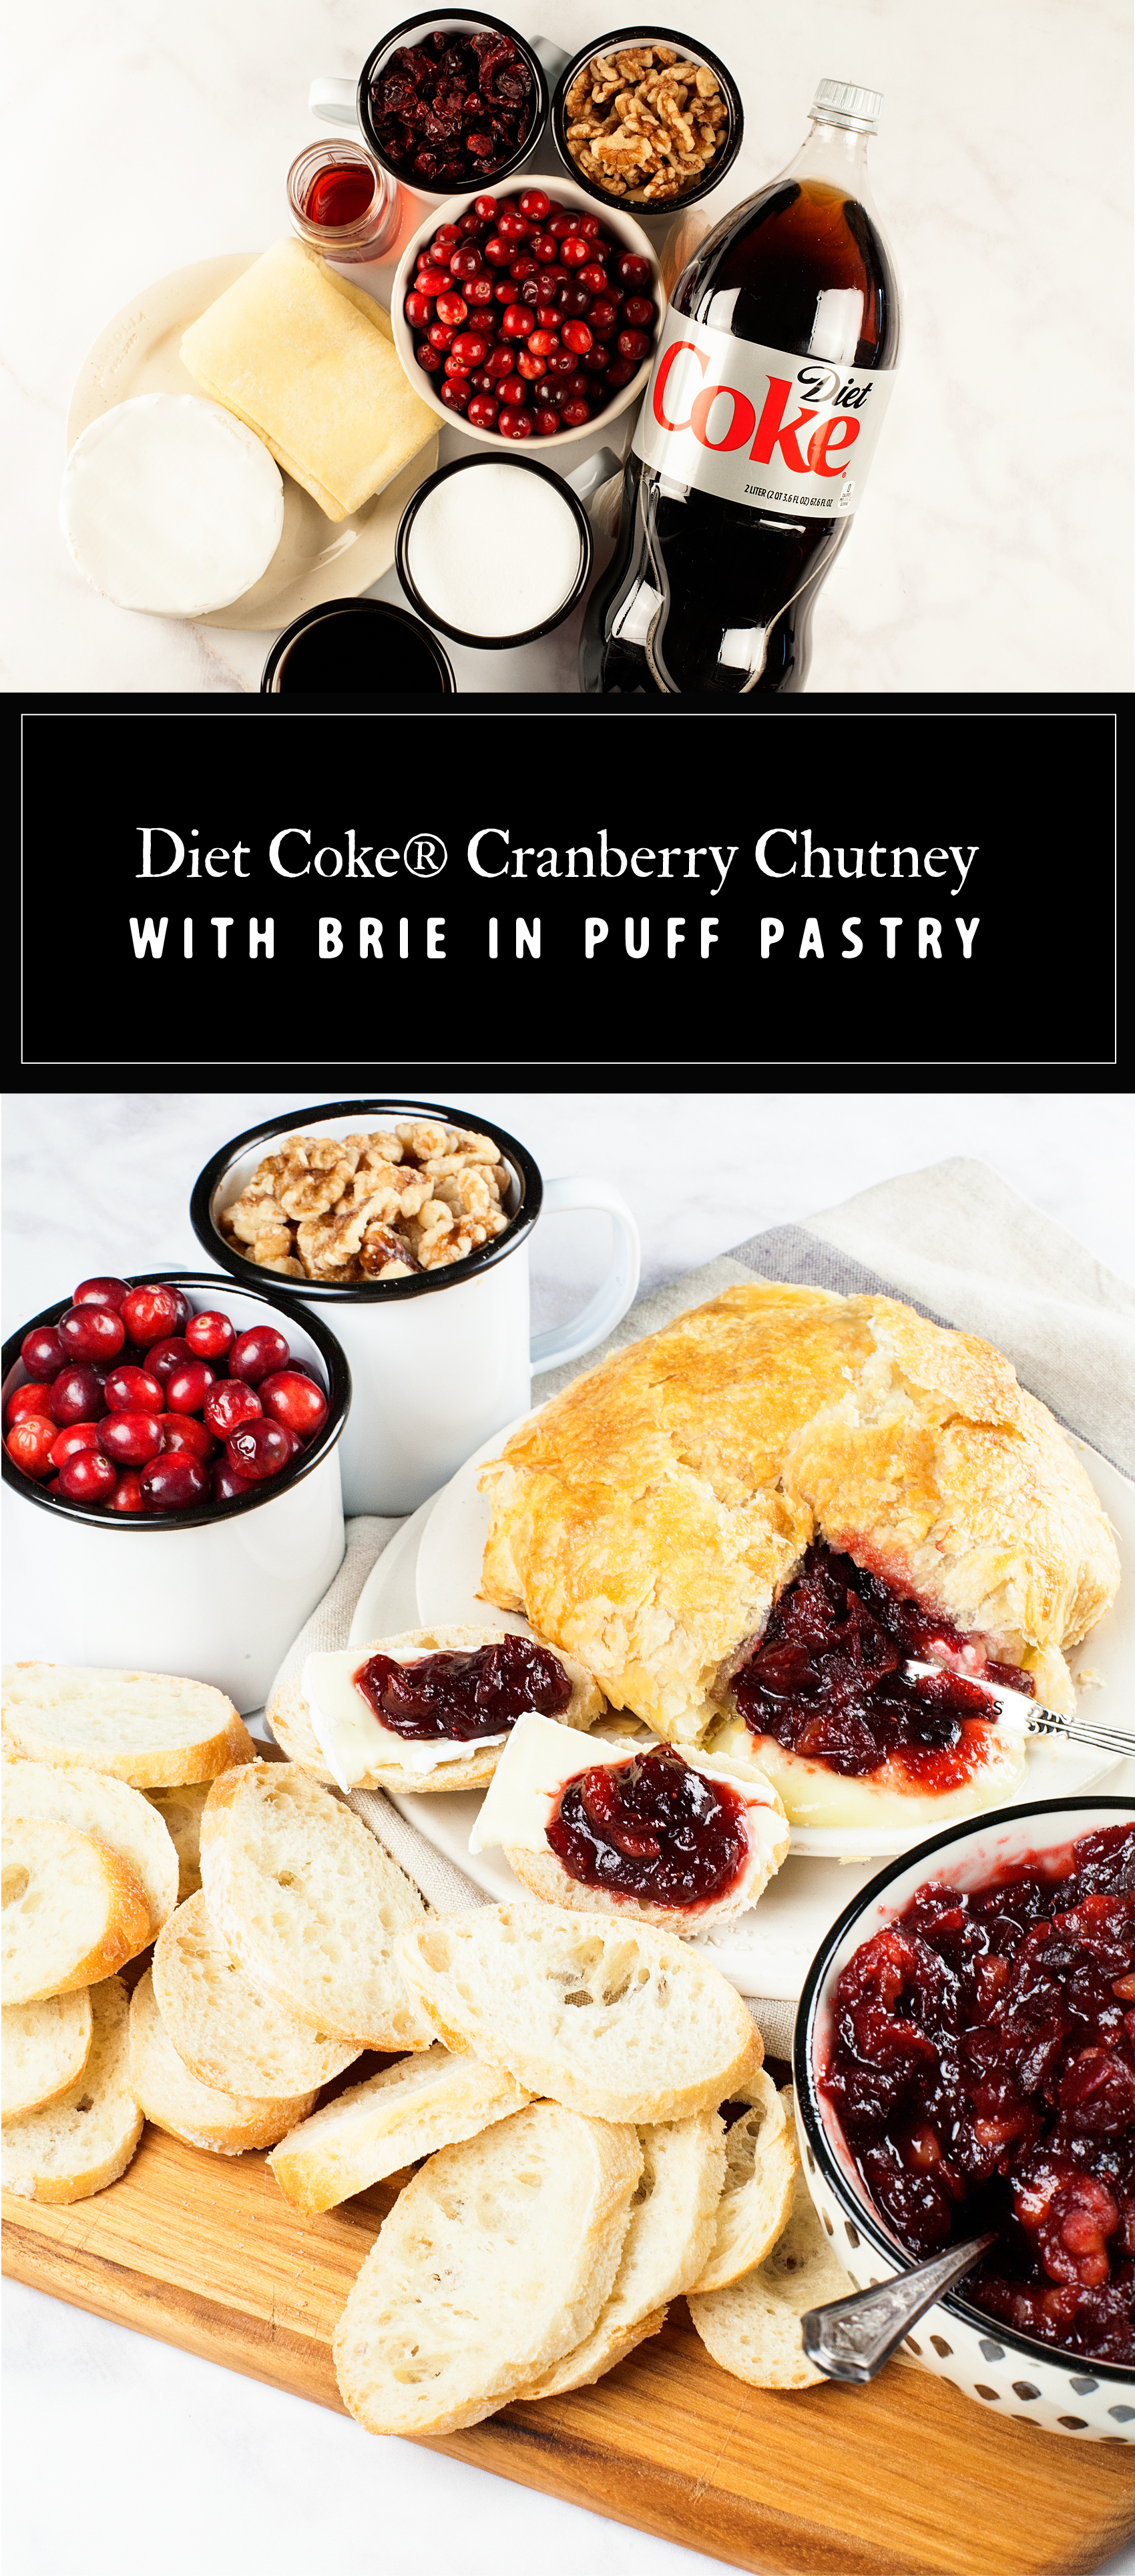
Wait a minute… Baking and cooking? Yep, Diet CokeⓇ is a great pantry staple that is good for cooking with as well. You may have heard of Diet CokeⓇ cake or even several types of meat slow cook nicely in Coca-ColaⓇ. Here is one of my favorite recipes for Cranberry Chutney with Brie in Puff Pastry to take to Holiday gatherings that is made with, surprisingly enough, Diet CokeⓇ! Here is a QUICK little video to show you how I put it together.
I LOVE how the Diet CokeⓇ Cranberry Walnut Chutney pairs with the Brie cheese, what’s fun is that it’s all wrapped up like a nice gift in some puff pastry. You have the savory cheese paired with the tangy and sweet chutney that is simply scrumptious. Plus, it looks great on a Holiday table. Our family can’t get enough of it! Here’s how to make it.
Diet CokeⓇ Cranberry Walnut Chutney with Brie in Puff Pastry
“Coca-Cola” is a registered trademark of The Coca-Cola Company. “Diet Coke” is a registered trademark of The Coca-Cola Company.
This holiday season, include Coca-Cola® as part of your tradition. Pick up Sprite® 4 pack 2 Liter, Diet Coke® 4 Pack 2 Liter, Coca-Cola® 35 pack cans, or Coca-Cola® 30 pack Mini Cans beverages from Sam’s Club, then upload your receipt for a chance to WIN a trip for two to Los Angeles featuring:
· An exclusive red-carpet screening of The Greatest Showman, plus pre-show
performance
· Round trip air transportation for two (2)
· Two (2) 20th Century Fox goodie bags
· Three (3) nights’ luxury accommodations in a Hollywood hotel · VIP backstage tour of Fox Studios with lunch at the on-site restaurant
· Full on-site assistance from a personal winner manager throughout the trip Don’t miss
this incredible opportunity!