Here is another blog friend who I have come to respect and admire. Have you met sweet Kiki from Kiki Creates?

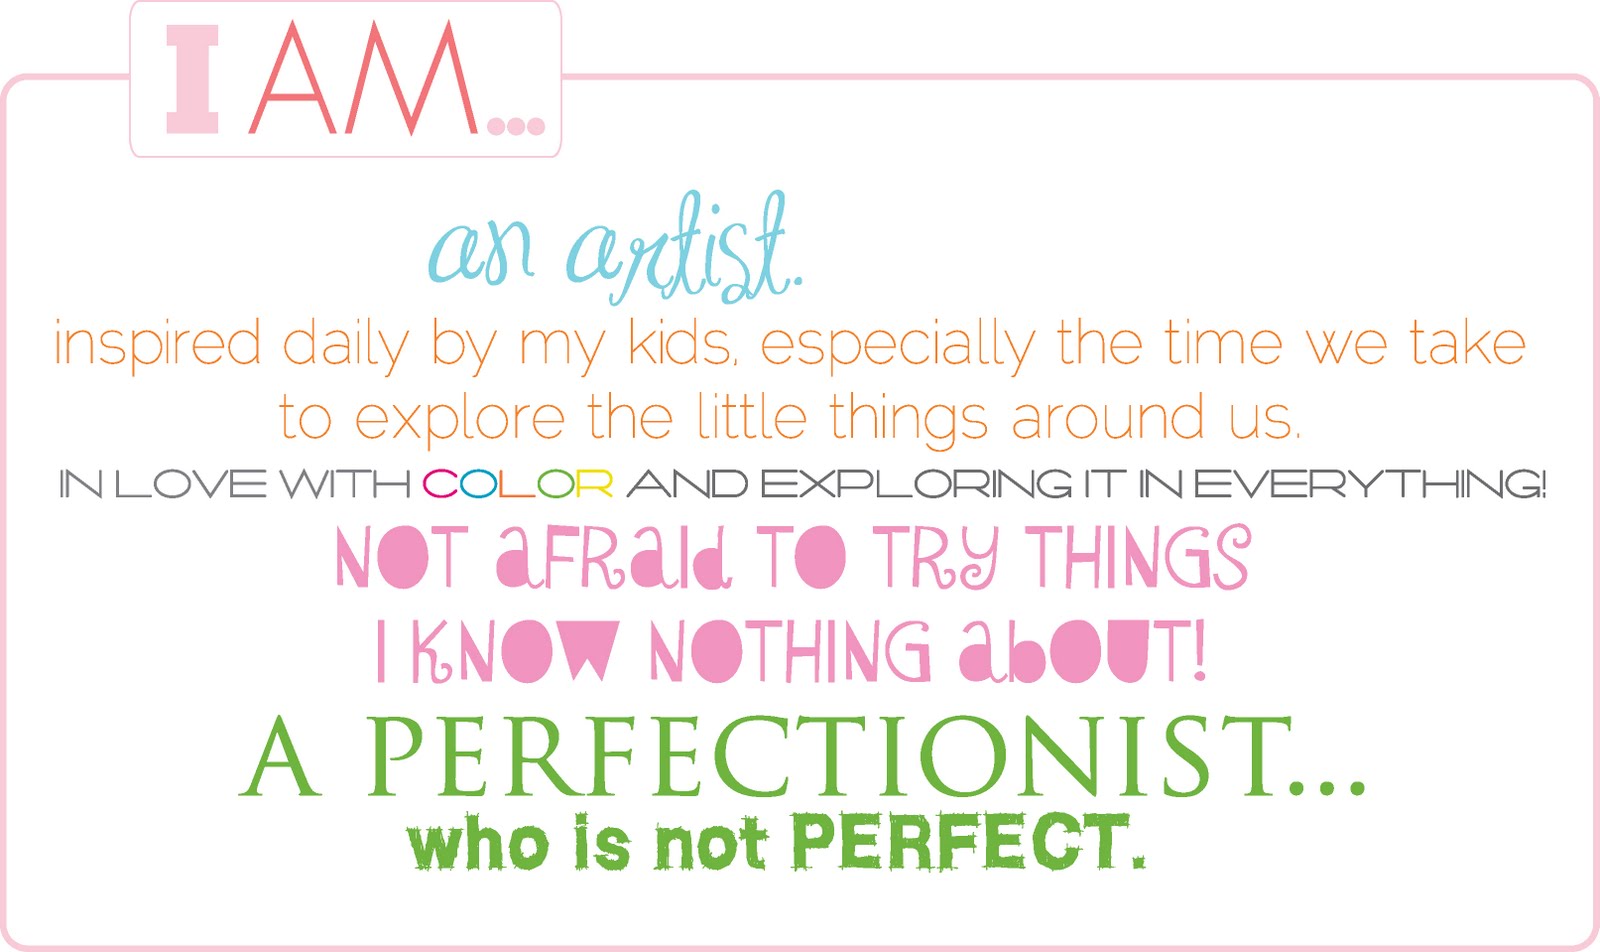
The things I KNOW:

In REAL life:
THINGS that make me happy:

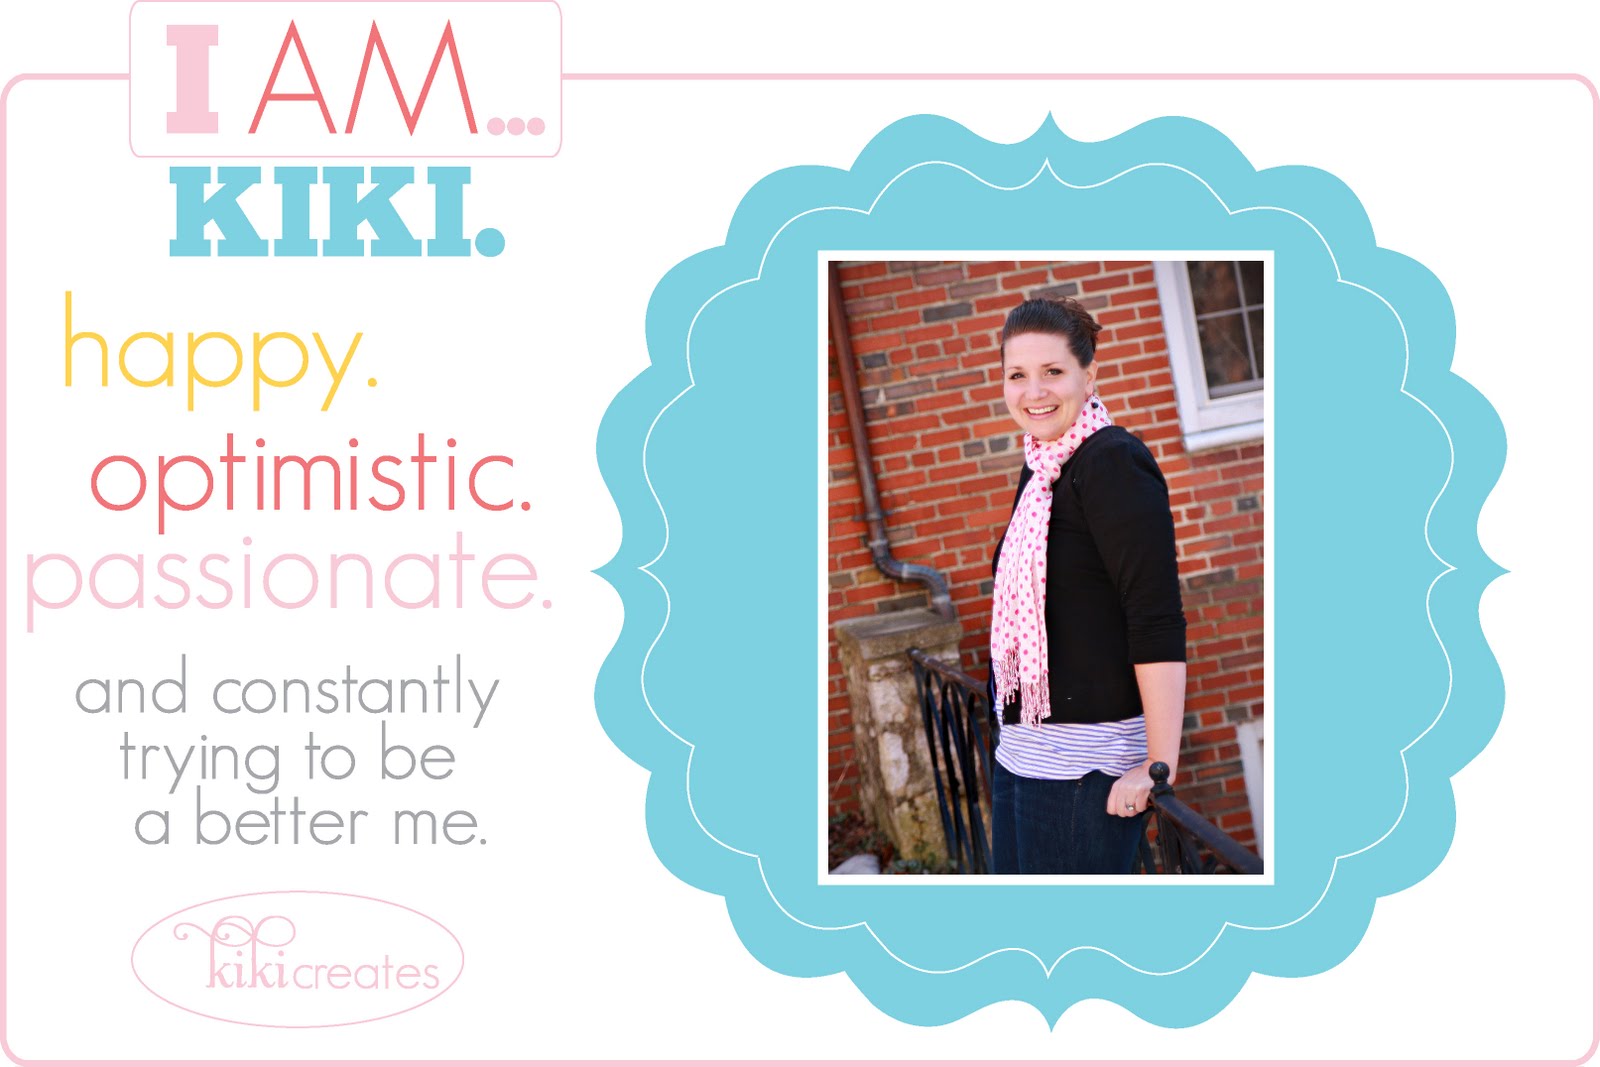
Isn’t she AMAZING!!! I am so lucky to live in the same city with this lovely gal and to be able to get together and play
Now let’s PARTY!!
…

 copy")

