• Skip to primary navigation
  • Skip to main content
  • Skip to primary sidebar
  • Skip to footer

Whipperberry

WhipperBerry • Your Home For Creative Inspiration

  • Home
  • Recipes
    • Starters
    • Easy Weeknight Dinners
    • Main Dish
    • Salads
    • Side Dish
    • Soups & Stews
    • Desserts
    • Breakfast
    • Miscellaneous
  • Tutorials
    • Creative Crafts
    • DIY Decor
    • Fabric Crafts
    • Food How-To
    • Jewlery
    • Paint Projects
    • Paper Art
    • Party Styling
    • Photography and Graphic Design
    • Silhouette
  • Holidays
    • Easter
    • Mother’s Day
    • Father’s Day
    • 4th of July
    • Halloween
    • Thanksgiving
    • Christmas
    • Valentine’s Day
  • Gift Ideas
    • Gifts For Everyone
    • Gifts for Dad
    • Mother’s day
    • For The Girls
    • For The Kids
    • Teacher Gift Ideas
    • Christmas
  • Printables
    • Holiday
    • Gift Idea
    • LDS Primary
  • Travel
  • About
    • Terms
  • Contact
  • Nav Social Menu

    • Facebook
    • Instagram
    • Pinterest
    • RSS
    • Twitter

Food

$2.00 DIY Beach Bag

0 · Jul 25, 2013 · 3 Comments

Hi Whipperberry readers!  It's Jenn from My Fabuless Life back this month to show you a super simple, super affordable little beach bag I threw together for a recent family vacation.  Literally, if you have five minutes and a five dollar bill, you can make this–you don't even need a personal cutter!  And what's extra awesome about this project is that you can use this method to "screen print" just about anything that's fabric!  


Our family recently went on vacation to the beautiful Oregon Coast and this trip meant two things for us: LOTS of time in the car (we drove from Utah to Oregon) and LOTS of time at the beach.  I always pack my 3 year old daughter a road trip bag and a brand new bag to hold all of the goodies is part of the fun.  For this trip, my $2.00 bag pulled double-duty by holding all of her stuff during the car ride and then all of our treasures and toys once we got there and were ready to spend our days on the beach.

To make your own bag you'll need:
Freezer paper
Craft paint + Fabric Medium
A cloth bag (I got mine for $1.99 at Hobby Lobby without the 40% coupon)
Iron

Find the image you want to use: for this one, I just Googled "Whale Silhouette" and found one that I liked.  Click on the image so it shows up on your screen like this (in Google, you can also click "view original image"):


Zoom in or out on the image until it's the size you want and then just lay your freezer paper right over the computer screen and trace GENTLY!  Let's not go ruining any computer screens here, since that would sort of negate this whole $2.00 project thing.  You should be tracing on the freezer paper shiny side down (pencil marks will be on the dull side).

Next, just cut out the image with an Exacto knife.  Make sure to leave plenty of room around your shape to "slop" your paint so it stays on the paper and doesn't smudge all over your fabric.  Make sense?  If not, you'll see what I mean below.


I wanted this to be sort of "kid chic" so I left the cute little face off of the whale–not to mention, it makes it that much easier to cut and paint.  Next, iron your freezer paper onto your fabric shiny side down.  Make sure to iron it down good and tight so your paint doesn't bleed underneath (I do it with my iron on the highest setting).  Also be sure to iron your bag or shirt or whatever you're using prior to painting it.  Painting on wrinkled fabric will not give you pretty results.

Next comes paint: mix the paint and medium according to the instructions on the bottle of fabric medium (which can be found with the craft paints).  I used gold paint (like I said, I was going "kid chic" here and it glitters in the sun–BONUS!) and my fabric medium ratio was 2 parts paint to 1 part medium.  This gives you a softer finish on the fabric once the paint dries.  You can do this without the medium, but your paint will be stiff and won't soften as much in the wash.  YES–you CAN wash it!!

Apply your paint (you can use a brush or a dobber), let the paint dry a little and then pull the freezer paper off and let the paint dry overnight.  DONE & DONE!!
 

This is such a fun easy way to personalize gifts.  Onesies for baby showers, book bags for kids, team t-shirts for little ones…the possibilities are really endless.  Later this week over at MFL, I'll be showing you what I filled this bag with for my little one and my favorite tips for LONG road trips with kids so make sure to stop by!

My Fabuless Life

diy screen printed team shirts // summer printable // memories in a jar 

jenn from my fabuless life

Chocolate Biscoff Buttercream Cupcakes

5 · Jul 24, 2013 · 19 Comments

This post is brought to you by Biscoff Spread // Have you “Spread the Love” yet? You know, the spread that has taken the nation by storm… Biscoff Spread.  I have dipped my toe in the Biscoff pool a couple of times and today I’m sharing my Chocolate Biscoff Cupcakes along with sharing about the Biscoff Spread the Love Challenge. All you have to do is share your photos of how you use Biscoff. You could win a trip to Belgium to the Biscoff factory, cash prizes or a years worth of Biscoff!!

Chocolate Biscoff Cupcakes from WhipperBerry

What is Biscoff? Well, if you’ve ever flown on a commercial airline within the last 20 years you may have had a Lotus Biscoff cookie as a in-flight treat.  They are a tasty cookie created in Belgium, and in Europe they are called Lotus Speculoos cookies.


Lotus Cookies from WhipperBerry


Back in 2007 a culinary enthusiast brought their Speculoos creation to a Belgium reality television show, not unlike our Shark Tank here in the U.S. and pitched an idea for turning the Speculoos cookies into a spread. The folks at Lotus LOVED the idea and that is how Biscoff Spread was born. Within 3 hours of it’s first release, the Biscoff spread sold out and it has become an overnight sensation all over the world!! Click here to find out where you can buy Biscoff.


Baking with Biscoff and WhipperBerry


All Biscoff products are made with all-natural ingredients and are preservative-free. They are free of trans fat and cholesterol and made without genetically modified ingredients or artificial colors. They are Vegan and also do not contain nuts. 


You can enjoy Biscoff in many ways, on toast, with apple slices, in a sandwich or in all kinds of sweet goodies. About a year ago, I created a Biscoff Crepe Raspberry Cake that was truly a show stopper. 


Raspberry-and-Biscoff-Crepe-Cake-copy


When I was developing that recipe I created my Biscoff buttercream recipe that is perfect for all types of desserts. This week I topped my favorite chocolate cupcakes with that amazing Biscoff buttercream and it was heaven in cupcake form. 


Chocolate Cupcakes with Biscoff Buttercream from WhipperBerry

Chocolate Biscoff Buttercream Cupcakes


Chocolate Cake:


1 Chocolate Cake Mix (any kind, I've used chocolate fudge, Swiss chocolate, or milk chocolate)


1 C Mini Chocolate Chips


1 cup Sour Cream


1 Pkg. of Chocolate Pudding (small 3.5 oz. box)


Biscoff Buttercream:


2 sticks of unsalted butter at room temperature


1 cup Biscoff


1 tsp. vanilla extract


pinch of salt


3-4 cups of powder sugar


1-2 tbsp. whole milk


Directions

For the most amazing chocolate cake ever, prepare cake batter as directed on box, and add sour cream, pudding and chocolate chips.  Pour into cupcake liners.  Bake as directed on box (you might need to add a minute or two to the baking time because of the added ingredients).  Place on a wire rack to cool.

For the buttercream I just modified my Simple Vanilla Buttercream recipe a bit by adding the Biscoff and lowering the amount of vanilla extract.  It’s a good classic and easy buttercream recipe.

In a bowl of an electric mixer with the paddle attachment,  place softened butter and Biscoff.  Cream the two together and add vanilla extract.  Turn mixer off and add half of the powder sugar, carefully turn the mixer on low and mix the sugar in completely. Add the remaining sugar slowly until it creates a dough like consistency. Add 1 tbsp. of milk and mix on high. Check the consistency of the buttercream. If it’s too tight add more milk. Mix on high for 5-7 minutes until light and fluffy.


If needed store in a air tight container in the refrigerator for up to a week.  Take out of the fridge for an hour or two before you want to use it to make sure that it is at room temperature when you need it.


Using a jumbo closed star decorating tip with a pastry bag from Sweet Baking Supply, I iced the cupcakes with a simple swirl and then drizzled a little melted Biscoff on top. For some added flair you can break-off a piece of a Lotus Biscoff cookie and place it on top of the frosting. These cupcakes will hold up quite well as long as the temperatures aren't too hot. Refrigerate if don't plan on eating them for a bit, but make sure to bring them back up to room temperature before serving. 


Biscoff Cupcakes


Don't forget to visit the Biscoff challenge for a chance to win a fun trip or a years worth of Biscoff. You can also find fun ideas on their Pinterest Boards along with their Facebook page.


Silhouette’s New Line of Products AND a Portrait GIVEAWAY

0 · Jul 22, 2013 · 209 Comments

This post brought to you by Silhouette // You know what’s right around the corner? You got it… The holiday crafting season! Time to start making your plans and stocking up on supplies. Time to hit up the Silhouette Shop!!

What’s even more exciting is that Silhouette is launching a whole new line of products this week at the Craft & Hobby Association Trade Show Create-n-Connect in Las Vegas! Eeeeeek, all kinds of fun new goodies to incorporate into your holiday crafting!!

Silhouette's New Line of Products

Along with the products featured above, they have a new Glass Etching Kit, a DIY Stamp Making Kit and a special Pen Holder!! All kinds of fun goodies.   Keep an eye on the Silhouette Blog, the will be highlighting several of the new products this week.

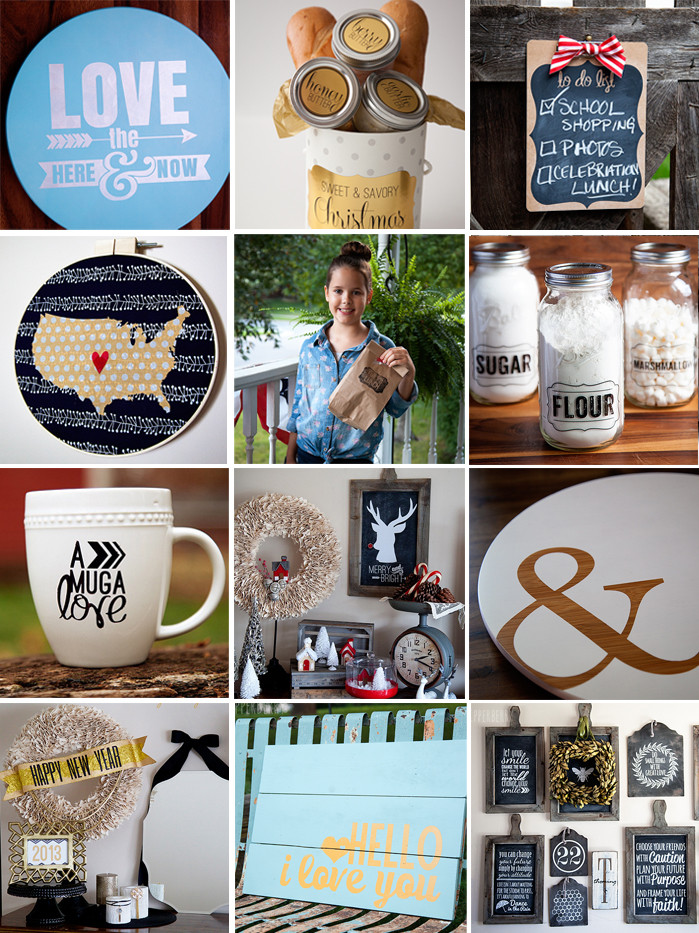
If you’ve followed WhipperBerry at all, you know that the Silhouette is my all-time FAVORITE crafting tool. Here are a few of my favorite Silhouette projects…

WhipperBerry Silhouette Projects

flash cards // painted lazy susan // fabric wall art // picnic caddy // vinyl wall art // vinyl globe // jack o’ lantern juice bottles // cuddle bug onezies // baby shower decor // valentines day wall art // hello, i love you sign // glitter art

With all that fun, have you been inspired to create something AAAMAZing? Well, Silhouette is making things super easy for you to stock up on all their goodies. Today though July 30th Silhouette has all of their consumable products at a whopping 40% off!! This promotion does not include the CAMEO or Portrait, downloads, download cards, subscriptions and gift cards.

July Silhouette Promotion

Click Here to visit the Silhouette Shop to take advantage of all the fun discounts!

Are you getting EXCITED!! What is that you say? You don’t have a CAMEO or Portrait? Don’t you worry!! Silhouette and I have you covered!! You can learn about my thoughts on the Cricut vs Silhouette and see what I actually suggest.

Whipperberry Silhouette GiveawayThe lovely folks at Silhouette are giving away one Silhouette Portrait to one lucky WhipperBerry friend. All you have to do is follow the directions in the Rafflecopter box below. This giveaway is open to anyone with a shipping address within the United States.

a Rafflecopter giveaway

Disclaimer // I was not compensated for this post. However, I am a Silhouette Affiliate.

Gone Fishing

0 · Jul 18, 2013 · 8 Comments

gone fishing

img source // gone fishing sign from okio b. designs

Well, I have finally cried UNCLE. I have been trying to work and participate in a family reunion this week and it hasn't worked so well. So, I am admitting defeat and will have to call off this week's party. Don't you worry, Friday Flair will return next week.  Thanks guys… I'll miss you!

Beeswax Candle and a Wood Burned Bowl

9 · Jul 17, 2013 · 10 Comments

 
Hi Whipperberrians!I am so excited to be back for month #2 on the Creative Team here at Whipperberry.  What an amazing bunch of girls they are!!  You can find me and my sis-in-law Jen posting over at Eat.Sleep.Make.  
 
Today I'm sharing with you how to make a scented beeswax candle and as the container, I'm using a wooden salad bowl that I bought at an estate sale for 25 cents.  
 
What you will need:
A wooden bowl
Wood burner
Block of beeswax (got mine at Hobby Lobby)
Wooden wick (Hobby Lobby)
Pasta Pot
Pyrex 4 cup measuring cup (or something similar)
 
 
Start by customizing your bowl by burning a design into it.  If you don't have a wood burner, you could always paint a design.


Next is the hardest part.  You need to guesstimate how much wax you will need to fill your bowl.  You want this to be in smaller chunks so it will melt properly. I just stabbed the block with a knife and plied chunks off of it.  
 
You need to use a double boiler to get the wax to melt without burning.  I kept my stove set on medium.  I found that if I turned it up higher than that the boiling water would jump into the wax (which, like I discovered, causes issues in the drying process).  
 
Use a cooking thermometer to monitor the heat of the wax.  It should get up to about 160-165 degrees and never go over 185 degrees.  


Once the wax was completely melted, I used some perfume oil I had from The Body Shop to scent the wax.  Essential oils can be used as well.  (If you want a candle that will relax you, use Eucalyptus Essential Oil and burn it while you are taking a bath.. so relaxing!)


Now, pour the wax in your container!  You can place the wick in first or after it is poured. It doesn't really matter.  I had some wax leftover, so I used a vintage baking tin for the rest.
 
The drying part can be quite tricky.  If it dries too fast, you will have cracking (like you can see in the photos of mine below).  Upon doing some research, it is best to place the containers on a cookie cooling stand so that the wax can dry from the bottom up.  This will also help prevent cracking.
 
Once my wax was completely cooled and hardened, I saw some separation from the side of the bowl and discovered all the water that had jumped into the melting wax had caused the wax to pull away from the container.  The water all dumped out, but it's definitely good to try and avoid this.
 
Fortunately, after burning for a little while, the crack will fill itself in, so no worries!


 I'm definitely over-the-moon pleased with how this turned out!  This was my first run at making candles and I think I'm hooked.  Would this not be an awesome house-warming gift, too?  
 
I'll see you all next month!
In the meantime, come visit me here:  Facebook / Pinterest / Blog


Check out some of our favorite projects!


DIY Arrow Bouquet // Plywood Inspire Boards // Gem Earrings
  • « Go to Previous Page
  • Page 1
  • Interim pages omitted …
  • Page 351
  • Page 352
  • Page 353
  • Page 354
  • Page 355
  • Interim pages omitted …
  • Page 497
  • Go to Next Page »

Primary Sidebar

Heather from Whipperberry
Hello... my name is Heather and I'm the creator of WhipperBerry a creative lifestyle blog packed full of great recipes and creative ideas for your home and family. I find I am happiest when I'm living a creative life and I love to share what I've been up to along the way... Come explore, my hope is that you'll leave inspired!

Footer

  • Privacy Policy
  • Crafts
  • Food
  • Gifts
  • Holidays
  • Home
  • Mom Life
  • Recipes
  • Travel

Copyright © 2026 · Seasoned Pro