A lawn can look great in photos and still fail in real life. Many homeowners deal with grass that thins out within weeks because it wasn’t built for daily use. Kids run in the same spots, pets follow the same paths, and suddenly the yard looks worn no matter how often you water or mow. The problem usually starts with planning. Most lawns are designed for looks first and function later. If your yard gets regular use, that approach won’t hold up. You need a setup that can handle movement, pressure, and weather without constant repair.
This guide walks you through practical decisions that help your lawn stay strong, safe, and usable every day.
Plan Around Real Daily Activity
Start by paying attention to how your yard actually gets used. Watch where your kids run, where your dog tends to loop, and where people naturally walk. These patterns don’t change much over time, so it makes sense to design around them. If you ignore these areas, the grass will wear down quickly no matter how good it looks at the start. Map out the busiest spots and treat them differently from the rest of the lawn.

Pick Grass That Can Handle Traffic
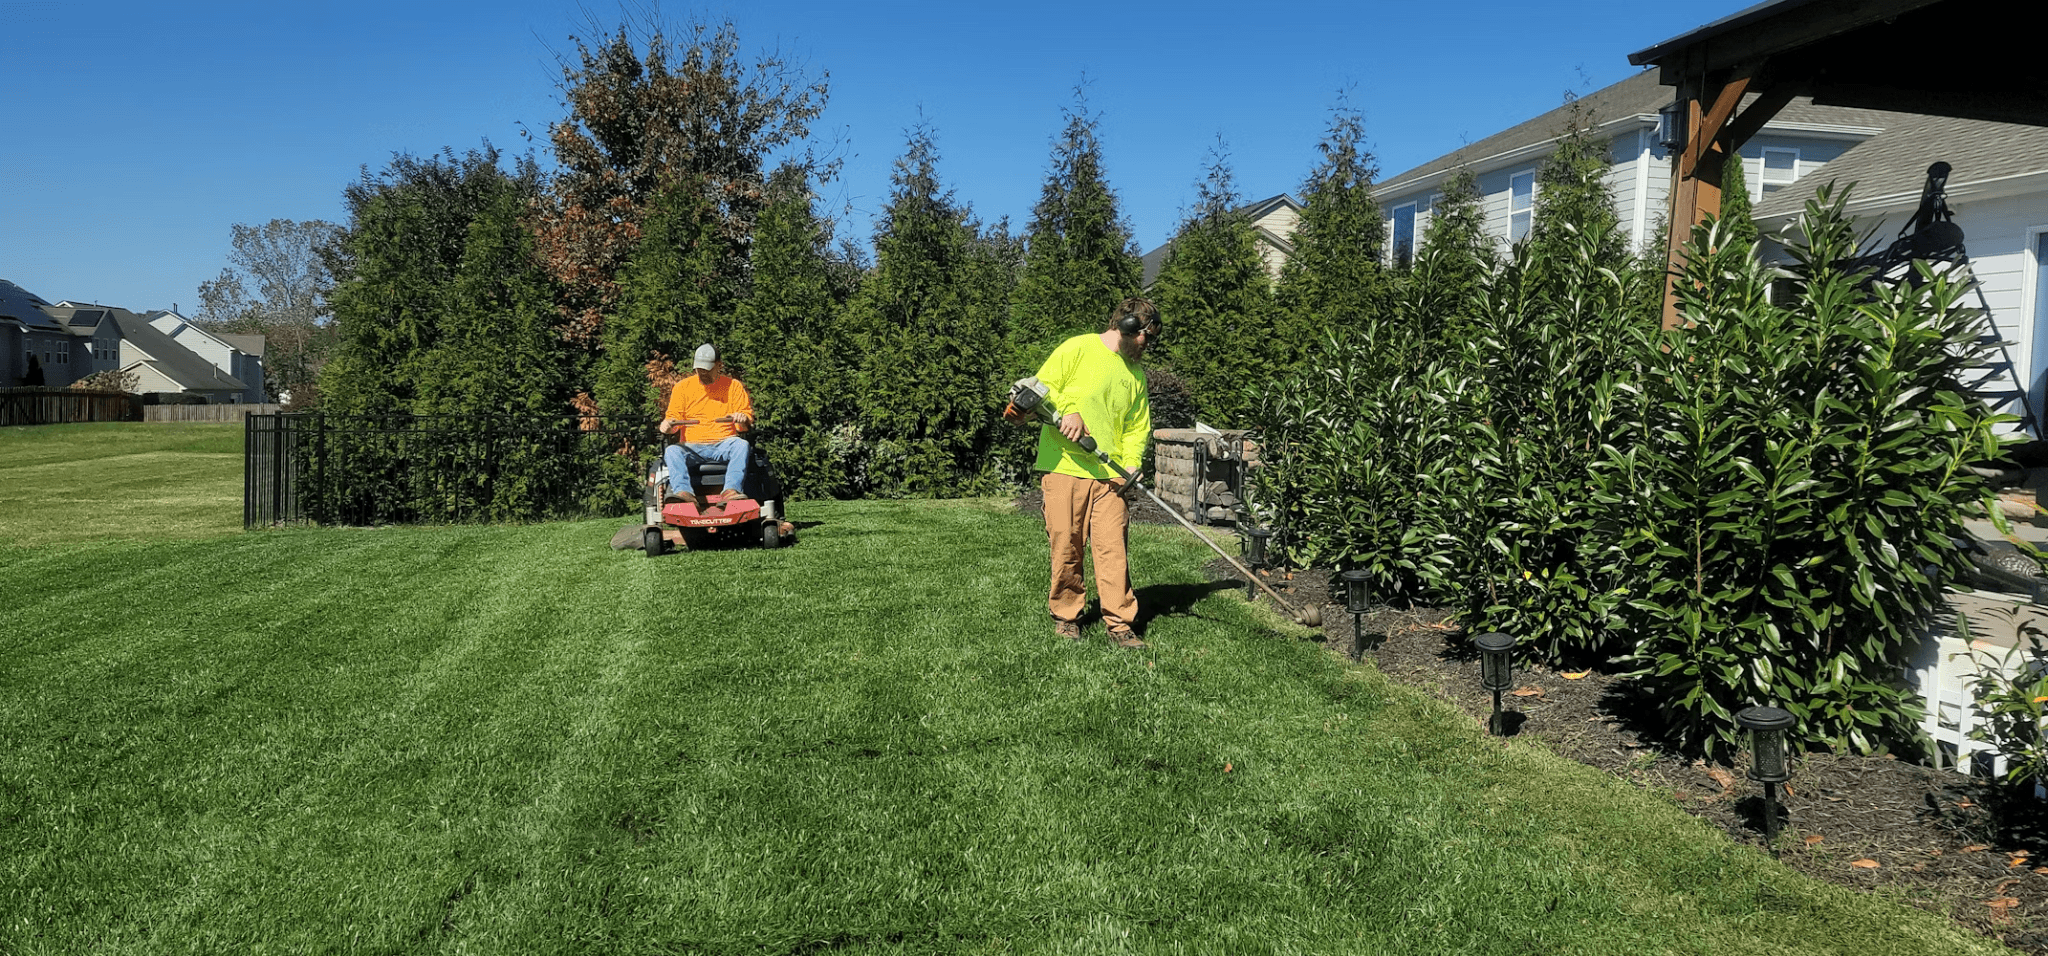
Not all grass types hold up under pressure. Some look soft and full but struggle with repeated use. For a yard that sees daily activity, sod is often the better starting point because it gives you an already established layer of grass instead of waiting for seed to grow in. A well-installed sod lawn creates a more even surface and begins rooting much faster when cared for properly. From there, choosing the right type of grass matters. Zoysia stands out because it grows dense and recovers well from wear. Many homeowners turn to Zoysia sod installation services to get a lawn that stays thick and handles daily traffic without breaking down quickly.
This approach gives you a stronger lawn from the start and helps it hold up over time.
Build Edges That Protect Your Lawn
Edges do more than make your yard look neat. They help protect the lawn from damage caused by foot traffic and equipment. Areas along driveways, patios, and walkways tend to wear out first because people step on them often. Without proper edging, grass in these spots thins out quickly and turns into dirt. Installing a solid edge using stone, brick, or metal creates a clear boundary and keeps grass from spreading into unwanted areas. It also makes mowing easier since you won’t need to trim uneven lines every time. Clean, strong edges help your lawn keep its shape and reduce the chances of damage spreading inward.
Fix Drainage Before It Becomes a Mud Problem
Water control plays a huge role in how your lawn holds up. If water collects in certain areas, the soil softens and grass roots weaken. Kids and pets then turn those spots into mud within days. Start by observing how water moves after rain or irrigation. Low spots usually need leveling, while compacted soil may need loosening so water can soak in properly. In some cases, adding a simple drainage channel or adjusting the slope of the yard makes a big difference. You don’t need a complex system for most homes, just a way to keep water from sitting too long. A dry, stable surface helps grass recover faster and stay usable.
Stick to a Lawn Care Routine You Can Maintain
A lawn that fits your schedule will always perform better than one that needs constant attention. Set a mowing height that supports healthy growth instead of cutting too short. Taller grass shades the soil and helps it retain moisture, which reduces stress during heavy use.
Watering should be consistent but not excessive. Deep watering a few times a week works better than light daily sprays. This encourages deeper roots, which improves durability. If your routine feels hard to keep up with, simplify it. A steady, realistic approach keeps your lawn in good shape without turning maintenance into a full-time task.
Handle Damage While It’s Still Small
Wear and tear are part of any active yard, but ignoring small issues leads to bigger problems. A worn patch starts as thin grass, then turns into exposed soil if left alone. Once that happens, it spreads quickly with regular use. Check your lawn every couple of weeks, especially in high-traffic areas. If you notice thinning, act early by reseeding or adding a small piece of sod. Lightly loosening the soil before repair helps new growth settle in faster. Quick fixes take less time and effort than replacing large sections later. Staying proactive keeps your lawn consistent and avoids major repairs.
A yard that works for kids and pets needs more than good looks. It needs smart planning, the right materials, and a routine that fits real life. When you focus on how the space gets used, you can prevent the most common problems before they start. Strong grass, healthy soil, and simple design choices go a long way. Regular care keeps everything on track without constant effort. The goal is to create a lawn that stays reliable through daily activity. When your yard holds up without frequent repairs, it becomes a space you can actually enjoy instead of something you’re always trying to fix.