• Skip to primary navigation
  • Skip to content
  • Skip to primary sidebar
  • Skip to footer

Whipperberry

WhipperBerry • Your Home For Creative Inspiration

  • Home
  • About
    • Terms
  • Recipes
    • ZipList
    • Starters
    • Easy Weeknight Dinners
    • Main Dish
    • Salads
    • Side Dish
    • Soups & Stews
    • Desserts
    • Breakfast
    • Miscellaneous
  • Tutorials
    • Creative Crafts
    • DYI Decor
    • Fabric Crafts
    • Food How-To
    • Jewlery
    • Paint Projects
    • Paper Art
    • Party Styling
    • Photography and Graphic Design
    • Silhouette
  • Holidays
    • St. Patrick’s Day
    • Easter
    • Mother’s Day
    • Father’s Day
    • 4th of July
    • Halloween
    • Thanksgiving
    • Christmas
    • New Years
    • Valentine’s Day
  • Gift Ideas
    • Gifts For Everyone
    • Gifts for Dad
    • Mother’s Day
    • Mother’s day
    • For The Girls
    • For The Kids
    • Teacher Gift Ideas
    • Christmas
  • Printables
    • Holiday
    • Gift Idea
    • LDS Primary
  • Travel
  • Contact
  • Nav Social Menu

    • Facebook
    • Google+
    • Instagram
    • Pinterest
    • RSS
    • Twitter
You are here: Home / Uncategorized / {Tutorial} Fabric Bunting

{Tutorial} Fabric Bunting

0 · Sep 7, 2010 · 6 Comments

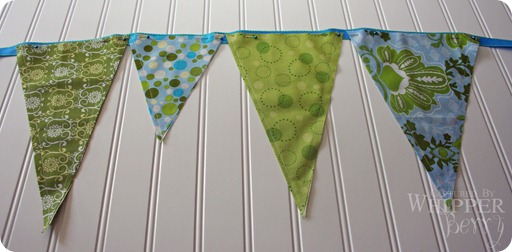
I have been working on a fun new dessert table for my daughter’s birthday and thought I would share a bit of a sneak peak.  The theme for the table: Haley’s favorite colors, blue and green.  I decided that one of the design elements would be a fabric bunting, so chic and fun.  Here is a tutorial on how to make a very simple bunting.

Now, I’m all about quick and easy, and so is this bunting.  What you will need:

  • Fabric of coordinating colors and patterns
  • Ribbon
  • Thread
  • Sewing Machine
  • Rotary cutting tool
  • Cutting Mat
  • Straight edge ruler
  • Straight pins

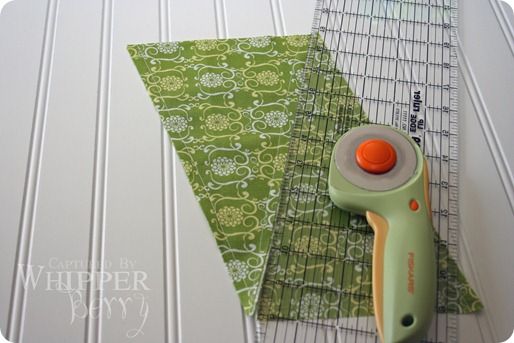
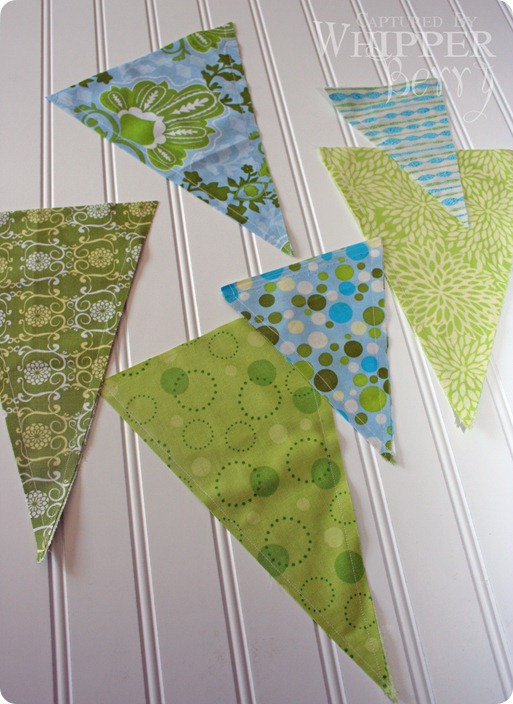
Now, when I came up with this design element for the table I decided that I didn’t want the triangles to be uniform.  So, I didn’t make a pattern {gasp!}  I folded the fabric in half and started cutting away.  I knew I wanted big and small triangles so I just eyeballed it.  You actually get better use of your fabric this way.  Less waste.

WB1 9

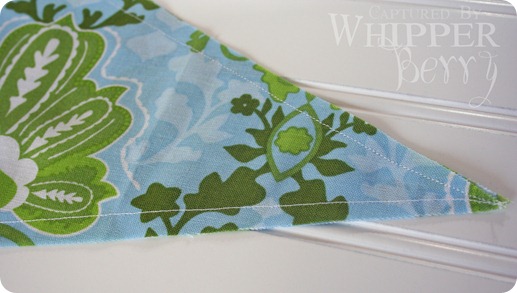
Another design element that I wanted for this bunting, I didn’t want perfect, finished edges.  I basically stitched the two triangles together, back to back with the sewing machine. This creates a bit of a rougher edge, but it saves TONS of time! 

WB6 9 

WB3 9

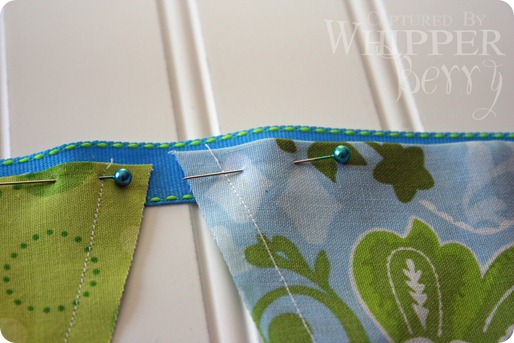
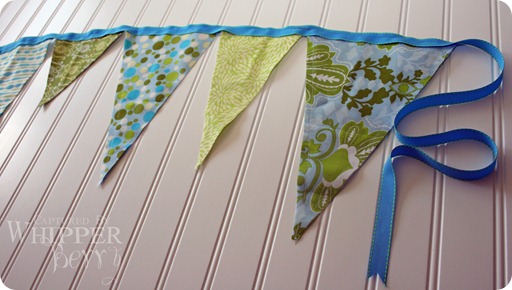
Once you have all of your triangles sewn together, lay out your ribbon and start to pin the triangles to the back side of the ribbon.  I am planning on using this bunting attached to a tablecloth so there is no need to make sure the wrong side of the bunting looks good.  You can however, lay another length of ribbon on the other side to create a finished look for both sides of the bunting.

WB5 9

Once you have a pattern that you like, you can now stitch your ribbon and triangles together with the sewing machine using a coordinating thread.

WB4 9

Voila!  You have a fabulous and easy fabric bunting for your next design project.

WB 9

If you have any question or comments we would love to hear them! 

AdSpot Don’t forget to check out our new sponsor page.  We are offering free advertising for three months here on WhipperBerry.  If you have a blog, product, website, business, Etsy shop, you name it, that you would like to promote, now is the time to do it!  Drop me a line, [email protected], we’ll chat.

Heather

button2

0
Pin
Share
Tweet
+1

Uncategorized

Reader Interactions

Comments

  1. JHill says

    September 8, 2010 at 2:42 am

    Thanks for linking up to the Mad Skills party!

    madincrafts.blogspot.com

    Reply
  2. Christene says

    September 8, 2010 at 6:02 pm

    I love the varied sizes and rough edges. Thanks for the tute!

    Reply
  3. Amanda Brantley says

    September 25, 2010 at 1:04 am

    I love the fabric choices!

    Reply
  4. Marina Mott says

    October 28, 2010 at 11:51 am

    Beautiful!! xx

    Reply

Trackbacks

  1. Bunting | Evoke Yarn and Fabric says:
    March 14, 2012 at 8:25 pm

    […] fabric bunting tutorial from Whipper Berry is […]

    Reply
  2. Naturally elegant and chic ideas and diy’s | PosyRosy says:
    July 12, 2012 at 12:17 am

    […] is another big trend this year, I love this mismatched pattern with different sized pennants, go to Whiperberry for all the details on how to make your […]

    Reply

Leave a Reply Cancel reply

Your email address will not be published. Required fields are marked *

This site uses Akismet to reduce spam. Learn how your comment data is processed.

Primary Sidebar

Hello... my name is Heather and I'm the creator of WhipperBerry a creative lifestyle blog packed full of great recipes and creative ideas for your home and family. I find I am happiest when I'm living a creative life and I love to share what I've been up to along the way... Come explore, my hope is that you'll leave inspired!

Load up on new recipes, exclusive goodies, + more!

Get the exclusive content you crave straight to your inbox.

Featured Recipes

Not all holiday gifts need to be ooey gooey sweet. Savory holiday gifts are just as lovely, sometimes even more so. I personally have been off sugar for 3 months now and I’m really nervous for the holiday season to arrive. Having the house fill up with sweets is NOT what I’m wishing for this Christmas. I would LOVE to get one of these Ball® Sharing Jar soup mixes as a gift. Not only are they soothing to the soul, but they are also good for you as well. - WhipperBerry @ballcanning #soupinajar #printabletags #souprecipe

Soup Mix Sharing Jars 

This year, I’m working on all kinds of fun gifts for the Holidays that will look spectacular gifted inside of a jar. One of my favorites is the White Chocolate Ginger Scone Mix in a jar. It’s really easy to put together a whole bunch of these gifts and really not expensive at all. It’s always a bonus to save a little money during the holidays. @ballcanning #giftsinajar #neighborgifts #teachergifts #sconeinajar

White Chocolate Ginger Scone Mix In A Jar 

As much as we hate to admit it, cold and flu season is on its way. There is nothing more miserable than one of those lousy winter colds. What’s almost just as bad is watching someone you care for dealing with a cold or, Heaven forbid, the flu! I’m always looking for ways to help cheer them up and let them know that we love them and hope for their better health. That’s when I came up with this idea for a Cold and Flu Rescue Kit to share with those loved ones that are suffering. • WhipperBerry

Cold and Flu Rescue Kit

Not to knock commercially prepared applesauce, but when you have the opportunity to enjoy homemade applesauce, you will know the difference. It’s sweet and tangy with the perfect texture. Not to mention the fact that it harmonizes well with many different notes on your palette AND, it’s super easy to make! #applesauce #applesaucerecipe #homemadeapplesauce

Maple Applesauce Recipe + Maple Applesauce Overnight Oatmeal Recipe

I was recently introduced to a simple Roasted Garlic and Roma tomato sauce recipe from Ball® Fresh Preserving that I have been dying to try. I knew it was going to be a GREAT base for my favorite Israeli Shakshuka dish and boy was I right. Come learn how to make this fabulous sauce for your family.

Roasted Garlic and Roma Tomato Sauce + an Easy Shakshuka Recipe

More

Footer

Instagram

Instagram has returned invalid data.

Copyright © 2021 · Seasoned Pro