• Skip to primary navigation
  • Skip to main content
  • Skip to primary sidebar
  • Skip to footer

Whipperberry

WhipperBerry • Your Home For Creative Inspiration

  • Home
  • Recipes
    • Starters
    • Easy Weeknight Dinners
    • Main Dish
    • Salads
    • Side Dish
    • Soups & Stews
    • Desserts
    • Breakfast
    • Miscellaneous
  • Tutorials
    • Creative Crafts
    • DIY Decor
    • Fabric Crafts
    • Food How-To
    • Jewlery
    • Paint Projects
    • Paper Art
    • Party Styling
    • Photography and Graphic Design
    • Silhouette
  • Holidays
    • Easter
    • Mother’s Day
    • Father’s Day
    • 4th of July
    • Halloween
    • Thanksgiving
    • Christmas
    • Valentine’s Day
  • Gift Ideas
    • Gifts For Everyone
    • Gifts for Dad
    • Mother’s day
    • For The Girls
    • For The Kids
    • Teacher Gift Ideas
    • Christmas
  • Printables
    • Holiday
    • Gift Idea
    • LDS Primary
  • Travel
  • About
    • Terms
  • Contact
  • Nav Social Menu

    • Facebook
    • Instagram
    • Pinterest
    • RSS
    • Twitter

Challenges

Propane Safety Checks to Make Before Using Your Home Appliances

0 · Sep 4, 2026 · Leave a Comment

There are 50 million households using propane every day for heating, cooking, and outdoor living. While it is an efficient and clean fuel, ignoring basic maintenance creates real safety hazards.

Ignored fittings dry out, and lines degrade. Unserviced appliances slowly develop burn issues.

Running through a basic safety routine before turning on your equipment keeps your home safe and ensures your gear operates at peak efficiency when you need it most.

Inspecting the Physical Tank for Visual Damage

Your first check starts at the tank cylinder itself. Look for heavy rust patches, deep dents, or structural gouges that compromise the metal shell. Minor surface rust is common, but flaking metal or severe pitting warrants an immediate inspection by a technician.

Always check that the tank sits upright on a flat, non-combustible base like concrete. Never store portable tanks on their side or inside enclosed spaces like garages or sheds.

Monitoring Your Fuel Gauge and Gas Supply

Running a propane system completely dry can draw sediment into your lines and cause pilot lights to fail. Keeping track of your fuel level prevents sudden outages and protects your appliances from unexpected air pockets in the fuel line.

Watching out for signs your propane tank is empty allows you to schedule refills early, avoiding frozen lines or airlock issues that require professional clearing.

Conducting a Leak Test on Gas Valves and Hoses

Gas leaks are the single largest hazard in home propane setups. A quick bubble test using soapy water is the most reliable way to find small gas leaks before sparking up a burner.

  • Mix equal parts liquid dish soap and water in a clean spray bottle
  • Spray the mixture directly over the valve, hose, and regulator connections
  • Watch closely for growing soap bubbles that indicate escaping gas

If you see bubbles forming around connection points, turn off the supply valve immediately. Tighten the fittings slightly and retest. And if bubbles continue to appear, replace the damaged hose assembly before using the appliance.
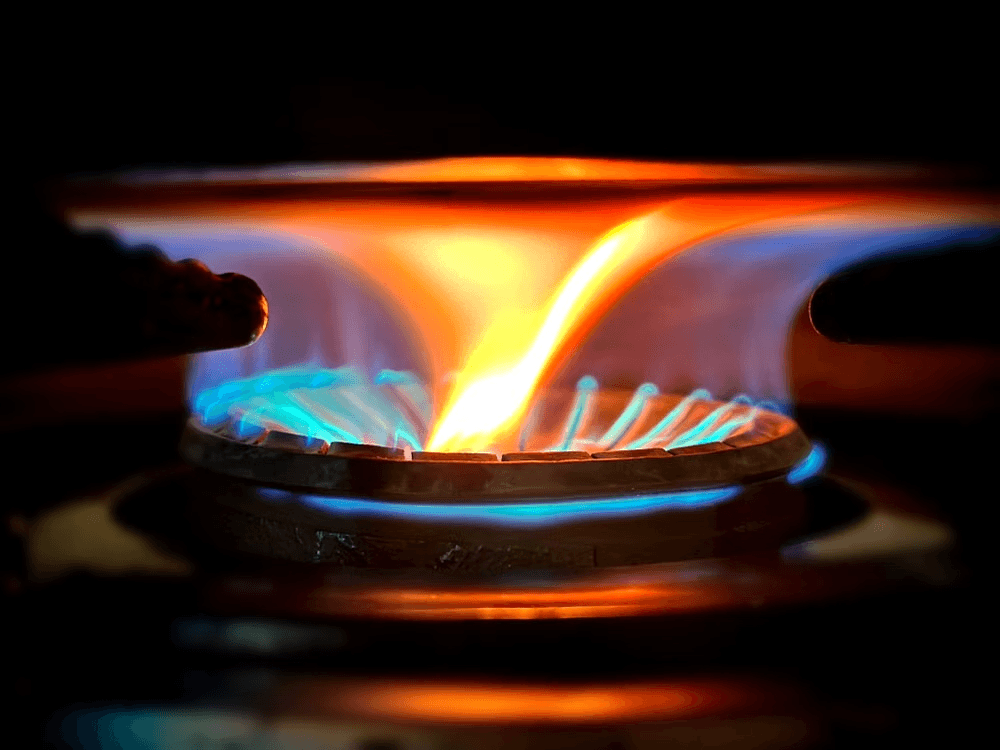
Close-up of a stove flame,

Examining Connectors and Rubber Supply Lines

Rubber hoses deteriorate over time due to weather exposure, pest damage, and UV light. Flexible lines should feel firm yet pliable, with no visible cracking when bent gently.

Old or brittle connectors are prone to splitting under pressure, making them a common failure point. Replace any hose that shows signs of dry rot, stiffness, or rodent chewing right away.

Evaluating Burner Flames and Ventilation

Turn on your appliance and take a close look at the flame color once it stabilizes. A healthy, complete propane burn produces a crisp blue flame with a small yellow tip.

A lazy, yellow, or orange flame indicates incomplete combustion, which often stems from blocked burner ports or inadequate air mixture. This condition produces dangerous carbon monoxide gas indoors. Turn off the unit and clear out any dust or cobwebs blocking the air shutter if the flame stays yellow.

Clearing Obstructions from Exhaust Vents

Outdoor debris can block your appliance flues faster than you think. Birds, spiders, and wasps routinely build nests inside vent pipes, trapping dangerous exhaust gases inside your living space.

Inspect all exterior vent hoods, chimney caps, and intake pipes before lighting indoor equipment. Clear away bird nests, heavy leaf buildup, or snow accumulation to keep airflow moving freely.

Checking Carbon Monoxide and Gas Detectors

Safety devices provide your final line of defense against undetected leaks or ventilation failures. Standard smoke alarms will not pick up gas buildup or carbon monoxide, so specialized monitors are essential.

Test every UL-listed CO and propane detector in your home monthly to verify the batteries work. Keep units installed near the floor for propane detection, as propane gas is heavier than air and settles in low spots.

Know When to Call a Professional Technician

Some maintenance tasks go beyond simple DIY fixes. If you smell rotten eggs, hear a continuous hiss, or see persistent rust inside burner assemblies, step away from the equipment.

Shut off the main gas valve on your tank if it is safe to do so. Leave the area immediately and contact your local gas provider or a qualified technician to troubleshoot the system safely.

Maintaining Safe Propane Systems Year Round

Taking a few minutes to inspect your tank, hoses, and burners prevents unexpected breakdowns and keeps your home safe. Catching minor wear early saves time and avoids expensive emergency repairs.

A quick check before firing up any gas appliance provides total peace of mind for you and your family. Scroll on to explore more posts for practical tips and hacks you can use at home every day.

What the Full Water Damage Restoration Process Involves

0 · Aug 5, 2026 · Leave a Comment

Water damage restoration follows a disciplined sequence, yet many owners only witness pumps, hoses, and loud drying equipment. The real job starts with hazard control and ends with repairs that return rooms to safe use. Moisture travels into framing, insulation, and finish layers faster than most people expect. A pipe break, roof leak, or overflow can trigger swelling, staining, odors, and microbial activity within a short window.

Fast Response

The first visit usually centers on loss control, safety, and immediate stabilization. Crews may stop the water source, isolate electrical hazards, and inspect for contamination before any major drying starts. In that early window, Charlotte, NC water damage restoration services often matter because soaked gypsum board, padding, and trim begin to break down quickly. Prompt action also reduces hidden moisture migration into adjacent rooms and lower cavities.

Inspection And Scope

Once the site is stable, technicians map the affected area with instruments and direct observation. They check wall cavities, flooring layers, ceilings, trim lines, and stored contents. Moisture meters, infrared imaging, and humidity readings help define the extent of the damage. That scope shapes labor, disposal, equipment needs, and repair planning. Good notes also support insurance review if water moved beyond the original point of entry.

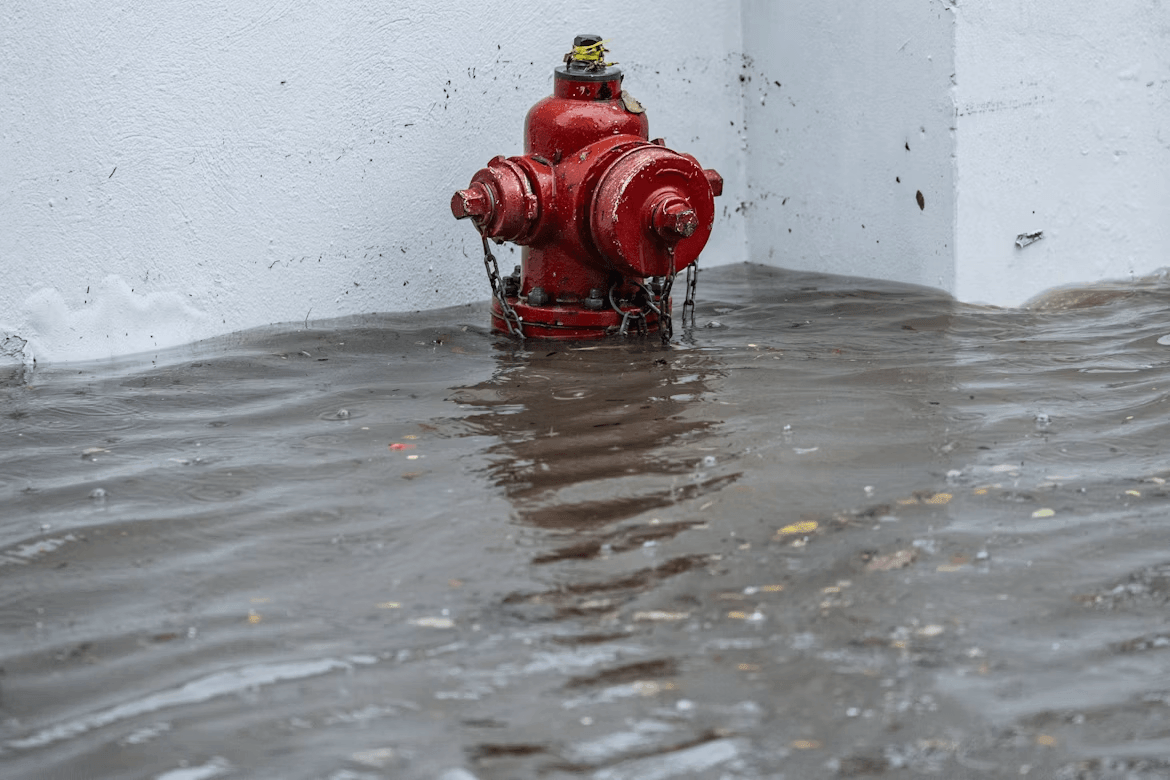
Red fire hydrant in a flooded street

Water Category

The source of the loss changes the restoration plan from the start. Clean water from a supply line carries lower initial health risk. Gray water from appliances or drain backups needs stronger sanitation measures. Black water from sewage or flood intrusion requires strict containment and protective gear. Categories can worsen with time, especially after stagnation, which affects cleaning methods and salvage decisions.

Extraction First

Standing water has to be removed before structural drying can work well. Crews use pumps, wet vacuums, and weighted extraction tools to pull liquid from floors and lower assemblies. Carpet pads often come out because they hold moisture and dry poorly. Quick extraction limits warping in wood, softening in drywall, and adhesive failure beneath finished surfaces. That step also shortens the overall recovery period.

Controlled Demolition

Some building materials cannot be restored safely after heavy saturation. Baseboards, insulation, drywall sections, and swollen laminate may need removal to expose trapped moisture. This work is targeted, not careless. Technicians open only the areas required for drying, cleaning, and later repair. Careful removal lowers secondary damage, improves air movement, and reduces the chance of odor or microbial growth inside enclosed spaces.

Drying Setup

After extraction, the focus shifts to controlled evaporation and moisture removal from the air. Air movers push dampness out of materials, while dehumidifiers capture that vapor before it settles elsewhere. Placement matters because stagnant zones slow progress. Crews may direct airflow into wall cavities or create contained drying areas. Daily temperature and humidity tracking confirms whether structural components are moving back to normal conditions.

Monitoring Progress

Drying is rarely complete after one equipment setup. Technicians return to record readings, adjust machines, and verify that wet materials are responding as expected. Subfloors, framing, and lower wall sections often retain moisture after painted surfaces appear normal. Without follow-up checks, concealed dampness can stay behind. Clear logs show what changed each day and support quality control, insurance communication, and repair timing.

Why Readings Matter

Moisture left inside framing can lead to odor, staining, material decay, and microbial growth. Instrument data provides objective proof that drying goals were reached before reconstruction begins.

Cleaning And Sanitizing

Dry materials are not automatically clean materials. Residue, silt, and contaminants may remain on surfaces or contents after visible moisture is gone. Technicians choose cleaning agents and antimicrobial treatments based on the water source and affected materials. Upholstery, textiles, and personal items may need separate attention. The aim is a sanitary interior with stable surfaces, acceptable odor conditions, and no lingering contamination concerns.

Mold Risk Window

Mold does not appear after every water loss, but damp materials create favorable growth conditions quickly. Speed matters because spores can colonize paper facing, wood fibers, and dust residues once moisture and warmth persist. If visible growth is already present, added containment and specialized cleanup may be necessary. Even without visible colonies, crews monitor areas where trapped humidity can support later growth behind finished surfaces.

Repairs And Rebuild

Restoration is not complete until damaged areas return to safe, functional use. That stage may include drywall replacement, trim installation, painting, flooring work, cabinet repairs, or finish carpentry. Some projects stay limited to one room, while others extend farther. Rebuild decisions should follow documented drying results so new materials are never installed over damp framing, subfloors, or hidden cavities that still hold moisture.

Conclusion

The full restoration process involves far more than pulling out water and placing fans in a room. It includes hazard control, moisture mapping, extraction, selective demolition, drying, cleaning, and repairs based on verified readings. Each stage protects building materials and indoor conditions from deeper harm. Owners who understand that sequence can ask sharper questions, judge service quality more accurately, and respond faster when water enters a property.

What to Know Before Installing A New Shower Tray In The Family Bathroom

0 · Jan 21, 2026 · Leave a Comment

If your bathroom needs a little refresh, replacing the shower tray might be a simple way to give the space both a new look and better function. For families, a well-chosen shower tray can help make busy mornings easier and daily routines safer and more comfortable.

Before making a decision, it helps to understand the different options available and how each one might fit into your home. From materials and sizes to safety features and installation tips, here are the most important things to consider before making the switch.

Types of Shower Trays

Material Choices

The first consideration should be the material of the shower tray. Common materials include acrylic, stone resin, and ceramic, each with its unique benefits.

• Acrylic: Lightweight and easy to install, acrylic trays resist mold and are available in many styles. However, they can scratch easily if not maintained properly.

• Stone Resin: These trays are heavy-duty and offer a luxurious feel. While they often come with a higher price tag, their durability and thermal properties make them worth the investment.

• Ceramic: Known for its classic appeal, ceramic trays are highly durable and easy to clean. They can be more challenging to install due to their weight but often complement more traditional bathroom designs.

Ultimately, your choice of material should align with your style preferences and maintenance capabilities.

Size Considerations

Shower trays come in various sizes. The dimensions you choose will depend significantly on the available space in your bathroom. A larger tray offers greater comfort, but it may not be practical in smaller bathrooms. Conversely, a compact tray may suit tighter spaces but could compromise the overall comfort of your shower experience.

Before making a decision, consider:

• The measurements of your current shower setup (if applicable)

• Local plumbing codes

• The room’s layout, including door swings and adjacent fixtures

Style and Design

The aesthetic aspect of a shower tray shouldn’t be overlooked. Today’s market offers a myriad of modern shower tray styles that can elevate your bathroom’s design. Whether you’re looking for a minimalist design to match a contemporary theme or something more ornate, it’s easy to customize the look to fit your unique vision. To explore a variety of options, you can see modern shower tray styles that may inspire your renovation journey.

install a shower tray

Drain Placement

Another essential factor to consider is the position of the drain. Depending on your existing plumbing layout, you may need to work with a plumber to ensure the new tray fits seamlessly into your room. Proper drain placement is crucial for water flow and preventing standing water, and it may dictate the type and style of shower tray you choose.

Ensuring Proper Slope

A well-installed shower tray should have a slope to encourage water drainage towards the drain. If your shower tray is not sloped correctly, you may end up with water pooling, which could eventually lead to mold growth. If you’re uncertain about how to achieve the correct slope, it’s wise to consult a professional to avoid future issues.

Choosing the Right Shower Tray Height

Height is another factor that can greatly affect your shower experience. The tray height should be compatible with the existing plumbing and the overall design of your bathroom. Low-profile trays are becoming increasingly popular due to their sleek appearance, but they can complicate drainage if not installed properly. Conversely, taller trays may offer easier installation and better drainage options but could alter the accessibility of your shower.

Installation Considerations

DIY vs. Professional Installation

While some homeowners may be tempted to install the shower tray themselves, hiring a professional can save you time and potential headaches. A skilled plumber will ensure that everything is done according to code, thus preventing any potential leaks that could damage your flooring and walls. They can also navigate challenges that may arise, such as uneven flooring or complicated plumbing systems.

Budgeting for Installation

The cost of installation can vary significantly depending on factors like location, the complexity of the job, and whether you’re working with a builder’s grade tray or opting for a high-end model. Be sure to account for installation in your overall budget, as well as any necessary plumbing adjustments.

shower tray

Additional Features

Non-Slip Surfaces

Safety is paramount, especially in wet areas like showers. Look for trays designed with non-slip surfaces to reduce the risk of slips and falls. Features such as textured surfaces can provide an extra layer of security without sacrificing design.

Eco-Friendly Options

For those who prioritize sustainability, some manufacturers offer eco-friendly shower trays made from recycled materials. Opting for such products can lessen the environmental impact of your renovation without compromising style.

Conclusion

The right shower tray can make a big difference in how your bathroom looks and works, especially in a home with kids or a busy family schedule. Whether you’re doing a full remodel or just updating a few key pieces, a smart choice here can add comfort, safety, and style to one of the most used rooms in the house.

Take your time to choose a tray that fits your needs, your space, and your design style. With the right planning and a little help from a pro, your bathroom can become a space that feels just right for everyone in the family.

5 Same-Day Delivery Challenges and How to Tackle Them with Ease

0 · Oct 17, 2025 · Leave a Comment

As a mom who juggles a busy home, loves creating beautiful spaces, and plans every detail when we travel, I’ve come to appreciate the magic of good organization. Whether it’s prepping for a family road trip or getting dinner on the table, timing matters. The same is true in the world of delivery, especially when it comes to same-day service.

Same-day delivery is a fast and reliable delivery solution that offers convenience and speed, especially for urgent deliveries, and meets customer expectations. Because customers expect instant gratification, same-day delivery options are becoming more popular among e-commerce and retail businesses that are racing to meet customer demands.

While offering same day delivery boosts customer satisfaction and loyalty, it does not come without its challenges. Therefore, businesses must carefully strategise to keep up with the increasing pressure and high delivery demands.

Many businesses outsource the deliveries to a reliable courier partner that provides same-day delivery services, which helps them avoid challenges and keep up with high delivery volumes. However, there are also a few practical solutions to combat the challenges involved with same-day deliveries.

Blue and white delivery truck in front of house

Challenges and Solutions of Same-Day Deliveries

The following are a few challenges many businesses experience when offering same-day delivery solutions, and practical solutions to meet these demands.

1. Tight Time Constraints

Time is the most critical challenge in same-day delivery. You must pack, process and dispatch orders almost immediately and use advanced technology route optimisation to ensure the fastest delivery routes. Delays at any point could easily ruin the promise of same-day delivery and leave the customer unsatisfied..

How to Overcome It:

  • Streamline Order Processing – Use automated systems to process orders instantly.
  • Pre-allocate Inventory – Keep popular products ready for immediate dispatch.
  • Zone-Based Delivery – Group orders geographically to reduce travel time.
  • Set Realistic Cut-Off Times – Clearly communicate the latest order time for same-day delivery to customers.

By optimising the workflow and managing expectations, businesses can meet tight delivery windows without compromising quality.

2. High Operational Costs

Same-day delivery is a more expensive delivery option compared to standard delivery solutions. There are higher costs for express delivery, you need additional staff, and faster inventory turnover. For many small and medium-sized businesses, these costs can easily cut into their profit margins or require higher delivery tariffs for customers.

How to Overcome It:

  • Partner with Reliable Carriers – Use delivery partners experienced in fast logistics to reduce in-house costs.
  • Leverage Technology – Route optimisation on software can minimise fuel and labour expenses.
  • Dynamic Pricing – Charge extra for same-day delivery to cover the higher costs.
  • Batch Deliveries – Consolidate orders going to the same area to reduce trips.

Smart planning and technology-driven solutions make same-day delivery financially sustainable.

3. Inventory Management Challenges

With fast-moving orders, you require very accurate real-time inventory data and management. Over and under-stocking are risks that could affect your business and lead to over-promising of products that are not in stock anymore.

Three people collaborating on laptops to solve delivery challenges

How to Overcome It:

  • Real-Time Inventory Systems – Implement software that updates stock levels instantly across all channels.
  • Safety Stock – Keep buffer inventory for popular items to avoid running out.
  • Supplier Coordination – Maintain close communication with suppliers to replenish stock quickly.
  • Predictive Analytics – Use sales data to forecast demand and plan inventory efficiently.

Efficient inventory management ensures businesses can fulfil orders promptly without disappointing customers.

4. Delivery Logistics and Traffic Issues

Even with the best preparation and route optimisation procedures in place, variables such as traffic, weather, or other route inefficiencies can still derail same-day delivery. Most urban streets pose a particular challenge, especially for quick deliveries.

Alt text: aerial view of trucks in a parking lot

How to Overcome It:

  • Use GPS and Traffic Data – Real-time navigation helps drivers avoid delays.
  • Multiple Fulfillment Centers – Strategically place warehouses closer to customer clusters.
  • Flexible Delivery Options – Offer scheduled delivery windows to avoid peak traffic hours.
  • Bike or Foot Couriers for Urban Areas – In congested cities, smaller vehicles can often deliver faster than vans.

By integrating smart logistics and local strategies, businesses can ensure prompt and reliable delivery.

5. Customer Communication and Expectations

Customers expect complete transparency about the whereabouts of their packages, delivery times, and any changes to their delivery status. Miscommunication and a lack of updates, or delays without notice, can quickly lead to customer distrust.

How to Overcome It:

  • Automated Notifications – Send SMS or email updates for order confirmation, dispatch, and delivery.
  • Clear Delivery Windows – Set precise time frames for delivery to manage expectations.
  • Customer Support Ready – Offer live chat or call support to handle queries quickly.
  • Feedback Mechanisms – Collect feedback post-delivery to improve the process continuously.

Transparent communication ensures customers remain informed, reducing frustration and building trust.

In Conclusion

Same-day delivery is a delivery solution that can help businesses retain and attract customers, while promoting their brand reputation and staying ahead of the game. However, with challenges such as tight timeframes, higher costs, inventory issues, and other logistical hurdles, these obstacles are difficult, however not impossible, to overcome.

By implementing smart technology, strategic planning, and proactive customer communication, you can meet the growing demands of your customers for speed and create a seamless and satisfying delivery experience.

  • Page 1
  • Page 2
  • Page 3
  • Go to Next Page »

Primary Sidebar

Heather from Whipperberry
Hello... my name is Heather and I'm the creator of WhipperBerry a creative lifestyle blog packed full of great recipes and creative ideas for your home and family. I find I am happiest when I'm living a creative life and I love to share what I've been up to along the way... Come explore, my hope is that you'll leave inspired!

Footer

  • Privacy Policy
  • Crafts
  • Food
  • Gifts
  • Holidays
  • Home
  • Mom Life
  • Recipes
  • Travel

Copyright © 2026 · Seasoned Pro