• Skip to primary navigation
  • Skip to main content
  • Skip to primary sidebar
  • Skip to footer

Whipperberry

WhipperBerry • Your Home For Creative Inspiration

  • Home
  • Recipes
    • Starters
    • Easy Weeknight Dinners
    • Main Dish
    • Salads
    • Side Dish
    • Soups & Stews
    • Desserts
    • Breakfast
    • Miscellaneous
  • Tutorials
    • Creative Crafts
    • DIY Decor
    • Fabric Crafts
    • Food How-To
    • Jewlery
    • Paint Projects
    • Paper Art
    • Party Styling
    • Photography and Graphic Design
    • Silhouette
  • Holidays
    • Easter
    • Mother’s Day
    • Father’s Day
    • 4th of July
    • Halloween
    • Thanksgiving
    • Christmas
    • Valentine’s Day
  • Gift Ideas
    • Gifts For Everyone
    • Gifts for Dad
    • Mother’s day
    • For The Girls
    • For The Kids
    • Teacher Gift Ideas
    • Christmas
  • Printables
    • Holiday
    • Gift Idea
    • LDS Primary
  • Travel
  • About
    • Terms
  • Contact
  • Nav Social Menu

    • Facebook
    • Instagram
    • Pinterest
    • RSS
    • Twitter

Cricut 101

Let’s Flamingle Sign • Sign Making 101

4 · May 10, 2018 · Leave a Comment

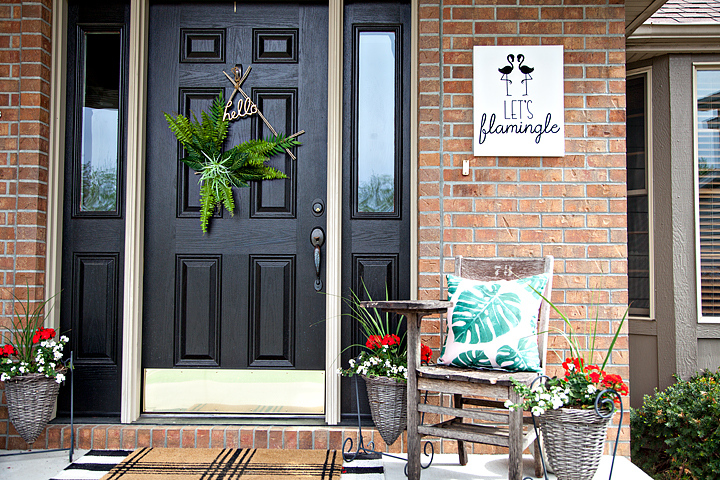
What do you call a group of flamingos? A Flamboyance of course! With a name like that, they are asking to Flamingle this Summer for all kinds of gatherings! I have been trying to find some inspiration for my new front porch sign for this summer and I finally stumbled up a fun flamingo themed saying that I thought was perfect for a summer sign created with my Cricut Maker & Easy Press, Let’s Flamingle Sign!

+ This post brought to you by the fabulous folks at Cricut +
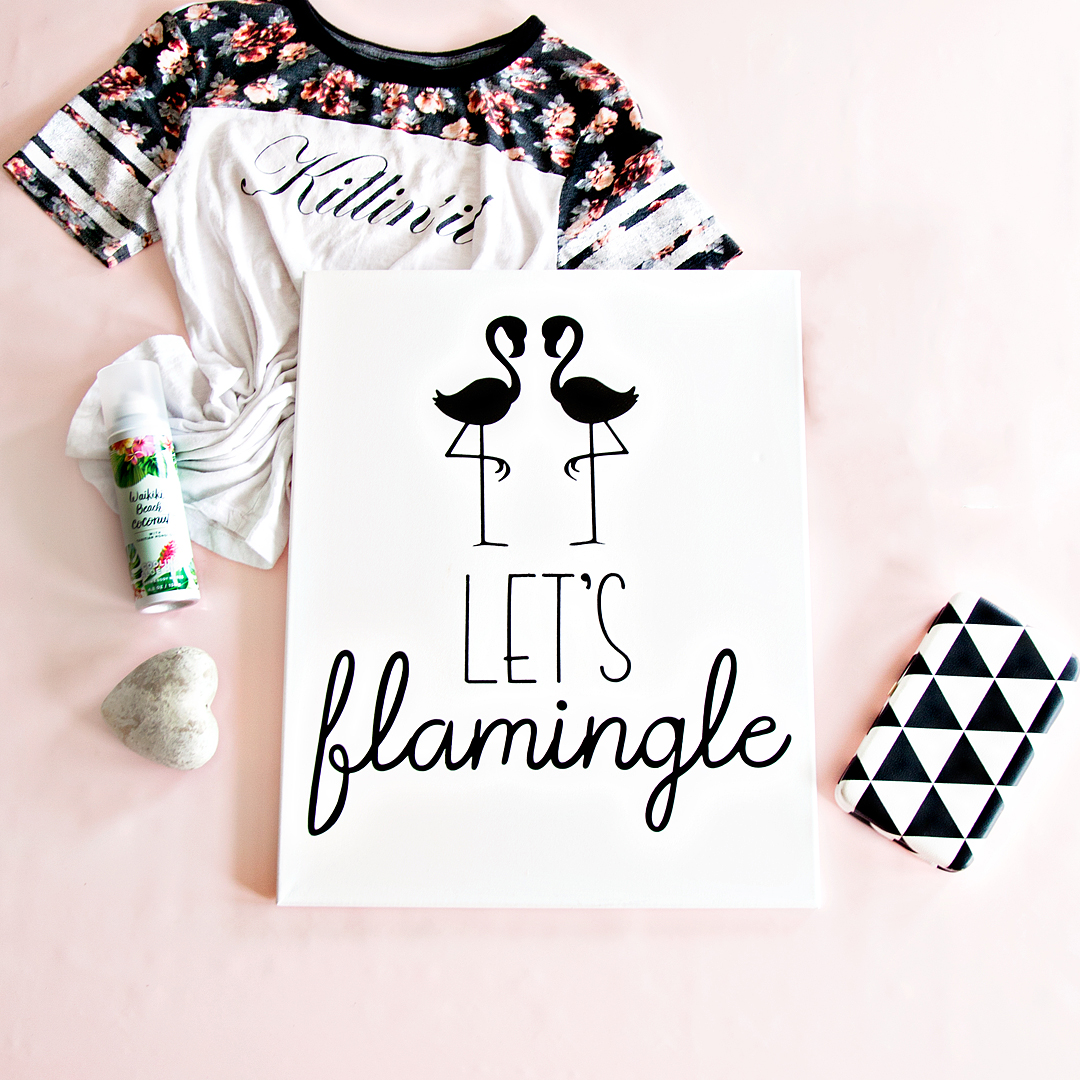
Let's Flamingle Sign - Sign Making 101 from WhipperBerry - This sign is great for a porch sign, party sign or a teen girls bedroom. It's simple, it's cute and really... Who doesn't love a FLAMINGO!

Sign Making 101

I love making signs… It’s is really one of my favorite ways to decorate my home. I especially love using the Cricut Iron-On Lite when I am making Canvas signs. Becuase of the nature of canvas, vinyl just doesn’t work but, Iron-On Lite works like a DREAM. It makes it look like your sign has been screen printed which I just love.

Now that Cricut has come up with the Easy Press and the Easy Press Mat, heat-transfer sign making is easier than ever! I grab the inexpensive canvas bulk packages at Michaels when they go on sale and have a whole slew of canvas sizes and shapes available when inspiration strikes.  Sometimes I frame them, sometimes I don’t. It’s really the mood that strikes me that day. These kinds of sign take minutes to make and really don’t involve a whole lot of mess (i.e. painting, sanding, etc.) and time-consuming work. Can I say it one more time… I LOVE them!!

Sign Making Supplies

Alright, let’s get down to the nitty-gritty… Here’s what you’ll need to make your Let’s Flamingle Sign.

  • 16x 20 canvas – or you can select the size that you want, just make sure that you size the design correctly before you cut your Iron-On Lite.
  • Cricut Iron-On Lite
  • Cricut Easy Press or an iron
  • Cricut Easy Press Mat or a towel
  • Cricut Iron-On Protective Sheet or a light cotton towel
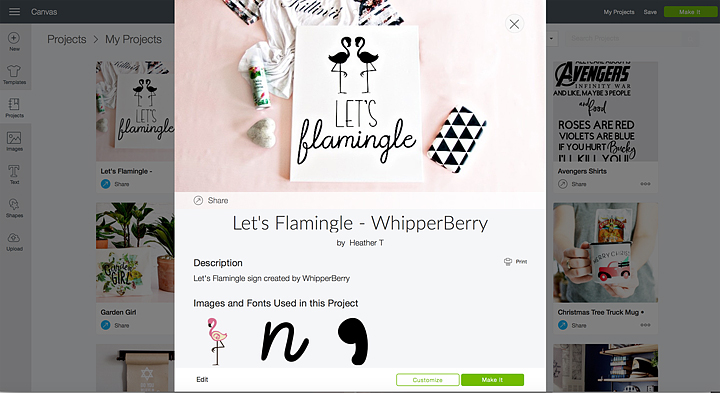
  • Let’s Flamingle Sign design in Cricut Design Space

Directions for Let’s Flamingle Sign

This one, my friends, is basically… CUT, PRESS & CELEBRATE!

First, you’ll need to click on the Let’s Flamingle Sign link in the supplies list and open the project in Cricut Design Space. It is currently sized for a 16 x 20 canvas but, you can totally select your own size canvas. You will just need to make sure that your graphics are sized appropriately.

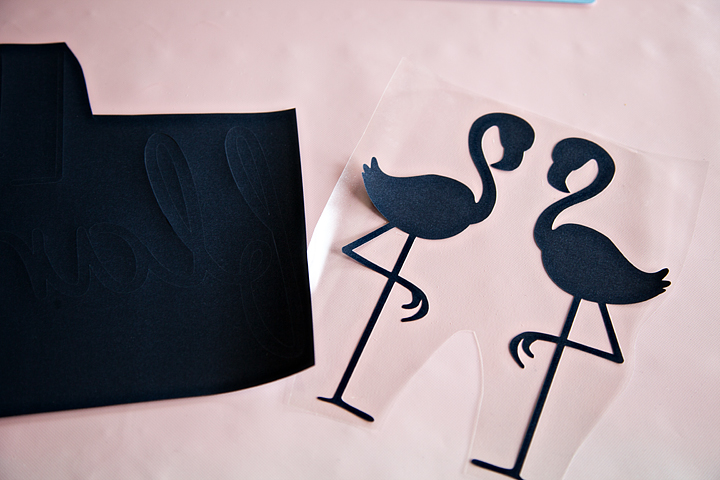
Next, you need to cut your Iron-On Lite according to the directions in Design Space. MAKE SURE TO MIRROR YOUR IMAGE! You will find a checkbox on the left-hand side of the cutting review screen, make sure that it is turned on so that your image will cut correctly. Anytime you use an iron-on type material, you will always need to mirror it before cutting the design.

Once your design is cut, you’ll need to weed the excess Iron-On Lite. That means you’ll need to remove the Iron-On Lite that doesn’t belong on your canvas.

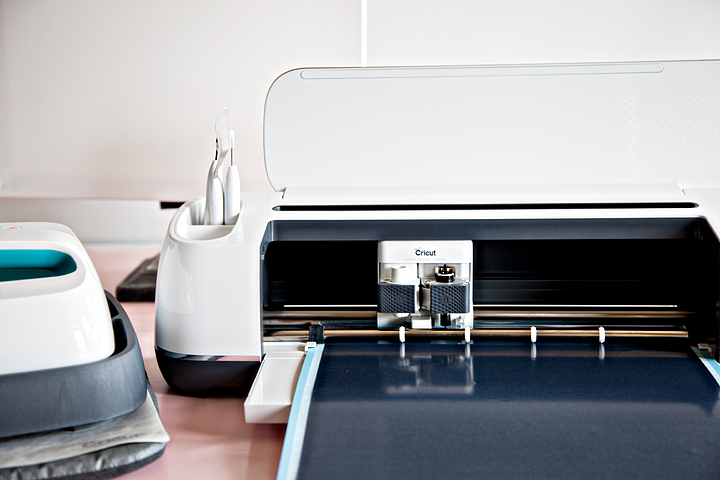
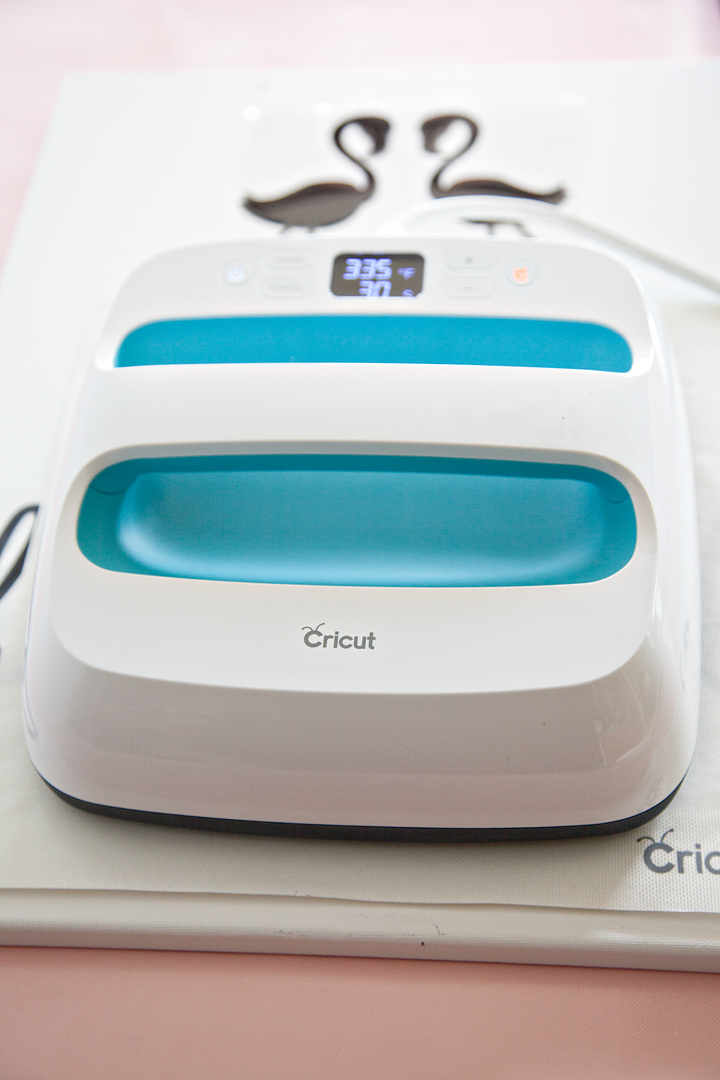
Now that your Iron-On Lite is prepped and ready to go, you’ll need to preheat your Easy Press or your iron.

Cricut Easy Press Basic Guidelines

  • Work on a hard surface like a countertop or sturdy table. An ironing board will not work.
  • Protect your surface. You need to use the Cricut Easy Press Mat or a towel underneath the item that you are pressing to protect the countertop or table.
  • Use the heat settings suggested by the smart guys at Cricut. For this project, this is the suggested settings.
    340°F / 171°C
    Pre-heat Canvas: 5 sec
    Apply Iron-On Lite: 30 sec
    Heat for an additional 15 seconds on the back of the canvas with the protective lining still in place
    Warm Peel: remove liner while the design is warm to the touch, but not hot. This is when removing the liner will be easiest. If you allow it to cool completely, it will just take a little more effort to remove the liner.

    * If you are using a standard iron, heat settings and times will be different. 

  • Protect the surface of your Iron-On Lite along with the heat plate of the Easy Press by using the Iron-On Protective Sheet or light cotton tea towel.

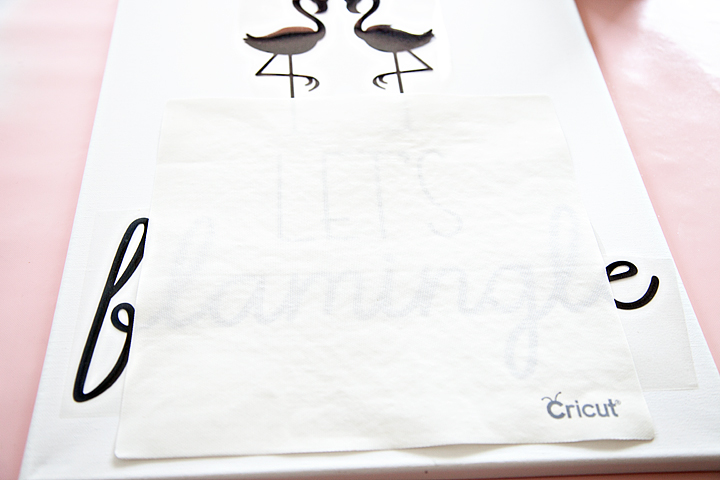
With this canvas, the Easy Press Mat worked perfectly to not only protect my surface but to also provide a platform for the canvas. The frame of the canvas makes using the Easy Press a little bit of a challenge. You can not press on a canvas without a platform underneath, the canvas will stretch and your sign will be ruined. Becuase of the height of the canvas frame, the Easy Press Mat worked great and I didn’t need to add additional books underneath to create a firm surface.

When the Iron-On Lite is cool to the touch, carefully remove the protective film.

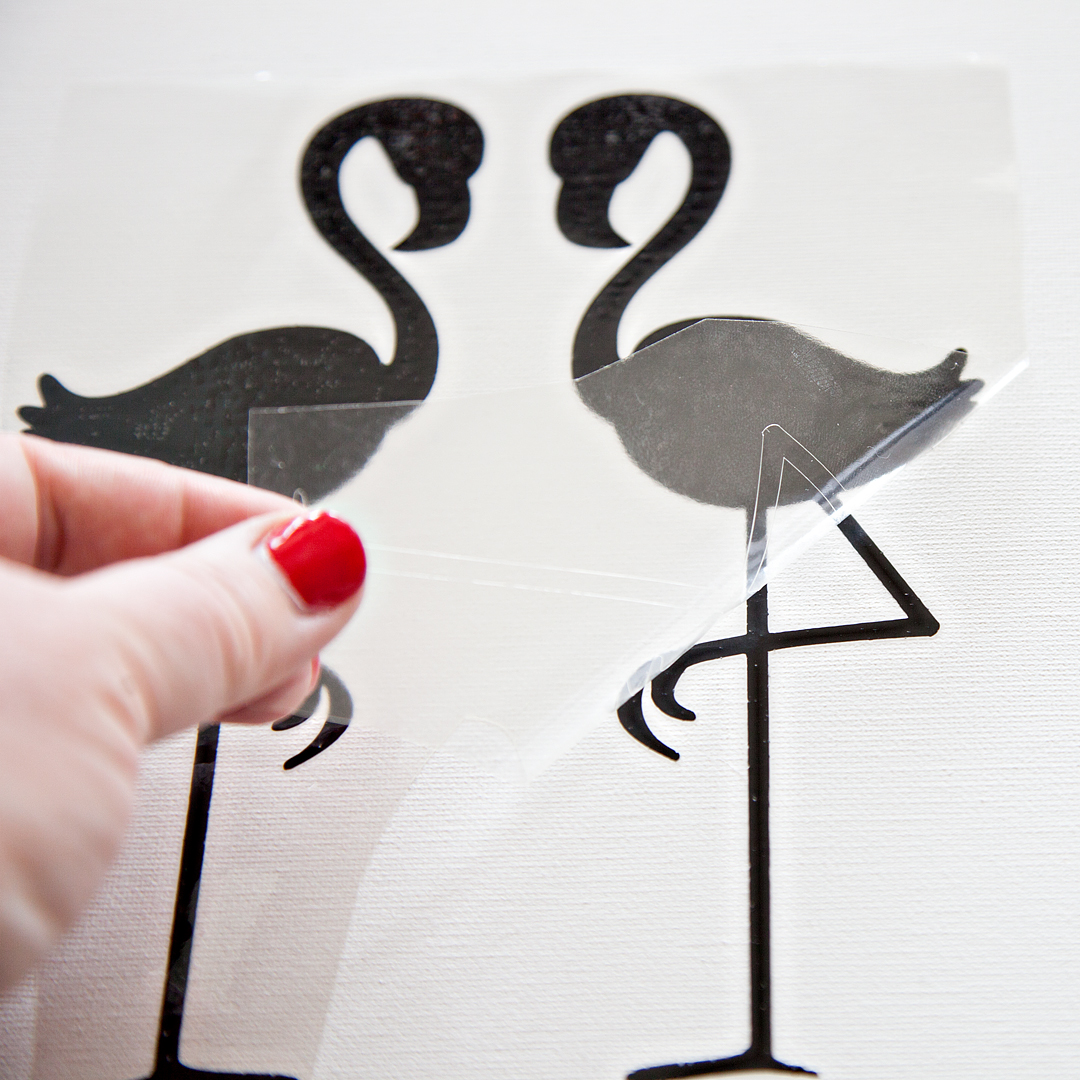
With that, your new sign is FINISHED!!

Let's Flamingle Sign - Sign Making 101 from WhipperBerry - This sign is great for a porch sign, party sign or a teen girls bedroom. It's simple, it's cute and really... Who doesn't love a FLAMINGO!

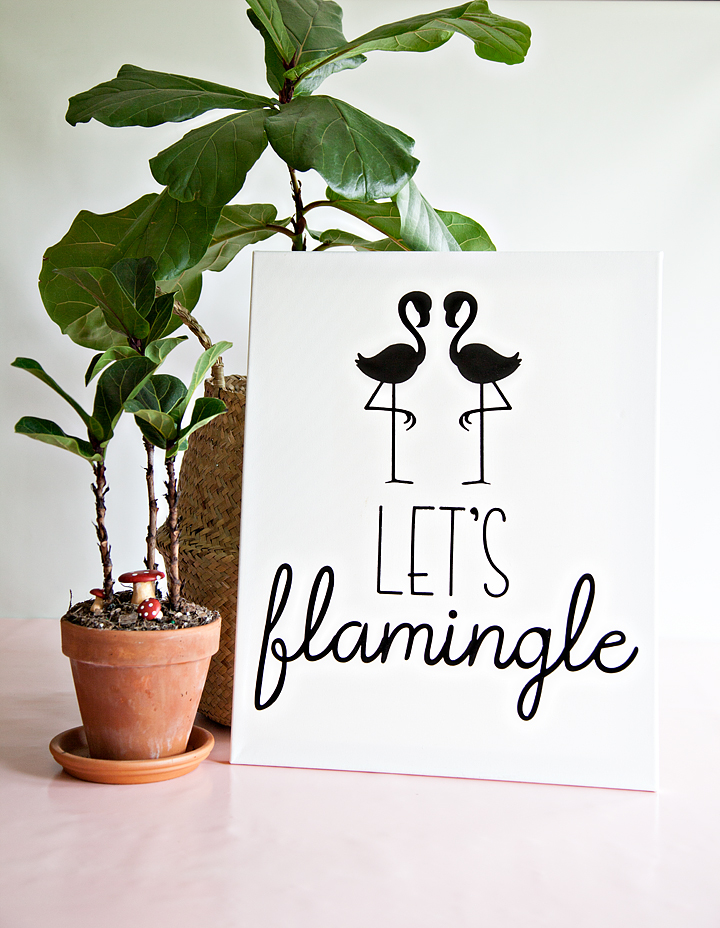
How easy was that! If you have the right tools, this sign is a cinch to make. I’m loving my new front porch sign and I can’t wait to “FLAMINGLE” with my friends this Summer!

Let's Flamingle Sign - Sign Making 101 from WhipperBerry - This sign is great for a porch sign, party sign or a teen girls bedroom. It's simple, it's cute and really... Who doesn't love a FLAMINGO!

How about you? What’s your summer look like? Looking to learn more about working in Cricut Design Space? You should check out my latest video on how to use the Slice Tool, it will rock your Cricut loving mind!

How to use the Cricut Slice Tool Graphic VIDEO TUTORIAL - WhipperBerry

More Cricut 101 Tutorials & Video Tutorials

  • How to Apply Patterened Iron-On
  • How to Apply the NEW SportFlex Iron-On
  • How to Work with Layers in Cricut Design Space
  • How to Prepare Your Designs to Cut on your Cricut Cutting Machine

Disclaimer • This post does contain some affiliate links they are purely for tracking purposes and are not paid links. However, I did receive payment for my time and received product to help in the creative process. Keep in mind, I will only share products that I truly love and use in my everyday life

This is a sponsored conversation written by me on behalf of Cricut. The opinions and text are all mine.

How to Use the Cricut Slice Tool • Cricut 101 Video Tutorial

10 · May 10, 2018 · Leave a Comment

Have you been looking to have a little more flexibility with your design work in Cricut Design Space? Frustrated that you can’t erase parts of images that you would like to not include in your design? I’ve got you covered today!! Have you noticed that little icon on the bottom right of the Cricut Design Space platform? It looks like this…How to use the Cricut Slice Tool Graphic VIDEO TUTORIAL - WhipperBerry

When I first started using Cricut Design Space, I looked at that tool and really could not figure out what the point was. It turned into my little wallflower that stood away from my favorite tools begging to be invited to dance as well. One day, just by happenstance, I started to play around with the Slice Tool and boy, I’ve been a huge fan ever since.

Cricut Slice Tool Video Tutorial

I’ve put together a video tutorial on three different ways to effectively use the Slice Tool when working in Cricut Design Space. It’s going to totally change the way you create your graphics for use with your favorite Cricut cutting machine. The video is about 14 minutes long but, it is well worth the time if you’re wanting to stretch your design muscles in Design Space.

What do you think? Has this tutorial inspired you to create with a little more flexibility in Design Space? I hope so! I would love to see what you design, tag me in your social media posts so I can see what you’ve created with the Slice Tool!

Disclaimer

This is an unpaid post. I have been independently creating my Cricut 101 Video Tutorial Series without any financial incentive from the lovely folks at Cricut.

How to Write on Labels with Cricut to Create Your Own Handwritten Labels

129 · Mar 28, 2017 · Leave a Comment

Love the look of handwritten labels but you’re not in love with your own handwriting? No problem! These Cricut handwritten labels come to the rescue!

Handwritten label by Cricut. Get that perfect look for your home weather it's; industrial labels, farmhouse labels or modern labels. You can achieve that perfect "handwritten" look even if you don't have great hand writing with the Cricut using your favorite handwritten fonts.

My Handwritten Labels Circut Explore Air 2 Project

Did you know that you can WRITE with your Cricut and cut out cute labels? You can even write on Avery labels with your Cricut! I put the Cricut markers to the test and created an easy-to-follow video to show you how to create some simple industrial-style labels that everyone loves right now. Here’s what inspired this project…

I have become obsessed with herbal tea this winter. My husband and I would share a mug of tea every night before bed to warm ourselves before hitting the hay. We started with one flavor of tea, Camomile, and over the chilly months, we started collecting all kinds of new flavors. Soon our collection of herbal tea started to take over our kitchen and I decided that it was time to find a better storage solution for our newfound tea love. I found a great industrial-style cabinet that fits perfectly in our kitchen and loaded it up with all of our tea.

The next step was to create some labels for our new tea storage solution. Because the cabinet was an industrial-style cabinet I wanted to create some industrial-looking labels that were handwritten. The problem… I’m not a huge fan of my handwriting. I was just not blessed with that gift, nor do I have the time to practice, practice, practice. I remembered that my Cricut Explore Air 2 has a great “handwritten” option using the Cricut Explore Pens.

Handwritten label by Cricut. Get that perfect look for your home weather it's; industrial labels, farmhouse labels or modern labels. You can achieve that perfect "handwritten" look even if you don't have great hand writing with the Cricut using your favorite handwritten fonts.

How to Write on Avery Labels with Your Cricut – Handwritten Label Inspiration

This is such a simple beginner project that anyone at any creative level can create for their home with their Cricut machine. For this industrial-style label, I kept things simple. I really only needed a “handwritten” tea name with a rectangle cut around it… Pretty basic. However, you can create all kinds of great “handwritten” labels with fancy shapes as well. I created a Label Design Pinterest board with some inspiration for all kinds of fun “handwritten” labels that you can make with the Cricut Explore Air 2.

The video below shows you in-depth how to create the lables.

How to Make Your Own Handwritten Labels With Cricut Explore Air 2

With all of that inspiration, you have to be chomping at the bit to get started. I created a simple, easy-to-follow video to show you exactly how to make these basic handwritten labels for a storage solution in your home. Grab a cup of tea, sit back and learn how to make your own labels.


Here’s What You Need to Make These Cricut Handwritten Labels

There are a few things you’ll need to make these awesome labels. The good news is you can get all of them online. Since you’re reading this I bet you already have a Cricut machine but if not, what are you waiting for!? The rest of the tools you may or may not have and I’d recommend picking them up to get this project going 🙂

  1. Cricut Machine (I used the Explore Air 2 for this)
  2. Cricut Pens
  3. Cricut Cutting Mat
  4. Avery Lables
  5. Optional but helpful: The Cricut spatula tool
  6. And just a little bit of practice!

That’s all you really need for this project. Most of these items are very cheap unless you don’t already have a Cricut machine. Even then, if you want to get into DIY home crafts and projects, the machines really are a bargain!

Tips & Tricks for Handwritten Cricut Labels

"Handwritten" label by Cricut. Get that perfect look for your home weather it's; industrial labels, farmhouse labels or modern labels. You can achieve that perfect "handwritten" look even if you don't have great hand writing with the Cricut using your favorite handwritten fonts.

Here are a few tips & tricks that I learned along the way.

  • STOP and think about your end game. What style are you looking to create with your handwritten labels? Make sure you are selecting fonts that pair well with that design concept. If you are going for an industrial look, you aren’t going to use a font that is more shabby chic. If you have a farmhouse style in your home, you aren’t going to select a modern-style font and so on.
  • When working within Cricut Design Space, don’t forget to ATTACH your layers before you send your design to your machine. We go over this in the video so make sure you check that out before you get started.
  • The Cricut Design Space makes it super easy to tell the difference between a handwritten layer and a cut layer in your label design. Keep an eye on the icons to tell the difference between the layers. (HINT… I cover this in the video.)
  • USE your Cricut tools! I always want to move too fast and forget that Cricut has created some great tools to help make your projects the best they can be. When removing card stock paper from the cutting mat, use the SPATULA TOOL to keep your paper nice and flat. If you remove the paper by just pulling it away from the cutting mat, it will curl slightly.
  • Don’t forget to watch the video! It’s less than 10 minutes and it covers everything you’ll need to know to create your own “handwritten” labels.

Now hopefully you know how to make labels with your Cricut Explore Air 2. As always, If you have questions post them in the comments below and I will answer!

  • « Go to Previous Page
  • Page 1
  • Page 2

Primary Sidebar

Heather from Whipperberry
Hello... my name is Heather and I'm the creator of WhipperBerry a creative lifestyle blog packed full of great recipes and creative ideas for your home and family. I find I am happiest when I'm living a creative life and I love to share what I've been up to along the way... Come explore, my hope is that you'll leave inspired!

Footer

  • Privacy Policy
  • Crafts
  • Food
  • Gifts
  • Holidays
  • Home
  • Mom Life
  • Recipes
  • Travel

Copyright © 2026 · Seasoned Pro