• Skip to primary navigation
  • Skip to main content
  • Skip to primary sidebar
  • Skip to footer

Whipperberry

WhipperBerry • Your Home For Creative Inspiration

  • Home
  • Recipes
    • Starters
    • Easy Weeknight Dinners
    • Main Dish
    • Salads
    • Side Dish
    • Soups & Stews
    • Desserts
    • Breakfast
    • Miscellaneous
  • Tutorials
    • Creative Crafts
    • DIY Decor
    • Fabric Crafts
    • Food How-To
    • Jewlery
    • Paint Projects
    • Paper Art
    • Party Styling
    • Photography and Graphic Design
    • Silhouette
  • Holidays
    • Easter
    • Mother’s Day
    • Father’s Day
    • 4th of July
    • Halloween
    • Thanksgiving
    • Christmas
    • Valentine’s Day
  • Gift Ideas
    • Gifts For Everyone
    • Gifts for Dad
    • Mother’s day
    • For The Girls
    • For The Kids
    • Teacher Gift Ideas
    • Christmas
  • Printables
    • Holiday
    • Gift Idea
    • LDS Primary
  • Travel
  • About
    • Terms
  • Contact
  • Nav Social Menu

    • Facebook
    • Instagram
    • Pinterest
    • RSS
    • Twitter

Wood

DIY Yard Yahtzee

5 · Aug 20, 2015 · 4 Comments

Are you looking for something fun for your summer holiday gatherings or even a lazy Sunday afternoon? Labor Day is coming up & kiddos love games. The bigger they get, the bigger they want their games! We were getting ready for a family event and I thought it would be super fun to create a DIY Yard Yahtzee game with large dice for the family to enjoy!

DIY-Yard-Yahtzee-from-WhipperBerry

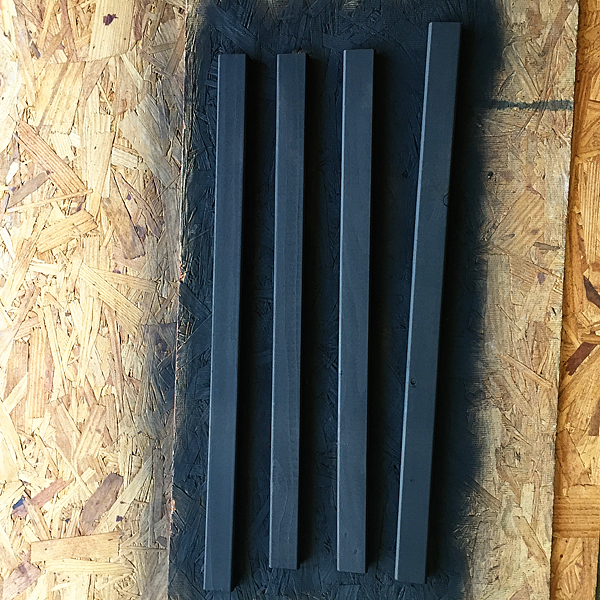
This is a great way to gather everyone for a little fun this summer. The dice are super easy to make, I whipped up 2 sets in a couple of hours. They are simple 4x4x4 blocks of wood that are faux stained with BB Frösch Chalk Paint. When they aren’t being used to play games, they make great decor for your home.

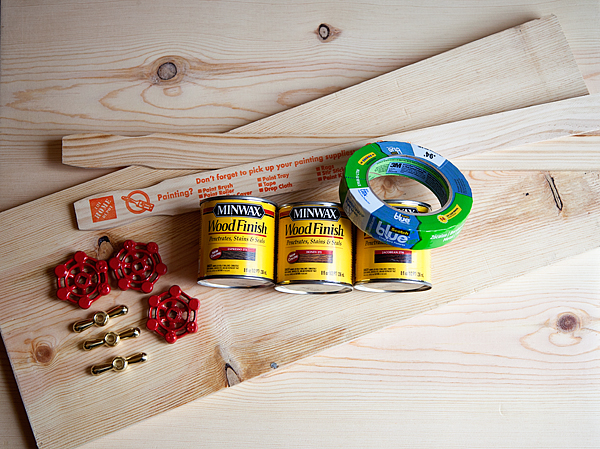
Here’s your materials list…

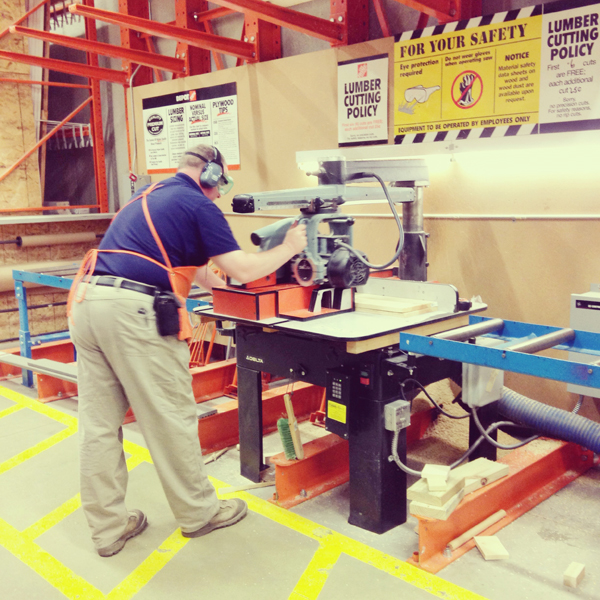
12 4x4x4 blocks ( I bought a 4x4x10 board at Home Depot and cut it into 4x4x4 blocks.)

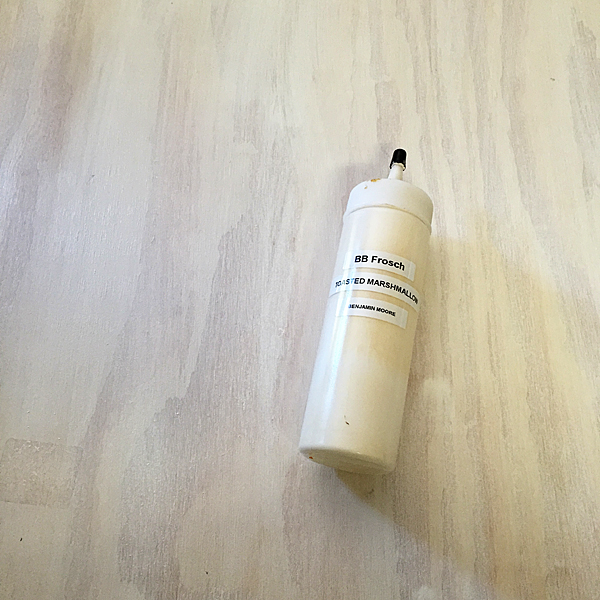
8 oz. BB Frösch Chalk Paint  – Brown

(You can select whatever color you like, I’ve used Mink from Benjamin Moore mixed with  BB Frösch Chalk Paint Powder. You can just grab a sample pot of paint at Home Depot in your favorite color and mix it with BB Frösch. You can even ask them for Mink, they have it in their system even though they don’t carry Ben Moore products.)

8 oz. BB Frösch Chalk Paint  – White

BB Frösch Premium Finishing Wax – Clear & Dark

Paint Brush

Wax Brush

Round sponge

Directions

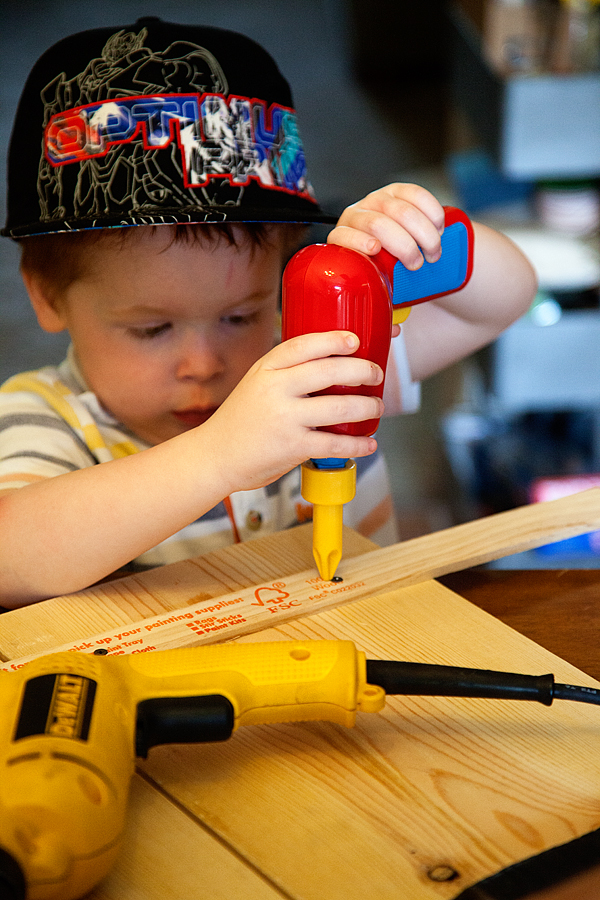
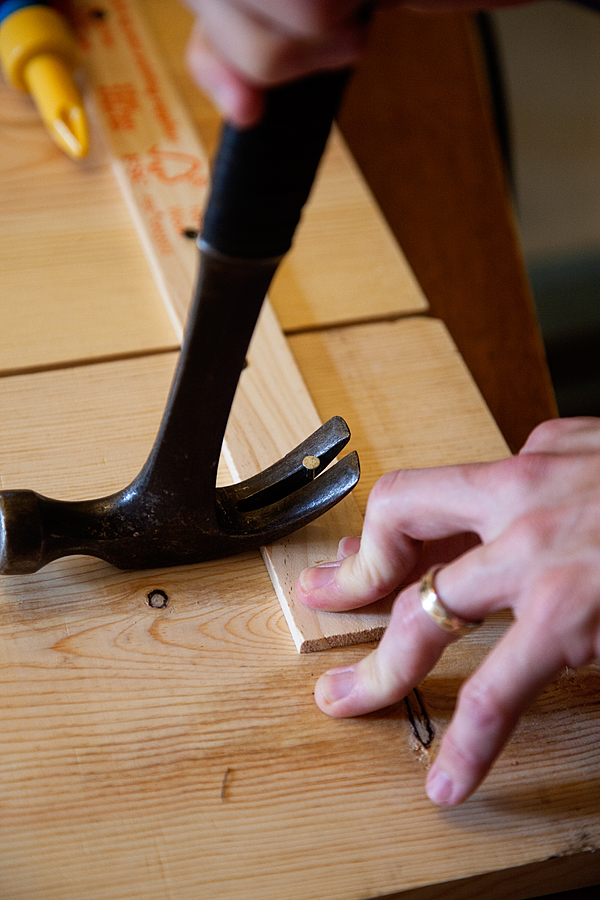
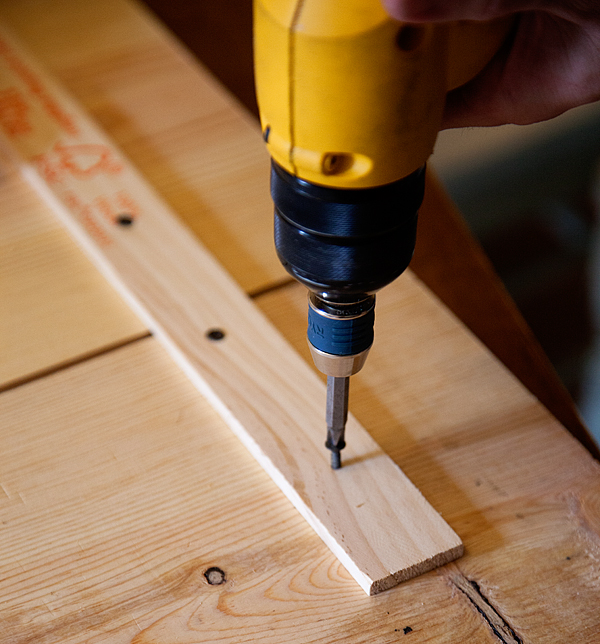
Please make sure you sand your blocks once they are cut, you don’t want any rough edges. Dust them off and get your space ready for a quick paint session. CLICK HERE for a quick video tutorial on how to make these cute dice.

Large Dice for Yard Yahtzee from Heather Thoming on Vimeo.

It’s really just that simple. A little paint & wax and you’re good to go. This is a great painting technique for furniture and all kinds of stuff… It’s not just for dice!

Now, all you need to do is gather the troops and PLAY!!

If you’re new to Yahtzee, here’s a link to the rules of the game that you can print if needed. You can download your printable Yahtzee score sheet here.

I’ve also created a fun printable that you can download.

Yard-Yahtzee-Printable-Score-Card

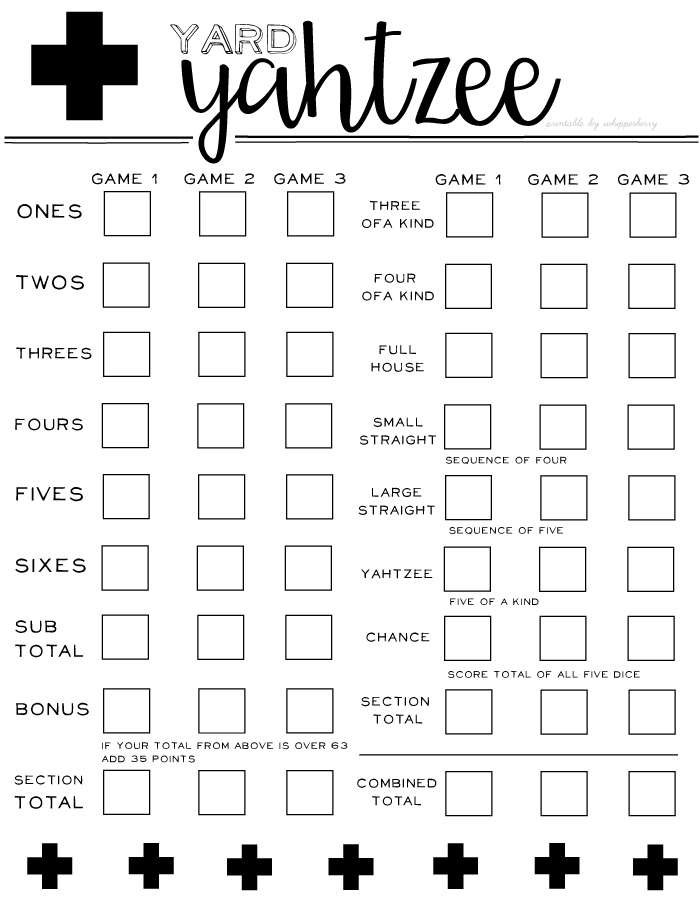
Click HERE to download Yahtzee Score Card

Now all you have to do is grab the troops and have a ball!!

Yard-Yahtzee-free-printable-from-WhipperBerry-13

Yard-Yahtzee-free-printable-from-WhipperBerry-4

+ This post originally aired on Skip to my Lou +

Kitchen Marquee Sign with Heidi Swapp

0 · Jul 31, 2015 · 3 Comments

+ Kitchen Marquee Sign post brought to you by Michaels Craft Stores +

kitchen-marquee-sign-with-heidi-swapp-by-whipperberry

I am obsessed with marquee signs… I truly am.

It started with this post back in July of 2013, my Designer Marquee Letters.

designer-marquee-letters-by-whipperberry

Back in the day when marquee letters were rather elusive. Your options were to either pay a fortune for the real deal, or find a way to DIY a set of your own. I went the DIY route which was great, the sign still lives in my kitchen and I love it, however… it was a tad challenging, still expensive and quite frankly it still looked a little wonkey with all kinds of wiring to contend with.

The day that Heidi Swapp released her Marquee Love, was a DREAM! Seriously, I’m not sure if I’ve ever been that excited about a product release in a long time. It’s BRILLIANT! Truly, I’m always kind of excited to see what Heidi has up her sleeve. She is taking the crafting world by storm these days with not only her Marquee Letters but her Minc Foil Applicator is GENIUS as well. One of my favorite crafting tools right now!

Heidi is one of those individuals who is amazingly innovative but someone who is truly genuine. She’s everyone’s cheerleader. We have connected a bit over social media and had a chance to chat at SNAP this last year. She is one lady who I truly admire and look up to. She’s brilliant and a go getter. She’s one of those ladies who dreams up a crazy idea like the Minc and just MAKES IT HAPPEN! I love that!

I had a ball this week creating with my favorite Heidi Swapp Marquee Love letters to celebrate Michaels Big Brand Sale Starting Sunday, August 2nd.

 Kitchen Marquee Sign

Kitchen-is-now-open-Heidi-Swapp-Marquee-Sign-from-WhipperBerry-1-2

I decided to take Heidi Swapp’s Marquee Love letters to the next level and add them to a wood sign, rather than just having them sit on a shelf. I have fallen in love with all kinds of fun typography signs for the kitchen floating around like this one from Gina of Shabby Creek Cottage

small-kitchen

BUT… I thought, how fun would it be to have a marquee element to it. Why not do a sign saying, “Kitchen is Now OPEN” with the OPEN in marquee letters showing that when the sign is alight, the kitchen is open, when it’s off, the kitchen is CLOSED. Fun, right! Here’s how to make it…

Materials Needed

  1. 24×24 plywood board
  2. 4 – 25 inch 1 1/2 x 1/2 inch boards for the frame
  3.  Heidi Swapp Marquee Love letters O,P,E,N
  4. Krylon Chalk Board Spray Paint
  5. White Chalk Paint – I used BB Frösch Chalk Paint Powder
  6. Silhouette or Cricut cutting machine OR Stencil Letters
  7. Vinyl
  8. Scrap paper
  9. painters tape
  10. Hot glue
  11. Brad nails
  12. Glue dots

Directions

Heidi-Swapp-Marquee-Sign-from-WhipperBerry-10

Gather your materials and prepare them to paint. I decided to use Krylon Black Chalkboard Paint because I love the deep black and the matte finish.

First, I spray painted my letters and the frame for the sign.

Heidi-Swapp-Marquee-Sign-from-WhipperBerry-9

Heidi-Swapp-Marquee-Sign-from-WhipperBerry-7

Then I used BB Frösch Chalk Paint to white wash the sign base. I chose that technique rather than just straight paint because I still wanted to see the wood grain.

Heidi-Swapp-Marquee-Sign-from-WhipperBerry-8

To white wash your board, all you need to do is use watered-down chalk paint and then lightly wipe-off the paint to reveal the grain of the wood. This is a great way to add a little color, keep the wood look and it also dries really quick!

Heidi-Swapp-Marquee-Sign-from-WhipperBerry-5

Next, I cut my vinyl with my Silhouette CAMEO using the Bebas font. Love that font!

I laid down my vinyl and then taped the rest of the board with painters tape and some scrap paper to mask the rest of the board while I spray painted the letters.

Heidi-Swapp-Marquee-Sign-from-WhipperBerry-4

Once the paint was dry, I placed my marquee letters and drilled holes to feed the lights through. Now, keep in mind, you need to think through the pavement of the holes and how you are going to arrange the lights in the letters. You want the battery packs sitting on the bottom frame of the sign and you need to place the drilled holes accordingly.

Heidi-Swapp-Marquee-Sign-from-WhipperBerry-6

Heidi-Swapp-Marquee-Sign-from-WhipperBerry-3

Then, I assembled my marquee letters and hot glued them to the board.

Next, I hot glued the frame to the sign base and then secured it with some brad nails.

Heidi-Swapp-Marquee-Sign-from-WhipperBerry-1

On the back of the board, I used a few glue dots to secure the battery packs for the letters to the back of the board.

Heidi-Swapp-Marquee-Sign-from-WhipperBerry

And that was it… your Kitchen Marquee Sign is finished!

Kitchen-is-now-open-Heidi-Swapp-Marquee-Sign-from-WhipperBerry-2

The cool thing it looks great with the lights ON or OFF!

Kitchen-is-now-open-Heidi-Swapp-Marquee-Sign-from-WhipperBerry-3

I found the cutest sign on The Diary of Dave’s Wife not to long ago…

Lunch-now-being-served

Of course had to make one of my own, I thought it look great placed right under my Kitchen is Now Open sign…

Kitchen-is-now-open-Heidi-Swapp-Marquee-Sign-from-WhipperBerry-4

How fun is that! I used some 3M Command Picture Hanging Strips that are velcro so I can easily interchange my breakfast, lunch & dinner signs for fun! LOVE IT!!

Don’t forget this next week is the perfect time to stock-up on all your favorite brands at Michaels Big Brand Sale!!

Disclaimer // This post is sponsored by Michaels Craft Stores. I am Michaels Maker this year and will be posting all kinds of goodies from Michaels Craft Stores. I do receive free product to create with.

Stop in for a Spell – Free Halloween Printables

7 · Sep 9, 2014 · 2 Comments

Hello Whipperberry Readers! Its Lisa and Pam from Over the Big Moon again! This month we have a Vintage Halloween Witch sign, some of our free Halloween printables just for you!

sit for a spell10

stop in for a spell

This print can easily be framed. But I wanted it for my front door. In order to do that I needed to make it weather/waterproof. I also adjusted the sign wording a little help it fit in with our Harry Potter themed Halloween decor.

wheasley wizard wheezes

First I bought a piece of wood that was slightly larger than my print.

sit for a spell1

I stained my wood with Minwax Dark Walnut stain. I also got out my Mod Podge in matte and an old brush.

sit for a spell3

I also printed my print and trimmed the white edges off. It is best to take an ink pad and rub it along the edges. It really ensures the whole thing looks old and aged.

sit for a spell4

Spread an even layer of Mod Podge over your wood. It can be bigger than the print, it dries clear so it wont matter.

sit for a spell5

Lay the print down and press it flat. I wanted let it dry over night to make sure it didn’t bubble up. When the excess on the top was dry enough I placed a piece of foil over it, just for added protection. Then placed some heavy flat objects on the top.

sit for a spell6

In the morning I added a thin layer of Mod Podge over the top.

sit for a spell7

After it was dry, I did a second coat. After the 2nd coat dried completely I sprayed it with Shellac to give it extra protection. After the Shellac dried it was as simple as drilling some holes and stringing burlap through it. It really boosts the front door appeal and turns a boring wreath into a statement!

sit for a spell11

You can download both the Salem Witch version or the Weasley Wizard Wheezes version just by clicking on the word links.

Be sure to stop by and visit us this month to check out some of our other fun and spooky Halloween projects!

spooky halloween decor Thanks for having us Heather!

DIY Barbecue Tool Storage for Father’s Day + $50 Home Depot GIVEAWAY

0 · Jun 11, 2014 · 3 Comments

Barbecue Tool Storage post brought to you by ScotchBlue™ Painter’s Tape // Father’s Day is right around the corner, and this year I decided I wanted to go the DIY route and make a place for our sweet Dad to hang his barbecue tools. I knew I wanted to make something that was stylish, yet masculine so I decided to create a funky storage board using ScotchBlue™ Painter’s Tape for Multi-Surface with Edge-Lock™ Paint Line Protector, Minwax® Wood Finish and some funky hooks found in the plumbing section of Home Depot.

photo 1

I thought this would go perfect for the Get it, Got it Blog Hop hosted by ScotchBlue™ Painter’s Tape ™ Painter’s Tape and Link to The Home Depot .

First things first, we needed to build the board… It turned into a fun family project with my son Gage getting in on the action…

photo 17

I bought two 1×10 boards and had the cool guys at Home Depot cut them in half for me right at the store.

photo 3

We secured three of the boards together with large painters sticks that you can get for free at Home Depot. We just screwed them to the back of the boards making sure to use screws that wouldn’t go through the front of the board.

photo 4

photo 5

Quick Tip // Use a nail to create a guide hole for your screw. Just nail it in part way, and then remove it from the board. This way you don’t have to drill a hole!

photo 6

we also added some “D” ring hangers on the back so that we could attach our rope when we were finished.

Here’s where the fun part starts… I used the ScotchBlue™ Painter’s Tape to create a fun geometric design on the board. Now the thinnest ScotchBlue™ Painter’s Tape I could find is .94 inch wide and I wanted my lines to be a little thinner, so once I laid down my tape, I then went back with a box cutter and a straight edge and cut the tape in half.

photo 7

photo 8

photo 9

It worked like a charm! I laid down 6 vertical stripes equally spaced apart and then random stripes in-between the vertical stripes with the ScotchBlue™ Painter’s Tape.

photo 10

It was all really rather random and I eye-balled the whole thing, so don’t get caught up in exact measurements. Trust your eye.

Then I used 4 different colors of Minwax® Wood Finish™; Jacobean, Honey, Expresso & Maple (Wood Finishing Cloth in Maple.)

photo 11

It was just a simple process of wiping on the different stain colors in a random pattern and then wiping it off with a clean cloth.

Then I used a gold paint marker from Elmer’s and a straight edge to define all of the lines. It turned out amazing!! I fall in love with stain over and over every time I use it. I sealed it with Minwax® Express Clear™ to protect the wood.

Next, we affixed the hardware for the hooks…

photo 12

I used faucet handles that you can find in the plumbing section for a dollar or two. They worked perfect with some brass machine screws (#8 32×1) and matching washers and machine screw nuts. I fed the screw through a washer and the top of the handle and then secured it with a nut on the other side. Then we drilled holes in the board just a tad smaller than the size of the screw.

photo 13

Then we just screwed in the hooks into the board.

photo 14

Then all we did was take a bit of rope and fed it through the “D” hangers and secured it with rope clamps… It turned out perfect!


I attached some hemp twine to my husband’s BBQ tools and hung them on their new board.
photo 15

Now this board can hand on a deck right next to your barbecue or on a wall close by. Then, in the off season you can hand it in the garage for safe keeping it’s perfect.

photo 16

Now per some discussion on Instagram while I was posting about my project, some folks thought it could be a tie rack… Either way, I’m sure any Dad would love it and all the work you put into making it for them!

Are you a fan of Home Depot or now someone who is? You can check out the Link to The Home Depot Consumer Program and then enter to win a $50 Home Depot gift card right here on WhipperBerry! You can follow Home Depot on Link to The Home Depot Facebook page , Link to The Home Depot Twitter and Link to The Home Depot Pinterest page

You can also follow ScotchBlue™ Painter’s Tape on Link to ScotchBlue Pinterest , Link to ScotchBlue Twitter , Link to ScotchBlue Facebook page . You can find all kinds of inspiration at any of these social channels or you can find even more at the other blogs that are participating in this summer’s Blog Hop Link to Centsational Girl Landing Page …

Link to Domestically Speaking blog post
Link to Dukes and Duchesses
Link to Centsational Girls Blog Post
Link to 320 Sycamore post

a Rafflecopter giveaway

I am proud to be a 3M- sponsored blogger, and, as part of my responsibilities, I get the opportunity to evaluate new products from ScotchBlue™ Painter’s Tape. Opinions are my own and additional product used in the project were selected by me.

  • « Go to Previous Page
  • Page 1
  • Interim pages omitted …
  • Page 5
  • Page 6
  • Page 7
  • Page 8
  • Page 9
  • Page 10
  • Go to Next Page »

Primary Sidebar

Heather from Whipperberry
Hello... my name is Heather and I'm the creator of WhipperBerry a creative lifestyle blog packed full of great recipes and creative ideas for your home and family. I find I am happiest when I'm living a creative life and I love to share what I've been up to along the way... Come explore, my hope is that you'll leave inspired!

Footer

  • Privacy Policy
  • Crafts
  • Food
  • Gifts
  • Holidays
  • Home
  • Mom Life
  • Recipes
  • Travel

Copyright © 2026 · Seasoned Pro