• Skip to primary navigation
  • Skip to main content
  • Skip to primary sidebar
  • Skip to footer

Whipperberry

WhipperBerry • Your Home For Creative Inspiration

  • Home
  • Recipes
    • Starters
    • Easy Weeknight Dinners
    • Main Dish
    • Salads
    • Side Dish
    • Soups & Stews
    • Desserts
    • Breakfast
    • Miscellaneous
  • Tutorials
    • Creative Crafts
    • DIY Decor
    • Fabric Crafts
    • Food How-To
    • Jewlery
    • Paint Projects
    • Paper Art
    • Party Styling
    • Photography and Graphic Design
    • Silhouette
  • Holidays
    • Easter
    • Mother’s Day
    • Father’s Day
    • 4th of July
    • Halloween
    • Thanksgiving
    • Christmas
    • Valentine’s Day
  • Gift Ideas
    • Gifts For Everyone
    • Gifts for Dad
    • Mother’s day
    • For The Girls
    • For The Kids
    • Teacher Gift Ideas
    • Christmas
  • Printables
    • Holiday
    • Gift Idea
    • LDS Primary
  • Travel
  • About
    • Terms
  • Contact
  • Nav Social Menu

    • Facebook
    • Instagram
    • Pinterest
    • RSS
    • Twitter

Wood

Lighted Floral Swag | Perfect to Add a Little Romance to Any Room

10 · Mar 2, 2017 · Leave a Comment

I know the majority of the country is looking forward to a little Spring heading their way. There is nothing better than some early spring blooms to help you out of the winter doldrums, but, if you’re still knee deep in snow… They aren’t going to show up any time soon. That’s when the Floral Market at Michaels should be your next stop ASAP!! Refreshing your home for spring is as easy as swapping out a few décor pieces or adding pretty faux florals. Or, you can make a Lighted Floral Swag to add a little romance to your room. Michaels has everything you need to get started!

Lighted Floral Swag with beautiful flowers from Michaels via WhipperBerry

How beautiful is THAT! Won’t that brighten-up your dull, gray day?

I started with these lovely flowers from the Michaels Flower Market…

How to make a lighted floral swag via WhipperBerry

Then I grabbed two different kinds of led lights to add a little flair…

DIY Lighted Floral Swag from WhipperBerry

This fun vintage style string of Edison LED light bulbs and then just your basic LED string lights. The next item I needed was some great branches from out in the back yard. If you don’t have any fallen branches, scour your neighborhood and see if your neighbors would be willing to part with some of theirs. You can even buy branches at your local garden center if needed.

Lighted Floral Swag Instructions

First, I wired my branches together with floral wire and used some twine to create loops to hang the branches from. Then I wrapped them with the wire LED lights first.

DIY Lighted Floral Swag from WhipperBerry

Don’t worry about the battery packs that you can see on the sides. Those will be hidden later on with the flowers. You’ll also need to trim your twine to make it look nice.

Next, I draped the light bulb string loosely around the branches.

DIY Lighted Floral Swag from WhipperBerry

I love how those bulbs look hanging from the branches!

Finally, I hot glue my flowers to the branches. I wanted kind of a minimalist look for this swag, but, you can go totally crazy with the blooms if you’d like. It’s totally up to your preferences.

DIY Lighted Floral Swag from WhipperBerry

DIY Lighted Floral Swag from WhipperBerry

I completed the look with a few old pieces from around the house, plus a new FABULOUS foot stool from Michaels!!

DIY Lighted Floral Swag from WhipperBerry

I mean how cool is that footstool?! I also grabbed that yummy gold “hello” at Michaels as well in the same section. I just adore it all!

DIY Lighted Floral Swag from WhipperBerry

This project is super easy! Run on over to Michaels to grab your favorite florals and get started. Let’s start Spring off with a lovely BLOOM!

Looking for more inspiration? Make sure you visit Michaels’ blog, The Glue String, to see the rest of the Michaels Makers’ Spring Refresh project ideas.

An InLinkz Link-up

DIH (Do it Herself) Drink Station

3 · Jun 13, 2016 · 4 Comments

+ This DIH Drink Station post brought to you by the lovely folks at Home Depot +

DIH Drink Station from WhipperBerry

 You guys, I’m so excited about this project. No, really!

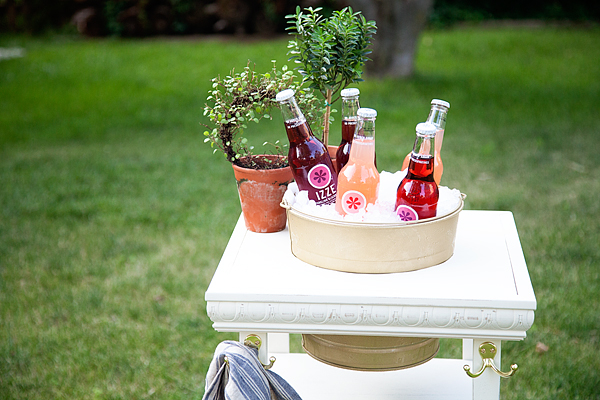
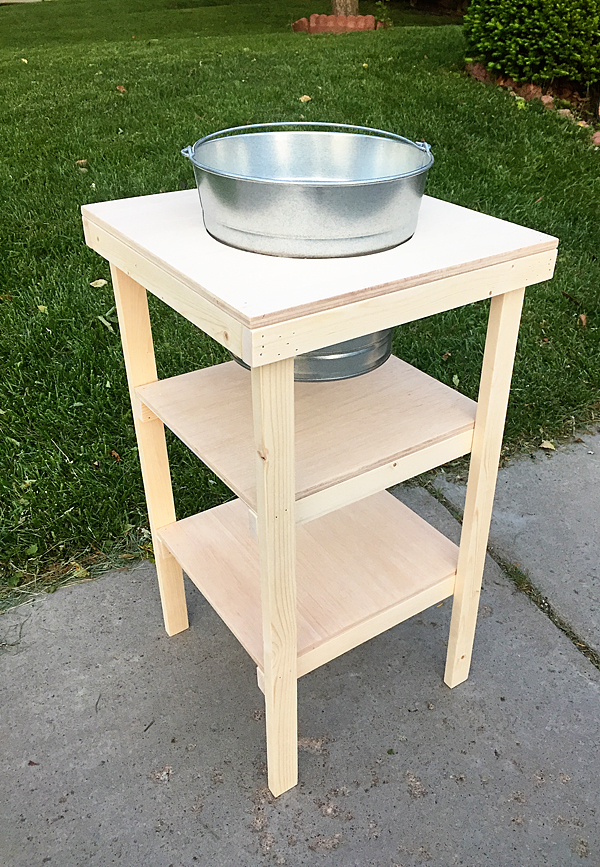
See that drink station above? I BUILT IT MYSELF!!!

Not bad for a girl who used to be afraid of power tools. Now I feel like I can conquer the world! Or build a table or something. I’m no Ana White yet, but I totally have the confidence now to try my hand at this building thing. I owe it all to Home Depot and their DIH (Do it Herself) challenge. The cool thing is that YOU can do this at your local Home Depot too!

This months DIH Workshop in your area will be on Thursday, June 16th at 6:30. Click HERE to register. If you have never been to a DIH workshop, you should go! This one is so fun, it’s FREE and you’ll learn how to make a beverage stations just like this one. Plus, to get to build on your skills and become truly handy around the house.

DIH Beverage Station from Home Depot

I was asked to be a part of a blogger challenge with 24 other bloggers. We all had to build the same beverage station from the Home Depot instructions and then give it our own special touches.

Doing some summer entertaining, this DIY Drink Station will be perfect!

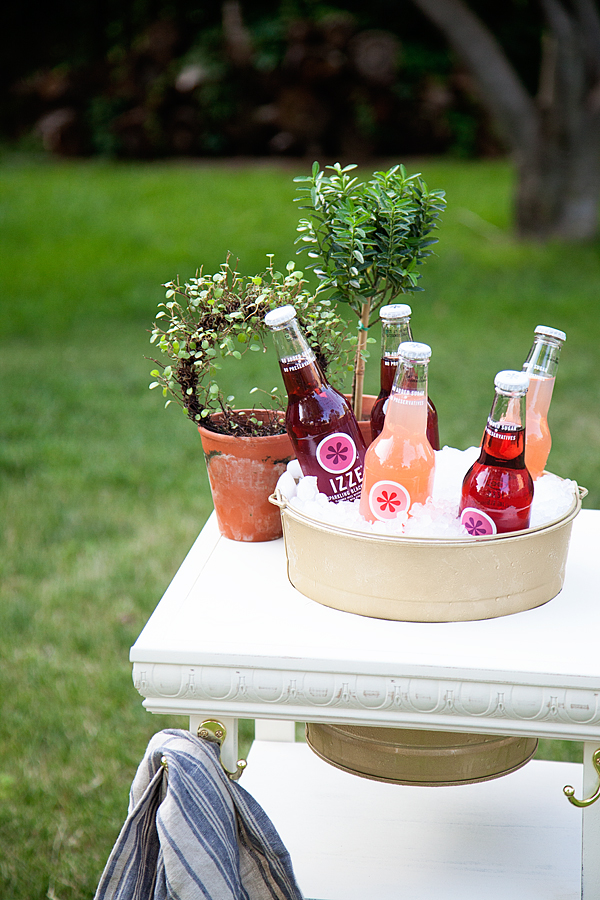
 I decided to give mine a classic look… I love everything clean and white right now but I want to distress through to a darker brown so, my first layer of paint was brown and then I painted the top an off-white and then distressed down a little bit.

DIH-Drink-Station-from-WhipperBerry-10

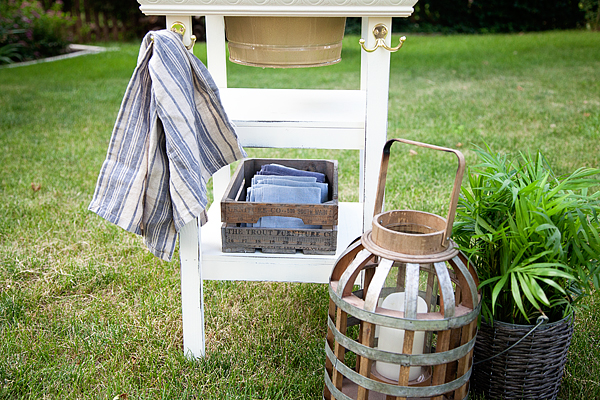
I added a decorative trim piece around the top to give it a more elegant look and then added these fabulous hooks on the side to give it a little more character. Of course I had to spray paint the bucket gold as well.

Doing some summer entertaining, this DIY Drink Station will be perfect!

 I can not even tell you how awesome it feels to know that I built this myself!! This is what I started with…

WhipperBerry-Beverage-Stand-11

IMG_8940

WhipperBerry-Beverage-Stand-5

WhipperBerry-Beverage-Stand

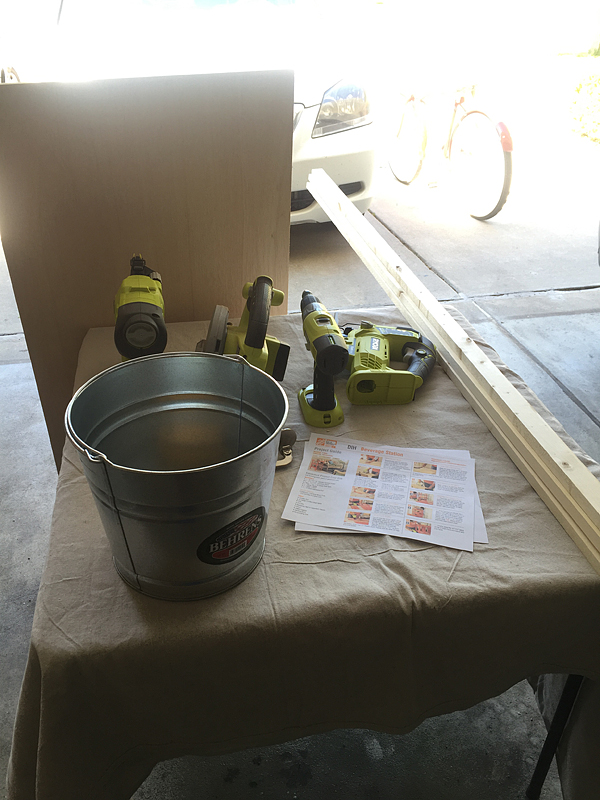
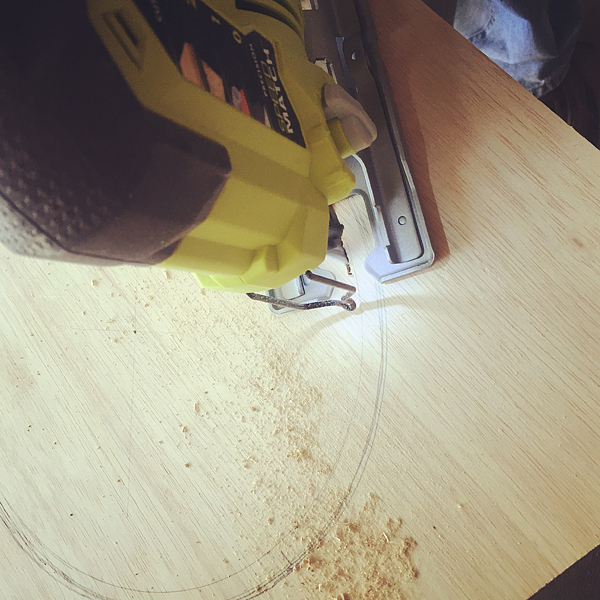
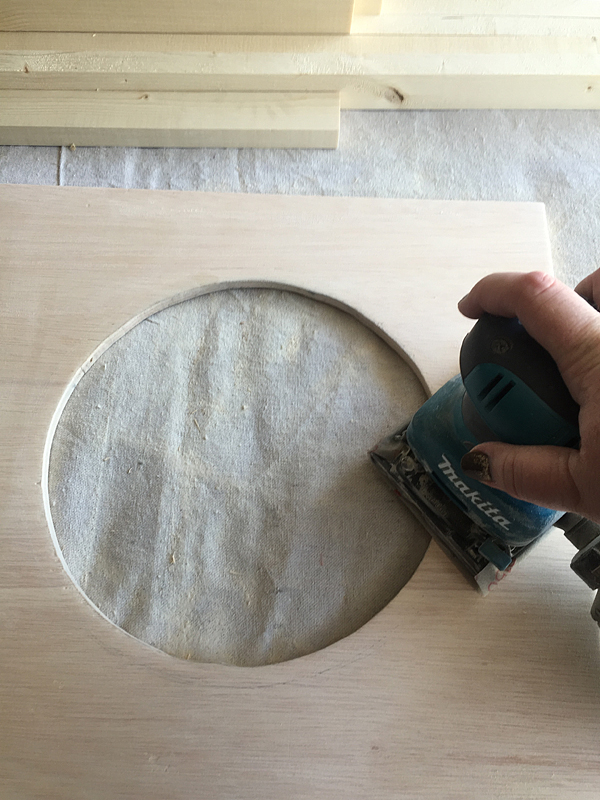
Just some basic plywood and some common boards, with some fabulous directions and that’s it! I now have a beverage station that I can be truly proud of.

DIH-Drink-Station-from-WhipperBerry-8

 Isn’t it cute! I’ve teamed up with 24 other bloggers who have created the very same thing and then personalized it for their taste. Won’t it be fun to see everyone’s different styles? Before you head out to check out the other drink stations, make sure you register to attend the DIH Beverage Station Workshop at your Home Depot. It’s FREE, it’s fun, grab a friend and learn how to BUILD!

Click on over and check out the other beverage stations…

The Casual Craftlete Blog

Little Glass Jar

Fox Hollow Cottage

Twelve On Main

Just Between Friends

One Horse Lane

The Crafting Chicks

Family Food Fun

Inspiration For Moms

Petticoat Junktion

Our Southern Home

Artsy Chicks Rule

Iris Nacole

The Rustic Life

Domestically Speaking

The Creative Mom

Live Laugh Rowe

Little Vintage Nest

One Artsy Mama

Dagmar’s Home

Fancy Farm Girls

All Things Thrifty

Whipperberry

Lolly Jane

Landee See Landee Do

Disclaimer // This post was sponsored by the Home Depot. I received product in order to complete my assigned task. Remember, I will only share what I truly love, and believe in!

Mistletoe Christmas Sign + Silhouette CAMEO GIVEAWAY

1 · Nov 22, 2015 · 259 Comments

+ This Silhouette CAMEO GIVEAWAY brought to you by Silhouette +

giveaway

Let’s get real…

 Christmas is right around the corner and we ALL want something nice in our stockings this year!

Frankly, I’m a gadgets girl. I love all kinds of tools that make my life easier or more creative.  My ALL-TIME FAVORITE creative tool is my Silhouette CAMEO. Seriously, hands-down, without a doubt, what would you take to a creative desert island (with power of course)… My CAMEO!!!

I will admit, that I have been blessed when it comes to these types of machines. I’ve extensively used both the Silhouette and Cricut cutting machines. I have met with the CEOs and their executive teams for both companies. I have learned about their visions for their companies and the new directions each company has in the works. I respect them both but, time and time again, I use my Silhouette CAMEO without a 2nd thought. It’s my go-to tool when I start any project. I LOVE my CAMEO. I love the creative capabilities that the Silhouette Studio has to offer. I love what’s available in the Silhouette Store and I love what I can create within the software. My hands don’t feel tied in any way with Silhouette. I can’t say the same for the other company’s software.

This Christmas I’ve created a fun new sign with my Silhouette CAMEO that I’m super excited to share with you guys.

WhipperBerry-White-Christmas-Mistletoe-Sign

This sign was painted with BB Frösch Chalk Paint Powder using my Faux Stain technique and then I stenciled this design onto the wood. There is NO WAY I could have made that sign without my Silhouette CAMEO.

For years before I had learned about any kind of cutting machine, I yearned to make projects like this and couldn’t. I don’t have the talent to hand letters nor the patients to trace and cut out a design with a craft knife. When I learned about the Silhouette Cutting Machine 5 years ago my heart skipped a beat. This was the creative tool I had been waiting for my whole life!

I bought one on their Black Friday deal back in 2011 and I’ve been in love ever since! So many products have come out since and as much as I love the companies, I always go back to… “I can make that with my Silhouette, why would I need to buy anything else.”

So here’s the deal… I’m going to be sharing my cut files for this Mistletoe sign on December 1st on Tatertots & Jello. If you don’t have a Silhouette yet, now’s the time to get one. This week, at Midnight on Wednesday, Silhouette is starting their Black Friday Sale. This sale is epic every year! They offer the best discounts on Black Friday, this is for sure the time to grab one and stock up and all kinds of Silhouette goodies. I’ll have all the details on the sales event right at Midnight on Wednesday… BUT, while we anxiously await, the amazing folks at Silhouette have given me a CAMEO to give away to one of you!!!

All you need to do is follow the directions in the Rafflecopter box below and you’ll be entered to win the Silhouette CAMEO of your dreams!

I’ll announce the winner on Thanksgiving morning. Don’t forget to come back that night to take advantage of the Silhouette deals. They sell out quickly so you don’t want to miss out.

a Rafflecopter giveaway

Halloween Tree Decorating

5 · Sep 25, 2015 · Leave a Comment

Whipperberry-Halloween-Tree-from-Treetopia-6

I’ve tried something new this year for Halloween… Have you ever decorated a Halloween tree before?

I know the trend is picking-up steam and people are doing all kinds of cool things for Halloween. I’ve teamed up with a handful of talented bloggers for a fun Halloween tree blog hop and GIVEAWAY! You need to run over and check-out Jennifer Perkins, Cathie Filian, Tried & True, My Paper Crane! Their trees are also so fun!! Hang tight and I’ll have the giveaway info at the bottom of the post.

I had a ball decorating this beautiful white tree from Treetopia with  black, white & gold glam for Halloween.  I LOVE how it looks with my Jack O’ Lope display that I created a few weeks ago… The tree adds a beautiful new element to the room that I just adore!

Whipperberry-Halloween-Tree-from-Treetopia-5

I’ve alway been in love with black & white decor when it comes to decorating for Halloween and knew that I wanted to carry that through with this tree. I found some fun large & small pumpkins at Target that were perfect. I was planning on painting my own, but these were already so cute I caved and bought them instead.

Whipperberry-Halloween-Tree-from-Treetopia-2

I added some beautiful fox masks from JoAnn that I fell in love with.

Whipperberry-Halloween-Tree-from-Treetopia-3

I also added more of my favorite black & white dice that I made a few weeks back and some apothecary jars from Target. I was looking for some kind of black filler to add some dimension to the tree and couldn’t find exactly what I was looking for. I wanted something that looked kind of like feathers mixed with spooky foliage. Weird, I know. I looked all over the place for the right look. I finally found a wreath in the Halloween section at Target and it was perfect. I deconstructed the wreath and used it as my tree filler. LOVE IT!

Whipperberry-Halloween-Tree-from-Treetopia-6

I also absolutely love my white tree from Treetopia, it looks perfect up against my black chalkboard wall for Halloween. It’s the Whisper White Cashmere Tree and it is fabulous. I’ve wanted a white tree for awhile now and I’m just so darn picky I couldn’t find one that I liked. They always looked so cheap. This one is nice and full and looks beautiful. I was so impressed with how easy the tree was to set-up. It has an extra long cord with and on/off foot peddle for ease of use. It also has a plug at the top of the tree to plug-in a tree topper if you have one of that sort, BRILLIANT!

The folks at Treetopia are giving away some fun trees for Halloween, Head over to their Facebook page for all the details!

Details // This post was sponsored by Treetopia however, I had a ball decorating this tree and wouldn’t have shared with you if I didn’t truly love the product!

  • « Go to Previous Page
  • Page 1
  • Interim pages omitted …
  • Page 4
  • Page 5
  • Page 6
  • Page 7
  • Page 8
  • Interim pages omitted …
  • Page 10
  • Go to Next Page »

Primary Sidebar

Heather from Whipperberry
Hello... my name is Heather and I'm the creator of WhipperBerry a creative lifestyle blog packed full of great recipes and creative ideas for your home and family. I find I am happiest when I'm living a creative life and I love to share what I've been up to along the way... Come explore, my hope is that you'll leave inspired!

Footer

  • Privacy Policy
  • Crafts
  • Food
  • Gifts
  • Holidays
  • Home
  • Mom Life
  • Recipes
  • Travel

Copyright © 2026 · Seasoned Pro