• Skip to primary navigation
  • Skip to main content
  • Skip to primary sidebar
  • Skip to footer

Whipperberry

WhipperBerry • Your Home For Creative Inspiration

  • Home
  • Recipes
    • Starters
    • Easy Weeknight Dinners
    • Main Dish
    • Salads
    • Side Dish
    • Soups & Stews
    • Desserts
    • Breakfast
    • Miscellaneous
  • Tutorials
    • Creative Crafts
    • DIY Decor
    • Fabric Crafts
    • Food How-To
    • Jewlery
    • Paint Projects
    • Paper Art
    • Party Styling
    • Photography and Graphic Design
    • Silhouette
  • Holidays
    • Easter
    • Mother’s Day
    • Father’s Day
    • 4th of July
    • Halloween
    • Thanksgiving
    • Christmas
    • Valentine’s Day
  • Gift Ideas
    • Gifts For Everyone
    • Gifts for Dad
    • Mother’s day
    • For The Girls
    • For The Kids
    • Teacher Gift Ideas
    • Christmas
  • Printables
    • Holiday
    • Gift Idea
    • LDS Primary
  • Travel
  • About
    • Terms
  • Contact
  • Nav Social Menu

    • Facebook
    • Instagram
    • Pinterest
    • RSS
    • Twitter

Wood

DIY Farmhouse Christmas Carol Star Tree Ornaments

111 · Nov 1, 2017 · 6 Comments


It’s officially Holiday Season! One thing that I LOVE about the Holidays is creating my own custom decor for our home. Love FARMHOUSE decor?

Then you are going to LOVE this Farmhouse-inspired Christmas Carol Star ornament that you can create for your home. This week I’ve teamed-up with DecoArt and Cricut to create some new ornaments for my Christmas tree this year.

We decided to go with the star of Christmas theme, so… I thought it would be fun to chalk paint some large wood stars and then put titles of Christmas Carols on them. They turned out so cute… Come learn how to make them for yourself.Create your own farmhouse Christmas decorations with a little help from WhipperBerry - Christmas Carol Stars

A few years ago, one of my good friends had the most beautiful Christmas trees. She had large stars all over the tree and I just adored it.

I asked her where the stars were from and I was devastated to learn that they were given to her from a friend who found them discarded from a department store after the holidays. DANG! There was no way of finding a set of my own.

This year, I decided it was time to make some large stars of my own. The timing couldn’t be more perfect! DecoArt and Cricut have teamed up this year to create all kinds of fabulous fun this Holiday season…

22520087_10212667444788382_464973044413398504_o

I love it when to amazing companies come together to inspire all of us to bring a little bit of our personalities into our home. These two are perfect for that. I’m sure that this will tickle your fancy… You’ll want to visit the DecoArt Blog to check out the GIVEAWAYS DecoArt & Cricut have up their sleeves this year!

Christmas Carol Stars Supply List

  • raw wood stars from Amazon
  • Americana Decor Curb Appeal – Black
  • Americana Decor Chalky Finish – Everlasting
  • paint brush
  • 250 grit sandpaper
  • Cricut vinyl – midnight
  • Cricut transfer tape
  • Cricut cutting machine like the  Cricut Maker

Instructions for Christmas Carol Stars

raw-star

First, grab your raw wood stars and wipe them down with a damp cloth to make sure they are dust and dirt free. Then paint your base coat with the Americana Decor Curb Appeal paint.

painting-the-star-black-first

The reason why I used the Curb Appeal paint is… One, it’s a durable paint and will stand up to the distressing of the chalk paint. Two, I just happened to have some left over after I painted my front door. I wanted to have a black base because I wanted it to show through when I distressed the white (Everlast) paint.

PRO TIP +  When using chalk paint, you will typically distress your paint to create the look that is typical with chalk paint. You’ll need to keep in mind what color you want to show through once distressed. You’ll need to use that color as your base color then paint your finishing color on top. Then make sure when you are distressing your piece, you don’t use too much pressure. You don’t want to accidentally distress down through your base coat.

Once your base coat is dry, paint your top coat with the Americana Decor Chalky Finish paint in Everlasting.

painting-farmhouse-wood-star

Pro Tip + Don’t worry about making your top coat look PERFECT with multiple layers of paint. You will be distressing them, no need for perfection. The heavier your layer of paint, the harder your piece will be to distress. No need to make extra work for yourself.

To distress, use a 250 grit sandpaper and lightly sand the raised edges of the stars.

how-to-distress-wooden-star-4

Christmas Carol Graphics

Now, it’s time to break out your Cricut machine. I’ve used the Cricut Explore machines and the Cricut Maker and I LOVE them both. For this project, I used my Cricut Maker but, either one is fine.

Athena_shop_hero_no-copy-copy2

Learning how to cut iron on vinyl with the Cricut Maker via WhipperBerry

To begin, I created these designs to put on the chalk painted stars…Farmhouse Christmas Carol Ornaments from WhipperBerry

I love how they help to usher in the spirit of the season. They remind us of seasons past and they also help to remember the true meaning of the season… The birth of our Savior Jesus Christ.

You can download these Christmas Carol designs HERE

Then all you need to do is to upload the SVG files to the Cricut Design Space. You can check out this post on how to upload a design in the Cricut Design Space to learn how to do that.

Then you’ll cut your designs on your Cricut machine and then apply the vinyl to your stars. To learn how to apply vinyl, visit this post… How to Apply Vinyl Tutorial that I created.

It’s really not hard if you follow a few simple steps. It truly is one of my favorite ways to create for my home.

Pro Tip + Make sure you wipe down your stars with a damp cloth to remove any remaining paint dust. It will make applying the vinyl much easier.

Now your stars are ready to add to your tree!

Farmhouse-Star-Christmas-Tree-via-WhipperBerry-3

Farmhouse-Star-Christmas-Tree-via-WhipperBerry-9

I can’t wait to see what you guys create this Holiday Season! Make sure to tag me on your social media posts. You can follow me on Facebook, Instagram & Pinterest.

Welcome to Our Patch • Fall Porch Ideas

2 · Sep 15, 2017 · Leave a Comment

Easily dress-up your front porch for Fall with gorgeous white Autumn pumpkins from Michaels and a few DIY projects created with a little help from Cricut that will turn your drab porch into something the neighbors will truly envy! Easily dress-up your front porch for Fall with gorgeous white Autumn pumpkins from Michaels and a few DIY projects created with a little help from Cricut that will turn your drab porch into some the neighbors will truly envy • Created by WhipperBerry

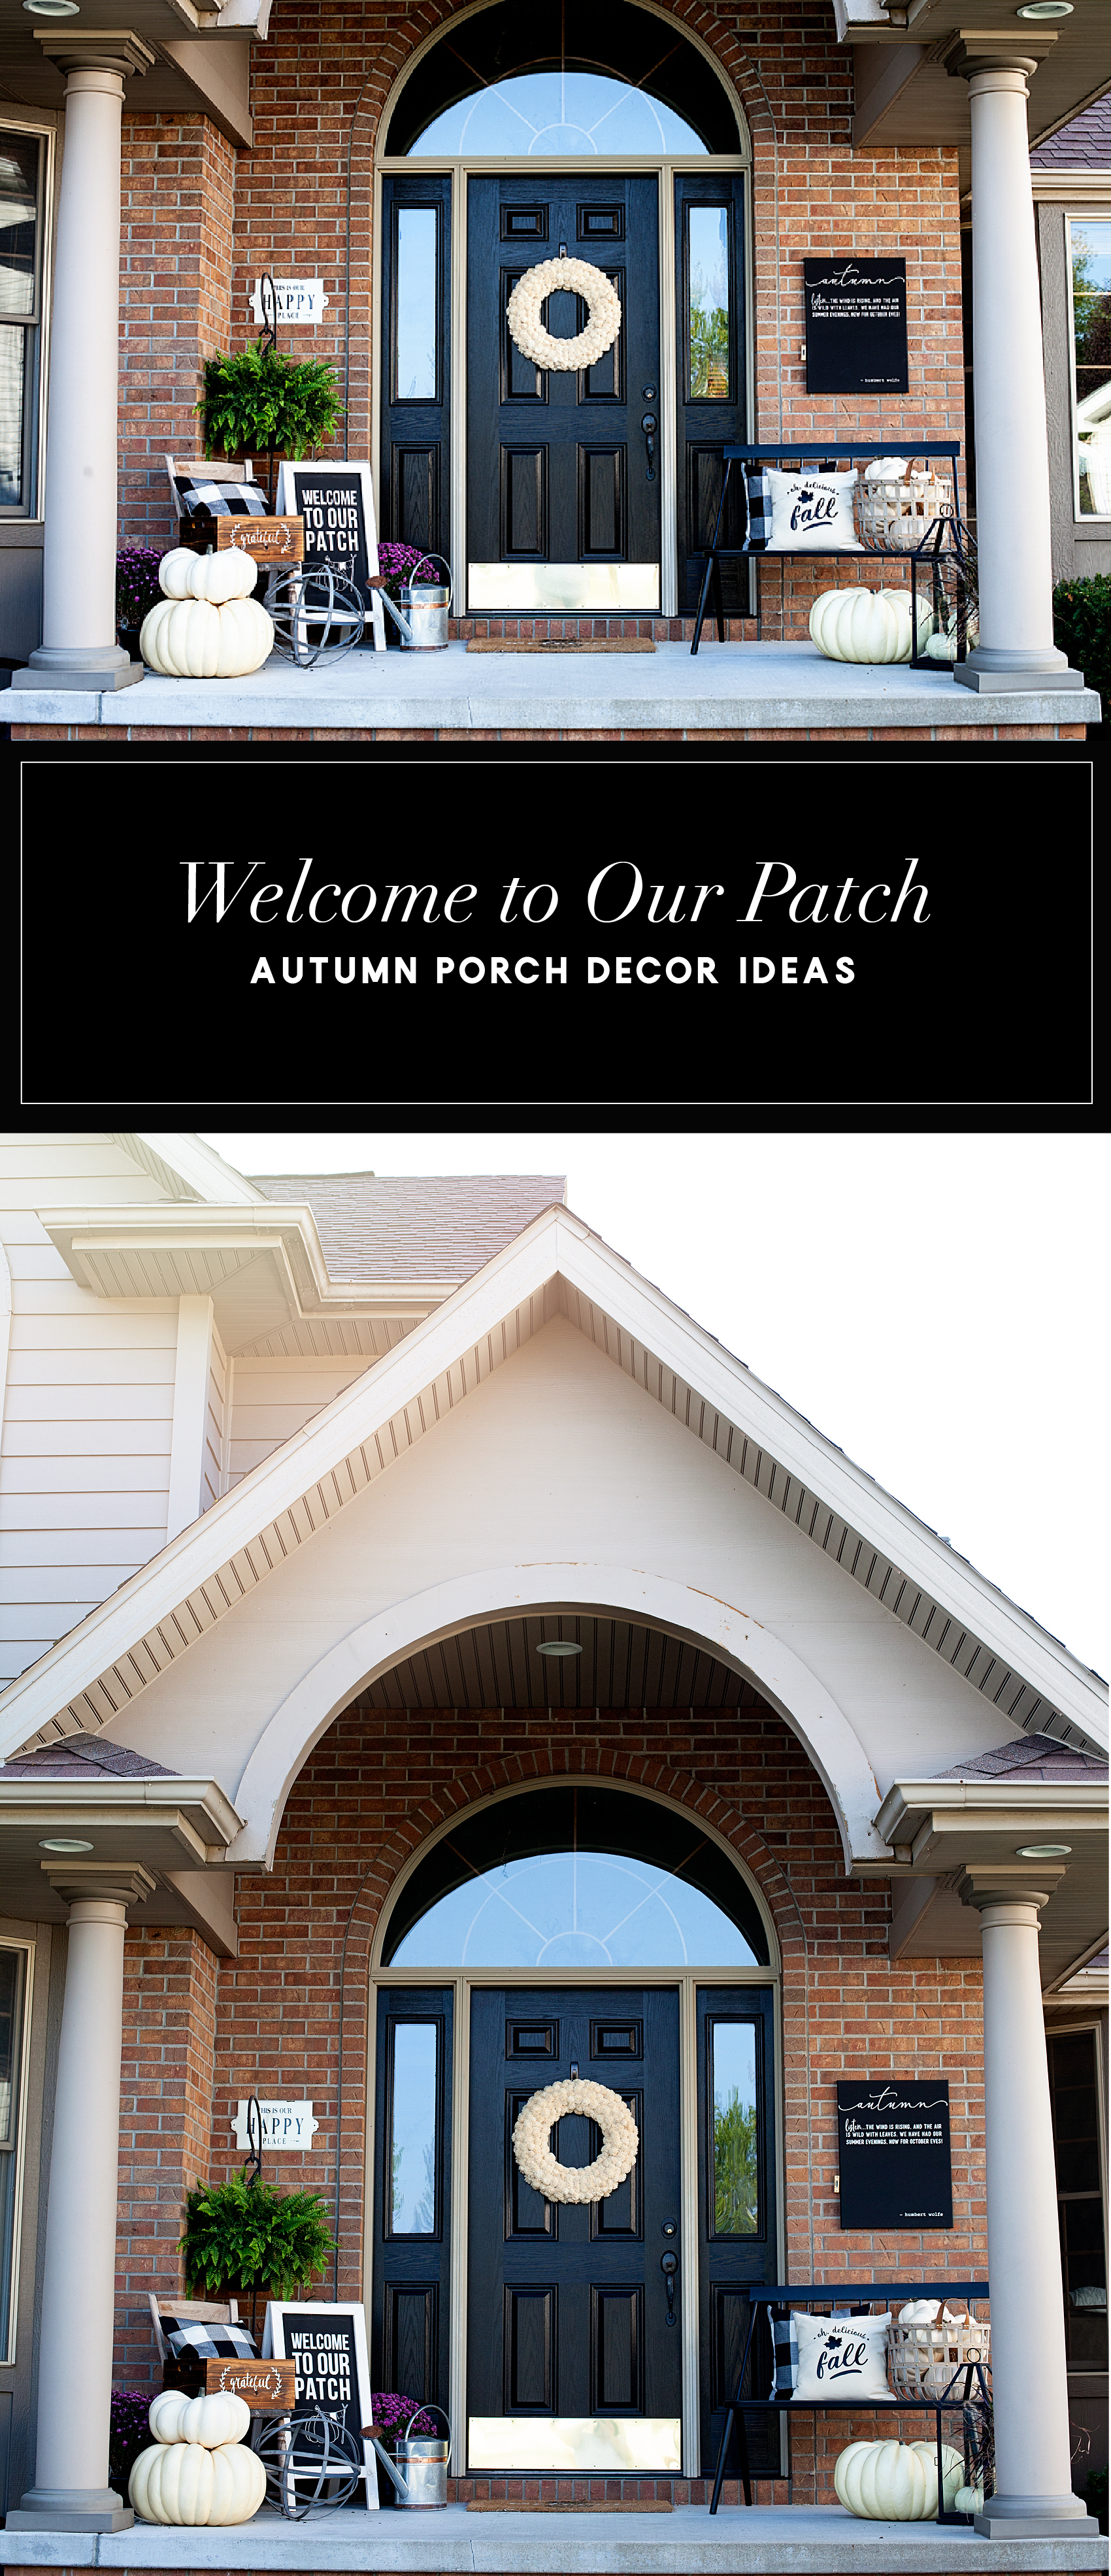
You guys!! I’m so excited to share my new front porch. If you’ve been following along in our home journey, you will know that back in March we purchase a new home here in Lincoln, Nebraska. I’ve been slowing getting the house up to snuff and I’m finally ready to show off our front porch with the fun Autumn decor that I’ve created. I’m calling it, Welcome to Our Patch.

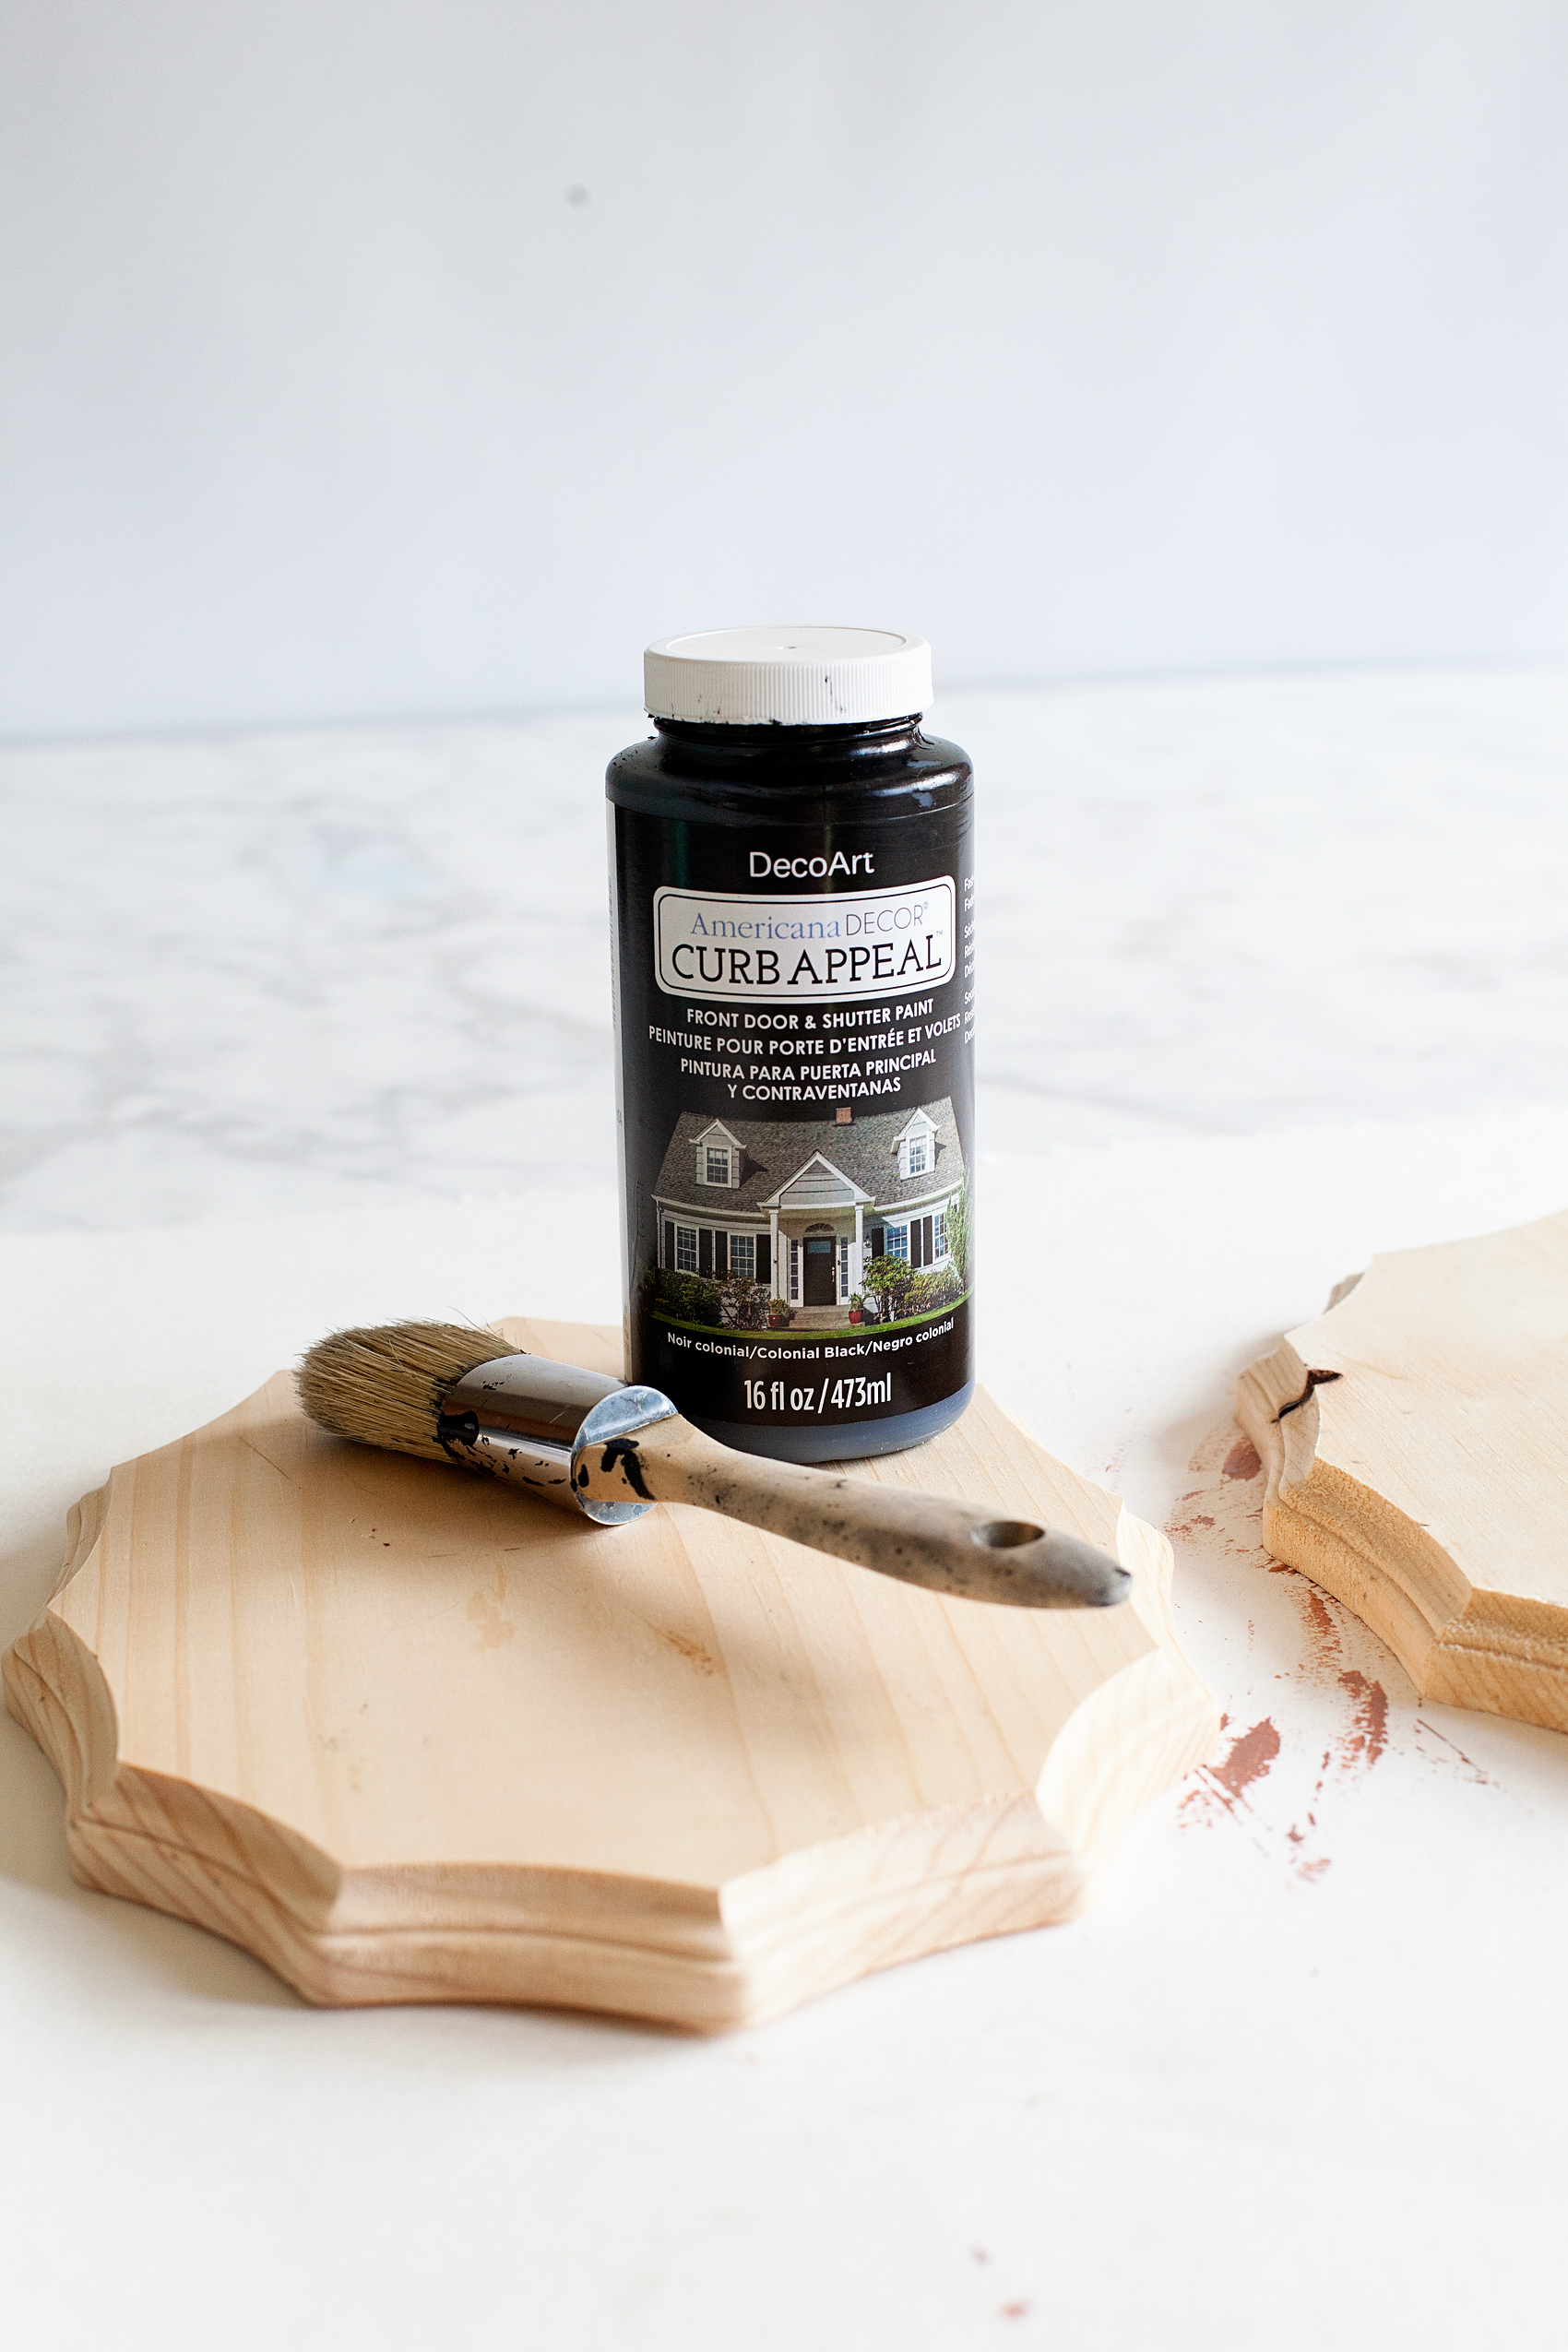
I’ve been working on some fun design elements with my Cricut Maker and playing around with different types of Cricut vinyl. Plus, I found these amazing PUMPKINS from Michaels. I LOVE how Michaels has really stepped up the pumpkin game. From playful pumpkins to spooky sights, Michaels has everything you need to MAKE it fun or beautiful this fall!

Easily dress-up your front porch for Fall with gorgeous white Autumn pumpkins from Michaels and a few DIY projects created with a little help from Cricut that will turn your drab porch into some the neighbors will truly envy • Created by WhipperBerry

Fall Porch Ideas

I tend to stick with the more classic and neutral white pumpkins when it comes to fall decorating. I found these BEAUTIFUL white pumpkins at Michaels in various shapes and sizes. They are all in that heirloom, pumpkin carriage type of pumpkin and they are just so pretty. I also LOVE that they won’t ever go bad and I can keep them year to year. Here are some ideas on how to use them in your decorating.

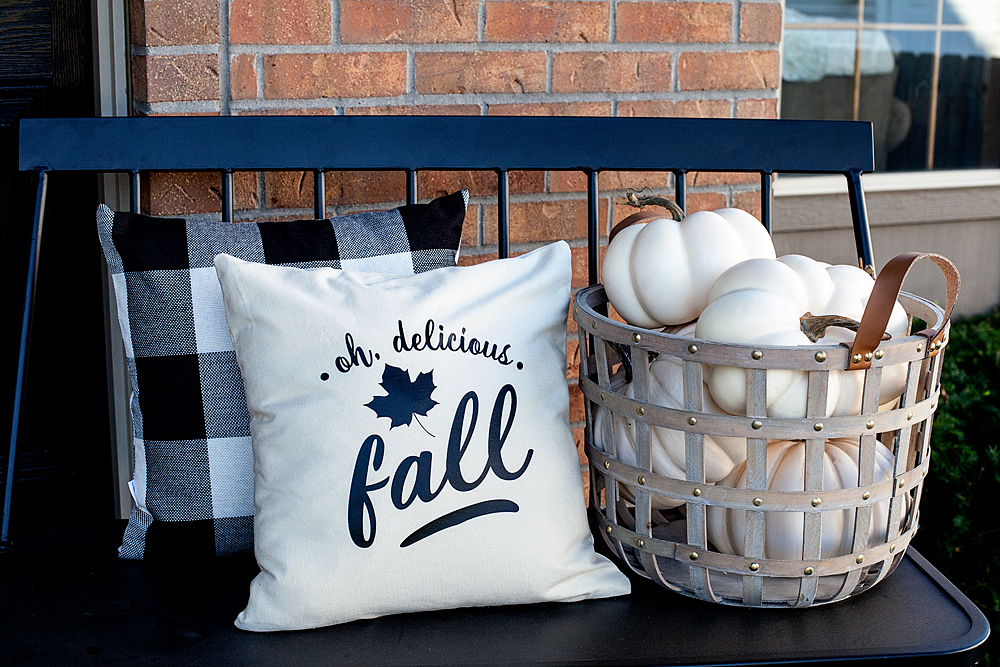
  • Grab a fabulous basket at Michaels and fill it with the smaller white pumpkins like the photo above.
  • Use pillows as part of your outdoor decor. I created this “Oh, Delicious Fall” pillow using my Cricut Maker and some of the Cricut Iron-On Lite along with the NEW Cricut Easy Press.
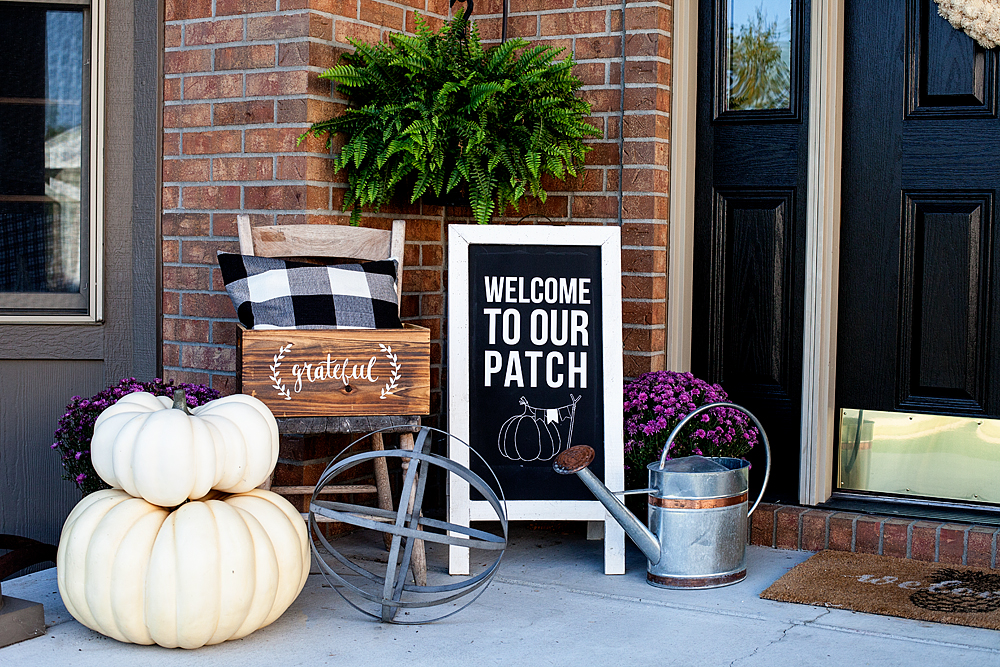
  • Invest in some of the large vintage style pumpkins to add to your beautiful “pumpkin patch.”
  • Fill a lantern with some of the smaller white pumpkins.

Easily dress-up your front porch for Fall with gorgeous white Autumn pumpkins from Michaels and a few DIY projects created with a little help from Cricut that will turn your drab porch into some the neighbors will truly envy • Created by WhipperBerry

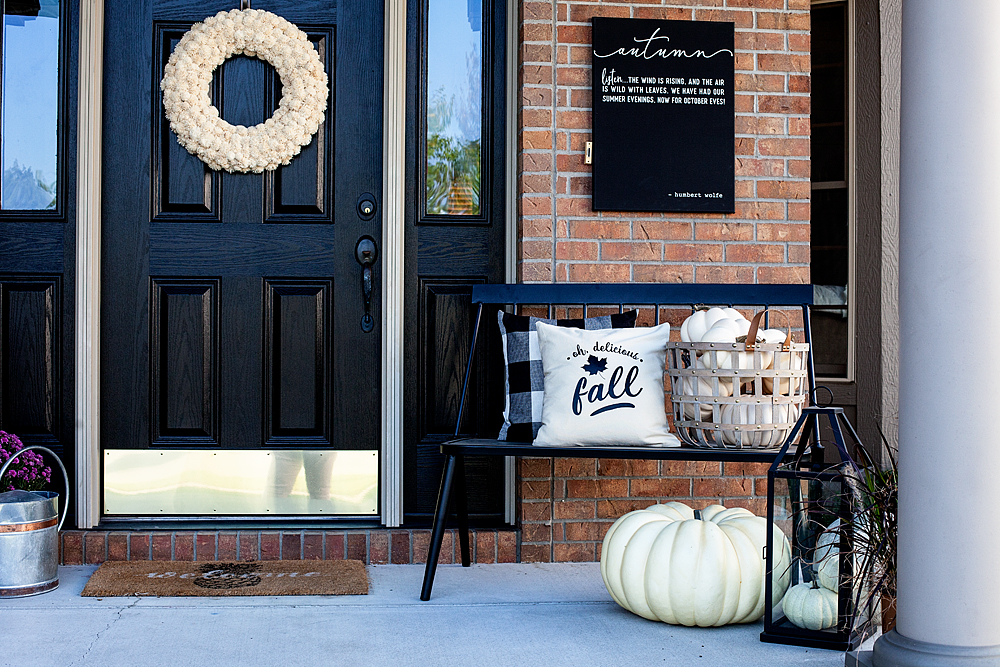
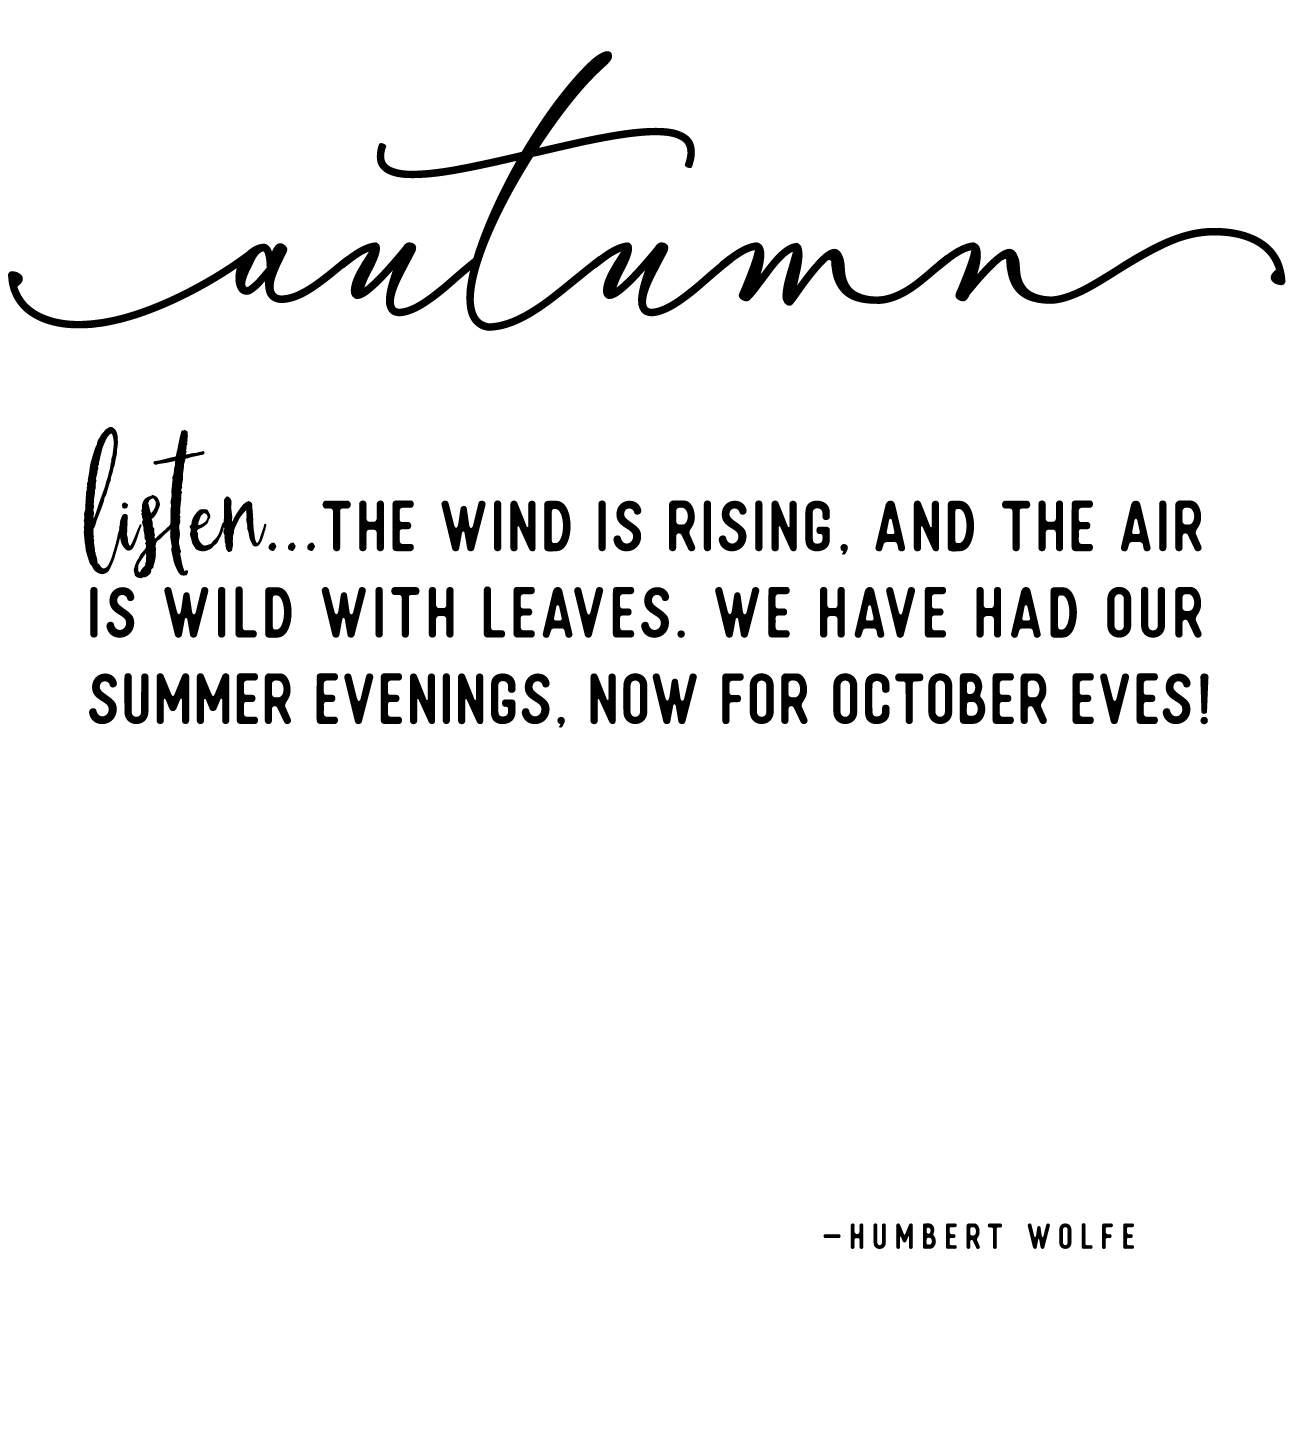
  • Create some wall art with a black canvas and some of the Cricut Iron-On Lite again. This works well for a front porch, indoor wall art or a mantel piece. I actually attached it to the brick with my FAVORITE Command Strips that I stock-up on at Michaels. I have been amazed at how well they work on the brick. It’s really cool! I see a whole bunch of outdoor wall art in my future.

Easily dress-up your front porch for Fall with gorgeous white Autumn pumpkins from Michaels and a few DIY projects created with a little help from Cricut that will turn your drab porch into some the neighbors will truly envy • Created by WhipperBerry

  • Grab an A-frame chalkboard sign from Michaels and add the “Welcome to Our Patch” design that I created for another great typography element. You know I love my word art!
  • Add a watering can, another pillow in a rustic crate, some plants… Anything you have around that could make this grouping look fall like. And of course… Pumpkins, more pumpkins for sure! It is a patch you know.

Easily dress-up your front porch for Fall with gorgeous white Autumn pumpkins from Michaels and a few DIY projects created with a little help from Cricut that will turn your drab porch into some the neighbors will truly envy • Created by WhipperBerryEasily dress-up your front porch for Fall with gorgeous white Autumn pumpkins from Michaels and a few DIY projects created with a little help from Cricut that will turn your drab porch into some the neighbors will truly envy • Created by WhipperBerry

You can download all of the SVG files for each element HERE

Let’s get busy and start our Fall crafting! Visit Michaels TODAY for all kinds of FABULOUS DEALS! For more inspiration, visit the Michaels Blog, Facebook, Instagram or Pinterest. They for sure have you covered.

Easily dress-up your front porch for Fall with gorgeous white Autumn pumpkins from Michaels and a few DIY projects created with a little help from Cricut that will turn your drab porch into some the neighbors will truly envy • Created by WhipperBerry

Creepy Halloween Taxidermy Plaques

9 · Sep 1, 2017 · Leave a Comment

Add a little flair to your spooky Halloween decorations with taxidermy plaques! I used the DecoArt Metallic Lustre to turn  simple spooky objects into creepy yet classy home decor. Come check it out… If you dare!

Add a little flair to your spooky Halloween decor with DecoArt! I used their Metallic Lustre to turn simple spooky objects into creepy yet classy taxidermy plaques to decorate our entryway for Halloween.

{ disclaimer • I am a DecoArt Ambassador and they have sponsored this post. However, all thoughts, ideas and opinions are my very own.}


 O.K. guys… It’s never too early to start thinking about your Halloween decorations! Over the years I’ve become quite the fan of decorating for this creepy holiday. I used to hate it, but I’ve kind of fallen in love with what you can create for this spooky night. I wanted to create some new pieces to add to my collection for the new home and found myself wandering the isles at Michaels wondering what to make. Then it hit me… I wanted to make some “taxidermy” plaques to add some cringe worthy art to my front entry way. I wanted to keep it simple and still classy so I thought a little Rose Gold Metallic Lustre from DecoArt would do the trick! Here’s how you can make them.

Add a little flair to your spooky Halloween decor with DecoArt! I used their Metallic Lustre to turn simple spooky objects into creepy yet classy taxidermy home decor.

Taxidermy Plaques Supply List

Add a little flair to your spooky Halloween decor with DecoArt! I used their Metallic Lustre to turn simple spooky objects into creepy yet classy taxidermy home decor.

  • wood plaques
  • DecoArt Metallic Lustre – Rose Gold
  • Americana Curb Appeal – Black
  • iron spider
  • iron keys
  • skeleton hand
  • small Staghorn Fern
  • paint brush
  • lint free cloth
  • drill
  • 8 screws
  • floral wire
  • moss
  • large bowl of water
  • baking sheet
  • drop cloth or something to protect your work surface

Instructions for Taxidermy Plaques

To begin, you will need to prep your work surface and cover it with a drop cloth or some type over covering to protect it.

Next, place your moss into a large bowl of water so that it can soak while you are working with the other pieces. Set it aside.

Add a little flair to your spooky Halloween decor with DecoArt! I used their Metallic Lustre to turn simple spooky objects into creepy yet classy taxidermy plaques to decorate our entryway for Halloween.

Then, grab your Americana Curb Appeal paint and paint 2 of your wood plaques. Keep one natural for your Staghorn Fern.

Add a little flair to your spooky Halloween decor with DecoArt! I used their Metallic Lustre to turn simple spooky objects into creepy yet classy taxidermy home decor.

I really like the Americana Curb Appeal paint and traditionally it’s not really used for crafting, it’s used to paint door and shutters typically. I had some on hand and thought it would work just fine for the wood plaques for this project. PLUS… I have used that same paint for my doors, fireplace & banister therefore, my plaques would match the rest of my space. Not only that but, I really like the finish that it create on the wood. You won’t see brush strokes, the coverage is phenomenal and you’ll still see the wood grain through the paint. I really like that! I like to paint wood but, I don’t want it to look plastic… you know?

Add a little flair to your spooky Halloween decor with DecoArt! I used their Metallic Lustre to turn simple spooky objects into creepy yet classy taxidermy home decor.

Once those are both painted, set them aside to dry. Don’t worry, they dry pretty quick.

Next, let’s drill a hole into the skeleton hand before we add the DecoArt Metallic Lustre.

Add a little flair to your spooky Halloween decor with DecoArt! I used their Metallic Lustre to turn simple spooky objects into creepy yet classy taxidermy plaques to decorate our entryway for Halloween.

The hand is made out of a resin so it isn’t a problem to drill a hole into it. It  might be a little hard to start, but once you get the hole stared, it’s not a big deal.

Next, grab the skeleton hand, keys, spider, the rose gold Metallic Lustre and your lint free cloth (or paper towel if you are in a pinch. Just don’t rub too hard.)

Add a little flair to your spooky Halloween decor with DecoArt! I used their Metallic Lustre to turn simple spooky objects into creepy yet classy taxidermy plaques to decorate our entryway for Halloween.

Now, the DecoArt Metallic Lustre is a wax finish, not paint. IT AWESOME!!  I love this stuff! I put a little onto my cloth like so…

Add a little flair to your spooky Halloween decor with DecoArt! I used their Metallic Lustre to turn simple spooky objects into creepy yet classy taxidermy plaques to decorate our entryway for Halloween.

… And then, rub it all over your object that you are wanting to add a little flair to.

Add a little flair to your spooky Halloween decor with DecoArt! I used their Metallic Lustre to turn simple spooky objects into creepy yet classy taxidermy plaques to decorate our entryway for Halloween.

It cures really quick so, if you don’t want to have full coverage, make sure you work in small sections and work quick. With these pieces, I didn’t want full coverage, I still wanted them to look a little rough. As for the keys, I only wanted the rose gold at the top of the keys and then left the bottom black.

Add a little flair to your spooky Halloween decor with DecoArt! I used their Metallic Lustre to turn simple spooky objects into creepy yet classy taxidermy plaques to decorate our entryway for Halloween.

Once the paint on the plaques is dry and the Metallic Lustre has cured (it only takes a few minutes) you are ready to mount them on their plaques.

Add a little flair to your spooky Halloween decor with DecoArt! I used their Metallic Lustre to turn simple spooky objects into creepy yet classy taxidermy plaques to decorate our entryway for Halloween.

I just used a 1 1/2 inch screw to adhere the skeleton hand to the plaque. However, I did drill pilot holes into the hand and the plaque before to ensure a proper fit.

Now… I’m sure you’ve noticed that there is now a unsightly screw in the hand.

Add a little flair to your spooky Halloween decor with DecoArt! I used their Metallic Lustre to turn simple spooky objects into creepy yet classy taxidermy plaques to decorate our entryway for Halloween.

No worries!! I took a stick and roughly added more of the Metallic Lustre to cover the screw head.

Add a little flair to your spooky Halloween decor with DecoArt! I used their Metallic Lustre to turn simple spooky objects into creepy yet classy taxidermy plaques to decorate our entryway for Halloween.

Once it cures, it’s hard and voilá… You can’t see the screw! Nice, huh?

For the spider, I placed a screw on the plaque and hung the spider on it. If you use the same spider that I used, it has a screw hanger on the back so it works perfect. I did add some of the Metallic Lustre to the screw to help it blend in.

Now it’s time to mount your Staghorn Fern. Grab the plaque that you didn’t paint along with your drill and 6 1 1/2 inch screws and some floral wire.

First, I drill pilot holes into the plaque.

Add a little flair to your spooky Halloween decor with DecoArt! I used their Metallic Lustre to turn simple spooky objects into creepy yet classy taxidermy plaques to decorate our entryway for Halloween.

Three on each side about an inch away from the edge of the board. Then I add my screws but keep about an inch sticking up from the board.

Add a little flair to your spooky Halloween decor with DecoArt! I used their Metallic Lustre to turn simple spooky objects into creepy yet classy taxidermy plaques to decorate our entryway for Halloween.

At this point, I lay my plaque in a baking sheet. This part can get a little messy and the baking sheet will help contain the mess. Then I take the floral wire and make a little loop to help start the process and attach it to the top screw.

Add a little flair to your spooky Halloween decor with DecoArt! I used their Metallic Lustre to turn simple spooky objects into creepy yet classy taxidermy plaques to decorate our entryway for Halloween.

Then I wind it around the rest of the screws making sure to keep the wire close to the base of the screw close to the wood.

Add a little flair to your spooky Halloween decor with DecoArt! I used their Metallic Lustre to turn simple spooky objects into creepy yet classy taxidermy plaques to decorate our entryway for Halloween.

Do not cut the floral wire yet. Take some of your moss, gently wring it out a bit and lay it on top of the wire.

Add a little flair to your spooky Halloween decor with DecoArt! I used their Metallic Lustre to turn simple spooky objects into creepy yet classy taxidermy plaques to decorate our entryway for Halloween.

Then take your Staghorn Fern and gently take it out of the pot and remove as much dirt as possible. Staghorn Ferns are air plant so they really don’t need to live in soil. They get their nutrients from the air and the moisture on their frawns. For a really great post on Staghorn Ferns and how to mount and care for them, check out Vintage Revivals. Mandi has a real love for these plants.

HowtoMountandCareforStaghornFernscompletetutorialwithpictures

Once I’ve removed as much of the dirt as I am comfortable with, I lay it down on top of the moss.

Add a little flair to your spooky Halloween decor with DecoArt! I used their Metallic Lustre to turn simple spooky objects into creepy yet classy taxidermy plaques to decorate our entryway for Halloween.

Here’s a funny tip…

Staghorn Ferns love banana peels. Apparently, they provide the kind of nutrition that the plants really like. Before I cover the plant with moss, I add a little bit of banana peel.

Add a little flair to your spooky Halloween decor with DecoArt! I used their Metallic Lustre to turn simple spooky objects into creepy yet classy taxidermy plaques to decorate our entryway for Halloween.

Next, cover it with more moss and then criss cross the wire over the whole mound like before, until it is secure. The wire actually melts right into the moss and you don’t see it at all.

Add a little flair to your spooky Halloween decor with DecoArt! I used their Metallic Lustre to turn simple spooky objects into creepy yet classy taxidermy plaques to decorate our entryway for Halloween.

Check out Mandi’s post for tips on how to care for your new mounted Staghorn Fern. Now you’re all set to hang your macabre little scene on your walls.

Add a little flair to your spooky Halloween decor with DecoArt! I used their Metallic Lustre to turn simple spooky objects into creepy yet classy taxidermy plaques to decorate our entryway for Halloween.

Another little trick… I hung mine with those Command Strip Picture Hanging Strips. LOVE those babies!

Add a little flair to your spooky Halloween decor with DecoArt! I used their Metallic Lustre to turn simple spooky objects into creepy yet classy taxidermy home decor.

I love how these add a little creepy and yet class to my entryway if that’s even possible!

Tips for Carefree Family Fun

4 · Aug 9, 2017 · 1 Comment

With Summer in full swing, it’s prime time for family get togethers. Come learn how we create carefree family fun with our family and friends!

• I’ve partnered with Carnival Cruise Line to create this post! Enjoy! •

Come learn how to create carefree family fun with simple to make yard games via WhipperBerry.

When Summer rolls in it’s time for family fun in the sun, playing at the pool and of course family reunions. Our family is actually at our annual family reunion right now in Idaho and we are having a ball! With our family, one of the challenges that we face is coming up with activities and get togethers that are fun for all ages.

Come learn how to create carefree family fun with simple to make yard games via WhipperBerry.

We have struggled in the past with the various ages that need to be entertained in our family. Our family has all ages… Elementary age, Middle School, High School & College age kiddos. Yeah, we know how to spread them out! Then, if you include the extended family, we have a whole other crew of infants through pre-school as well. Looking at the other end of the spectrum, we have young adults, middle aged and seniors as  well. We pretty much have the whole rainbow of ages in our family. How on earth do you entertain a crew like this?

Come learn how to create carefree family fun with simple to make yard games via WhipperBerry.

Well, let me tell ya… It can be a challenge. Here are some of our tips for carefree family fun!

Tips for Carefree Family Fun

  • Keep things simple
  • Plan healthy, energy promoting yet simple meals
  • Create activities that can be entertaining for all ages
  • Schedule down time
  • Keep things relaxed and fun, don’t let your expectations get out of control

Keep Things Simple

When dealing with all ages, the more simple the activity the better. Plan activities that the whole family will enjoy. You really don’t need to over schedule yourself to say that you’ve had fun. Right now we are having a ball hanging out in my parents back yard and playing games with the kids. One of these years we are going to make things even more simple and plan a family cruise with Carnival Cruise Line. Carnival is all about fun for all. They have become the masters at finding ways to help the whole family enjoy simple and carefree family fun!

Carnival believes everyone deserves a place to play, where they can jump in on the fun without a second thought. The possibilities for play abound on a Carnival cruise — at any one moment, you may be laughing until your sides ache, singing and dancing your heart out, taking in amazing sights, or savoring mouthwatering bites – all with the help of your crew – the ultimate fun facilitators.  You can’t get more simple than that! They handle all the hard stuff and your only job is to have FUN together!

Plan Heathy Meals

Nothing weighs a group down more than poor meal planning. One cannot live on burgers and hot dogs alone. Plan meals that are easy to prepare ahead of time and help to give everyone healthy energy. Here are some of my favorite go-to recipes that would be perfect for a carefree family get together.

Overnight French Toast a great breakfast OR dessert for large gatherings.

• Overnight French Toast + a PERFECT prep-ahead breakfast that everyone will love •

Breakfast Power Bowl + Perfect for family get togethers

• Breakfast Power Bowls + This is a simple breakfast that is easy to customize to everyone’s taste •

The BEST Chicken Salad recipe. Perfect for large family gatherings from WhipperBerry.

• The BEST Chicken Salad Recipe + Perfect to make ahead of time! •

Onion and Poppy Seed Salad from WhipperBerry + Another crowd pleaser

• Onion and Poppy Seed Salad + Another crowd pleaser •

And that’s just a few of our favorites! Checkout my Pinterest board for other great WhipperBerry recipes.

Now, if you aren’t into cooking and want someone else to take the helm in that area, … man oh man, Carnival is the way to go. The Carnival Chef’s know how to tickle the taste buds and please every palette in your family!

Create Activities that can be Entertaining for all Ages

Here’s where the fun never ends… It can be hard to find activities that everyone will love. We’ve found that yard games tend to be a huge hit with the littles all the way up to the oldies. There is just something about the novelty of the games. What’s fun is that they are easy to DIY so that you don’t have to spend and arm and a leg for them.

We’ve created a set of medium sized yard dominos and some small dice that everyone LOVES to play with.

Come learn how to create carefree family fun with simple to make yard games via WhipperBerry.

Come learn how to create carefree family fun with simple to make yard games via WhipperBerry.

Come learn how to create carefree family fun with simple to make yard games via WhipperBerry.

Now I’ve seen dominos that are super big that you play all over your yard and they are super fun. I wanted a smaller set that is easy to store and transport. I cut some 1 x 4 planks into 6 1/2 inch blocks and used a wood burning tool to create the dots. Everyone loves them!

Come learn how to create carefree family fun with simple to make yard games via WhipperBerry.

They even love building towers with them.

Come learn how to create carefree family fun with simple to make yard games via WhipperBerry.

Come learn how to create carefree family fun with simple to make yard games via WhipperBerry.

Come learn how to create carefree family fun with simple to make yard games via WhipperBerry.

DIY-Yard-Games-from-WhipperBerry-27

Who says only little kiddos love to play with toys!

As inspiration from Carnival Cruise Line’s live game show, where you can team up with your friends and family to play some of the most classic games, we also created some dice for Yard Yahtzee! We had a blast and you can easily re-use your homemade pieces for your own favorite dice game.

Come learn how to create carefree family fun with simple to make yard games via WhipperBerry.

Again, I used my wood burning tool and cut some 2 x 2 blocks to create the dice. If you are a Yahtzee fan, here is a printable score card that you can download.

Printable Yahtzee Score Card from WhipperBerry

• Download Yahtzee Score Card HERE •

If you would rather have someone else be the cruise director, sail with Carnival the fun ship! They have a ship full of all kinds of fun activities for all ages.

Create a Chance for Relaxation

With all of this fun, you need to keep in mind that all of your age groups will need some rest. Create some opportunities for down time. Don’t forget to create a safe space for the teenagers to be teenagers. They like to stay up late and sleep-in.

The more rest you have, the more fun you can have together without a whole bunch of grumps. You know that Carnival also excels in this area. And for adults, don’t forget to check out all of their SPA options!

Also, don’t forget to keep your expectations in check. We all want a magical time together but, the bottom line is… The little ones will get cranky and won’t want to go along with the schedule or, someone will get sick. Personality types are put to the test and that’s alright. Everyone needs to just step back, relax and go with the flow. Remember, this is the time to make memories that will last a lifetime!

pastedGraphic_17.png

  • « Go to Previous Page
  • Page 1
  • Page 2
  • Page 3
  • Page 4
  • Page 5
  • Page 6
  • Interim pages omitted …
  • Page 10
  • Go to Next Page »

Primary Sidebar

Heather from Whipperberry
Hello... my name is Heather and I'm the creator of WhipperBerry a creative lifestyle blog packed full of great recipes and creative ideas for your home and family. I find I am happiest when I'm living a creative life and I love to share what I've been up to along the way... Come explore, my hope is that you'll leave inspired!

Footer

  • Privacy Policy
  • Crafts
  • Food
  • Gifts
  • Holidays
  • Home
  • Mom Life
  • Recipes
  • Travel

Copyright © 2026 · Seasoned Pro