• Skip to primary navigation
  • Skip to main content
  • Skip to primary sidebar
  • Skip to footer

Whipperberry

WhipperBerry • Your Home For Creative Inspiration

  • Home
  • Recipes
    • Starters
    • Easy Weeknight Dinners
    • Main Dish
    • Salads
    • Side Dish
    • Soups & Stews
    • Desserts
    • Breakfast
    • Miscellaneous
  • Tutorials
    • Creative Crafts
    • DIY Decor
    • Fabric Crafts
    • Food How-To
    • Jewlery
    • Paint Projects
    • Paper Art
    • Party Styling
    • Photography and Graphic Design
    • Silhouette
  • Holidays
    • Easter
    • Mother’s Day
    • Father’s Day
    • 4th of July
    • Halloween
    • Thanksgiving
    • Christmas
    • Valentine’s Day
  • Gift Ideas
    • Gifts For Everyone
    • Gifts for Dad
    • Mother’s day
    • For The Girls
    • For The Kids
    • Teacher Gift Ideas
    • Christmas
  • Printables
    • Holiday
    • Gift Idea
    • LDS Primary
  • Travel
  • About
    • Terms
  • Contact
  • Nav Social Menu

    • Facebook
    • Instagram
    • Pinterest
    • RSS
    • Twitter

Wreath

Hanging with My Gnomes Wreath • Video Tutorial

27 · Dec 3, 2018 · 1 Comment

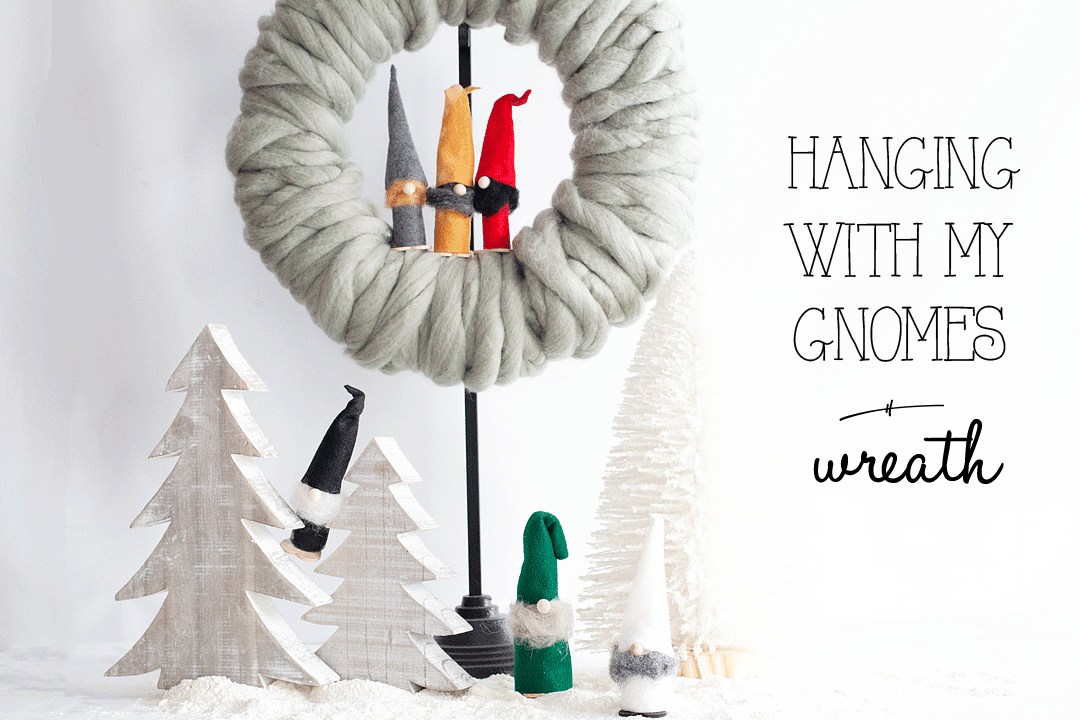
Yo, yo, yo… I’m hanging with my Gnomes this Holiday season! LOL!! This is actually a fun Christmas tradition that comes from our favorite Nordic friends up in Sweden & Norway. Gnomes have always been a big part of their Holiday traditions and I thought it would be a fun one to add to our family’s Christmas this year. These cute gnomes are so easy to make and to add them to a yarn wrapped wreath form is a quick and easy way to introduce some new friends to your home. I grabbed all of my supplies at Michaels, my favorite creating store and set to work. Here’s how I made them.

+ This post brought to you by my favorite friends at Michaels +Yo, yo, yo... I'm hanging with my Gnomes this Holiday season! LOL!! This is actually a fun Christmas tradition that comes from our favorite Nordic friends up in Sweden & Norway. Gnomes have always been a big part of their Holiday traditions and I thought it would be a fun one to add to our family's Christmas this year. These cute gnomes are so easy to make and to add them to a yarn wrapped wreath form is a quick and easy way to introduce some new friends to your home. I grabbed all of my supplies at Michaels, my favorite creating store and set to work. Here's how I made them.

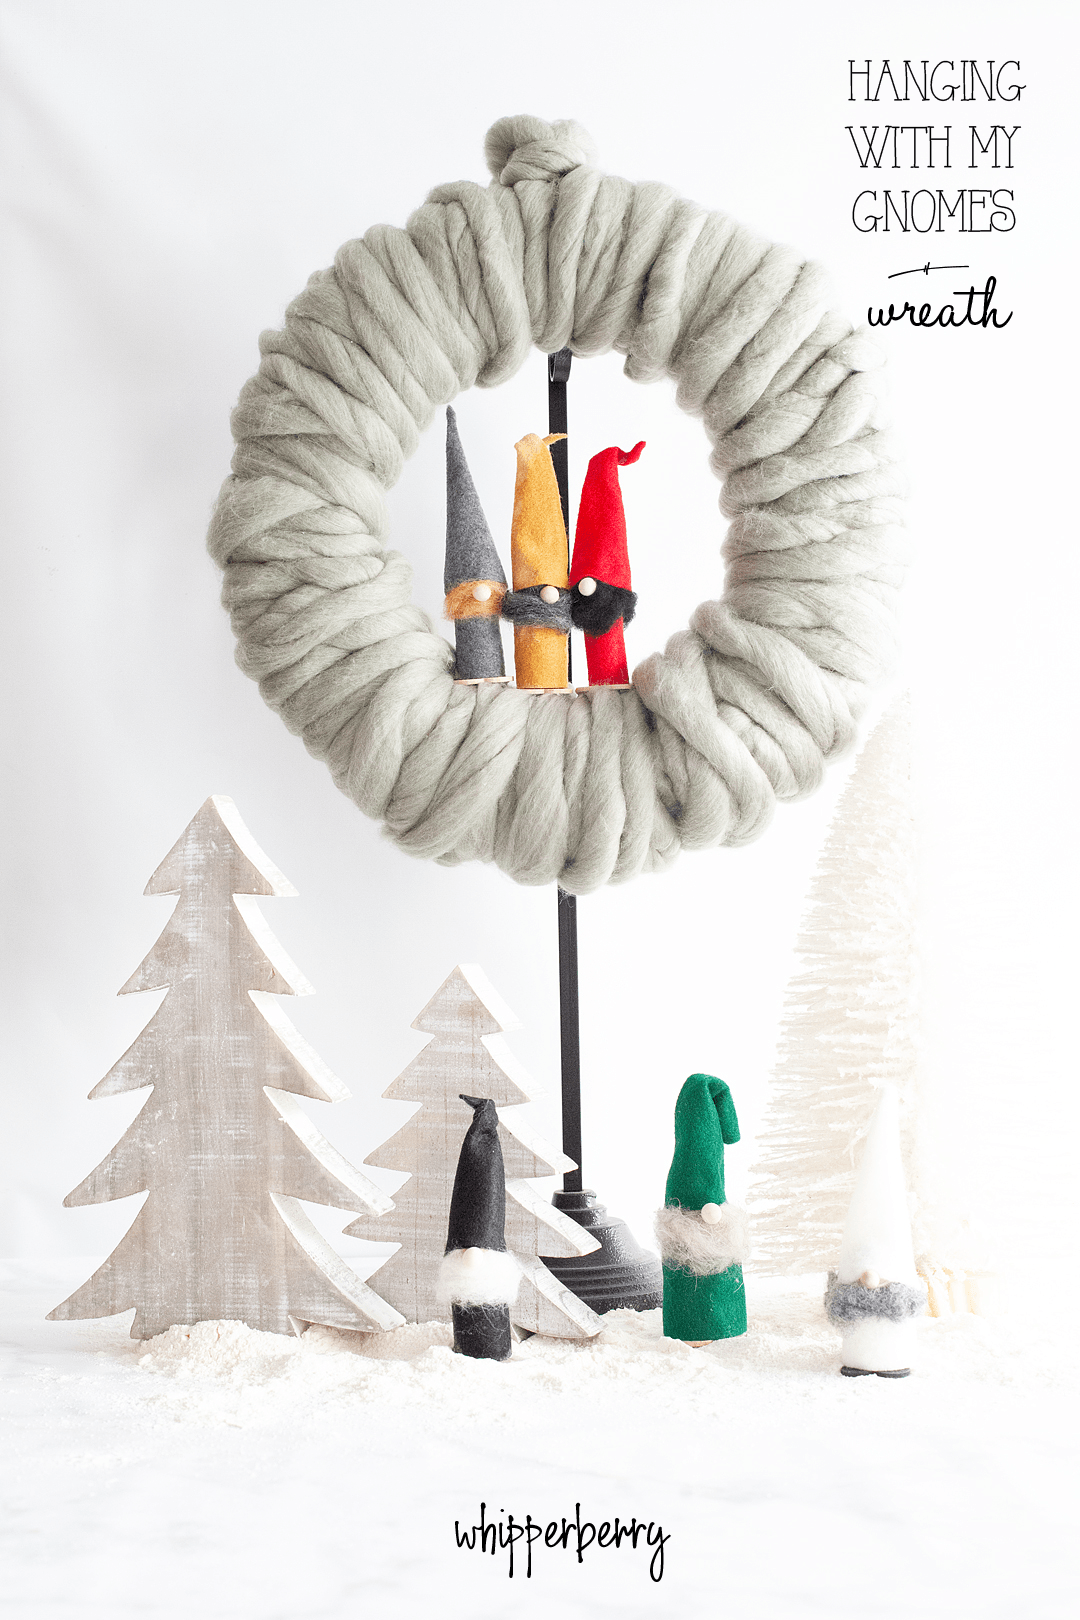
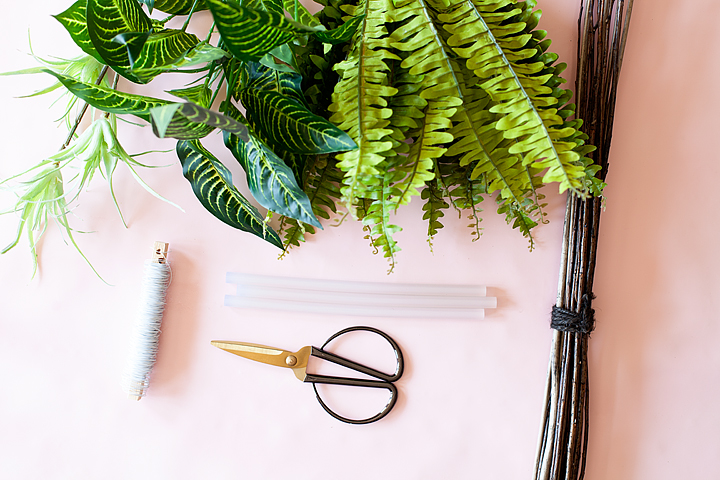
This wreath couldn’t be easier! You could even get the kiddos involved as long as you’re in charge of the hot glue part. We don’t want any burned little fingers. They can cut out felt, make beards & even wrap the wreath with the yarn. It’s a great Holiday project for the family. Here is what you’ll need to make one.

Yo, yo, yo... I'm hanging with my Gnomes this Holiday season! LOL!! This is actually a fun Christmas tradition that comes from our favorite Nordic friends up in Sweden & Norway. Gnomes have always been a big part of their Holiday traditions and I thought it would be a fun one to add to our family's Christmas this year. These cute gnomes are so easy to make and to add them to a yarn wrapped wreath form is a quick and easy way to introduce some new friends to your home. I grabbed all of my supplies at Michaels, my favorite creating store and set to work. Here's how I made them.

Hanging with my Gnomes Wreath Supply List

  • wreath form
  • super chunky yarn
  • floral greening pins
  • large peg people -raw wood
  • wood hearts – raw wood
  • felt
  • wool roving
  • rock candy sticks
  • floral wire
  • hot glue gun and glue sticks
  • scissors
  • wire cutters

Video Tutorial

Here is a fun, quick video tutorial to show you how to make these little guys…


Ok, had to create something fun when working with gnomes, right?

Here’s a quick list of instructions for the hanging with my gnomes wreath as well.

Yo, yo, yo... I'm hanging with my Gnomes this Holiday season! LOL!! This is actually a fun Christmas tradition that comes from our favorite Nordic friends up in Sweden & Norway. Gnomes have always been a big part of their Holiday traditions and I thought it would be a fun one to add to our family's Christmas this year. These cute gnomes are so easy to make and to add them to a yarn wrapped wreath form is a quick and easy way to introduce some new friends to your home. I grabbed all of my supplies at Michaels, my favorite creating store and set to work. Here's how I made them.

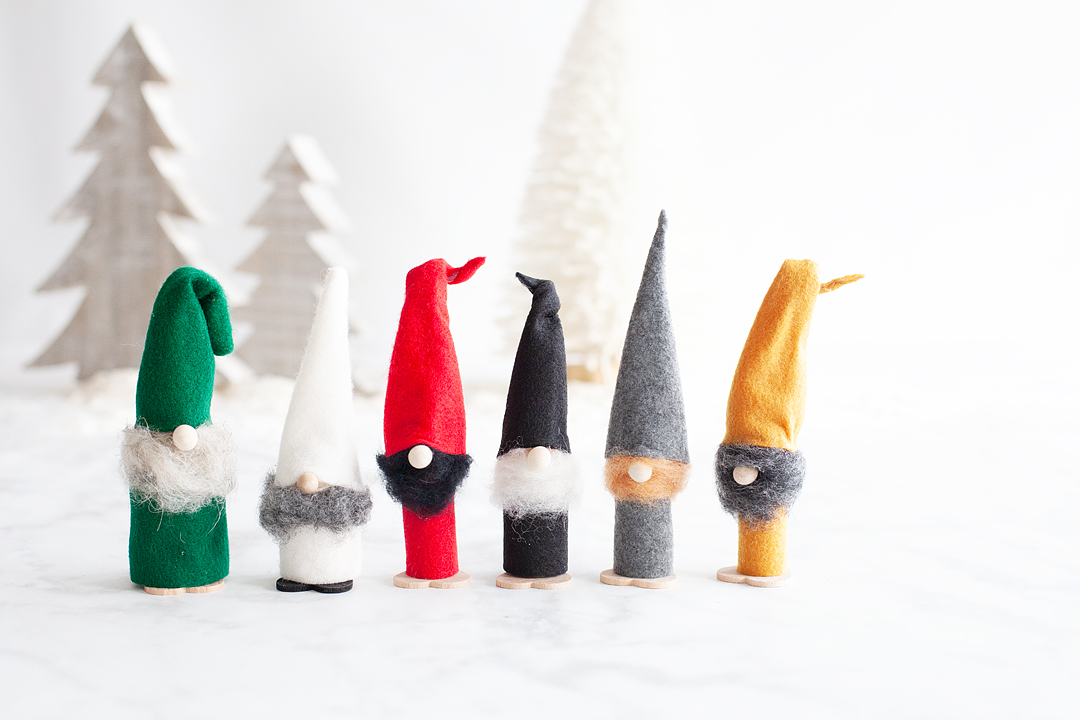
  1. Hot glue the wood heart onto the bottom of the peg person. The top of the heart will be the top of his feet.
  2. Measure the height of the peg person’s body and cut a strip of felt that is large enough to wrap around the peg person. I can’t really give exact measurements for this because all peg people are a little different.
  3. Hot glue the felt onto the body of the peg person.
  4. Tear a 2.5 inch section of wool roving and gently pull it apart a bit to create your gnomes beard.
  5. Carefully hot glue the beard onto the peg person.
  6. Cut a tall triangle out of felt for the gnomes hat. Make sure the base is wide enough to wrap around the peg person’s head.
  7. Hot glue a section of floral wire onto the inside part of the felt triangle.
  8. Hot glue the trangle together to create the gnome hat like in the video.
  9. Hot glue the hat onto your gnome’s head.
  10. Cut the stick off of the rock candy stick and then hot glue the wood ball onto the peg person for the nose.Yo, yo, yo... I'm hanging with my Gnomes this Holiday season! LOL!! This is actually a fun Christmas tradition that comes from our favorite Nordic friends up in Sweden & Norway. Gnomes have always been a big part of their Holiday traditions and I thought it would be a fun one to add to our family's Christmas this year. These cute gnomes are so easy to make and to add them to a yarn wrapped wreath form is a quick and easy way to introduce some new friends to your home. I grabbed all of my supplies at Michaels, my favorite creating store and set to work. Here's how I made them.
  11. To start the wreath, tie a knot into the chunky yarn and secure it with the greening pins onto the wreath form.
  12. Wrap the form with the yarn until completely covered. It’s easier to work with smaller sections of yarn so cut lengths that are about 2 yards long and continue wrapping the wreath form until covered.
  13. Hot glue your new little gnome friends onto the center of the wreath.

Yo, yo, yo... I'm hanging with my Gnomes this Holiday season! LOL!! This is actually a fun Christmas tradition that comes from our favorite Nordic friends up in Sweden & Norway. Gnomes have always been a big part of their Holiday traditions and I thought it would be a fun one to add to our family's Christmas this year. These cute gnomes are so easy to make and to add them to a yarn wrapped wreath form is a quick and easy way to introduce some new friends to your home. I grabbed all of my supplies at Michaels, my favorite creating store and set to work. Here's how I made them.

Macrame Autumn Door Hanging

7 · Sep 17, 2018 · Leave a Comment

We’ve kind of fallen in love with the macrame trend at our house lately. We made a HUGE macrame celebration arch for my daughter Haley’s wedding a few weeks ago and I then felt inspired to make a macrame Autumn door hanging for my front entry for the impending season change. Oh, Autumn… You truly are my favorite!!

• This post is brought to you by Michaels Craft Stores •

We've kind of fallen in love with the macrame trend at our house lately. We made a HUGE macrame celebration arch for my daughter Haley's wedding a few weeks ago and I then felt inspired to make a macrame Autumn door hanging for my front entry for the impending season change. Oh, Autumn... You truly are my favorite!!

I’m going to date myself here, I’m not old enough to remember the first macrame trend in the 1970’s. However, I do remember the aftermath of that trend. Garage sales full of macrame goods looking desperately for a new home. Needless to say, when the Boho trend started a new a few years ago, I kind of chuckled a bit when macrame returned in fashion. Then my little side chuckles disappeared and I kind of fell in love with the look. Like fell hard… I want to macrame all the things now. My Macrame pinboard has gone nuts with all of the fun macrame projects I would like to tackle.

Macrame Autumn Door Hanging Supplies

Of course, when it came time to stock up on supplies I ran to Michaels my go-to supply store. They have everything you need to make all things macrame, fall decor & blank surfaces for signs. I especially love that you can order online and pick-up easily at the store. I save so much time just placing my order online and then my husband or daughter can run over and grab my supplies when they are out and about. We no longer have frustrating phone calls with my husband trying to find something at Michaels only to have him come home with the wrong item or not enough for what I need. I have the isles memorized but he sure doesn’t! It’s also nice to tack a pick-up to another errand without having to spend too much time walking through the store. Yep, I’m a big fan!

  • Cotton Rope
  • a branch from your yard or, wood dowel
  • square 9×9 galvanized metal sign
  • 1-2 Fall floral picks
  • scissors
  • wire cutters
  • hot glue gun and hot glue
  • Cricut Premium Vinyl
  • Cricut cutting machine

Instructions

For this project, I’m not going to share a tutorial for the macrame. Now don’t worry, I have you covered. I’m going to send you over to A Beautiful Mess to share the tutorial that I used to learn how to macrame. Seems only fair, right?

My neighbors were trimming their trees and I found a fun branch that would be perfect for a macrame door hanging and asked if I could snag it. I scaled down the macrame project from the curtain with 15 sections to 5 sections and set to work.

We've kind of fallen in love with the macrame trend at our house lately. We made a HUGE macrame celebration arch for my daughter Haley's wedding a few weeks ago and I then felt inspired to make a macrame Autumn door hanging for my front entry for the impending season change. Oh, Autumn... You truly are my favorite!!

Next, I cut the vinyl for the sign part of the door hanging with my Cricut Maker. You can even use my design if you’d like in Cricut Design Space. I then affixed the vinyl to the galvanized metal sign base.

I originally started with white vinyl and it didn’t stand out as I had hoped on the galvanized metal. So, I switched to some black vinyl to go with my door. You may want to try a different color that fits the color of your entryway.

Then I used my wire cutters and cut sections of the Fall floral picks of the pick and hot glued them onto the galvanized metal. Then I hot glued the metal sign onto the macrame and that was it. I had a perfect door hanger to use in Autumn.

For more Fall inspiration, visit Michaels. They have all kinds of fabulous Fall finds!

Boho Spring Wreath • Say Hello with Style

6 · Apr 26, 2018 · Leave a Comment

I have always been a wreath girl at heart. After years of watching Martha Stewart on her old shows in the 1990’s (the best ones, if you ask me) I have always wanted to push myself to either find or create the best wreaths for my front door. For me, it’s a must… You MUST always greet every visitor at your door with a cheerful hello in the form of a beautiful wreath. With the beginning of the new season, I thought a DIY Boho Spring Wreath was definitely in order. Come learn how to make one of your own!

+ This Boho Spring Wreath post brought to you by the folks at Michaels +

Boho Spring Wreath created with greenery from Michaels and created by WhipperBerry

What is a Boho Spring Wreath

Spring is all about new beginnings. After the hustle and bustle of the holidays and getting gifts for everyone else, it’s time to treat yourself (and your space!) With bright florals and fresh projects, Michaels helps you MAKE all things spring!

What is Boho really? Short for “bohemian,” boho as a style is most closely associated with the hippies of the ‘60s and ‘70s, but the truth is it borrows from so many fashion subcultures and time periods that almost any outfit or decor can be “boho” if you style it right. To me, this wreath is a little mother earth paired with a hint of glam and that’s why it qualifies as Boho to me. I love the elements of nature, the sticks tied together with jute and then dressed with greenery that will last throughout the whole year. All topped with a cheerful HELLO in gold that adds that hint of glam like the cherry on top.

Supplies

Boho spring wreath supplies

The supplies are rather simple which goes along with the theme of simplicity for this wreath. I found everything at Michaels which makes gathering supplies super easy.

  • Birch Twigs
  • Spring Greenery at Michaels
    • BOSTON FERN LEAVES
    • AIR PLANTS
    • ZEBRA BUSH
  • hot glue gun
  • hot glue sticks
  • 22 gauge floral wire
  • gold aluminum decorative wire
  • natural wired twine 
  • scissors
  • wire cutters
  • hello – This isn’t the exact hello that I used for mine. They unfortunatley, don’t have that one listed online. If you can’t find the metal one at Michaels, you can use this one and it will look GREAT too. It’s larger scale which will also look fabulous with this wreath. Plus, you can paint it whatever color you would like.

Boho Spring Wreath Instructions

Here is a quick video tutorial showing you how to make this easy spring wreath…

  1. Trim the twigs to your desired length.
  2. Place in a triangle and wire all three sides together. Trim ends if needed.
  3. Cut the fern leaves from the stem and wire them to the twigs in the left-hand corner.
  4. Cut the Zebra Bush leaves from the stem and hot glue them to the fern leaves.
  5. Cut the air plants from the stem and glue them in place.
  6. Wrap the two bottom corners with wired twine.
  7. Create hanger with wired twine at the top of the triangle then, wrap the tip of the triangle with the wired twine to hold the hanger in place.
  8. Use the gold wire to wire the hello to the wreath.
  9. Hang your wreath on your door or wall and test to see if any adjustments need to be made.
  10. Enjoy!

Boho Spring Wreath created with greenery from Michaels and created by WhipperBerry

+ Disclaimer • This is a post that has been sponsored by Michaels. I am a Michaels Maker for 2018 and will receive product and payment to share my creative ideas with you all.  Please remember, I will only share those things that I truly find exeptional and something that I will use in my every day life +

NEW YEAR INSTAGRAM WREATH

0 · Dec 30, 2013 · 3 Comments

Hi Whipperberry friends!  It's Jenn from My Fabuless Life.  I hope your Holidays were wonderful!  Today I'm sharing a quick Memory Wreath I put together with some of my favorite moments (via Instagram) from the past year.  I have a sort of picture addiction and am always running out of space to hang or display more frames, so this is perfect for being able to display LOTS of pictures in a small space!

I started my Instagram wreath with a wire wreath form from the craft store and spray painted it gold.


Then I printed out my favorite Instagrams in black and white.  You can find a free template and tutorial on how to print them yourself here.
 

Once cut, I laid them out on the wreath to get an idea of placement, and then just slipped them between the wire.  I put a little piece of tape of the back of them to hold them in place and then taped some of them directly on.
 

Then I added a few yarn pom poms and that's it!  I plan on keeping this up all year and switching out the pictures periodically.


You Might Also Like:

Free New Year Printables / How To Build A Farm Table / DIY Pom Pom Bookmarks


  • Page 1
  • Page 2
  • Page 3
  • Go to Next Page »

Primary Sidebar

Heather from Whipperberry
Hello... my name is Heather and I'm the creator of WhipperBerry a creative lifestyle blog packed full of great recipes and creative ideas for your home and family. I find I am happiest when I'm living a creative life and I love to share what I've been up to along the way... Come explore, my hope is that you'll leave inspired!

Footer

  • Privacy Policy
  • Crafts
  • Food
  • Gifts
  • Holidays
  • Home
  • Mom Life
  • Recipes
  • Travel

Copyright © 2026 · Seasoned Pro