As moms, we often notice the little details that bring everything together. Whether it is for a big event, a workday, or a family celebration, the right shoes can make a big difference in how the dads in our lives look and feel.
A well-made pair of men’s formal shoes can instantly sharpen an outfit. It adds a clean and polished touch, even to a simple look. More than that, it helps him feel confident and ready for whatever the day brings. When he feels good in what he wears, it shows in the way he carries himself.
There are many styles to choose from, and each one fits a different need. Some are best for formal occasions, while others are more relaxed and easy to wear. In this guide, we will walk through the key styles and help you choose the right well-made pair of men’s formal shoes for every moment that matters.
Oxfords
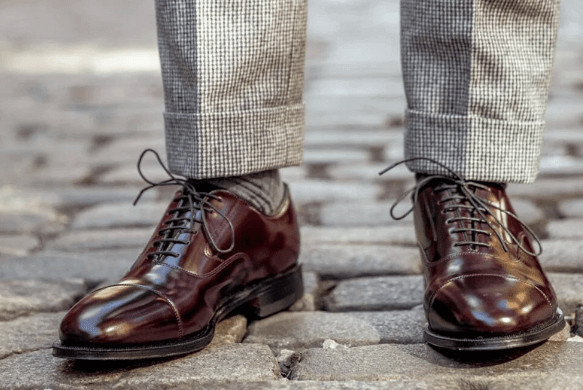
When it comes to more formal moments, Oxfords are often the pair we reach for when we want the dads in our lives to look their best. They have that clean, classic look that instantly feels polished and put together.
What makes them stand out is the closed lacing, which gives a neat and structured shape. This style has been around since the 19th century, and it is still a go-to for formal events today.
If he has a big meeting, a wedding, or any special occasion coming up, a well-made pair of men’s formal shoes like Oxfords is always a safe and reliable choice. It is one of those styles you can trust to look right every time.
Derbies
Derbies are a great option when you want something that still looks polished but feels a bit more relaxed. As moms, we know comfort matters just as much as style, especially for long days.
Their open lacing design gives more flexibility and room, which can make them easier to wear throughout the day. They started as a practical everyday shoe but still manage to look neat enough for work or semi-formal settings.
Depending on the color, they can feel more formal or more laid-back. This makes them a helpful choice when you want something versatile for both work and family time.
Captoes
If you are looking for something simple and dependable, cap toe shoes are always a strong choice. They offer a clean and classic look that works well for everyday business wear.
The extra stitching across the toe adds just enough detail without being too much. This keeps the overall style neat and easy to pair with different outfits.
Then there are cap toe brogues, which bring in a bit more personality. The small perforations, known as broguing, add texture and interest. This makes the shoe feel slightly more relaxed while still looking put together.
For dads who need something for work or semi-formal events, this style offers a nice balance between classic and stylish.
Wingtips
Wingtips are a great choice if you want to add a bit more personality while still keeping things polished. Their longer, more detailed shape gives a slightly sharper look that pairs well with tailored outfits.
The signature wing design adds visual interest without feeling too bold. It is a style that stands out in a subtle way.
When broguing is added, the shoe feels even more relaxed and easier to wear with heavier fabrics like tweed or flannel. This makes wingtips a good option for dads who like to mix classic and casual pieces in their wardrobe.
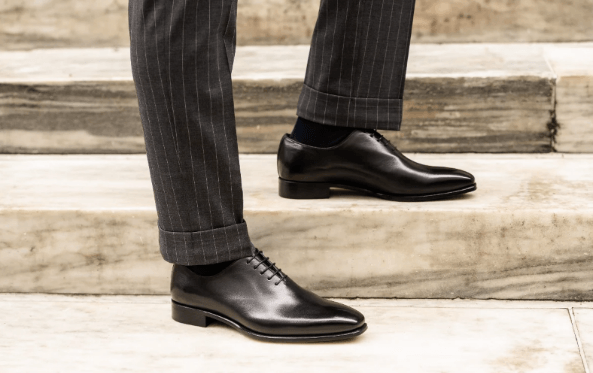
Whole Cuts
Whole cut shoes are perfect when you want something sleek and very refined. Made from a single piece of leather, they have a smooth and clean finish that looks very put together.
This simple design gives them a more modern feel, making them a popular choice for formal events today. They work well with suits and even tuxedos when the occasion calls for it.
As moms, we know that keeping things in good condition matters. With proper care and polishing, this well-made pair of men’s formal shoes can stay looking sharp for years.
Longwings
Longwings take the classic wingtip idea and give it a more relaxed, rugged twist. You can spot them by the detailing that runs all the way around the heel. This creates a continuous line that feels bolder and more laid-back. They often come with thicker soles and are made from sturdier leathers, which adds to that more casual, grounded look.
Because of this, they’re better suited for off-duty outfits rather than formal settings. Think denim, chinos, or heavier fabrics where that extra texture and weight work in your favour. They still carry a sense of craftsmanship and style, just in a way that feels more easy-going than traditional dress options.
Spectators
Spectators are some of the most eye-catching formal leather shoes for men. Defined by their two-tone design, they combine contrasting materials or colours to create a bold, vintage-inspired look. Traditionally, darker sections highlight areas like the toe and lacing, while lighter or textured panels add depth and character. This style has roots going back to the early 20th century, when it was seen as a more expressive option for dressier occasions.
While they still carry that slightly “dressy but fun” reputation, modern versions have become more refined and wearable. A sleek, toned-down pair can work surprisingly well with a sharp suit. They add just enough personality without feeling over the top. It’s a confident choice for anyone who wants to spice up their wardrobe while looking polished.
Loafers
Loafers are a great option when you want something that feels both comfortable and still put together. As moms, we know how important it is for the dads in our lives to have something easy to wear, especially on busy days.
Because they slip on, they are simple and practical, but they still look neat enough for work or casual gatherings. One of the most popular styles is the penny loafer, with its small strap detail across the front that adds a bit of character.
This is the kind of well-made pair of men’s formal shoes that works for many parts of daily life. Whether he is heading to the office, running errands, or spending time with family, loafers offer that easy balance of comfort and style.
Final Thoughts
Choosing the right well-made pair of men’s formal shoes is not just about style. It is about helping the dads in our lives feel confident, comfortable, and ready for any occasion. From classic Oxfords to easy loafers, each style has its own place depending on the moment.
As moms, we want the best for our families, even in the small details. A good pair of shoes can last for years and support him through workdays, celebrations, and everything in between.
If you are looking for a reliable option, you can explore this collection of well-made pair of men’s formal shoes to find styles that fit his needs and your family’s lifestyle.