• Skip to primary navigation
  • Skip to main content
  • Skip to primary sidebar
  • Skip to footer

Whipperberry

WhipperBerry • Your Home For Creative Inspiration

  • Home
  • Recipes
    • Starters
    • Easy Weeknight Dinners
    • Main Dish
    • Salads
    • Side Dish
    • Soups & Stews
    • Desserts
    • Breakfast
    • Miscellaneous
  • Tutorials
    • Creative Crafts
    • DIY Decor
    • Fabric Crafts
    • Food How-To
    • Jewlery
    • Paint Projects
    • Paper Art
    • Party Styling
    • Photography and Graphic Design
    • Silhouette
  • Holidays
    • Easter
    • Mother’s Day
    • Father’s Day
    • 4th of July
    • Halloween
    • Thanksgiving
    • Christmas
    • Valentine’s Day
  • Gift Ideas
    • Gifts For Everyone
    • Gifts for Dad
    • Mother’s day
    • For The Girls
    • For The Kids
    • Teacher Gift Ideas
    • Christmas
  • Printables
    • Holiday
    • Gift Idea
    • LDS Primary
  • Travel
  • About
    • Terms
  • Contact
  • Nav Social Menu

    • Facebook
    • Instagram
    • Pinterest
    • RSS
    • Twitter

Gift Ideas

Zipper Pouch a Perfect Holiday Hostess Gift Cut with the Cricut Maker

122 · Nov 22, 2017 · 8 Comments

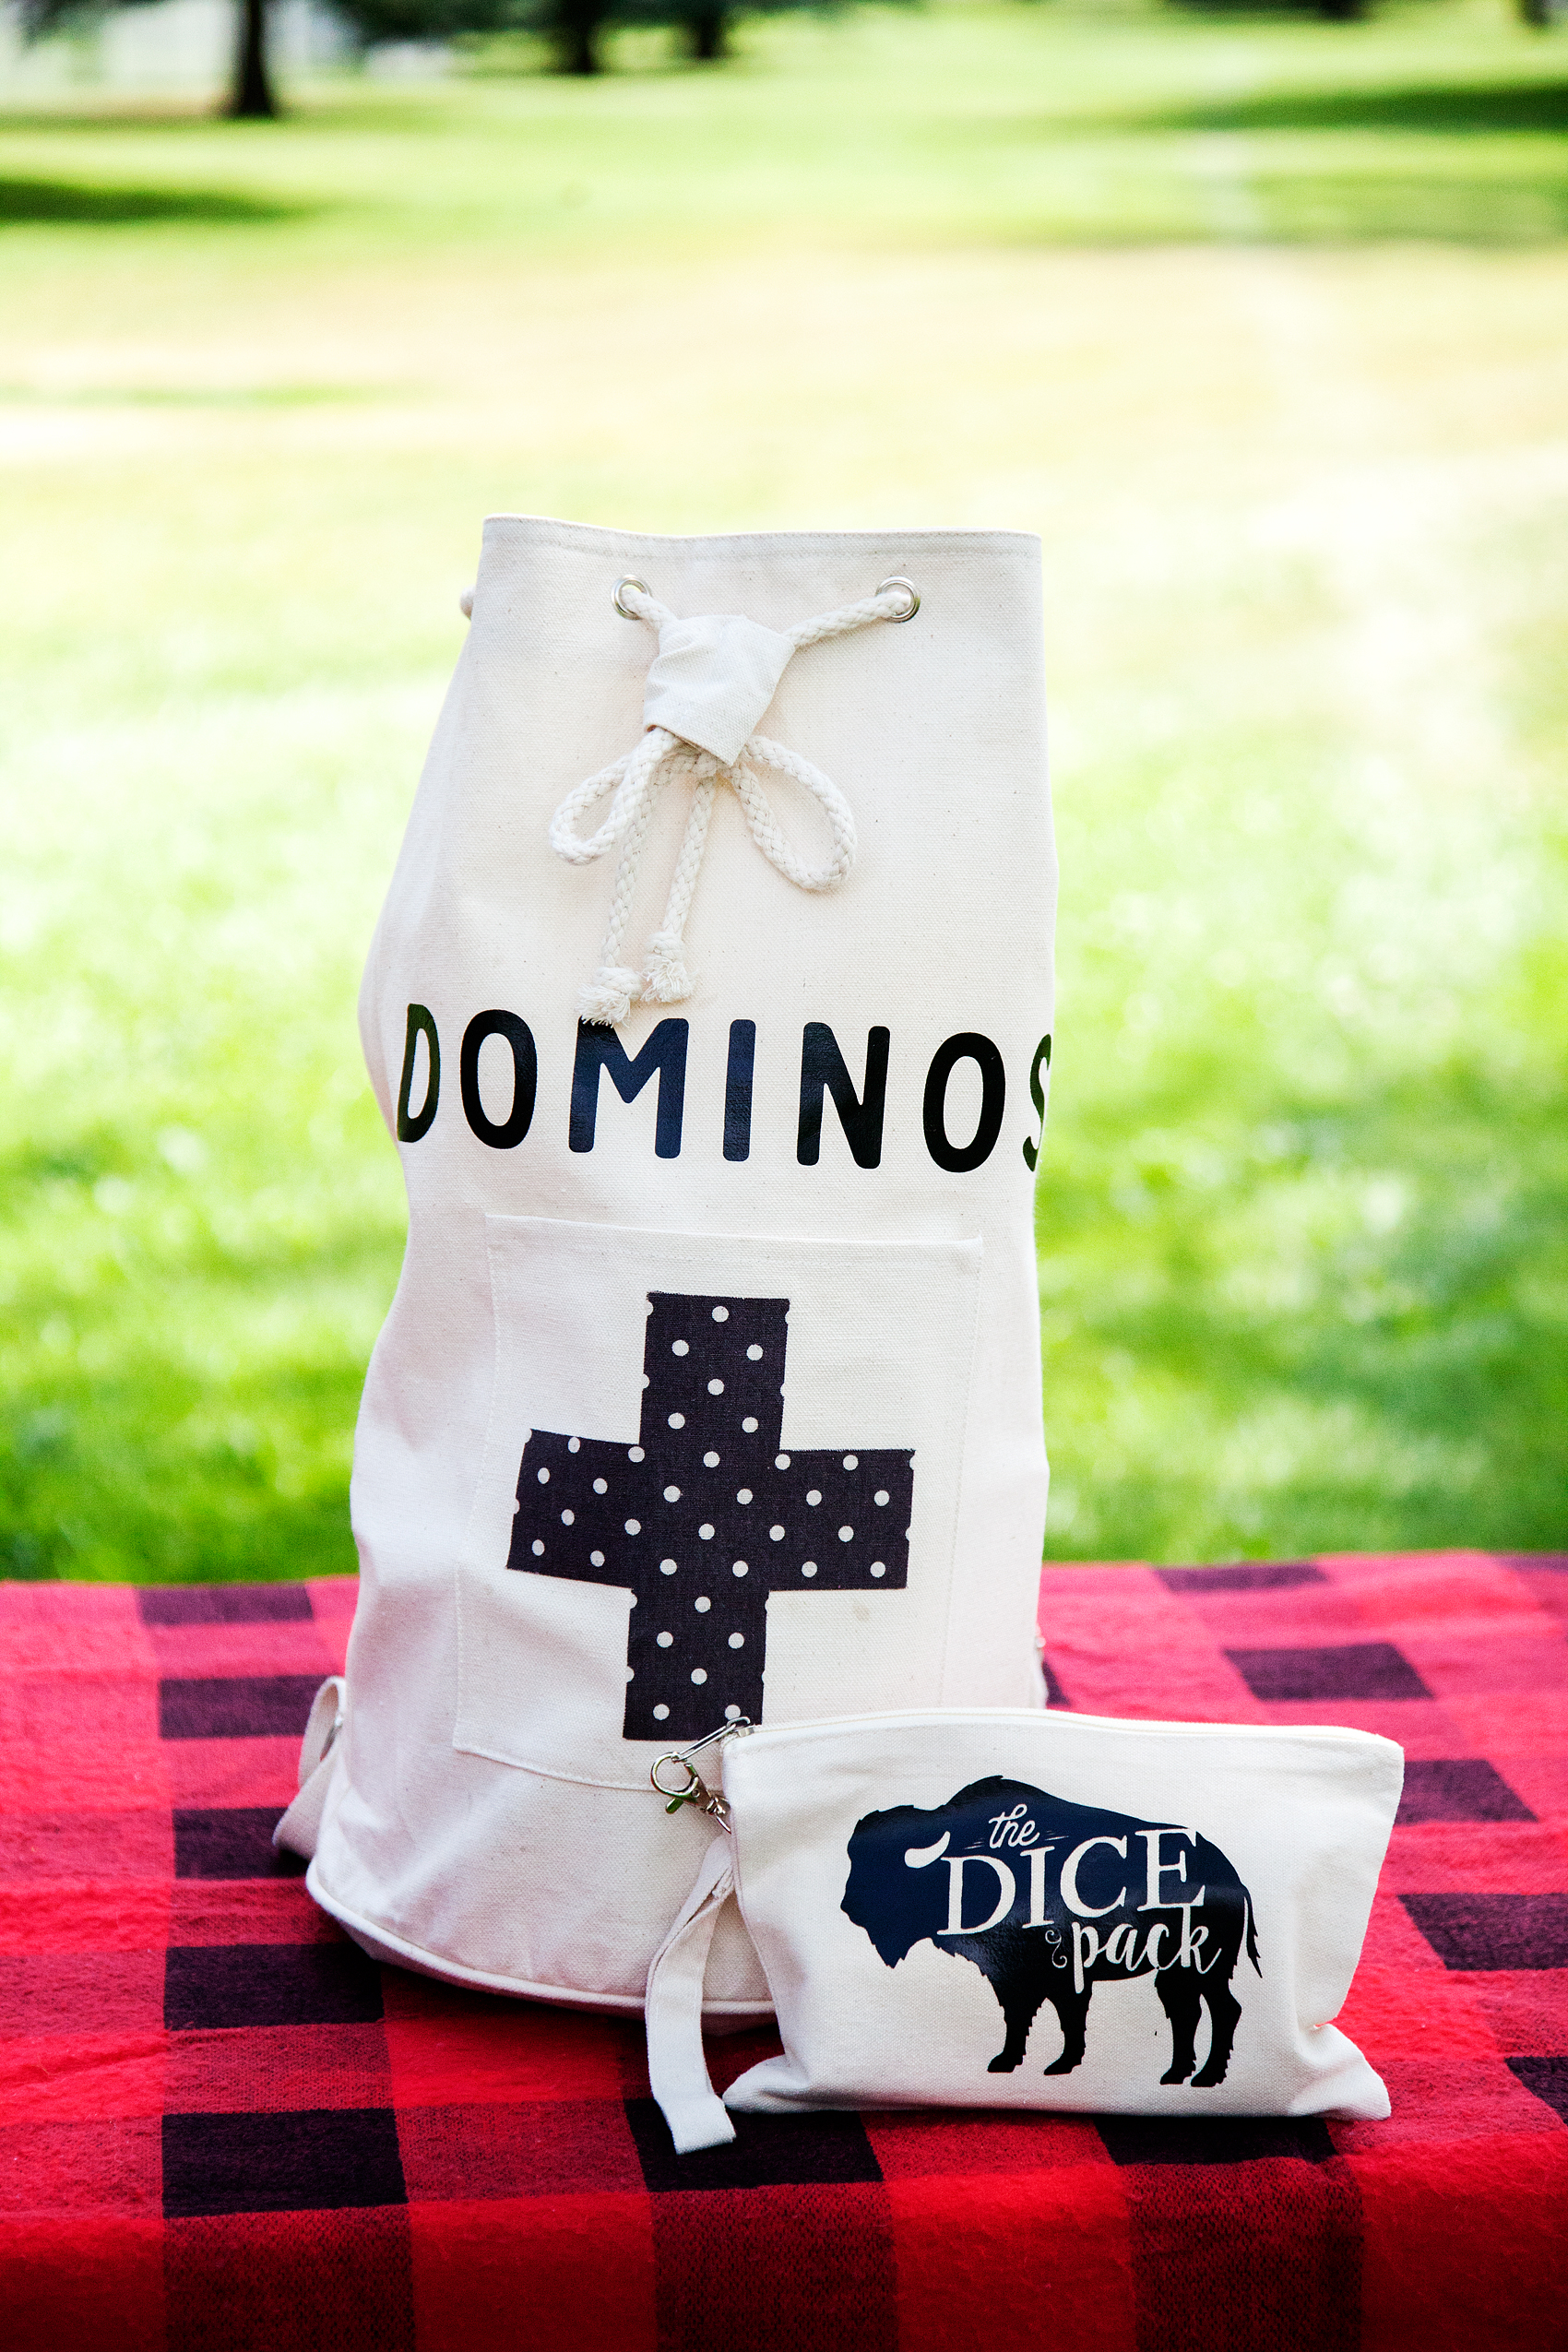
I am a HUGE fan of thoughtful handmade gifts! I try as much as possible to create something special to give friends and family during the holiday season. This year I have become a little obsessed with stylish little zipper pouches. They are so handy for keeping those little odds and ends organized and really… They’re so darn cute! I’ve even created a design of my own it’s called the WhipperBerry Zipper Pouch and it’s the perfect Holiday Hostess Gift!

+ This post is brought to you by Cricut +Everyone loves thoughtful homemade gifts and this stylish zipper pouch is the perfect gift to whip-up in a fews hours to give as a fabulous Christmas gift this year + you can take the guess work out of cutting the pattern with the Cricut Maker! Come on over and learn how to make one of your own on WhipperBerry.

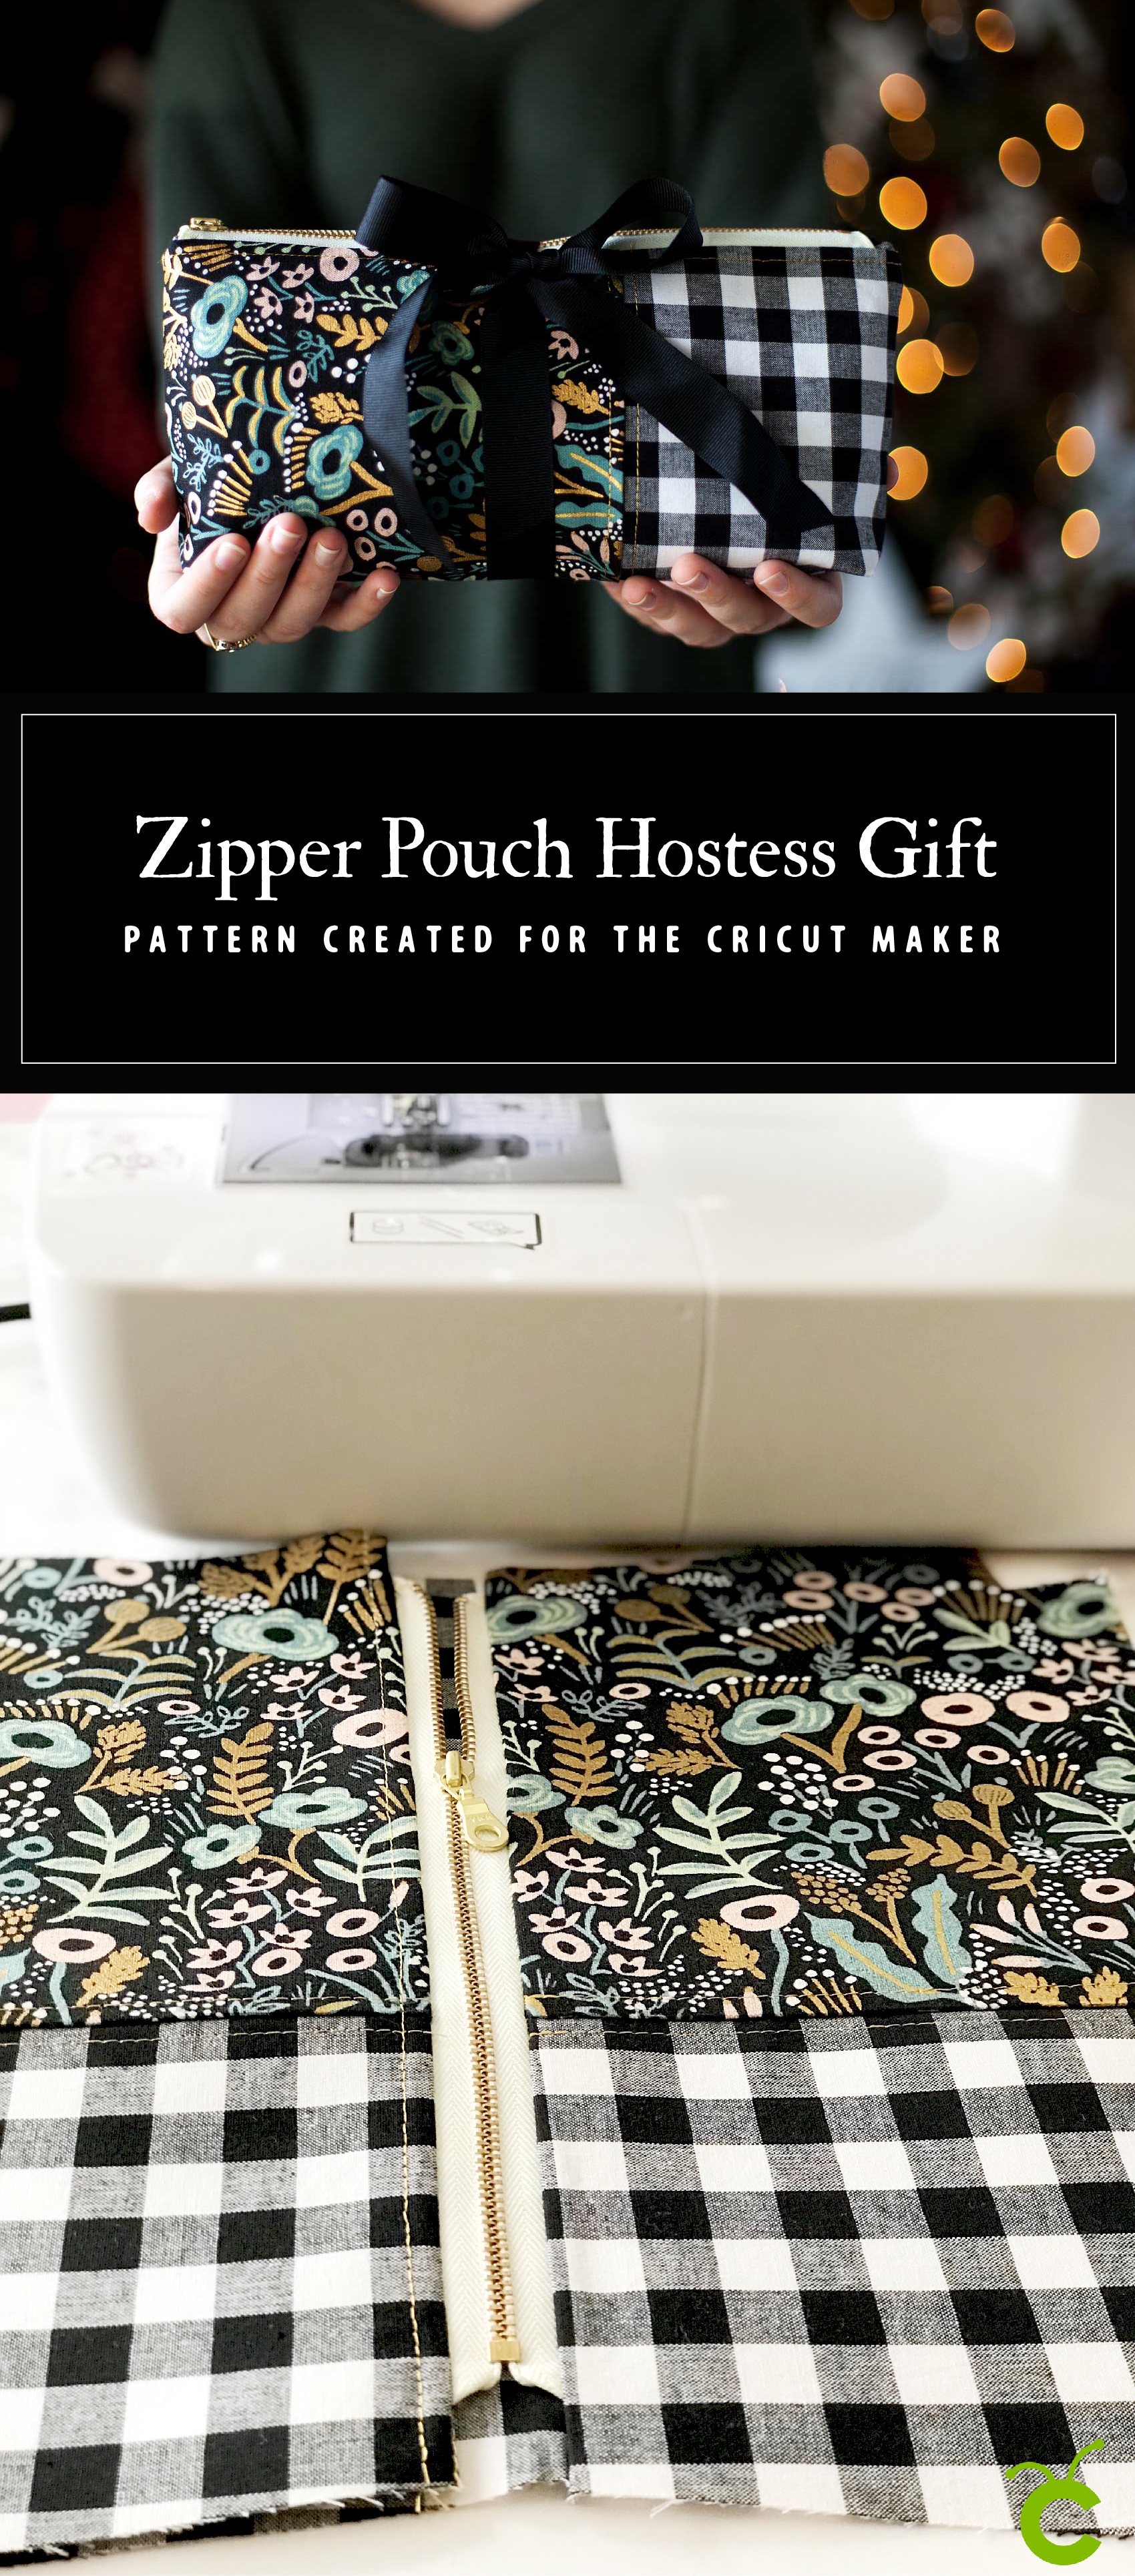
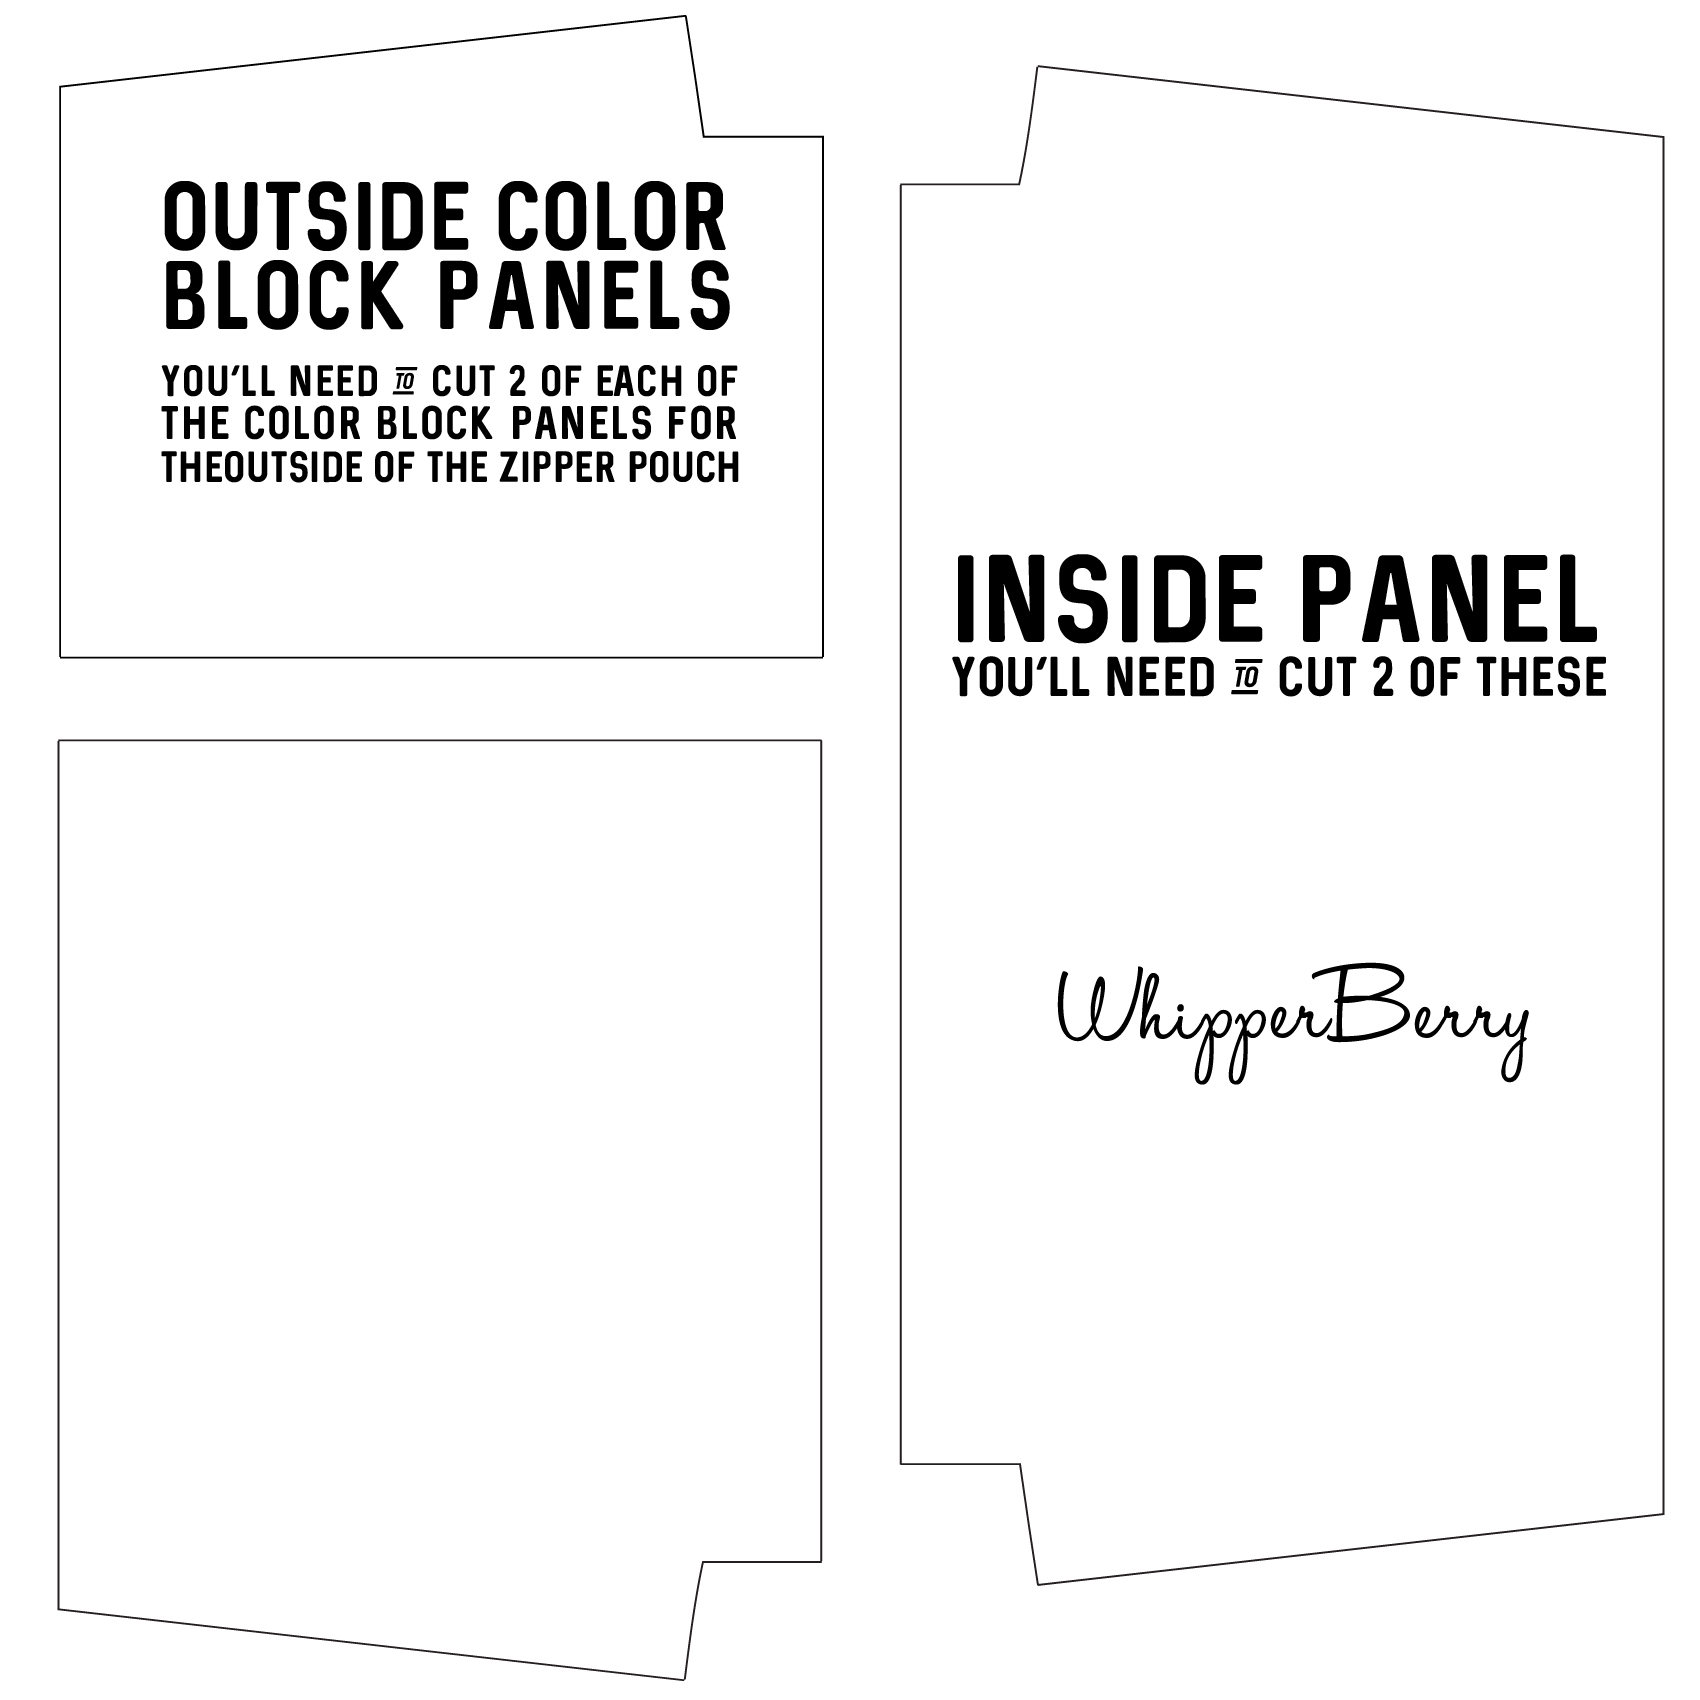
  Not too long ago, I made a cute little pencil pouch using the pattern created by Anna from Noodlehead. I LOVED the pattern so much… I was a total nerd and decided that I wanted to convert Anna’s PDF pattern to a SVG file so that I could cut my fabric on my Cricut Maker. It took a little trial and error, but I managed to make it work. I imported my newly created SVG file to the Cricut Design Space and again, with a little more fiddling around, I managed to make it work. I was THRILLED! I love Anna’s pencil pouch and I’ve now sewn a few different variations trying to improve my sewing skills. I love this little pouch but, I’ve been wanting to make one that is larger and will hold things other than just pens and pencils. I decided to modify Anna’s pattern a bit and make a larger zipper pouch to give as holiday hostess gifts this year.

Why Sew with the Cricut Maker

This is a BOLD move for me! I’ve embraced all kinds of creative gift ideas, but I’ve never sewn for my friends and family. I’ve always thought it was too hard, too troublesome, too time consuming. This cute, stylish and heartfelt gift is quite frankly one that I would LOVE to receive. So, why not make several? I’ve always shied away from sewing because I could never cut the pattern just right. Something would ALWAYS be off… Not anymore!!! I’ve been cutting fabric for sewing projects now for a few months and man am I hooked. Knowing that you are starting off with good bones makes the sewing so much more enjoyable. Reasons why I love cutting fabric with the Cricut Maker…

  • Precision cuts – you’ll always start with good bones.
  • Less waste – you’ll use far less fabric by using a precision cutting tool.
  • Empowerment – the Cricut Maker is bring sewing to the masses, no more excuses, you CAN do this.
  • More intricate designs – have you always kept things really simple? With the Cricut Maker, you can get as fancy as you want.

Here’s a quick little video on how I cut my fabric for the zipper pouch

The WhipperBerry Zipper Pouch Material List

  • 10″ zipper
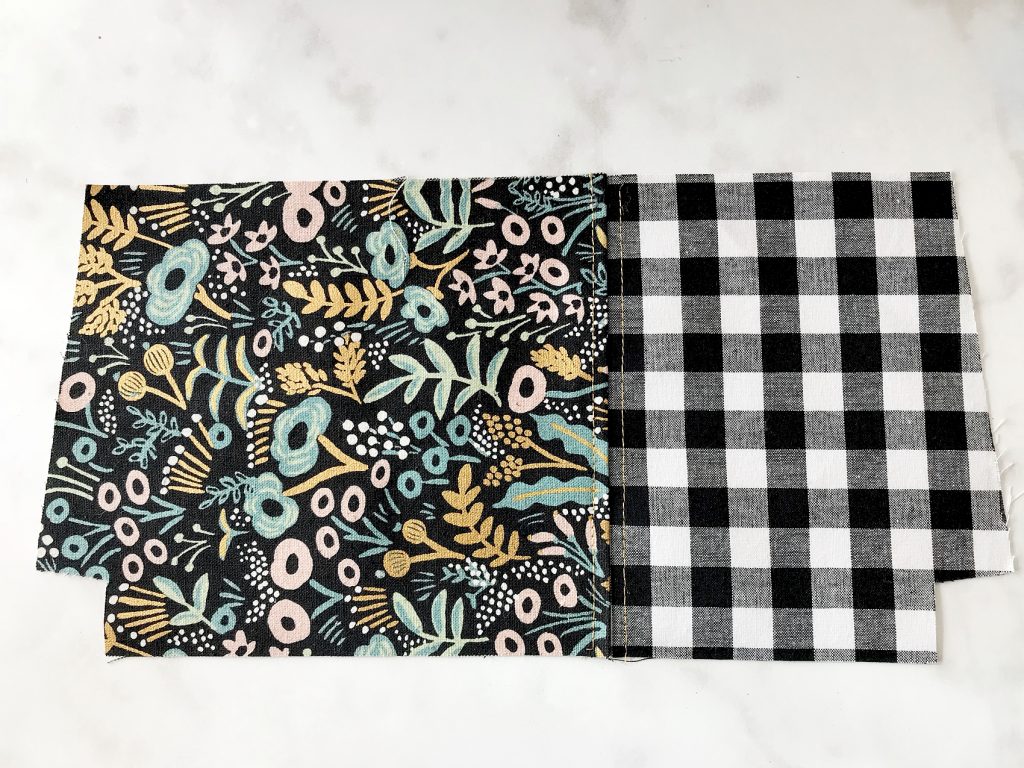
  •  14″ x 28″ of cotton fabric for lining + I used Cotton + Steel black and white Checkers for the lining and the accent fabric
  • 16″ x 18″ main print cotton linen canvas – I used Cotton + Steel  Tapestry Midnight Canvas
  • 8″ x 12″ accent fabric
  • 1/2 yard Fusible Ultra Lightweight Interfacing
  • thread that compliments your fabric
  • download the SVG cutting files

Everyone loves thoughtful homemade gifts and this stylish zipper pouch is the perfect gift to whip-up in a fews hours to give as a fabulous Christmas gift this year + you can take the guess work out of cutting the pattern with the Cricut Maker! Come on over and learn how to make one of your own on WhipperBerry.

Instructions

First thing to do it to visit my post on How to Import and Use a SVG File in Cricut Design Space. I have a full video Tutorial on how to cut this exact pattern and it will really help the cutting go super smooth. Before I start cutting though, I fuse my interfacing onto the lining of my pouch. If you are using a lighter fabric for either one of the exterior pieces, you’ll want to fuse that fabric as well. Make sure to do this step BEFORE you cut your fabric. Pro Tip • If you don’t have enough interfacing to cover your entire piece of fabric, don’t worry. Keep your interfacing scraps and piece it together. No biggie!
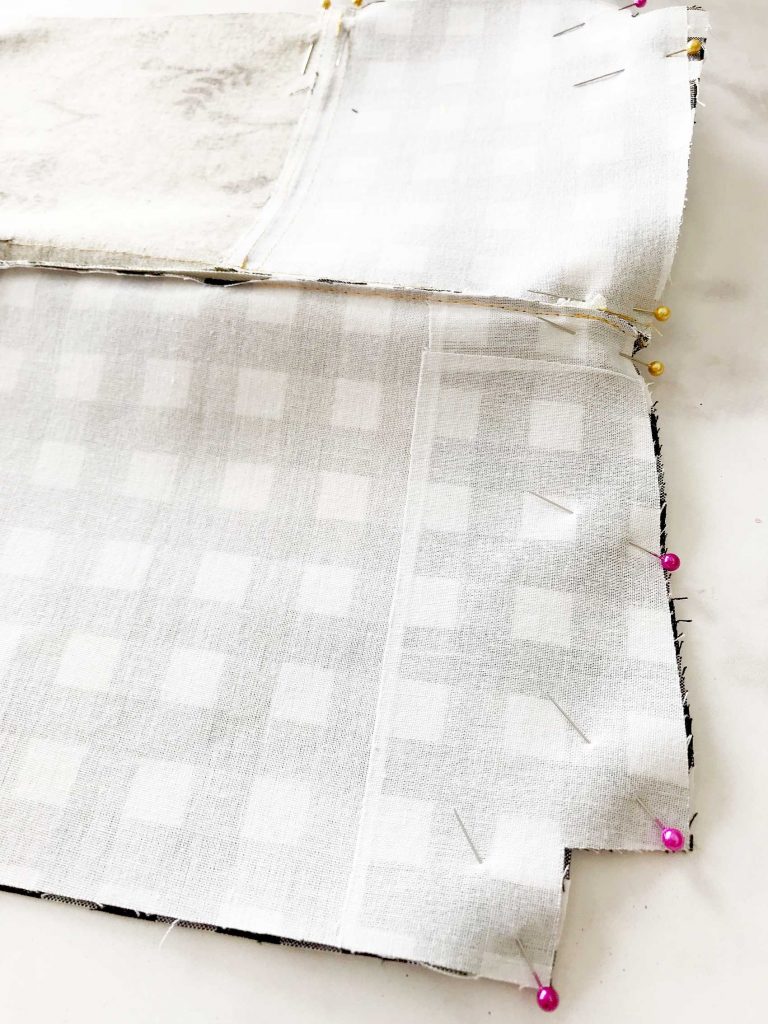
 IMG_2613

Piece the Outside

Start by sewing the outside together by placing the main print and accent fabric right sides together and sew using a 1/4″ seam allowance. Press seam to one side and topstitch. Then repeat with the other side of the exterior of the pouch. IMG_2516 IMG_2529

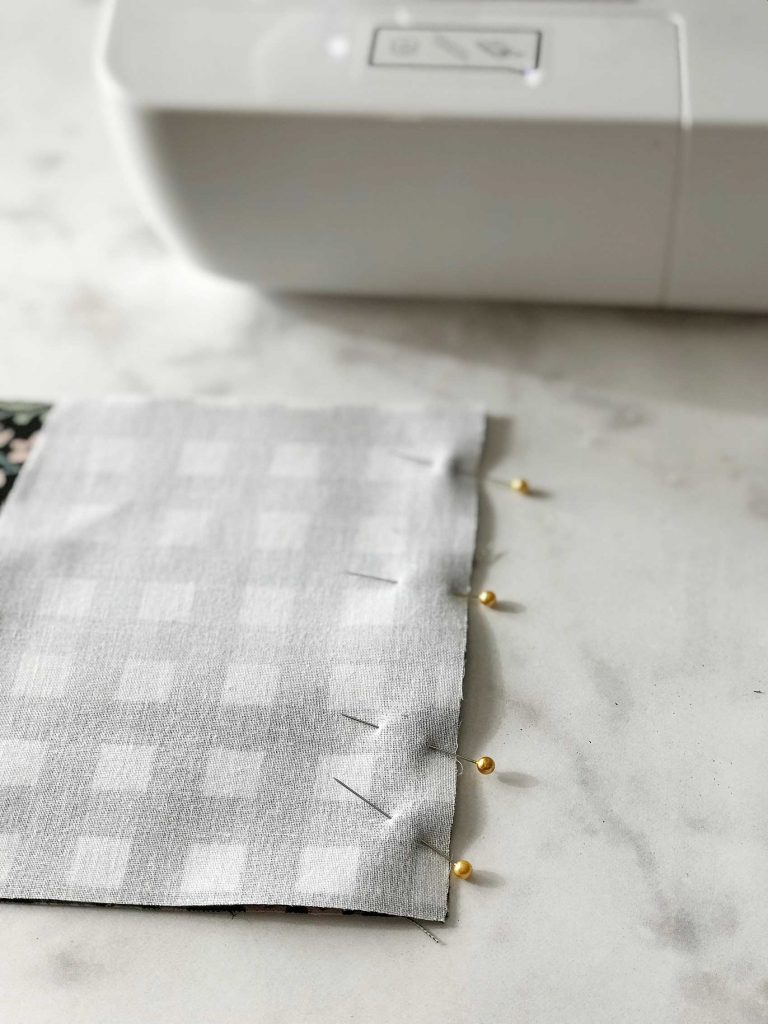
How to Prepare the Zipper

Before you attach your zipper, you need to prepare both ends of the zipper by folding it over towards the back side and placing a few stitches to hold it in place. Repeat on all four ends of the zipper.
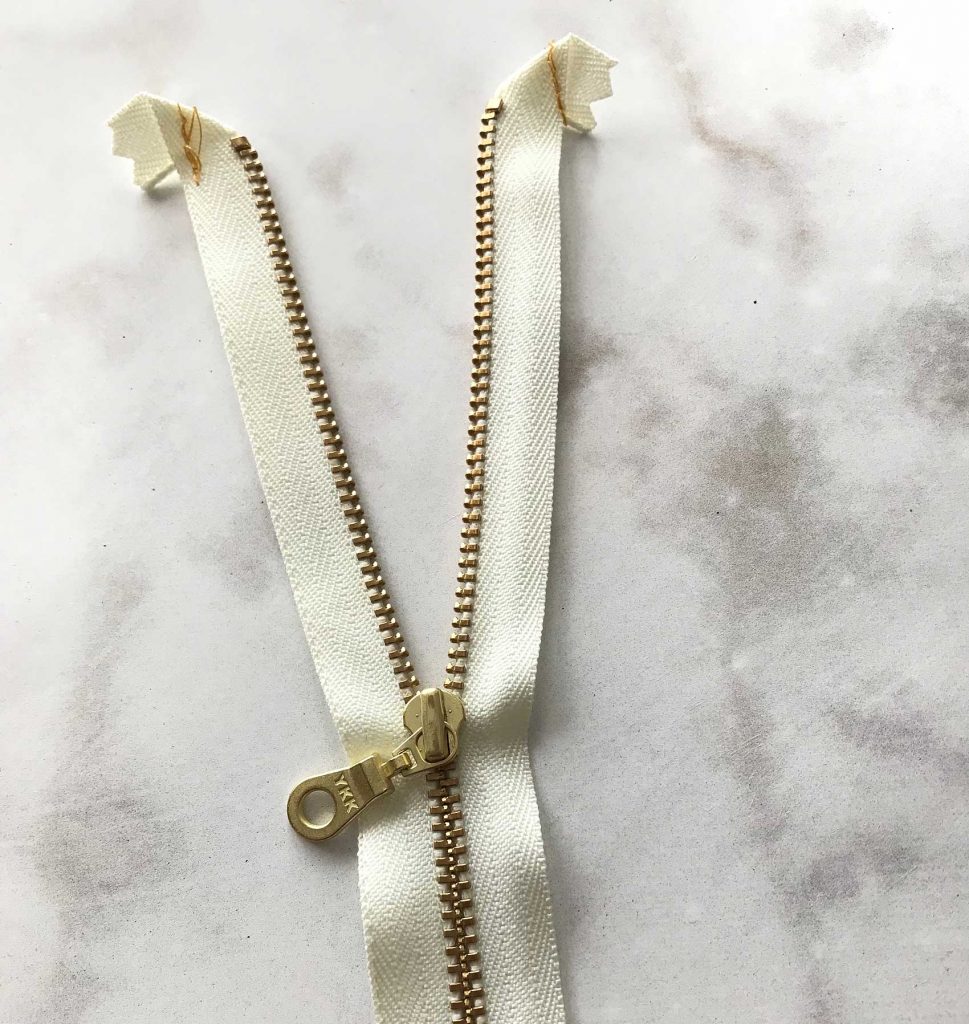
 IMG_2533

Attach the Zipper

With exterior panel right side up, center zipper right side facing down (zipper pull at left) along top edge then pin in place. IMG_2602 IMG_2605 
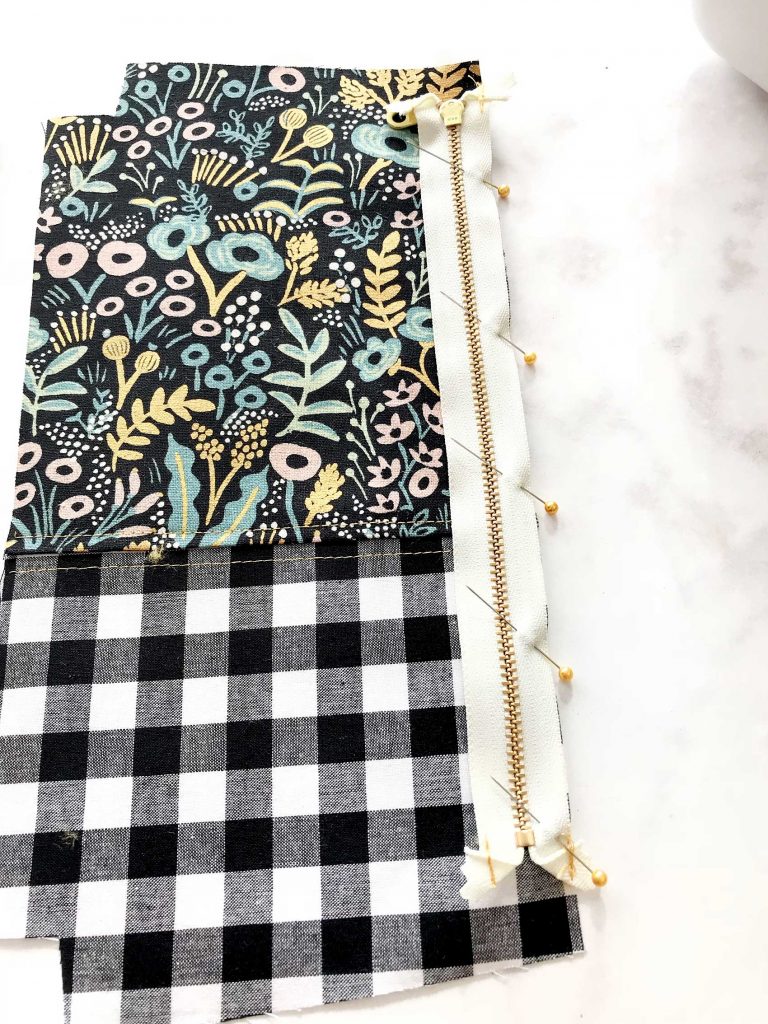
Place one lining piece, right side down on top of the exterior piece again pin into place. Using your zipper foot, sew along top edge using a 1/4″ seam allowance. Open like a book and press exterior panel away from zipper. Topstitch along zipper using an 1/8″ seam allowance. Make sure NOT to top stitch both layers together. Position outside panel and lining panel wrong side on together and press away from zipper. Repeat the same steps to attach the other side of the bag with the remaining exterior panel and lining panel to the other side of the zipper. This time placing zipper pull at right. Keep and eye on your top seems and make sure they match up.  IMG_2609 
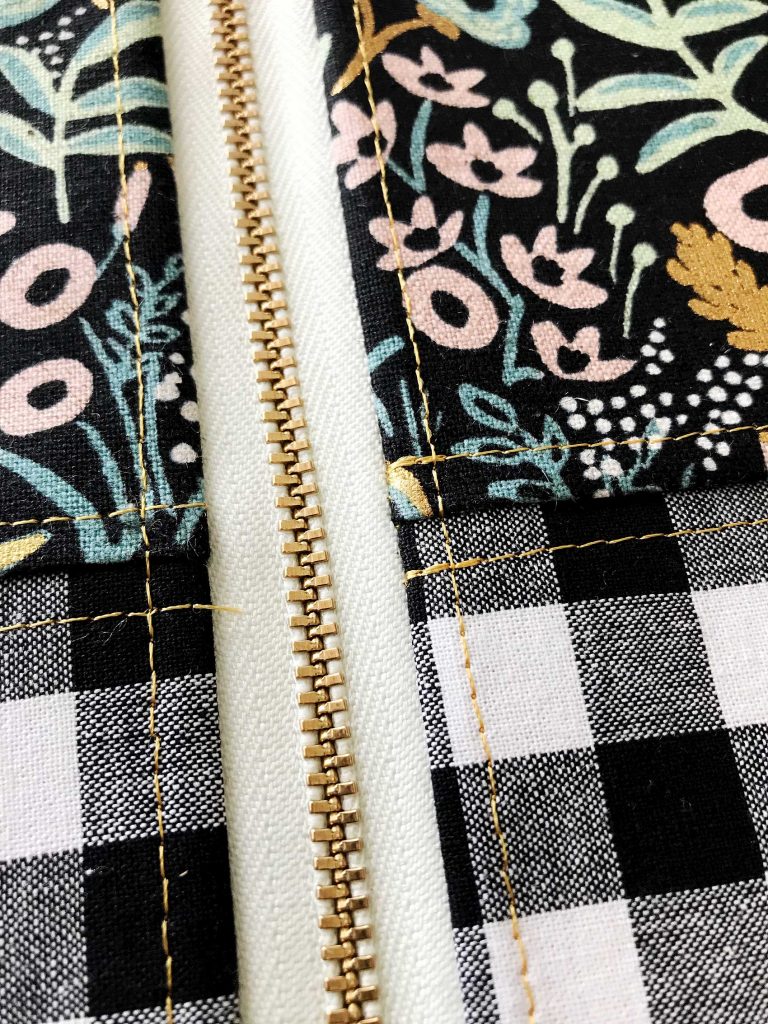
Then press both sides again. IMG_2606

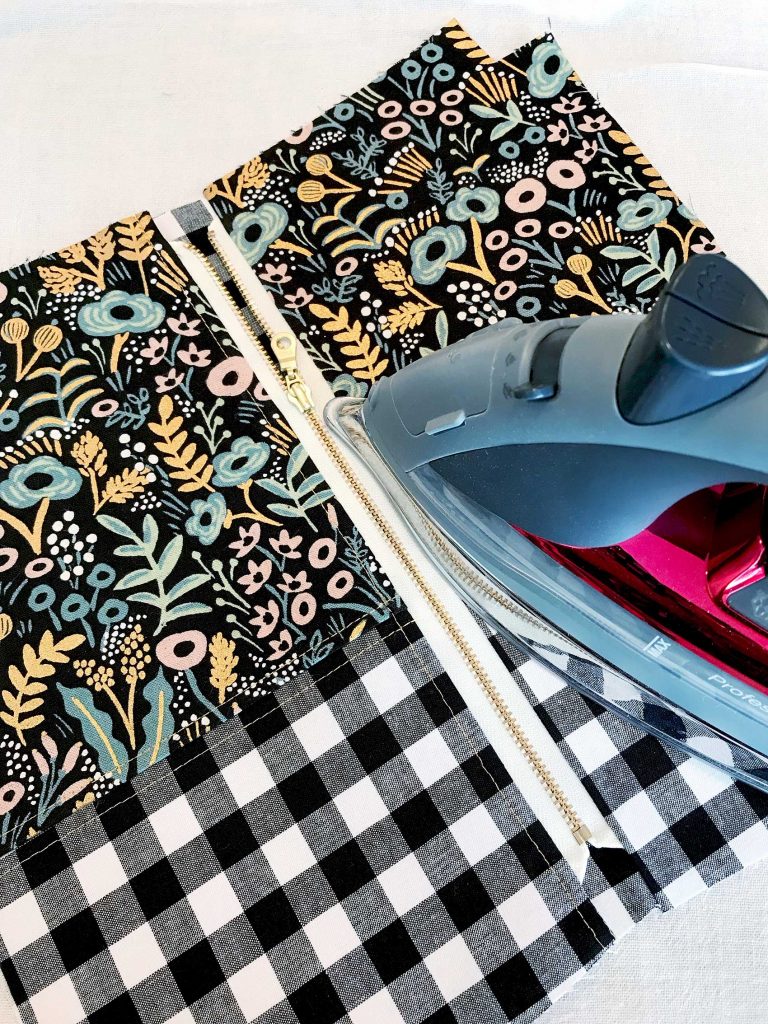
Finish the Zipper Pouch

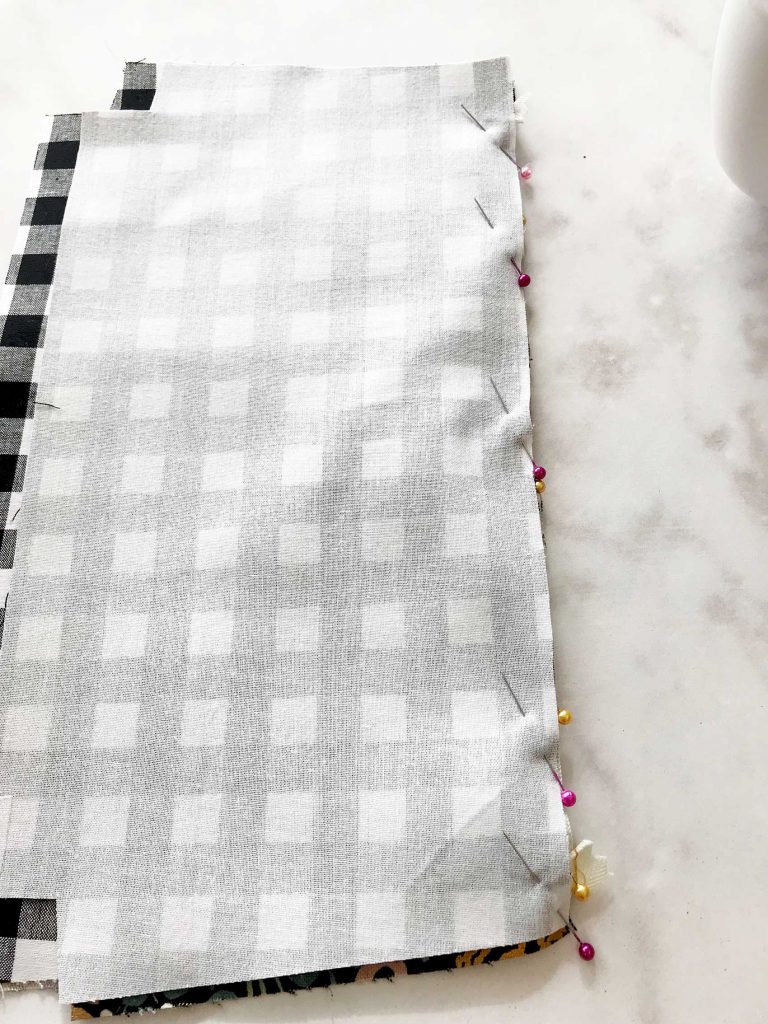
Open zipper halfway. This is an important step. IMG_2611 
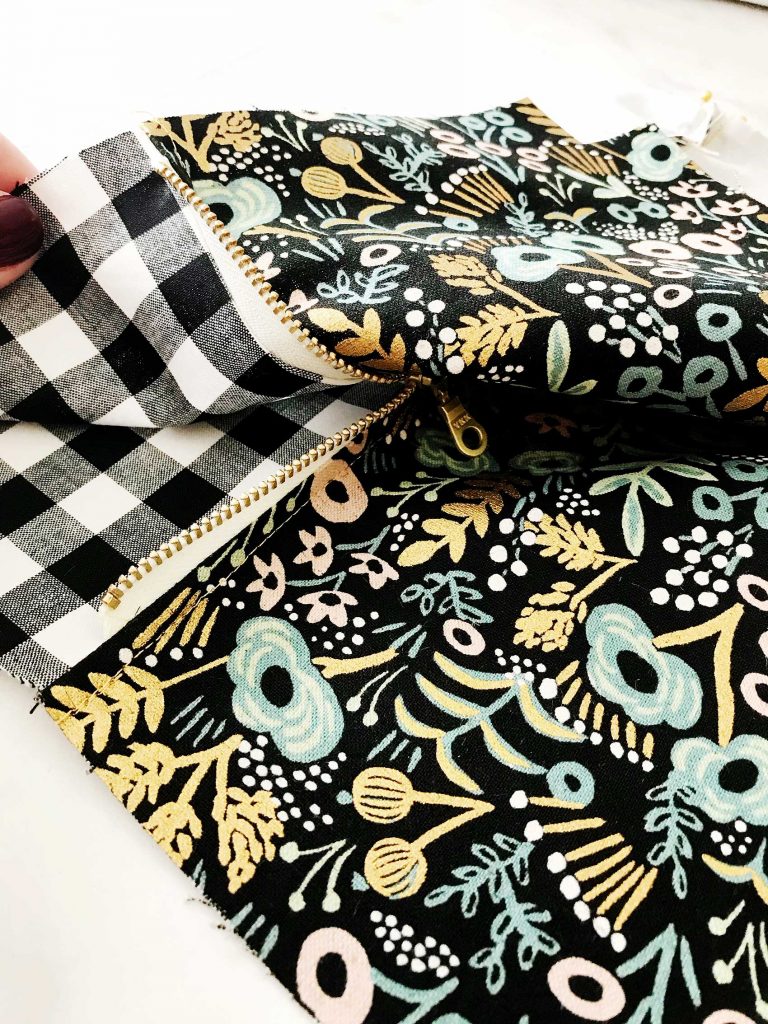
Position exterior panels right side together and lining pieces right side together and pin along sides and bottom. IMG_2614 
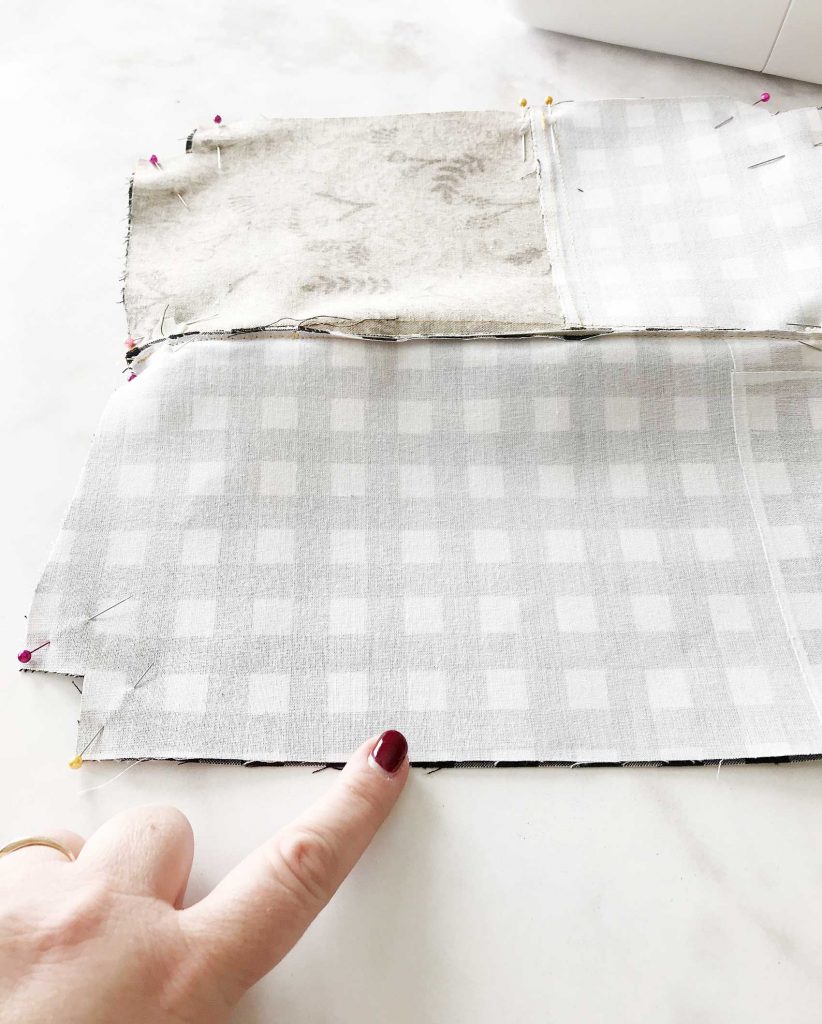
Be sure that you place pins on either side at the intersections of where the lining meets the exterior on each side of the pouch and where the seem of the exterior meet. IMG_2610 
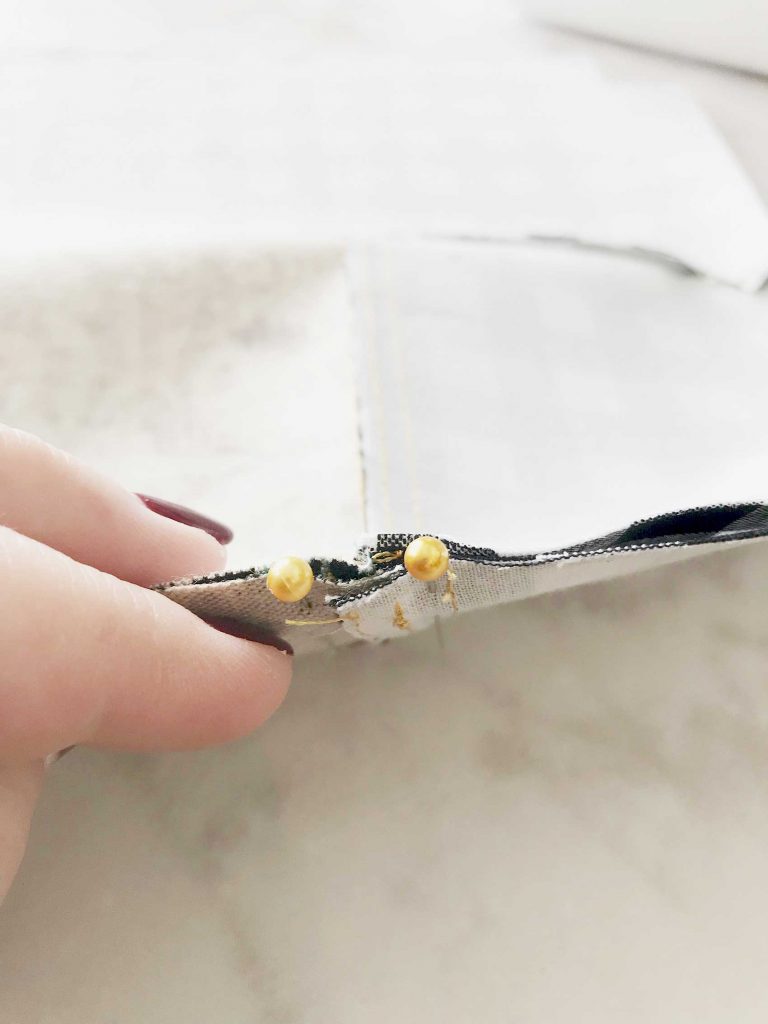
Sew along the bottom and sides of the pouch using a 1/4″ seam allowance. You will need to leave a 4 inch opening in the lining so that you’ll be able to turn your pouch. Make sure to not stitch together the corner cut outs. IMG_2617 IMG_2615 
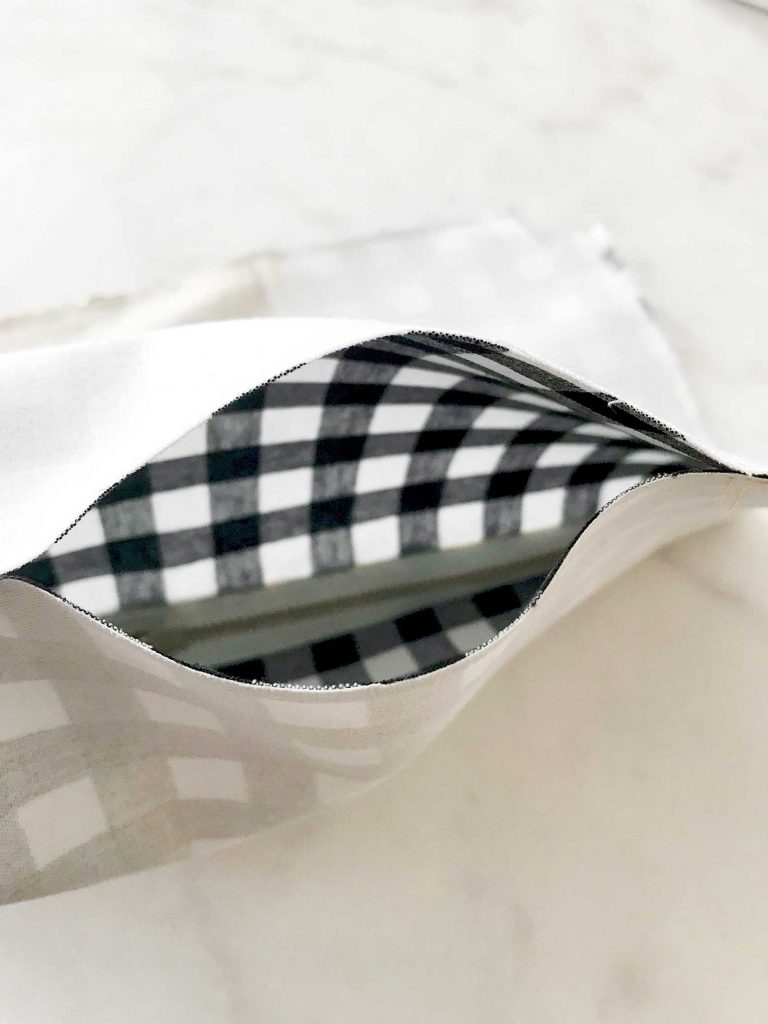
Speaking of corner cut outs… Check out the precision of how the fabric lines up. That’s solely possible because of the Cricut Maker. You can sew with confidence knowing that your fabric will line-up easily because of the perfect cuts. Ok, back to work… Reach inside your bag and shimmy the zipper open all the way. Box your corners by pinching the corners together and line-up the seam and pin. IMG_2616 
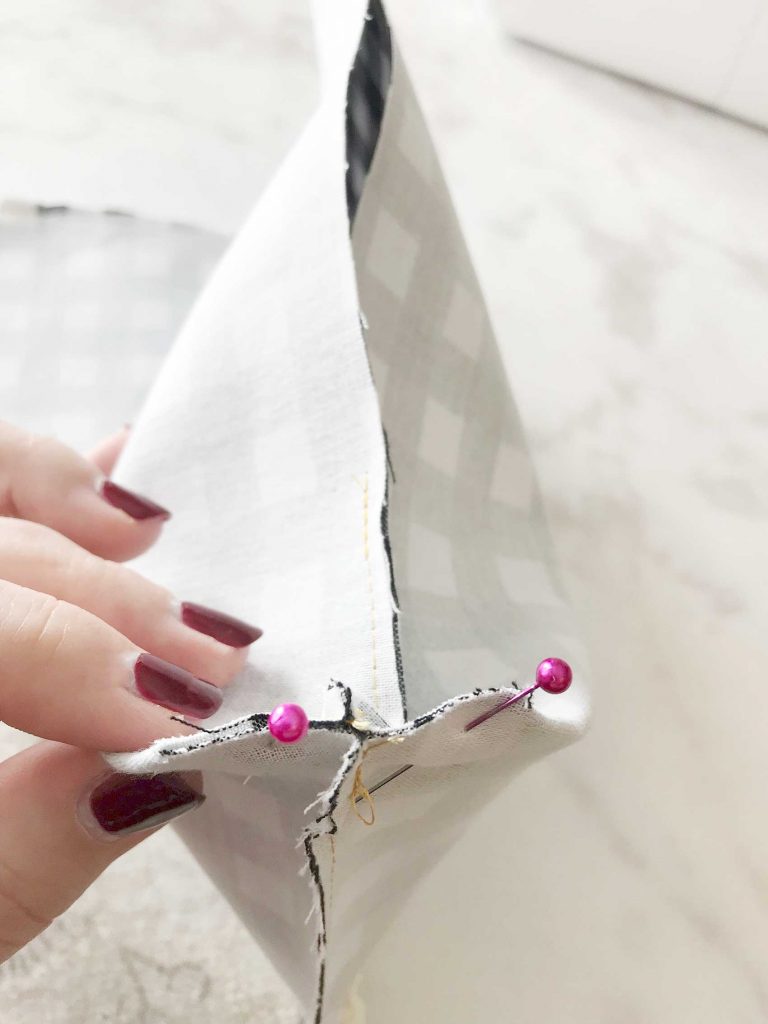
Repeat on the remaining 3 corners. IMG_2618 
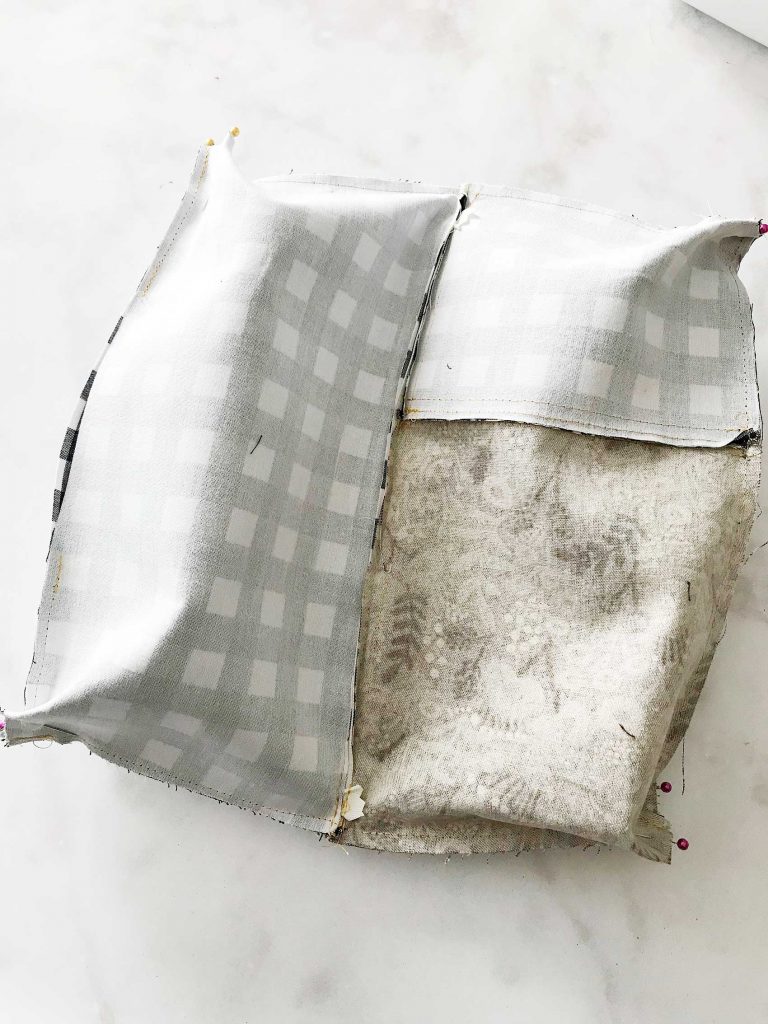
Sew straight across with a 1/4″ seam allowance. IMG_2620 
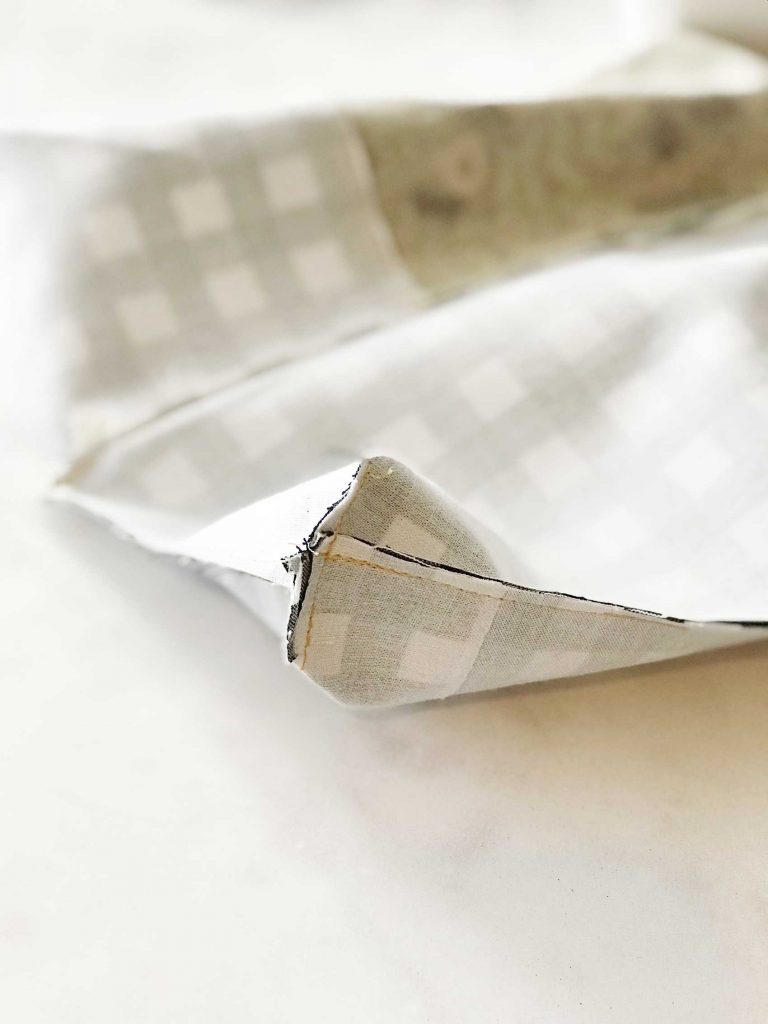
Repeat with the remaining 3 sides. You’re so close to the finish line! All you need to do is turn out your pouch so that it is right side out. That’s where the 4 inch opening comes in handy. IMG_2621 IMG_2622 
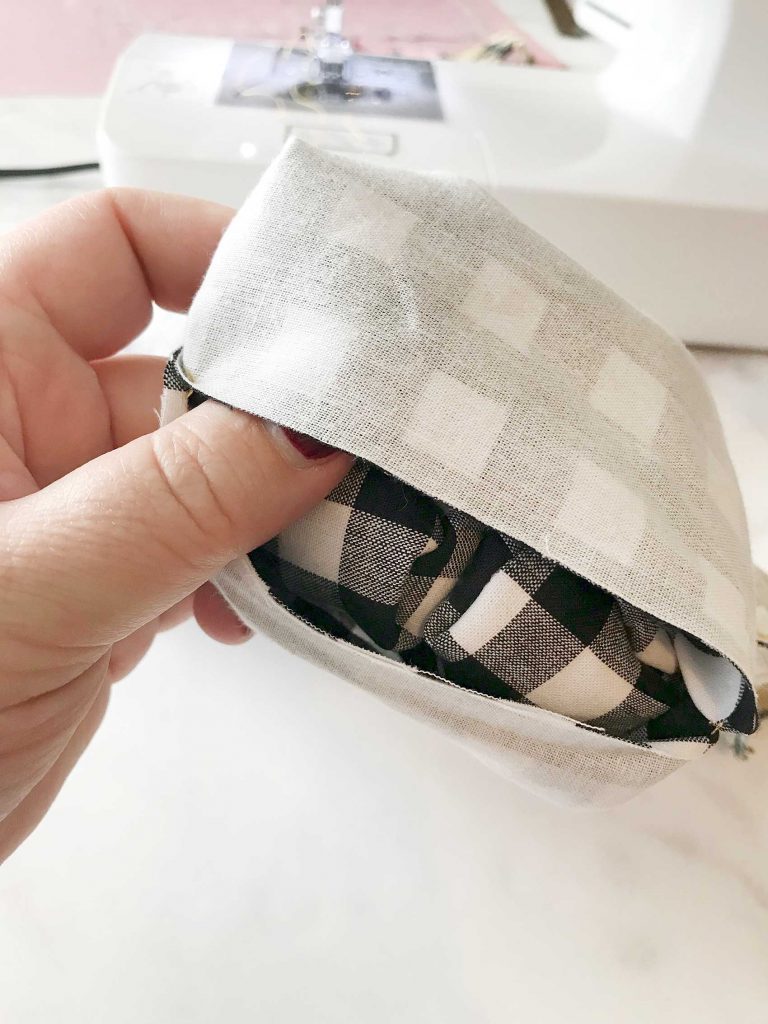
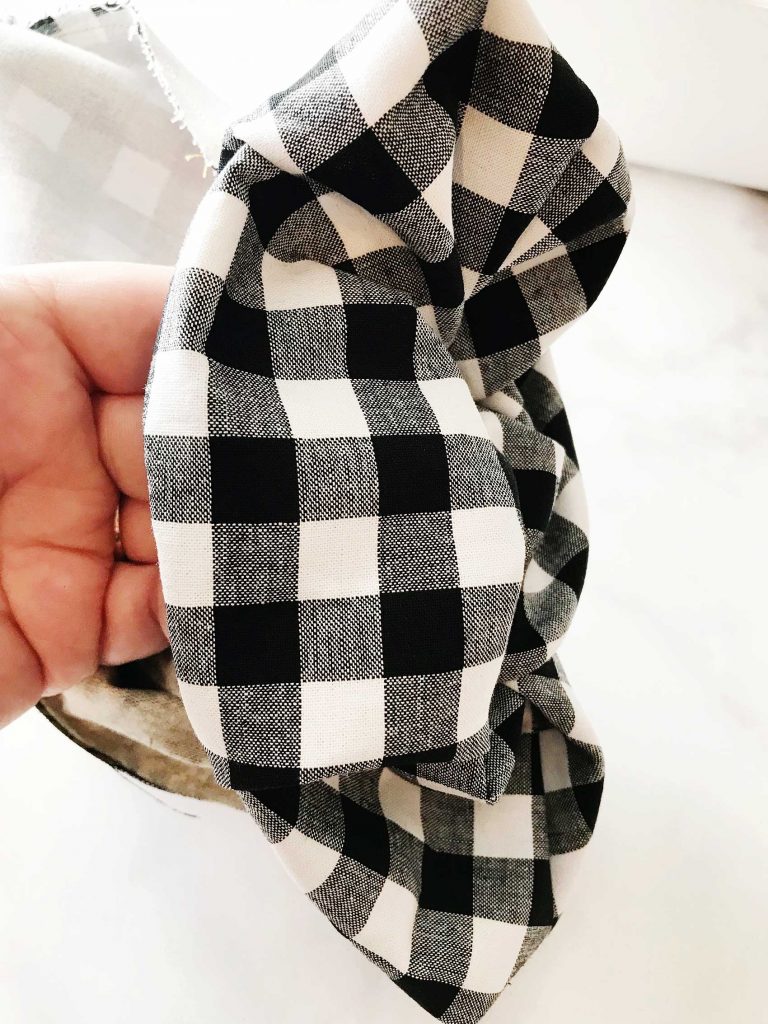
Pull it through that opening just as if you were turning a sock right side out. IMG_2623 
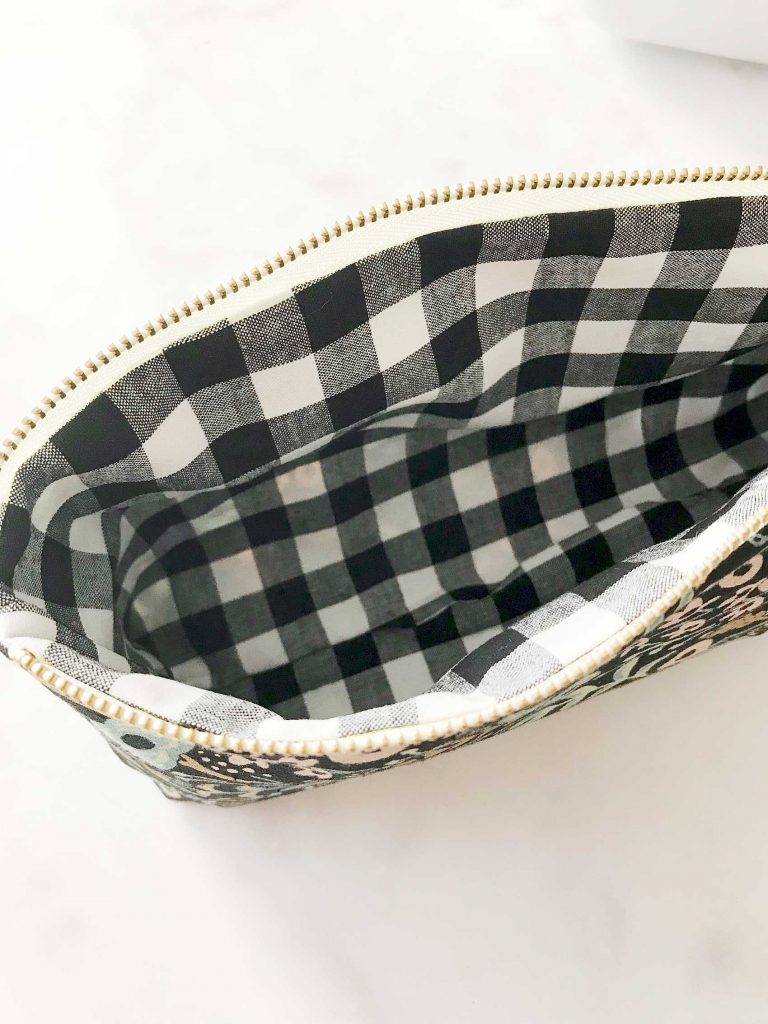
Are you just swimming with PRIDE now!!! Take a minute to make sure everything is settled in all the right places. Push the lining corners into the right spot. You may want to use the eraser side of a pencil or a chopstick to push those into place. You may want to even press your pouch again if it needs it. That’s it, you now have a beautiful, stylish large pouch that you made yourself. It has your fingerprints all over it. You chose your favorite fabric and it screams your style! Everyone loves thoughtful homemade gifts and this stylish zipper pouch is the perfect gift to whip-up in a fews hours to give as a fabulous Christmas gift this year + you can take the guess work out of cutting the pattern with the Cricut Maker! Come on over and learn how to make one of your own on WhipperBerry. 
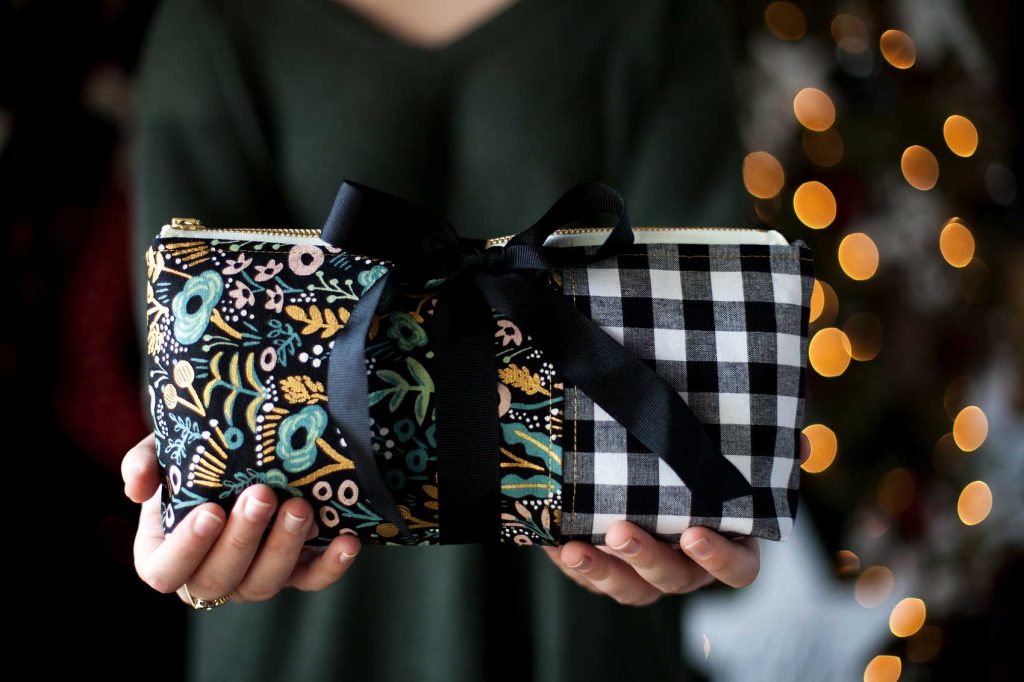
Now, you can profile all of your friends and figure out what their perfect little somethings zipper pouch would look like. Then, whip one up for them to take as a hostess gift, holiday gift, friend gift, it’s Tuesday gift… Basically, it’s a great creative gift that ANYONE can make with a little help from the Cricut Maker & a sewing machine. You could even personalize it with some Cricut Iron-on Lite and the Cricut Easy Press. That would be really cool. What to win some amazing Cricut goodies for yourself? Enter below for a chance to win! a Rafflecopter giveaway If you’re looking to make a shorter pencil pouch, visit Noodlehead for that pattern and directions.

This is a sponsored conversation written by me on behalf of Cricut. The opinions and text are all mine.

Snowball Bath Bomb Printable Gift Tag

45 · Nov 10, 2017 · 1 Comment

Hey guys! The Holidays are right around the corner and now’s the time to start preparing. I had a friend tell me today, “the Christmas season starts the minute Halloween is over and Thanksgiving is half-time.” I’m not one to run right past Thanksgiving but, I kind of get where he’s coming from. As busy as things get, it’s a great idea to start workin on those fun neighbor, office, teacher and friend gifts. Now, if you’re planning on baking, you’ll have to wait until the last minute to make your treats. With these Snowball Bath Bombs, you can still pull out the mixer and not have to scramble at the last minute to put your sweet treats together. These could be wrapped up in July if you’re really that prepared!

SNOWBALL BATH BOMBS Looking for a simple Christmas gift for friends and neighbors? This simple to make snowball bath bomb will quickly become your favorite gift to give this holiday season!

Check out this video to see how easy they are to make…

Snowball Bath Bombs via WhipperBerry from Heather Thoming on Vimeo.

For the full recipe you’ll need to visit I Heart Nap Time to get all of the details on how to make the snowball bath bombs BUT… You can download the free printable HERE.

snowball bath bomb whipperberry free printable gift tag-100

This tag is double sided. All you need to do is print the front then flip your paper over and print the polka dots on the back side.

SNOWBALL BATH BOMBS Looking for a simple Christmas gift for friends and neighbors? This simple to make snowball bath bomb will quickly become your favorite gift to give this holiday season!

Make sure to run over to I Heart Naptime to get all of the instructions on how to make this gem of a little gift.  You can also pin the image below to help you remember what you’re going to make for your friends and neighbors this year. Happy gifting!

SNOWBALL BATH BOMBS Looking for a simple Christmas gift for friends and neighbors? This simple to make snowball bath bomb will quickly become your favorite gift to give this holiday season!

Tips for Carefree Family Fun

4 · Aug 9, 2017 · 1 Comment

With Summer in full swing, it’s prime time for family get togethers. Come learn how we create carefree family fun with our family and friends!

• I’ve partnered with Carnival Cruise Line to create this post! Enjoy! •

Come learn how to create carefree family fun with simple to make yard games via WhipperBerry.

When Summer rolls in it’s time for family fun in the sun, playing at the pool and of course family reunions. Our family is actually at our annual family reunion right now in Idaho and we are having a ball! With our family, one of the challenges that we face is coming up with activities and get togethers that are fun for all ages.

Come learn how to create carefree family fun with simple to make yard games via WhipperBerry.

We have struggled in the past with the various ages that need to be entertained in our family. Our family has all ages… Elementary age, Middle School, High School & College age kiddos. Yeah, we know how to spread them out! Then, if you include the extended family, we have a whole other crew of infants through pre-school as well. Looking at the other end of the spectrum, we have young adults, middle aged and seniors as  well. We pretty much have the whole rainbow of ages in our family. How on earth do you entertain a crew like this?

Come learn how to create carefree family fun with simple to make yard games via WhipperBerry.

Well, let me tell ya… It can be a challenge. Here are some of our tips for carefree family fun!

Tips for Carefree Family Fun

  • Keep things simple
  • Plan healthy, energy promoting yet simple meals
  • Create activities that can be entertaining for all ages
  • Schedule down time
  • Keep things relaxed and fun, don’t let your expectations get out of control

Keep Things Simple

When dealing with all ages, the more simple the activity the better. Plan activities that the whole family will enjoy. You really don’t need to over schedule yourself to say that you’ve had fun. Right now we are having a ball hanging out in my parents back yard and playing games with the kids. One of these years we are going to make things even more simple and plan a family cruise with Carnival Cruise Line. Carnival is all about fun for all. They have become the masters at finding ways to help the whole family enjoy simple and carefree family fun!

Carnival believes everyone deserves a place to play, where they can jump in on the fun without a second thought. The possibilities for play abound on a Carnival cruise — at any one moment, you may be laughing until your sides ache, singing and dancing your heart out, taking in amazing sights, or savoring mouthwatering bites – all with the help of your crew – the ultimate fun facilitators.  You can’t get more simple than that! They handle all the hard stuff and your only job is to have FUN together!

Plan Heathy Meals

Nothing weighs a group down more than poor meal planning. One cannot live on burgers and hot dogs alone. Plan meals that are easy to prepare ahead of time and help to give everyone healthy energy. Here are some of my favorite go-to recipes that would be perfect for a carefree family get together.

Overnight French Toast a great breakfast OR dessert for large gatherings.

• Overnight French Toast + a PERFECT prep-ahead breakfast that everyone will love •

Breakfast Power Bowl + Perfect for family get togethers

• Breakfast Power Bowls + This is a simple breakfast that is easy to customize to everyone’s taste •

The BEST Chicken Salad recipe. Perfect for large family gatherings from WhipperBerry.

• The BEST Chicken Salad Recipe + Perfect to make ahead of time! •

Onion and Poppy Seed Salad from WhipperBerry + Another crowd pleaser

• Onion and Poppy Seed Salad + Another crowd pleaser •

And that’s just a few of our favorites! Checkout my Pinterest board for other great WhipperBerry recipes.

Now, if you aren’t into cooking and want someone else to take the helm in that area, … man oh man, Carnival is the way to go. The Carnival Chef’s know how to tickle the taste buds and please every palette in your family!

Create Activities that can be Entertaining for all Ages

Here’s where the fun never ends… It can be hard to find activities that everyone will love. We’ve found that yard games tend to be a huge hit with the littles all the way up to the oldies. There is just something about the novelty of the games. What’s fun is that they are easy to DIY so that you don’t have to spend and arm and a leg for them.

We’ve created a set of medium sized yard dominos and some small dice that everyone LOVES to play with.

Come learn how to create carefree family fun with simple to make yard games via WhipperBerry.

Come learn how to create carefree family fun with simple to make yard games via WhipperBerry.

Come learn how to create carefree family fun with simple to make yard games via WhipperBerry.

Now I’ve seen dominos that are super big that you play all over your yard and they are super fun. I wanted a smaller set that is easy to store and transport. I cut some 1 x 4 planks into 6 1/2 inch blocks and used a wood burning tool to create the dots. Everyone loves them!

Come learn how to create carefree family fun with simple to make yard games via WhipperBerry.

They even love building towers with them.

Come learn how to create carefree family fun with simple to make yard games via WhipperBerry.

Come learn how to create carefree family fun with simple to make yard games via WhipperBerry.

Come learn how to create carefree family fun with simple to make yard games via WhipperBerry.

DIY-Yard-Games-from-WhipperBerry-27

Who says only little kiddos love to play with toys!

As inspiration from Carnival Cruise Line’s live game show, where you can team up with your friends and family to play some of the most classic games, we also created some dice for Yard Yahtzee! We had a blast and you can easily re-use your homemade pieces for your own favorite dice game.

Come learn how to create carefree family fun with simple to make yard games via WhipperBerry.

Again, I used my wood burning tool and cut some 2 x 2 blocks to create the dice. If you are a Yahtzee fan, here is a printable score card that you can download.

Printable Yahtzee Score Card from WhipperBerry

• Download Yahtzee Score Card HERE •

If you would rather have someone else be the cruise director, sail with Carnival the fun ship! They have a ship full of all kinds of fun activities for all ages.

Create a Chance for Relaxation

With all of this fun, you need to keep in mind that all of your age groups will need some rest. Create some opportunities for down time. Don’t forget to create a safe space for the teenagers to be teenagers. They like to stay up late and sleep-in.

The more rest you have, the more fun you can have together without a whole bunch of grumps. You know that Carnival also excels in this area. And for adults, don’t forget to check out all of their SPA options!

Also, don’t forget to keep your expectations in check. We all want a magical time together but, the bottom line is… The little ones will get cranky and won’t want to go along with the schedule or, someone will get sick. Personality types are put to the test and that’s alright. Everyone needs to just step back, relax and go with the flow. Remember, this is the time to make memories that will last a lifetime!

pastedGraphic_17.png

How to Apply Vinyl Tutorial + New Kitchen Sign Design

5 · May 9, 2017 · 2 Comments

Have you always wanted to create beautiful vinyl signs but, can’t quite get the hang of applying vinyl? Look no further, I’m sharing my pro tips for how to apply vinyl to create beautiful vinyl signs.

How to Apply Vinyl Have you always wanted to create beautiful vinyl signs but, can’t quite get the hang of applying vinyl? Look no further, I’m sharing my pro tips for how to apply vinyl to create beautiful vinyl signs.

how to transfer vinyl tutorial • brought to you by Cricut

Recently, we moved to our new forever home and I have been madly creating all kinds of fun things to make the space my own. I LOVE creating word art whether it be for vinyl signs, painted signs, or for printables, for some reason that kind of decor always speaks to me. (No pun intended!) I love typography and everything that comes with creating with words and letters. I love watching trends come and go and adding my version to the fray.

Right now, with the popularity of the show Fixer-Upper, word art is hot. I have all kinds of farmhouse/industrial signs all over my house. I found a fun, blank chalkboard stand at Michaels in their decor section and thought it would be fun to create a new “The Kitchen is Now Open” Sign for my counters. After a little bit of playing around, this is the design that I settled on…

How to Apply Vinyl Have you always wanted to create beautiful vinyl signs but, can’t quite get the hang of applying vinyl? Look no further, I’m sharing my pro tips for how to apply vinyl to create beautiful vinyl signs like this, "The Kitchen is Now Open Sign" with menu from WhipperBerry.

Download Kitchen Sign for Free

It has a little bit of farmhouse flair that so many of us are in love with right now. Now, this sign could be a little intimidating with all of the little letters but, don’t let it be intimidating. YOU CAN DO THIS! All you need is a little patience. So many people try and rush through a project and they get easily frustrated and then their project fails. That is so SAD! Step back, grab a Diet Coke (or, whatever it is that makes you happy), and ENJOY the process of creating.

For today, I’m focusing on just the vinyl transfer part of sign making. I’m working on a few more tutorials on how to create your sign in the NEW Cricut Design Space that was launched in BETA mode a week ago. It’s fabulous! I’ve been having a ball getting to know the new, faster & more user-friendly Design Space. I’m sure you’re going to love it too! It’s so easy to create your own designs within the Design Space or you can create in other programs like Photoshop or Illustrator and import your PNG files directly into Design Space and create that way as well. I’ll be working on more tutorials for both of those options soon.

I’m also working on a video tutorial on how to weed your vinyl. That’s the process of removing the negative part of your design in the vinyl. It’s really not hard, but I have a few tricks up my sleeve that will make it a little easier. Today, I’m just going to focus on how to apply vinyl. Here’s a quick video to show you how to apply vinyl to any type of smooth surface.

Video Tutorial for How to Apply Vinyl

How to Apply Vinyl by WhipperBerry from Heather Thoming on Vimeo.

See, isn’t that simple! Honestly, the trickiest part is making sure that the design is centered onto your surface. As long as you stick with these simple tips, you can become a vinyl sign PRO!

Pro Tips for Applying Vinyl

How to Apply Vinyl Have you always wanted to create beautiful vinyl signs but, can’t quite get the hang of applying vinyl? Look no further, I’m sharing my pro tips for how to apply vinyl to create beautiful vinyl signs like this, "The Kitchen is Now Open Sign" with menu from WhipperBerry.

  • Take your time – like I said before, don’t rush. If some of the vinyl lifts while you are transferring it to either the transfer tape or your sign… Don’t stress out. Lay that section back down and press on the vinyl with your finger and then try again. You’ll get it, just don’t rush.
  • Make sure your surface is clean – Now think about this, if you try and place a sticker on a surface covered in dust, dirt, sand, or general grime, what will happen? The sticker won’t stick. Same thing with adhesive vinyl. Whatever you are adhering it to needs to be clean. Nothing is more frustrating than laying down some vinyl and then finding a little piece of dirt stuck under the vinyl image making an unsightly bump. Take the time to make sure everything is clean.
  • Trim excess vinyl backing – Again, vinyl is just one big sticker. Stickers are placed on backing to keep the adhesive side sticky. The same applies to vinyl. Once you have cut your design on your Cricut machine, you’ll weed your vinyl and then you’ll want to cut away the excess vinyl backing. This will help when laying down your design and making sure it is placed the way you would like it.
  • Create a hinge – Several years ago, when the Cricut cutting machines made cutting your own vinyl possible, a good friend of mine, who owned a large-scale sign-making company, taught me her tricks for applying vinyl. Each of these tricks, I still use them every time. One of them is to use the transfer tape to create a “hinge” at the top of your design. Check out the video and you’ll see what I mean.
  • Pull transfer tape low, slow, and diagonally – My sign-making friend also taught me this years ago. When removing the transfer tape, pull low, slow and diagonally. What I mean by low is, that you are essentially folding the non-sticky side over on itself as you are pulling as close to your surface as possible. When do that along with pulling diagonally, you’ll be less likely to pull the vinyl back up as you remove the transfer tape.

A Quick Note on Materials

Here we have it… Not all vinyl and transfer tapes are created equal!! I have tried many brands of both vinyl and transfer tape. I’ve used what the professionals use and basic crafters vinyl. I LOVE the Cricut Transfer Tape!! It’s clear and so easy to use. I’ve also been very happy with the Cricut Vinyl. I have exclusively used the Premium Outdoor Vinyl for most of my projects and have been thrilled with the results. I made some travel mugs with the Premium Vinyl and have run them through the dishwasher many, many times and have yet to have any issues with the vinyl coming off. I LOVE that!

Stay tuned for more Cricut tutorials and projects coming to WhipperBerry! By the way… If you have any questions, feel free to leave a comment here. I would be happy to help!

How to Apply Vinyl Have you always wanted to create beautiful vinyl signs but, can’t quite get the hang of applying vinyl? Look no further, I’m sharing my pro tips for how to apply vinyl to create beautiful vinyl signs like this, "The Kitchen is Now Open Sign" with menu from WhipperBerry.

Disclaimer // I am a Cricut Ambassador and receive  product and payment to help with my projects. As always, I will NEVER promote a product that I don’t truly believe in!

  • « Go to Previous Page
  • Page 1
  • Interim pages omitted …
  • Page 6
  • Page 7
  • Page 8
  • Page 9
  • Page 10
  • Interim pages omitted …
  • Page 18
  • Go to Next Page »

Primary Sidebar

Heather from Whipperberry
Hello... my name is Heather and I'm the creator of WhipperBerry a creative lifestyle blog packed full of great recipes and creative ideas for your home and family. I find I am happiest when I'm living a creative life and I love to share what I've been up to along the way... Come explore, my hope is that you'll leave inspired!

Footer

  • Privacy Policy
  • Crafts
  • Food
  • Gifts
  • Holidays
  • Home
  • Mom Life
  • Recipes
  • Travel

Copyright © 2026 · Seasoned Pro