We live in a world that constantly demands our attention. Between the endless notifications on our phones, the hustle of managing a household, and the pressure to “do it all,” finding a moment of genuine peace can feel like searching for a needle in a haystack.
I know I’m not alone in feeling that burnout creeping in by 4 PM, when the only thing I want is to retreat into a shell of silence. But over the years, I’ve learned that relaxation isn’t just about stopping work—it’s about actively creating a space that invites your nervous system to settle down.
Of course, when burnout becomes severe or persistent, it may require more than just rest and personal coping strategies. In such cases, seeking support from a psychiatric clinic in Nevada, or elsewhere, or mental health professional can be an important step. A professional can help identify the underlying causes of burnout, whether they stem from chronic stress, emotional exhaustion, or other mental health concerns. They can also provide structured guidance, therapy, or treatment options tailored to your needs.
Creating a non-toxic sanctuary at home doesn’t mean you need a complete renovation or a spa-level budget. It’s really about intention. It’s about stripping away the toxins—both chemical and emotional—that clutter our lives and replacing them with nourishing, calming elements.
Whether you are living a strict Paleo lifestyle or just trying to make healthier choices for your family, curating a non-toxic sanctuary is the ultimate form of self-care. Let’s dive into how we can transform our homes into havens of tranquility, one simple change at a time.

Setting the Stage with Sensory Details
The moment you walk through your front door, your senses are bombarded with information. If your home is cluttered, smells stale, or is lit with harsh fluorescent bulbs, your brain stays in “alert” mode. To flip the switch to relaxation, we have to start by addressing what we see, smell, and feel. This isn’t just about aesthetics; it’s about biology.
The Magic of Lighting
Lighting is perhaps the most underrated tool in our wellness toolkit. Our bodies are governed by circadian rhythms, which are heavily influenced by the light we are exposed to.
Respecting Your Circadian Rhythm
During the day, bright, blue-toned light keeps us awake and productive. However, once the sun goes down, that same light suppresses melatonin, the hormone we need for sleep. I’ve made it a rule in my house to dim the lights after dinner. We switch from overhead lighting to warm, amber-toned lamps. It signals to everyone—kids and pets included—that the day is done. If you can, invest in some smart bulbs that can shift to a redder hue in the evening; it makes a world of difference in how heavy your eyelids feel by bedtime.
Choosing Beeswax Over Paraffin
Candles are the classic relaxation cliché, but not all candles are created equal. Standard paraffin candles can release toxins like benzene and toluene into the air—basically the opposite of what we want in a clean home. I switched to 100% beeswax candles years ago and haven’t looked back. They burn cleaner, longer, and actually help purify the air by releasing negative ions. Plus, the warm, honey-colored glow of a beeswax flame is incredibly soothing and cozy, perfect for winding down.
Aromatherapy and Air Quality
What we breathe directly impacts how we feel. Stale air can lead to headaches and fatigue, while fresh, clean air energizes and calms us.
The Power of Diffusers
Instead of reaching for synthetic air fresheners, which are often laden with phthalates and other endocrine disruptors, I love using an essential oil diffuser. Scents like lavender, chamomile, and bergamot have proven effects on the nervous system, helping to lower heart rate and reduce stress. It’s a simple ritual: fill the diffuser, add a few drops of oil, and let the scent fill the room. It’s an instant mood shifter that feels luxurious but is completely natural.
Bringing Nature Indoors
Houseplants are another non-toxic way to improve air quality and vibe. Snake plants, pothos, and peace lilies are incredibly easy to keep alive (even for those of us without a green thumb) and work overtime to filter indoor air pollutants. Visually, seeing greenery connects us to nature, which is inherently grounding. Placing a few plants in your relaxation corner creates a mini-sanctuary that feels alive and fresh.
Nourishing Your Body for Rest
We often think of food as fuel for energy, but it’s also the building block for relaxation. If your blood sugar is crashing or your gut is inflamed, no amount of meditation will make you feel truly calm.
The Gut-Brain Connection
There is a direct line of communication between our stomach and our brain. When we eat inflammatory foods—like gluten or processed sugars—it sends stress signals to our system.
Paleo-Friendly Evening Snacks
If you need a nibble before bed, stick to foods that stabilize your blood sugar. A small handful of macadamia nuts or a slice of turkey wrapped in avocado provides healthy fats and protein without the insulin spike. I love making homemade gelatin gummies with tart cherry juice; they are fun to eat and tart cherries are a natural source of melatonin. It’s a treat that actually serves a purpose.
The Magnesium Miracle
Most of us are deficient in magnesium, a mineral crucial for muscle relaxation and stress management. I try to incorporate magnesium-rich foods like pumpkin seeds and dark leafy greens into dinner. Sometimes, I’ll even take a high-quality magnesium glycinate supplement or use a magnesium oil spray. It helps “unclench” tight muscles and prepares the body for deep, restorative sleep.
Hydration Habits
Water is life, but how and when you drink it matters for relaxation. Dehydration causes cortisol levels to rise, making you feel anxious and jittery.
Herbal Infusions
Swap that evening glass of wine (which actually disrupts sleep quality) for a warm cup of herbal tea. Holy basil (Tulsi), lemon balm, and passionflower are my go-to herbs for stress relief. There is something ritualistic about boiling the water, steeping the leaves, and wrapping your hands around a warm mug. It forces you to slow down and sip, giving you a few minutes of mindfulness in a busy evening.
Timing Your Intake
While hydration is key, drinking too much right before bed can lead to disrupted sleep due to bathroom breaks. I try to front-load my water intake earlier in the day and switch to small sips of tea after 7 PM. This ensures I’m hydrated enough to prevent headaches but not so full that I’m waking up at 3 AM. It’s a delicate balance, but one that your sleep cycle will thank you for.
Curating Your Comfort Zone
Your environment should feel like a non-toxic sanctuary like a warm hug. This is where we get to play with textures and tools that physically comfort us.
Textiles and Textures
The sense of touch is powerful. Rough, scratchy fabrics can be irritating, while soft, natural fibers can make us feel safe and held.
Investing in Organic Cotton
Your skin is your largest organ, and it absorbs what it touches. Conventional bedding is often treated with formaldehyde and harsh dyes. Switching to organic cotton or linen sheets was a game-changer for me. They are breathable, soften with every wash, and ensure that I’m not wrapping myself in chemicals for eight hours a night. The feeling of clean, crisp organic cotton is an underrated luxury that elevates the entire sleep experience.
The Weight of Calm
If you haven’t tried a weighted blanket yet, you are missing out. The gentle pressure stimulates serotonin production and reduces cortisol, mimicking the feeling of being hugged. It’s particularly helpful for those nights when your mind is racing and your body just won’t settle. I keep one on the couch for movie nights and one on the bed; it’s an instant “off” button for my anxiety.
Tools for Tranquility
Sometimes we need a little help to switch gears from “mom mode” or “work mode” to “rest mode.” This is where having a few dedicated tools can help.
The Art of Journaling
I keep a notebook on my nightstand to do a “brain dump” before bed. Writing down tomorrow’s to-do list or just venting about the day’s frustrations gets the thoughts out of my head and onto paper. It clears the mental clutter so I don’t have to lie awake ruminating on it. It’s a simple analog tool that costs almost nothing but saves so much mental energy.
Exploring Lifestyle Accessories
In the pursuit of zen, we often look for items that signal to our brain that it’s time to chill. This could be anything from a high-quality yoga mat for evening stretching to a specific playlist of lo-fi beats that drowns out the street noise.
I’ve had friends who rave about curating their own “relaxation kits” with everything from acupressure mats to browsing sites like Everything 420 for unique lifestyle gear that sets a laid-back mood. The goal is to find what resonates with your personal vibe and build a toolkit that you can dip into whenever the world feels a little too loud.
The Ritual of Physical Release
Stress is physical. We hold it in our jaws, our shoulders, and our hips. To truly relax, we have to physically release that tension.
Detox Baths
A hot bath is a classic for a reason, but we can upgrade it to a therapeutic session.
The Power of Epsom Salts
Epsom salts are essentially magnesium sulfate. When dissolved in warm water, they can be absorbed through the skin, helping to soothe sore muscles and draw out toxins. I pour at least two cups into my bath. It turns the water into a silky, mineral-rich soak that melts away the tension of carrying toddlers or groceries all day.
Adding Essential Oils
To supercharge the bath, I mix a few drops of lavender or eucalyptus oil with a carrier oil (like coconut or jojoba) before adding it to the water. Never add essential oils directly to the water as they can burn your skin! The steam from the bath acts as a diffuser, surrounding you in a cloud of calming scent while the warm water relaxes your muscles.
Gentle Movement
You don’t need a grueling workout to relieve stress; in fact, high-intensity exercise late at night can spike cortisol.
Yin Yoga
Yin yoga involves holding gentle poses for several minutes at a time. It targets the deep connective tissues and fascia, which is where we store a lot of emotional stress. Doing just ten minutes of Yin poses, like “Child’s Pose” or “Legs Up the Wall,” can drastically lower your heart rate and prepare your body for sleep.
Simple Stretching
If yoga feels too structured, just simple stretching works wonders. Focus on the neck and shoulders, where most of us carry our tension. gentle neck rolls and arm stretches can increase blood flow and signal to your body that the workday is over. It’s about being kind to your body, not pushing it.
Disconnecting to Reconnect
Finally, the most important step in creating a sanctuary is protecting it from the outside world.
Digital Boundaries
Our devices are portals to stress. To create a true sanctuary, we have to close those portals.
Designated Phone Storage
Create a “sleeping bag” for your phone—a box or drawer in the kitchen where it lives after a certain hour. Physically removing the phone from your relaxation space prevents the temptation to “doom scroll.” If you use your phone as an alarm, buy a cheap analog alarm clock. Reclaiming your bedroom as a phone-free zone is one of the most powerful things you can do for your mental health.
Blue Light Blocking
If you must use screens in the evening, invest in blue-light-blocking glasses. They filter out the harsh frequencies that disrupt melatonin production. It’s not a perfect solution, but it helps mitigate the damage if you want to watch a movie or read on a tablet.
Analog Activities
Once the screens are off, what do you do? Rediscover the joy of analog activities.
Reading Real Books
There is something grounding about holding a physical book. The smell of the paper, the turning of the pages—it engages the brain in a slow, focused way that screens simply can’t. Whether it’s a cookbook, a novel, or a self-help guide, reading is a form of meditation that transports you out of your current stress.
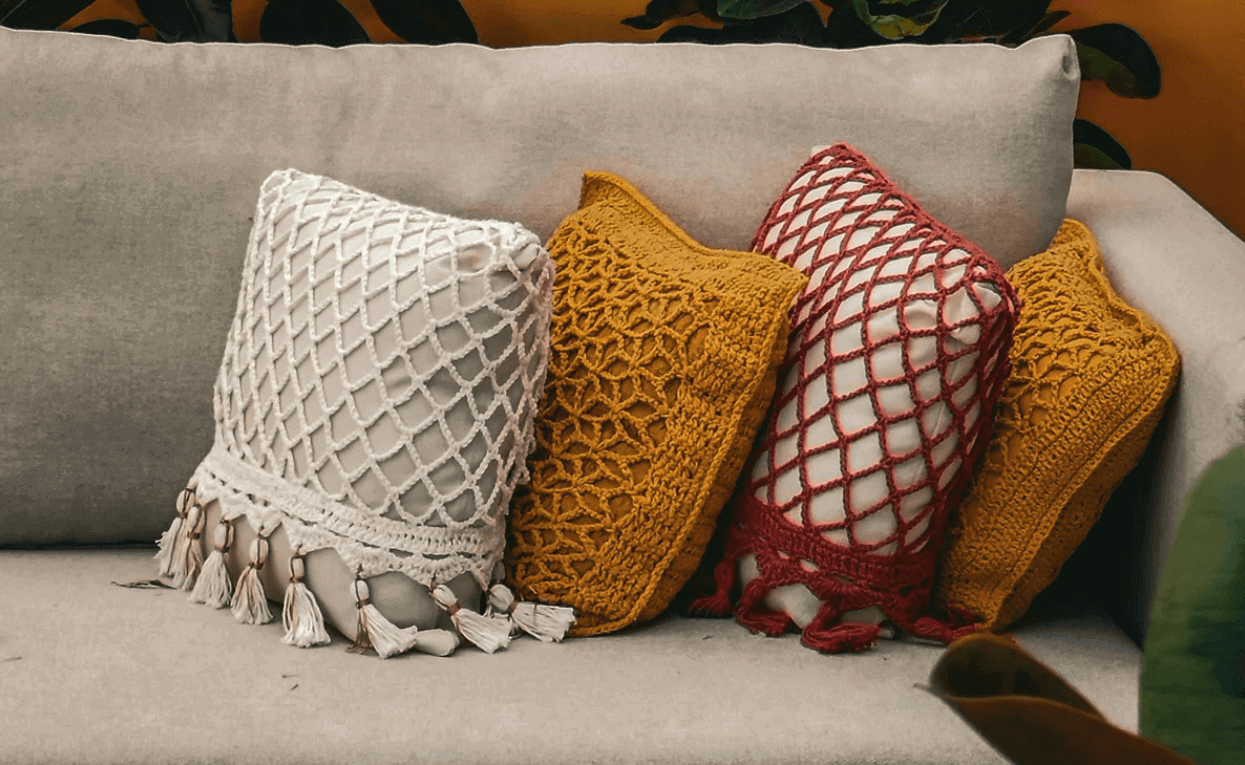
Creative Crafting
Taking a page from the creative community, engaging your hands in something repetitive and creative can be incredibly soothing. Knitting, crochet, or even adult coloring books allow your mind to wander while your hands are busy. It puts you in a “flow state,” which is deeply restorative for the brain. It’s not about being productive; it’s about being present.
Conclusion
Creating a sanctuary isn’t about perfection. It’s not about having a pristine, magazine-ready home or following a rigid set of rules. It’s about small, intentional choices that honor your need for rest. It’s choosing the beeswax candle over the synthetic one. It’s choosing herbal tea over the wine. It’s choosing to put the phone away and breathe.
By stripping away the toxins and adding in layers of comfort, we create a space where we can truly let go. In a world that glorifies busy-ness, building a non-toxic sanctuary is a radical act of self-love. So tonight, dim the lights, pour the bath, and give yourself permission to just be. You are worth it.