• Skip to primary navigation
  • Skip to main content
  • Skip to primary sidebar
  • Skip to footer

Whipperberry

WhipperBerry • Your Home For Creative Inspiration

  • Home
  • About
    • Terms
  • Recipes
    • ZipList
    • Starters
    • Easy Weeknight Dinners
    • Main Dish
    • Salads
    • Side Dish
    • Soups & Stews
    • Desserts
    • Breakfast
    • Miscellaneous
  • Tutorials
    • Creative Crafts
    • DYI Decor
    • Fabric Crafts
    • Food How-To
    • Jewlery
    • Paint Projects
    • Paper Art
    • Party Styling
    • Photography and Graphic Design
    • Silhouette
  • Holidays
    • St. Patrick’s Day
    • Easter
    • Mother’s Day
    • Father’s Day
    • 4th of July
    • Halloween
    • Thanksgiving
    • Christmas
    • New Years
    • Valentine’s Day
  • Gift Ideas
    • Gifts For Everyone
    • Gifts for Dad
    • Mother’s day
    • For The Girls
    • For The Kids
    • Teacher Gift Ideas
    • Christmas
  • Printables
    • Holiday
    • Gift Idea
    • LDS Primary
  • Travel
  • Contact
  • Nav Social Menu

    • Facebook
    • Instagram
    • Pinterest
    • RSS
    • Twitter

Frozen Desserts

Homemade Strawberry Pretzel Ice Cream Recipe

14 · Jun 22, 2018 · 11 Comments

UPDATED • 6/22/2018 {Originally posted on 3/14/2014}

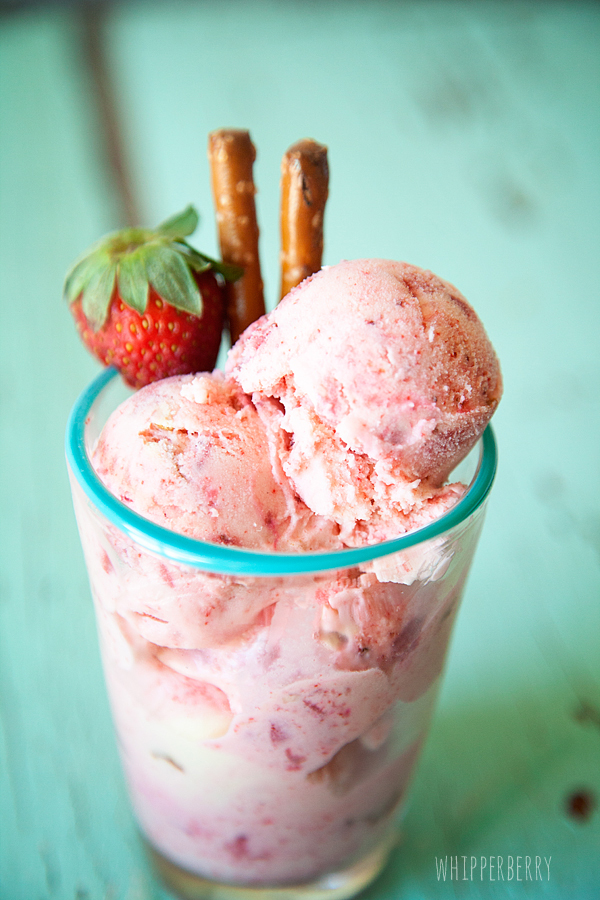
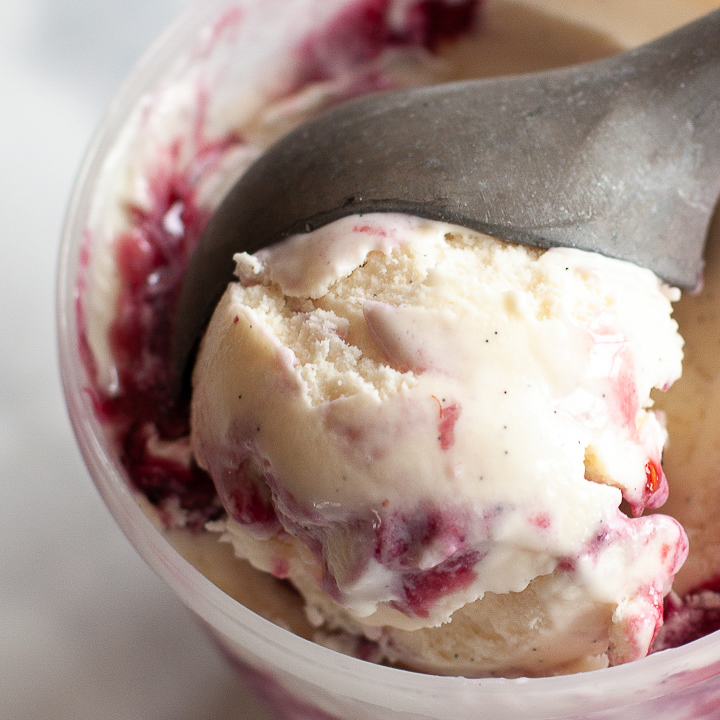
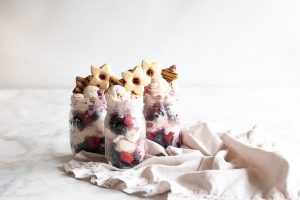
Inspired by the classic Strawberry Pretzel Salad, this frozen treat will charm your family and friends with it’s sweet and slightly salty flavors. Homemade Strawberry Pretzel Ice Cream Recipe perfect for your Summer gatherings!

Homemade-strawberry-pretzel-ice-cream-from-Whipperberry
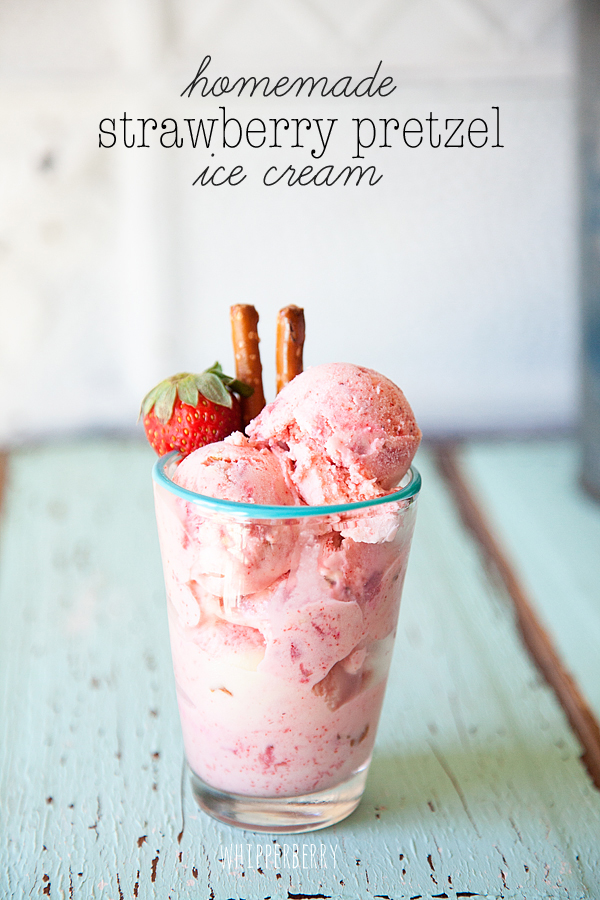
Yep, you got it… Strawberries & Pretzels! It’s a take off the classic Strawberry Pretzel Salad that so many of us know and love. The tangy strawberry Jell-0 paired with a  sweet cream cheese layer on top of a bed of pretzels. If you’ve never had it before, it may seem a little strange, the salty and sweet combination, but it’s actually really good!

Strawberry-Pretzel-Dessert

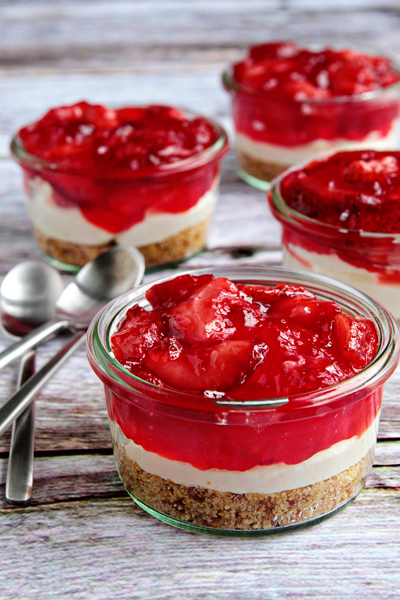
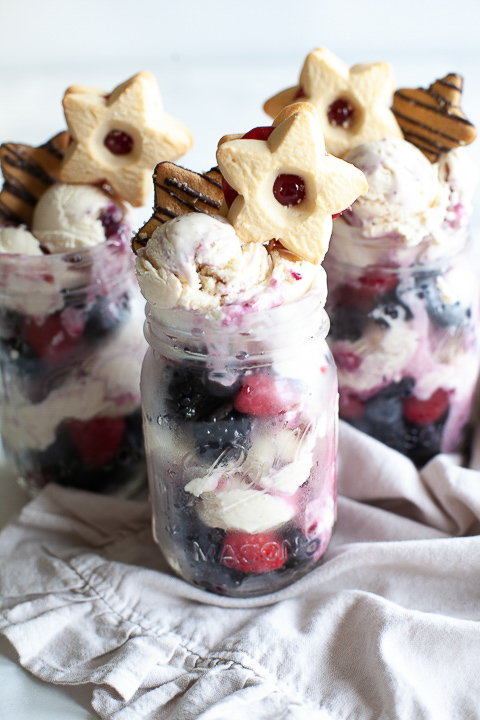
img source // strawberry pretzel salad in a jar from my baking addiction

Here’s a fantastic example of the fun dessert from My Baking Addiction.  If you haven’t ever tried it, you should whip up a batch, it’s really good. I used this recipe as the inspiration for my new ice cream flavor.

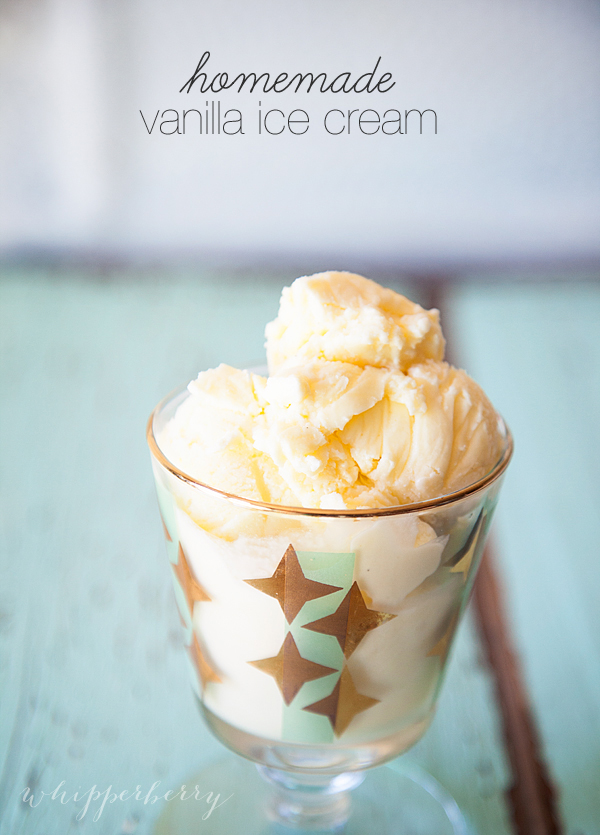
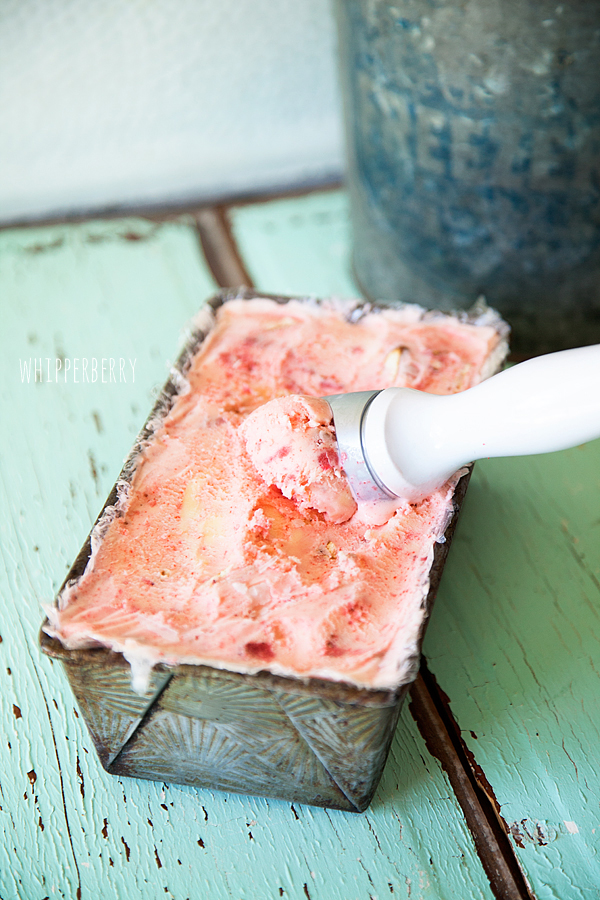
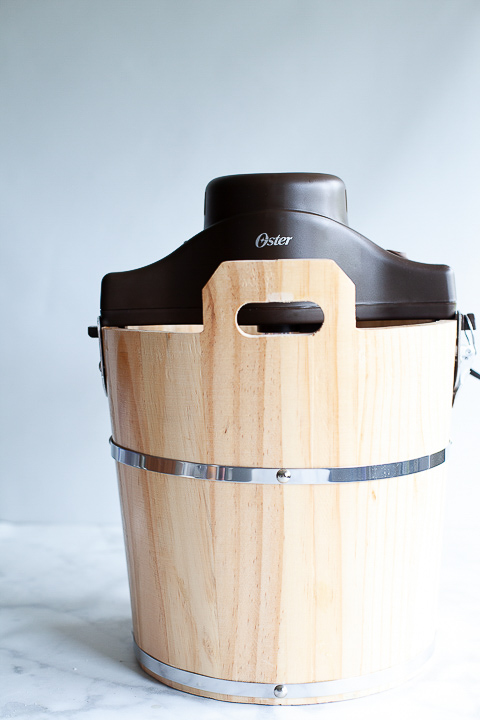
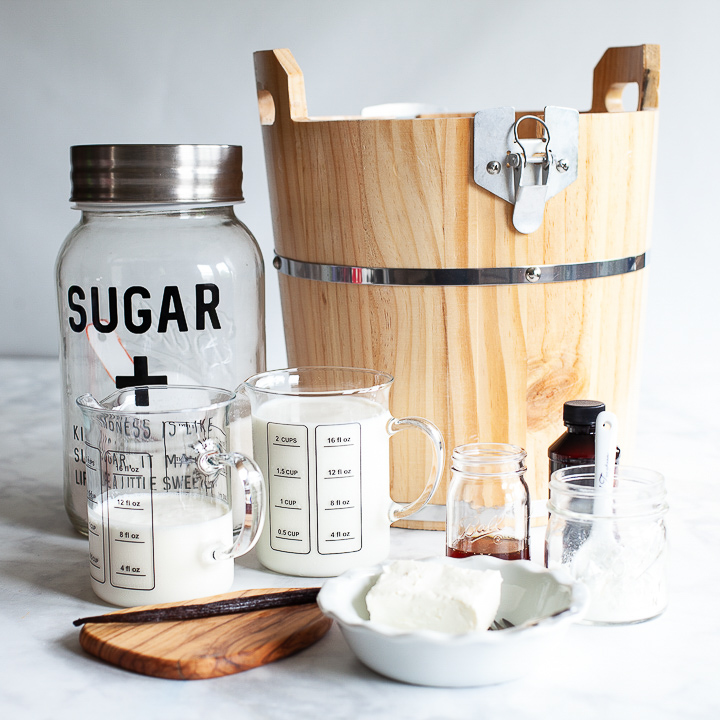
Last week, I started a new series for the next few months… ICE CREAM! I LOVE homemade ice cream and I thought it would be fun to go back to our roots and learn the art of homemade ice cream. For my first ice cream post, It was my ice cream 101 if you will. I shared a fantastic ice cream base, The Best Homemade Vanilla Ice Cream recipe…  That vanilla recipe is GREAT on it’s own, but it is also a fantastic base for all kinds of different flavors.

Homemade-ice-cream-from-Whipperberry-22

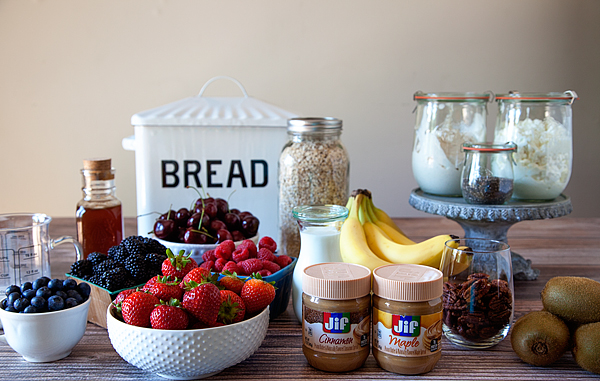
All I had to do was add a few more ingredients to that recipe to make my strawberry pretzel ice cream. Here is the recipe…

Homemade-ice-cream-from-Whipperberry-9

 
Save Print
Prep time
15 mins
Cook time
45 mins
Total time
1 hour, 60 mins
 
3.2.2310

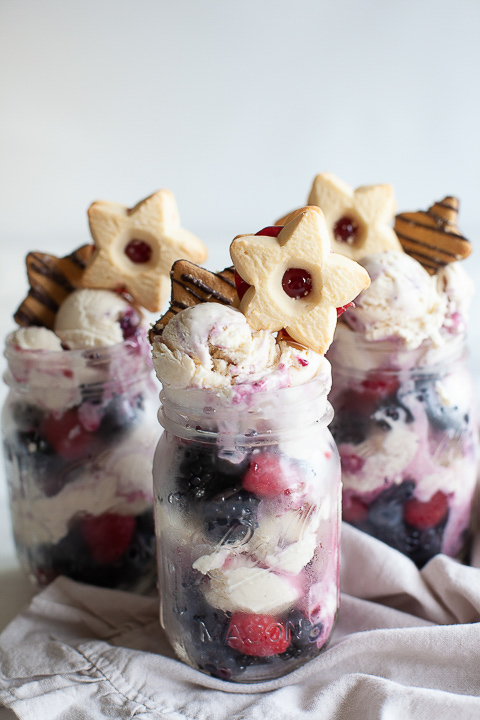
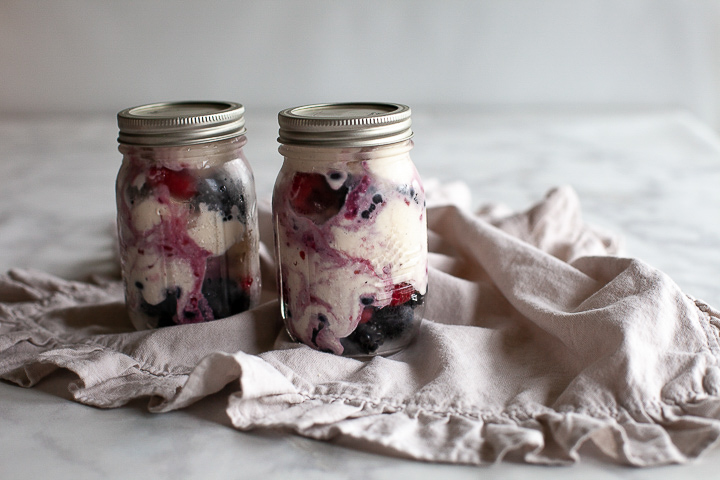
Serve this on a nice warm Summer day and your family and friends will be blown away with this fun flavor mixture!

Homemade-ice-cream-from-Whipperberry-21

SaveSave

SaveSave

SaveSave

SaveSave

SaveSave

Homemade Mixed Berry Swirl Ice Cream Recipe

13 · May 30, 2018 · 2 Comments

It’s ICE CREAM and BERRY Season!!!! I’m not sure if I could be any more excited! I have a great love of both so this is by far my favorite flavor time of year. It’s time to whip up a batch of Mixed Berry Swirl Ice Cream.

+ This post is brought to you by Ball® Fresh Preserving Products by Newell Brands +

Mixed Berry Jam Recipe

Last year, I was super honored to be invited to Newell Brands’ Ball® Fresh Preserving test kitchens to learn how to make Mixed Berry Jam, and the rest my friends, has been history. I’ve been a canning fool ever since. Jams, peaches, pickles, pickled jalapeños… Let’s just say that 2017 was the year of preserving in the WhipperBerry household much to the joy of my family. We’ve all fallen in love and are so excited for this year’s preserving season to kick-off.

This last weekend I whipped up a small batch of the Ball® Mixed Berry Jam recipe so that I could then use it as a scrumptious addition to some homemade ice cream I was planning on making. This jam recipe really couldn’t be any easier. It’s a great recipe to start with and I love that you can make it in small batches AND have total control over how much sugar you add. You don’t have that opportunity with commercially prepared jams. I had the opportunity to learn from Newell Brands’ Ball® canning experts just how easy this jam is to make.

Now that I’ve hopefully peaked your interest, you can find the full Mixed Berry Jam recipe over on FreshPreserving.com. I’m also sharing my label design for those who might want to use that as well.

Mixed Berry Jam Jar Labels - whipperberry

Mixed Berry Swirl Ice Cream Recipe

Here my friends… Is the star of the show, my mixed berry swirl ice cream recipe. Let’s just say, it’s divine.

EASY Homemade Mixed Berry Swirl Ice Cream Recipe • WhipperBerry

It’s creamy with that sweet and tart flavor of the berries. Being that it’s homemade, it has a totally different luscious texture that your taste buds are going to fall head over heels for. Commercial ice cream makers whip a lot of air into their ice cream which is a process that the home cook doesn’t have the equipment to do. Therefore, homemade ice cream has the taste and texture more like premium ice cream or gelato… WHICH I LOVE!

Another thing that makes this ice cream a little different is that it is made without eggs. I KNOW! I was shocked when I found this recipe as well. I grew up in a family that liked to make homemade ice cream every once in a while and the ice cream base recipe always called for egg yolks. In my mind, that’s what made it so decadent. In reality, the egg yolks not only made it dreamy but, it also helps to stop the formation of ice crystals which is very important in ice cream making. Without the eggs, what is going to stop the formation of ice crystals then?

Mark Bittman, the award-winning author of the How to Cook Everything Series, sings the praises of this type of ice cream base in his New York Times article where I originally found the recipe for a simple vanilla ice cream. This recipe calls for a cornstarch slurry and cream cheese to help with the formation of ice crystals. Becuase this isn’t a traditional custard base, it makes this recipe a lot easier to make and also very forgiving. Therefore, if this is your first rodeo with the ice cream maker, this recipe is perfect!

Ice Cream Making Supplies

When it comes to ice cream making, you need to be prepared with a few supplies that make the process a whole lot easier.

  •  Ice cream maker – I’m a traditional girl and I love the classic wooden bucket ice cream maker. When I was a girl, I think my parents used the old hand crank ice cream maker to keep us kiddos under control during the summer. We had to sit there and crank the machine for 40 minutes or longer, which kept us kiddos occupied for a while. Luckily, we also have the charm of those classic wooden bucket ice cream makers with an electric crank so no more tired arms!The classic wooden bucket ice cream maker with all the charm of yesterday but with the modern electric crank - whipperberry
  • Ice cream base storage – this ice cream base recipe makes exactly a quart of the base. Naturally, a Ball® Quart Wide-Mouth Jar is the perfect way to store your ice cream base. However, to avoid thermal shock, you’ll want to make sure you invert the jars and then warm them by running under hot water before you ladle the hot ice cream base into the jar.  Make sure to dry the inside of the jar before adding the the ice cream base.Quickly chill your ice cream base in a @ballcanning quart jar in a ice bath - whipperberry
  • Ice cream storage container– Glass jars ARE NOT the best option when it comes to storing your ice cream due to the nature of freezing. However, Ball® Plastic Freezer Jars with special snap-on lids work great!

Instructions

Before you can start your ice cream, you’ll need to make up a small batch of the mixed berry jam. You can find that recipe at the top of this post. Make sure to allow for the jam to fully cool and jell before you add it to your ice cream.

This is one of those recipes that the kiddos can help with from start to finish and they will love making real ice cream.

2 votes

Print

Mixed Berry Swirl Ice Cream

Prep 30 mins

Cook 45 mins

Inactive 24 hours

Total 25 hours, 15 mins

Author Heather Thoming • WhipperBerry

Yield 4-5 servings

This ice cream is so fantastic and super easy to make. All you need are a few ingredients and you'll be whisked back to your childhood!

Ingredients

  • 2 1/4 cups whole milk, divided
  • 5 teaspoons cornstarch
  • 2 ounces cream cheese, very soft
  • 1/4 teaspoon fine salt
  • 1 cup heavy cream
  • 2/3 cup granulated sugar
  • 2 tablespoons honey
  • 1 vanilla bean, optional
  • 1 teaspoon vanilla extract
  • 4 tablespoons of mixed berry jam

Instructions

  1. Make the cornstarch slurry- Place a 1/4 cup of the milk and cornstarch in a small bowl and whisk until the cornstarch is fully dissolved. 
  2. Smooth out the cream cheese - Place the cream cheese and 1/4 cup of the milk in another small bowl and whisk until smooth then, whisk in the salt. 

  3. Simmer the milk - Place the remaining 1 3/4 cups milk, sugar, cream along with the honey in a medium saucepan and whisk to combine. (If you are using a vanilla bean) Lay the vanilla bean flat on a cutting board and slit it open lengthwise. Use the tip of the knife to scrape all the vanilla beans into the saucepan, then toss in the whole vanilla bean pod. 
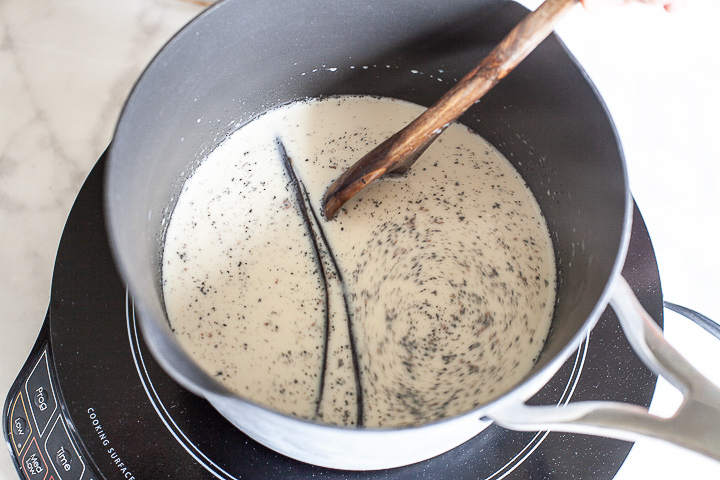
Bring to a simmer over medium heat, whisking frequently. Reduce the heat and simmer for 4 minutes. Remove from the heat. 

  4. Thicken the ice cream base -  Whisk about 1/2 cup of the hot milk mixture into the cornstarch slurry. 
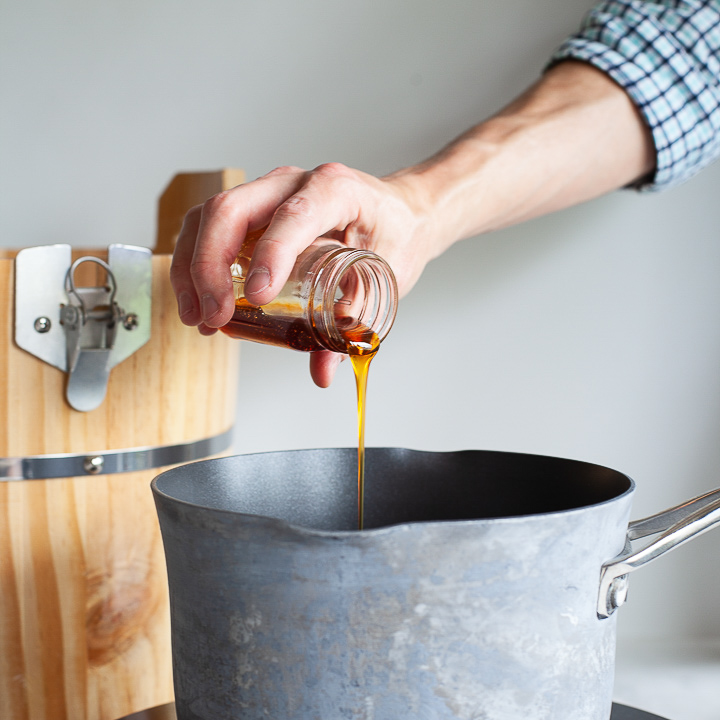
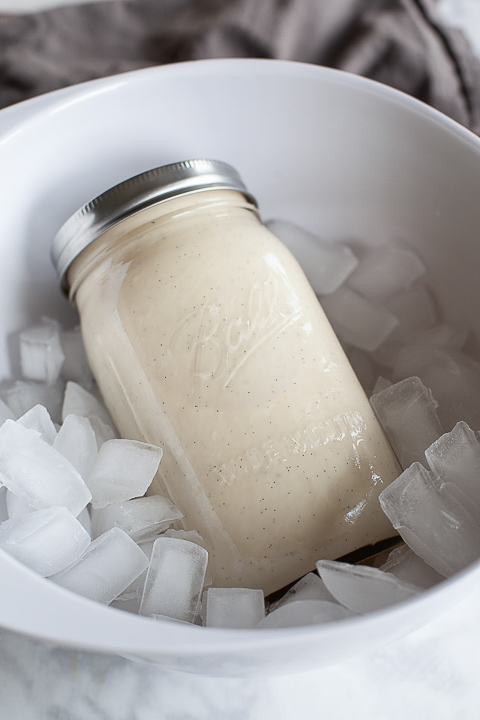
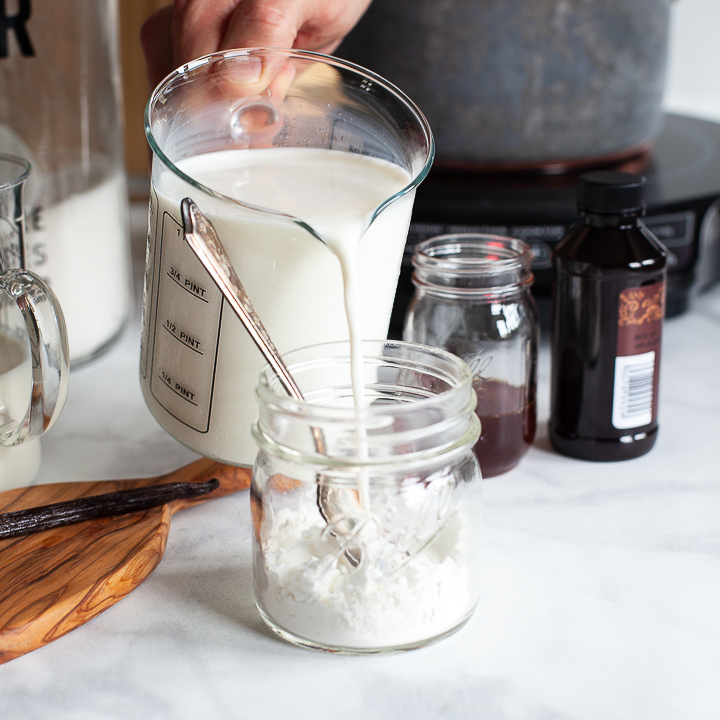
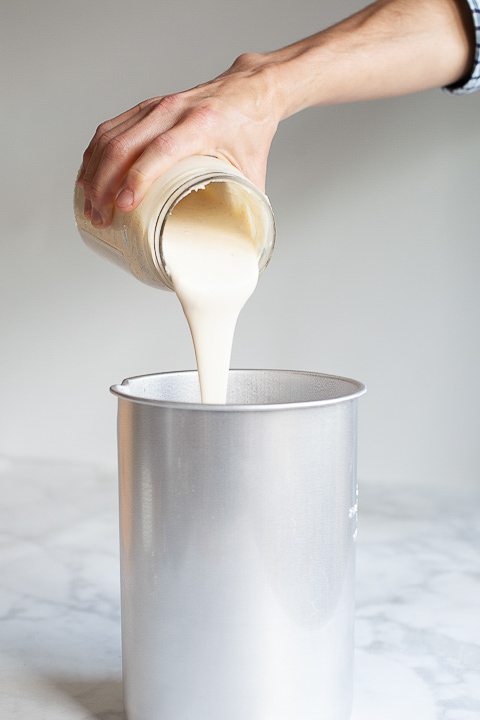
Slowly pour this back into the hot milk, whisking constantly. Return to the medium heat and cook, whisking frequently, until it comes to a boil. 
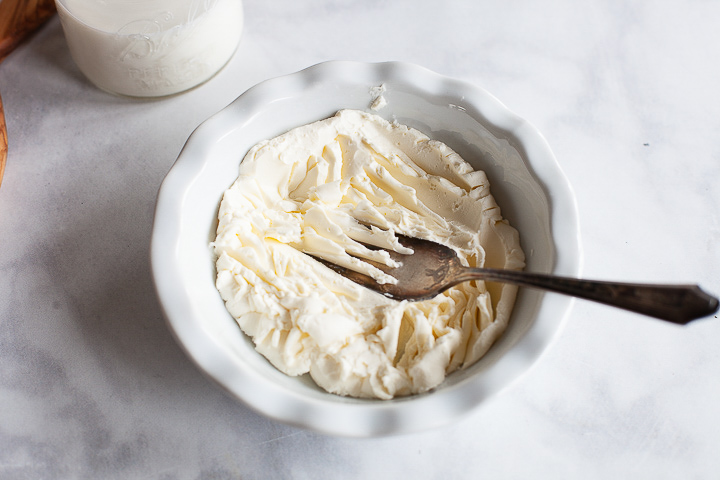
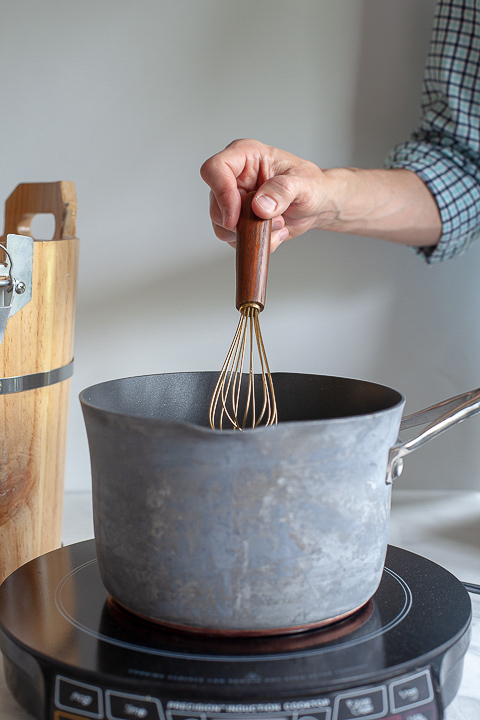
Boil for 1 minute, then remove from the heat. Whisk in the cream cheese mixture. Remove the vanilla bean husk. Whisk in the vanilla extract.  

  5. Chill the ice cream base - Chill this ice cream base for at least 4 hours or overnight in the refrigerator. If you are in a hurry, you can also pour your ice cream mix into a quart jar and submerge it in an ice water bath. (Remove the lid of the jar being careful to not get any water into the jar.) Stir every few minutes until the ice cream base is nice and chilled. This will cool your base very fast and very thoroughly.  Quickly chill your ice cream base in a @ballcanning quart jar in a ice bath - whipperberry

  6. Churn the ice cream base - The goal of churning the ice cream is to freeze the base while stirring the ice cream constantly so that large ice crystals don't form in the ice cream. You will need to follow the instructions for your ice cream maker for this step.  

  7. 10. Stir in mixed berry jam - No matter what kind of ice cream maker you use, the freshly churned ice cream will still be very soft and even runny after it has been churned. 

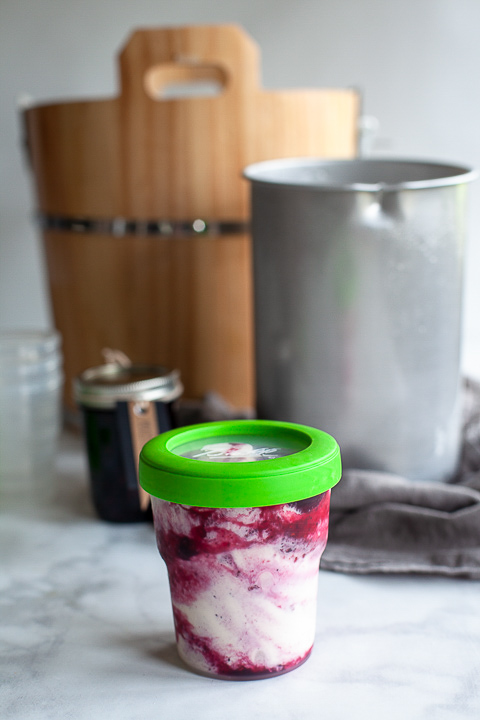
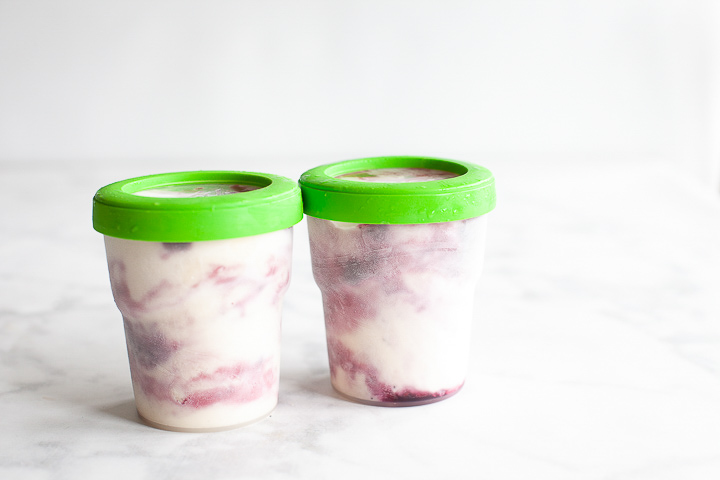
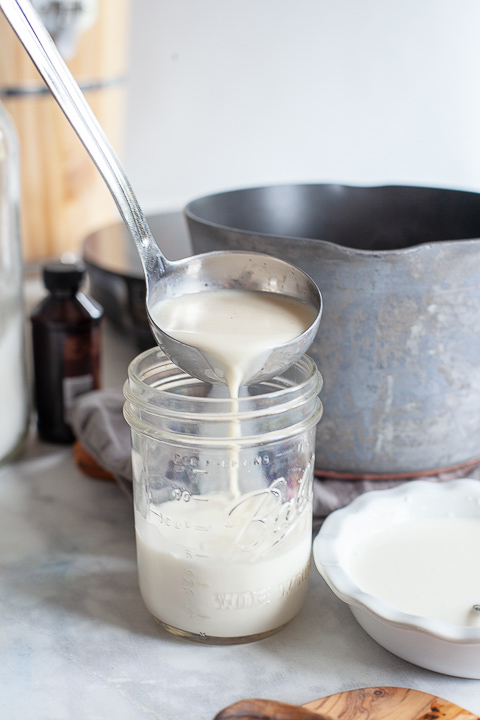
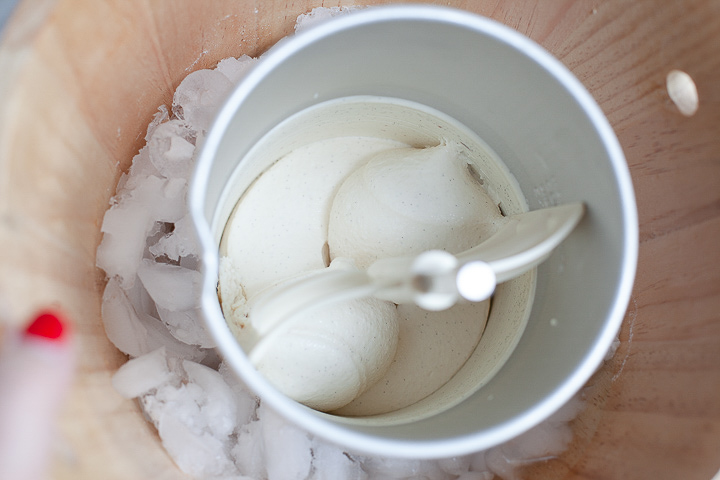
    Adding the jam is best done AFTER you have finished with the ice cream maker. I actually borrowed a trick from Starbucks and swirled the jam onto the inside of the plastic jar before I even put the ice cream in the jar.  Then, I filled the plastic jar half way and put a spoonful of jam on the top. I filled the plastic jar the rest of the way, leaving about 3/4 of an inch at the top of the jar to allow for expansion. Then I added another spoonful of jam. Then I took a knife and gently stirred the ice cream in ONE figure eight pattern. You want this ice cream to be swirled not totally stirred in. 

  8. Harden the ice cream in the freezer -  In order to get that scoopable texture, and to let the flavors bloom, it's best to freeze the ice cream for at least a few hours before eating.  EASY Homemade Mixed Berry Swirl Ice Cream Recipe • WhipperBerry

Notes

Storage -  The ice cream can be stored in the freezer for up to 2 months. Keep the plastic wrap or waxed paper pressed against the surface at all times to keep ice crystals from forming.

Serving - This ice cream is best served after it has been out of the freezer for a few minutes and had some time to thaw a little bit. I like to serve it in the NEW Ball® Stars and Stripes Keepsake Jars. I layer the ice cream with fresh berries and then top it all off with some fun cookies.

You can even send them home with your friends or give as a quick gift for a neighbor in these great jars.

Courses Dessert


Disclosure +  I am a paid partner for Newell Brands, makers of Ball® Fresh Preserving Products. However, all thoughts and opinions expressed are entirely my own. 


SaveSave

SaveSave

SaveSaveSaveSave

SaveSave

SaveSaveSaveSave

SaveSave

SaveSave

SaveSave

Fruity Breakfast Pizza PLUS more great Morning Hacks to Make Life Easier

7 · Jul 18, 2016 · 1 Comment

+ This Breakfast Pizza Post brought to you by Jif® Peanut Butter +

Jif-Peanut-Butter-Fruity-Breakfast-Hacks-by-WhipperBerry-3

Let’s face it… Mornings can be ROUGH! But, they don’t have to be.

I know that we are mid-summer at the moment, but I’m already starting to dread back-to-school. My kiddos start in early August, so we really only have a few more precious weeks of summer left.

Now is the time to perfect our morning routine so that as we transition back into school mode, we already have a good habit to start the year off right. We sat down and pow-wow’d and came up with some great breakfast ideas and some morning hack ideas that we think will help our family have fabulous mornings and maybe your family as well!

Morning Hack #1 Plan Ahead

Nothing tanks a day faster than not having a plan. We have found that a little planning ahead of time makes for smoother mornings. Happier kiddos and definitely a happier Mom. Plan outfits, pack backpacks & make lunches the night before.

 You can even make your power packed breakfast the night before with my Overnight Protein Power Oatmeal recipe!

Jif-Peanut-Butter-Fruity-Overnight-Oatmeal-from-WhipperBerry-13

 Click the photo above to grab the full recipe.

Morning Hack #2 Keep a Well Stocked Pantry & Fridge

Jif-Peanut-Butter-Fruity-Breakfast-Hacks-by-WhipperBerry-1

One of the keys to happy mornings at our house is having a well stocked pantry and fridge. Now that doesn’t mean we have an over abundance of food that goes to waste. We’ve figured out some key staples that can make several different recipes with just a few key ingredients.  All of the recipes I’m sharing today have been developed with the basic ingredients above.

Fruit, nuts, flat bread, rolled oats, milk, honey, cottage cheese, yogurt and Jif® Flavored Peanut Butter Spreads in Maple & Cinnamon. That’s it! With just those ingredients my kiddos and I can make several different types of breakfasts that they all love like our fruit pizza that my little guy adores!

Jif-Peanut-Butter-and-fruit-Pizza-from-WhipperBerry-5

 Fruit Breakfast Pizza Recipe

Fruity Breakfast Pizza PLUS more great Breakfast Hacks
 
Save Print
Prep time
5 mins
Cook time
2 mins
Total time
7 mins
 
This easy and nutritious meal is great for the kiddos in the morning. They can even design their very own.
Author: Heather // WhipperBerry
Cuisine: breakfast
Serves: 1-2
Ingredients
  • Flat bread
  • 1-2 tablespoons of Jif® Cinnamon Flavored Peanut Butter Spread
  • Fruit - You select your family's favorite fruit
  • Honey drizzle - optional
Instructions
  1. Toast your flat bread to crisp it up a bit.
  2. Spread a generous layer of the Jif® Cinnamon Flavored Peanut Butter Spread onto the flat bread.
  3. Layer your favorite fruit on top of the peanut butter.
  4. Drizzle with honey and ENJOY!
3.4.3177

Morning Hack #3 Be Flexible

Now, I know that my first suggestion is to plan ahead BUT… What if your pre-schooler wants ice cream for breakfast and won’t take no for an answer? Or your middle schooler refuses to go to school without the right kind of hair spray (yep, I did that to my Mom once. 1st day of 7th grade. I had run out of Aqua Net. Stellar Middle School moment! Sorry Mom!) Pre-schoolers, middle schoolers… Really all kiddos are classic for this, trust me, I know the pain!

The key here is to be flexible. Learn how to go with the flow… Your pre-schooler wants ice cream for breakfast? Make them a smoothie bowl and they won’t know what hit them!

Jif-Peanut-Butter-Fruity-Breakfast-Hacks-by-WhipperBerry-4

 Click the photo above for the Peanut Butter and Fruit Smoothie Bowl Recipe

Morning Hack #4 Take Time to Slow Down

Even during the summer things can be really hectic in the morning. Chores, playdates, swim lessons you name it… Mornings can typically be a rush. On the mornings that aren’t a rush, TAKE TIME TO SLOW DOWN. Saturday or Sundays can be perfect for this. Take time to slow down and make something that is extra special for the family. Take the time to sit and giggle together, get to know each other better. These are the mornings that we want to remember for years to come!

When we take the time to slow down, our family loves to eat pancakes. I’m not always jazzed about the lack of nutrition in traditional pancakes so I’ve upped my game and made some gluten-free, protein packed pancakes that my family loves!

Jif-Peanut-Butter-Oat-and-Cottage-Cheese-Pancakes-by-WhipperBerry-1-4

Click on the photo above for the recipe.

Bottom line is, you want to have smooth mornings with your family and you want them to have nutritious meals that fuel them for the day. With a little prep work you can achieve just that and EVERYONE will be healthy & happy!! Invite Jif® Flavored Peanut Butter Spreads to breakfast and you’ll be a ROCK STAR!!

Jif-Peanut-Butter-Fruity-Breakfast-Hacks-by-WhipperBerry-2

 Disclaimer // This post is sponsored by Jif® I received product samples for review purposes. Opinions are my own.

Peaches and Cream Dairy-Free Popsicles

1 · Aug 25, 2014 ·

Our family has a healthy obsession with peaches. We will take them in any form fresh right off the tree, canned, baked even frozen! This summer has been the year of the peach. My husband has been buying them by the case load and we have been madly canning them in hopes of prolonging the season. The other day I thought it would be fun to take some of our canned peaches and make them into tasty peaches and cream dairy-free popsicles…

Dairy-Free-Peaches-and-Cream-Popsicles-1

I love finding ways to take those flavors I love, and make them a little healthier for my family. I have several friends who are all dairy-free and I thought that I would make these tasty treats so that they can enjoy this flavor combination as well.

I used Silk Vanilla Soy Milk for the cream part of my peaches and cream concoction. With the Silk Soy Protein I know that my family is getting some nutritional value even when they are feasting on popsicles rather than just empty calories like most. Check out these amazing benefits of Silk Vanilla Soy Milk…

• 6 grams of heart-healthy soy protein2

• 50% more calcium than dairy milk1

• 100% cholesterol-free

• Low in saturated fat

• Free of dairy, lactose, gluten, casein, egg and MSG

• Verified by the Non-GMO Project’s product verification program

• No artificial colors, flavors or funny business

Dairy-Free-Peaches-and-Cream-Popsicles-4

Pair all that plant protien goodness with these super easy to make pops and you are a WINNER! Here’s how you make them.

Peaches and Cream Dairy-Free Popsicles

1 3/4 cups Silk Vanilla Soy Milk

1 diced canned peach

1/4 cup canned peach juice

1/2 packet of dried vanilla pudding mix

In a medium bowl, combine Silk Vanilla Soy Milk, peach juice and pudding mix. Whisk and set aside. Dice peach into bite sized pieces and add to the popsicle base. Pour base into popsicles molds and place in freezer for at least 4 hours. Carefully remove from mold and enjoy!!

Looking for more inspiration? Come visit Silk and sign-up to become a member of the Silk Community…

Screen-Shot-2014-08-25-at-10.19.30-AM

You can also follow along with all the Silk news on their Facebook page!!

1 Silk Vanilla Soymilk: 45% DV of calcium vs. 30% DV in 2% dairy milk. USDA National Nutrient Database for Standard Reference, Release 26. Data consistent with typical 2% dairy milk.

2 In a diet low in saturated fat and cholesterol, 25 grams of soy protein per day may reduce the risk of heart disease. A serving of Silk Vanilla Soymilk has 6.25 grams.

This conversation is sponsored by Silk. The opinions and text are all mine.

  • Go to page 1
  • Go to page 2
  • Go to page 3
  • Go to page 4
  • Go to Next Page »

Primary Sidebar

Heather from Whipperberry
Hello... my name is Heather and I'm the creator of WhipperBerry a creative lifestyle blog packed full of great recipes and creative ideas for your home and family. I find I am happiest when I'm living a creative life and I love to share what I've been up to along the way... Come explore, my hope is that you'll leave inspired!

Footer

  • Privacy Policy

Copyright © 2023 · Seasoned Pro