• Skip to primary navigation
  • Skip to main content
  • Skip to primary sidebar
  • Skip to footer

Whipperberry

WhipperBerry • Your Home For Creative Inspiration

  • Home
  • Recipes
    • Starters
    • Easy Weeknight Dinners
    • Main Dish
    • Salads
    • Side Dish
    • Soups & Stews
    • Desserts
    • Breakfast
    • Miscellaneous
  • Tutorials
    • Creative Crafts
    • DIY Decor
    • Fabric Crafts
    • Food How-To
    • Jewlery
    • Paint Projects
    • Paper Art
    • Party Styling
    • Photography and Graphic Design
    • Silhouette
  • Holidays
    • Easter
    • Mother’s Day
    • Father’s Day
    • 4th of July
    • Halloween
    • Thanksgiving
    • Christmas
    • Valentine’s Day
  • Gift Ideas
    • Gifts For Everyone
    • Gifts for Dad
    • Mother’s day
    • For The Girls
    • For The Kids
    • Teacher Gift Ideas
    • Christmas
  • Printables
    • Holiday
    • Gift Idea
    • LDS Primary
  • Travel
  • About
    • Terms
  • Contact
  • Nav Social Menu

    • Facebook
    • Instagram
    • Pinterest
    • RSS
    • Twitter

Recipes

Spice Cookies with Holiday Nog Glaze Recipe

6 · Dec 3, 2014 ·

+ This Spice Cookie with Holiday Nog Glaze post is brought to you by the folks at Silk +

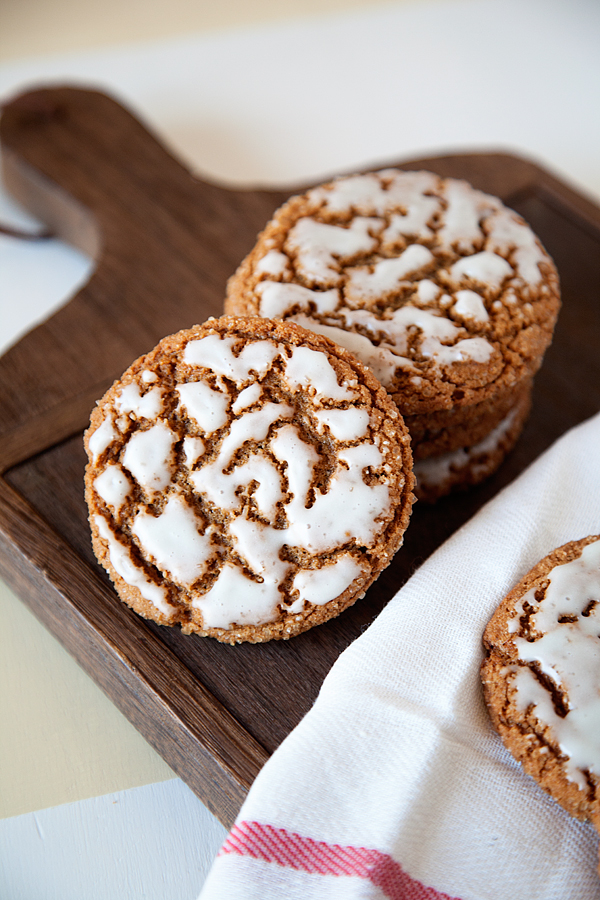
There is nothing better to usher in the Holiday season than a good batch of Spice Cookies! My kiddos and I think that they are truly Christmas on a plate for sure…

Spice-Cookies-with-Holiday-Nog-Glaze-3

There is just something special about a soft chewy cookie that is packed full of the spices of the season… Cinnamon, nutmeg, cloves, ginger, molasses & a new addition cardamom, YUM!

This is a cookie that truly stands the test of time. People have been making spice cookies for hundreds of years and it’s a fun tradition at our house. This year I decided to add a little flair with a Holiday Nog Glaze…

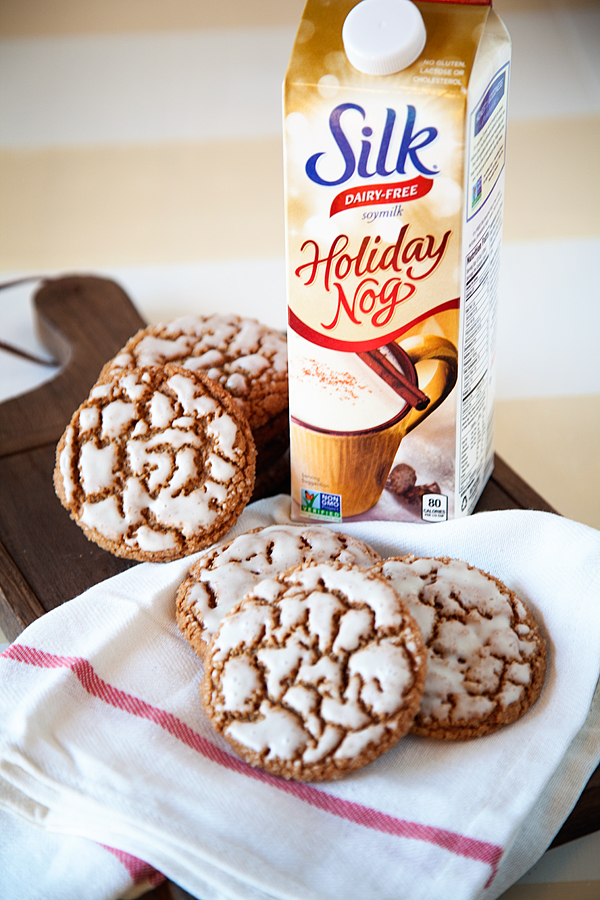
Spice-Cookies-with-Holiday-Nog-Glaze-4

Yep, you got it… It adds a whole lotta love to those scrumptious cookies. I chose Silk Holiday Nog over traditional Egg Nog for a few reasons…

​First, I LOVE IT!! Seriously, have you tried this stuff? It’s all of the flavors of the season without all the guilt! I don’t think I will ever drink traditional Egg Nog ever again.

Second, It’s a great dairy-free alternative for our dairy-sensitive friends! Plus, here are the other goodies about Silk Holiday Nog…

Absolutely no cholesterol or saturated fat

Free of dairy, lactose, gluten, casein, egg and MSG

Verified by the Non-GMO Project’s product verification program

No artificial colors, flavors or funny business

Yea… it’s a NOG that I can truly get behind.

Third… As a Silk Member, you can enter to win a $500 Spa Gift Card!

Yes, we all know we could use one of those babies after the mad rush of the Holidays! You too can become a member HERE. They have new giveaways every month along with fabulous coupons for their members! SCORE!!

Now on to the cookies… Here’s how to make these scrumptious, Christmas on a plate, Spice Cookies with Holiday Nog Glaze.

Silk Cookies with Holiday Nog Glaze Recipe

Preheat oven to 350Ëš

​3 sticks of butter (1 1/2 cups) softened

1 cup white sugar

1 cup brown sugar

2 eggs

1 egg yolk

1/2 cup molasses

4 1/2 cups all-purpose flour

4 teaspoons ground ginger

1/2 teaspoon cinnamon

1/2 teaspoon ground cardamom

1/4 nutmeg

1 teaspoon ground cloves

1/4 teaspoon salt

2 teaspoons baking soda

1 cup of course sugar

1/4 cup Silk Holiday Nog

3 cups powdered sugar

1/4 teaspoon salt

Cream butter & sugars with an electric mixer until light and fluffy. Add eggs, egg yolk and molasses.

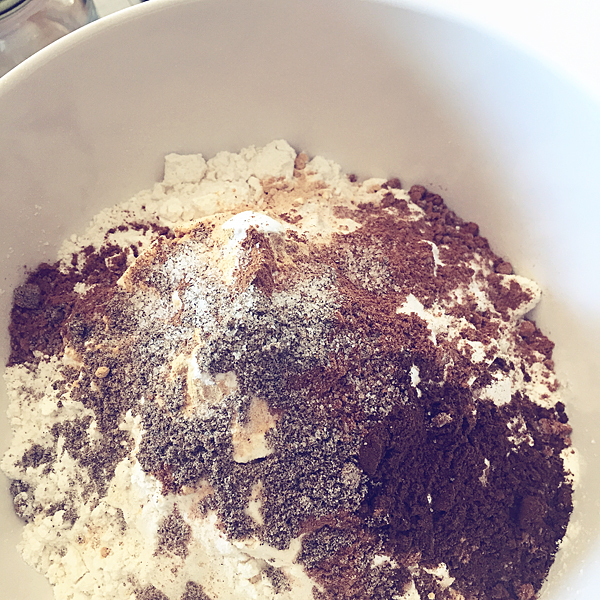
In a large bowl, combine your spices and dry ingredients; flour, salt, baking soda and all of the spices…

spices

Aren’t they pretty?!

Gradually add the dry ingredients into the creamed sugar mixture until fully incorporated.

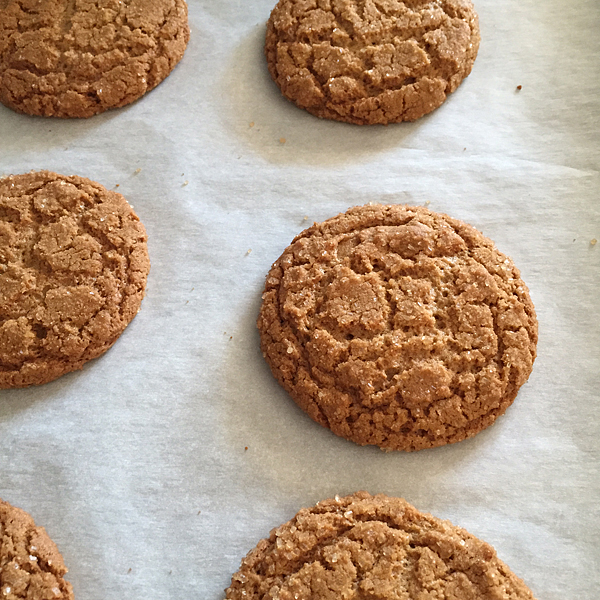
Place dough in the refrigerator for 30 minutes. Remove the dough and scoop the dough into 2 inch balls with a cookie scoop. Roll the cookie balls in a bowl with the course sugar. Place on a parchment lined baking sheet and place in a 350Ëš oven for 13-14 minutes. Remove from oven and let cool.

spice-cookies

Mix Holiday Nog glaze while cookies are cooling. Add the powdered sugar to a small bowl, add salt and Silk Holiday Nog and whisk until it turns into a thick glaze.

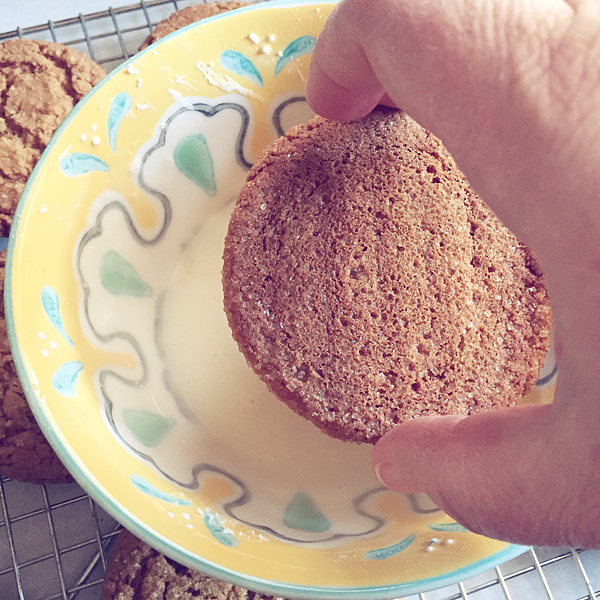
Once the cookies are cool, dip the top part of the cookie into the glaze. Be careful to not fully submerge.

Holiday-Nog-Glaze

You only want to lightly kiss the top of the cookie with the glaze. Place on a cooling rack and wait for the glaze to set.

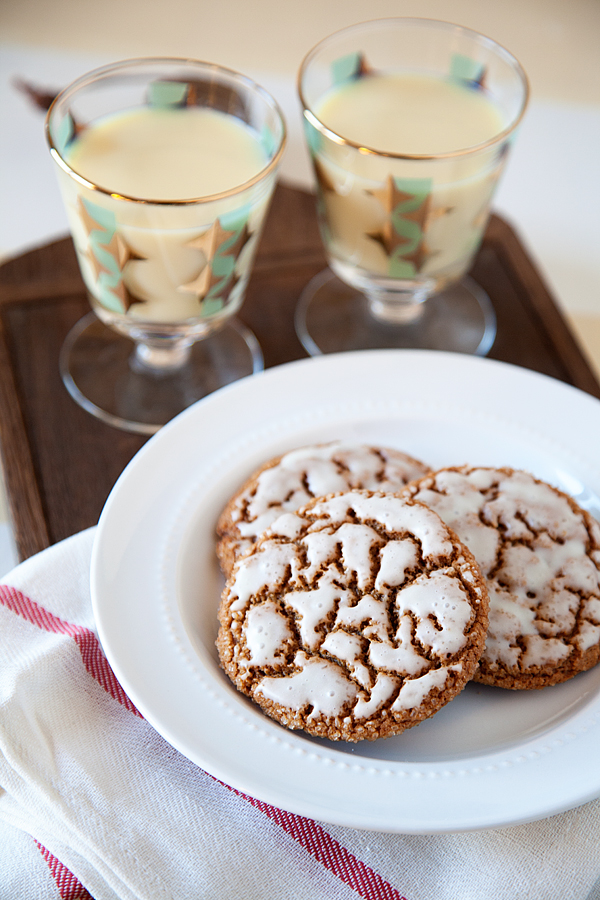
Once the glaze is set, serve your cookies with a nice glass of Silk Holiday Nog!

Spice-Cookies-with-Holiday-Nog-Glaze-2

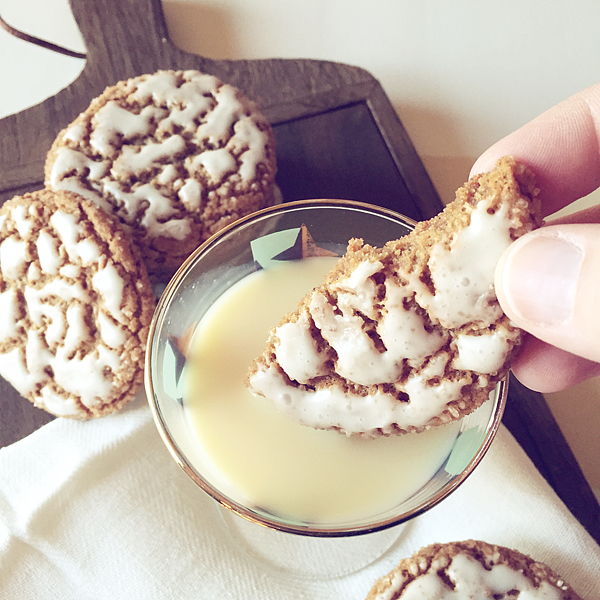
They taste great dunked into the nog as well… just sayin’

dipping-your-spice-cookies-in-your-Silk-Holiday-Nog

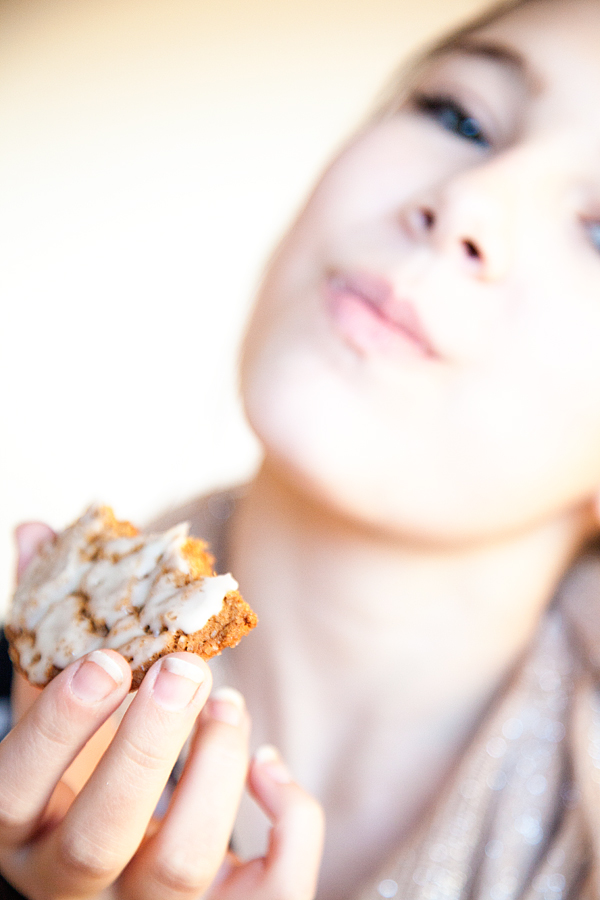
Hannah and I thoroughly enjoyed them…

Spice-Cookies-with-Holiday-Nog-Glaze-5

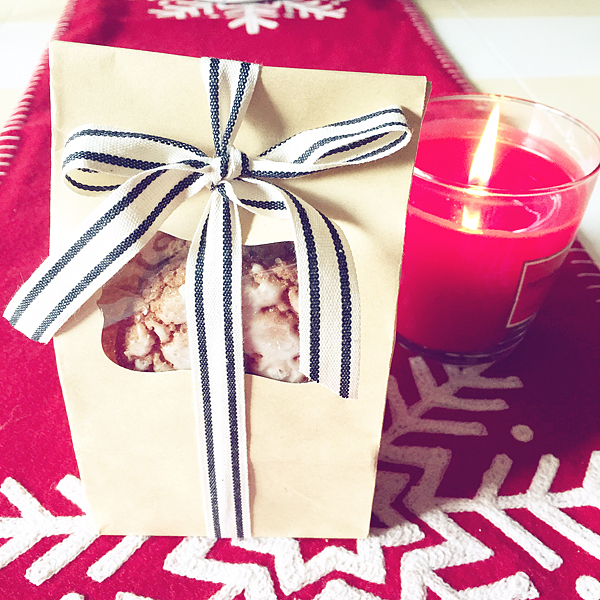
The also make perfect Holiday neighbor gifts! Bag up a few of these bad boys and share with your family and friends. I would even pair it with a carton of silk, they’ll thank you for it!

spice-cookie-neighbor-gift

This conversation is sponsored by Silk. The opinions and text are all mine.

Christmas Snowball Fight Edible Centerpieces + Loads of GIVEAWAYS

4 · Nov 29, 2014 · 54 Comments

+ This Christmas Snowball Fight Edible Centerpieces post brought to you by Hostess  #HostessHoliday +

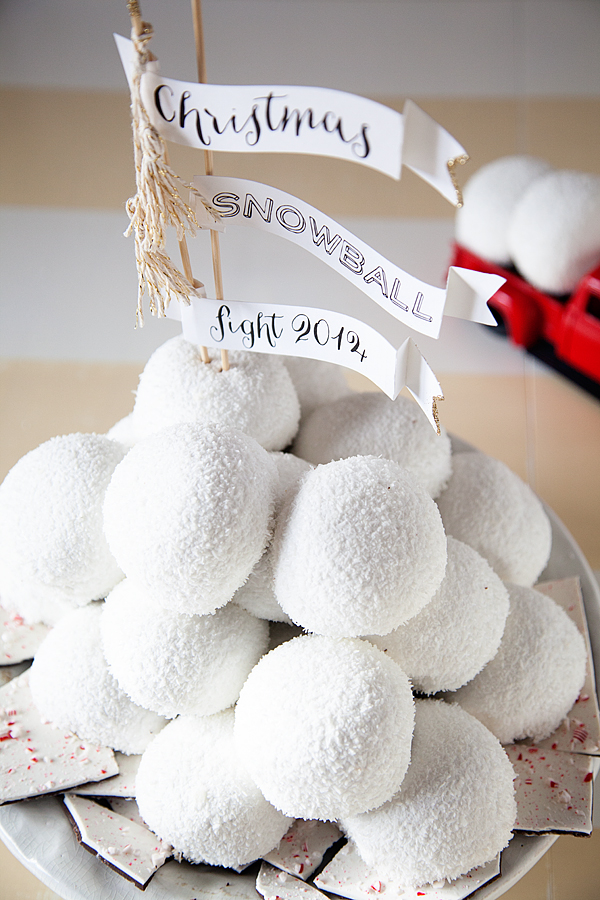
Who’s up for a SNOWBALL FIGHT?!

Hostess-Christmas-Snowball-Fight-2014-5

I’m talking the tastiest snowball fight around….

We’re starting a new tradition here in the WhipperBerry house, we are going to have indoor, scrumptious snowball fights each Christmas.

As a kid I LOVED the snow, I still do, I just don’t love the cold very much.

I have magical Christmas memories of playing out in the snow for hours, building snow caves out of the drifts along our house. Snuggling in to making scores of snowballs in my cave, getting ready for the battle to come. The battle was never as epic as I had planned for, but I was prepared for darn sure!

This year I’m preparing in a much sweeter & easier way…

Hostess-Christmas-Snowball-Fight-2014-16

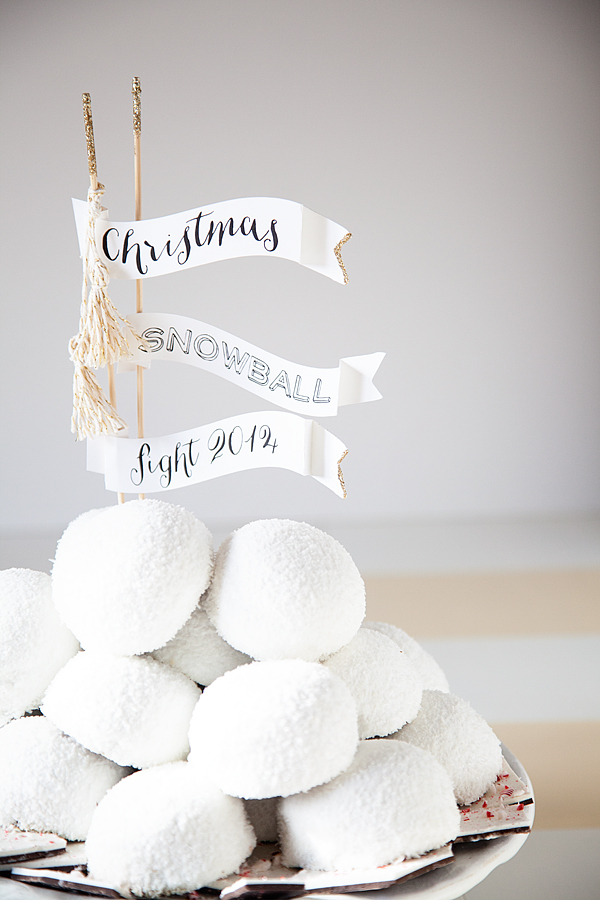
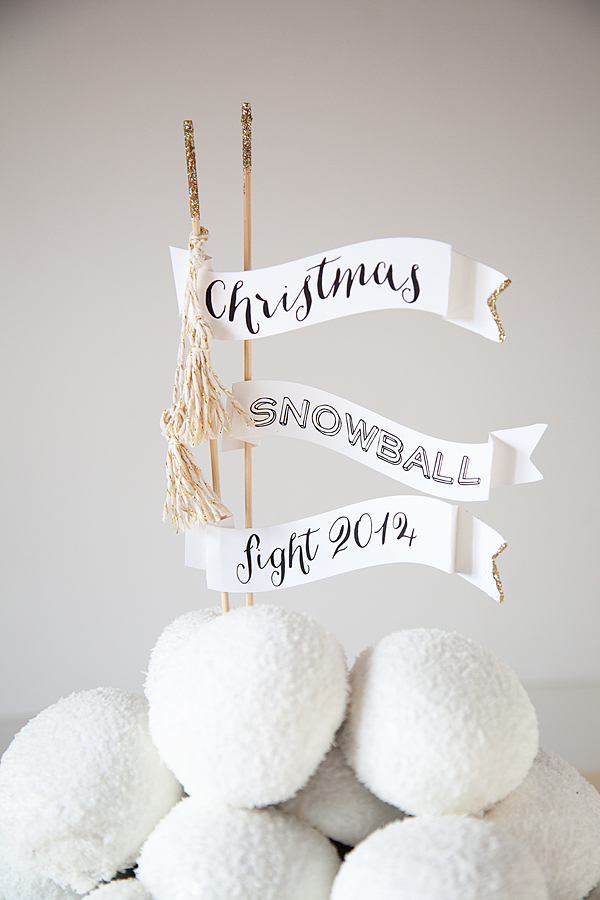
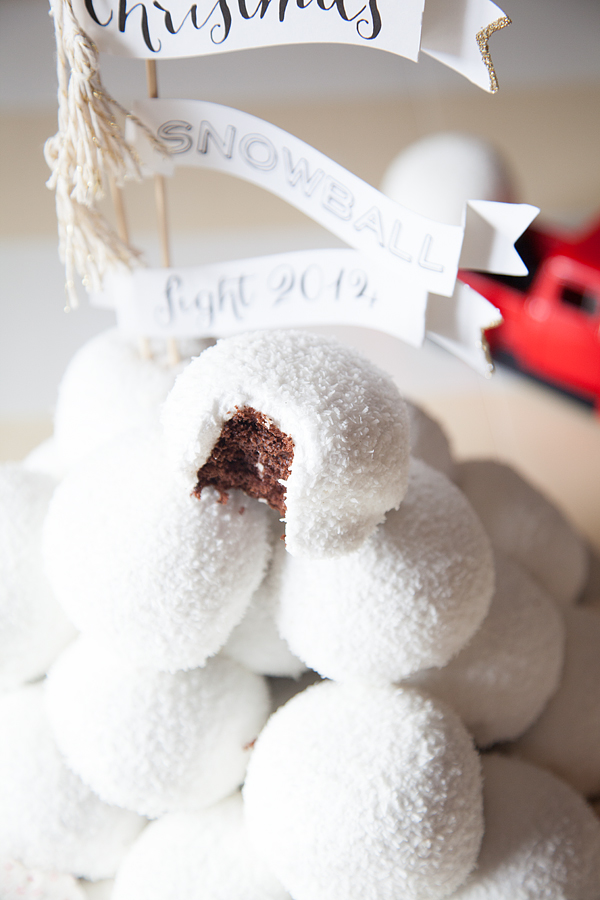
How fun is this edible centerpiece that you can simply create with some Hostess Sno Balls®, some peppermint bark and a fun banner?!

We run around like crazy during the Holidays,working tirelessly to create magical memories for our families and friends. Why not let Hostess do a little heavy lifting?!

The folks at Hostess not only want to make your Holidays tasty, they want to sweeten the deal with a Pin to Win Hostess Holiday Sweepstakes!

hostess_bloggerimage

Wouldn’t it be cool if Hostess helped not only with some sweet treats, but helped pay for Christmas as well?! I’ll fill you in on all the details on how to win $1000 at the end of the post… First, let’s talk snowball fight!

Christmas Snowball Fight Edible Centerpieces

This is the easiest centerpiece you’ll ever make, not to mention the fact… Your kiddos will LOVE it, it’s magical and white so it will match any decor! I went to Walmart and stocked up on four boxes of Hostess Sno Balls®. That’s 24 Sno Balls® to make your epic fight!

Hostess-Christmas-Snowball-Fight-2014-12

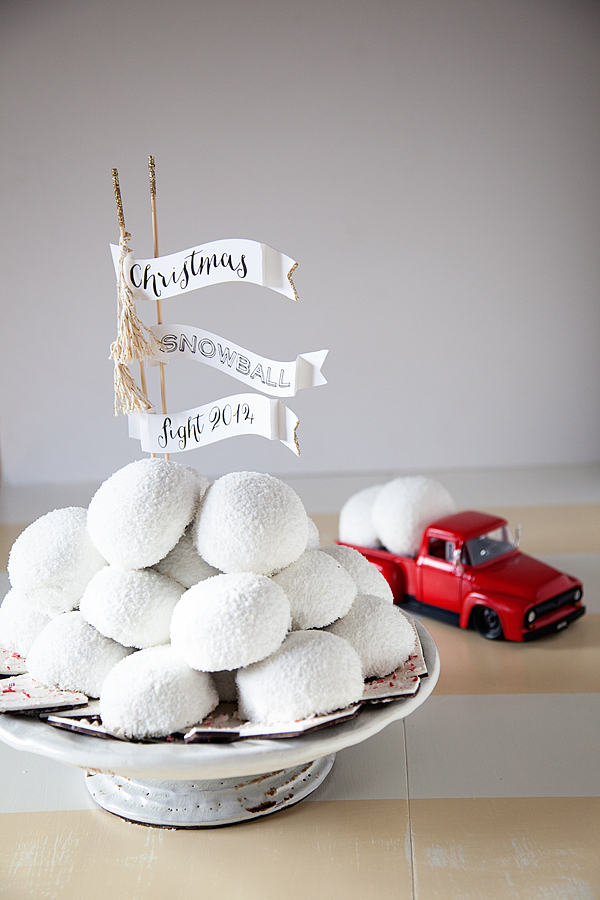
First, on a cake plate, layer some peppermint bark. This step is optional, if you can’t find peppermint bark you can leave this step out.

Next, pile your Sno Balls® as high as they will go.

Hostess-Christmas-Snowball-Fight-2014-16

If you have a fun little red truck, you can add that in if you would like for a pop of whimsy and color. I found my truck at Target.

Now, all you have to do is make your Christmas Snowball Fight 2014 banner.

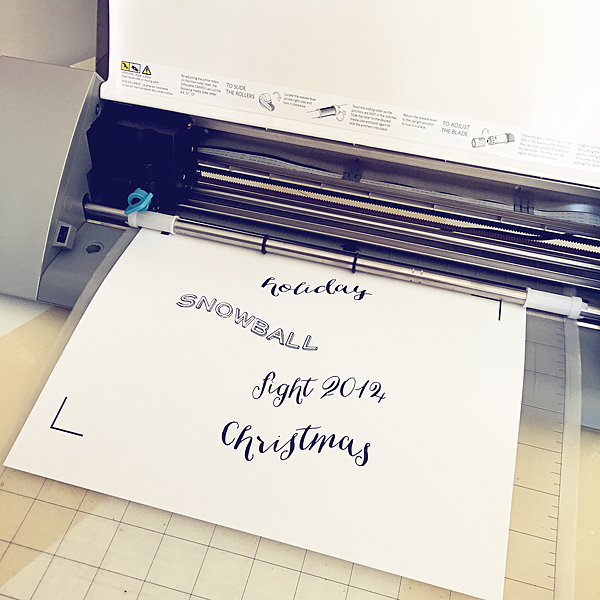
If you have a Silhouette it’s super simple, as a matter of fact… HERE are my Silhouette files for you to download and use!

All you have to do is print them from your computer…

upload-files-into-silhouette-software

and cut them on your Silhouette cutting machine…

cut-banners-with-silhouette-camea

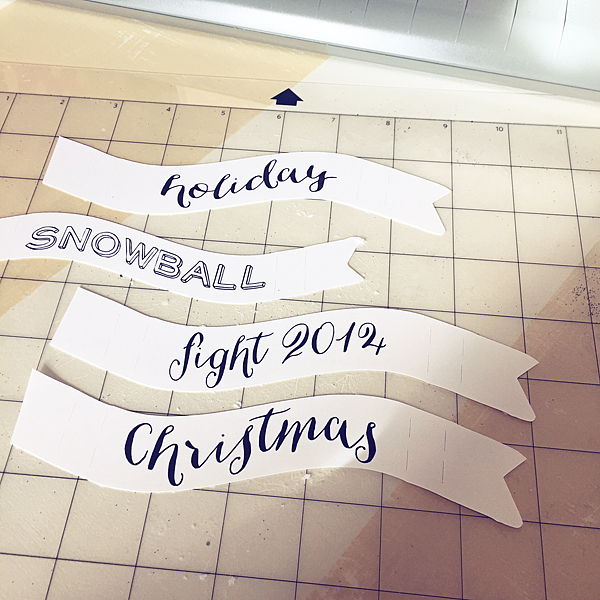
Once you cut them out…

cut-snowball-fight-banners-with-Silhouette-cutting-machine

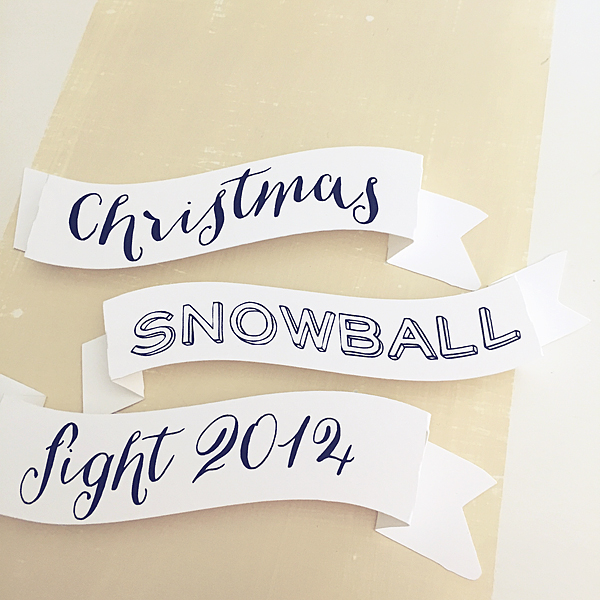
bend them along the perforated lines and that is how you get that fun 3D effect.

prepare-banners

Using some glue dots, glue them onto some bamboo skewers that you can find in the kitchen section at the market. I dipped the top of my skewers in plain old glue and added some gold glitter first. I also added some glitter to the edge of a couple of the banners.

Hostess-Christmas-Snowball-Fight-2014-1

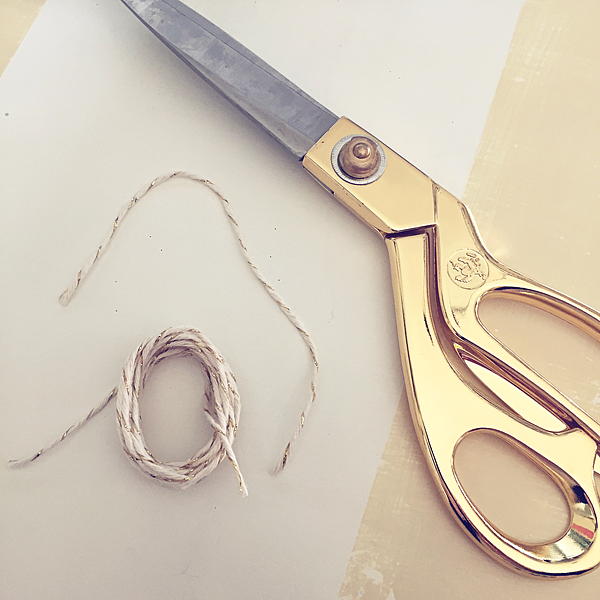
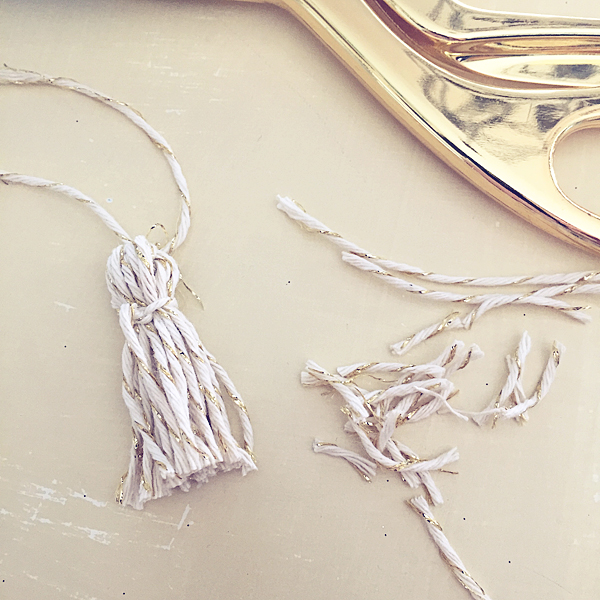
The tassels are made out of gold baker’s twine. They are simple to make…

wind-bakers-twine-around-three-fingers

Wrap some of the twine around three fingers  about 8 times.

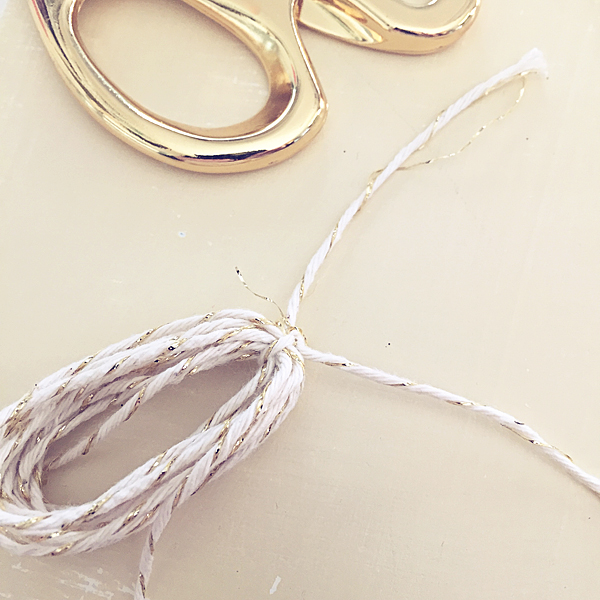
tie-off-the-top-of-the-tassle

Using another piece of twine roughly 6 inches long. Tie the top of the wrapped twine.

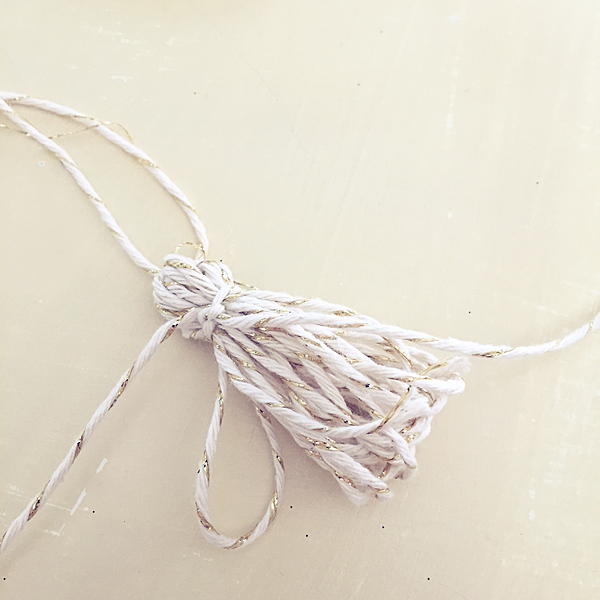
how-to-make-a-tassle

Then using another small piece of twine roughly 4 inches long, tie around the top of the tassel.

bakers-twine-tassle

Then trim the bottom of the tassel and voilà, you have a simple tassel to add to your banners!

Hostess-Christmas-Snowball-Fight-2014-17

How fun is that edible centerpiece?! It really takes minutes to make and it adds a fun, whimsical flair to your holiday table.

Pin to Win Hostess Holiday Sweepstakes

Who wants a go at $100o this Holiday Season? There’s even more…

Here is what you have a chance to win!

Grand Prize: One random winner will receive a $1,000 Walmart gift card and Hostess products.

First Prize: One random winner will receive a $500 Walmart gift card and Hostess products.

Second Prize: One random winner will receive a $250 Walmart gift card and Hostess product.

All you have to do is visit the Pin to Win Hostess Holiday Sweepstakes HERE to enter!

BONUS $100 GIVEAWAY

Want another way to win?

For a chance to win $100 Walmart gift card GIVEAWAY… follow the steps in the Rafflecopter widget below.

a Rafflecopter giveaway

For more holiday inspiration, follow Hostess on Pinterest, Twitter, Instagram or on Facebook…

Disclaimer // This blog post is part of a paid SocialMoms and Hostess blogging program. The opinions and ideas expressed here are my own.


Thanksgiving Pie Stencils

5 · Nov 25, 2014 · 3 Comments

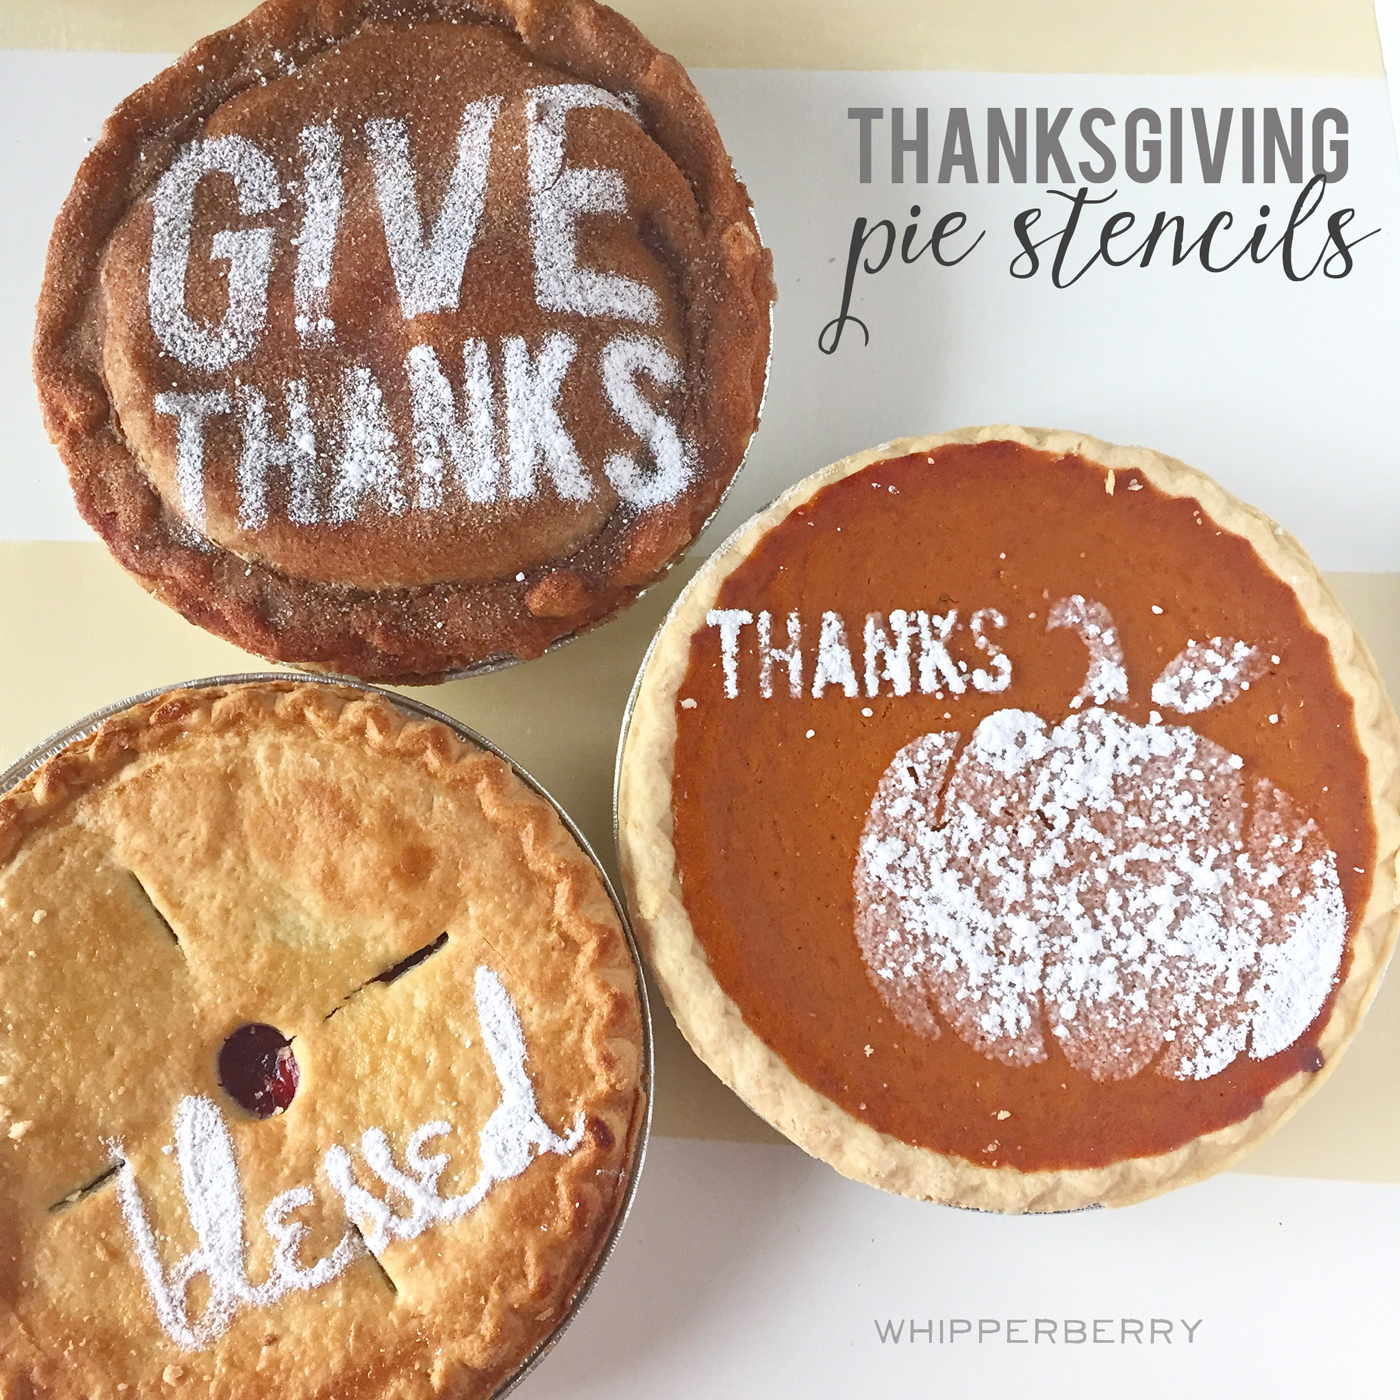
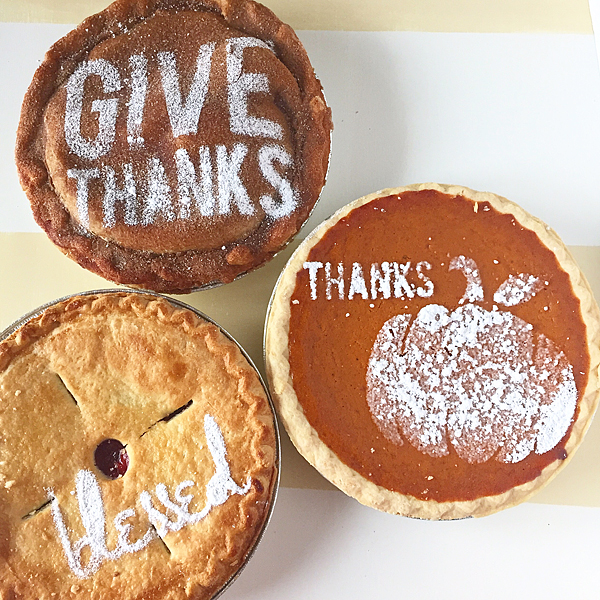
When it comes to Thanksgiving… I’m the pie girl. I LOVE making pie. I even have the PERFECT pie crust recipe.  However, I do understand that pies can sometimes be intimidating. Whether you’re baking your own pies or bringing store bought pies to your Thanksgiving celebration… I have a fun little way to add a little more bling to your pies… Have you ever thought to stencil your pies?

thanksgiving-pie-stencils-from-whipperberry

I thought I would experiment with ways to make you look like a rockstar when you serve your pies, homemade or store bought!

First step… If you are bringing a store bought pie, put your pie in a pie plate if you have one. That will mask the store bought pie tin.

If you don’t have that… No worries.

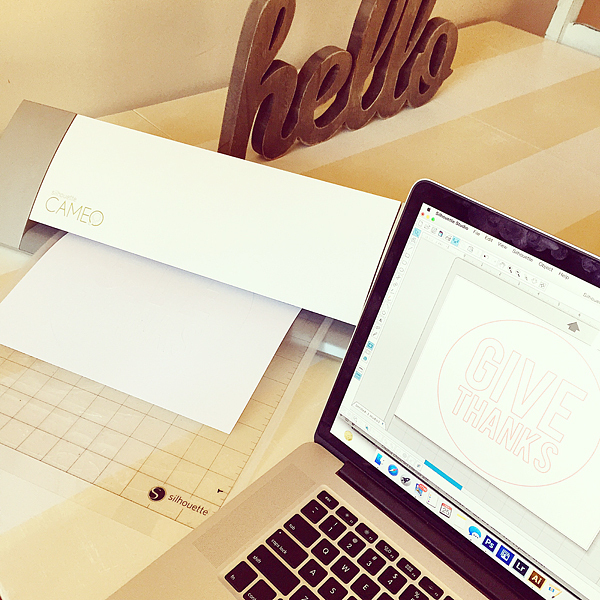
Bust out your Silhouette CAMEO or Portrait. (I’m giving away TWO Silhouette Portraits this week!) I have created some fun Thanksgiving pie stencils that are super easy to cut and dress-up your pies with.

Download the Thanksgiving Pie Stencils Silhouette Files HERE

Making-Pie-Stencils-with-a-Silhouette-CAMEO

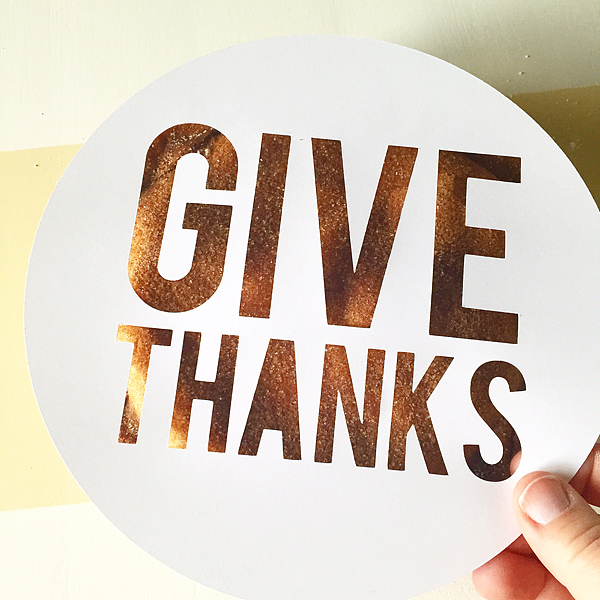
Cut your stencils out of just basic 8 1/2 x 11  card stock.

Once they are cut, set them aside until you are ready to serve your pies. When you are ready to serve them place your stencil right onto of the pie.

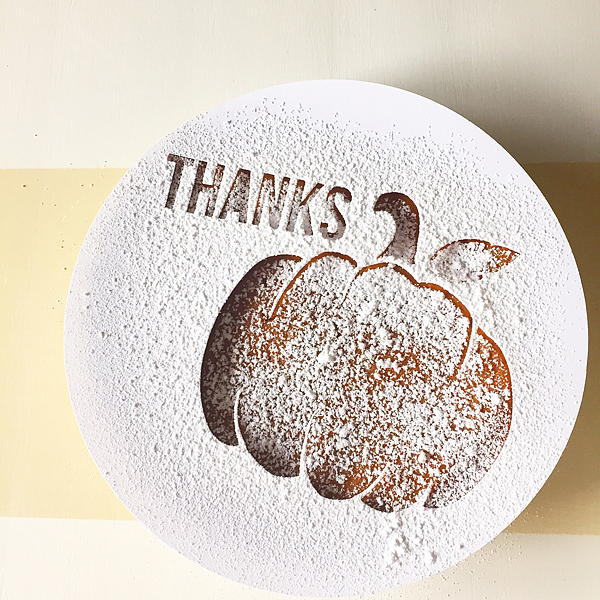
Thanks-pie-stencil-with-Silhouette

Put some powdered sugar into a mesh strainer and gently tap the mesh strainer with a spoon and dust the top of the pie.

WhipperBerry-Thanks-Pie-Stencil

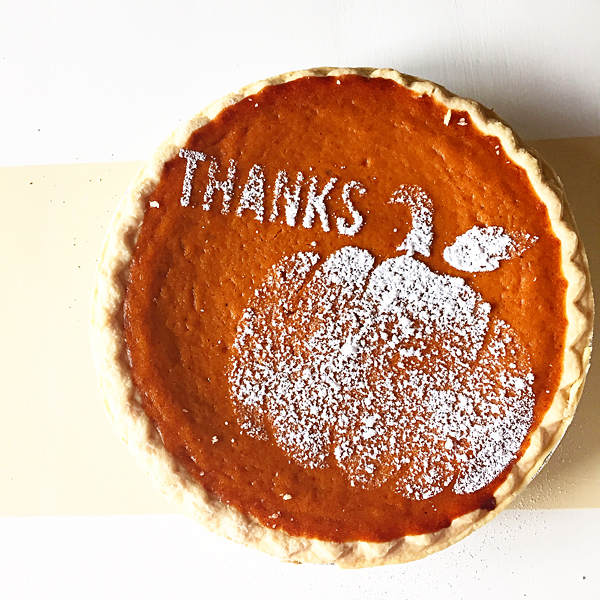
Remove the stencil and voilà… Your boring old pie has a little flair!

pumpkin-pie-stencil-from-WhipperBerry

Now with pumpkin pies, your powdered sugar will melt, so make sure you do this right before you serve. Other pies like apple will stand-up for quite a while.

Give-Thanks-Pie-Stecil-from-WhipperBerry

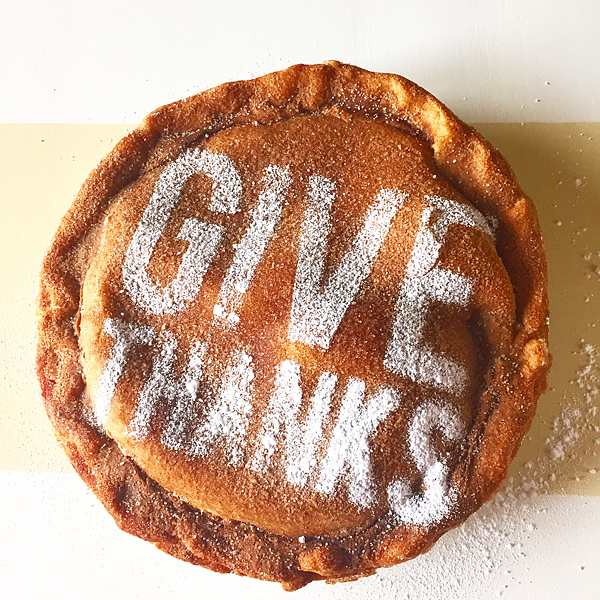
WhipperBerry-Give-Thanks-Pie-Stencil

And… They look amazing!!

Pie-Stencils-from-WhipperBerry

 All three of these pies are from the store, and they don’t look boring anymore!

If you have a Silhouette cutting machine… this is a fun way to dress-up any pie.

This is reason #586 why you need to have a Silhouette cutting machine!

I will have some GREAT Black Friday Deals here in a day or two will all the details on how you can grab a machine of your very own!

Disclaimer // This is not a sponsored post.

Holiday Nog Pull Apart Bread + Neighbor Gift

74 · Nov 12, 2014 ·

+ This Holiday Nog Pull Apart Bread post brought to you by Silk +

Silk-Holiday-Nog-Pull-Apart-Bread-WhipperBerry

I’m so excited for this time of year… I LOVE baking and creating goodies for my friends and neighbors. I grew-up with a Mom who kicked it into high gear for a few weeks in December every year, pumping out Holiday goodies like peanut brittle, chocolate peanut butter bars, and fudge along with cookies galore. I remember watching both my parents working together on those scrumptious neighbor treats, and it always made my heart happy.

I remember the year when I ate SO MUCH of my favorite Chocolate Peanut Butter Bars, I swore I would never eat chocolate again! It took me a few years, but I eventually found my way back.

Now that I’m the Mom, I try to come up with some fun goodie each to year to share with our friends. A few weeks ago, I was at the Pillsbury Bake-Off and was inspired. A few of the entires were fun pull-apart breads with various different flavor profiles. I thought it would be fun to have a Holiday Nog Pull Apart Bread for a neighbor gift.

Silk-Holiday-Nog-Pull-Apart-Bread-2

This is really just a simplified cinnamon roll with the addition of a Silk Holiday Nog glaze on top. Why Silk Holiday Nog you ask?

Well… First off, I LOVE it! It has all the Holiday flavor without all the guilt. It is free of dairy, egg, casein, MSG & lactose. It has no cholesterol or saturated fat and has a fraction of the calories of traditional Egg Nog. It’s the perfect Holiday treat minus the guilt. I thought it would be the perfect flavor profile for my pull-apart bread!

Silk-Holiday-Nog-Pull-Apart-Bread-1

Now, the real secret to this pull apart bread is how EASY it is to make! You will look like you slaved over it for hours, but no… It really only took minutes to make. Here’s how you make it.

Holiday Nog Pull Apart Bread Recipe

1 can of Pillsbury Crescent Seamless Dough Sheets

3 tablespoons melted unsalted butter

1 teaspoon pumpkin pie seasoning

2 teaspoons of sugar

1 teaspoon of Swedish Pearl Sugar (optional)

1 cup powdered sugar

1 tablespoon Silk Holiday Nog

​pinch of salt

non-stick baking spray

Preheat the oven to 350Ëš

You will need small paper loaf baking pans to bake your bread in. This will also make it easier to give as gifts to your friends. Spray the pan with a non-stick baking spray and set aside.

Open your Pillsbury dough and unroll on a clean surface and brush with melted butter.

IMG_0007

Then sprinkle the entire surface with pumpkin pie seasoning and sugars.

IMG_0008

I like to add the Swedish Pearl Sugar to my bread, but it’s not totally needed. It just gives it that little extra something. You can find this in most grocery stores these days in the baking isle.

IMG_0010

Next, cut your dough into squares roughly the width of your baking pan.

IMG_0011

Stack your squares, and place them in your pan.

IMG_0013

You should have some extra room for the dough to expand. Brush the top with more melted butter and sprinkle with more sugar.

Place in a 350Ëš oven for 30 minutes. Remove from oven and let cool.

In the meantime, you can whisk-up your glaze. In a small bowl add 1 cup of powdered sugar and pour 1 tablespoon of Silk Holiday Nog into the sugar, whisk together. The sugar should melt right into the Holiday Nog. Play with the consistency, If you like a thick glaze, don’t add as much liquid, if you like a thinner glaze, add more. Once you get your desired consistency, add a good pinch of salt. Carefully drizzle glaze over your pull-apart bread.

Package it up in a cellophane bag for your friends and neighbors. I think I am also going to add a carton of Silk Holiday Nog to the basket when deliverthis treat! It will taste so good with the bread!!

Silk-Holiday-Nog-Pull-Apart-Bread-WhipperBerry

Now this recipe makes one loaf. If you are wanting to make more than one, you will need to grab more cans of dough and double or triple the recipe.

I will have you know… NONE of the bread that I made for this post even left the house! My husband and the kiddos got to it first and they inhaled them before they even had time to cool and be photographed. Yep they are that tasty!

For more fun holiday treat ideas from Silk, sign-up for their club and get special deals as well. You can also find great ideas on the Silk Facebook page.

What’s your favorite Holiday treat to share?

This conversation is sponsored by Silk. The opinions and text are all mine.

  • « Go to Previous Page
  • Page 1
  • Interim pages omitted …
  • Page 26
  • Page 27
  • Page 28
  • Page 29
  • Page 30
  • Interim pages omitted …
  • Page 67
  • Go to Next Page »

Primary Sidebar

Heather from Whipperberry
Hello... my name is Heather and I'm the creator of WhipperBerry a creative lifestyle blog packed full of great recipes and creative ideas for your home and family. I find I am happiest when I'm living a creative life and I love to share what I've been up to along the way... Come explore, my hope is that you'll leave inspired!

Footer

  • Privacy Policy
  • Crafts
  • Food
  • Gifts
  • Holidays
  • Home
  • Mom Life
  • Recipes
  • Travel

Copyright © 2026 · Seasoned Pro