It is no secret that I am a huge fan of International Delight Coffee Creamer. I love it in my drinks, I love to bake with it, heck… I even craft with my empty bottles! So… When International Delight™ introduced their new line of Cold Stone Creamery™ Coffee Creamers you know I was first in line to give these new flavors a go!
They are sweet and luscious and summer in a bottle. Somehow they managed to bottle those special summer days in those Cold Stone Creamery™ bottles. Days that you look back and remember walking down the boardwalk at the beach with your favorite ice cream melting down the waffle cone with your best friends chasing after some cute boys. Catching fireflies in the back yard with a cold mason jar full of vanilla ice cream, topped with fresh chocolate chip cookie crumbles and another jar collecting those magical little bugs. Swapping stories with your grandpa on the front porch sharing a pint of Sweet Cream. You know… Those kind of summer days!
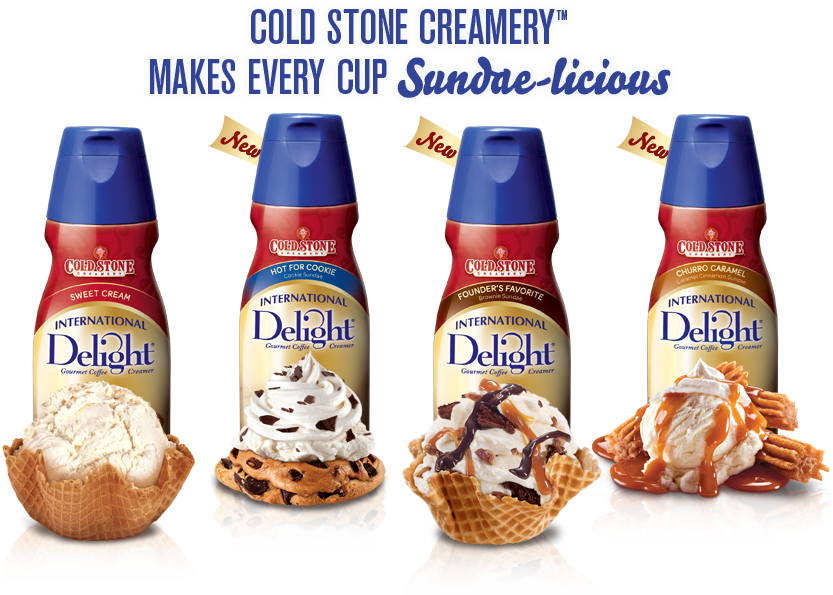
We have four new flavors to test out. Sweet Cream, Hot for Cookie, Founder's Favorite & Churro Caramel! Four new flavor combinations to inspire you as we wrap up this summer. Doesn't that just make you want to plan the ultimate ice cream social? We are hitting the home stretch and the summer is almost over. My kiddos actually head back to school today, wouldn't it be fun to send summer out with a bang with the best ice cream party on the block? I've pulled together a fun Pinterest Board with all kinds of ice cream social ideas, here's what I would love to create to celebrate the last few weeks of summer…
… Are you inspired? I know my taste buds are a buzzing! Want some more inspiration? You can check out International Delight's Boards for even more fun.
How would you like the chance to throw your very own Ultimate Ice Cream Social with the help of International Delight? FIVE lucky readers will get to do just that in International Delight's Pin to Win Sweeps! Here are the rules.

Love ice cream + coffee? This summer, International Delight is bringing your favorite Cold Stone Creamery ice cream flavors to coffee and they're celebrating by giving away five $400 grand prizes to throw this summer’s ultimate Ice Cream Social! To enter, visit the ID + Ice Cream Pinterest board and pin your favorite image using the #IScream4ID hashtag. Good luck!
This is a sponsored conversation written by me on behalf of International Delight. The opinions and text are all mine.