• Skip to primary navigation
  • Skip to main content
  • Skip to primary sidebar
  • Skip to footer

Whipperberry

WhipperBerry • Your Home For Creative Inspiration

  • Home
  • Recipes
    • Starters
    • Easy Weeknight Dinners
    • Main Dish
    • Salads
    • Side Dish
    • Soups & Stews
    • Desserts
    • Breakfast
    • Miscellaneous
  • Tutorials
    • Creative Crafts
    • DIY Decor
    • Fabric Crafts
    • Food How-To
    • Jewlery
    • Paint Projects
    • Paper Art
    • Party Styling
    • Photography and Graphic Design
    • Silhouette
  • Holidays
    • Easter
    • Mother’s Day
    • Father’s Day
    • 4th of July
    • Halloween
    • Thanksgiving
    • Christmas
    • Valentine’s Day
  • Gift Ideas
    • Gifts For Everyone
    • Gifts for Dad
    • Mother’s day
    • For The Girls
    • For The Kids
    • Teacher Gift Ideas
    • Christmas
  • Printables
    • Holiday
    • Gift Idea
    • LDS Primary
  • Travel
  • About
    • Terms
  • Contact
  • Nav Social Menu

    • Facebook
    • Instagram
    • Pinterest
    • RSS
    • Twitter

Crafts

An Amazing Wedding

0 · Aug 30, 2010 · 2 Comments

My latest obsession…wedding stalking.  I have discovered some amazing Do-it-Yourself weddings recently.  I found this one on Lisa Leonard’s blog from Lisa Leonard Designs.  I am sooo in love with her creations, but that’s for another day.  By all means, go check them out.  You too will fall in love!

Lisa attended this wedding a few weeks ago and I just had to share!

peettarr1-custom-hand-stamped-jewelry peettarr2-custom-hand-stamped-jewelry peettarr3-custom-hand-stamped-jewelry peettarr4-custom-hand-stamped-jewelry

{Guests were able to type notes to the bride and groom.  The one above says, “you are the mint in my tea.”  My heart is a flutter.}

peettarr5-custom-hand-stamped-jewelry peettarr7-custom-hand-stamped-jewelry peettarr8-custom-hand-stamped-jewelry

{Guests were invited to fill hand stamped bags with flavored coffee beans. AMAZING!  I especially LOVE the photo below.  I have also become obsessed with old windows and I love how they used them as design elements for their big day.}

peettarr9-custom-hand-stamped-jewelry peettarr10-custom-hand-stamped-jewelry peettarr11-custom-hand-stamped-jewelry

I love, love, love all of the personal and rustic elements to this wedding.  What a fun day to share with your family and friends!

On a side note–I think I forgot to mention that I have sponsored a giveaway at {Oh}Brooke.  Head on over and check it out.  If you have been dying for a fun WhipperKeeper now is your chance to win one! 

Heather

Handmade Paper Flower Tutorial

2 · Aug 27, 2010 · 10 Comments

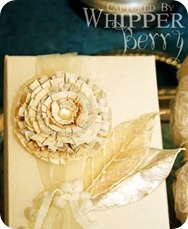
Here is the paper flower tutorial I promised. I first made this flower for the Ellie Pooh card, and then again on one of the favor boxes.

WB_044_thumb[2]  WB_113[3]

Step One:

Flower Tutorial 001 copy

Start with heavy white paper. With a pair of scissors cut a circle slightly larger than you want the size of your flower to be. I don’t use a punch or a circle cutter because I think the flower looks better if the circles aren’t perfect. Continue cutting circles, successively smaller and in graduated sizes from the first. The more circles you use, the fuller the flower will be. For this example I use nine.

Step Two:

Flower Tutorial 002 copy

Cut slits from the edge of each circle towards the center. Make the cuts varying lengths and widths apart, while still keeping them fairly close together.

Step Three:

Flower Tutorial 003 copy

Use a paper scratcher, or the edge of a serrated knife, to scrape the paper from the center outward. This helps to give the paper a worn, aged look.

Step Four:

Flower Tutorial 004_edited-1

Color the circles, one at a time, using inks or dyes. For this example, as well as the favor box, I used Tattered Angel Glimmer Mists, but for the Ellie Pooh flower I used Tim Holtz Distress Inks diluted with water. While the circle is damp, use your fingers to crush it into a ball. Use a heat tool to dry the paper while it’s still in the ball. When it’s almost dry, gently unfold the paper circle being careful not to rip the “petals”.

Step Five:

Flower Tutorial 005 copy

Layer the colored shapes, and glue them together with a drop of craft glue at the center of each circle. Top it off with a button or rhinestone, and voila! You have yourself a super shabby-chic flower that can go just about anywhere.

If you make one, send me a picture. I would love to see it. Have fun!

Signature[5]whipperberry

Gypsy’s Crepes

0 · Aug 26, 2010 · 3 Comments

I’m finally home from an unexpected extended vacation.  Well, the vacation was expected, the extension was not.  But it was a wonderful extension. 

My cupboards are bare, I have mountains of laundry to climb, but I had to share one of my loves from the trip.   Part of the little jaunt was to the Peach Festival in Palisade, Colorado.  I am originally from Colorado, so heading home is a breath of fresh air for my overly cooked Las Vegas self.  While we were at the festival I stumbled upon this super yummy crepe trailer. 

GJ 424 copy

Not only were their all-natural organic crepes delish, their cute little 1963 travel trailer was to die for. 

GJ 374 GJ 379

GJ 426 GJ 423

Isn’t it fun?  What is your favorite festival food?  Have you found a fun food truck or trailer?  I would love to hear!

Heather

Milk Paint

0 · Aug 25, 2010 · 3 Comments

My mom and I love furnishing our homes.  Nearly every time I pay her a visit, we stop by an old antique shop in the quaint little town of Shelly.  Here, Bramble Furniture sells their amazing pieces for a fraction of their retail price.  My mom has some of their furniture in her home and I just wish so badly that I could afford it myself.  Really, it’s the finish that I love.  Here’s an example…

brambleheadboard 

Gorgeous, isn’t it?  I’d really like to add another piece of molding to a shelf that I have in my family room and create this look.

pbshelf 

I love it.  I must add though, you have to be really careful when decorating with pieces like this.  They ooze with character, and you wouldn’t want to overdo it.  Keep the rest of your decorating around it simple so that your piece can “sing”.
When I found Design*Sponge’s tutorial for her
milk painting technique, my heart nearly jumped right out of my chest.  I truly thought that this finish was made for the pros only, something that I could only purchase.  However, Barb has written up a beautiful step-by-step guide to aging your furniture with milk paint.  It’s definitely going up high on my eternally lengthy list of things to do.

What do you think of this finish?  Do you think it’s fabulous?  Like it belongs at the dump?  Be true, I would love to hear.

Whitney

Bridal Spectacular

0 · Aug 24, 2010 · 3 Comments

So, as you probably know by now, this last weekend WhipperBerry teamed up with The Secret Garden at the Las Vegas Bridal Show. We set up a grand booth featuring a WhipperBerry Dessert Table, along with glorious wonders from the Secret Garden. We used the beautiful fabric we found in Santee Alley, as well as the trees! Erin and I manned the booth, along with three other fabulous gals: Kelli, Melissa, and Chae.

40244_1461757236304_1604650984_1134390_8270806_n

40597_1461754116226_1604650984_1134341_6858381_n 45850_1461753476210_1604650984_1134328_2273358_n

40597_1461753876220_1604650984_1134335_519817_n

Well, if you’ve been keeping up with us on Facebook then you know that all of our hard work paid off because we won the award for the Best Booth, as voted by the other exhibitors! Woo-hoo!

40244_1461757076300_1604650984_1134386_3619839_n

If you saw us at the show, please, please, please leave us a comment and tell us what you thought! Thank you!

Also we have the winner of the drawing we held at the show! We will be contacting this lucky bride personally, of course, but a big congratulations to Rachel M!

For more pictures, visit our Facebook page, and while you’re there become a fan!

Emily

  • « Go to Previous Page
  • Page 1
  • Interim pages omitted …
  • Page 502
  • Page 503
  • Page 504
  • Page 505
  • Page 506
  • Interim pages omitted …
  • Page 512
  • Go to Next Page »

Primary Sidebar

Heather from Whipperberry
Hello... my name is Heather and I'm the creator of WhipperBerry a creative lifestyle blog packed full of great recipes and creative ideas for your home and family. I find I am happiest when I'm living a creative life and I love to share what I've been up to along the way... Come explore, my hope is that you'll leave inspired!

Footer

  • Privacy Policy
  • Crafts
  • Food
  • Gifts
  • Holidays
  • Home
  • Mom Life
  • Recipes
  • Travel

Copyright © 2026 · Seasoned Pro