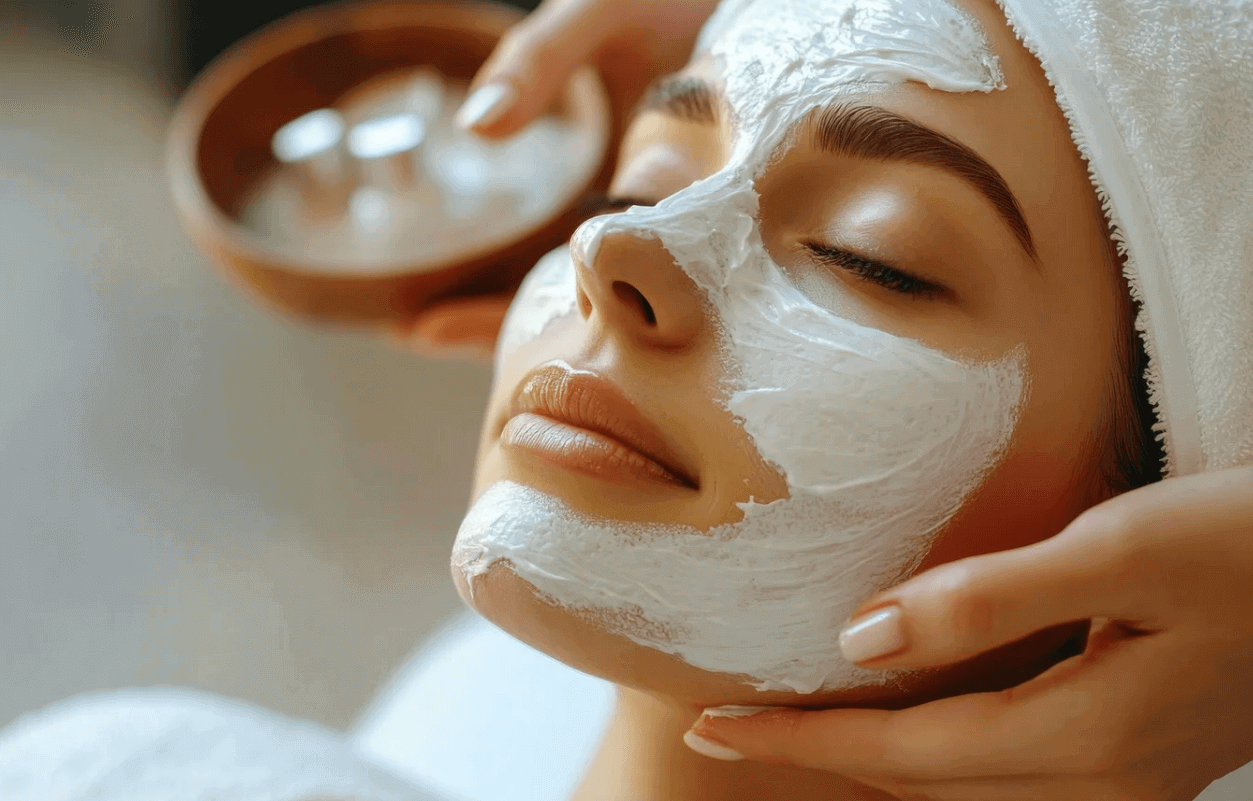
• Skip to primary navigation
  • Skip to main content
  • Skip to primary sidebar
  • Skip to footer

Whipperberry

WhipperBerry • Your Home For Creative Inspiration

  • Home
  • Recipes
    • Starters
    • Easy Weeknight Dinners
    • Main Dish
    • Salads
    • Side Dish
    • Soups & Stews
    • Desserts
    • Breakfast
    • Miscellaneous
  • Tutorials
    • Creative Crafts
    • DIY Decor
    • Fabric Crafts
    • Food How-To
    • Jewlery
    • Paint Projects
    • Paper Art
    • Party Styling
    • Photography and Graphic Design
    • Silhouette
  • Holidays
    • Easter
    • Mother’s Day
    • Father’s Day
    • 4th of July
    • Halloween
    • Thanksgiving
    • Christmas
    • Valentine’s Day
  • Gift Ideas
    • Gifts For Everyone
    • Gifts for Dad
    • Mother’s day
    • For The Girls
    • For The Kids
    • Teacher Gift Ideas
    • Christmas
  • Printables
    • Holiday
    • Gift Idea
    • LDS Primary
  • Travel
  • About
    • Terms
  • Contact
  • Nav Social Menu

    • Facebook
    • Instagram
    • Pinterest
    • RSS
    • Twitter

Crafts

Seasonal Table Styling & Menu: How to Create a Cozy Fall Dinner Party at Home

0 · Sep 24, 2025 · Leave a Comment

There’s something magical that comes with fall — the cool breeze, the maples bursting with golden color, and the rich flavors of fall. For some, autumn is the quintessential season to get together with loved ones and feel the comfort of good company over warm, satisfying meals.

Having a warm autumn dinner party is the best way to enjoy the season, and with the proper blend of table setting, décor, and a well-conceived menu, you can have a gathering that is both refined and welcoming.

When you plan your dinner party, keep in mind that the experience is not just about food. The atmosphere you establish — from the soft glow of candlelight to the coziness of changing colors of the seasons — will determine your evening. Your guests won’t just have an enjoyable meal, but they’ll leave invigorated and inspired.

And here’s a real-life tip: after all that cooking and entertaining, you’ll appreciate an easy, environmentally friendly cleaning process. Lots of hosts adore TheSoapery’s castile soap for this purpose.

It’s natural, multi-purpose, and gentle to use for washing dishes, cleaning countertops, and even for gentle hand washing, which is so important when preparing a large meal. It allows you to have a fresh, welcoming kitchen without putting harsh chemicals in your home.

Let’s jump into how you can decorate your table, create a seasonal menu, and entertain a dinner party that embodies the warmth of fall.

1. Creating the Mood with a Fall-Inspired Color Palette

The color scheme you select will be the cornerstone of your fall table decor. Autumn is all about rich, earthy tones, so take color cues straight from nature.

  • Classic Autumn Colors: Burnt orange, mustard yellow, burgundy, chocolate brown, and deep forest green.
  • Modern Neutrals: Soft beige, cream, grey, and muted terracotta.
  • Metallic Accents: Copper, bronze, or gold details in flatware, candle holders, or chargers.

Styling Tips:

  • Employ a linen tablecloth in cream or taupe with a plaid or striped table runner layered on top for texture.
  • Napkins are an excellent means of introducing strong autumn colors. Tie them up with twine or ribbon and insert a sprig of herb, cinnamon stick, or wheat stalk.
  • Dinner plates don’t have to be fancy. Plain white or stoneware plates look lovely when accessorized with seasonal decorative items.

Pro Tip: Limit 2–3 dominant colors and 1 metallic accent for a cohesive, put-together appearance.

fall dinner party

2. DIY Centerpieces That Make a Statement

The centerpiece is usually the star of a dinner party, and autumn provides you with ample inspiration. Rather than purchasing an overpriced floral arrangement, you can create your own centerpiece using natural, seasonal items.

Try these Ideas:

  • Pumpkin & Gourd Centerpiece: Combine mini pumpkins in different shapes and sizes along the table runner.
  • Candles for Candles’ Sake: Brass or glass holders with taper candles give off a warm, cozy glow.
  • Fruit as Décor: Baskets of apples, pears, figs, or pomegranates serve as both decoration and snack.
  • Rustic Greens: Dried flowers, eucalyptus branches, or wheat stalks arranged together for a farm-to-table look.

DIY Project: Paint tiny pumpkins metallic colors of gold or copper to get a modern farmhouse look.

3. Cozy Textures for a Welcoming Table

One of the simplest ways to produce a layered, homey look is to add texture. Think outside your plates and glasses:

  • Set woven or jute placemats under each place setting.
  • Utilize wooden cutting boards as serving boards for bread or charcuterie.
  • Set ceramic mugs for cider or mulled wine in addition to regular glasses.
  • Drape wool or knit throws across chairs to encourage guests to linger.

Textures not only provide visual appeal but also invite a feeling of comfort and warmth.

4. Crafting the Perfect Seasonal Menu

Food is the centerpiece of any occasion, and fall flavors are well-suited to being rich, comforting, and crowd-pleasing. Opt for a menu that’s hearty without being heavy, seasonal without being daunting.

Starter Ideas

  • Butternut Squash Soup with Sage Butter – Warming and creamy, served best with crusty bread.
  • Roasted Beet & Goat Cheese Salad – A crisp choice with fall hues.
  • Caramelized Onion Tart – A rich wine-pairing appetizer.

Main Course Options

  • Herb-Roasted Chicken with Root Vegetables – A classic centerpiece dish that’s easy to prepare.
  • Braised Short Ribs with Mashed Potatoes – Rich, slow-cooked flavors that feel indulgent.
  • Pumpkin Risotto with Parmesan – Creamy, comforting, and vegetarian-friendly.

Desserts That Shine

  • Spiced Apple Crisp with Vanilla Ice Cream – A cozy classic with cinnamon and nutmeg.
  • Pumpkin Cheesecake Bars – Perfect for make-ahead baking.
  • Pecan Pie Tartlets – Bite-sized indulgence with a nutty crunch.

Drinks & Extras

  • Warm mulled cider with cinnamon and cloves.
  • Sparkling cranberry spritzers for a refreshing touch.
  • A charcuterie board featuring brie, smoked gouda, fig jam, and candied pecans.

5. Hosting Hacks to Keep It Simple

Entertaining doesn’t have to feel overwhelming. These small tricks will help you host with confidence:

  • Prep in Advance: Soups, desserts, and braised meats can often be made the day before.
  • Self-Serve Stations: Set up a drink bar where guests can refill their glasses without waiting.
  • Music Matters: Curate a playlist of acoustic, jazz, or soft indie tracks to set the mood.
  • Clean as You Go: Wash prep bowls and utensils as you cook — eco-friendly soaps like castile make it easier to manage.
  • Personal Touches: Handwritten name cards, seasonal printables, or a mini menu at each setting add charm without much extra work.
fall dinner

6. Small Details That Elevate Your Dinner Party

Sometimes, the little touches are what make the biggest impression. Consider adding:

  • Scented candles with notes of cinnamon, clove, or vanilla.
  • Mini welcome drinks or amuse-bouches served as guests arrive.
  • Seasonal goodie bags (like jars of spiced nuts or homemade pumpkin bread).
  • A Polaroid or instant camera for guests to capture memories.

Final Thoughts

A dinner party in autumn is not just about food — it’s about setting an atmosphere of warmth and connection. By blending seasonal table styling, warm textures, and a considerate menu, you can craft a night that feels truly memorable. The secret is balance: don’t strive for perfection, but for comfort and authenticity.

And when the last guest leaves and you’re left with dishes and surfaces to clean, remember to keep things simple and eco-friendly. Natural products like TheSoapery‘s castile soap make it easy to tidy up while staying mindful of the environment.

So light the candles, set your table, and let autumn inspire your next gathering. With the right touches, your fall dinner party will be the highlight of the season.

Where Can You Get Your Eyeglass Lenses Replaced Quickly for a Business Trip?

0 · Sep 24, 2025 · Leave a Comment

If you’re anything like me, prepping for a business trip (or let’s be honest, any kind of trip) usually means juggling a hundred little things—packing, childcare, meals, schedules. The last thing you need is to realize your glasses are scratched or your prescription’s off right before you leave. That happened to me once, and let’s just say, trying to read a presentation through smudged lenses wasn’t the kind of “blur” I had in mind.

Thankfully, there are services that can replace your lenses quickly—sometimes the very same day. Whether you want to keep your favorite frames or just need a fresh pair in a pinch, there are real solutions that work for busy moms who don’t have time to wait.

Here’s a roundup of the best places to get your eyeglass lenses replaced fast, so you can head into your next trip focused and prepared.

get your eyeglass lenses replaced

Overnight Glasses with next-day delivery options

Travelers often need fast solutions if their glasses break or lenses become scratched right before a trip. Overnight services can provide new prescription lenses or complete glasses within 24 hours, which helps avoid delays before an important business meeting.

Many providers now offer same-day production with overnight shipping. This means a person can place an order in the afternoon and receive the finished glasses the next day. The speed depends on the prescription type, but single vision lenses are usually the quickest to process.

For those who want to keep their current frames, some services allow new lens replacement in old frames. This option is practical because it saves time and avoids the need to adjust to a new frame style.

Next-day delivery options can also include coatings such as scratch resistance or anti-reflective finishes. These additions may not slow down the process, which makes them useful for travelers who need both speed and durability.

EuroOptica NYC Same Day Glasses Service at 280 Columbus Ave

EuroOptica at 280 Columbus Ave in New York City offers a same-day glasses service that helps travelers who need fast lens replacement. This location has an on-site lab, which allows staff to cut and fit lenses without long delays.

Customers can bring in a prescription and select frames or reuse their current pair. Because the lab is in-house, many orders can be completed within the same day, making it practical for someone preparing for a business trip.

In addition to lens replacement, the store provides adjustments and repairs. This means visitors can address small frame issues at the same time they update their lenses.

The boutique also carries a wide range of frames from different brands, so travelers can leave with both a new look and a clear view. The convenient Upper West Side location makes it easy to stop in before heading out of the city.

Eyemart Express for eye exams and fast lens replacement

Eyemart Express offers both eye exams and lens replacement in one visit. Most locations are set up next to independent optometrists, so customers can get an updated prescription before ordering new lenses. This setup makes it easier to handle everything in the same trip.

The company has in-store labs that allow many glasses to be made the same day. For travelers who need lenses before leaving for a business trip, this quick turnaround can be helpful. In some cases, glasses can be ready within hours.

Customers can bring in their current frames to have lenses replaced, or they can choose new frames if needed. Staff members provide guidance on lens types and frame options to match different prescriptions and budgets.

In addition to in-store service, online orders are available with free shipping. However, those with limited time often benefit most from visiting a store directly, since it allows them to walk out with new lenses the same day.

Replacement Lens Express with expert lens fitting

Replacement Lens Express offers a way for travelers to keep their favorite frames while updating their lenses. The company has worked in lens replacement for more than a decade, which gives them strong experience in handling different frame types and prescriptions.

Customers can send in their own frames and request new lenses that match their current prescription. This process allows people to avoid the higher costs often charged at local optical shops. It also helps those who need fast service before leaving for a trip.

The service includes prescription and non-prescription options, so both everyday glasses and sunglasses can be updated. Turnaround times are designed to be quick, which is helpful for anyone preparing for travel on short notice.

Experts fit the new lenses into the frames with care, so the glasses return ready to wear. As a result, travelers can continue using frames they already like without delays or extra steps.

eyeglass lenses

Zoomer offering lens replacement ready in under 30 minutes

Travelers often need fast solutions before leaving for a trip. Zoomer provides same-day lens replacement that can be ready in under 30 minutes for single vision or non-prescription lenses. This speed allows customers to keep their plans on track without long delays.

For more complex lenses such as progressives or bifocals, the process may take a few business days. However, customers can usually keep their frames during production and return for a quick swap once the lenses are ready. This option helps avoid going without glasses.

The service also covers prescription sunglasses, blue light lenses, and standard eyeglass replacements. Prices vary by lens type, but the process remains focused on quick turnaround and convenience.

Because the work is done in-store, customers often skip the wait times often linked to outside labs. As a result, those preparing for a business trip can walk in, replace their lenses, and leave with clear vision in a short amount of time.

Conclusion

For mothers, flexibility is everything and that includes how we handle the unexpected. Whether it’s a cracked lens the day before a big meeting or realizing your backup glasses are nowhere to be found, it’s reassuring to know fast, reliable lens replacement options exist.

From local shops that can help in a couple of hours to online services that ship overnight, there’s no need to settle for fuzzy vision or uncomfortable frames. These services give you one less thing to worry about—so you can show up clear-eyed, confident, and ready to take care of business (and then some).

How to Build Your Dream Backyard Safely: A Step-by-Step Guide for DIY Homeowners

0 · Sep 24, 2025 · Leave a Comment

Building backyard projects can be one of the most rewarding parts of homeownership, but it can also turn stressful if safety is overlooked. A single mistake or skipped precaution can lead to injuries, while poorly constructed features risk collapsing and putting others in danger.

A beautiful backyard should offer more than visual appeal. Thoughtful design not only adds to your home’s value but also enriches daily life, enhances comfort, and makes the space more functional. When planning your outdoor retreat, it is important to keep balance in mind.

In this guide, we will take you through each step of the process on how to build your dream backyard that is both safe and stunning. You will find practical tips and ideas to help you design an outdoor space you can enjoy year-round. Let’s get started.

How to Build Your Dream Backyard

Start with a Safe and Smart Plan

Creating your dream outdoor space begins with thorough planning. First thing to remember, a solid plan not only smooths out your renovation journey but also keeps stress at bay and increases your chances of success.

Define your backyard goals

Before picking up any tools, take time to assess your current space and envision what you want to achieve. Consider existing features, drainage patterns, and how sunlight affects different areas of your yard. The ideal slope for proper yard drainage should range between 2-3% away from your house foundation.

Think about how you’ll actually use the space:

  • Do you need areas for entertaining guests?
  • Are children’s play areas a priority?
  • Would you like to start a vegetable garden?
  • Do you want a tranquil retreat for relaxation?

Creating a mental image of your ideal day in the new backyard will guide your design choices. Picture yourself enjoying morning coffee on a sunlit deck or hosting weekend gatherings. Additionally, make a list of must-have features that align with your available space and budget.

For complex projects, creating a detailed base map of your property showing all fixed features, utilities, and existing vegetation serves as an excellent foundation document.

Check local codes and permits

Depending on the scope of your backyard project, you may need to obtain permits from your local municipality. This step is essential, as skipping it can result in fines or forced changes to your completed work.

Most jurisdictions distinguish between minor remodels (small gardens, minor landscaping) that typically don’t require permits, and major remodels (decks, pools, outdoor kitchens) that almost always do.

Common permits for backyard projects include:

  • Building permits for structural changes
  • Zoning permits to verify compliance with local regulations
  • Grading permits for significant excavation work
  • Electrical permits for outdoor lighting installations
  • Plumbing permits for water features or irrigation systems
  • Fence permits for new installations

Furthermore, homeowners’ association rules may influence design choices by setting limits on colors, materials, or structure heights.

By securing proper permits, you ensure your project meets safety standards, avoid legal complications, and protect your property’s value for years to come.

Prepare the Site and Tools

Proper preparation sets the foundation for success in any backyard project. Subsequently, taking time to prepare your work area and tools properly will save hours of frustration and prevent potential hazards.

Clear and level the ground

Begin by thoroughly removing all obstacles from your designated work area. This includes clearing away grass, rocks, plants, debris, and any other materials that might interfere with your project. For effective clearing:

  • Remove vegetation and mark boundaries of the construction area
  • Clear out rocks, debris, and other obstructions
  • Dispose of cleared materials responsibly

Afterward, focus on leveling the ground. This crucial step prevents water pooling and ensures proper drainage for your structures. For larger areas, consider using a landscape rake to smooth the surface, along with a bubble or laser level for accuracy.

Inspect and organize your tools

Efficiently organized tools make your project run smoothly. Start by emptying and cleaning your toolbox, then sort tools by type and frequency of use. Consider these organization strategies:

  • Install drawer liners to prevent scratches on tools
  • Use custom trays for small parts like nuts and bolts
  • Arrange tools by weight—heaviest items at the bottom
  • Employ foam organizers for better visibility and protection

Taking time to inspect your tools before starting ensures everything is in proper working condition, particularly for cutting and digging implements.

Mark underground utilities

Perhaps the most critical preparation step is identifying what lies beneath your work area. Consequently, contact 811 at least two business days before digging—regardless of project size. Each year, damages to buried utilities cost approximately $30 billion in repairs and societal impacts.

In addition to 811, many homeowners turn to trusted providers like BHUG when searching for underground utility locating services near me. Working with an experienced company ensures greater accuracy and peace of mind before you begin your project. Professional locators will mark underground lines using a color-coded system:

  • Red: Electric
  • Yellow: Gas/Oil
  • Orange: Communications/Cable TV
  • Blue: Water
  • Green: Sewer

Even shallow digging requires this precaution since some utilities are buried just inches below the surface. Remember to respect these markings throughout your project—they’ll guide your safe digging zones.

Build Key Backyard Features Step-by-Step

How to Build Your Dream Backyard Safely

Now it’s time to transform your plans into reality by tackling the main features of your dream backyard. Let’s break down each element into manageable steps.

Install a patio or deck

For a patio installation, begin by marking your layout with stakes and string. Excavate the area to a depth of about 6 inches plus your paver thickness. Next, add 4 inches of gravel base material and compact it firmly. Pour a 1-inch layer of sand and level it using conduit pipes as guides. Then lay pavers one by one, working from a corner outward, and ensure they fit snugly together. Finally, add edge restraints and sweep polymeric sand between the joints to lock everything in place.

For deck building, start by attaching a ledger board to your house with lag screws. Dig footing holes below the frost line, add gravel, and pour concrete with J-bolts for post anchors. Once dry, attach posts to the anchors and install the main support beam. Next, add joists using hangers, ensuring proper spacing (typically 16 inches apart). Finally, lay decking boards perpendicular to the joists, leaving 1/8-inch gaps between them.

Add garden beds and plantings

Raised beds offer numerous advantages—better drainage, warmer soil, and easier access. For best results, build beds that are 6-24 inches in height and no wider than your comfortable reach. Cedar is excellent for wooden beds due to its durability, while galvanized steel provides a modern alternative.

The ideal soil mixture for raised beds is approximately 2/3 topsoil and 1/3 compost. Position your beds in areas receiving at least 6-8 hours of sunlight for sun-loving plants like tomatoes and peppers.

Build a path or walkway

Start by determining the path’s purpose and traffic level. Primary paths should be at least 48 inches wide, while secondary paths can be 30-36 inches. Mark your route using stakes and string, then excavate to a depth of about 6 inches.

Add a 4-inch gravel base for stability and drainage, with a slight slope (1/4 inch per foot) away from structures. For finishing materials, consider options ranging from inexpensive gravel ($0.65-$3.00 per square foot) to elegant natural stone ($15-$50 per square foot).

Install lighting and irrigation

For landscape lighting, mount transformers near GFCI outlets and run low-voltage cables to your fixture locations. Place path lights consistently along walkways and install step lights where needed. Moreover, keep fixtures away from flammable materials and always use outdoor-rated products.

When installing irrigation, connect to your water supply using a backflow preventer. Run main lines and branch lines to different zones based on water needs. For drip systems, use 1/2-inch poly tubing as main lines with 1/4-inch tubing to individual plants. Finally, program your timer to water zones separately, adjusting schedules seasonally.

Add Safety and Comfort Elements

Backyard projects are exciting, but safety and comfort should always come first. Protecting yourself during construction and designing spaces that feel welcoming will help you enjoy your outdoor area with confidence.

Keep these essentials in mind:

  • Wear proper protective gear such as eye protection, gloves, steel-toe boots, hardhats, and hearing protection.
  • Keep all electrical equipment at least 10 feet away from power lines and use GFCI outlets, outdoor-rated extension cords, and well-maintained tools.
  • Avoid operating electric tools in wet conditions or leaving them unattended.
  • Add shaded zones with pergolas, parasols, summer houses, or strategically planted trees to stay cool and create quiet retreats.
  • Install fencing around pools or play areas, or use options like glass enclosures, bamboo fencing, wrought iron, or natural landscaping to enhance safety and privacy.

Stepping Back to Enjoy Your Work

Creating a safe and beautiful backyard is about more than checking off tasks on a list. Each step you take, from planning and preparation to building and adding comfort features, shapes a space where memories can unfold. A well-designed outdoor area enriches daily life, offers peace of mind, and becomes a place where family and friends naturally gather.

When you combine safety with creativity, you set the stage for a backyard that lasts for years to come. Thoughtful choices in layout, materials, and protective measures ensure that your outdoor retreat remains a source of pride and enjoyment in every season. Now that the groundwork is complete, it is time to step back, take a deep breath, and savor the space you have built with care.

Designing a Home That Reflects Who You Are

0 · Sep 23, 2025 · Leave a Comment

Designing a home that authentically reflects individual personality is no longer a luxury—it is an expectation. As personalization becomes central to both residential development and consumer demand, design professionals, builders, and developers are increasingly tasked with delivering spaces that capture the uniqueness of each homeowner.

This shift is not only aesthetic but functional. Today’s buyers want homes that align with their lifestyle, values, and identity, from the ground up.

Personalization begins with a deep understanding of the homeowner’s priorities. Whether it’s a preference for open-concept spaces, traditional layouts, or multipurpose rooms, the architectural foundation must serve the way the individual or family lives.

For some, this may mean a dedicated art studio or home gym; for others, it could involve creating zones for entertaining or quiet retreat. A purpose-driven approach to designing a home ensures function comes first, while still allowing self-expression to shine in every corner.

Material selection also plays a critical role. Natural woods, reclaimed metals, or sustainable composites can reflect environmental values, while bold marbles or high-contrast finishes convey a strong visual personality.

Flooring, wall treatments, and cabinetry should be approached not just from a durability or cost-efficiency standpoint, but with attention to how they contribute to the emotional tone and tactile experience of a space.

Purposefully Designing a home

Color, Texture, and Lighting as Personality Markers

One of the most direct ways of designing a home is by personalization through color. Color psychology has long been used in commercial spaces to influence mood and behavior, and it applies equally well to residential design.

Earth tones may suggest calm and grounding, while brighter hues can express creativity and energy. While neutral palettes remain popular for resale value and versatility, accent walls, trim details, or bold fixtures offer controlled opportunities for visual storytelling.

Textures add dimension and depth that go beyond the visual. Layering materials—linen drapes, stone backsplashes, leather upholstery—creates tactile diversity that helps communicate warmth, luxury, or minimalism, depending on the homeowner’s intent.

Likewise, lighting is not just a functional requirement but a powerful design tool. Layered lighting—ambient, task, and accent—provides flexibility while enabling personalization. Whether through modern pendant lights, antique sconces, or smart lighting systems with color-change capabilities, lighting choices allow for both mood setting and aesthetic cohesion.

Furnishings and Art as Extensions of Identity

Furnishings bridge the gap between structure and soul. They are where personality truly comes to life—whether through a curated mix of vintage and modern pieces, custom upholstery, or handcrafted tables.

The key is to avoid generic, mass-produced décor in favor of selections that carry meaning, even in professionally staged homes. This may include heirlooms, bespoke items, or locally sourced designs that reflect regional culture.

Art offers another layer of personal expression. Incorporating artwork—be it photography, sculpture, or contemporary painting—transforms walls into narratives. Art doesn’t need to match the sofa; it needs to resonate with the people who live in the space. Likewise, books, collected objects, and even functional items like handmade ceramics contribute to a more expressive and authentic environment.

Outdoor Living as a Personal Retreat

Personalization extends beyond the walls of the home. Outdoor spaces should serve as a natural extension of interior living, reflecting the same care and character. This might include curated gardens, outdoor dining areas, fire features, or small studio structures for work or creativity.

In climates that support year-round outdoor use, the return on investment for functional exterior space is significant—not just financially, but in terms of lifestyle quality.

One key feature that continues to grow in popularity is the private pool. A pool serves not only as a recreational asset but as a customizable design statement. While pools are often associated with warmer regions, demand for personalized aquatic features is rising nationwide—including in cities like St. Louis.

For homeowners seeking pool installation in St. Louis, the focus is increasingly on tailored solutions that integrate seamlessly with the home’s architecture and landscape design. Custom shapes, lighting, and surrounding materials allow a pool to reflect personal style as effectively as any indoor room.

Designing a home

Aligning Design with Lifestyle and Identity

Ultimately, a personalized home is not defined by a singular design style—it is defined by intentional choices that reflect the occupant’s values, preferences, and lifestyle. For developers, designers, and real estate professionals, facilitating that level of customization is becoming a competitive necessity.

Offering clients the tools, partnerships, and flexibility to make thoughtful, individualized decisions can elevate a home from simply functional to deeply meaningful. As design evolves with cultural and generational shifts, designing a home that reflects personality ensures both desirability and lasting satisfaction.

From Boring to Beautiful: Home Upgrades and Replacements That Make a Big Impact

0 · Sep 23, 2025 · Leave a Comment

Small visual changes can give any place new life. Dated features or aging materials tend to make rooms feel dull and less inviting. That doesn’t mean you need a massive overhaul to improve things. Simple home upgrades like repainting walls, replacing flooring, or updating lighting can completely shift the feel of your surroundings.

Even something like a front door swap can make a strong first impression. Before jumping into any project, consider which parts of your place look worn down and how much value a targeted update can add.

Here’s how you can get started:

Why Curb Appeal Starts With the Front Door

First impressions matter, and the entry point sets the tone. If your front door looks faded, warped, or outdated, it’s worth considering a change. A new door made from durable materials with modern hardware adds both security and style.

Color choice plays a big role, too. Earthy neutrals, deep blues, and matte blacks are in demand. If the trim or frame is chipped, repainting it gives an instant refresh. Swapping in a smart lock or upgraded handle also adds a subtle luxury touch.

These changes don’t require tearing anything apart. A simple door refresh improves the front view and changes how people feel as they walk through it.

Home Upgrades

Upgrading Windows: An Investment That Pays Off

Changing your windows offers more than better visuals. A trusted replacement window contractor can improve energy savings and indoor comfort with custom-fit installations. They can offer vinyl, fiberglass, and wood interior window options designed for different preferences and budgets.

A reputable replacement window company can also guide you on design, measure with accuracy, and handle the work without subcontracting. Their process includes a free in-person consultation to review choices and answer questions clearly.

You can expect tight sealing, smooth operation, and minimal disruption during installation. Noise control and better insulation come with it. These upgrades help lower utility bills while giving you clear, well-fitted panes that match your style.

Swapping Out Old Flooring

Flooring has a major effect on how fresh or dated a room feels. Old carpeting traps dust and shows wear easily. Damaged tiles or warped boards distract from the rest of the design. You don’t have to go with high-end wood to make a good change.

Many people opt for luxury vinyl planks or engineered options that mimic the look of real wood without the high cost. These materials work well in both dry and humid areas, making them versatile. Light oak, medium walnut, or neutral greys are popular for their clean appearance. New flooring makes rooms feel cleaner, more open, and easier to care for.

Updating Lighting Fixtures and Bulbs

Lighting plays a bigger role than most people think. A dated fixture with yellow bulbs makes everything look dull. Replacing fixtures with simpler, cleaner designs changes the vibe instantly. Choose LED bulbs that use less energy and create even light.

Try using layered lighting: overhead lights, wall sconces, and floor lamps can each serve a purpose. Dimmers allow you to adjust brightness based on the time of day or activity. Look at your kitchen, entryway, and main room first. They usually make the most impact.

Swapping one or two fixtures doesn’t take long, and it often makes the room feel more finished and relaxed without much effort.

Refreshing Kitchen Cabinets Without a Full Remodel

You don’t always need to rip things out to update your kitchen. Often, the base structure of the cabinets is fine. It’s just the finish or hardware that looks outdated. Painting them in fresh, neutral colors like soft white, beige, or slate grey can brighten the area.

Swapping knobs or handles with clean, simple designs makes a noticeable difference. You could also remove upper doors to create open shelving without rebuilding anything. For a more significant change with minimal cost, consider adding a tile backsplash in a classic pattern. This balances style and function without a full makeover. Small adjustments like these make a daily-used area more enjoyable.

Small Bathroom Changes with a Big Return

A few targeted updates can make any bathroom feel clean and refreshed without starting from scratch. Swapping out an old faucet or adding a new mirror can shift the entire mood. Choose streamlined fixtures and keep the color palette light and simple.

Towel hooks, shelving, and matching hardware can tie everything together without overwhelming the space. Even re-caulking around the sink and tub gives a fresher look. If the vanity feels bulky or outdated, consider painting it or replacing just the countertop.

Focus on useful items. Things you touch or see every day. These subtle adjustments bring the space up to date without taking on a full remodel.

Home Upgrades and Replacements

Smart Thermostats and Simple Energy Savers

Adding a smart thermostat doesn’t just look sleek. It helps save money and reduces energy use. These devices learn your schedule and adjust the temperature automatically. Some models allow app-based control, so you can fine-tune your settings remotely.

This is especially helpful if you’re away often or have inconsistent routines. For even more energy control, consider sealing gaps around doors or switching to insulated shades. LED bulbs and smart plugs also help manage energy in daily use.

These changes don’t take long to install but can impact long-term utility costs. You’ll notice the comfort and ease right away, especially during peak heating or cooling seasons.

Built-In Storage That Works for Real Life

Built-ins help you organize areas that usually collect clutter. Whether it’s a custom closet system, media console, or added shelving in a laundry area, these upgrades keep things neat without needing more square footage.

Use drawers or closed cabinets for things you don’t want on display, and open shelving for decor or books. Some designs even incorporate seating, like a small bench with storage below. If hiring a carpenter is too costly, there are modular kits that work well with minimal tools. This kind of built-in option brings order and purpose to your everyday routines without feeling bulky or overdone.

You don’t need a full-scale remodel to make meaningful changes. Small updates, like swapping out lights, adding storage, or refreshing your front door, can completely shift how your space feels.

Replacing windows through a trusted provider brings both comfort and savings. Thoughtful upgrades, even when done one step at a time, make daily routines easier and more enjoyable.

Choose what works best for your budget, timeline, and needs. Focus on changes you’ll actually use and notice. With the right priorities, any place can go from tired to polished—and you don’t have to start from scratch to get there.

  • « Go to Previous Page
  • Page 1
  • Interim pages omitted …
  • Page 95
  • Page 96
  • Page 97
  • Page 98
  • Page 99
  • Interim pages omitted …
  • Page 444
  • Go to Next Page »

Primary Sidebar

Heather from Whipperberry
Hello... my name is Heather and I'm the creator of WhipperBerry a creative lifestyle blog packed full of great recipes and creative ideas for your home and family. I find I am happiest when I'm living a creative life and I love to share what I've been up to along the way... Come explore, my hope is that you'll leave inspired!

Footer

  • Privacy Policy
  • Crafts
  • Food
  • Gifts
  • Holidays
  • Home
  • Mom Life
  • Recipes
  • Travel

Copyright © 2026 · Seasoned Pro