• Skip to primary navigation
  • Skip to main content
  • Skip to primary sidebar
  • Skip to footer

Whipperberry

WhipperBerry • Your Home For Creative Inspiration

  • Home
  • Recipes
    • Starters
    • Easy Weeknight Dinners
    • Main Dish
    • Salads
    • Side Dish
    • Soups & Stews
    • Desserts
    • Breakfast
    • Miscellaneous
  • Tutorials
    • Creative Crafts
    • DIY Decor
    • Fabric Crafts
    • Food How-To
    • Jewlery
    • Paint Projects
    • Paper Art
    • Party Styling
    • Photography and Graphic Design
    • Silhouette
  • Holidays
    • Easter
    • Mother’s Day
    • Father’s Day
    • 4th of July
    • Halloween
    • Thanksgiving
    • Christmas
    • Valentine’s Day
  • Gift Ideas
    • Gifts For Everyone
    • Gifts for Dad
    • Mother’s day
    • For The Girls
    • For The Kids
    • Teacher Gift Ideas
    • Christmas
  • Printables
    • Holiday
    • Gift Idea
    • LDS Primary
  • Travel
  • About
    • Terms
  • Contact
  • Nav Social Menu

    • Facebook
    • Instagram
    • Pinterest
    • RSS
    • Twitter

Healthy Snacks

Bring Back Dessert with Dessertify

0 · Jul 21, 2014 · 4 Comments

Who’s tired of skipping dessert? We are all trying so hard to be good most of the time, wouldn’t it be fun to get a little bit of that sweet that we crave without all the guilt! I’m super excited to tell you guys about a project that I’ve been working on over the last several months with the crew from FiberOne®…

FiberOne-Dessertify-with-WhipperBerry

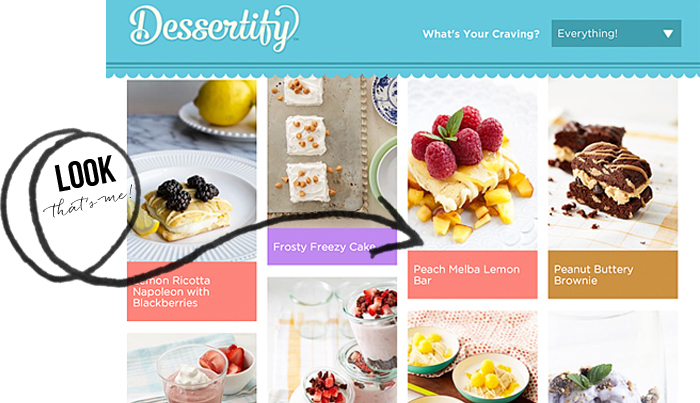
The crew at FiberOne® has created the new website called Dessertify and we are on a mission to BRING BACK DESSERT!! They’ve assembled a crack crew of food bloggers, gave all of us a mission to find some simple dessert hacks that hovered right around 200 calories… Not an easy mission I assure you. How can you pack all that sweet goodness into such a low calorie profile? Well… You use some great FiberOne® products as your base and the rest is easy!!

I created five different “dessert hacks” for Dessertify, and I’m super excited to finally be able to introduce you to my creations…

Lemon-Peach-Melba-Bar-from-WhipperBerry

Lemon Peach Melba Bar

Let’s just say, the Aussies got it right when they put raspberries and peaches together… I upped the ante with the addition of lemon. Together this dessert hack is like summer on a plate! At just under 200 calories, this dessert hack will for sure bring that fruity sweet back into your life! Click on the Lemon Peach Melba Bar link above to go to Dessertify and get the recipe.

coffee-cake-rice-pudding-parfait

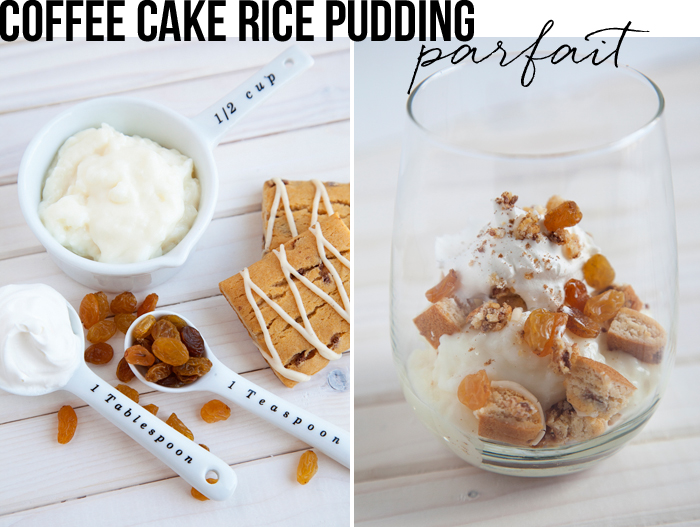
 Cinnamon Coffee Cake Rice Pudding Parfait

This dessert hack will take you right back to grandma’s kitchen. This down home concoction of cinnamon coffee cake paired with rice pudding brings comfort dessert back into style. Top it off with some golden raisins and you have a dessert that will warm you even on the coldest night. This dessert at roughly 215 calories will earn grandma’s seal of approval for sure!

butterscotch-mousse-parfait-from-WhipperBerry

Butterscotch Mousse Parfait

This dessert hack will take you to sweet and salty heaven. Check this out… Chocolate Peanut Butter Brownie FiberOne® Bar paired with butterscotch pudding, whipped topping, and crushed pretzels… Yea, it’s aaaamazing! At roughly 221 calories this is a sweet & salty fan’s delight.

double-chocolate-chip-cookies-with-mousse-from-WhipperBerry

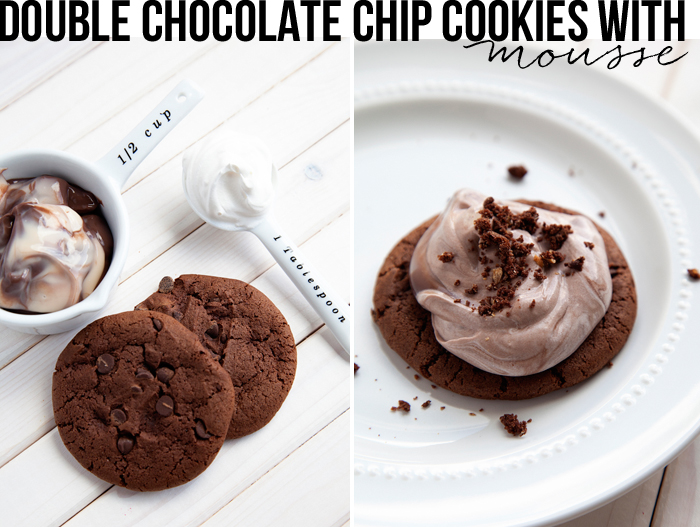
Double Chocolate Chip Cookies with Mousse

This one is a chocolate lover’s dream. It’s like dunking your cookies in milk, but soooo much better! The addition of a light chocolate mousse just takes this experience to a whole new level. Sitting right around 255 calories, your midnight cookie craving will be something you can truly enjoy!

blueberry-streusel-parfait-from-WhipperBerry

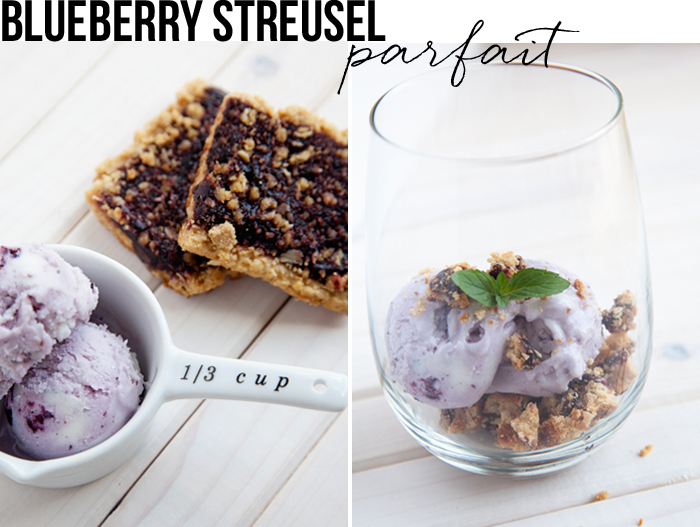
Blueberry Streusel Parfait

I adore frozen yogurt and this combination of FroYo with the Blueberry Streusel FiberOne® Bar is heavenly! This dessert hack comes in right around 250 calories and is one of my favorites!

Come on over to Dessertify and see all of the other amazing dessert hack ideas. You won’t have to feel guilty after you indulge in dessert anymore!!!

Disclaimer // This post is brought to you by FiberOne®. I received product and payment for my recipe ideas. As always all thoughts, ideas and opinions are my very own and I will never post about products that I don’t truly believe in.

Fiesta Summer Salad

0 · Jun 30, 2014 · Leave a Comment

+ This Fiesta Summer Salad is inspired by Marcela Valladolid from The Food Network +

fiesta-summer-salad

This salad BLEW MY MIND… It’s simply amazing! It is seriously a flavor explosion in your mouth. It was inspired by Marcela Valladolid from the Food Networks show Mexican Made Easy. I took her recipe and then went a step further and turned it into a Mexican version of Panzanella Salad which is a bread salad. I added some spiced croutons and it was lovely! Here’s the recipe for the salad and you can find the recipe for the spicy croutons HERE…

Fiesta Summer Salad
 
Save Print
Prep time
10 mins
Cook time
3 mins
Total time
13 mins
 
This salad is like a flavor explosion, your friends will be blown away!
Author: Heather // WhipperBerry
Recipe type: salad
Cuisine: Mexican
Serves: 6-8
Ingredients
  • 2 teaspoons cumin seeds
  • 2 teaspoons coriander seeds
  • 1 dried chili de arbol or ½ teaspoon chili flakes
  • ¼ cup pine nuts
  • ½ cup extra virgin olive oil
  • ¼ cup balsamic vinegar
  • salt & pepper
  • ¾ cup pitted and halved kalamatta olives
  • ¾ cup green olives sliced
  • 2 cups grape or cherry tomatoes - halved
  • ½ cup of queso fresco or mild feta
  • 2 cups of spicy croutons
Instructions
  1. In a dry skillet over medium high heat, toast your cumin and coriander seeds and pine nuts until the nuts slightly brown. This will take about 2 minutes. Toss and stir the seeds and nuts to avoid them burning.
  2. Once they are finished toasting, add them to a small jar with the extra virgin olive oil, balsamic vinegar along with the salt and pepper. Store in the fridge for at least 30 minutes for the flavors to marry.
  3. For the salad, clean and cut your tomatoes and add to a large bowl. Add olives, croutons and cheese to the bowl and top with dressing
3.2.2310

Creamy Avocado Gazpacho with Spicy Croutons

2 · Jun 30, 2014 · Leave a Comment

+ Creamy Avocado Gazpacho with Spicy Croutons inspired by Tori Richie from Appetite for Adventure on The Food Network +

creamy-avacado-gazpacho-from-WhipperBerry

There is nothing better on a hot summer day than a cool, refreshing gazpacho! What is gazpacho? It’s a cold soup that is typically made with pureed vegetables or even fruit. It is fresh, clean and so delicious! Here is my take on Tori Richie’s Avocado Gazpacho recipe…

Creamy Avocado Gazpacho with Spicy Croutons
 
Save Print
Prep time
10 mins
Cook time
15 mins
Total time
25 mins
 
A creamy and light cold soup that your friends and family will love!
Author: Heather // WhipperBerry
Recipe type: soup
Cuisine: Mexican
Serves: 4-6
Ingredients
  • 2 large cucumbers - peeled & seeded
  • 3 avocados
  • 2 limes - juiced
  • ½ cup vegetable stock
  • 1 small jalapeño - seeded and chopped
  • 3 green onions - white and green
  • ½ teaspoon salt
  • ½ teaspoon cumin
  • ¼ teaspoon chili powder
  • ¼ teaspoon pepper
  • olive oil
  • 4-5 grape tomatoes - diced
  • ¼ cup queso fresco - crumbled
  • 4 large slices of crusty bread or pumpernickel bread
  • ½ stick of butter
  • 2 teaspoons chili powder
  • 1 teaspoon cumin
  • 1 teaspoon mexican oregano
  • 1 teaspoon kosher salt
Instructions
  1. Clean and prep all your veggies and roughly chop each one. Add the cucumber, avocado, lime juice, vegetable stock, jalapeño, green onion, salt, cumin, chili powder and pepper to the jar of a blender. Blend until pureed. If the mixture is too thick, you can add more vegetable stock until you reach your desired consistency.
  2. Chill in the refrigerator for a least 30 minutes.
  3. For the spicy croutons... Cut bread into small bite sized pieces. Place in a 450˚ oven for 10 minutes.
  4. Melt butter and add chili powder, cumin, crushed Mexican oregano and salt.
  5. Remove croutons from oven and drizzle with butter mixture and toss to coat.
  6. Put croutons back into the oven for an additional 5 minutes.
  7. Remove from oven and let cool.
  8. When you are ready to serve the gazpacho, place the soup in small bowls, drizzle with a little extra virgin olive oil and top with spicy croutons, diced tomatoes and crumbled queso fresco.
3.2.2310

Fiesta Scallop and Shrimp Cocktail

4 · Jun 30, 2014 · 1 Comment

+ Fiesta Scallop and Shrimp Cocktail recipe inspired by Marcela Valladolid from The Food Network’s Mexican Made Easy +

whipperberry-spicy-shrimp-and-scallop-cocktail

This is a fun new take on your basic shrimp cocktail and it’s super easy to make. The recipe was inspired by one of my favorite Food Network Chef’s Marcela Valladolid from  The Kitchen and Mexican Made Easy Fame.  I of course had to put a little WhipperBerry spin on it. Instead of poaching the scallops, I actually pan seared my scallops and then chilled them. It added a little more depth to the flavor of the scallop and I love it. Also, rather than starting from scratch with my cocktail sauce, I use a commercially prepared cocktail sauce as my base and then doctored it with some of Marcela’s ingredients. Here’s the recipe…

Fiesta Scallop and Shrimp Cocktail
 
Save Print
Prep time
5 mins
Cook time
5 mins
Total time
10 mins
 
Surprise your guests with this fun and spicy to take on the classic shrimp cocktail!
Author: Heather // WhipperBerry
Recipe type: Appetizer
Cuisine: American
Serves: 4
Ingredients
  • 1 lb. cooked shrimp (peeled, deveined, tail off)
  • 8 large sea scallops
  • 3 cups cocktail sauce
  • 1 large lime (juiced)
  • ½ of a serrano chili (finely diced)
  • ¼ teaspoon of Tabasco Soy Sauce
  • 2 tablespoons of olive oil
  • salt and pepper
Instructions
  1. In a large bowl or large canning jar, mix your cocktail sauce, lime juice, serrano chili, and spicy Tabasco soy sauce. Mix well, cover and let chill in the refrigerator for a least 30 minutes.
  2. Prepare scallops by rinsing gently with cold water, removing the "foot" a little flap that you will find on the side of the scallop. Just pull it off and discard. Completely dry the scallops and set on paper towel to absorb any moisture.
  3. In a skillet, add olive oil and set over high heat. Once the pan it hot, add the scallops and turn down the heat to medium high.
  4. Let the scallop cook for 2 minutes or until seared (brown) on one side and then flip over to sear the other side for another 2 minutes. Remove from the pan. Let cool and then store in an air tight container with a paper towel at the bottom, in the refrigerator until chilled and ready to use.
  5. When ready to serve, cut the scallops in half and place in a medium sized bowl. Add the shrimp making sure they are rinsed, dried and tail removed, into the bowl. Cover with cocktail sauce and combine. Place in serving cups with a small stock of celery to garnish.
3.2.2310

Chocolate Cherry Pudding Pops + Gluten and Dairy Free

2 · Jun 25, 2014 · 5 Comments

+ This gluten-free dairy-free Chocolate Cherry Pudding Pops recipe post brought to you by Silk +

Silk-Cocolate-Covered-Cherry-Pudding-Pops-1

Nothing makes my summer heart happier than when the cherries finally come into season. Yep, I’m one of those girls that will always run for the cherry flavored ANYTHING the first chance that I get. The lack of tiny little seeds that get caught in my teeth first drew me in when I was a kiddo. Don’t get me wrong I’m an equal opportunity berry lover as well. I adore strawberries and raspberries, but my hear belongs to my favorite cherry. (Yes, I know… Cherries aren’t technically berries. I just tend to lump them in the same group. They are actually from the prune family and are called drupes. Go look it up. Drupe just doesn’t roll off the tongue like berry does.)

When my father introduced the idea of chocolate covered cherries when I was little, I nearly died and floated off to cherry heaven. I’ve spent many of Christmases as a kiddos curled up in a chocolate cherry sugar coma. It was my Dad’s favorite Christmas treat, so I guess the apple doesn’t fall to far from the tree. I was always the first in line when that special box came out. I was a puppy dog really following him around awaiting the spoils from my master.

Needless to say, I have grown up with a love for the flavor combination of chocolate and cherry. Remind me… One of these days, I need to post my Chocolate Cherry Cake for you guys. It’s mind blowing!!

Now, with the new summer crop, I was hoping to have my favorite flavor combination but in a bit of a healthier way. I thought, why not make a gluten-free, dairy-free chocolate cherry pudding pop? Pudding’s not dairy-free you say… Well, if you mix your pudding with Silk Soy Milk it certainly is!

Silk-Cocolate-Covered-Cherry-Pudding-Pops-2

Not only that but you are adding plant protein power to your popsicles! Here’s how I made them…

First, I washed and prepped my cherries by pitting them and cutting them into quarters. I took 2 cups of Chocolate Silk Soy Milk and whisked in 3-4 tablespoons of pudding powder mix. I placed the cherries, roughly about three cherries per pop, into the popsicle mold. Then I poured the Silk Pudding mixture into the mold. I used my Zoku so it went super quick, only 7 minutes. If you are doing it the traditional way, place your pops into the freezer for at least 4 hours.

Silk-Cocolate-Covered-Cherry-Pudding-Pops-3

The kiddos and I enjoyed this scrumptious summer treat and man, were they good. The cherry chunks were tasty mixed in with the chocolate pudding base, I couldn’t be happier.

Are you a Silk fan? Are you looking for more ways to use Silk Soy, Almond or Coconut Milk in your diet? You need to visit Silk’s Facebook Page for all kinds of recipes and ideas for ways to add more plant protein power to your diet. You can even sign up for the Silk fan club and receive coupons and fun ideas right in your inbox. Total score!

What kinds of frozen treats would you like to make with Silk? Leave a comment with your fun summer treat idea!

This is a sponsored conversation written by me on behalf of Silk. The opinions and text are all mine.

  • « Go to Previous Page
  • Page 1
  • Page 2
  • Page 3
  • Page 4
  • Page 5
  • Go to Next Page »

Primary Sidebar

Heather from Whipperberry
Hello... my name is Heather and I'm the creator of WhipperBerry a creative lifestyle blog packed full of great recipes and creative ideas for your home and family. I find I am happiest when I'm living a creative life and I love to share what I've been up to along the way... Come explore, my hope is that you'll leave inspired!

Footer

  • Privacy Policy
  • Crafts
  • Food
  • Gifts
  • Holidays
  • Home
  • Mom Life
  • Recipes
  • Travel

Copyright © 2026 · Seasoned Pro