• Skip to primary navigation
  • Skip to main content
  • Skip to primary sidebar
  • Skip to footer

Whipperberry

WhipperBerry • Your Home For Creative Inspiration

  • Home
  • About
    • Terms
  • Recipes
    • ZipList
    • Starters
    • Easy Weeknight Dinners
    • Main Dish
    • Salads
    • Side Dish
    • Soups & Stews
    • Desserts
    • Breakfast
    • Miscellaneous
  • Tutorials
    • Creative Crafts
    • DYI Decor
    • Fabric Crafts
    • Food How-To
    • Jewlery
    • Paint Projects
    • Paper Art
    • Party Styling
    • Photography and Graphic Design
    • Silhouette
  • Holidays
    • St. Patrick’s Day
    • Easter
    • Mother’s Day
    • Father’s Day
    • 4th of July
    • Halloween
    • Thanksgiving
    • Christmas
    • New Years
    • Valentine’s Day
  • Gift Ideas
    • Gifts For Everyone
    • Gifts for Dad
    • Mother’s day
    • For The Girls
    • For The Kids
    • Teacher Gift Ideas
    • Christmas
  • Printables
    • Holiday
    • Gift Idea
    • LDS Primary
  • Travel
  • Contact
  • Nav Social Menu

    • Facebook
    • Instagram
    • Pinterest
    • RSS
    • Twitter

bb frösch

Silhouette CAMEO + BB Frösch a Match Made in Heaven // GIVEAWAY

188 · Jan 12, 2016 · 477 Comments

Silhouette-CAMEO-and-BB-Frosch-GIVEAWAY

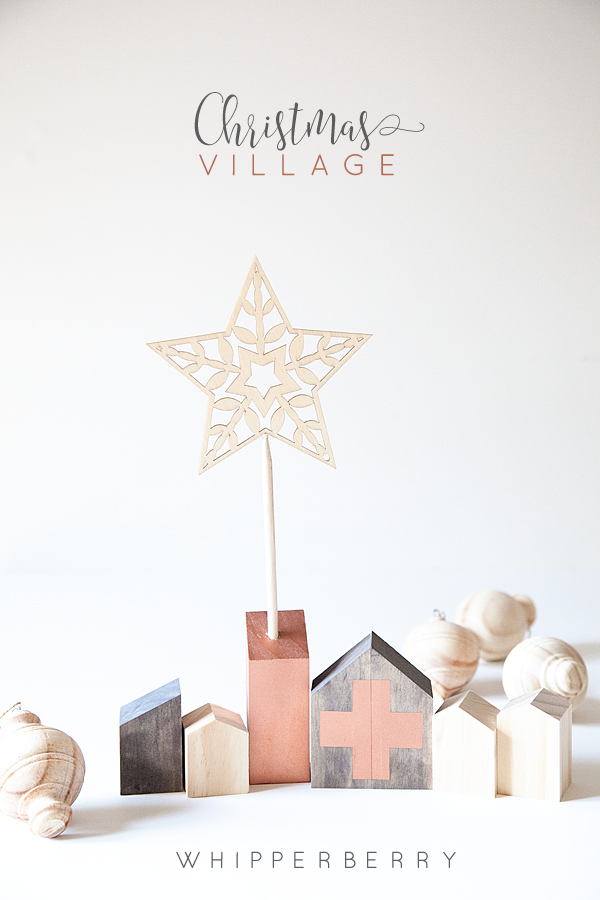
Peanut Butter & Jelly, Fred & Ginger, Mac & Cheese… Famous pairings.  We have a new one that I’m sure you’re going to fall in love with as well!

Silhouette & BB Frösch Chalk Paint Powder!

If you love to create in any way shape or form, you need to learn how these two play so well together. Here’s an example…

Silhouette-CAMEO-and-BB-Frosch-GIVEAWAY-1

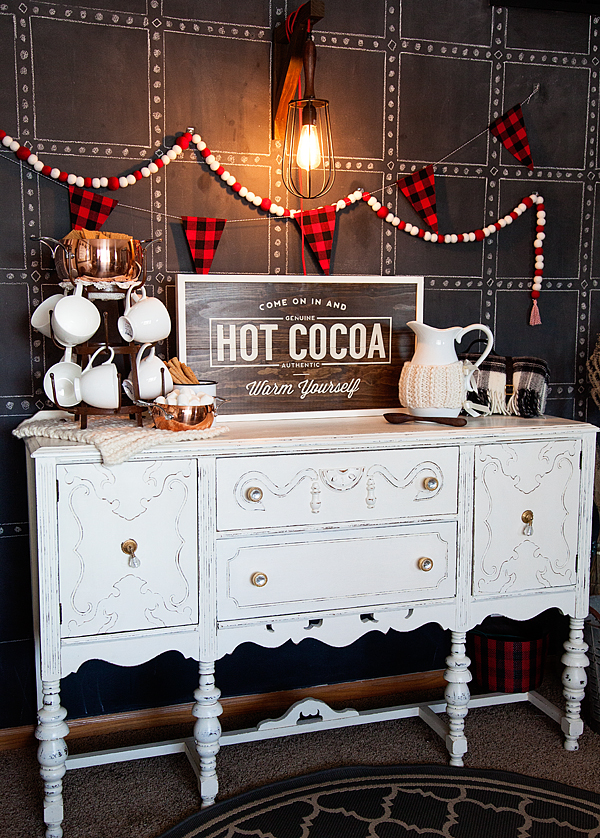
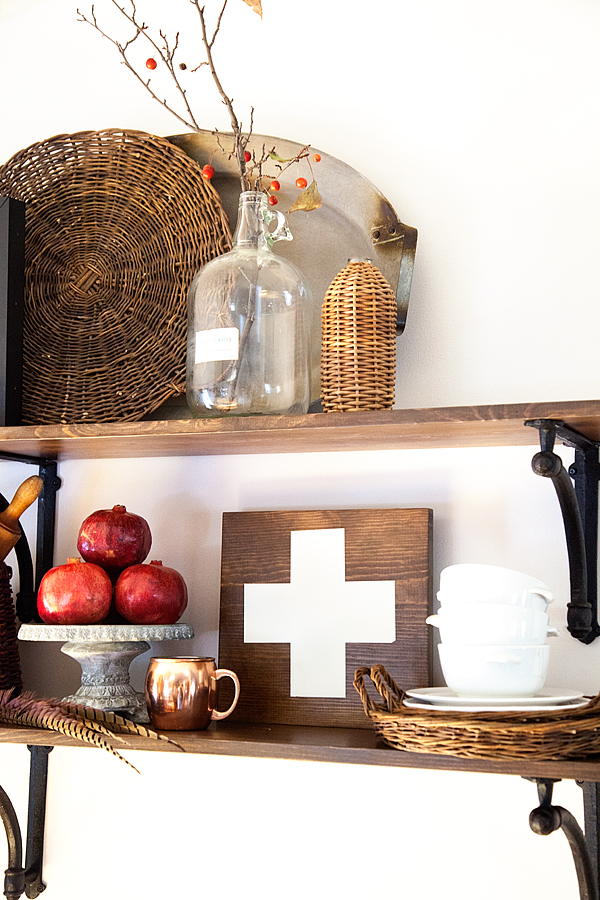
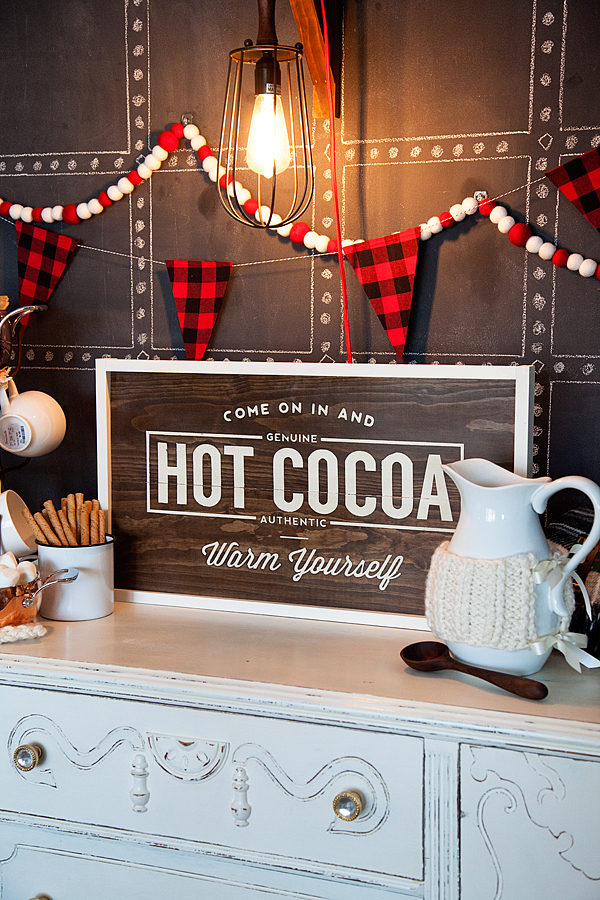
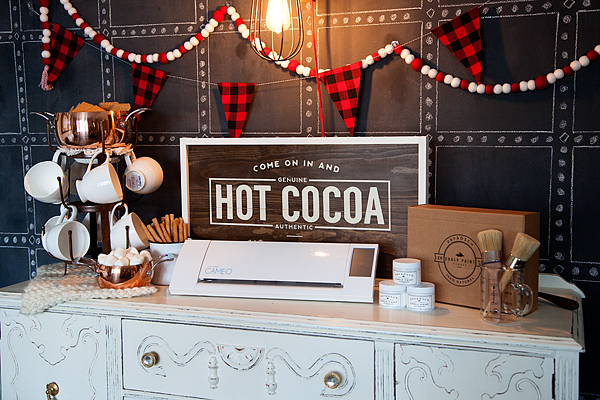
This hot cocoa bar was created with BOTH Silhouette AND BB Frösch. The beautiful buffet was transformed with BB Frösch along with the fun Hot Cocoa sign. We used our Silhouette CAMEO to create the stencil for the sign along with the buffalo plaid fabric banner. WAY FUN!!

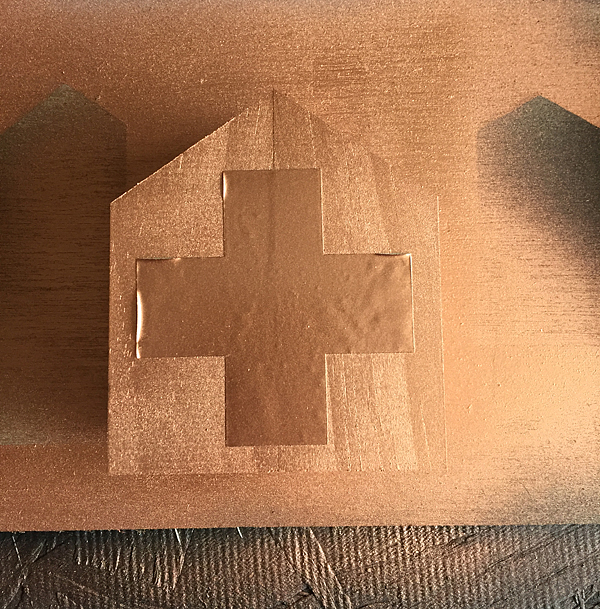
It’s super easy to make signs with Silhouette & BB Frösch.

You can download WhipperBerry’s Hot Cocoa sign design HERE.

Creating-Hot-Cocoa-Sign-with-Silhouette-CAMEO

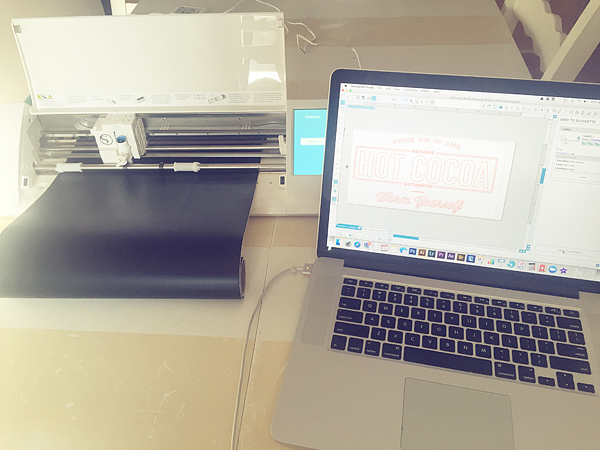
I typically use the Silhouette Premium Vinyl when I’m making signs. You can also use the Stencil Material.

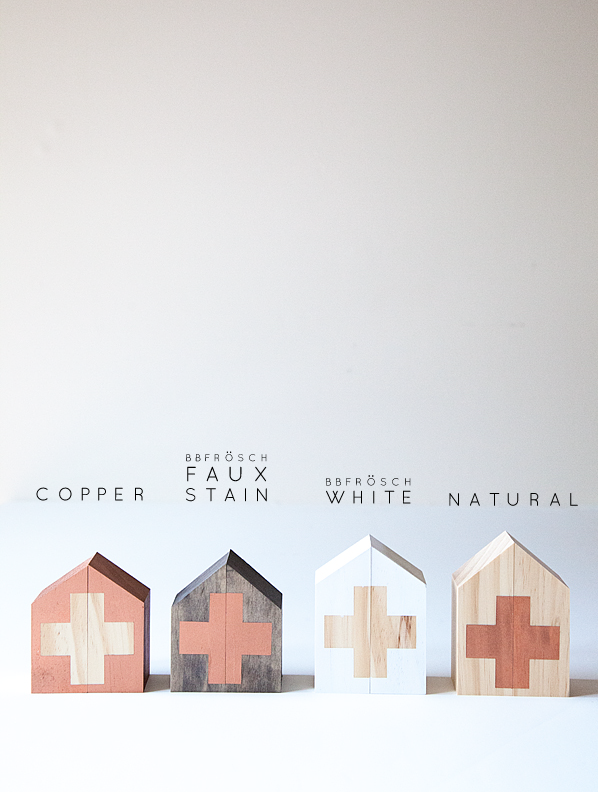
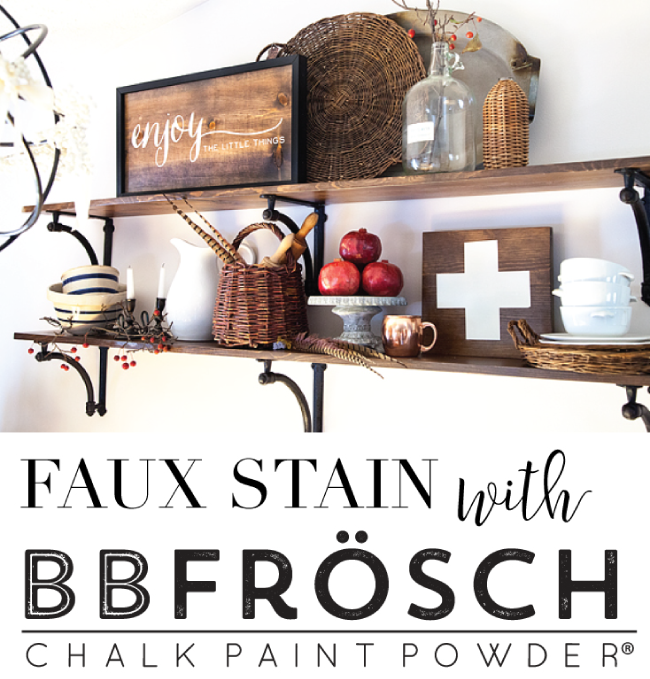
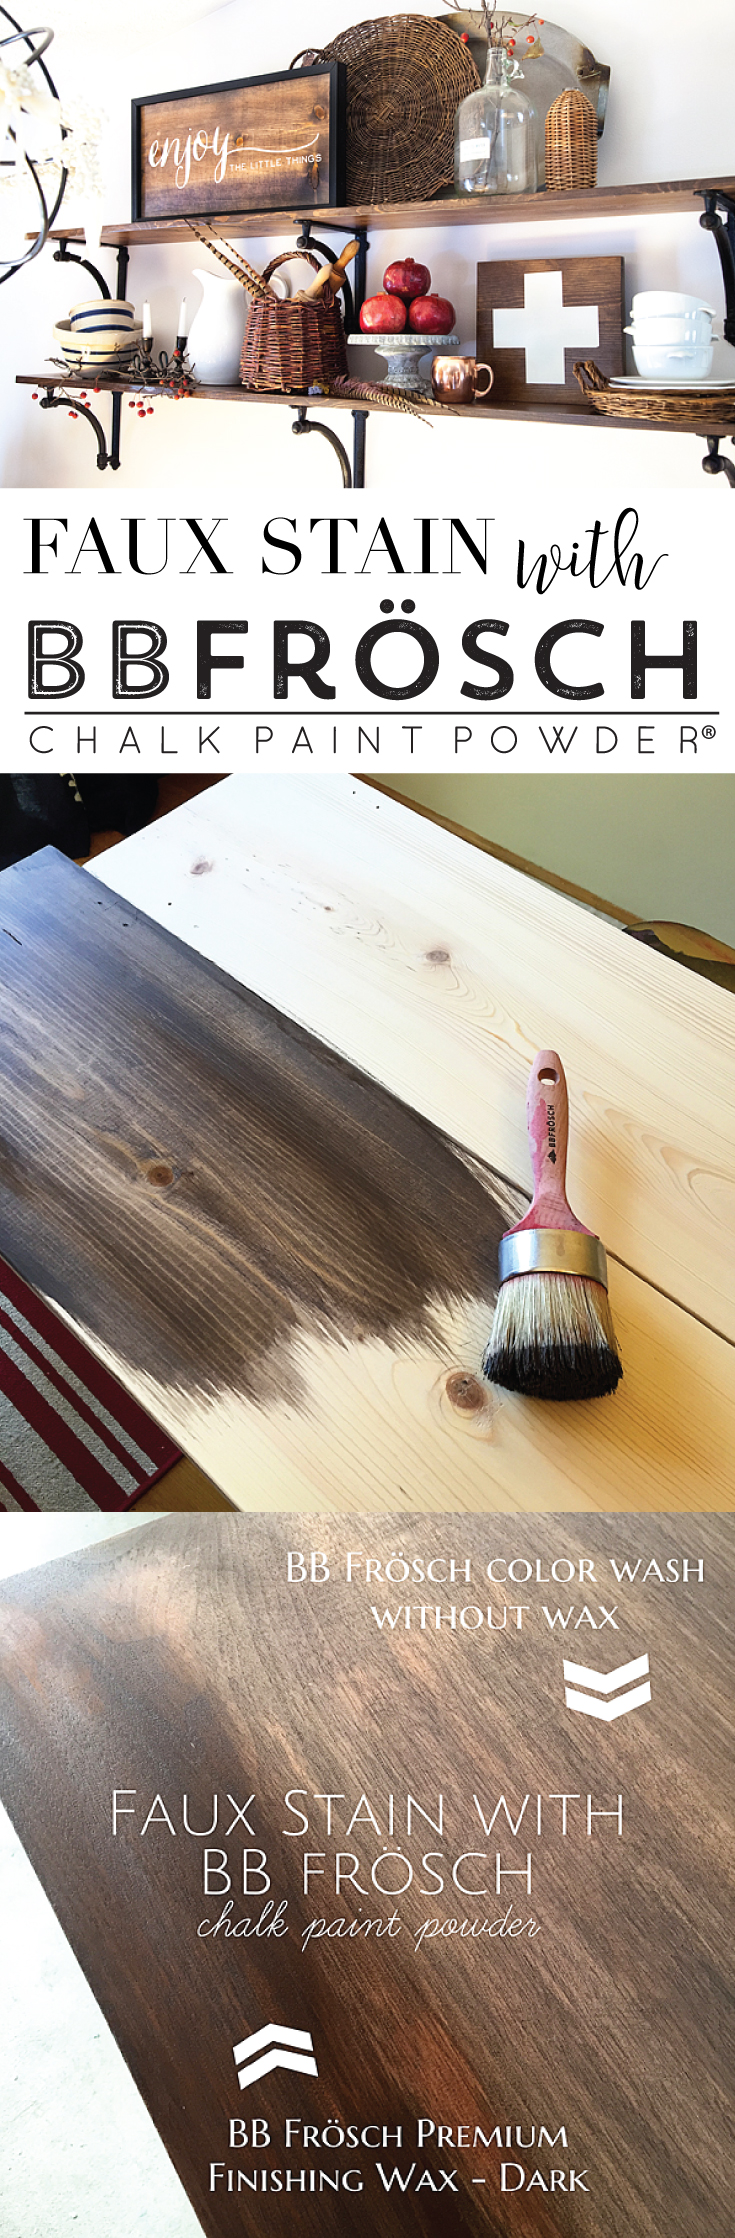
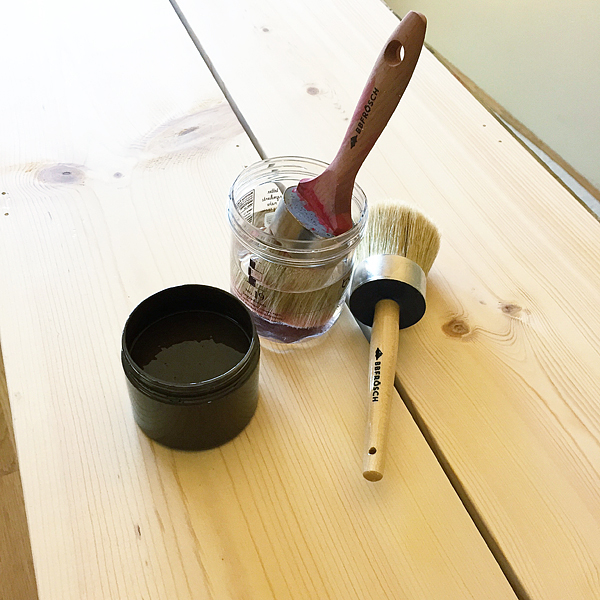
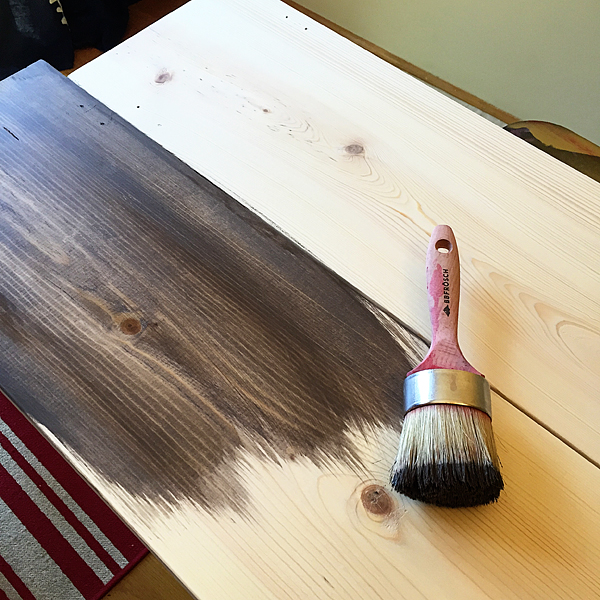
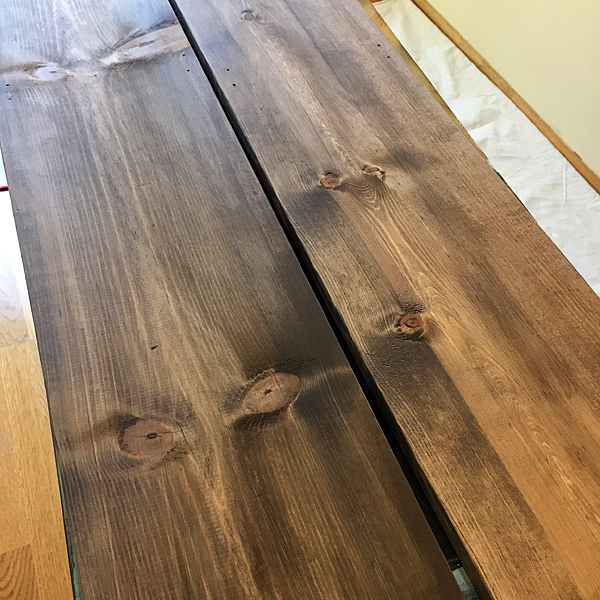
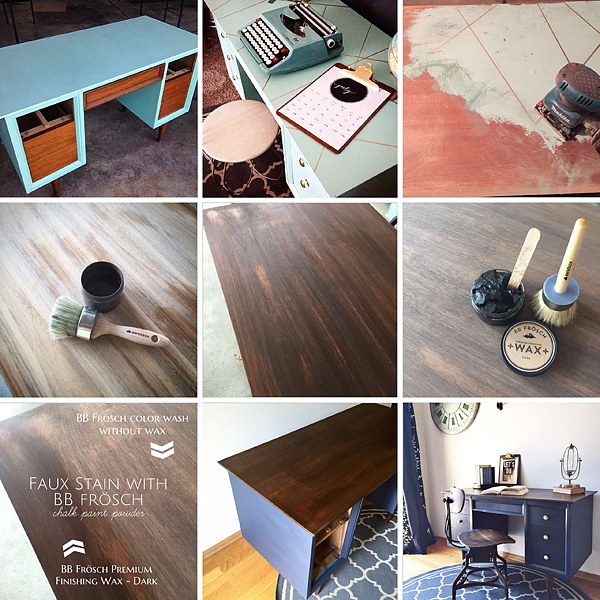
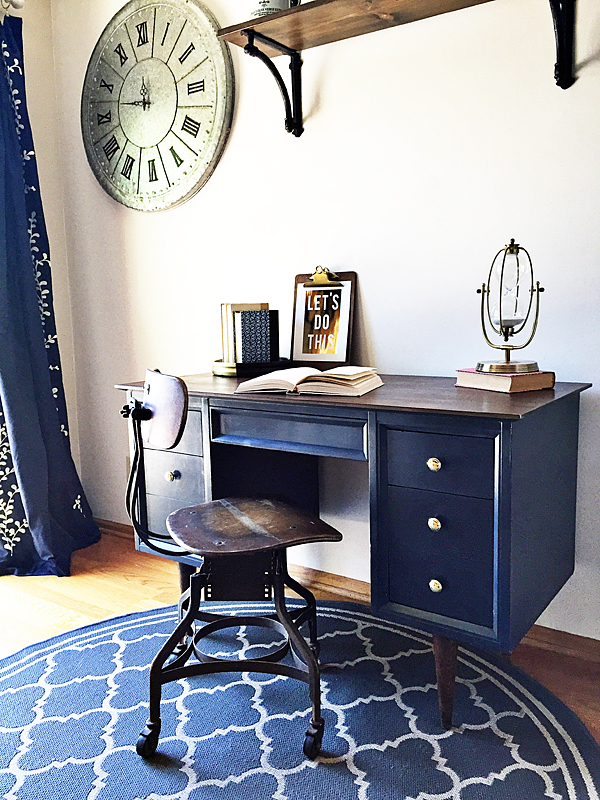
With this sign, started with a BB Frösch (more about BB Frösch in just a second) Faux Stained base. You can learn all about that HERE.

Hot-Cocoa-Sign-Stencil-from-WhipperBerry

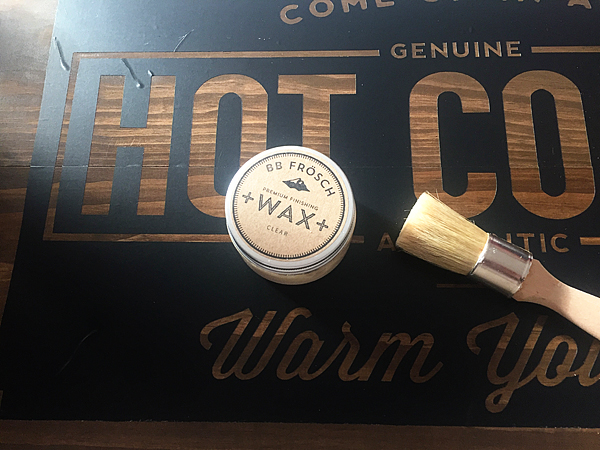
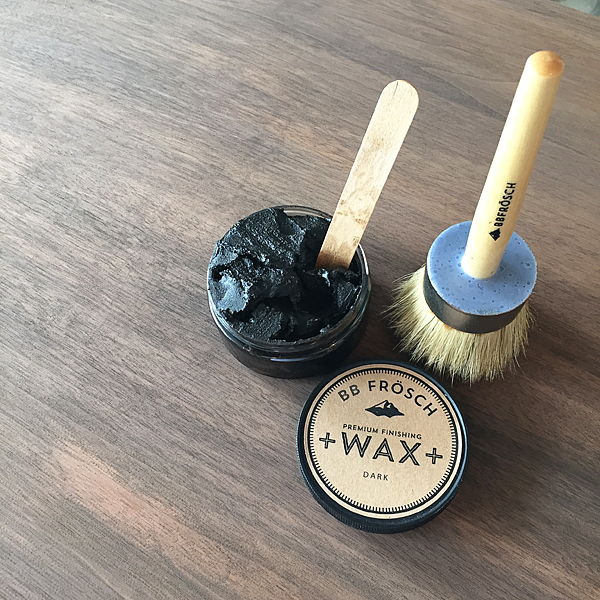
The secret to a perfect stencil is to seal your stencil with BB Frösch Premium Finishing Wax before you paint. It helps seal any edges that might leak.

Then I paint away…

BB-Frosch-Hot-Cocoa-Sign

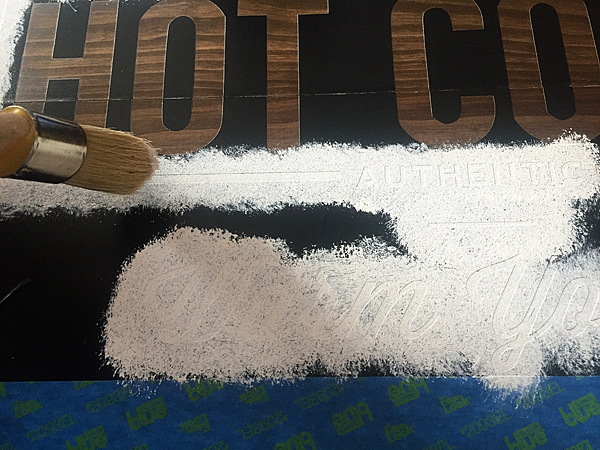
I distress the sign and then finish it with another coat of clear wax  to seal and protect my work. It gives the sign a beautiful sheen.

Silhouette-CAMEO-and-BB-Frosch-GIVEAWAY-3

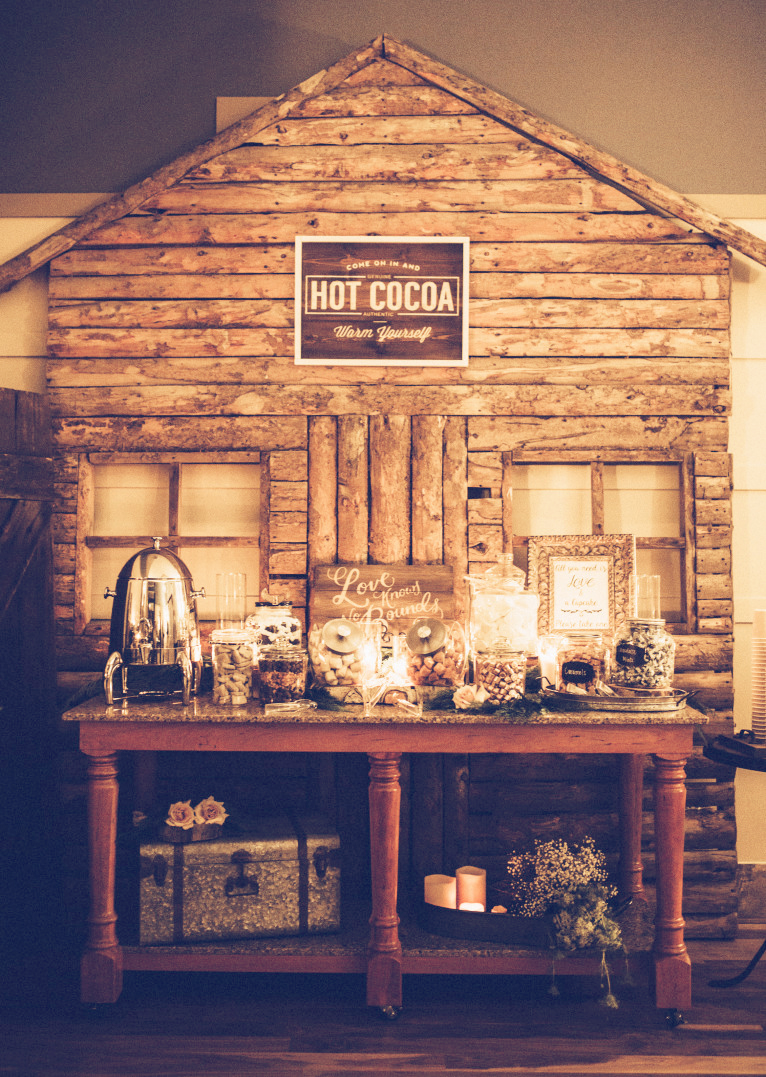
This same BB Frösch / Silhouette sign was a part of a fun wedding recently. Witney Carson from Dancing with the Stars commissioned WhipperBerry  & BB Frösch to create a custom sign for the Hot Cocoa bar at the reception.

Witney_Carson_Wedding_1427-e1452490187527

Witney_Carson_Wedding_2729-e1452489585282

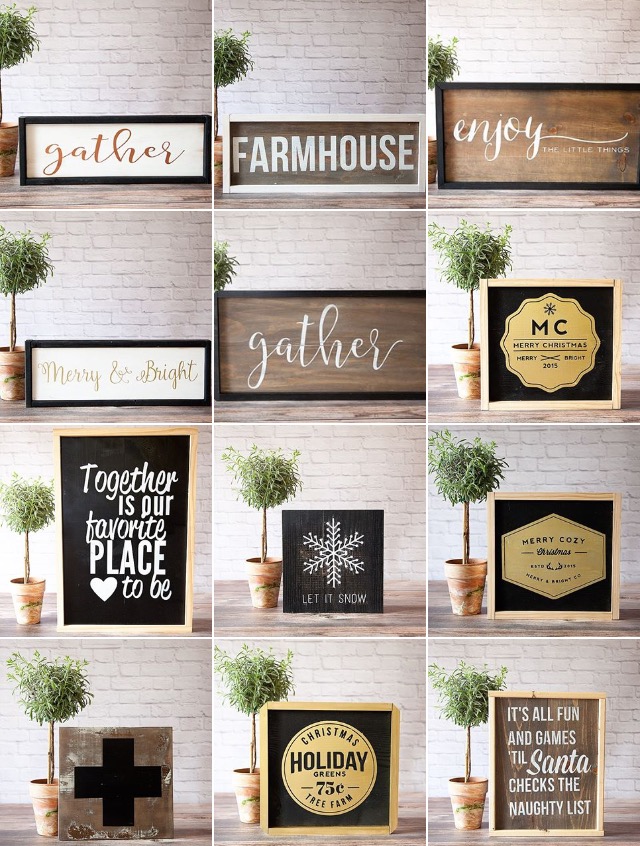
I’ve been working on signs like this for a while now, I LOVE THEM!!

FullSizeRender 2

Now, many of you are very familiar with the whole family of Silhouette cutting machines. Whether you have the Silhouette CAMEO, Portrait or the Curio… You know that you can design and create all kinds of fabulous goodies. If you didn’t know though, I’ve recently switched over to using a Cricut more often. I talk about the differences between Cricut vs Silhouette here. BUT…

What is BB Frösch Chalk Paint Powder?

BB Frosch Red Desk Makeover

Many of you may be asking, “What is BB Frösch Chalk Paint Powder?“

I’m so glad you asked! BB Frösch is an all-natural powder that you add to any flat latex paint and turn it into chalk paint. The reason why we all love chalk paint is the ease of use & manipulability .

Ease of use – NO sanding, stripping or priming.

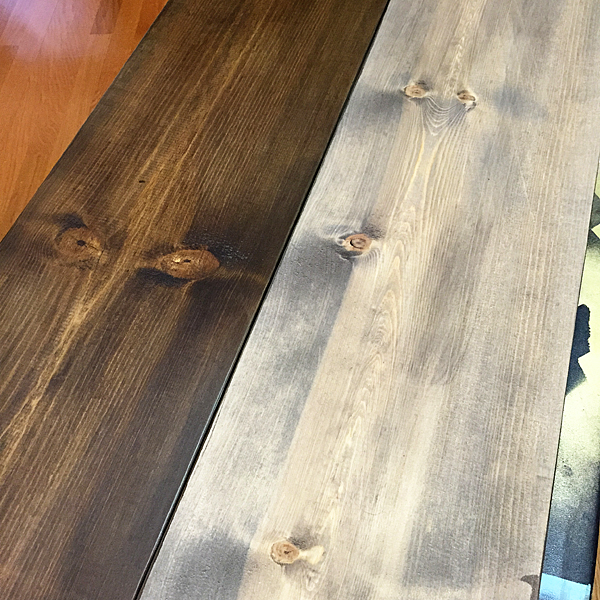
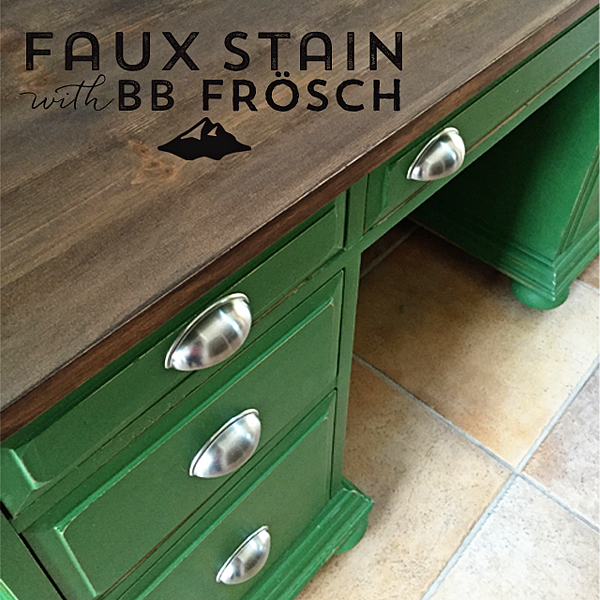
Manipulability – You can manipulate all kinds of finishes like smooth and modern, faux stain – all the way to shabby chic.

What BB Frösch brings to the table is AFFORDABILITY & FLEXIBILITY!

Affordability – When you use BB Frösch Chalk Paint Powder vs. boutique brands of chalk paint, you cut your paint expense in HALF!

Flexibility – YOU get to select your paint color, any color of the rainbow! If you were to use one of the boutique brands, you have a limited color palette.

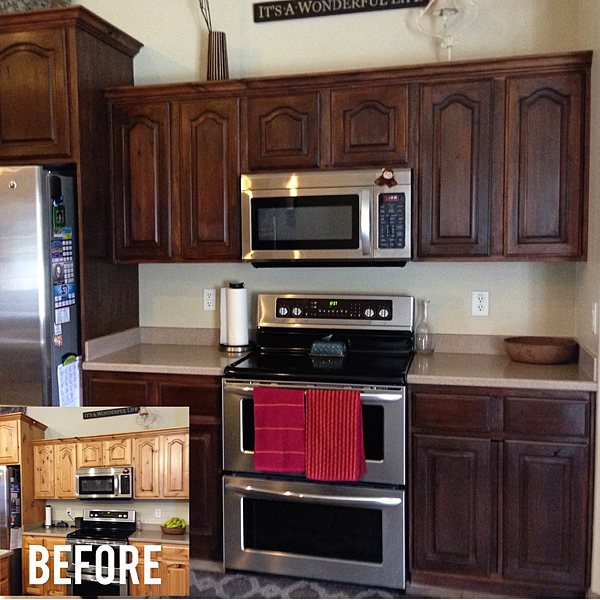
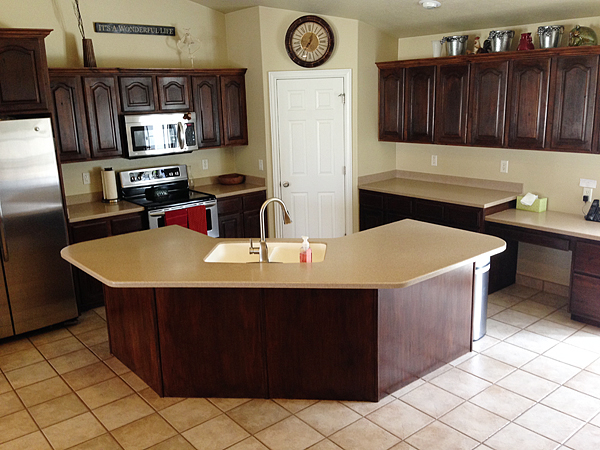
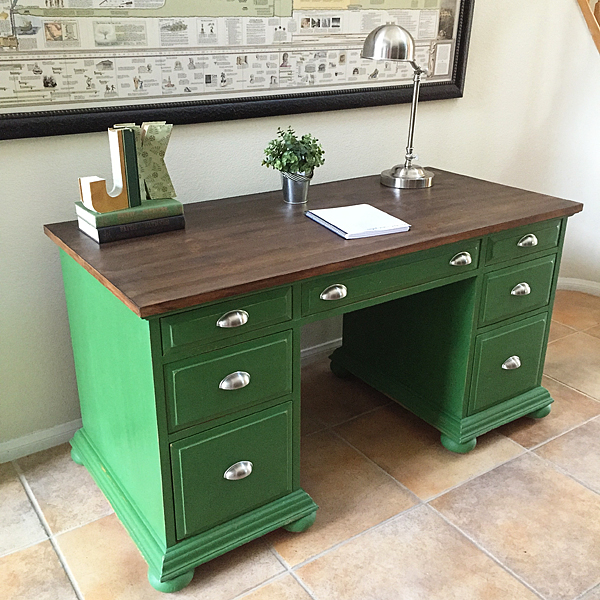
You can paint wood, metal, glass, fabric… We’ve painted pretty much anything from a kitchen all the way down to the rug.

Classy-Clutter-BB-Frosch-Kitchen

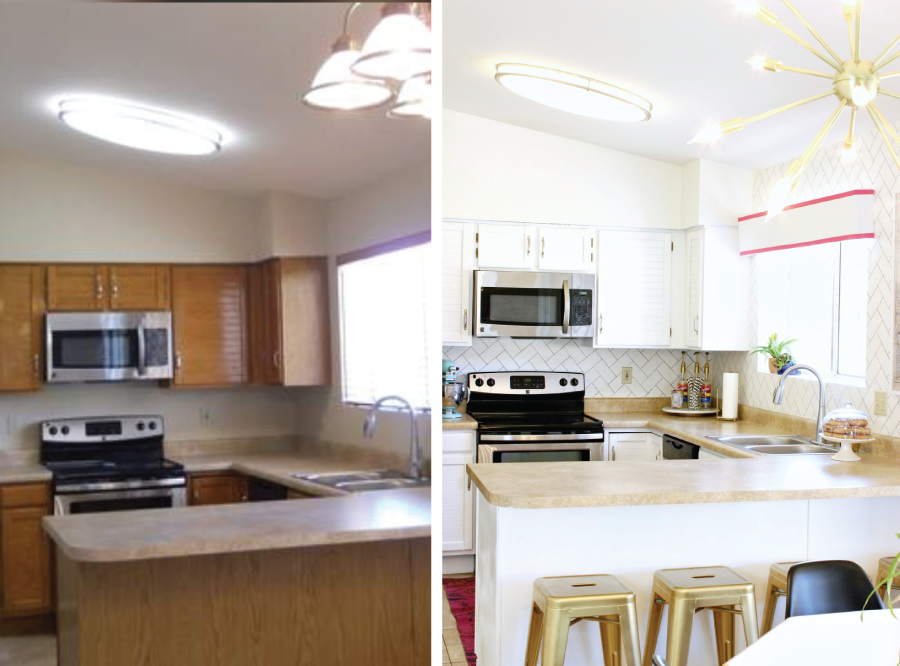
Classy Clutter BB Frösch Kitchen Makeover

BB-Frosch-Red-Desk-Makeover---Barn-Owl-Primitives

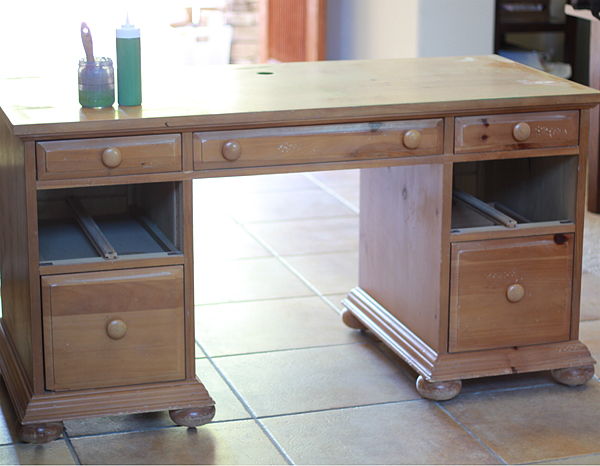
Barn Owl Primitives Red Desk Makeover

BB-Frosch-Chalk-Paint-Powder-painted-RUG

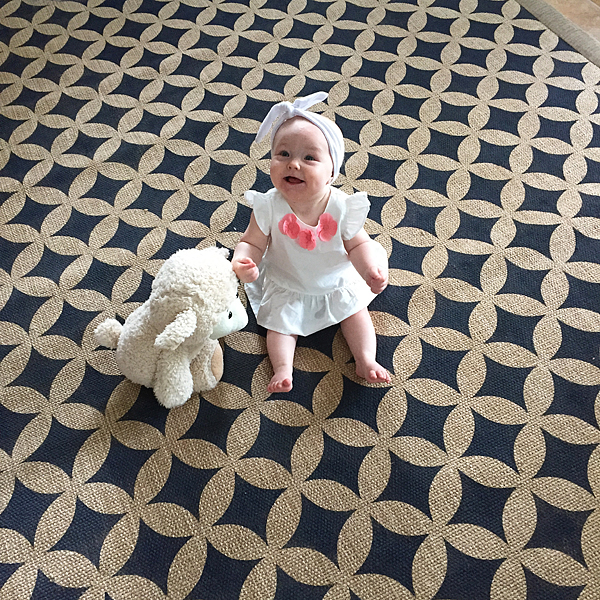
BB Fröshed Stenciled Rug – You can watch how we did that HERE!

You can find all kinds of BB Frösch inspiration on our Instagram account or Facebook.

Silhouette & BB Frösch

The beauty of BB Frösch is that it brings the fantastic Chalk Paint world into the crafting world as well. Before it was way to expensive to use chalk paint for anything other than painting furniture or cabinetry. The cost was way to prohibitive for small scale projects. NOT with BB Frösch!! You can get all of the magic of chalk paint without the high price tag. Couple that with any of the Silhouette products and you have a match made in HEAVEN!!

BB-Frosch-Signs

You can create custom signs like these or create your very own stencil to stencil your pillows, bags or rugs. Really the things that you can do with these two are LIMITLESS!!

GIVEAWAY

Now that we’ve wet your whistle… We would LOVE to help YOU get started on your very own Silhouette + BB Frösch project!

Silhouette-CAMEO-and-BB-Frosch-GIVEAWAY-6

Silhouette & BB Frosch have teamed up to GIVEAWAY a…

Silhouette CAMEO

+

BB Frosch Starter Kit

valued at $415

To one lucky person!

All you have to do to enter is follow the directions in the Rafflecopter box below.

a Rafflecopter giveaway

Simple Kid Friendly DIY Christmas Village

3 · Nov 28, 2015 · Leave a Comment

WhipperBerry-Christmas-Village

Who’s looking for something fun & simple to do this Christmas? Something even the kiddos will love!

This year, I’m looking to simplify. I want to simplify everything, the gift giving, the message, the decor. I want the Holidays to be more about the family and the true meaning of Christmas. Several years ago my family spent a month in Germany in December and we had a chance to enjoy a European Christmas that was simply magical. For the Germans the holiday is all about nature, simplicity & family. We fell in love! Ever since then I have wanted to create more of an old-world Christmas experience and this year is finally the year… I’m so excited!!

It’s all starting with my simple kid-friendly DIY Christmas Village. I wish I could take all of the credit for this, but I can’t. I was inspired by a friend of mine here in Lincoln from Little Red Cabin. She has this beautiful shop where she sells simple, yet stunning decor items for the home. She used to sell these Christmas Villages in her shop but she no longer carries them, therefore I had to make one of my own and of course put my WhipperBerry spin on them. It’s really quite simple, you only need a few items.

Christmas Village Supplies

WhipperBerry-Christmas-Village-5-1

2×2 Select Pine Board

BB Frösch Chalk Paint Powder

Behr Premium Plus Sample Pots FLAT – Mink & Decorator White

Krylon Premium Metallic Spray Paint – Copper Foil

DIY Christmas Village Instructions

The trickiest thing with this project is getting access to a saw. If you don’t have a saw, hit up your neighbors or family members. I’m sure someone has something you can use. I have a Rigid 10 inch Sliding Compound Miter Saw and it works like a dream for this project, but it isn’t the only saw that will work.

How-to-cut-WhipperBerry-Christmas-Village

All you need is to be able to cut at an angle for this little village. There is no rhyme or reason when you’re cutting the little buildings. I made the little buildings roughly 3-4 inches tall, with all different types of angles for their roofs. I mostly used a 30-40˚ angle when cutting to tops of my buildings.

WhipperBerry-Christmas-Village-4

The only one that needs to be exact is the larger building in the center that you place your stencil on. For that one I used a 35˚ cut and made sure both sides of the building were the same hight.

Sand your blocks if needed. My wood cut so nice that I didn’t really need to sand them at all.

Now it’s time to paint your village. I knew that I wanted to keep some natural wood, Faux Stain some building with BB Frösch & then spray some of the buildings with copper spray paint for a metallic accent. I’ve see others use puffy paint for these kinds of projects but I liked the spray paint instead. If you have kids creating these then you can use puffy paint instead because they love it.  I wrote a post about how to make your own puffy paint too!

WhipperBerry-Christmas-Village-colors

Faux Staining & Painting with BB Frösch Chalk Paint Powder

This to me is my favorite part… I LOVE working with Chalk Paint! I use BB Frösch Chalk Paint Powder when I’m crafting. Typically Chalk Paint is too expensive for crafting, but not when you use BB Frösch. I mix the chalk paint powder with a sample pot of Behr Premium Plus Flat paint from Home Depot. The BB Frösch turns the regular paint into CHALK PAINT for a fraction of the cost.

It’s so easy to mix-up your chalk paint, here’s a quick video showing you how to do it.

For the White buildings, I just brush on the Decorator White BB Frösch Chalk Paint and because it’s has the all-natural mineral additives, it dries super quick! I don’t really bother to wax these guys, they don’t really need it. Plus, I like the look of the flat finish.

Now for the Faux Stain… You use this technique that I created when you want to see the natural wood come through. Traditionally people would use Stain for this, but I use BB Frösch because it’s so much easier. You can visit this post on WhipperBerry to learn how to Faux Stain.

Faux-Stain-BB-Frösch-Chalk-Paint-Powder

I love how the faux stain turns out for this Christmas Village. I use the color MINK from Benjamin Moore for most of my Faux Staining. YES, I use the sample pots of Behr at Home Depot, but they have the color recipe for the Benjamin Moore colors in their computer. Just ask for Benjamin Moore Mink and they will be able to look it up.

Copper Buildings

Now for the copper, I use Krylon’s Premium Metallic Spray Paint in Copper Foil. It’s super simple and adds that little pop of copper that is so hot right now.

WhipperBerry-Christmas-Village-6

Just spray paint a couple of your buildings for that accent color.

Spray-Paint-some-sections-of-the-Christmas-Village

Stencil

Now for the stencil…I’ve used a Swiss Cross, but you can use whatever you like. A star, snowflake, heart… Whatever you come-up with really. I cut my stencil out of vinyl on my Silhouette CAMEO but you can either buy a pre-made stencil or create one of your own.

I put the two pieces of cut wood together and then place the stencil on top.

Stenciling-WhipperBerry-Christmas-Village

Then paint with your desired color. ALSO, don’t forget that you can use both the positive and negative parts of the stencil. That way you don’t have to waste anything!

IMG_5997

Peel-off the vinyl once it is dry and voilá… You have a stylish decorated building for your set.

WhipperBerry-Christmas-Village-1

You can also drill a hole into one of your buildings and add a star. I just glued a star ornament from Michaels to the top of a dowel and it fit perfect with the village.

I love this simple decor that is kid friendly. So many Holiday decorations are breakable and we’re constantly following the kiddos around telling them not to touch… With this simple Christmas Village they can touch and play with it all they want!

+ This was originally a guest post on 30 Handmade Days +

How to Make Paint Look Like Stain | Faux Stain with Chalk Paint

63 · Oct 29, 2015 · 6 Comments

Do you love the stained look, but can’t stand the idea of staining?

It’s smelly, sticky, messy… Not to mention all of the chemicals that you are introducing into your home. I have a fabulous alternative for you!

Faux Stain with BB Frösch Chalk Paint Powder®…

Faux-Stain-with-BB-Frösch-Chalk-Paint-Powder

Doesn’t it look fantastic?! BB Frösch is an ALL-NATURAL paint additive that you can add to any flat latex paint and turn it into chalk paint. Mixed with a low-VOC or no-VOC paint you don’t have to worry about any of those harmful chemicals from other stains or paints. With the addition of BB Frösch, you are giving your paint the fabulous adhesion properties and manipulatable properties that everyone loves about chalk paint.

Which Kind of Chalk Paints Should You Use to Make it Look Like Stain?

As you can tell I love BB Frosch. There are a lot of different brands and types that you can use for chalk paint though. I wrote a post about the best chalk paints you can read. The down and dirty of it is that BB Frosch Powder is number one in my heart, and then you have the rest. The difference is that you mix the powder with any paint that you want to use instead of buying actual chalk paint.

PSA- DON’T EVER USE THOSE DIY CHALK PAINT RECIPES! They are harmful to your health and won’t work for this technique. Plaster of Paris and Unsanded Grout have caustic chemicals in them. You don’t want to introduce those into your home or your body for sure.

Now onto the fun stuff…

I’ve been traveling the country teaching BB Frösch Workshops and one of the techniques that we teach is a color wash technique. This is a technique you would use if you wanted to still see the wood grain when painting a piece. Even though I am the co-founder of a chalk paint company, I still am a lover of the natural wood look. I hate to cover up all of that character, BUT… Sometimes a piece still needs new life with a little TLC, OR  maybe you have some raw wood that you would love to add some nice rich color to. For example like my shelves…

Classic-Christmas-Tree-from--WhipperBerry-15

I LOVE the look of a nice rich stain, but I hate to stain! That’s when I thought… Why not use that color wash technique that I teach all the time and make it LOOK like it was stained? That is what I set out to do.

How to Faux Stain with BB Frösch Chalk Paint

I found a beautiful brown paint color from Benjamin Moore called Mink and I LOVE it!! When you are faux staining with this color it’s super fun because it pulls a little gray when painting (faux staining) your project. It’s a beautiful weathered wood look but, when I finish it with our Dark BB Frösch Premium Finishing Wax it gives it that nice rich stained look that everyone loves. If I want to keep the weathered wood look, I would just finish it with the clear wax.

BB-Frösch-Faux-Stained-wood-planks-with-and-without-wax

But I’m getting ahead of myself.

First, you need to mix your paint with BB Frösch Chalk Paint Powder. Here is a quick video on how to do that…

Mixing BB Frösch Chalk Paint Powder from BB Frösch on Vimeo.

Once your paint is mixed, you’re ready to go.

Quick-and-easy-faux-stain-with-BB-Frösch-

You’ll need your trusty BB Frösch paint brush and wax brush for this project and a jar of water along with your mixed BB Frösch Chalk Paint.

This technique works amazingly well on raw wood, but it can also be used on a finished piece with a little extra care. We have a customer that faux stained her entire kitchen without any sanding or striping  before she set to work. Here’s a look at her before and after…

BB-Frösch-Faux-Stained-Kitchen-2

YEA, it’s that aaaamazing!! Not to mention the fact that this took DAYS rather than weeks or heaven forbid months to finish. Couple that with the fact that this took less then a gallon of paint and your golden!

BB-Frösch-Faux-Stained-Kitchen

For this tutorial, I am using raw wood that I purchased at Home Depot. All you need to do is make sure your brush is pretty wet, dip it in your paint and then swirl it around on your paint lid, mixing the water and paint a bit.

Then, going with the grain, brush the watered-down paint onto your wood. Follow that with a lint-free cloth and lightly wipe the surface of your wood exposing the grain of the wood.  THAT’S IT!!

How-to-faux-Stain-with-BB-Frösch-Chalk-Paint

Continue that process until you’ve finished your entire piece. It will literally take just minutes to dry and then you’re ready for the wax.

BB-Frösch-Dark-Premium-Finishing-Wax-for-Faux-Staining

This is another simple step. Take your wax brush and butter a little bit of wax onto your brush, just like you butter your toast. Then, with the grain brush on the wax in a small section about the size of a 12×12 piece of paper. Then using a lint-free cloth, wipe off any excess wax and then rub the area until smooth. Move on to your next section and repeat the process until your piece is finished. Go back with a lint-free cloth and then buff to your desired sheen.

faux-staining-with-BB-Frösch-finished-boards

These shelves took only 30 minutes, start to finish… READY TO HANG in 30 minutes!!

You can’t do that with stain!!

BB-Frösch-Faux-Stain

Funny thing… Both of those signs that I made for my Fall display are also Faux Stained with BB Frösch as well, using the same technique just on a smaller scale.  See, you can craft with BB Frösch Faux Stain and transform your kitchen at the same time. It’s BRILLIANT if I do say so myself!

This technique is catching fire… Here are a few more projects that use the same technique.

BB-Frösch-Faux-Stained-and-Green-Desk

This beautiful desk was transformed by Kacey Stout one of our BB Frösch Masters in Las Vegas. She painted the base of the desk with Behr Paint “Hummingbird” and then Faux Stained the top with Benjamin Moore “Mink combined with BB Frösch Dark Premium Finishing Wax. She transformed it from this…

BB-Frösch-Faux-Stained-Desk-Before

To THIS…

BB-Frösch-Faux-Stained-and-Green-Desk-After

I also transformed an old desk with the same idea…

BB-Frösch-Faux-Stained-Mid-Century-Desk

WhipperBerry-BB-Frösch-Faux-Stained-Desk

I bought that desk at a garage sale for $10… After I gave it a good once over with BB Frösch, I sold it for a couple hundred. Not to shabby!

Needless to say, this is by far one of my favorite techniques. I’ve even used it to make a large set of dice for Yard Yahtzee… This set I kept that weathered wood look and just used a clear wax to finish the look.

Yard-Yahtzee-free-printable-from-WhipperBerry-11

Here is another set of shelves that we made for an appearance on Studio 5 in Salt Lake.

BB-Frösch-Faux-Stain-at-Studio-5

BB-Frösch-at-Studio-5

Here’s Kristin and I on set, AND… Here’s a link to the segment.

If I haven’t convinced you yet to try this… I don’t know what will!

Go grab yourself some BB Frösch and get to work. You’re going to LOVE it!!

DIY Yard Yahtzee

5 · Aug 20, 2015 · 4 Comments

Are you looking for something fun for your summer holiday gatherings or even a lazy Sunday afternoon? Labor Day is coming up & kiddos love games. The bigger they get, the bigger they want their games! We were getting ready for a family event and I thought it would be super fun to create a DIY Yard Yahtzee game with large dice for the family to enjoy!

DIY-Yard-Yahtzee-from-WhipperBerry

This is a great way to gather everyone for a little fun this summer. The dice are super easy to make, I whipped up 2 sets in a couple of hours. They are simple 4x4x4 blocks of wood that are faux stained with BB Frösch Chalk Paint. When they aren’t being used to play games, they make great decor for your home.

Here’s your materials list…

12 4x4x4 blocks ( I bought a 4x4x10 board at Home Depot and cut it into 4x4x4 blocks.)

8 oz. BB Frösch Chalk Paint  – Brown

(You can select whatever color you like, I’ve used Mink from Benjamin Moore mixed with  BB Frösch Chalk Paint Powder. You can just grab a sample pot of paint at Home Depot in your favorite color and mix it with BB Frösch. You can even ask them for Mink, they have it in their system even though they don’t carry Ben Moore products.)

8 oz. BB Frösch Chalk Paint  – White

BB Frösch Premium Finishing Wax – Clear & Dark

Paint Brush

Wax Brush

Round sponge

Directions

Please make sure you sand your blocks once they are cut, you don’t want any rough edges. Dust them off and get your space ready for a quick paint session. CLICK HERE for a quick video tutorial on how to make these cute dice.

Large Dice for Yard Yahtzee from Heather Thoming on Vimeo.

It’s really just that simple. A little paint & wax and you’re good to go. This is a great painting technique for furniture and all kinds of stuff… It’s not just for dice!

Now, all you need to do is gather the troops and PLAY!!

If you’re new to Yahtzee, here’s a link to the rules of the game that you can print if needed. You can download your printable Yahtzee score sheet here.

I’ve also created a fun printable that you can download.

Yard-Yahtzee-Printable-Score-Card

Click HERE to download Yahtzee Score Card

Now all you have to do is grab the troops and have a ball!!

Yard-Yahtzee-free-printable-from-WhipperBerry-13

Yard-Yahtzee-free-printable-from-WhipperBerry-4

+ This post originally aired on Skip to my Lou +

  • Go to page 1
  • Go to page 2
  • Go to page 3
  • Go to Next Page »

Primary Sidebar

Heather from Whipperberry
Hello... my name is Heather and I'm the creator of WhipperBerry a creative lifestyle blog packed full of great recipes and creative ideas for your home and family. I find I am happiest when I'm living a creative life and I love to share what I've been up to along the way... Come explore, my hope is that you'll leave inspired!

Footer

  • Privacy Policy

Copyright © 2023 · Seasoned Pro