• Skip to primary navigation
  • Skip to main content
  • Skip to primary sidebar
  • Skip to footer

Whipperberry

WhipperBerry • Your Home For Creative Inspiration

  • Home
  • Recipes
    • Starters
    • Easy Weeknight Dinners
    • Main Dish
    • Salads
    • Side Dish
    • Soups & Stews
    • Desserts
    • Breakfast
    • Miscellaneous
  • Tutorials
    • Creative Crafts
    • DIY Decor
    • Fabric Crafts
    • Food How-To
    • Jewlery
    • Paint Projects
    • Paper Art
    • Party Styling
    • Photography and Graphic Design
    • Silhouette
  • Holidays
    • Easter
    • Mother’s Day
    • Father’s Day
    • 4th of July
    • Halloween
    • Thanksgiving
    • Christmas
    • Valentine’s Day
  • Gift Ideas
    • Gifts For Everyone
    • Gifts for Dad
    • Mother’s day
    • For The Girls
    • For The Kids
    • Teacher Gift Ideas
    • Christmas
  • Printables
    • Holiday
    • Gift Idea
    • LDS Primary
  • Travel
  • About
    • Terms
  • Contact
  • Nav Social Menu

    • Facebook
    • Instagram
    • Pinterest
    • RSS
    • Twitter

Recipe

Plum Berry Basil Ice Cream

1 · Jul 30, 2013 · 3 Comments

 
A couple years ago my sister in law introduced me to the flavor combination of strawberries and basil. Sounds odd at first, but they compliment each other beautifully! And I recently found a love for a frozen treat put plum and basil together, so when I was assigned to make one of the flavors of homemade ice cream for a family reunion, I knew what I wanted to do! Considering that one of my husband's uncles was hesitant to try it because of the basil, but then asked for the recipe later, I'd say it was a success.
 
 
Homemade Plum Berry Basil Ice Cream
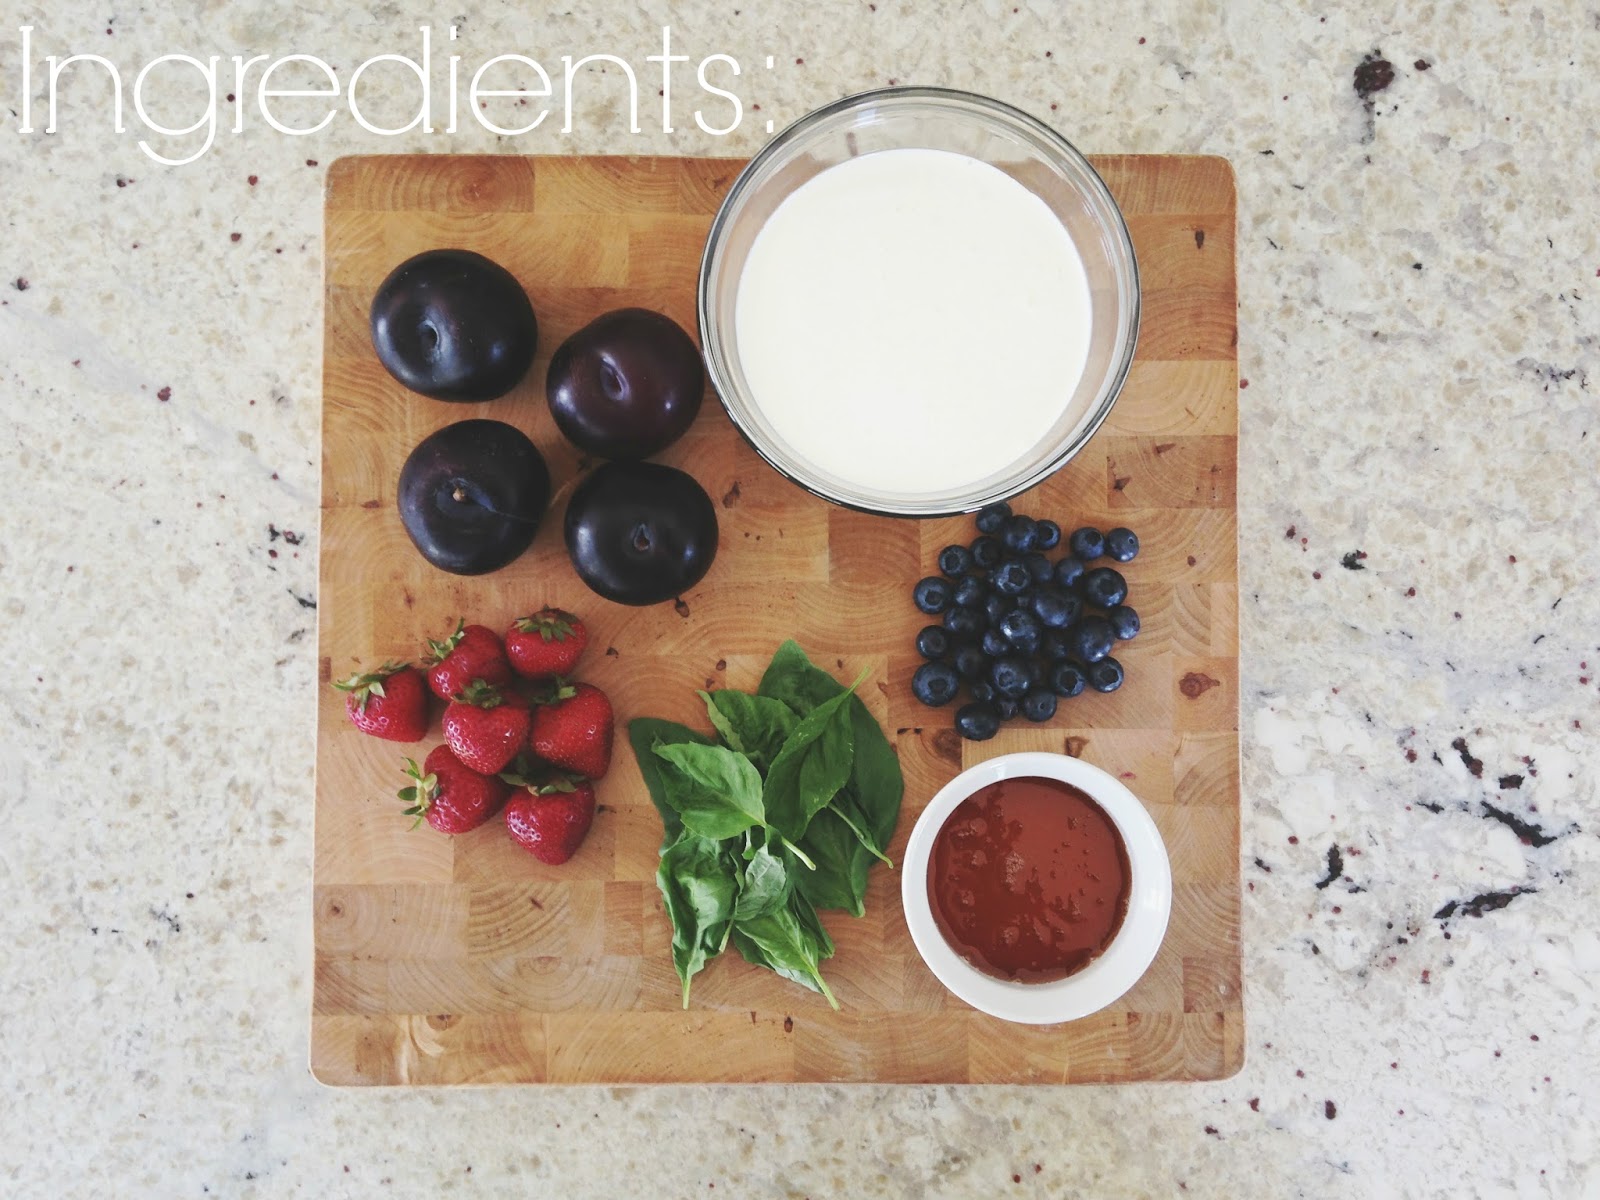
Yields: 1 quart
 
Ingredients:
1 lbs very ripe plums, pitted and chopped, with skins (I used 4 large plums)
7-8 strawberries, sliced
2/3 cups blueberries (fresh or frozen)
1/2 cup agave (or 3/4 cup sugar)
2 cups heavy whipping cream
1/3 cup fresh basil, chopped and bruised
 
In a medium pot, cook the plums and strawberries over medium heat, stirring often. Continue until the fruit softens and the plums start to break down — about 15 minutes. Pour into a heat proof bowl (I used a 9×13" glass pan to cool it down faster), add blueberries, then cover and refrigerate until the mixture is room temperature — about 30 minutes. 
 
Pour the cream in the pot you just used for the fruit, and add the agave (or sugar) and basil, which has been finely chopped and bruised by pressing it with the flat part of the knife to release the oils. Warm the cream mixture over medium-low heat, stirring often. Cook for about 5 minutes (if you use sugar, make sure it has dissolved), then remove from heat to let steep — about 15-20 minutes.
 
Pour cream mixture through a strainer into the bowl (or 9×13" pan) with the fruit mixture to strain the basil, make sure to press the basil leaves with a wooden spoon to release any extra liquid and as much flavor as possible. And if you really like the basil flavor, like myself, you can put a spoonful of it back in. 🙂 Stir the mixture, then cover and refrigerate, until the ingredients are very cold — 1 to 2 hours, or more.
 
Pour ice cream into an ice cream machine and freeze/churn until desired consistency. You could serve immediately, or place in a freezer container and freeze for another few hours to harden it up. The lovely fuchsia color comes from the plum!
 
** If you don't have an ice cream maker, go here for great directions on how to make/freeze ice cream without a machine. 
 
 
Thank you again for having me Heather! Hope everyone is enjoying an extra sweet summer!
 
xo,
Haley


 Pear & Gorgonzola Pizza // DIY Sillhouettes on Canvas // Tuxedo Zucchini Bread Muffins
 
Haley life is sweet
 

Chocolate Biscoff Buttercream Cupcakes

5 · Jul 24, 2013 · 19 Comments

This post is brought to you by Biscoff Spread // Have you “Spread the Love” yet? You know, the spread that has taken the nation by storm… Biscoff Spread.  I have dipped my toe in the Biscoff pool a couple of times and today I’m sharing my Chocolate Biscoff Cupcakes along with sharing about the Biscoff Spread the Love Challenge. All you have to do is share your photos of how you use Biscoff. You could win a trip to Belgium to the Biscoff factory, cash prizes or a years worth of Biscoff!!

Chocolate Biscoff Cupcakes from WhipperBerry

What is Biscoff? Well, if you’ve ever flown on a commercial airline within the last 20 years you may have had a Lotus Biscoff cookie as a in-flight treat.  They are a tasty cookie created in Belgium, and in Europe they are called Lotus Speculoos cookies.


Lotus Cookies from WhipperBerry


Back in 2007 a culinary enthusiast brought their Speculoos creation to a Belgium reality television show, not unlike our Shark Tank here in the U.S. and pitched an idea for turning the Speculoos cookies into a spread. The folks at Lotus LOVED the idea and that is how Biscoff Spread was born. Within 3 hours of it’s first release, the Biscoff spread sold out and it has become an overnight sensation all over the world!! Click here to find out where you can buy Biscoff.


Baking with Biscoff and WhipperBerry


All Biscoff products are made with all-natural ingredients and are preservative-free. They are free of trans fat and cholesterol and made without genetically modified ingredients or artificial colors. They are Vegan and also do not contain nuts. 


You can enjoy Biscoff in many ways, on toast, with apple slices, in a sandwich or in all kinds of sweet goodies. About a year ago, I created a Biscoff Crepe Raspberry Cake that was truly a show stopper. 


Raspberry-and-Biscoff-Crepe-Cake-copy


When I was developing that recipe I created my Biscoff buttercream recipe that is perfect for all types of desserts. This week I topped my favorite chocolate cupcakes with that amazing Biscoff buttercream and it was heaven in cupcake form. 


Chocolate Cupcakes with Biscoff Buttercream from WhipperBerry

Chocolate Biscoff Buttercream Cupcakes


Chocolate Cake:


1 Chocolate Cake Mix (any kind, I've used chocolate fudge, Swiss chocolate, or milk chocolate)


1 C Mini Chocolate Chips


1 cup Sour Cream


1 Pkg. of Chocolate Pudding (small 3.5 oz. box)


Biscoff Buttercream:


2 sticks of unsalted butter at room temperature


1 cup Biscoff


1 tsp. vanilla extract


pinch of salt


3-4 cups of powder sugar


1-2 tbsp. whole milk


Directions

For the most amazing chocolate cake ever, prepare cake batter as directed on box, and add sour cream, pudding and chocolate chips.  Pour into cupcake liners.  Bake as directed on box (you might need to add a minute or two to the baking time because of the added ingredients).  Place on a wire rack to cool.

For the buttercream I just modified my Simple Vanilla Buttercream recipe a bit by adding the Biscoff and lowering the amount of vanilla extract.  It’s a good classic and easy buttercream recipe.

In a bowl of an electric mixer with the paddle attachment,  place softened butter and Biscoff.  Cream the two together and add vanilla extract.  Turn mixer off and add half of the powder sugar, carefully turn the mixer on low and mix the sugar in completely. Add the remaining sugar slowly until it creates a dough like consistency. Add 1 tbsp. of milk and mix on high. Check the consistency of the buttercream. If it’s too tight add more milk. Mix on high for 5-7 minutes until light and fluffy.


If needed store in a air tight container in the refrigerator for up to a week.  Take out of the fridge for an hour or two before you want to use it to make sure that it is at room temperature when you need it.


Using a jumbo closed star decorating tip with a pastry bag from Sweet Baking Supply, I iced the cupcakes with a simple swirl and then drizzled a little melted Biscoff on top. For some added flair you can break-off a piece of a Lotus Biscoff cookie and place it on top of the frosting. These cupcakes will hold up quite well as long as the temperatures aren't too hot. Refrigerate if don't plan on eating them for a bit, but make sure to bring them back up to room temperature before serving. 


Biscoff Cupcakes


Don't forget to visit the Biscoff challenge for a chance to win a fun trip or a years worth of Biscoff. You can also find fun ideas on their Pinterest Boards along with their Facebook page.


Healthy Ice Cream Sandwiches

2 · Jul 15, 2013 · 1 Comment

Hello Whipperberry readers! Jenn here from Clean and Scentsible!  I'm so excited to be back here today sharing one of our kid-friendly, healthy summertime treats…


These ice cream sandwiches are very simple to make and the kids can have lots of fun coming up with their own variations.  To make the "ice cream" simply blend up 2 ripe, frozen bananas in your blender or food processor until it turns soft and creamy {like a soft served ice cream texture}.  Spoon the mixture between 2 graham crackers and place in the freezer for approximately 20-30 minutes {makes 6 sandwiches}.
 
 
My oldest is a huge sprinkles fan, so we added some colorful sprinkles to these ones.  They also taste wonderful with peanut butter {or Nutella!}spread over the graham crackers and, of course, adding a little chocolate is always a yummy option too! 🙂
 
 
If you get a chance, pop on over to Clean and Scentsible for some more summertime inspiration!  There's always lots going on and I would love to hear from you!
Summertime Caddy and Frosted Mason Jars
Watermelon Pudding Pops
Sisal Rope Flower Pots
You can also connect with me here:
 Facebook / Pinterest / Instagram / Twitter


I hope you are all having a wonderful summer!

Jenn Clean and Scentsible

Photobucket

Mint Chocolate Chip Ice Cream Recipe

6 · Jul 9, 2013 · 7 Comments

Mint Chocolate Chip Ice Cream Recipe // It is great to be back here at Whipperberry! Let’s talk about one of my favorite summer treats… Ice cream! It gets pretty warm here in Utah. As the temperatures rise, my mind gets busy trying to think of fun and new flavors of ice cream to make. I always end up back at the old standby of chocolate chip. This time I wanted to get a little crazy and add a little somthin’ extra!

mint_ice_cream

Now, you might be surprised to learn that I DO NOT own an ice cream maker! *GASP!* So how is it that I made this amazingly fluffy and delicious looking treat? Easy! I combined two basic ingredients, added in my mixers and froze away. You can see the tutorial for the basic two ingredient ice cream here.

mint_chocolate_chip

Here is what you will need: 2 cups of heavy whipping cream 1 (14 oz) can sweetened condensed milk 1 cup chocolate chunks 1/2 teaspoon peppermint extract 1/2 teaspoon vanilla extract Now, let’s get started! In a small bowl mix together the condensed milk, chocolate chunks, and extracts. Set aside. Whisk your heavy cream in the bowl of an electric mixer until soft peaks form. Gently fold your whipped cream into your condensed milk mixture. Pour this into an airtight container and transfer to your freezer. Allow to freeze 6 hours, or overnight.

mint_ice_cream_close

I like to chop my chocolate chunks a bit to make them a little smaller, but that’s just personal preference.  

mint

The best thing about this recipe is how adaptable it is! Don’t like mint or chocolate chips? No problem! Switch them out for cherries or cheesecake. Or stick with plain ol’ vanilla. The possibilities are endless! Hop over to my site and check out a few of the fun flavors I’ve made!

jesseca from one sweet appetite

One Sweet Appetite

cake batter ice cream // july bbq // parmesan fries

  • « Go to Previous Page
  • Page 1
  • Interim pages omitted …
  • Page 39
  • Page 40
  • Page 41
  • Page 42
  • Page 43
  • Interim pages omitted …
  • Page 53
  • Go to Next Page »

Primary Sidebar

Heather from Whipperberry
Hello... my name is Heather and I'm the creator of WhipperBerry a creative lifestyle blog packed full of great recipes and creative ideas for your home and family. I find I am happiest when I'm living a creative life and I love to share what I've been up to along the way... Come explore, my hope is that you'll leave inspired!

Footer

  • Privacy Policy
  • Crafts
  • Food
  • Gifts
  • Holidays
  • Home
  • Mom Life
  • Recipes
  • Travel

Copyright © 2026 · Seasoned Pro