• Skip to primary navigation
  • Skip to main content
  • Skip to primary sidebar
  • Skip to footer

Whipperberry

WhipperBerry • Your Home For Creative Inspiration

  • Home
  • Recipes
    • Starters
    • Easy Weeknight Dinners
    • Main Dish
    • Salads
    • Side Dish
    • Soups & Stews
    • Desserts
    • Breakfast
    • Miscellaneous
  • Tutorials
    • Creative Crafts
    • DIY Decor
    • Fabric Crafts
    • Food How-To
    • Jewlery
    • Paint Projects
    • Paper Art
    • Party Styling
    • Photography and Graphic Design
    • Silhouette
  • Holidays
    • Easter
    • Mother’s Day
    • Father’s Day
    • 4th of July
    • Halloween
    • Thanksgiving
    • Christmas
    • Valentine’s Day
  • Gift Ideas
    • Gifts For Everyone
    • Gifts for Dad
    • Mother’s day
    • For The Girls
    • For The Kids
    • Teacher Gift Ideas
    • Christmas
  • Printables
    • Holiday
    • Gift Idea
    • LDS Primary
  • Travel
  • About
    • Terms
  • Contact
  • Nav Social Menu

    • Facebook
    • Instagram
    • Pinterest
    • RSS
    • Twitter

Cricut

How to Write on Labels with Cricut to Create Your Own Handwritten Labels

129 · Mar 28, 2017 · Leave a Comment

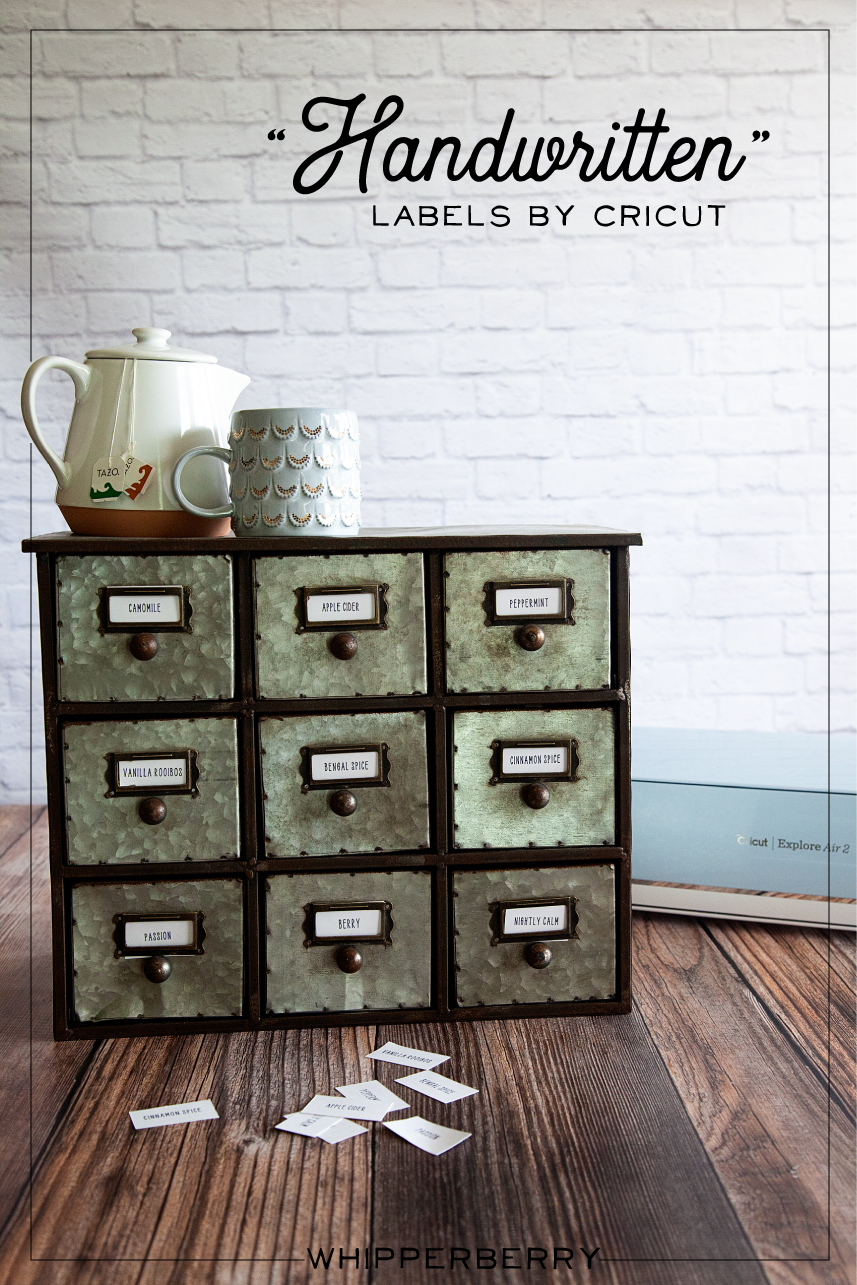
Love the look of handwritten labels but you’re not in love with your own handwriting? No problem! These Cricut handwritten labels come to the rescue!

Handwritten label by Cricut. Get that perfect look for your home weather it's; industrial labels, farmhouse labels or modern labels. You can achieve that perfect "handwritten" look even if you don't have great hand writing with the Cricut using your favorite handwritten fonts.

My Handwritten Labels Circut Explore Air 2 Project

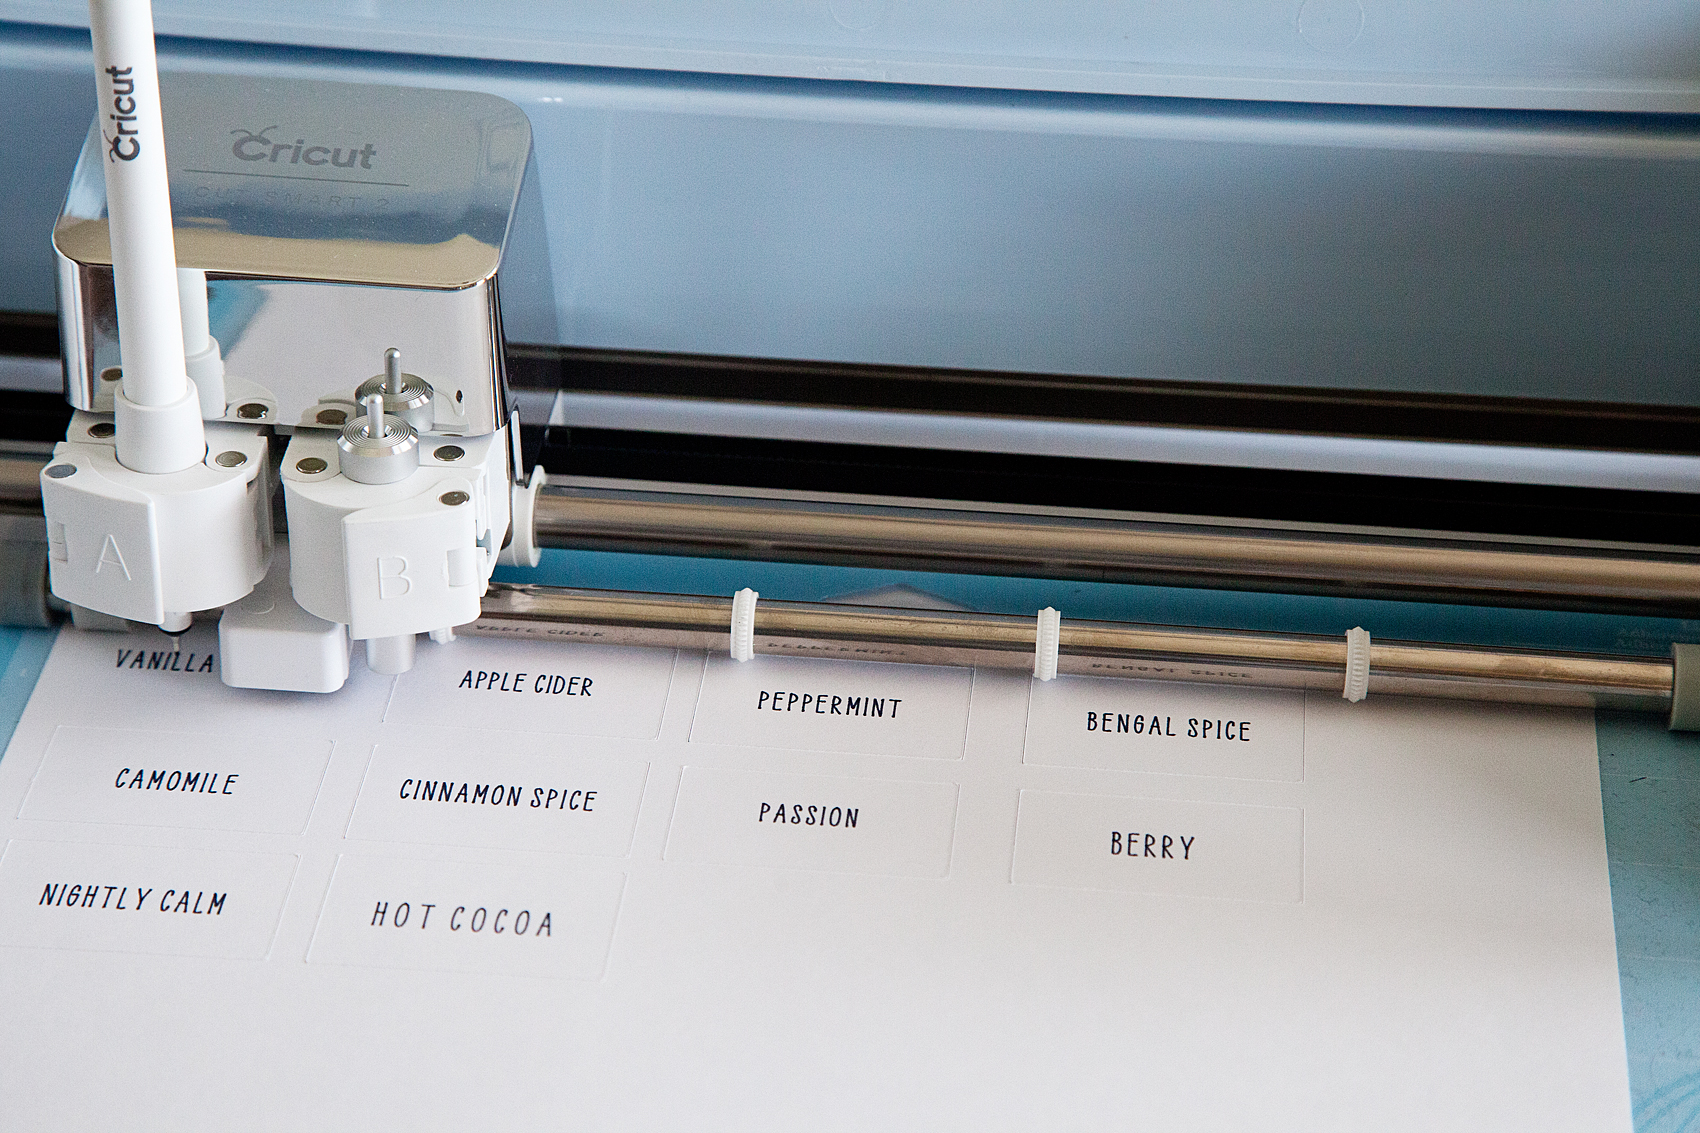
Did you know that you can WRITE with your Cricut and cut out cute labels? You can even write on Avery labels with your Cricut! I put the Cricut markers to the test and created an easy-to-follow video to show you how to create some simple industrial-style labels that everyone loves right now. Here’s what inspired this project…

I have become obsessed with herbal tea this winter. My husband and I would share a mug of tea every night before bed to warm ourselves before hitting the hay. We started with one flavor of tea, Camomile, and over the chilly months, we started collecting all kinds of new flavors. Soon our collection of herbal tea started to take over our kitchen and I decided that it was time to find a better storage solution for our newfound tea love. I found a great industrial-style cabinet that fits perfectly in our kitchen and loaded it up with all of our tea.

The next step was to create some labels for our new tea storage solution. Because the cabinet was an industrial-style cabinet I wanted to create some industrial-looking labels that were handwritten. The problem… I’m not a huge fan of my handwriting. I was just not blessed with that gift, nor do I have the time to practice, practice, practice. I remembered that my Cricut Explore Air 2 has a great “handwritten” option using the Cricut Explore Pens.

Handwritten label by Cricut. Get that perfect look for your home weather it's; industrial labels, farmhouse labels or modern labels. You can achieve that perfect "handwritten" look even if you don't have great hand writing with the Cricut using your favorite handwritten fonts.

How to Write on Avery Labels with Your Cricut – Handwritten Label Inspiration

This is such a simple beginner project that anyone at any creative level can create for their home with their Cricut machine. For this industrial-style label, I kept things simple. I really only needed a “handwritten” tea name with a rectangle cut around it… Pretty basic. However, you can create all kinds of great “handwritten” labels with fancy shapes as well. I created a Label Design Pinterest board with some inspiration for all kinds of fun “handwritten” labels that you can make with the Cricut Explore Air 2.

The video below shows you in-depth how to create the lables.

How to Make Your Own Handwritten Labels With Cricut Explore Air 2

With all of that inspiration, you have to be chomping at the bit to get started. I created a simple, easy-to-follow video to show you exactly how to make these basic handwritten labels for a storage solution in your home. Grab a cup of tea, sit back and learn how to make your own labels.


Here’s What You Need to Make These Cricut Handwritten Labels

There are a few things you’ll need to make these awesome labels. The good news is you can get all of them online. Since you’re reading this I bet you already have a Cricut machine but if not, what are you waiting for!? The rest of the tools you may or may not have and I’d recommend picking them up to get this project going 🙂

  1. Cricut Machine (I used the Explore Air 2 for this)
  2. Cricut Pens
  3. Cricut Cutting Mat
  4. Avery Lables
  5. Optional but helpful: The Cricut spatula tool
  6. And just a little bit of practice!

That’s all you really need for this project. Most of these items are very cheap unless you don’t already have a Cricut machine. Even then, if you want to get into DIY home crafts and projects, the machines really are a bargain!

Tips & Tricks for Handwritten Cricut Labels

"Handwritten" label by Cricut. Get that perfect look for your home weather it's; industrial labels, farmhouse labels or modern labels. You can achieve that perfect "handwritten" look even if you don't have great hand writing with the Cricut using your favorite handwritten fonts.

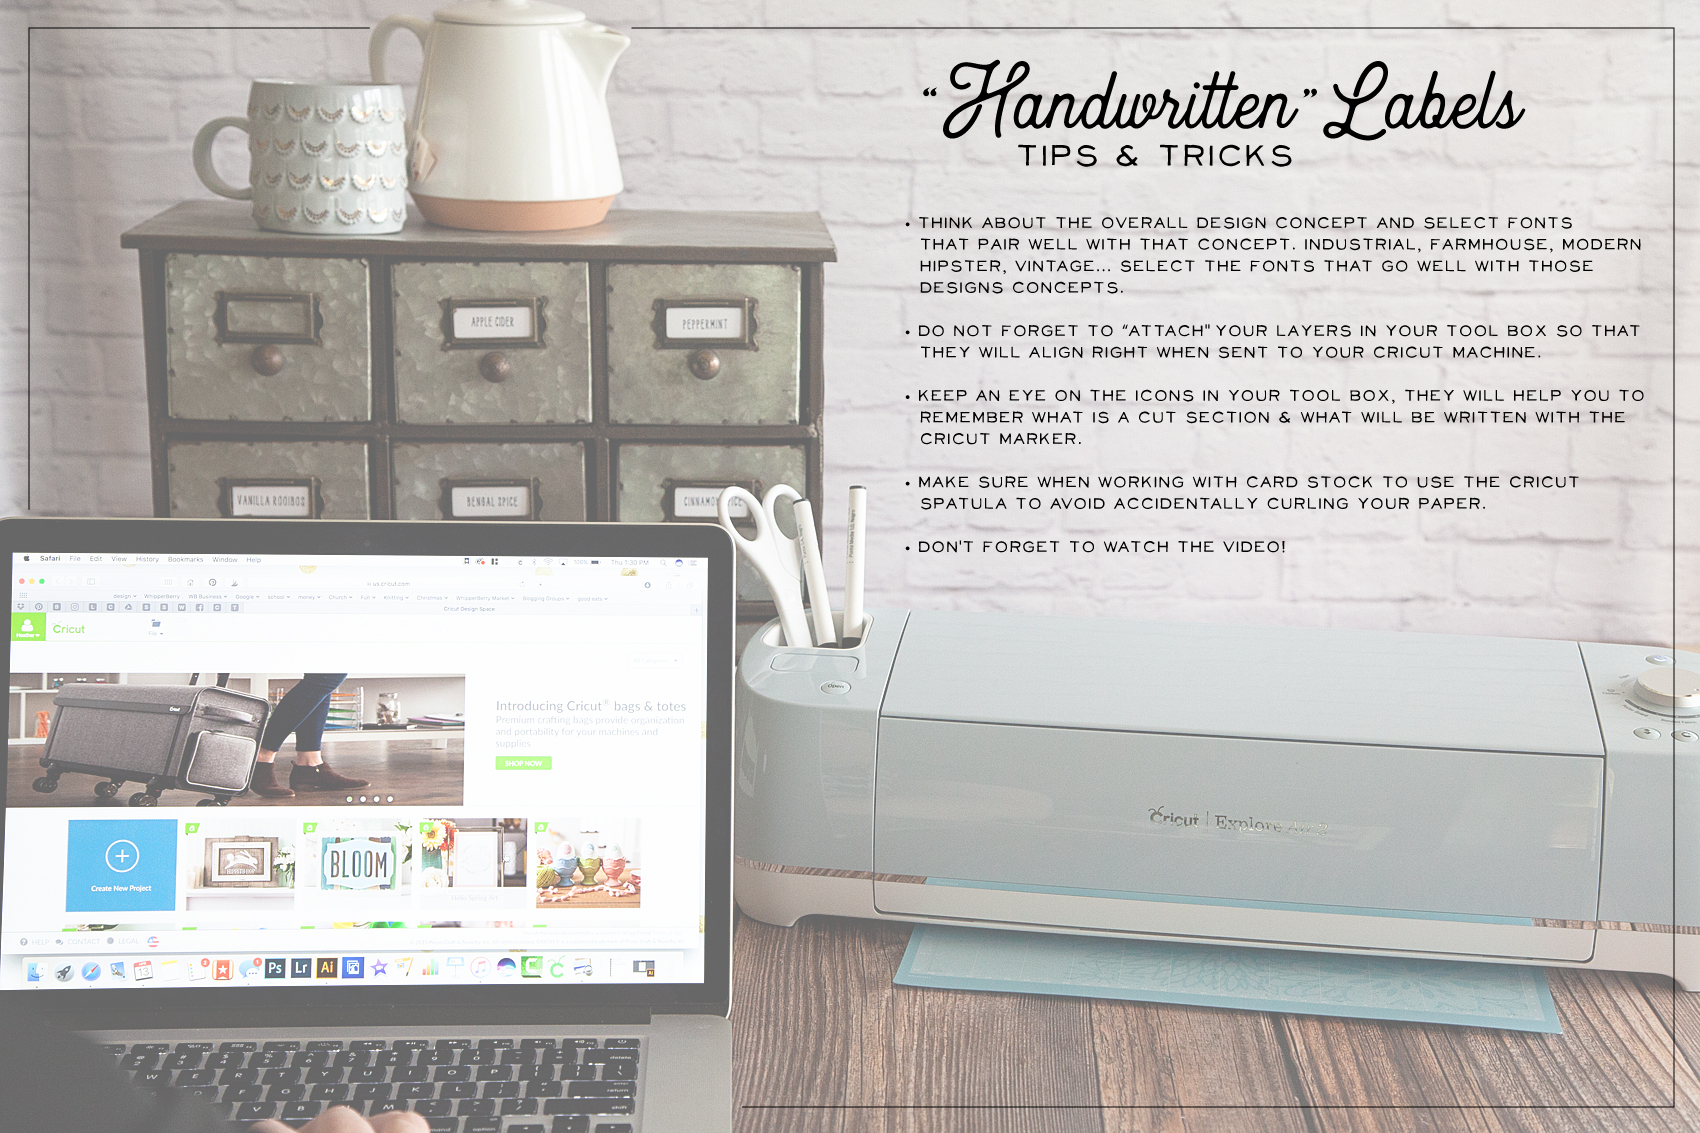
Here are a few tips & tricks that I learned along the way.

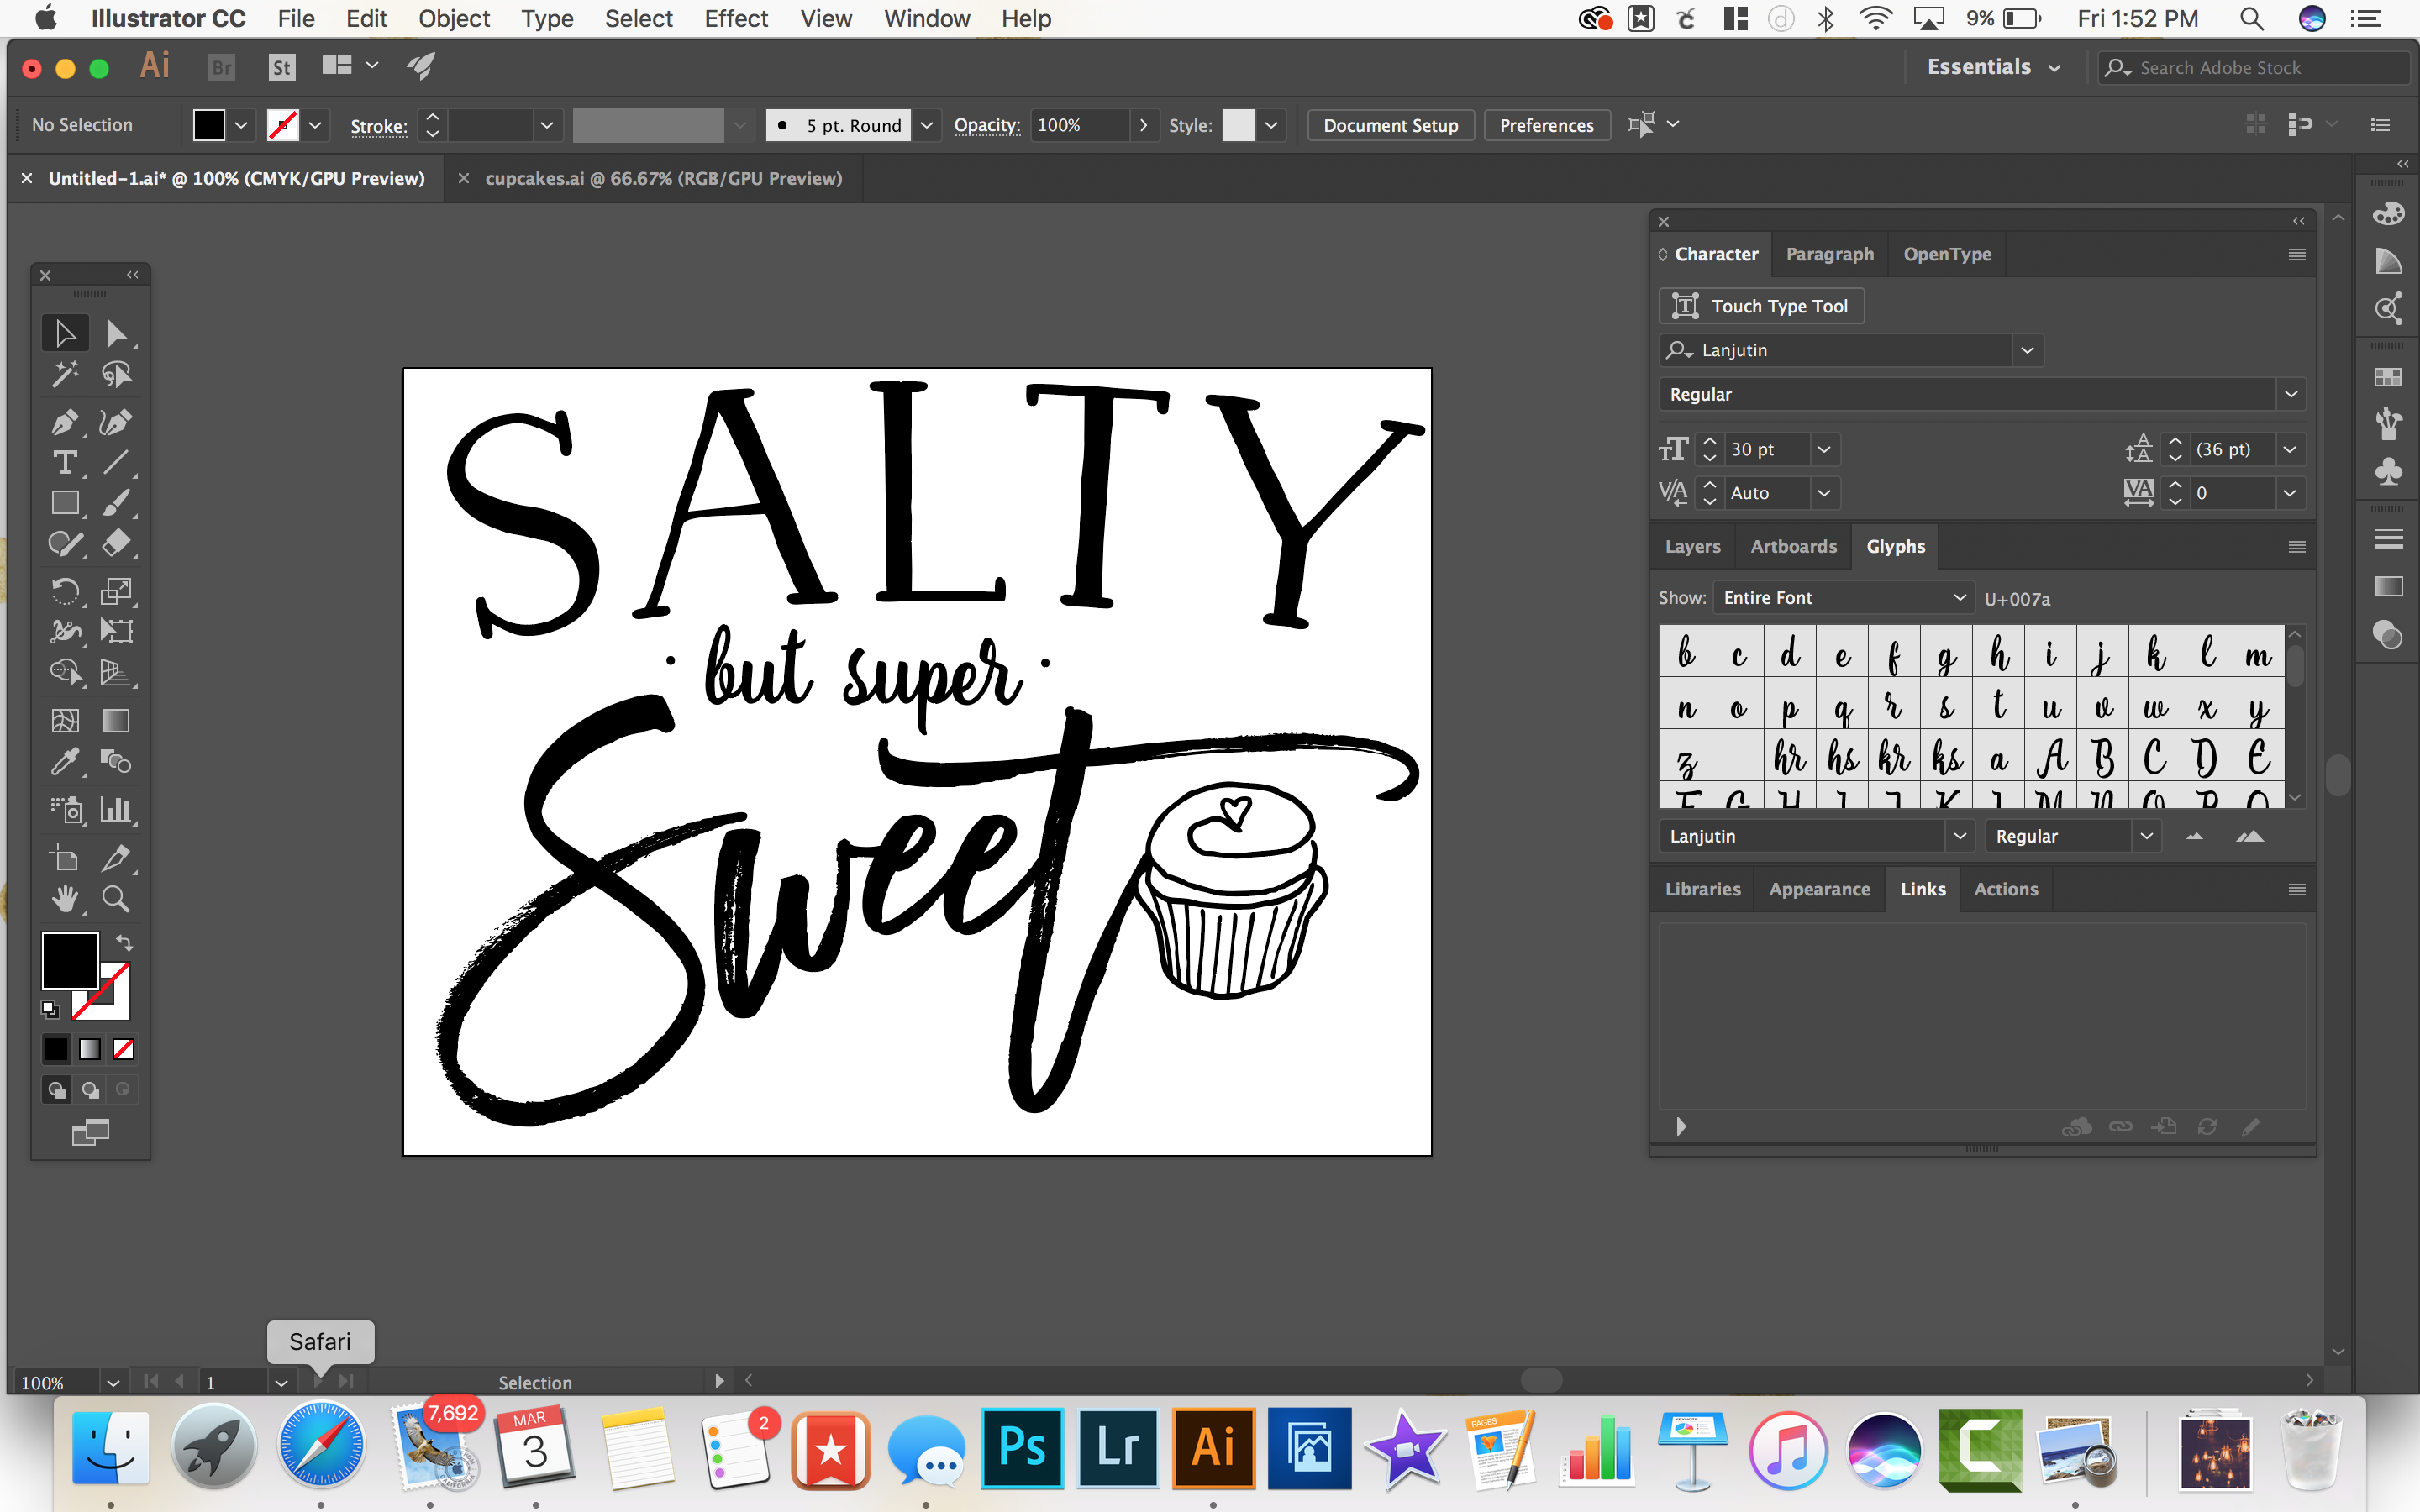
  • STOP and think about your end game. What style are you looking to create with your handwritten labels? Make sure you are selecting fonts that pair well with that design concept. If you are going for an industrial look, you aren’t going to use a font that is more shabby chic. If you have a farmhouse style in your home, you aren’t going to select a modern-style font and so on.
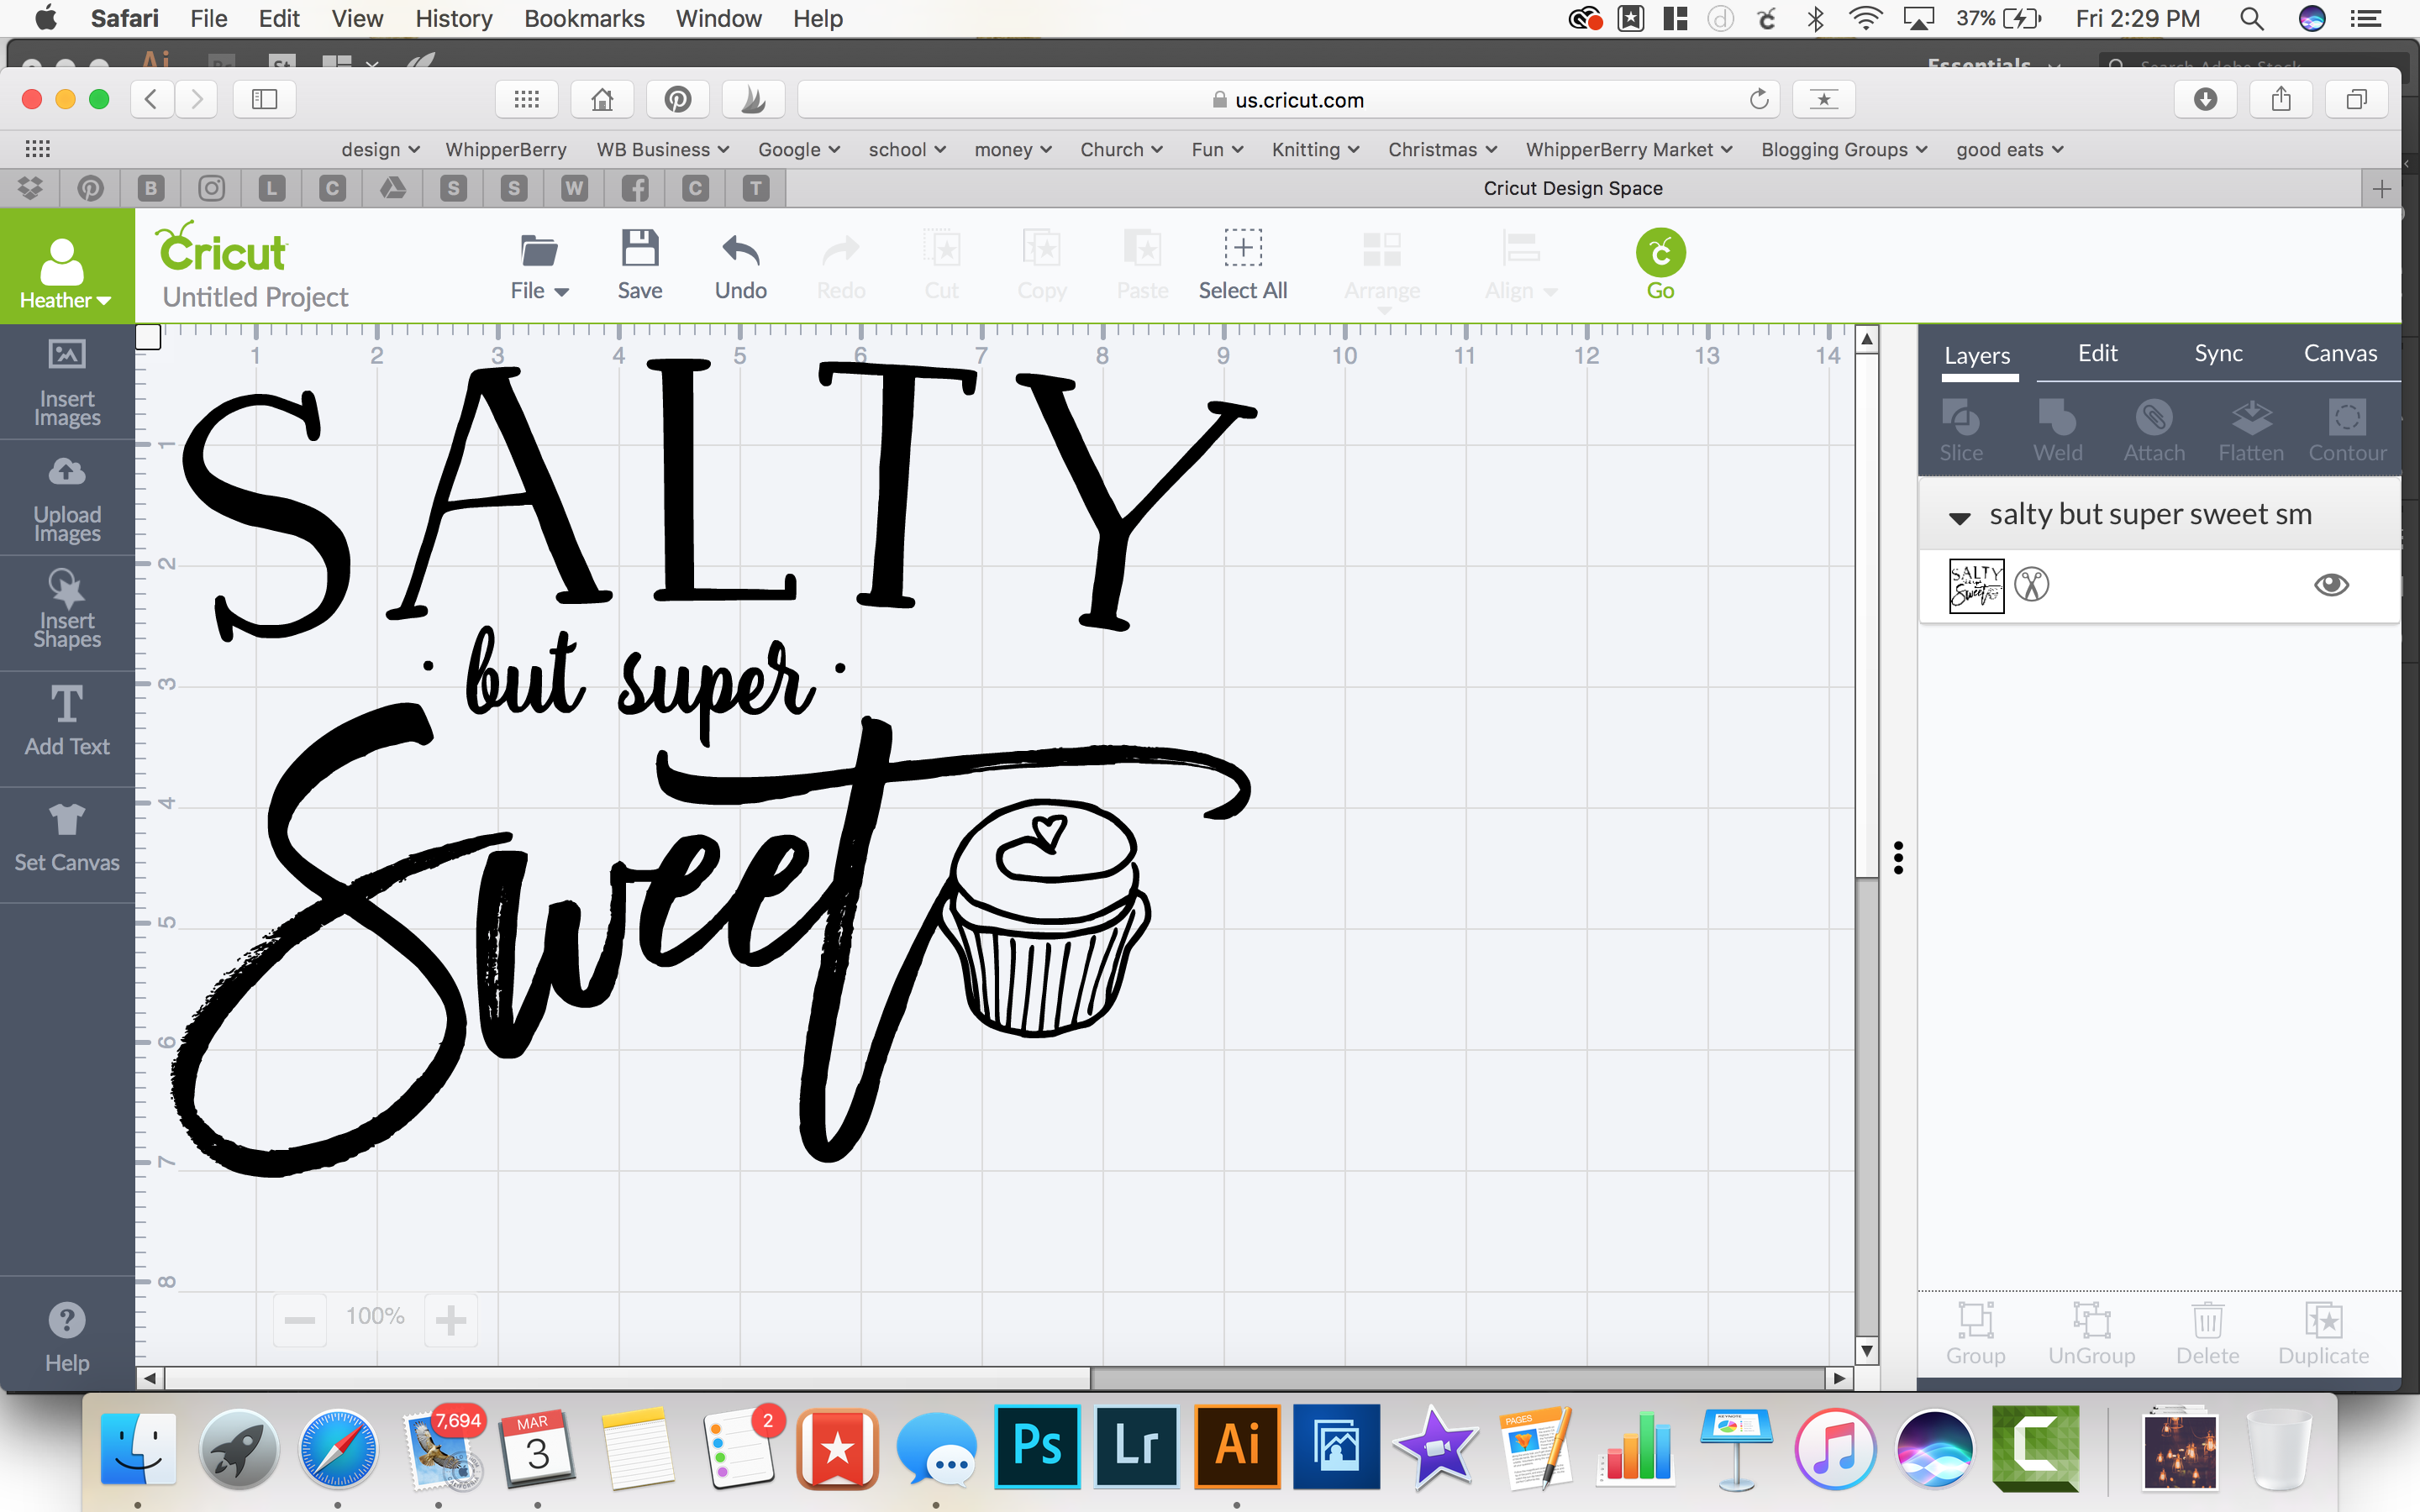
  • When working within Cricut Design Space, don’t forget to ATTACH your layers before you send your design to your machine. We go over this in the video so make sure you check that out before you get started.
  • The Cricut Design Space makes it super easy to tell the difference between a handwritten layer and a cut layer in your label design. Keep an eye on the icons to tell the difference between the layers. (HINT… I cover this in the video.)
  • USE your Cricut tools! I always want to move too fast and forget that Cricut has created some great tools to help make your projects the best they can be. When removing card stock paper from the cutting mat, use the SPATULA TOOL to keep your paper nice and flat. If you remove the paper by just pulling it away from the cutting mat, it will curl slightly.
  • Don’t forget to watch the video! It’s less than 10 minutes and it covers everything you’ll need to know to create your own “handwritten” labels.

Now hopefully you know how to make labels with your Cricut Explore Air 2. As always, If you have questions post them in the comments below and I will answer!

DIY T-Shirt Design + Salty but Super Sweet with Cricut Rose Gold IRON-ON Foil

14 · Mar 7, 2017 · Leave a Comment

Anyone out there have a middle school girl, a sassy friend or teenagers at all? I have ALL THREE!! The level of sass in my life is epic. I have three girls all in the teen years and there is a new term floating around our house these days… “ohhhh, SALTY!” OR, “You’re being soooo SALTY!” Isn’t it funny when the newer generation comes up with their new slang or vernacular? If you haven’t heard the term before, think of it in terms of a person who has the same kind of savory bite like salt.  It basically means that, you are upset and throwing a bunch of sass. I decided that with three teenage girls and a truck load of sassy friends they all needed a special tee that describes them to a “T.” After a particularly rough afternoon with one of my girls the perfect saying popped into my head, “Salty but Super Sweet.” That’s exactly how I felt in the moment. She was being so hard to deal with, yet under it all, I know that she is, and will always be SUPER SWEET. That’s when I set to work to design a perfect DIY t-shirt for her and all of the other “SALTY” ladies in my life using my Cricut Explore Air 2 and my FAVORITE Rose Gold Iron-On Foil!

Salty by Super Sweet DIY T-Shirt by WhipperBerry
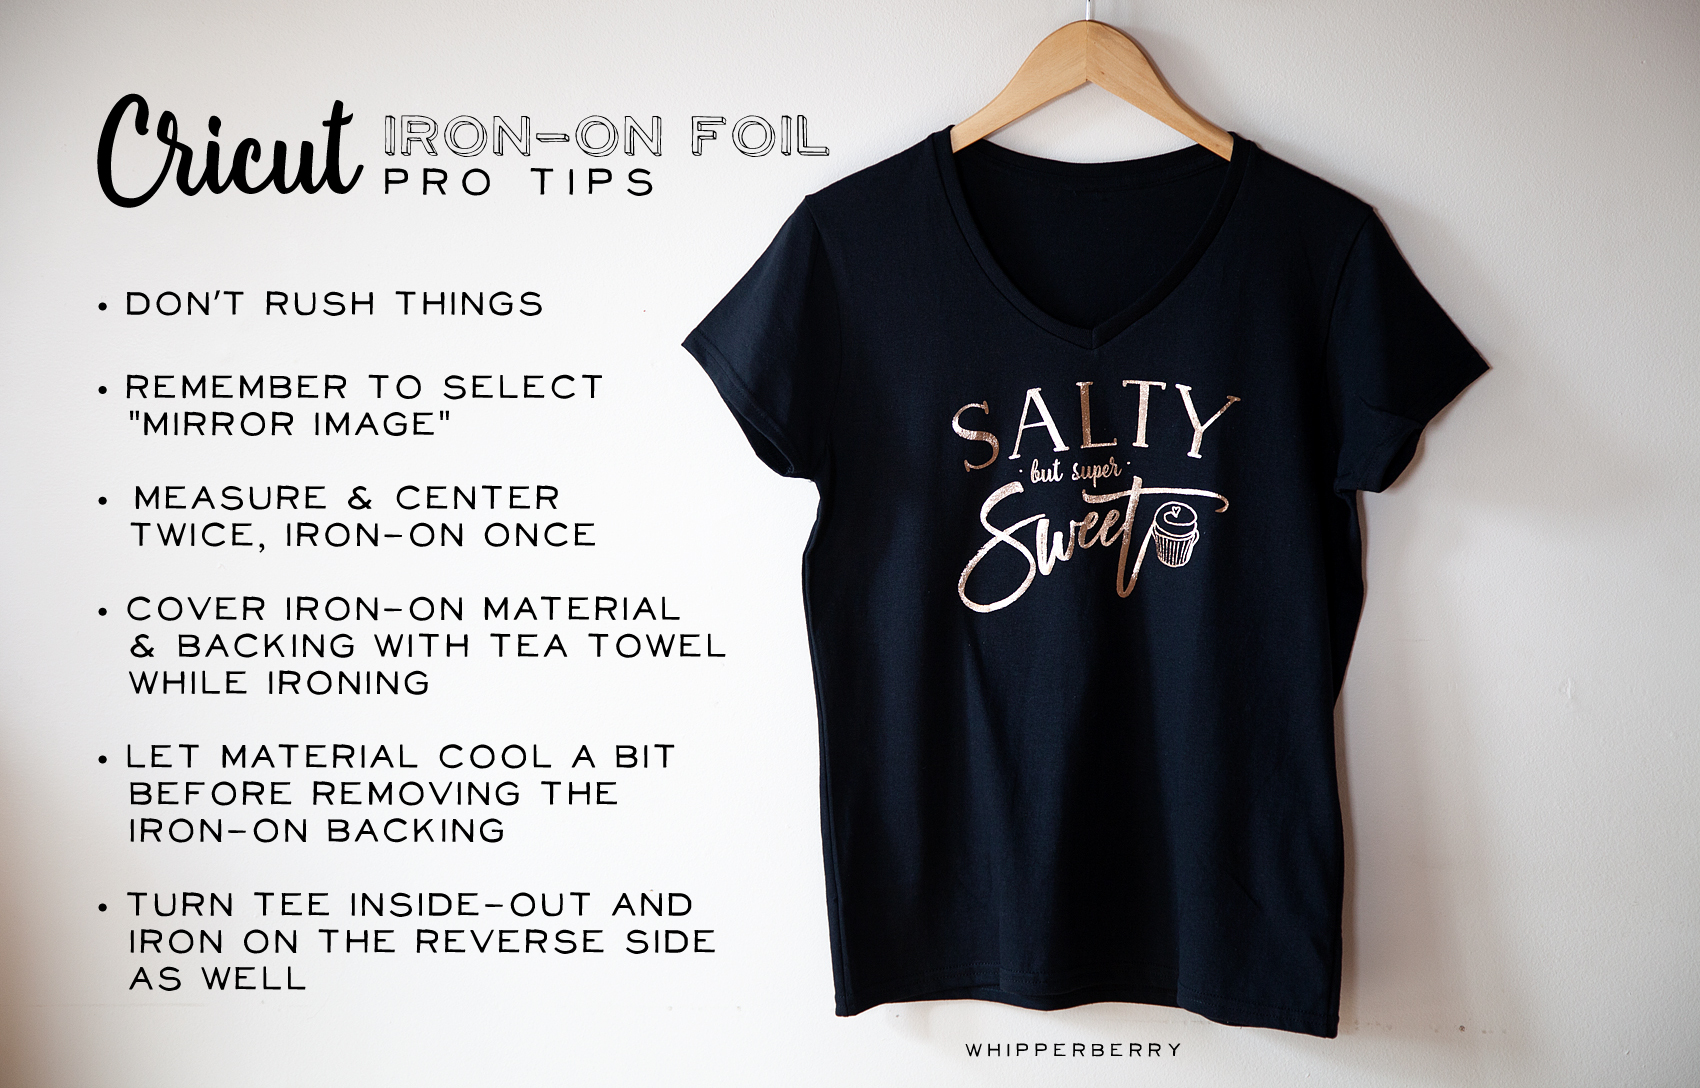
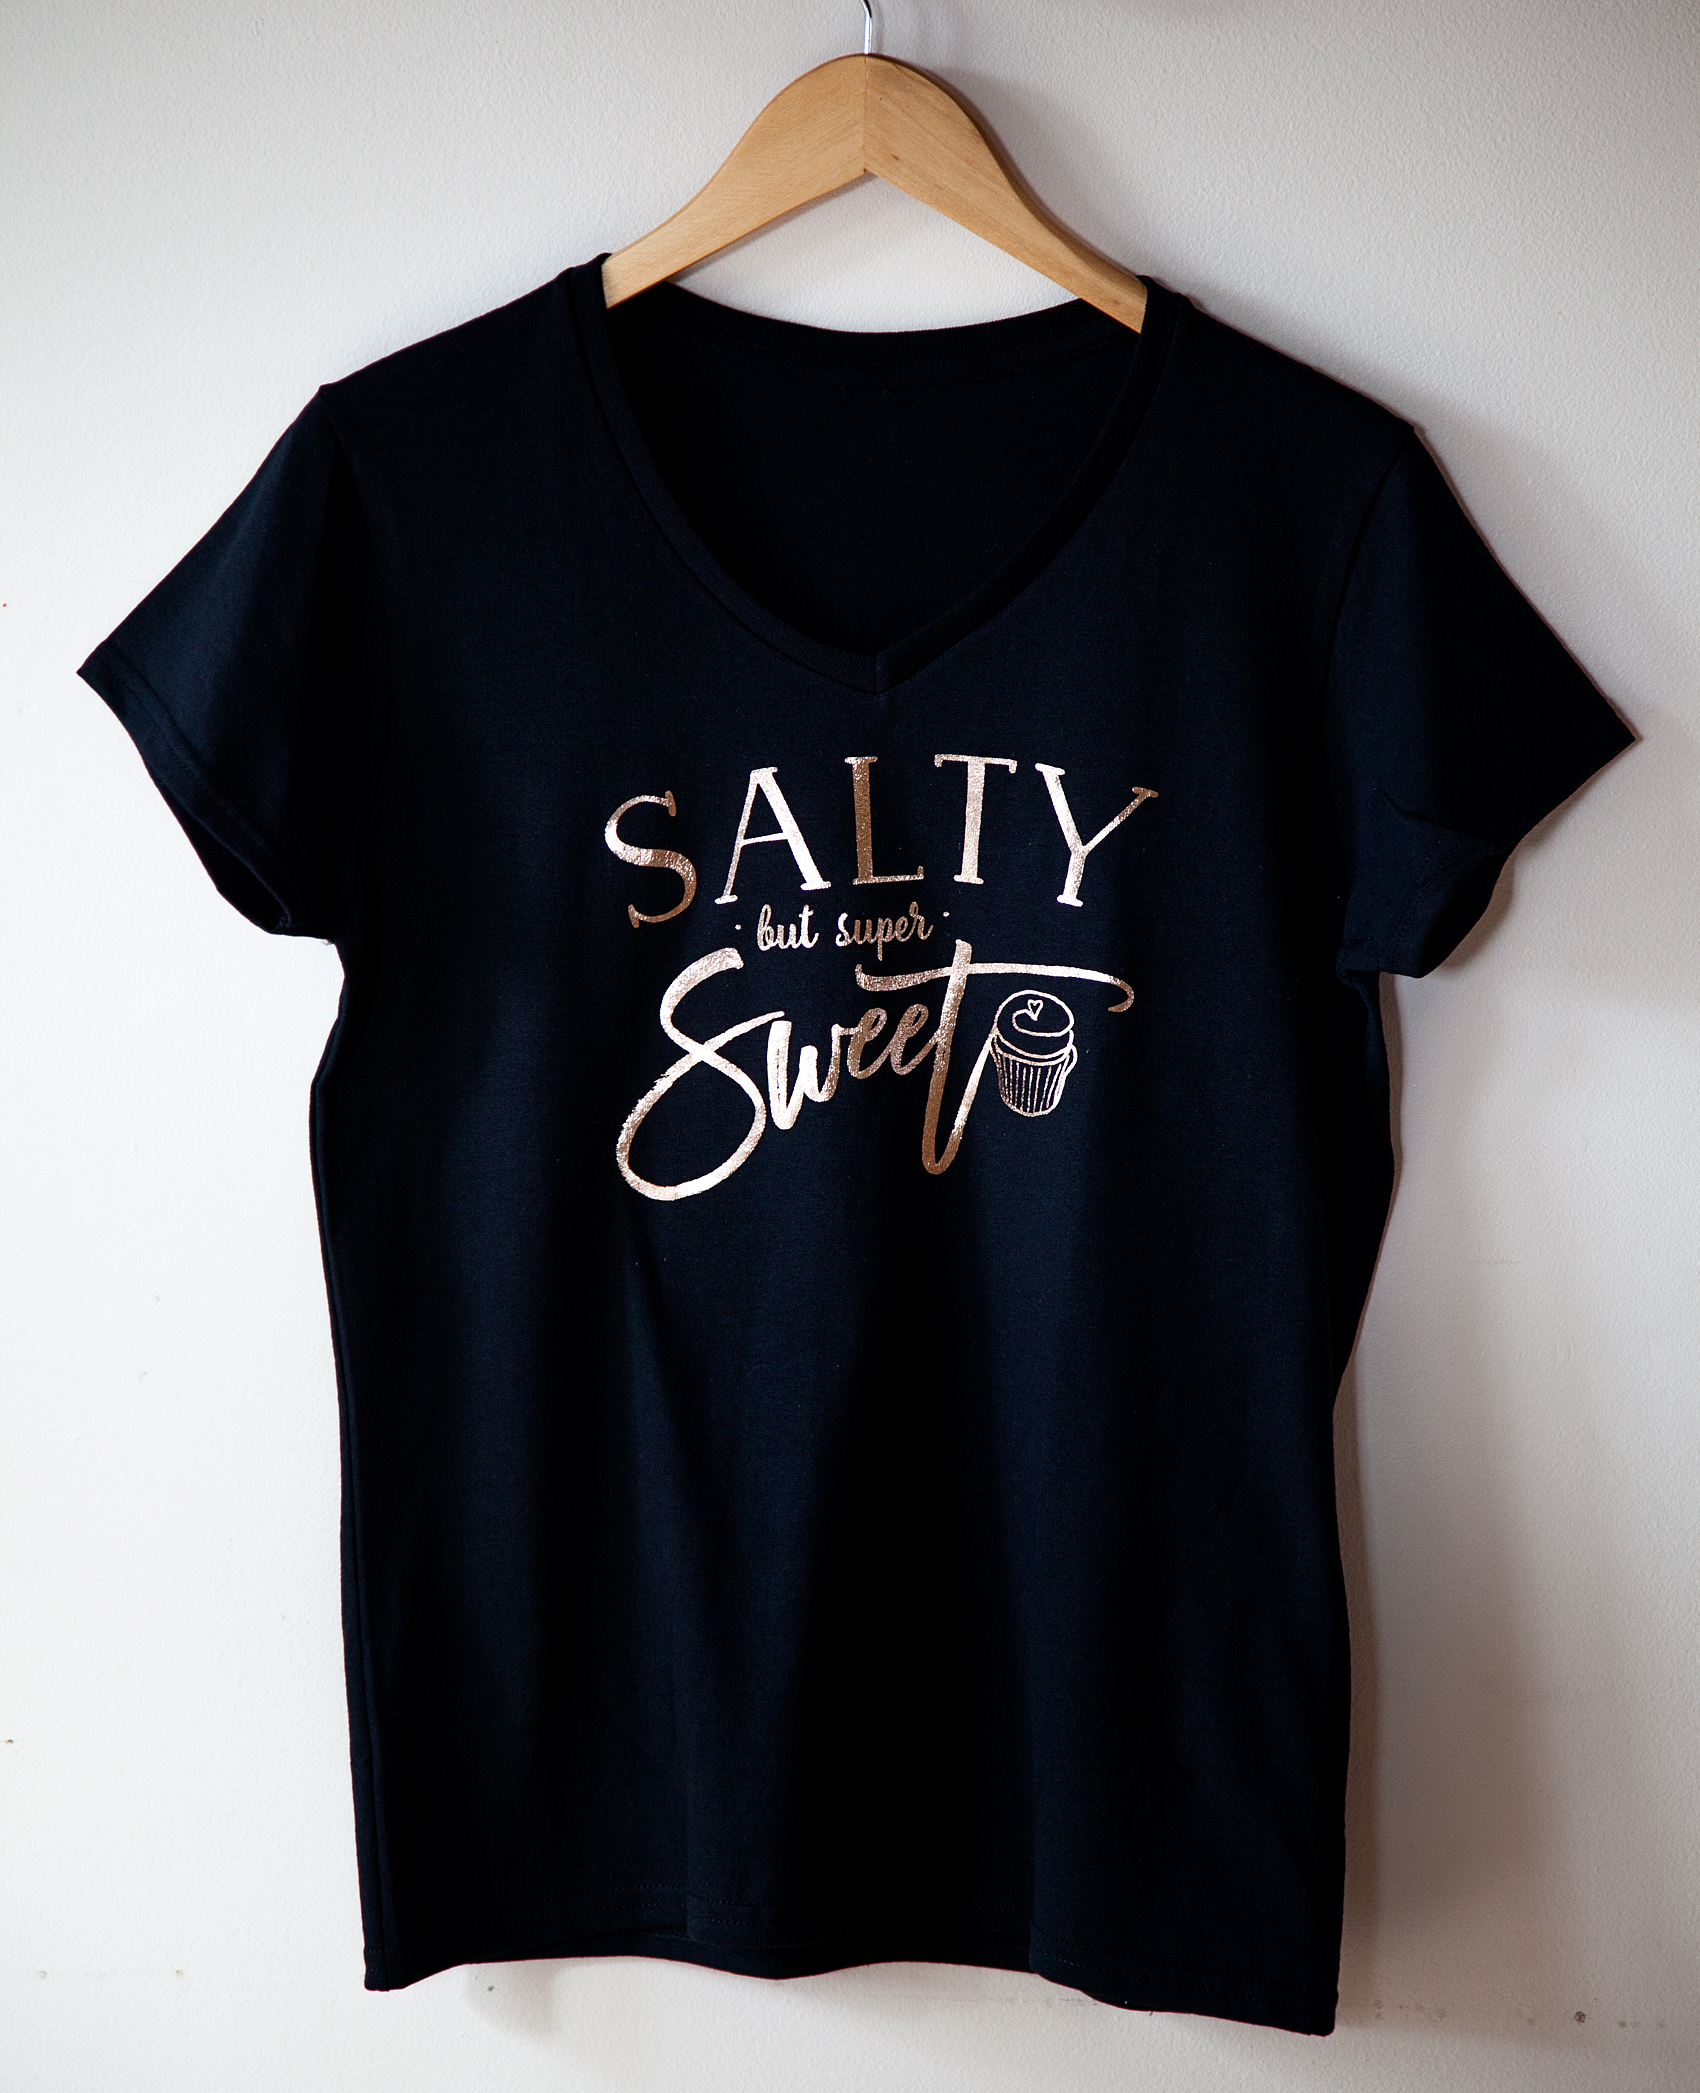
Materials for the DIY T-Shirt

I ran over to my local Michaels and grabbed some of their black v-neck t-shirts in their fabulous t-shirt section. Have you checked that out yet? You can get all kinds of sizes, colors, youth, adult and even v-neck tees. The v-neck that I bought was $5.99 AND…  If you keep and eye-out, they usually have some crazy awesome sales on the t-shirts that make them an even better deal.

Black V-Neck T-shirt from Michaels

I decided that with a “SALTY” kind of tee, I needed to use a material for the graphics that REALLY stood-out. I combed through Cricut’s vast array of iron-on materials and selected the metallic Rose Gold Iron-On Foil. I’ve become a HUGE fan of all of their foils and this one REALLY does not disappoint. It adheres to the t-shirt fabric beautifully and looks fabulous against the black tee.

Salty but Still Super Sweet DIY Tee with Cricut Iron-On Rose Gold Foil

I’ve used other iron-on materials from other brands and sadly, the materials are peeling off by the end of the day. Incredibly frustrating after spending time & money to create something special just for it to peel off the first time you wear it.

• PRO TIP •

Iron-on PRO Tips for Cricut Cutting Machines via WhipperBerry

 Creating the DIY T-Shirt Design

This is where things get super exciting!! Did you know that you have a couple of different options when it comes to creating designs to use with your Cricut when creating your own shirts or, anything really!

First off, you DON’T have to be a mad designer in order to utilize your Cricut machine. Cricut has made it so easy to browse through a whole library of projects in the Cricut Design Space. If you want to do the whole DIY t-shirt thing and you don’t know where to start, go into Design Space and search the whole Fashion section and you’ll find all kinds of fun ideas.

It’s also easy to create your own designs within Design Space. If you’ve already done some basic design work in other programs like Adobe Elements you’ll feel right at home within Design Space.

Screen Shot 2017-03-03 at 2.29.04 PM

If you are more of an advanced designer, you can create designs within programs like Adobe Illustrator and Photoshop, save them as .jpg, .gif, .png, .bmp, .svg, or .dxf files and upload them right into design space.

Designing in Illustrator for Cricut cutting machine

That is one of my favorite ways to create. I’ll be creating and sharing some fun files with you a few times a month so you’ll want to make sure you stop by often to see what the new designs are. I’ll also be creating tutorials to teach you how to create with your Cricut cutting machine along with all kinds of handy PRO TIPS.

Don’t forget, here is the PNG file that you may download to create your own DIY T-shirt with my Salty but Super Sweet design… Here is the download file for the Salty but Super Sweet tee. This is for personal use only please.

It’s time to get creating, go grab your Cricut and let’s get our creative juices flowing!

Salty but Still Super Sweet DIY Tee with Cricut Iron-On Rose Gold Foil

Disclaimer – I am a proud member of the Cricut team and look forward to sharing my experiences with you every month. As always, I will never share with you a product that I don’t absolutely LOVE and use often in my everyday life. This post does contain affiliate links and I am paid to cover my time and materials when creating these posts.

Using Cricut Faux Leather + Gold Foil to Dress-up Your Home

15 · Feb 15, 2017 · 2 Comments

149781-Hayneedle Photo Shoot-005

5 stylist walk into a bar… Alright, maybe not a bar. A glorious industrial blank space in the heart of Salt Lake, they have 3 Cricut Explore Air 2 machines, new bedroom furniture from Hayneedle and all kinds of Cricut tools & materials. One stylist says…

Alright, this is starting to sound like a really bad joke. The strange thing is, it really happened. I had the great opportunity to head out to Salt Lake to share in the creation of a fun bedroom space with some great blog friends. Hayneedle graciously supplied the basic room elements and then we had the assignment to add a little pizzaz to the space. The main themes were industrial, softened up with a little romantic floral flair. My assignment was the chair and then heading up the collaboration of one of the gallery walls.

For the chair, I created a classic pillow using the Cricut Faux Leather and designed a fun wreath using crafting pearls from Michaels for the “berries.”

Classic Wreath Pillow created by WhipperBerry using Cricut Faux Leather and the Cricut Explore Air 2

I LOVED how it turned out… It added just enough personality to make the beautiful chair from Hayneedle SING!

149781-Hayneedle Photo Shoot-014

I then worked on a super fun piece of wall art that I adore…

Let us dance in the sun with wildflowers in our hair wall art from WhipperBerry

Since the room was going to have a floral flair, I thought a playful quote on the wall would look fantastic. I found this quote and then set to designing it so that would tie the other wall art pieces from the other designers together. I decided to use the AAAAMAZING Adhesive Gold Foil from Cricut for this piece and I ADORED how it turned out.

Come on over to the Cricut Blog to see WHO the other stylist are, see the rest of the projects, learn how to RE-CREATE what I designed and see the COMPLEATED ROOM. PLUS, you’ll have a chance to WIN the whole room for yourself!! You won’t want to miss out on that!

Disclaimer + I am a Cricut Ambassador and this post does have affiliate links. Please know, I will NEVER promote a company or product that I don’t truly believe in and use myself.

  • « Go to Previous Page
  • Page 1
  • Interim pages omitted …
  • Page 11
  • Page 12
  • Page 13

Primary Sidebar

Heather from Whipperberry
Hello... my name is Heather and I'm the creator of WhipperBerry a creative lifestyle blog packed full of great recipes and creative ideas for your home and family. I find I am happiest when I'm living a creative life and I love to share what I've been up to along the way... Come explore, my hope is that you'll leave inspired!

Footer

  • Privacy Policy
  • Crafts
  • Food
  • Gifts
  • Holidays
  • Home
  • Mom Life
  • Recipes
  • Travel

Copyright © 2026 · Seasoned Pro