• Skip to primary navigation
  • Skip to main content
  • Skip to primary sidebar
  • Skip to footer

Whipperberry

WhipperBerry • Your Home For Creative Inspiration

  • Home
  • Recipes
    • Starters
    • Easy Weeknight Dinners
    • Main Dish
    • Salads
    • Side Dish
    • Soups & Stews
    • Desserts
    • Breakfast
    • Miscellaneous
  • Tutorials
    • Creative Crafts
    • DIY Decor
    • Fabric Crafts
    • Food How-To
    • Jewlery
    • Paint Projects
    • Paper Art
    • Party Styling
    • Photography and Graphic Design
    • Silhouette
  • Holidays
    • Easter
    • Mother’s Day
    • Father’s Day
    • 4th of July
    • Halloween
    • Thanksgiving
    • Christmas
    • Valentine’s Day
  • Gift Ideas
    • Gifts For Everyone
    • Gifts for Dad
    • Mother’s day
    • For The Girls
    • For The Kids
    • Teacher Gift Ideas
    • Christmas
  • Printables
    • Holiday
    • Gift Idea
    • LDS Primary
  • Travel
  • About
    • Terms
  • Contact
  • Nav Social Menu

    • Facebook
    • Instagram
    • Pinterest
    • RSS
    • Twitter

DecoArt

Team Spirit Writers by DecoArt

16 · Jun 11, 2013 · 5 Comments

This post brought to you by DecoArt // Yesterday, I sent Haley and Hannah off to Girls Camp for the week! Girls Camp is a fabulous event that our 12-18 year old girls from church participate in every year. This is Hannah's first year and she is super excited. Haley is a veteran and couldn't wait to get together with all her friends and introduce Hannah to the elusive creature the Snipe (wink, wink!) Back in Vegas we had a fun tradition of using Team Spirit Writers to send the girls off in style to camp in style…

Spirit Writers with WhipperBerry and DecoArt

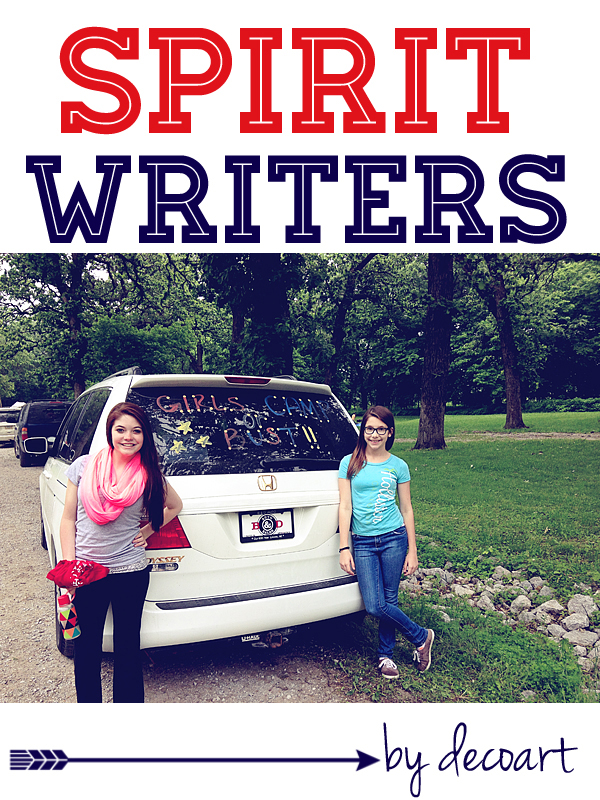
I don't know when the tradition started, but for the last several years the girls would always get a hold of these window paint pens and decorate all the cars for the trip up to camp. It was always fun to see what they came up with. Now that we live in a new state with a whole new set of traditions, we thought we would bring one of our old traditions with us. 

DecoArt Spirit Writers

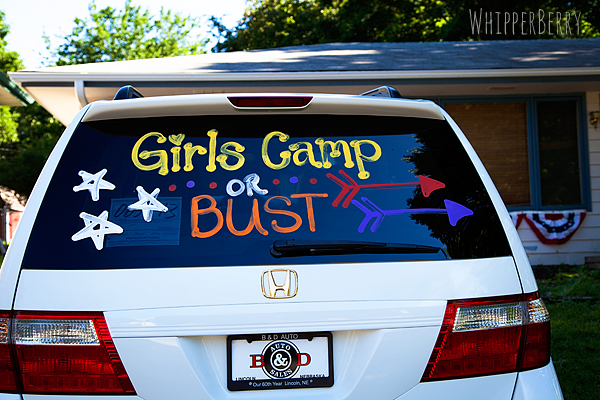
It was perfect!! The girls felt right at home and everyone at camp drop-off thought it was the coolest thing ever. The Spirit Writers come in several colors and with their easy to use applicators they are super fun to add a little spunk for your next event!! 

Spirit Writers by Decoart

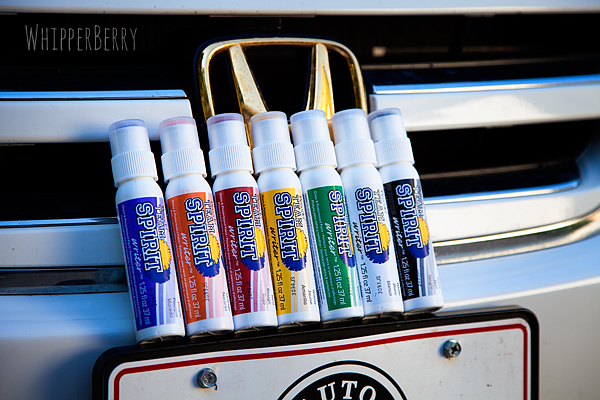
They are also super easy to clean off with a little window cleaner. You can find the Team Spirit Writers and Jo-Anns.

Disclaimer // I am a part of the DecoArt Core Blogger group and did receive product and payment for this post, however, all thoughts, ideas and opinions are my own.

Lazy Susan Art

53 · May 28, 2013 · 24 Comments

This post brought to you by DecoArt // I have become obsessed with the Lazy Susan! My Grandmother’s table had a large lazy susan that I was enamored with as a child. I was fascinated by the inner workings and the fact that it could double as a steering wheel in a pinch. Just in the last few months I’ve been on the hunt for the perfect lazy susan and then it hit me… It would look fabulous with a little artistic touch.

Ampersand Lazy Susan with DecoArt White Wash Paint

I am a part of the DecoArt Core Bloggers and did receive compensation for this post. However, all thoughts, ideas and opinions are my very own.

I found this great bamboo lazy susan at a local store and I just loved the wood grain. I thought it would look great with a negative graphic stenciled onto the surface. Meaning… You use a negative stencil thus showing the wood grain in the graphic while the rest of the surface is covered in paint. I’ve loved this look for quite some time now.  Here is what you will need…

Supplies

  • Lazy Susan
  • DecoArt Americana White Wash

Americana White Wash craft paint for some lazy susan art

  • Vinyl Stencil (I created mine using my Silhouette CAMEO)
  • Transfer tape
  • Sandpaper
  • Foam brush

Instructions

This project is so easy, it really only takes a half an hour at the most, a little more if you count drying time.  Yet, it creates a stunning piece for your table or for a gift. First you need to decide what graphic you would like to put on the surface of your lazy susan. I have always loved ampersands (&) and I thought it would look fabulous as a graphic on the table. I scrolled though a bunch of fonts until I found the perfect ampersand, it was in the Baskerville font. Isn’t it just lovely? For those of you who love ampersnads, you know just what I’m talking about.

I used my Silhouette CAMEO to cut the ampersand out in vinyl. I wanted the ampersand to be large, but not to take over the entire wood surface and I knew I wanted it to be a little off set. I used transfer tape to help me position the vinyl just right…

Using transfer tape place your vinyl onto your lazy susan

Notice how I left part of the vinyl hanging off the side of the lazy susan…

Use vinyl to create a stencil for your lazy susan

I just love that off set look. After the stencil was in place, I use some fine grit sand paper to carefully rough up the surface of the wood. That helps the paint adhere better. Then, I added 3 or 4 coats of the Americana White Wash so that it had a nice clean surface and that was it. I carefully removed the stencil and voila, I now have a fun lazy susan for the center of my table…

WhipperBerry Ampersand Lazy Susan

I have another lazy susan that I created for the brand new DecoArt Blog that will debut soon…

the-decoart-matallics-looks-like-brushed-metal

I am one of DecoArt’s Core Bloggers and will be sharing posts over there, (when the site launches) twice a month. As soon as this one goes live I will let you know, and you can learn how to make this beauty as well.

That’s it… I’m on a mission!  Every house needs to have a fabulous lazy susan!! Run out and grab one of your own, dress it up and then show off your photos on Facebook or Instagram and tag me so I can check them all out!!

Dress-up Your Dinnerware with DecoArt

0 · May 15, 2013 · 11 Comments

Tired old dinnerware… Dress it up with DecoArt

Dress up your dinnerware with DecoArt

So the other day, I was on a date with my sweetheart and we were walking through Target (yes, it was a glamorous Target date) and I found these fun summer dinnerware items that had some really great texture to them. They were also on clearance, total score. I thought they would look lovely with a little hint of gold and a touch of Americana Sea Breeze…

Dress-up your dinnerware

Supplies

  • Some dinnerware that needs some dressing up.
  • Gold spray paint – I used Krylon Premium Gold
  • DecoArt Americana Acrylic – Sea Breeze ​

DecoArt Americana Sea Breeze

  • Painters Tape
  • Plastic Wrap
  • Sponge brush
  • Fine grit sand paper 

Instructions

To begin, you need to mask all of the portions of your piece that you don't want painted. I only wanted to paint the handles of the salad spoons and the bottom of the goblets so I masked off a good portion of the items with plastic wrap and painters tape.

Use plastic wrap to mask your surface before painting

Use the painters tape to create a a clean line for the spray paint. Next, use the gold spray paint and spray paint the selected areas of your piece.

Spray with gold Krylon spray paint

I decided to use spray paint because I didn't want any brush lines in the gold portion of the project. I wanted it to look as much like metal as possible. Once the paint was dry, I taped it off again to create another line for the Sea Breeze paint with a little of the gold peaking out. Now for this layer of paint I didn't mind the brush lines. I wanted it to be rough and look like a fine almost coppery patina.

Use painters tape to create clean lines on our cup

When the paint was dry I the sanded it lightly with super fine grain sand paper to show off the fabulous texture. It almost looks like aged copper. I love it!

Fun textures with DecoArt paint

It really adds a fun look to these simple and inexpensive dinnerware items. Make sure you hand wash them from this point, but they should last for quite some time and add a fun look to your summer table.

Dressed-up dinnerware with DecoArt

This is a fun project that you could even do with your kiddos this summer. Find some fun and inexpensive dinnerware or picnic items and let the kiddos go to town.

Gold Accent Picture Frame with DecoArt Dazzling Metallics

1 · Apr 30, 2013 · 4 Comments

Gold Accented Picture Frame with DecoArt // I have fallen in LOVE with gold accents! They seem to be all the rage right now, and I am totally jumping on  the trend bandwagon. Yesterday I had the opportunity to take DecoArt’s Dazzling Metallics for a test drive while I dressed-up an old picture frame…

DecoArt Dazzling Metallics Gold Accented Frame-3

I had this old frame from Target that I had spray painted blue (another new fav) but it needed a little extra love. Recently I had added some gold accents to an old wood bowl and thought it would be fun to dress-up the frame the same way. The lovely part of this project is that it was soooo easy! You know me, nothing too challenging here. I chose DecoArts Dazzling Metallics Champagne Gold for my paint and set to work…

DecoArt Dazzling Metallics Gold Accented Frame-1

The frame has flower like petal grooves that were carved out and would act as a perfect natural place for a gold petal accent. Carefully, I filled in the grooves with the metallic paint…

DecoArt Dazzling Metallics Gold Accented Frame-2

That’s all there was to it. I filled in all the grooves and let it dry and then added a second coat. After a few hours of drying time, my new frame was ready for display!

DecoArt Dazzling Metallics Gold Accented Frame-3

I added one of my favorite Instagram photos of my sweet Emily and her friend and put it on display with my gold accented bowl. They make a perfect pair!

Do you have anything laying around the house that could use a little gold pick me up? You’ll be surprised how much it can add to a room! And if you happen to have real gold items — maybe old jewelry or décor pieces — and you’re curious how much your gold is worth, you can use this scrap gold calculator to estimate its value before upcycling or repurposing it! Check out DecoArts full line of Dazzling Metallics for all kinds of inspiration.

  • « Go to Previous Page
  • Page 1
  • Interim pages omitted …
  • Page 6
  • Page 7
  • Page 8
  • Page 9
  • Go to Next Page »

Primary Sidebar

Heather from Whipperberry
Hello... my name is Heather and I'm the creator of WhipperBerry a creative lifestyle blog packed full of great recipes and creative ideas for your home and family. I find I am happiest when I'm living a creative life and I love to share what I've been up to along the way... Come explore, my hope is that you'll leave inspired!

Footer

  • Privacy Policy
  • Crafts
  • Food
  • Gifts
  • Holidays
  • Home
  • Mom Life
  • Recipes
  • Travel

Copyright © 2026 · Seasoned Pro