• Skip to primary navigation
  • Skip to main content
  • Skip to primary sidebar
  • Skip to footer

Whipperberry

WhipperBerry • Your Home For Creative Inspiration

  • Home
  • Recipes
    • Starters
    • Easy Weeknight Dinners
    • Main Dish
    • Salads
    • Side Dish
    • Soups & Stews
    • Desserts
    • Breakfast
    • Miscellaneous
  • Tutorials
    • Creative Crafts
    • DIY Decor
    • Fabric Crafts
    • Food How-To
    • Jewlery
    • Paint Projects
    • Paper Art
    • Party Styling
    • Photography and Graphic Design
    • Silhouette
  • Holidays
    • Easter
    • Mother’s Day
    • Father’s Day
    • 4th of July
    • Halloween
    • Thanksgiving
    • Christmas
    • Valentine’s Day
  • Gift Ideas
    • Gifts For Everyone
    • Gifts for Dad
    • Mother’s day
    • For The Girls
    • For The Kids
    • Teacher Gift Ideas
    • Christmas
  • Printables
    • Holiday
    • Gift Idea
    • LDS Primary
  • Travel
  • About
    • Terms
  • Contact
  • Nav Social Menu

    • Facebook
    • Instagram
    • Pinterest
    • RSS
    • Twitter

Fabric

How to Make a Fabric Bow | A Tutorial

14 · Nov 29, 2011 · 60 Comments

If you’ve be reading WhipperBerry for any time at all, you know I LOVE good packaging.  I love those extra special embellishments that really say that you’ve taken the time and effort to make the gift or goodie something extra special.  Not too long ago I saw a tutorial on how to make one of those generic bows out of burlap from For the Love, and it got me thinking… I wonder if you could make a fancy stacked bow out of fabric and have it still have a crisp form?  I started to play around and sure enough, you can.  Here is how to make a DIY fancy bow out of fabric…
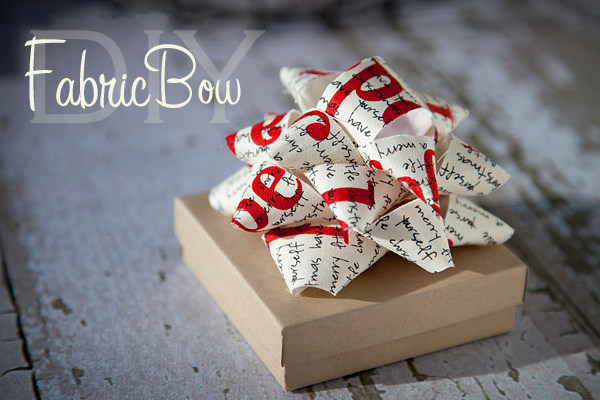
Fabric Bow Tutorial
Learn how to make a fabric bow

Here is Your Supply List to Make Your Own Fabric Bow

  • Fabric ~ I used fat quarters and they work perfectly for this.
  • Interfacing ~ I used Wonder Under
  • Stapler & Staples
  • Glue Gun & Glue Sticks
  • Iron & Ironing Board

If you don’t have some of these supplies it’s quite easy to find them. You can get them at Amazon, your local craft store, or with a quick Google search online.

DIY Fabric Bow Tutorial

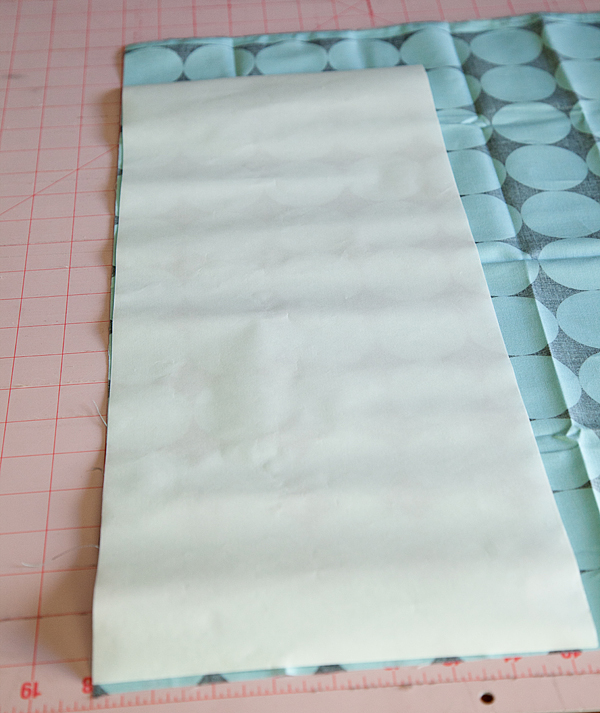
Cut fabric interfacing {Wonder Under} to 8×20 inches. Iron the “right” side of the interfacing to the wrong side of the fabric.
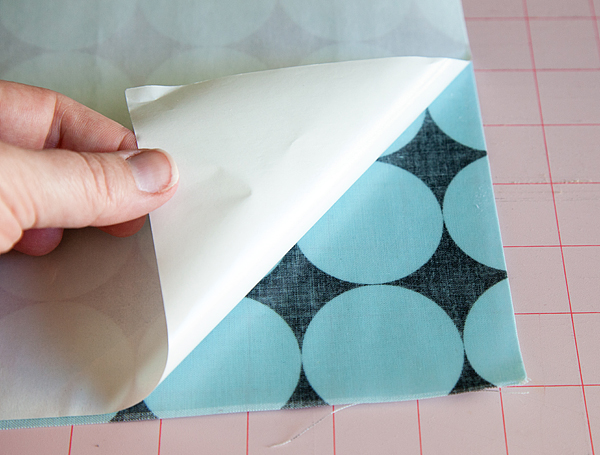
Let the fabric cool and then peel the paper from the interfacing that is now affixed to the fabric.
Place another piece of 8×20 fabric “right” side up on the top of the “wrong” side, with the interfacing sandwiched in the middle and then iron together.

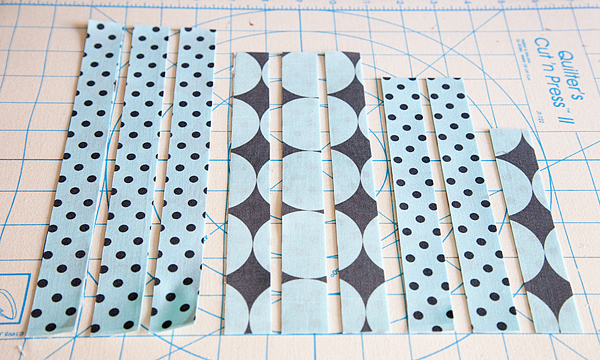
Cut fabric into 9 strips…

  • Three 10 inches
  • Three 9 inches
  • Two 8 inches
  • One 6 inches

Starting with the first 10-inch strip of fabric, make a loop on one end with the tail meeting up in the middle. Flip the fabric over and do the same with the opposite end with the tails meeting in the middle and overlapping slightly.
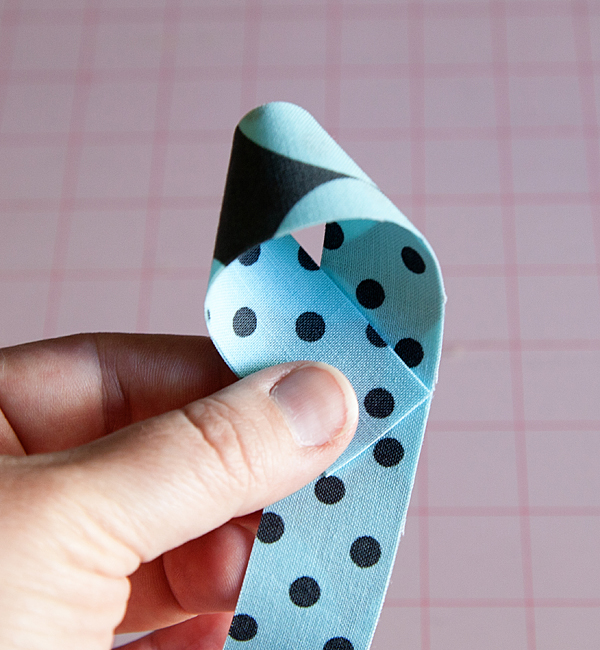
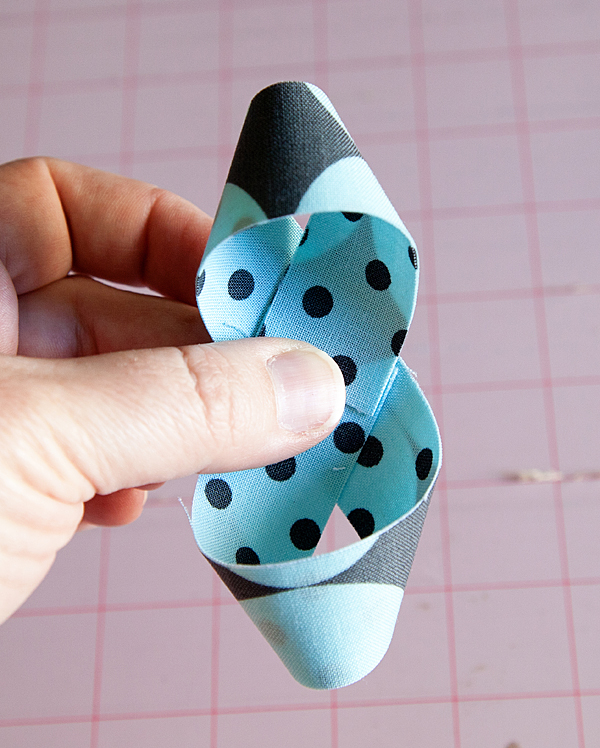
 

Place a staple or two to secure the two loops.
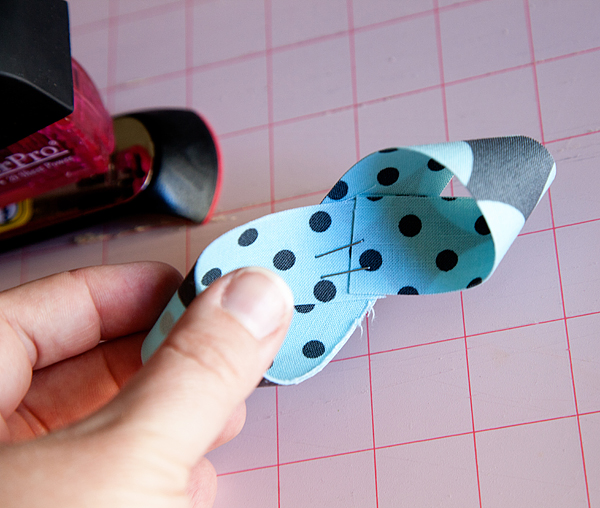
Repeat with the rest of the 10, 9 & 8-inch strips of fabric.
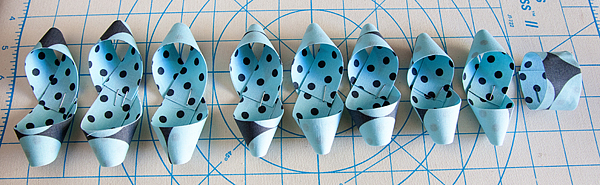
Start to layer each section starting with the largest {10 in.} loops crisscrossing them and adding a dab of hot glue in the middle to secure.
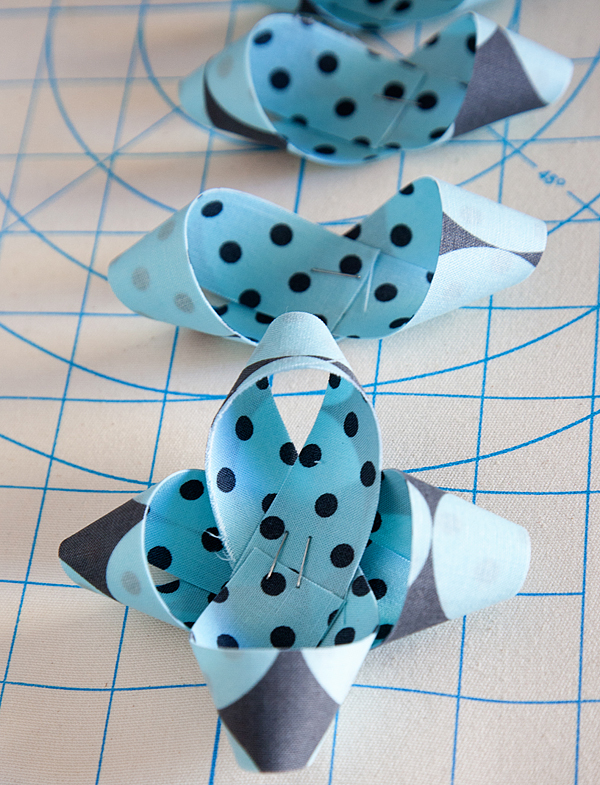
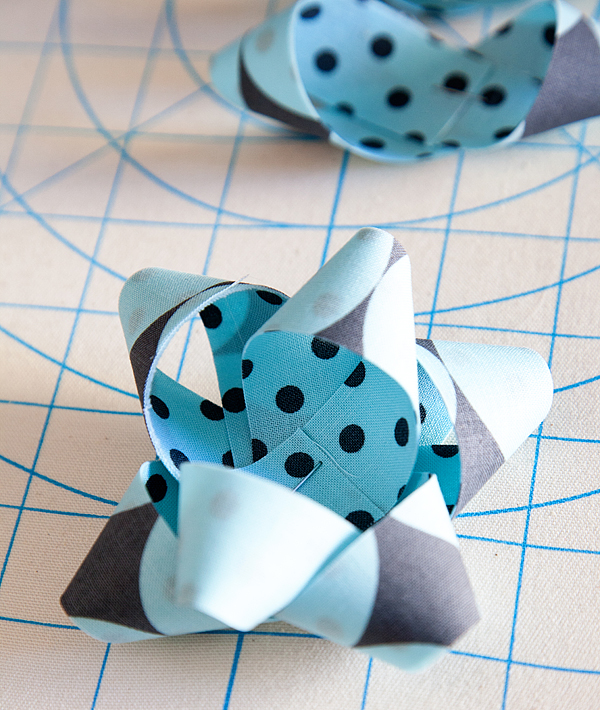
 

Continue Layering the largest to the smallest in the criss-cross pattern until you have used all of the 10, 9 & 8-inch loops.  With the 6-inch strip of fabric, make a simple loop making sure to size it to bow. Secure with a staple or a dab of hot glue.  Then place at the top of the bow with a dab of hot glue. Voila… You now have a stunning fabric bow!
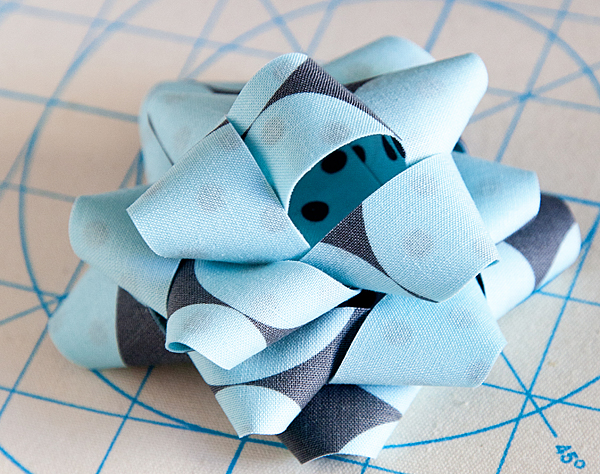
If you would like to print the instructions for this tutorial click here for the PDF version…
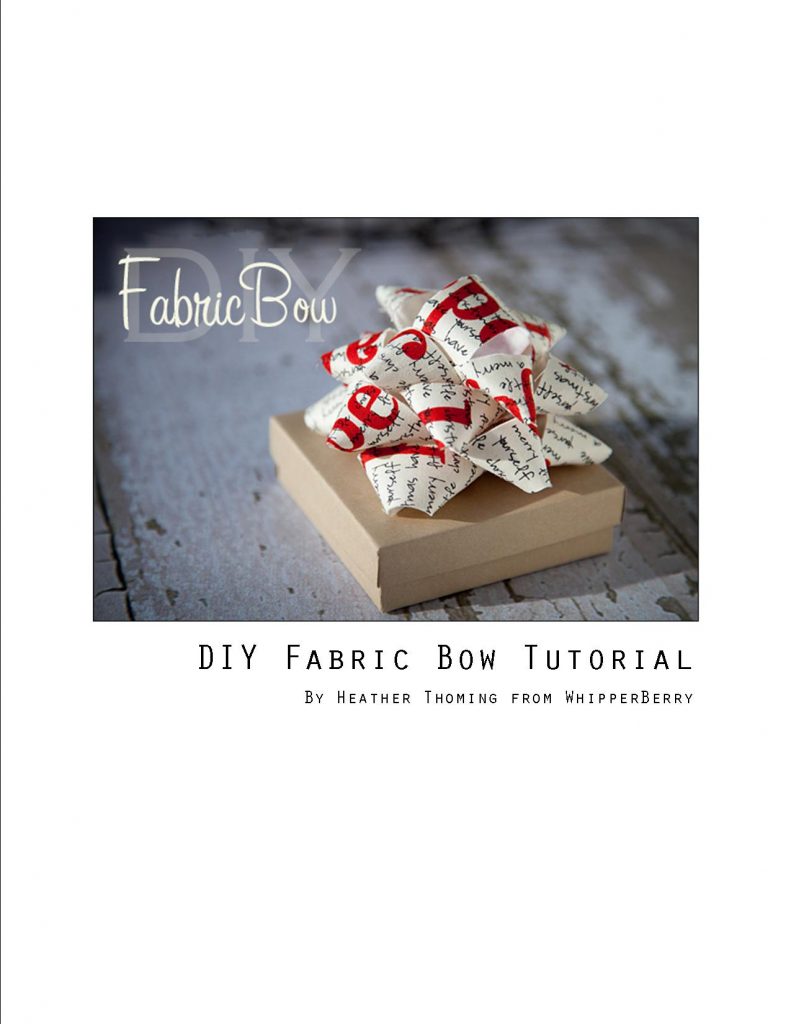
This wraps up my fancy DIY fabric bow tutorial.  Have any other questions or tips for how to make a fabric bow? Leave them down in the comments below. Or, if you want some more crafts to do when you’re bored make sure to check out that page.
 

The Candy Cane Wreath

54 · Nov 16, 2011 · 45 Comments

A few weeks ago I participated in I Heart Nap Time's Crazy Christmas Crafter event with my Candy Cane Wreath.  Just in case you missed it… here it is!


Hello all you Crazy Christmas Crafters!  I'm Heather from WhipperBerry and I am thrilled to come and hang out with you guys here at I Heart Naptime today. I LOVE the Holidays and I especially love all of the fun Christmas crafting that can be had this time of year,  It was so fun to bust out the red and white the other day to work on this fun Candy Cane Wreath…

A few weeks ago Shelley from House of Smiths invited me over to her place to share a fun Halloween wreath that I had created that I aptly named The Candy Corn Wreath.  While I was working on that post I thought it would also be a GREAT candy cane wreath for Christmas too, and… it would be perfect for Jamielyn's Crazy Christmas Crafters!! It is soooo easy to make, anyone can do it.  Plus it really makes a statement.  Here is what you will need…

…

Read On →

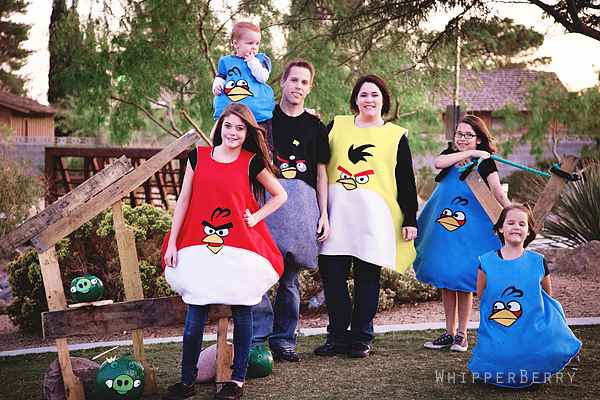
Happy Angry Bird Halloween & Friday Flair Features

0 · Oct 30, 2011 · 18 Comments

Happy Halloween… Angry Bird Style from the WhipperBerry Family!!

…

Read On →

DIY Halloween Trick-or-Treat Bags

0 · Oct 26, 2011 · 9 Comments

I just realised that I never posted this DIY Trick-or-Treat bag that I made for a fun event over at Eighteen25 and thought I would share if you happened to miss it.  It's so easy and fun… you TOTALLY still have time to make some for your kiddos for the festivites coming up!


When I think of Halloween one of my favorite elements is coming up with a super cute Trick-or-Treat bag for my four kiddos.  Now in my day, the bag of choice was my pillow case becuase I tend to lean on the side of optimistic, or shall we say hopeful! But a pillow case is about as cute as a… well a pillow case!

This year I teamed up with Christene one of my contributors at WhipperBerry to create a super easy DIY Trick-or-Treat bag that is the perfect size and darn stickin' cute…

{design elements from the Spooky Junque kit by Rhonna Farrer}

Here is what you will need for this fun project…

…

Read On →

  • « Go to Previous Page
  • Page 1
  • Interim pages omitted …
  • Page 6
  • Page 7
  • Page 8
  • Page 9
  • Go to Next Page »

Primary Sidebar

Heather from Whipperberry
Hello... my name is Heather and I'm the creator of WhipperBerry a creative lifestyle blog packed full of great recipes and creative ideas for your home and family. I find I am happiest when I'm living a creative life and I love to share what I've been up to along the way... Come explore, my hope is that you'll leave inspired!

Footer

  • Privacy Policy
  • Crafts
  • Food
  • Gifts
  • Holidays
  • Home
  • Mom Life
  • Recipes
  • Travel

Copyright © 2026 · Seasoned Pro