Yes, you can use chalk paint on glass. Chalk paint is a great way to make ordinary glass jars and bottles look pretty. You can even achieve a distressed look on any textured glass item. However, there are a few things you need to know about chalk painting on glass. It’s important for the glass to be clean and dry. It’s also important to be patient and apply the paint in thin layers, allowing for time to dry between layers.
How Do You Use Chalk Paint on Glass?
Using chalk paint on glass is one of the easiest chalk paint projects you can do! The results are pretty, and you can easily finish chalk-painted projects in a day.
The First Step for Using Chalk Paint on Glass
- The first step is to ensure your glass jar (or whatever object you will be painting), is clean and dry. If there is any sticky adhesive residue from a label, use rubbing alcohol or a product like “Goo-Gone” to remove all traces of it.Once you have done that, there are a couple of easy ways you can get the glass sparkling clean. A one-to-one mixture of water and distilled white vinegar, or just ordinary rubbing alcohol, is the best at cleaning glassware.
After cleaning, be sure to rinse your glass thoroughly under warm running water to remove any traces of alcohol or vinegar. The paint won’t stick unless the glass has been thoroughly rinsed off.
It might be tempting to just use commercial spray-on glass cleaner. While these products are fine for windows, they are not the best for cleaning a surface where you want to apply paint. They might leave a very fine film on the glass, which can cause your paint to go on unevenly and it will look streaky.
Second Step
- Once the glass is perfectly clean and completely dry, you are ready to paint! Keep in mind that glass is a non-porous surface. The chalk paint won’t soak into the glass at all; it lays on top of the surface. You will need to apply at least two coats of chalk paint, maybe three coats if you want a more opaque coverage.
You can apply chalk paint to any glass item simply by brushing it on with an ordinary paintbrush. The first coat of paint will undoubtedly look somewhat streaky when it dries. That’s okay, it will smooth out when you apply the second coat of paint.
Be sure to allow time for the paint to dry between coats. Fortunately, chalk paint dries quickly. It should be dry to the touch in 30 to 40 minutes, depending on the brand of chalk paint.
If the first coat of paint doesn’t seem to be sticking to the glass, it might be because the glass isn’t perfectly clean. You can wipe off the chalk paint before it’s fully dry, thoroughly clean your glass, and try again once it is fully dry.
Another reason for the paint not sticking could be that the brand of chalk finish paint that you are using is too thin or just doesn’t adhere well to non-porous surfaces.You can remedy this by either applying a very thin coat of white acrylic paint first as a primer coat, or you can scuff the glass a little bit with some light sandpaper or steel wool. You don’t have to scratch the glass up very much, just a little bit to give the paint something to hold on to.
Third Step
- Once you’ve applied a couple of coats of chalk paint and they are fully dry, you can add some final touches to make your project extra special!If the glass you painted has any texture such as raised surfaces or lettering, you can create a distressed look simply by rubbing it with some light sandpaper. This look is so popular with home decor professionals who use chalk-painted mason jars and old bottles in their design plans.
Adding color-coordinated ribbon or lace trim also adds a nice finishing touch to painted jars and bottles. You can even decoupage over chalk-painted jars, but be sure to use a matte finish decoupage medium to preserve the velvety smooth look of the chalk paint.
Final Step
- The final step is to seal your chalk-painted project. This really is optional for painted glass pieces. The reason you might want to seal your paint is that the chalk paint is more likely to chip or scuff on glass than it would on a wood surface.If you don’t expect your painted glass project to be handled very much, you can probably get away with skipping the sealant if you don’t want to do it.
You can seal glass pieces with either clear poly acrylic sealant or chalk paint wax. Just be sure to use a sealant that has a matte or ultra-matte finish, so your paint will have that lovely “chalky” appearance!If you choose to apply a wax sealant, keep in mind that wax can sometimes make the paint color look slightly darker. If you’ve painted jars or bottles that you plan to use for tea light candle holders, you might not want the paint to look darker.
Projects for Using Chalk Paint on Glass
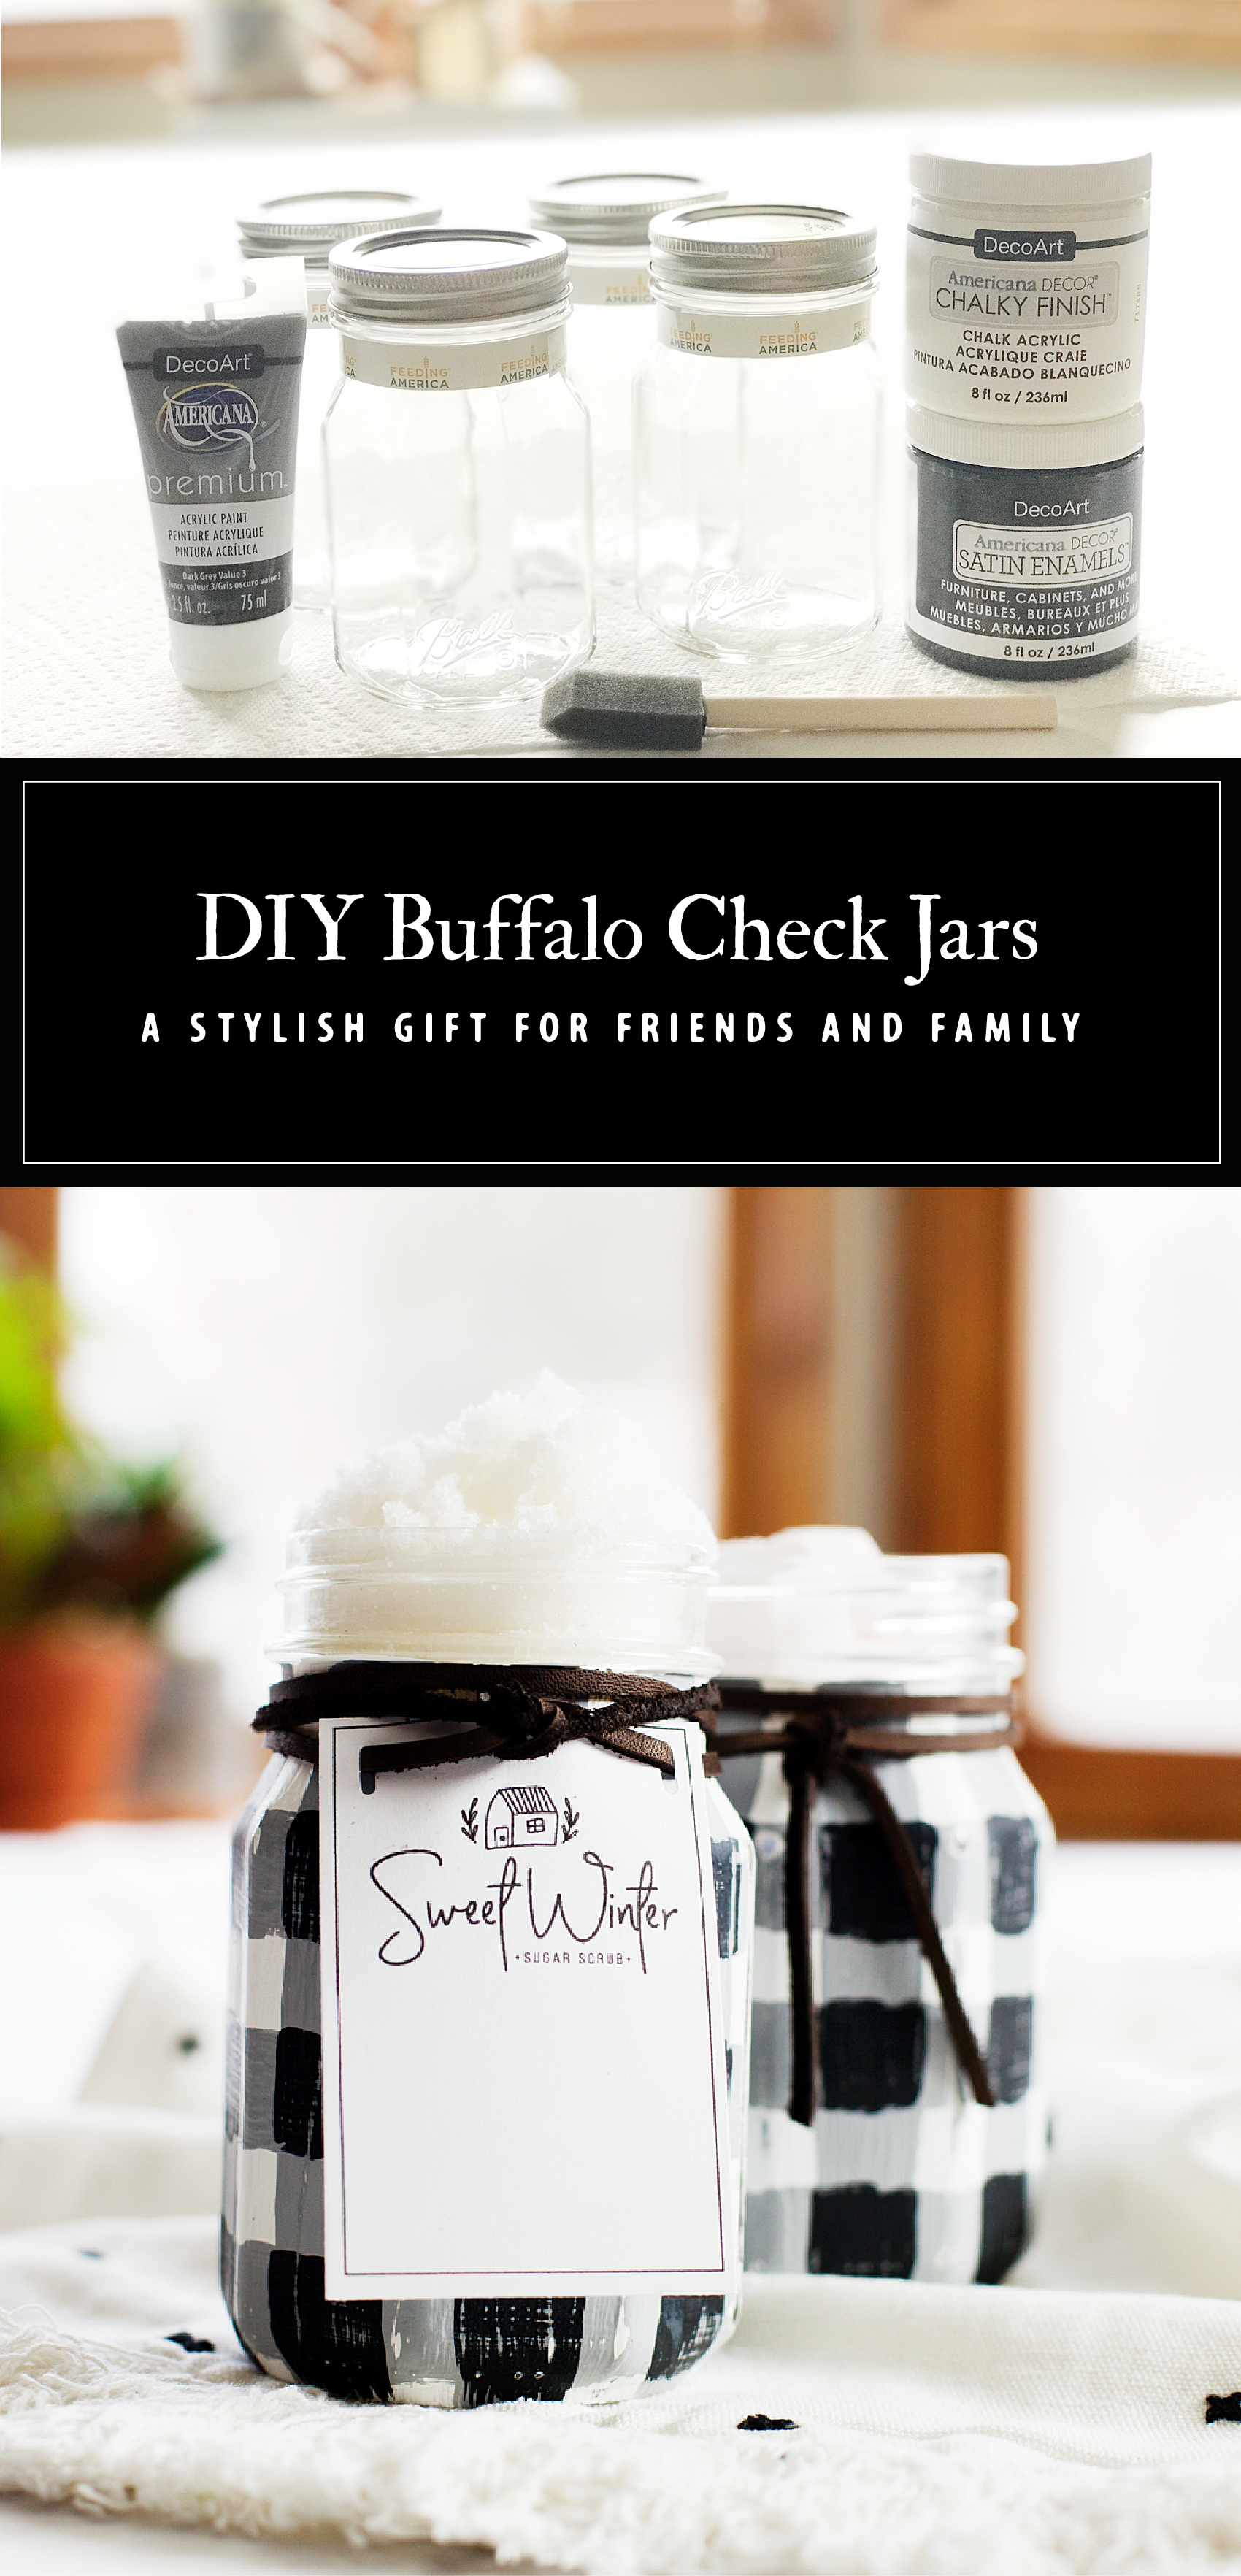
If you’ve searched on the internet for anything related to using chalk paint on glass, you’ve probably seen countless photos of painted mason jars in various sizes.
There’s a reason this is so popular; the painted jars are easy to do and are perfect “cottage core” home accessories! A little bit of distressing to bring out any designs or writing on the jars adds more appeal.
Mason jars aren’t the only glass jars that look great once they’ve been painted. Any and all glass jars can be transformed into something pretty with a few coats of chalk paint.
Pay attention before you throw out an empty spaghetti sauce jar or olive jar; unusual shapes can be transformed into something pretty for your home. Even little baby food jars look adorable when painted. The painted jars can be used to hold pens, kitchen utensils, paintbrushes, office supplies, etc.
You can use painter’s tape to block off sections of the glass jar to create stripes, or if you only want to paint part of the jar. Using tape will make sure you achieve straight, clean-edged lines. You can leave part of the glass clear, and the jars make lovely tea light holders. Chevron and diagonal patterns can be achieved with painters’ tape, also.
While you’re contemplating if you should throw out an empty glass jar, don’t forget that glass bottles can also be transformed with chalk paint.
Ordinary beer or soda bottles can become cute vases when painted in cheerful colors. Liquor bottles usually come in a variety of interesting shapes, and when painted (and maybe decorated with decoupage or ribbons) they can become an eye-catching table centerpiece.
Search discount stores, thrift shops, and yard sales for glass candleholders. Paint them in holiday colors for inexpensive and easy decorations. A little bit of distressing on the edges of candlesticks gives them vintage appeal.
Clear glass lamps of various styles have long been a staple of home decor.
They’re easy to find in thrift stores. A couple of coats of chalk paint transforms a clear lamp that you wouldn’t normally notice into an elegant room accessory. You can add a little distressing with light sandpaper, along with a vintage-style lampshade, to give an antique look to your lamp.
Do you have old picture frames tucked in the back of a closet in your home? Paint the glass with a couple of coats of chalk paint, then you can stencil designs or a meaningful saying over the painted background. The result is a cute sign similar to what you can find in just about every home decor store right now, at a fraction of the cost.
How Long Does it Take for Chalk Paint to Dry on Glass?
One of the great things about using chalk paint on glass is that it dries quickly. If you apply thin coats of paint, each coat should dry within 30 minutes or so.
Some brands of chalk-style paint might take more or less time than that, but they are all generally quick-drying.
How Do You Keep Chalk Paint on Glass?
Chalk paint isn’t as durable as acrylic or oil-based paints. It chips and scuffs pretty easily. When painted on glass, it’s even a little bit less durable.
This is because the paint doesn’t absorb into the glass at all; it simply covers the surface. You can lessen the likelihood of your painted glass projects getting chipped by painting them with two to three very thin coats of chalk paint. The thin coats of paint will adhere to each other and will be harder to chip off.
It’s important to note that the more you handle anything painted with chalk paint, the more likely the paint might scratch or chip. If you’re worried about chipping from frequent touching and use, consider applying a sealant coat to protect the paint.
How to Seal Chalk Paint on Glass
A good way to ensure your chalk paint stays on the glass is to apply a sealant. If you want to preserve the perfectly smooth, matte appearance of chalk paint, make sure any sealant you buy has a “matte” or “ultra-matte” finish. Poly-acrylic sealants can be purchased in both liquid and spray forms.
Whether you are applying liquid sealant with a paintbrush or spraying on spray sealant, it will look best if you use two to three thin coats. Just like when you’re painting, be sure to allow adequate drying time between each coat.
You can use chalk-paint wax to seal your painted glass project. Using a wax sealant takes a little bit of extra effort, and most wax finishes leave a very subtle sheen on the finished project. Wax sealants can make some colors look a little darker than unsealed paint, so keep that in mind, too.