• Skip to primary navigation
  • Skip to main content
  • Skip to primary sidebar
  • Skip to footer

Whipperberry

WhipperBerry • Your Home For Creative Inspiration

  • Home
  • Recipes
    • Starters
    • Easy Weeknight Dinners
    • Main Dish
    • Salads
    • Side Dish
    • Soups & Stews
    • Desserts
    • Breakfast
    • Miscellaneous
  • Tutorials
    • Creative Crafts
    • DIY Decor
    • Fabric Crafts
    • Food How-To
    • Jewlery
    • Paint Projects
    • Paper Art
    • Party Styling
    • Photography and Graphic Design
    • Silhouette
  • Holidays
    • Easter
    • Mother’s Day
    • Father’s Day
    • 4th of July
    • Halloween
    • Thanksgiving
    • Christmas
    • Valentine’s Day
  • Gift Ideas
    • Gifts For Everyone
    • Gifts for Dad
    • Mother’s day
    • For The Girls
    • For The Kids
    • Teacher Gift Ideas
    • Christmas
  • Printables
    • Holiday
    • Gift Idea
    • LDS Primary
  • Travel
  • About
    • Terms
  • Contact
  • Nav Social Menu

    • Facebook
    • Instagram
    • Pinterest
    • RSS
    • Twitter

Crafts

Best chalk spray paint

19 · Nov 19, 2023 · Leave a Comment


Hello everyone! Today, I want to share with you my experience with chalk spray paint, a fantastic tool for anyone who loves DIY projects.

I’ve used various types of chalk spray paints, and I must say, they’re a game-changer for achieving that lovely, matte finish on furniture and other crafts.

The ease of use is incredible – just shake the can, and you’re ready to spray, no brush or roller needed!

One thing I appreciate about chalk spray paint is how quickly it dries. It’s perfect for those of us who are eager to see the results without waiting too long.

Plus, the even coverage you get with a spray can is hard to achieve with a brush, especially on intricate pieces or those with lots of nooks and crannies.

My favorite aspect is the variety of colors available. Whether you’re looking for a classic vintage look or something more modern, there’s a color for every style. And the matte finish? It adds such a chic and sophisticated touch to any piece.

As for sprayers, choosing the right one can make a big difference. I’ve tried a few and found that some are better suited for larger projects while others are great for finer details.

Also if you’re a beginner in spraying and want to learn more about how to spray with chalk paint get it here.

So, if you’re thinking about giving your furniture or decor a new lease of life, chalk spray paint is worth a try. It’s easy, and fast, and the results are always stunning.Let’s start with the first one.

My Experience with Rust-Oleum Chalked Spray Paint
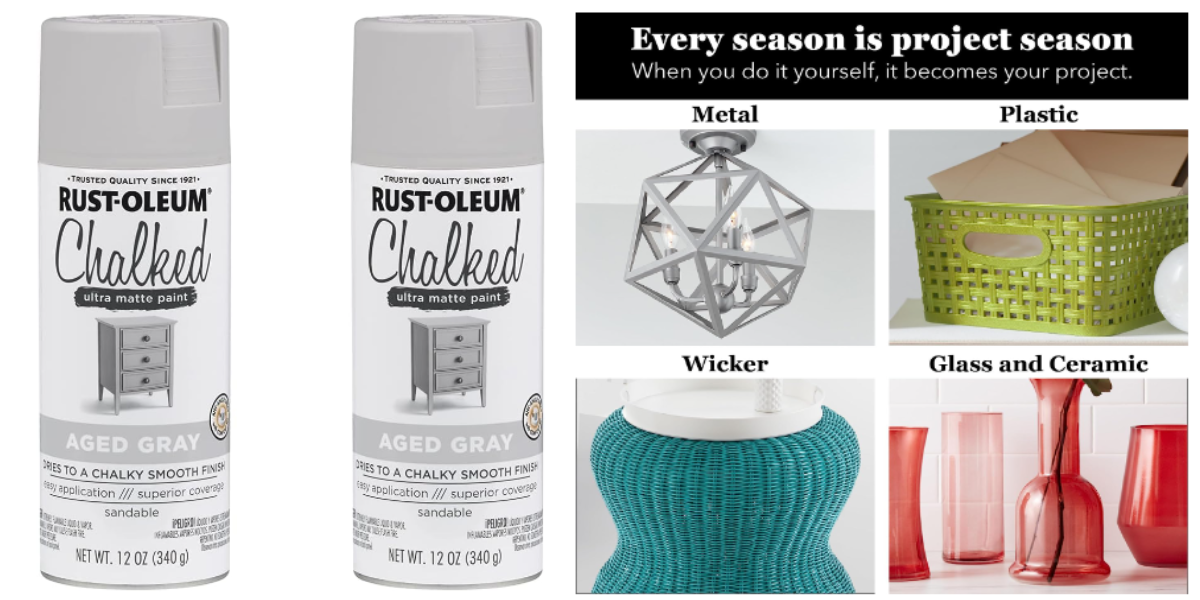


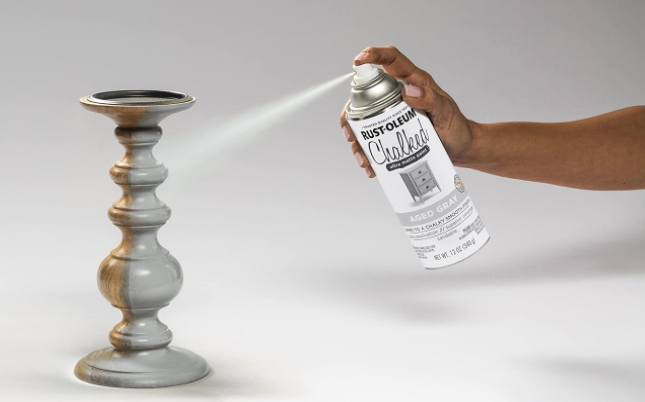
From my experience, using Rust-Oleum Chalked Spray Paint has been an absolute delight. This spray paint is a dream for any DIY enthusiast.

Its smooth, ultra-matte finish transforms any piece of furniture or décor into something special. I’ve used it on a variety of surfaces, and the adherence is remarkable – no need for any prep work like sanding or priming!

The range of colors is another plus. Whether I’m working on a small art project or a large piece of furniture, there’s always a perfect shade available.

The quick drying time is also a huge advantage, especially when I’m eager to see the finished product.

What I really appreciate about Rust-Oleum Chalked Spray Paint is its user-friendliness. Even with minimal painting experience, I’ve achieved professional-looking results.

The paint’s even coverage and ease of application make it ideal for both beginners and seasoned crafters. It’s definitely my go-to for achieving that chic, vintage look effortlessly.


Krylon Chalk Spray Paint
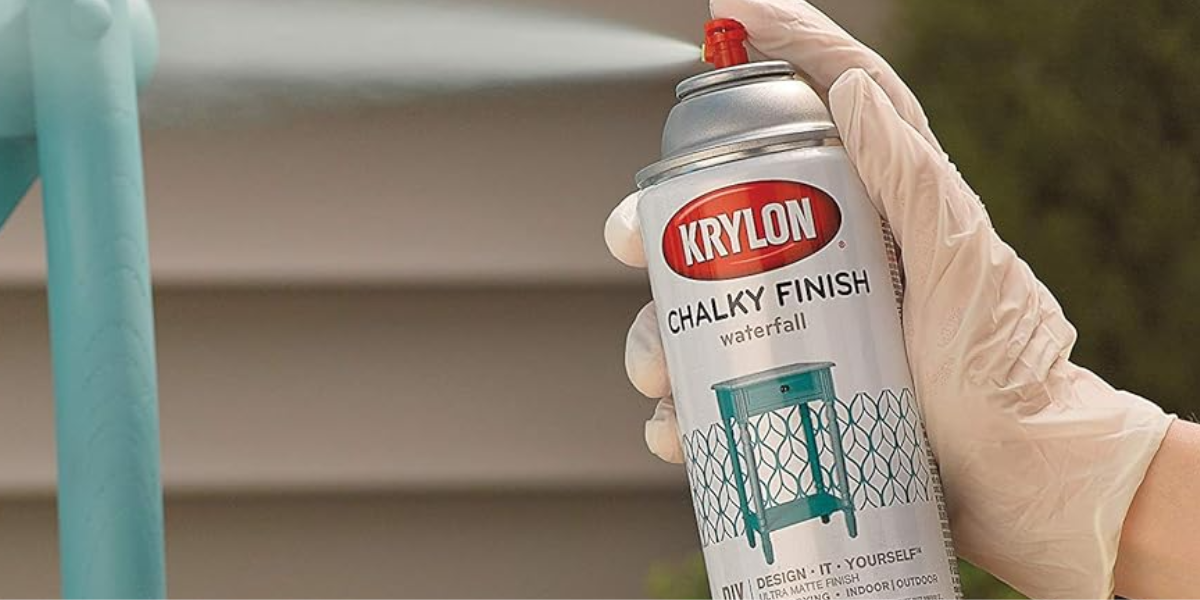


Krylon Chalky Finish Spray Paint really impressed me with its fast-drying formula and durability. When I first used it for a small crafting project, the thing that stood out the most was how quickly it dried.

It’s perfect for those times when you’re excited to see your project come together quickly. Another aspect I love about this paint is its adherence.

It sticks well to various surfaces without needing a primer, which saves a lot of time and effort.

The finish is also something to talk about. It gives a smooth, ultra-matte look that’s just perfect for creating that vintage vibe.

I used it on a picture frame, and the transformation was amazing! Plus, the range of soft, neutral colors available is great for projects where you want a subtle yet elegant look.

For anyone looking to add a touch of sophistication to their DIY projects, Krylon  Chalky Finish is a fantastic choice.


Graco Magnum 262800 X5 Stand Airless Paint Sprayer
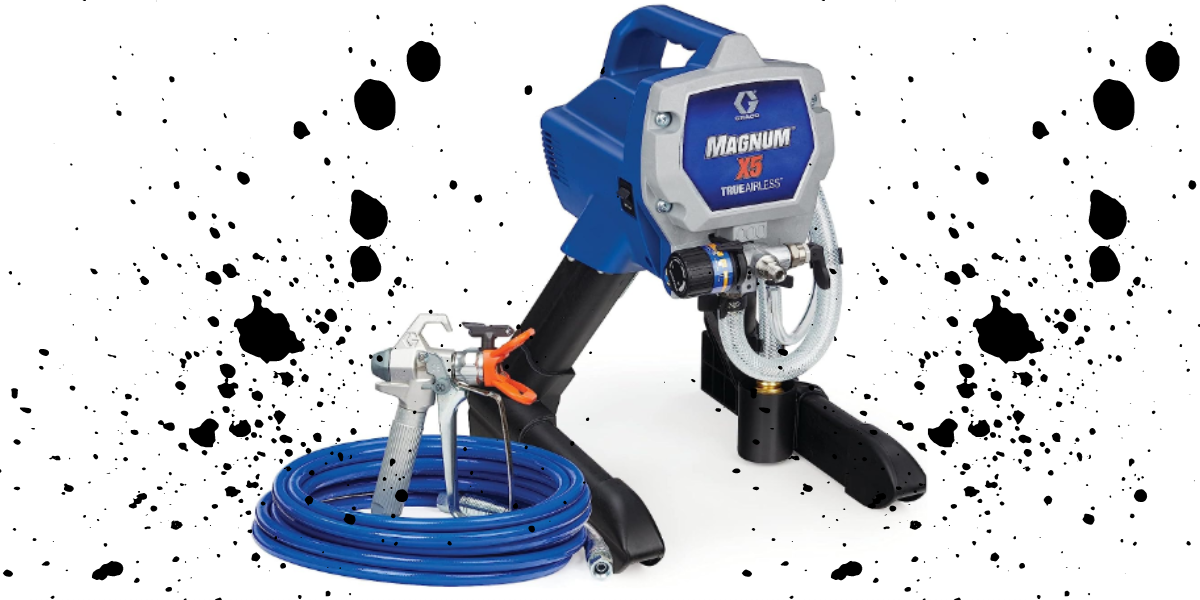
 

From my personal experience, the Graco Magnum 262800 X5 Stand Airless Paint Sprayer is a top-notch choice, especially for larger or more frequent DIY projects.

This sprayer is like the powerhouse of paint sprayers – it’s robust and can handle just about any painting task you throw at it.

What I love most about the Graco Magnum X5 is its efficiency. It spreads paint quickly and evenly, making big jobs, like painting a fence or a large piece of furniture, a breeze.

The adjustable pressure control is super handy, allowing me to tailor the paint flow to match the project’s needs, whether I’m working on a delicate piece of art or a big, sturdy table.

The professional finish it gives makes every project look like it was done by a pro. It’s a bit more expensive than some other sprayers, but for its durability and performance, it’s definitely worth the investment.

Conclusion

After trying out various chalk spray paints, I’ve genuinely enjoyed seeing the transformation they bring to my projects.

Each brand has its unique strengths, but they all share the ability to turn an ordinary item into something special. The ease of use, quick drying time, and gorgeous matte finish make chalk spray paints a staple in my DIY toolkit.

I particularly love the rich color options available, which add so much personality to my work. While some are a bit pricier than others, the quality of the finish makes them worth the investment.

These paints are also great for quick DIY makeovers, especially if you enjoy creating short craft videos to share your projects and inspire others. It’s satisfying to capture the before-and-after transformation of a simple item with just a few coats of paint.

Overall, using these chalk spray paints has been a rewarding experience, offering both convenience and impressive results. They’ve expanded my creative possibilities, and I can’t wait to tackle more projects with them!
What is Chalk Mineral Paint and How to Use it?

2 · Nov 11, 2023 · Leave a Comment

Hey there, friends! Have you heard about chalk mineral paint? It’s like the new BFF for DIY-ers and home decor enthusiasts.

Let’s dive into what makes this paint so fabulous and why it might just be the secret ingredient for your next project. Whether you’re a DIY diva or just dipping your toes into the world of creative painting, this post is for you!

What is Chalk Mineral Paint?

Okay, so what’s the scoop on chalk mineral paint? Imagine a paint that’s like a smoothie for your furniture – full of good stuff! It’s got natural minerals like calcium carbonate (that’s a fancy way of saying chalk) and talc, mixed with water and a binder. This magical mix gives us a paint that’s not just beautiful but also has a dreamy, velvety texture and a gorgeous matte finish.

Is Chalk Paint the Same as Chalk Mineral Paint?

Now, I know it’s easy to mix up chalk paint and chalk mineral paint. They’re like cousins in the paint family! While both give you that lovely matte look, they’re a tad different.

Chalk paint is super user-friendly and versatile, but it might have more man-made stuff in it. Chalk mineral paint, on the other hand, is all about those natural vibes, focusing on earthy ingredients.

This difference can give your projects a unique touch and make you feel good about being kind to Mother Earth.

What’s the Difference Between Chalk Paint and Mineral Paint?

When you step into the colorful world of paint types, it’s like entering a candy store – so many options! Now, let’s chat about two types of paints that often cause a bit of head-scratching: chalk paint and mineral paint.

Chalk Paint: Your Go-To for a Charming Matte Finish

Chalk Paint Furniture

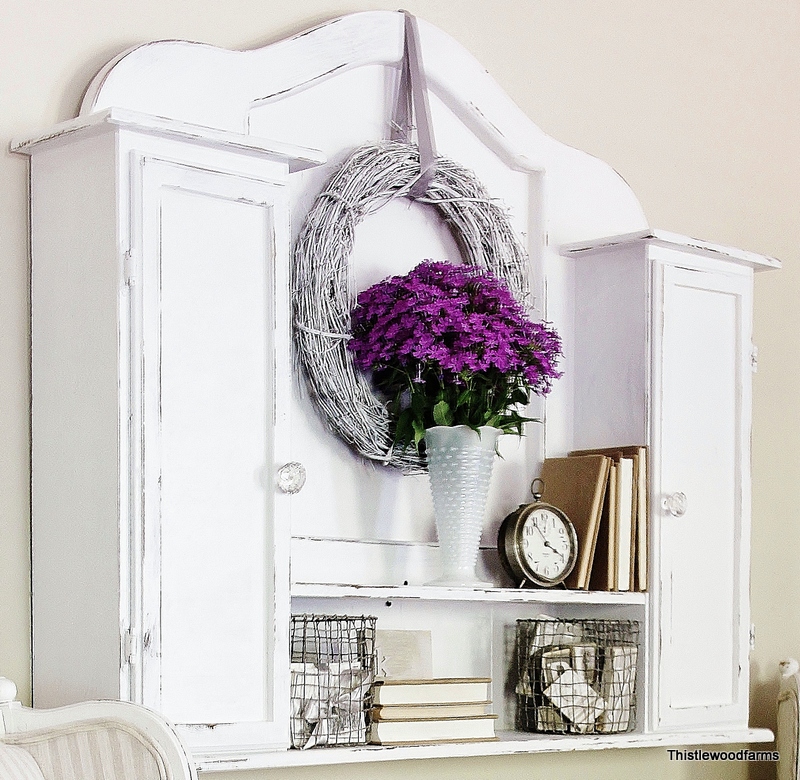
Chalk paint is the darling of the furniture refinishing world. It’s known for its matte, powdery finish and its forgiving nature. No need to sand or prime your piece; this paint is like that easygoing friend who doesn’t need any fuss.

It sticks to almost anything and is ideal for creating that cozy, vintage vibe. Plus, it dries quickly, so you can transform a thrift store find into a shabby chic masterpiece in no time.

Mineral Paint: The Durable Decorator

Now, let’s talk about mineral paint. This isn’t just chalk paint’s cousin with a different name. Mineral paint actually has its own distinct personality.

It’s like chalk paint’s outdoorsy sibling, known for its toughness and weather resistance. Made with natural mineral pigments and a binder, mineral paint is usually more durable than chalk paint.

It’s perfect for both interior and exterior projects, especially where you need a paint that can stand up to Mother Nature or the hustle and bustle of a busy home.

Making the Choice

So, how do you choose between the two? Think about what you’re painting and where it’s going to live. If you’re aiming for an indoor piece with a quaint, country look, grab that jar of chalk paint.

But if you’re painting your front door, some outdoor furniture, or anything that will wrestle with the elements (or little sticky fingers), mineral paint might be your champion.

In the end, whether you choose chalk paint for its no-prep charm or mineral paint for its enduring nature, both will help you create something beautiful. Just go with your gut and your project’s needs, and let the painting party begin!

How to Use Chalk Mineral Paint

Using chalk mineral paint is a piece of cake! Here’s how you do it:

  1. Prep Your Piece: Clean up your surface, but don’t worry about priming – this paint’s got it covered!
  2. Stir it Up: Give your paint a good mix to wake up all those lovely minerals.
  3. Apply with Flair: Grab a brush or roller and get painting. The coverage is fantastic, so it won’t take long!
  4. Dry Time: Let your masterpiece dry. Grab a cup of coffee and give it a few hours.
  5. Seal the Deal: For extra protection, especially on well-loved pieces, add a sealant.

Pro Tips for Stunning Results

To get that ‘wow’ effect with your chalk mineral paint, here are some fun tips:

  • Play with Textures: Different brushes can create cool effects. Experiment and see what you love!
  • Layer, Layer, Layer: Mixing colors can create an oh-so-chic look.
  • Go Vintage: For an antique feel, gently sand the edges after painting.
  • Protect Your Work: A wax or sealant keeps your piece looking fab for longer. Get the best chalk paint wax here.

Wrap-Up

So, there you have it, my creative friends! Chalk mineral paint is like a little jar of joy for your home projects. Whether you’re transforming an old dresser or adding a personal touch to your decor, this paint is a game-changer.

Remember, the most important thing is to have a blast and let your creativity shine. Happy painting, and let’s make our homes as fun and fabulous as we are!

And hey, don’t stop here. With chalk mineral paint’s unique properties and eco-friendly formula, there’s a whole world of possibilities waiting for you. Let’s grab those brushes and make some magic!

Can You Use Chalk Paint On Glass? A Quick How-To Guide

51 · Sep 23, 2023 · Leave a Comment

Yes, you can use chalk paint on glass. Chalk paint is a great way to make ordinary glass jars and bottles look pretty. You can even achieve a distressed look on any textured glass item. However, there are a few things you need to know about chalk painting on glass. It’s important for the glass to be clean and dry. It’s also important to be patient and apply the paint in thin layers, allowing for time to dry between layers.

How Do You Use Chalk Paint on Glass?

Using chalk paint on glass is one of the easiest chalk paint projects you can do! The results are pretty, and you can easily finish chalk-painted projects in a day.

The First Step for Using Chalk Paint on Glass

  • The first step is to ensure your glass jar (or whatever object you will be painting), is clean and dry.  If there is any sticky adhesive residue from a label, use rubbing alcohol or a product like “Goo-Gone” to remove all traces of it.Once you have done that, there are a couple of easy ways you can get the glass sparkling clean. A one-to-one mixture of water and distilled white vinegar, or just ordinary rubbing alcohol, is the best at cleaning glassware.

    After cleaning, be sure to rinse your glass thoroughly under warm running water to remove any traces of alcohol or vinegar. The paint won’t stick unless the glass has been thoroughly rinsed off.

    It might be tempting to just use commercial spray-on glass cleaner. While these products are fine for windows, they are not the best for cleaning a surface where you want to apply paint. They might leave a very fine film on the glass, which can cause your paint to go on unevenly and it will look streaky.

Second Step

  • Once the glass is perfectly clean and completely dry, you are ready to paint! Keep in mind that glass is a non-porous surface. The chalk paint won’t soak into the glass at all; it lays on top of the surface. You will need to apply at least two coats of chalk paint, maybe three coats if you want a more opaque coverage.

    You can apply chalk paint to any glass item simply by brushing it on with an ordinary paintbrush. The first coat of paint will undoubtedly look somewhat streaky when it dries. That’s okay, it will smooth out when you apply the second coat of paint.

    Be sure to allow time for the paint to dry between coats. Fortunately, chalk paint dries quickly. It should be dry to the touch in 30 to 40 minutes, depending on the brand of chalk paint.

    If the first coat of paint doesn’t seem to be sticking to the glass, it might be because the glass isn’t perfectly clean. You can wipe off the chalk paint before it’s fully dry, thoroughly clean your glass, and try again once it is fully dry.

    Another reason for the paint not sticking could be that the brand of chalk finish paint that you are using is too thin or just doesn’t adhere well to non-porous surfaces.You can remedy this by either applying a very thin coat of white acrylic paint first as a primer coat, or you can scuff the glass a little bit with some light sandpaper or steel wool. You don’t have to scratch the glass up very much, just a little bit to give the paint something to hold on to.


Third Step

  • Once you’ve applied a couple of coats of chalk paint and they are fully dry, you can add some final touches to make your project extra special!If the glass you painted has any texture such as raised surfaces or lettering, you can create a distressed look simply by rubbing it with some light sandpaper. This look is so popular with home decor professionals who use chalk-painted mason jars and old bottles in their design plans.

    Adding color-coordinated ribbon or lace trim also adds a nice finishing touch to painted jars and bottles. You can even decoupage over chalk-painted jars, but be sure to use a matte finish decoupage medium to preserve the velvety smooth look of the chalk paint.

Final Step

  • The final step is to seal your chalk-painted project. This really is optional for painted glass pieces. The reason you might want to seal your paint is that the chalk paint is more likely to chip or scuff on glass than it would on a wood surface.If you don’t expect your painted glass project to be handled very much, you can probably get away with skipping the sealant if you don’t want to do it.

    You can seal glass pieces with either clear poly acrylic sealant or chalk paint wax. Just be sure to use a sealant that has a matte or ultra-matte finish, so your paint will have that lovely “chalky” appearance!If you choose to apply a wax sealant, keep in mind that wax can sometimes make the paint color look slightly darker. If you’ve painted jars or bottles that you plan to use for tea light candle holders, you might not want the paint to look darker.

Projects for Using Chalk Paint on Glass

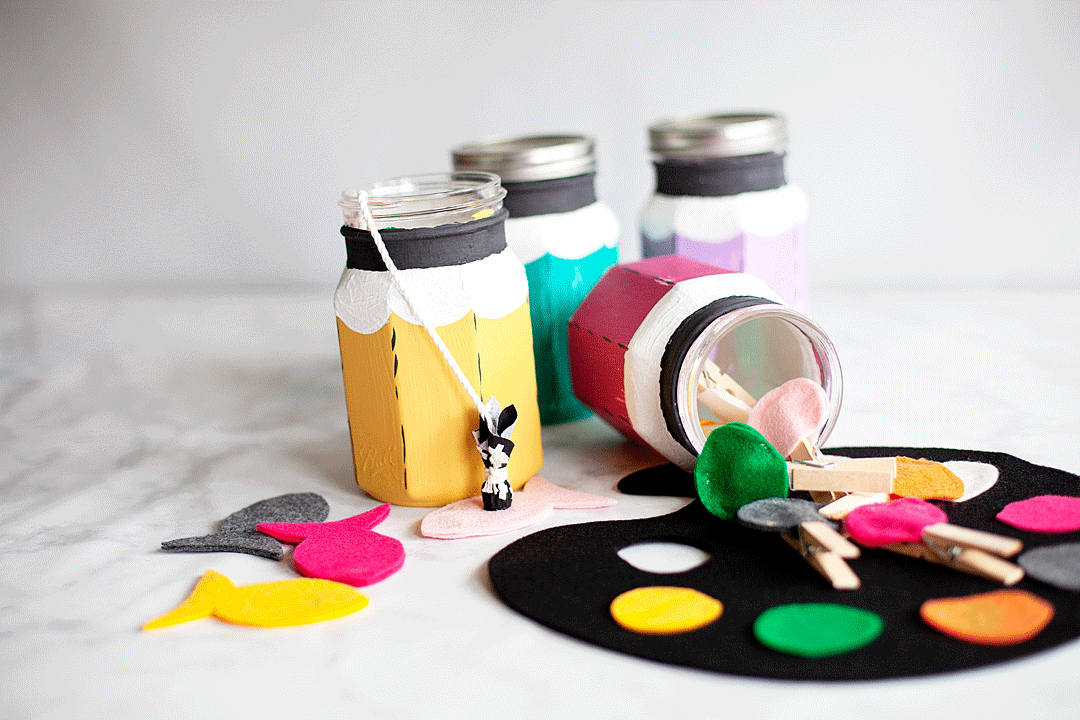
If you’ve searched on the internet for anything related to using chalk paint on glass, you’ve probably seen countless photos of painted mason jars in various sizes.

There’s a reason this is so popular; the painted jars are easy to do and are perfect “cottage core” home accessories! A little bit of distressing to bring out any designs or writing on the jars adds more appeal.

Mason jars aren’t the only glass jars that look great once they’ve been painted. Any and all glass jars can be transformed into something pretty with a few coats of chalk paint.

Pay attention before you throw out an empty spaghetti sauce jar or olive jar; unusual shapes can be transformed into something pretty for your home. Even little baby food jars look adorable when painted. The painted jars can be used to hold pens, kitchen utensils, paintbrushes, office supplies, etc.

You can use painter’s tape to block off sections of the glass jar to create stripes, or if you only want to paint part of the jar. Using tape will make sure you achieve straight, clean-edged lines. You can leave part of the glass clear, and the jars make lovely tea light holders. Chevron and diagonal patterns can be achieved with painters’ tape, also.
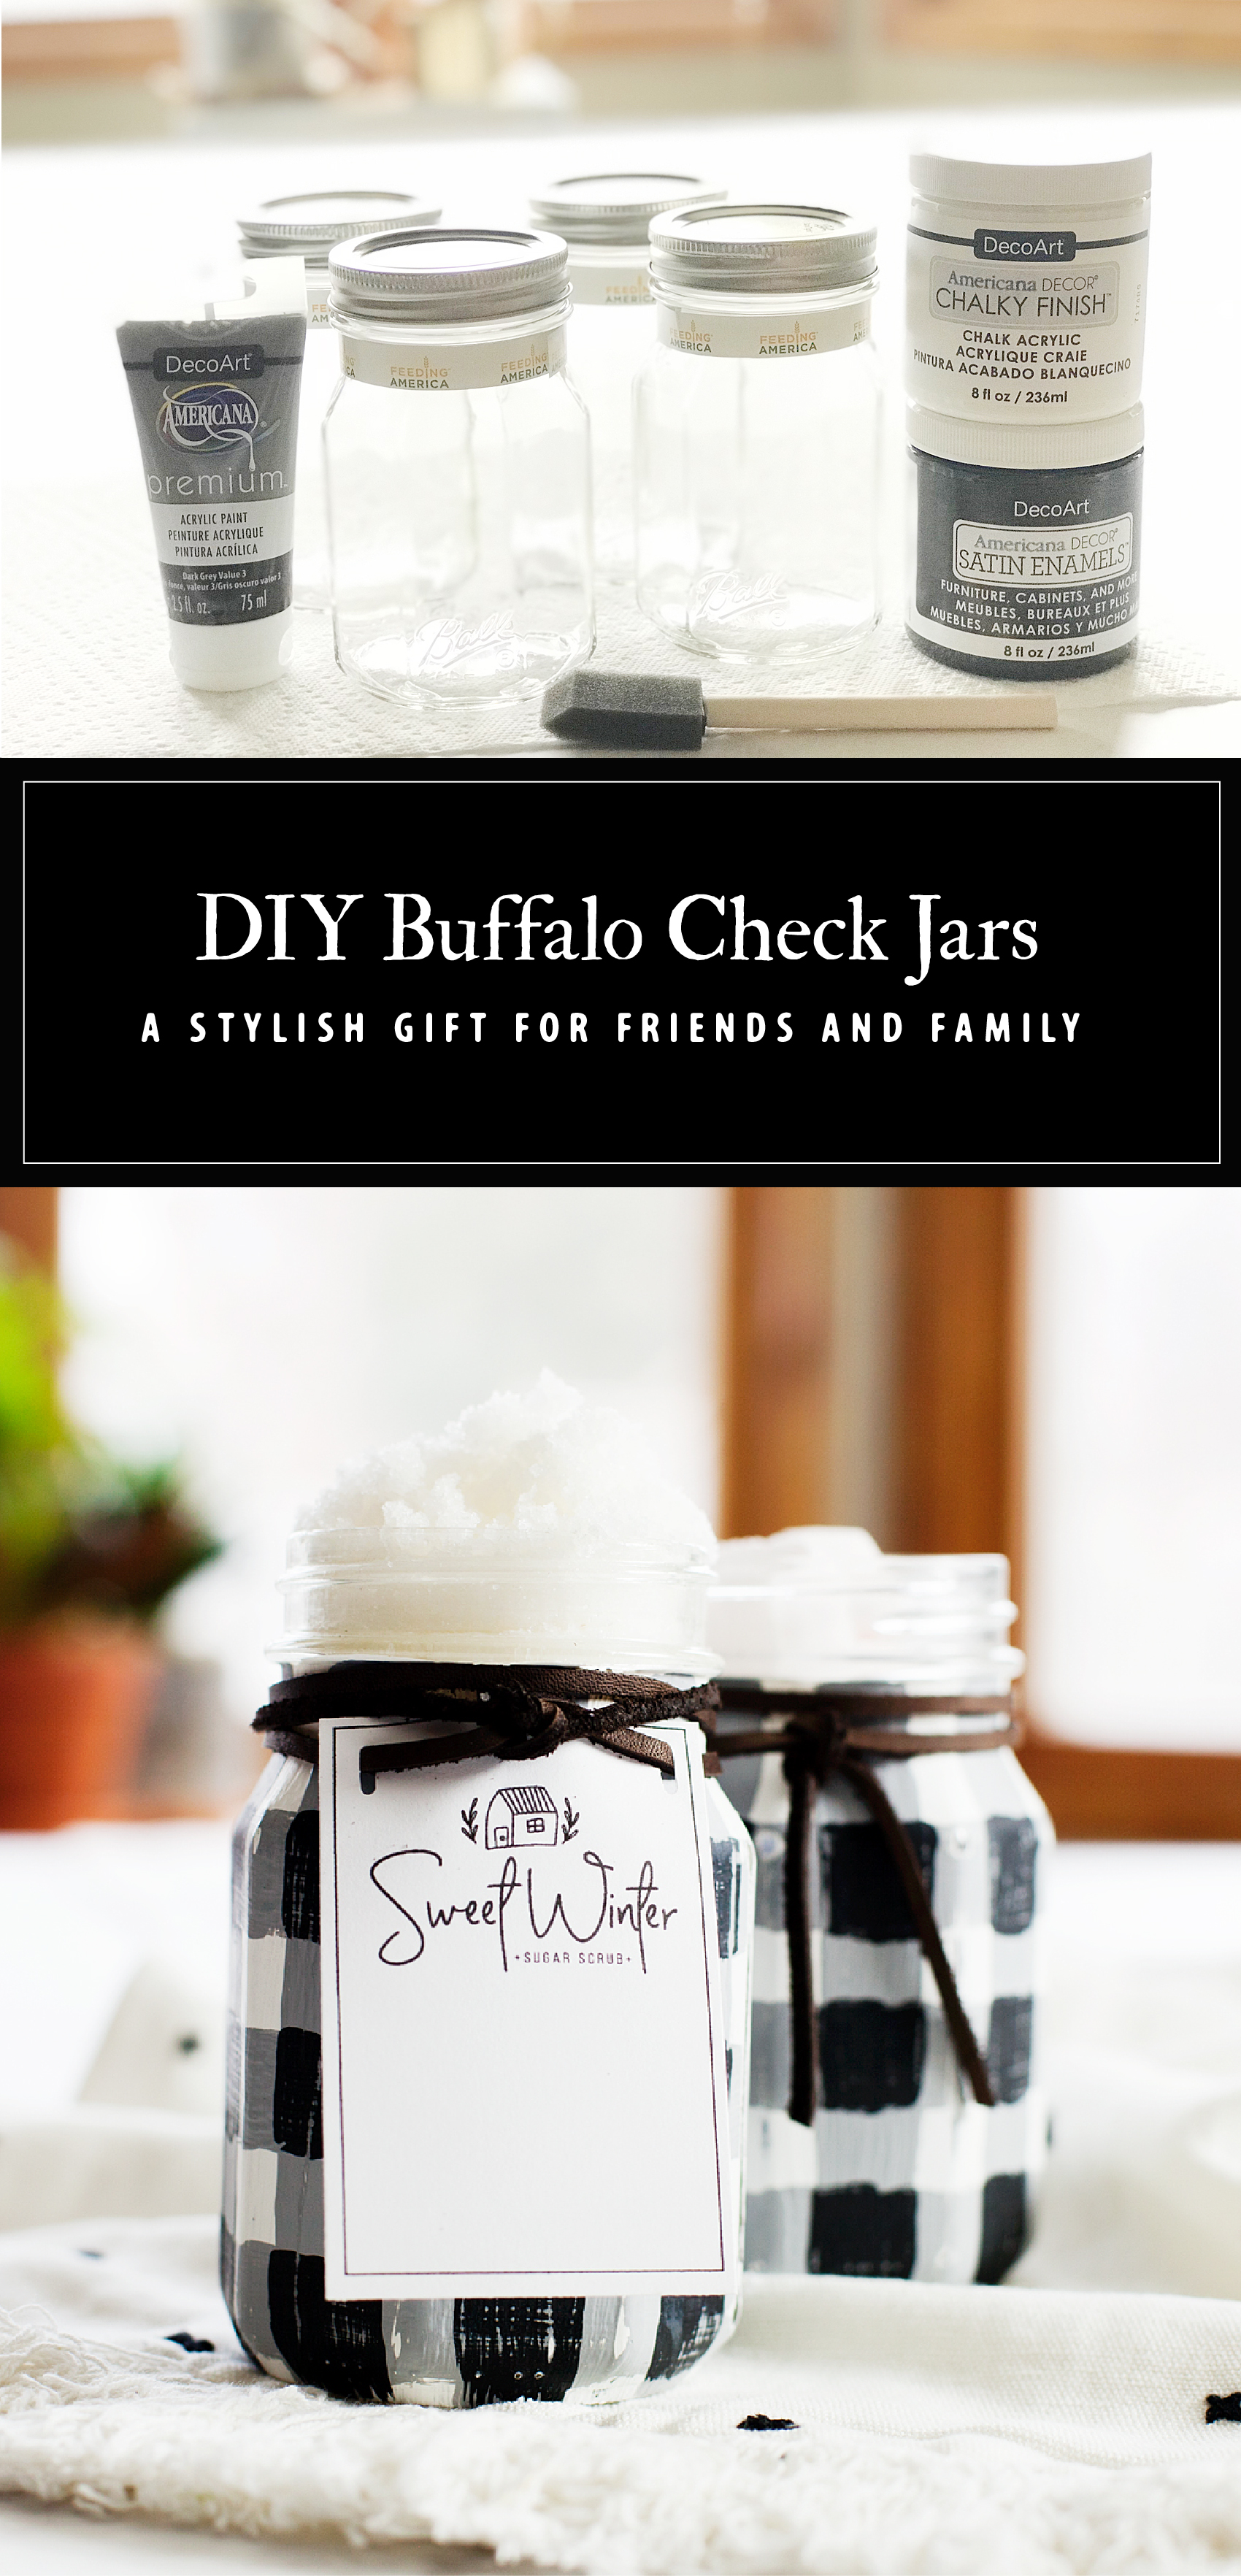
Love the Buffalo Check trend? Yep, me too! I thought it would be fun to use some of the Ball® Giving Jars to create some Buffalo Check Jars to use as gifts this Holiday Season. Here's how you can make some of your own.


While you’re contemplating if you should throw out an empty glass jar, don’t forget that glass bottles can also be transformed with chalk paint.

Ordinary beer or soda bottles can become cute vases when painted in cheerful colors. Liquor bottles usually come in a variety of interesting shapes, and when painted (and maybe decorated with decoupage or ribbons) they can become an eye-catching table centerpiece.

Search discount stores, thrift shops, and yard sales for glass candleholders. Paint them in holiday colors for inexpensive and easy decorations. A little bit of distressing on the edges of candlesticks gives them vintage appeal.

Clear glass lamps of various styles have long been a staple of home decor.

They’re easy to find in thrift stores. A couple of coats of chalk paint transforms a clear lamp that you wouldn’t normally notice into an elegant room accessory. You can add a little distressing with light sandpaper, along with a vintage-style lampshade, to give an antique look to your lamp.

Do you have old picture frames tucked in the back of a closet in your home? Paint the glass with a couple of coats of chalk paint, then you can stencil designs or a meaningful saying over the painted background. The result is a cute sign similar to what you can find in just about every home decor store right now, at a fraction of the cost. 

How Long Does it Take for Chalk Paint to Dry on Glass?

One of the great things about using chalk paint on glass is that it dries quickly. If you apply thin coats of paint, each coat should dry within 30 minutes or so.

Some brands of chalk-style paint might take more or less time than that, but they are all generally quick-drying. 

How Do You Keep Chalk Paint on Glass?

Chalk paint isn’t as durable as acrylic or oil-based paints. It chips and scuffs pretty easily. When painted on glass, it’s even a little bit less durable.

This is because the paint doesn’t absorb into the glass at all; it simply covers the surface. You can lessen the likelihood of your painted glass projects getting chipped by painting them with two to three very thin coats of chalk paint. The thin coats of paint will adhere to each other and will be harder to chip off.

It’s important to note that the more you handle anything painted with chalk paint, the more likely the paint might scratch or chip. If you’re worried about chipping from frequent touching and use, consider applying a sealant coat to protect the paint.

How to Seal Chalk Paint on Glass

A good way to ensure your chalk paint stays on the glass is to apply a sealant. If you want to preserve the perfectly smooth, matte appearance of chalk paint, make sure any sealant you buy has a “matte” or “ultra-matte” finish. Poly-acrylic sealants can be purchased in both liquid and spray forms.

Whether you are applying liquid sealant with a paintbrush or spraying on spray sealant, it will look best if you use two to three thin coats. Just like when you’re painting, be sure to allow adequate drying time between each coat.

You can use chalk-paint wax to seal your painted glass project. Using a wax sealant takes a little bit of extra effort, and most wax finishes leave a very subtle sheen on the finished project. Wax sealants can make some colors look a little darker than unsealed paint, so keep that in mind, too.

Is Tempera Paint Washable?

28 · Aug 23, 2023 · Leave a Comment

Yes. Tempera paint is washable. However, the material the paint is on matters. You’ll need to read the rest of this post to learn how to clean tempera paint from different surfaces.

Any painting project can get messy. In spite of the best efforts to keep everything clean, sometimes accidents happen.

Fortunately, tempera paint is very easy to wash out of almost anything. Because it is water-soluble, soap and water work great for most paint spills and mishaps.

Here are a few methods to make paint clean-up easier for different circumstances:

How To Clean Tempera Paint From Paint Brushes

Cleaning your paintbrushes properly is so essential. It ensures that your brushes will last a long time. Washing tempera paint from your brushes is very easy, and doesn’t take very long at all.

Whenever you are ready to clean your brush, or just to change paint colors, rinse your brush thoroughly in a cup of clean water. Most of the paint will come out just by doing this.


To thoroughly clean your brushes, the first step is to wipe any excess paint off using a paper towel. After that, you can use a little dab of liquid dish soap on the bristles and gently rub it with your fingers to loosen the paint.

Then you swish your brush around in a cup of clean water; this should remove most, if not all, of the paint.

When the paint is removed, you can rinse your brush under cool water to remove any remaining soap that is in the bristles.

Smooth the bristles of the brush so that they are all in one direction. Let your newly clean paint brush dry flat, or hang up by the handle (bristles pointing down). Drying flat or hanging will keep the bristles nice and straight.

If the tempera paint has dried on your paintbrush bristles, the same method should work. However, it’s probably going to take a little more dish soap.

You can try to gently pick the bits of dried paint off the bristles before cleaning with the soap.

How To Wash Tempera Paint Out Of Clothes

Washing tempera paint out of clothes is fairly easy, but the longer the paint is on the fabric the more likely it is to stain.

If you get paint on your clothes and it is still wet, you can blot any excess paint with a paper towel, then launder the clothing in cold water right away.

Using cold water is important, as hot water might cause any stain to set more permanently in the fabric.

Also, let the clothing item air dry instead of putting it in the clothes dryer. If there is even a tiny bit of the stain left, heat from the dryer could set it in the fabric permanently.

If the paint has dried, or if there is a lingering stain after the clothing has been through the laundry, you still might be able to get it clean. If the paint is dry, try flaking as much of the dried paint off as possible. You can use a plastic knife or a spoon to do this.

Then, use a spray bottle with diluted vinegar (one part vinegar, 1.5 parts water) to soak the stained area. Let it set for 10 to 15 minutes, then blot (don’t scrub!) with a clean paper towel or rag. You can repeat this a couple of times until the stain is gone.

You can also use a commercial stain remover, such as Oxy-Clean, to get rid of the stain. Just be sure to blot the stained area; scrubbing at it could just rub the stain back into the fabric fibers.

How To Wash Tempera Paint Off Of Skin

Have you ever done a painting project and managed not to get paint on yourself? I don’t think I ever have! Fortunately, tempera paint easily washes off skin, even when it is dry.

Ordinary soap and water should wash away the paint with no problem. You can also use a bit of liquid dish detergent if hand soap doesn’t seem to be getting it all clean.

If you’ve got paint stains on or around your fingernails, a paste made from baking soda and water works great to clean it up.

Can You Wash Tempera Paint off of Wood?

Yes but it can be challenging. Tempera paint on wood will come off if you leave it outdoors long enough. If it’s inside you may need to take it outside to pressure wash it.

Scrubbing it can be a bit challenging but will help quite a bit as well.

How To Remove Tempera Paint From Glass Windows

Tempera paint is frequently used for temporary window signs or holiday artwork. Removing it takes a little bit of work, but it doesn’t have to be stressful.


To begin, you can use a plastic spatula or putty knife to gently scrape off as much of the dried tempera paint as possible.

Once you can’t scrape any more off the glass, you can wash it with a solution of one part white vinegar/one part warm water. Soak a soft cloth in the vinegar/water solution and scrub to loosen as much paint as possible.

You will probably need to rinse the cloth and repeat this several times.

If there are stubborn spots of paint that you can’t scrub away, blot the area with the vinegar/water solution and wait for 5 to 10 minutes. Then you can scrub it away with the cloth.

After the window is completely cleaned, let it dry thoroughly. Finally, clean it with some spray glass cleaner to get rid of any remaining residue.

How To Wash Tempera Paint Out Of Carpet

Hopefully, you never have to clean spilled or dripped tempera paint from your carpet. But if you do, it’s very similar to the method for cleaning paint from clothing.

If the paint is completely dry, use a spoon to try to scrape as much of the paint off of the carpet as possible. Tempera paint is very brittle when it dries, so you might be able to scrape most of it away. Vacuum the paint dust right away before finishing with the cleaning.

The best thing to use for cleaning paint out of carpet is a commercial stain-removing product like Oxy-Clean or Resolve.

Spray it over the stained area, wait 10 minutes or so, then blot (never scrub!) with a clean cloth. Use a clean portion of the cloth each time you blot, so you don’t transfer the cleaned-up paint back onto the carpet. Repeat this a few times until the stain is gone.

If you don’t have any commercial stain-removing spray, you can try a diluted white vinegar and water mixture, just like you would use to remove the stain from clothing.

After the stain is gone, use a clean towel to soak up any excess moisture. Once the area is completely dry, vacuum again so there are no tiny bits of dried paint left in the carpet fibers.

  • « Go to Previous Page
  • Page 1
  • Interim pages omitted …
  • Page 27
  • Page 28
  • Page 29
  • Page 30
  • Page 31
  • Interim pages omitted …
  • Page 92
  • Go to Next Page »

Primary Sidebar

Heather from Whipperberry
Hello... my name is Heather and I'm the creator of WhipperBerry a creative lifestyle blog packed full of great recipes and creative ideas for your home and family. I find I am happiest when I'm living a creative life and I love to share what I've been up to along the way... Come explore, my hope is that you'll leave inspired!

Footer

  • Privacy Policy
  • Crafts
  • Food
  • Gifts
  • Holidays
  • Home
  • Mom Life
  • Recipes
  • Travel

Copyright © 2026 · Seasoned Pro