• Skip to primary navigation
  • Skip to main content
  • Skip to primary sidebar
  • Skip to footer

Whipperberry

WhipperBerry • Your Home For Creative Inspiration

  • Home
  • Recipes
    • Starters
    • Easy Weeknight Dinners
    • Main Dish
    • Salads
    • Side Dish
    • Soups & Stews
    • Desserts
    • Breakfast
    • Miscellaneous
  • Tutorials
    • Creative Crafts
    • DIY Decor
    • Fabric Crafts
    • Food How-To
    • Jewlery
    • Paint Projects
    • Paper Art
    • Party Styling
    • Photography and Graphic Design
    • Silhouette
  • Holidays
    • Easter
    • Mother’s Day
    • Father’s Day
    • 4th of July
    • Halloween
    • Thanksgiving
    • Christmas
    • Valentine’s Day
  • Gift Ideas
    • Gifts For Everyone
    • Gifts for Dad
    • Mother’s day
    • For The Girls
    • For The Kids
    • Teacher Gift Ideas
    • Christmas
  • Printables
    • Holiday
    • Gift Idea
    • LDS Primary
  • Travel
  • About
    • Terms
  • Contact
  • Nav Social Menu

    • Facebook
    • Instagram
    • Pinterest
    • RSS
    • Twitter

Paint

Hello I Love You Wood Sign // Silhouette Promotion and GIVEAWAY

0 · Jul 1, 2013 · 308 Comments

Silhouette Promotion Affiliate Team Member  // Can you believe it? It's JULY already!! The fire flies are a blaze here in Lincoln and I am LOVING the summer so far. It's so green and lush here and did I mention the fire flies? For a girl who has never lived in an area with the luminescent bugs… this is just magical!  

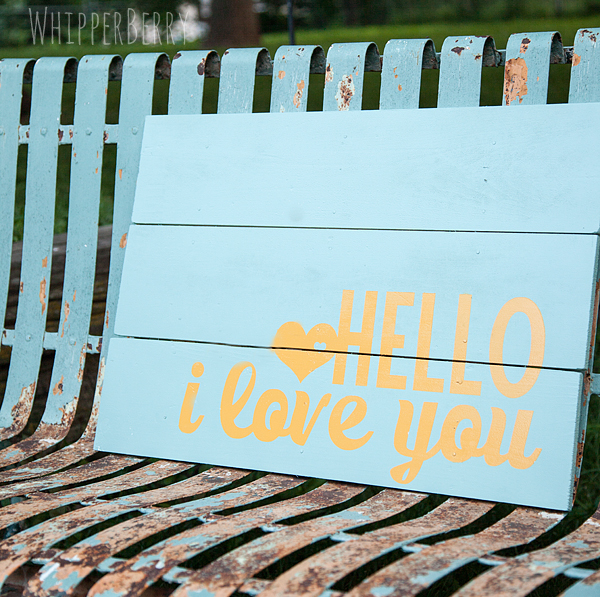
Well, with a new month we have a new Silhouette promotion… and I've created a new sign with the help of Rhonna Designs mad design skillz and the Silhouette Designer Edition Software…

Hello I love you Sign from WhipperBerry

Before I dive right on into the project I want to let you know about his month promotion… You know, just in case you are like me and have the attention span of a gnat. This way if you are dying to get a new CAMEO, Portrait or just the Designer Edition Software you don't have to muddle through my boring old tutorial on how to make this aaaaamazing sign. So, here are the details…

July Silhouette Promotion

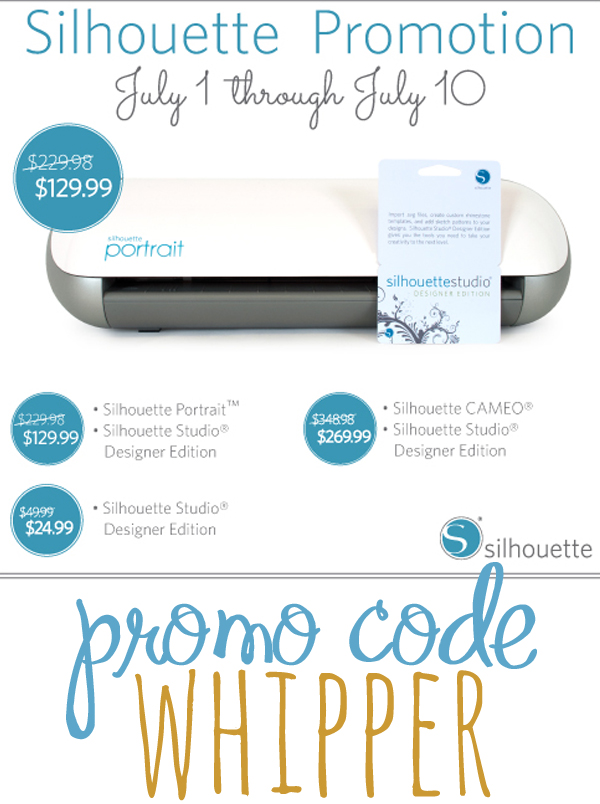
SMOKIN' WHITE HOT DEAL, right?

Click here to visit the Silhouette Shop to check out all of July's special deals!

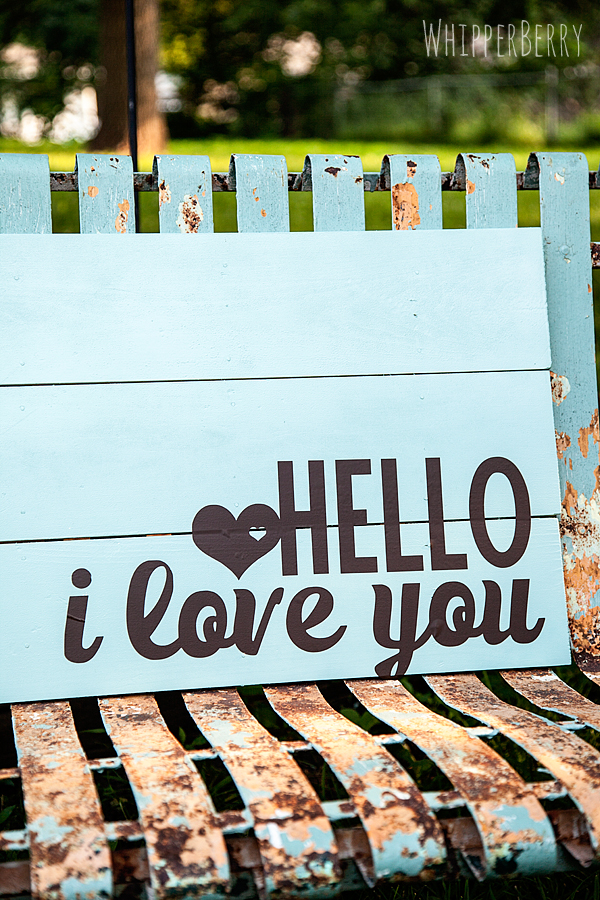
Now, before we get to the GIVEAWAY… Let me tell you a little bit about the sign I made this afternoon. It is a super slick, super easy sign to make. I bought the wood at Lowes and it was already cut in the 6×24 length with is perfect for making signs. Then I grabbed a couple of wood shims to secure the wood planks together and that was it…

WhipperBerry wood sign

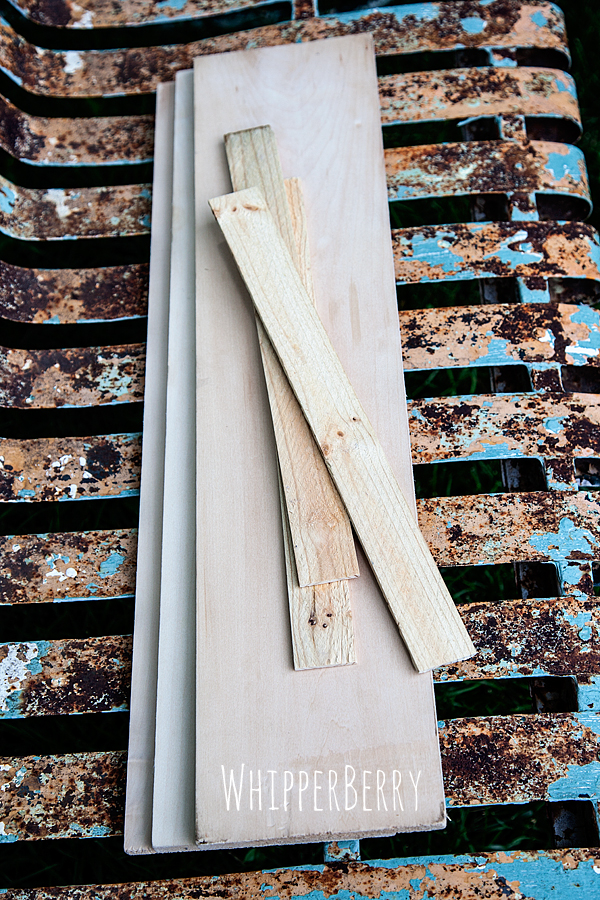
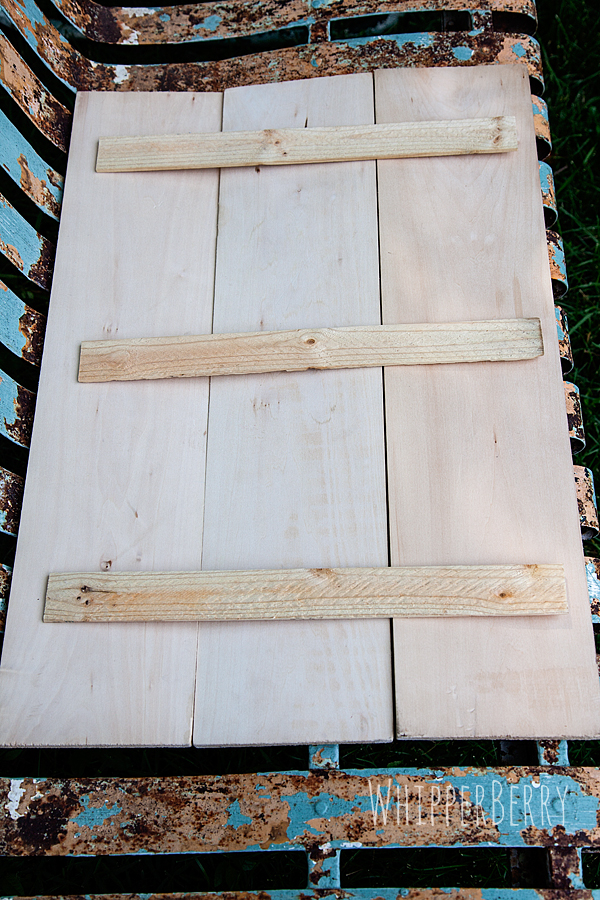
I laid the boards out and placed the wood shims on the back and secured the boards with come short nails and I was good to go.

how to build a wood sign

I primed the wood with some Kilz Spray Primer and then painted a few coats of Krylon Catalina Mist. Then while it was drying I prepared my stencil with my Silhouette Designer Edition Software. 

Hello I love you design from Rhonna Designs

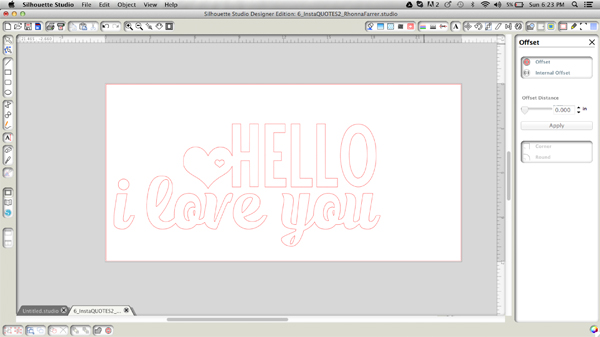
The Designer Edition Software is a must have addition when you have a Silhouette machine. It just gives you greater design options that with the basic software that comes with your machine. With this image above, I was able to convert a PNG file from Rhonna Designs into a cuttable file. That means that your design options are limitless with the CAMEO or Portrait! 

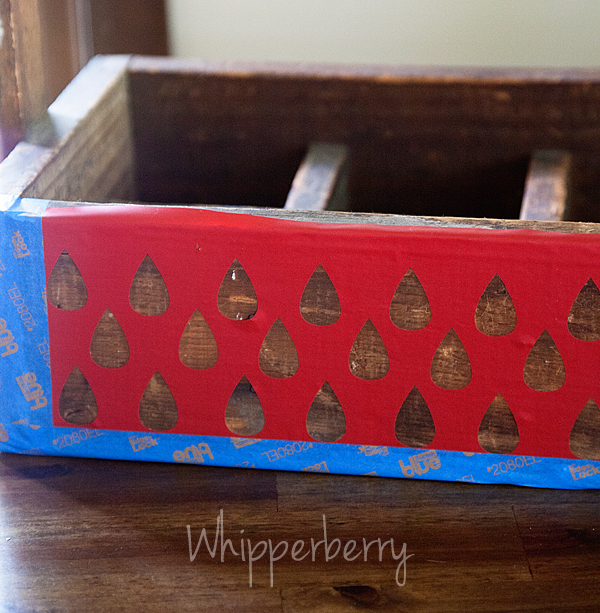
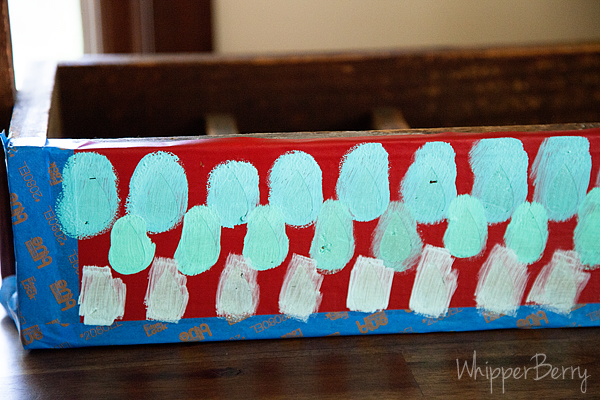
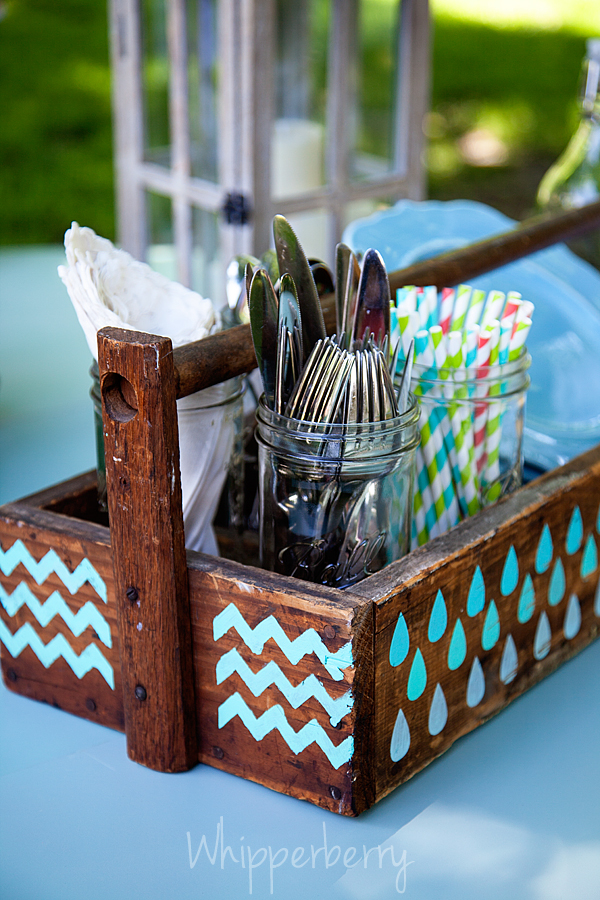
Once my design was complete I cut the vinyl and used it as a stencil to then paint my sign with Krylon Sun Yellow. I also made a sign where I just added the vinyl to the sign rather than using the vinyl as a stencil. They both look great!

painted hello i love you sign

Here's a post that I created awhile ago with a video on how to convert a PNG file in the Silhouette Designer Edition Software.

Want to compare the Design Studio options? Here is a breakdown…

Silhouette Studio Options
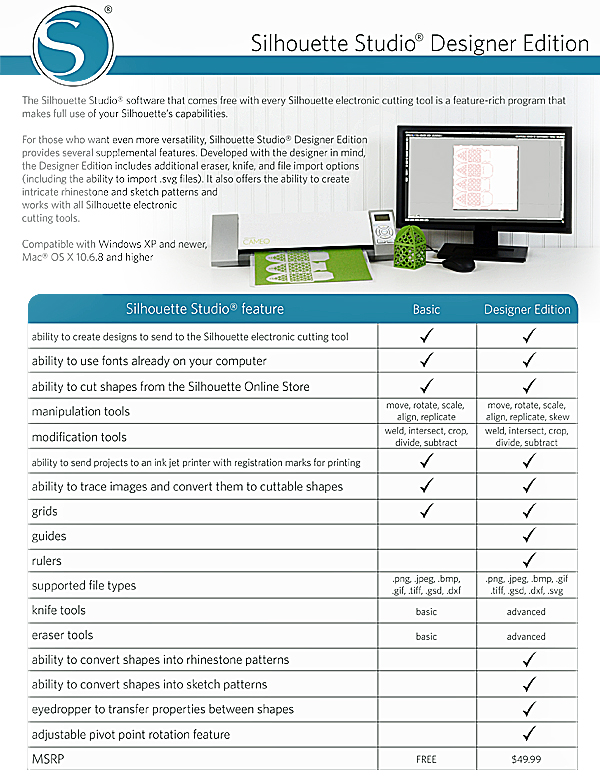
The best part… You can grab the Designer Edition from now until July 10th for only $24.99! Not to mention some smokin' deals when you bundle that with a CAMEO or Portrait! 

Wait, you want more? 

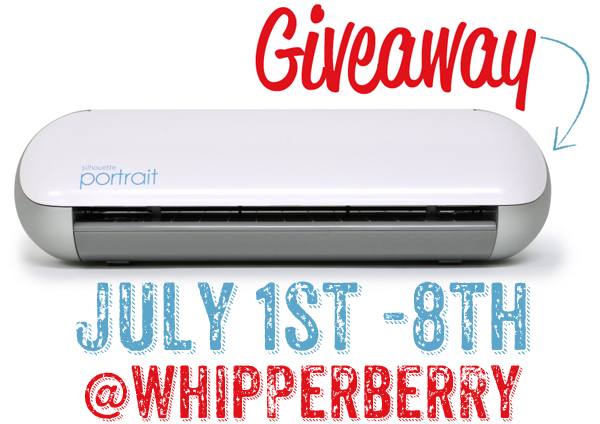
How about I give away one Silhouette Portrait with the Designer Edition Software to one of you!!

Whipperberry Silhouette Giveaway Instagram image

All you have to do is follow the directions in the Rafflecopter box below and you will be entered to win. 

// This giveaway is open from July 1-8 and only for residence of the United States. A winner will be announced on July 9th. //

a Rafflecopter giveaway

DIY Polka Dot Denim

1 · Jun 25, 2013 · 7 Comments

DIY Polka Dot Denim Jeans // Here is our last Creative Team post for this month. I'm thrilled to introduce Haley from Life is Sweet! Haley has been a long time WhipperBerry friend from back when WhipperBerry was the new kid on the block. She has always been so supportive and a wonderful friend. Haley may not know this but she is a real example to me… She is such a wonderful mother and a positive example that has a gift for lifting others and making them feel special. Haley has amazing style and shares fun projects and recipes peppered in a blog about her beautiful family and the lessons she learns in this daily journey we call life & parenthood!


  Hello WhipperBerry friends! I'm still on cloud 9 to be able to share here with the rest of the lovely ladies on the WhipperBerry Creative Team…thank you Heather! Today I'll be sharing a tutorial involving one of my favorite patterns: polka dots. They can be fun and casual, classy and bold. I've seen polka dotted pants here and there for a little while now, and I love them! Recently I found a pair of white denim pants with black polka dots that I couldn't help but gush over, sadly the price tag put a stop to that train rather quick. So I made them happen with a pair of pants I already owned! And they're my new favorite pair of jeans. Do you like polka dots? If so, give this a try!


– Denim (or any kind of pants or skirt really…needs to be washed at least once prior to painting)
– Fabric paint (I love the Tulip brand…can be found at most craft stores and even Walmart)
– Pencil to mark the dots
– Stamp/Eraser of a pencil to stamp the dots (or something that is the right size of dot you're wanting)
– Paper, cut in a diamond-shape for the stencil (mine had a long cross-section of 3 inches, and a short cross-section of 2 inches)


STEP 1:
You'll want to set the diamond stencil on the denim and mark all four corners with small dots. Then move the diamond, matching up one of the sides with two of the dots, and then mark the remaining two corners. And repeat…over and over. 
TIP: Do your best to match them up, but don't stress about having them be exactly in alignment. 🙂 That is why I chose to do a diamond as opposed to a square, I think it hides imperfections better.


STEP 2:
Lay your pants on a flat surface. With your eraser (or other tool for painting the dots) dab a small amount of fabric paint and then lightly press it onto denim over your pencil marks. Repeat for each dot. 
TIP: You may need to dap/press twice if the dot needs to be darker/more solid, just be sure not to have too much paint on the eraser, you can always mark it again, but you can't make an already-painted mark smaller. 


STEP 3:
Let the one side dry (a couple hours should be good, but lightly touch the last dot you painted to be sure the paint isn't wet) and then flip over to mark and paint the other side (Steps 1 and 2). Let fully dry…then have fun wearing them out on the town!
 
 
Past posts:
Shabby to Chic DIY Photo Gallery
Roasted Coconut and Almond Hawaiian Pizza
"You Are My Sunshine" Printables
 
You can also connect with me here:
Instagram // Pinterest
 
xo,
Haley

Picnic Caddy

2 · Jun 17, 2013 · 6 Comments

This post brought to you by DecoArt // I am always keeping my eyes peeled for fun items that I can dress-up with a little paint. Fun little finds that have some character, but with a little zip of color make them the star of the show! I found this great "Junk Shop" here in Lincoln called Simply Bungalow and it's  FULL of all kinds of goodies. Heidi and her Mom do a fabulous job of curating a wonderful shop and I have fallen in love with it. The other day I stopped in a found a rustic caddy that I thought would make a fabulous picnic caddy…

WhipperBerry's Picnic Caddy

Isn't it fun how a little paint can really add some pizzaz to an item? The contrast between the wood and the ombre paint is just lovely.  It's going to be perfect to carry out our plates and utensils outside into our backyard oasis this summer.  You can make one for your table as well.

Keep an eye out for a great wood caddy. This one was made with old reclaimed wood, but you can find newer ones and stain them the color that you like, it's super easy.

wood caddy from simply bungalow in lincolcn

If you're handy you can even make one of your own. Ana White has a great reclaimed wood caddy with all the plans, that would be perfect for this project.

Supplies

  • Wood caddy
  • DecoArt Americana Acrylic Craft Paint – I used Whispering Turquoise, Sea Breeze and Bahama Blue

Select three colors to create your ombre effect

  • Some type of graphic stencil – You can find all kinds of stencils at any of the craft stores out there or you can make your own out of vinyl with your Silhouette or Cricut craft cutting machines. I made mine with my Silhouette CAMEO using the 12×24 cutting mat. It was perfect for making the large stencil that I needed.
  • Painters tape
  • Sponge brush

Instructions

Clean and dry your wood before you apply your stencil. This just makes sure any dirt or dust is removed before you try and paint. Apply your stencil to the wood if you are using vinyl, or tape any other type of stencil onto your surface.

use a vinyl stencil to create your pattern for the picnic caddy

I even added an edge of painters tape around the vinyl just to make sure I didn't have any over paint issues. 

Next, I started at the top and added one color of paint (Bahama Blue) on the top row, the second color (Sea Breeze) on the middle row and the third (Whispering Turquoise) on the bottom row. This creates a subtle ombre effect.

Carefully dab paint onto the surface

Let that dry for just a few minutes and then carefully remove the stencil. Let it completely dry and then turn and start your next section. I used a chevron stencil for the sides and the raindrop stencil for the front and back of the caddy. I distressed it just a bit to have it look a little more rustic and then I was finished! Isn't it cute?

dressed-up picnic caddy from whipperberry

My kiddos love to load it up and take it out to our picnic table outside to get things set for our breakfast, lunch or dinner…

My kiddos enjoying the new picnic caddy

You won't need a center piece anymore!  You'll have a beautiful and functional caddy for your table. No ones needs to know how easy it is to make!!

Disclaimer // I am a member of DecoArt's Core Blogger group and received free product along with compensation for this post. However, all thoughts, ideas and opinions are my very own!


Team Spirit Writers by DecoArt

16 · Jun 11, 2013 · 5 Comments

This post brought to you by DecoArt // Yesterday, I sent Haley and Hannah off to Girls Camp for the week! Girls Camp is a fabulous event that our 12-18 year old girls from church participate in every year. This is Hannah's first year and she is super excited. Haley is a veteran and couldn't wait to get together with all her friends and introduce Hannah to the elusive creature the Snipe (wink, wink!) Back in Vegas we had a fun tradition of using Team Spirit Writers to send the girls off in style to camp in style…

Spirit Writers with WhipperBerry and DecoArt

I don't know when the tradition started, but for the last several years the girls would always get a hold of these window paint pens and decorate all the cars for the trip up to camp. It was always fun to see what they came up with. Now that we live in a new state with a whole new set of traditions, we thought we would bring one of our old traditions with us. 

DecoArt Spirit Writers

It was perfect!! The girls felt right at home and everyone at camp drop-off thought it was the coolest thing ever. The Spirit Writers come in several colors and with their easy to use applicators they are super fun to add a little spunk for your next event!! 

Spirit Writers by Decoart

They are also super easy to clean off with a little window cleaner. You can find the Team Spirit Writers and Jo-Anns.

Disclaimer // I am a part of the DecoArt Core Blogger group and did receive product and payment for this post, however, all thoughts, ideas and opinions are my own.

  • « Go to Previous Page
  • Page 1
  • Interim pages omitted …
  • Page 11
  • Page 12
  • Page 13
  • Page 14
  • Page 15
  • Interim pages omitted …
  • Page 17
  • Go to Next Page »

Primary Sidebar

Heather from Whipperberry
Hello... my name is Heather and I'm the creator of WhipperBerry a creative lifestyle blog packed full of great recipes and creative ideas for your home and family. I find I am happiest when I'm living a creative life and I love to share what I've been up to along the way... Come explore, my hope is that you'll leave inspired!

Footer

  • Privacy Policy
  • Crafts
  • Food
  • Gifts
  • Holidays
  • Home
  • Mom Life
  • Recipes
  • Travel

Copyright © 2026 · Seasoned Pro