• Skip to primary navigation
  • Skip to main content
  • Skip to primary sidebar
  • Skip to footer

Whipperberry

WhipperBerry • Your Home For Creative Inspiration

  • Home
  • Recipes
    • Starters
    • Easy Weeknight Dinners
    • Main Dish
    • Salads
    • Side Dish
    • Soups & Stews
    • Desserts
    • Breakfast
    • Miscellaneous
  • Tutorials
    • Creative Crafts
    • DIY Decor
    • Fabric Crafts
    • Food How-To
    • Jewlery
    • Paint Projects
    • Paper Art
    • Party Styling
    • Photography and Graphic Design
    • Silhouette
  • Holidays
    • Easter
    • Mother’s Day
    • Father’s Day
    • 4th of July
    • Halloween
    • Thanksgiving
    • Christmas
    • Valentine’s Day
  • Gift Ideas
    • Gifts For Everyone
    • Gifts for Dad
    • Mother’s day
    • For The Girls
    • For The Kids
    • Teacher Gift Ideas
    • Christmas
  • Printables
    • Holiday
    • Gift Idea
    • LDS Primary
  • Travel
  • About
    • Terms
  • Contact
  • Nav Social Menu

    • Facebook
    • Instagram
    • Pinterest
    • RSS
    • Twitter

Paint

Cute DIY Folding Chairs Makeover

141 · Jun 9, 2013 · 92 Comments

WhipperBerry Creative Team // Today I’m super excited to introduce you to another member of the WhipperBerry Creative Team… Jenn from My Fabulous Life. She is one talented lady with an amazing list of talents…
jenn from my fabuless life


  I’m Jenn and I blog about DIY, furniture refinishing, and other random creative endeavors over at My Fabuless Life. I’m beyond thrilled and flattered that Heather has asked me to be a part of her team.  Today I’m sharing a cute folding chair makeover story in DIY style!

It’s probably no surprise that I love to host parties and gatherings at my house and volunteer my abode for events whenever possible–my husband totally loves it.  So this past year, when the parents asked me what I wanted for Christmas, I told them, without skipping a beat, FOLDING CHAIRS! Buuuttt….I feel like nothing puts a damper on my party quite like adding some drab, ugly folding chairs to a perfectly planned table setting.  You can imagine the parents’ joy when they granted my Christmas wish and I immediately said, “Oh, I’m so excited! I can’t wait to paint these and recover them.” Queue collective, “Aww, no, don’t do that…they’re perfectly good and new…wait until they’re at least beat up a little….”

I had a little guilt about going against the wishes of the gift-givers, but seriously, these girls were not going to be invited to my parties in this outfit.

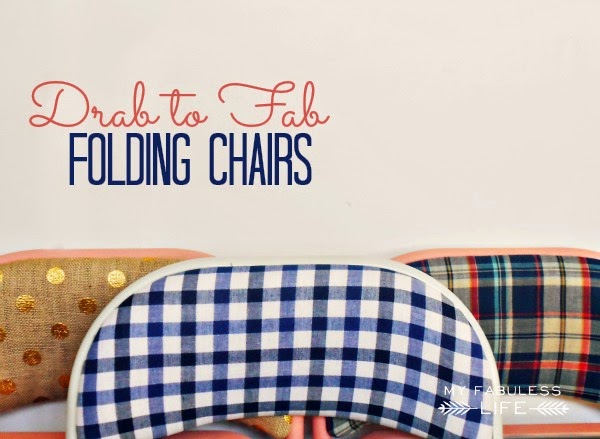
How to Makeover Folding Chairs – Do it Yourself Style

I originally set out to do some vintage florals, but plaids have stolen my heart in a big way lately–for some reason whenever I say this, I hear Tim Gunn in my head talking about menswear.  Anyway, I was at Walmart, of all places one day, and found the blue and pink plaid (on the right) in their remnant bin for like $2.00 and knew EXACTLY what I was going to do with the chairs.  The gold, polka dot burlap was not in the original plan, but when you find GOLD, POLKA DOT BURLAP (at Joann’s), you USE IT!  I may need meetings for this burlap addiction because it is quickly appearing all over my house and I can not get enough.

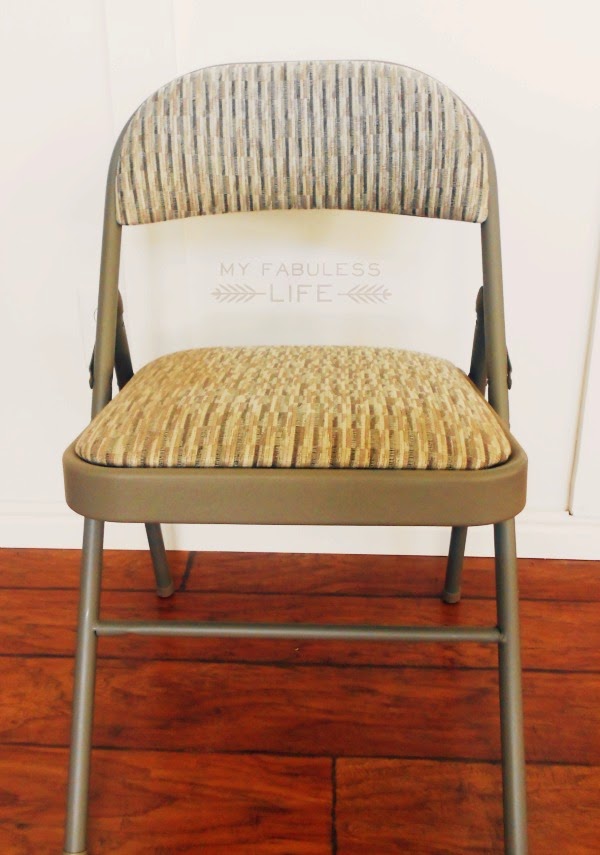
How to Add Cushions to Metal Folding Chairs

Metal folding chairs are a bit uncomfortable. So, if you don’t already have the one’s with cushions you’ll want to add cushions first. This might seem hard if you want to do it yourself but it’s actually easy! The things you’ll need for adding a cushion are below.

Things You’ll Need to DIY:

Spray paint (about one can for each chair)
Fabric (less than 1/2 yard for each chair)
Staple gun (can be purchased for about $10 just about anywhere that sells basic tools)
(4) 1″ screws for each chair

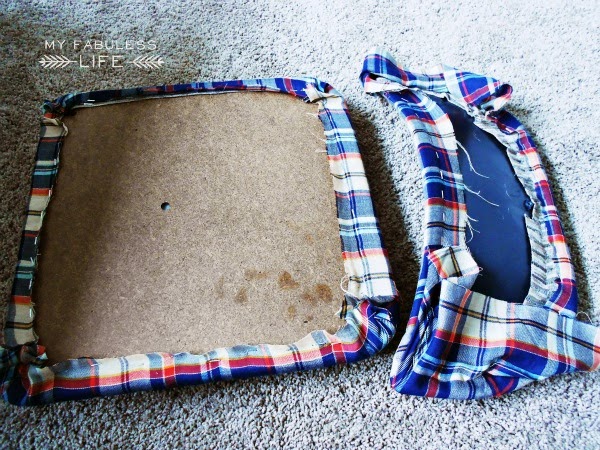
Start by removing the pads from the chair.  On my chairs, the ones on the back just came off by unscrewing three little screws.

The seat cushion was attached with some type of plastic screws so I just clipped the ends off with wire cutters (just something will cut through thick plastic).  DON’T TRY TO PULL THEM OUT.  They have a flat head that’s attached to the wood under the padding and you’ll just rip a hole through the seat–learned that one the hard way.

Then spray paint the chairs.  I used Valspar Brushed Rose and Mellow Spring from Lowe’s.  While the paint is drying, you can upholster your cushions.

Just lay the cushion on the fabric, cut a piece of fabric big enough to pull around it, and staple it down right over the top of the existing fabric.  Make sure to keep it pulled tight, and if you’re using a fabric with a pattern, keep flipping the cushion over as you go to make sure you’re keeping the pattern straight.

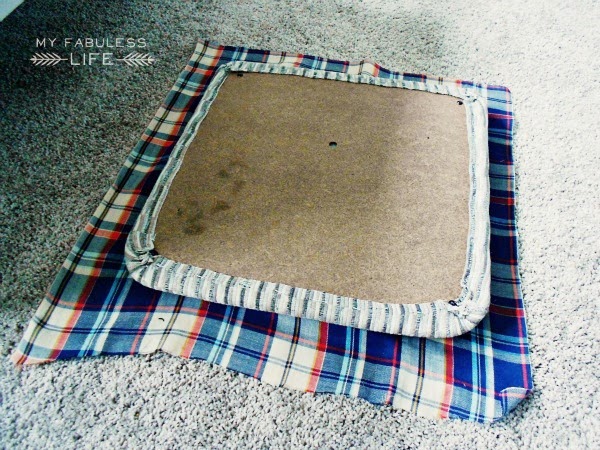
Trim the excess fabric and reattach the cushions.  To attach the seat cushions, just drill a new screw up through where the old plastic screw used to be.

And there you have it!  Pretty, party-ready chairs! And when they’re this easy, you can change the fabric for every party if you want!

You can find more Fabulessness at My Fabuless Life, here are a few more fun finds…
My Fabuless Life
dressed-up childs artwork // diy towel rack // printables
Sweet Relish

Lazy Susan Art

53 · May 28, 2013 · 24 Comments

This post brought to you by DecoArt // I have become obsessed with the Lazy Susan! My Grandmother’s table had a large lazy susan that I was enamored with as a child. I was fascinated by the inner workings and the fact that it could double as a steering wheel in a pinch. Just in the last few months I’ve been on the hunt for the perfect lazy susan and then it hit me… It would look fabulous with a little artistic touch.

Ampersand Lazy Susan with DecoArt White Wash Paint

I am a part of the DecoArt Core Bloggers and did receive compensation for this post. However, all thoughts, ideas and opinions are my very own.

I found this great bamboo lazy susan at a local store and I just loved the wood grain. I thought it would look great with a negative graphic stenciled onto the surface. Meaning… You use a negative stencil thus showing the wood grain in the graphic while the rest of the surface is covered in paint. I’ve loved this look for quite some time now.  Here is what you will need…

Supplies

  • Lazy Susan
  • DecoArt Americana White Wash

Americana White Wash craft paint for some lazy susan art

  • Vinyl Stencil (I created mine using my Silhouette CAMEO)
  • Transfer tape
  • Sandpaper
  • Foam brush

Instructions

This project is so easy, it really only takes a half an hour at the most, a little more if you count drying time.  Yet, it creates a stunning piece for your table or for a gift. First you need to decide what graphic you would like to put on the surface of your lazy susan. I have always loved ampersands (&) and I thought it would look fabulous as a graphic on the table. I scrolled though a bunch of fonts until I found the perfect ampersand, it was in the Baskerville font. Isn’t it just lovely? For those of you who love ampersnads, you know just what I’m talking about.

I used my Silhouette CAMEO to cut the ampersand out in vinyl. I wanted the ampersand to be large, but not to take over the entire wood surface and I knew I wanted it to be a little off set. I used transfer tape to help me position the vinyl just right…

Using transfer tape place your vinyl onto your lazy susan

Notice how I left part of the vinyl hanging off the side of the lazy susan…

Use vinyl to create a stencil for your lazy susan

I just love that off set look. After the stencil was in place, I use some fine grit sand paper to carefully rough up the surface of the wood. That helps the paint adhere better. Then, I added 3 or 4 coats of the Americana White Wash so that it had a nice clean surface and that was it. I carefully removed the stencil and voila, I now have a fun lazy susan for the center of my table…

WhipperBerry Ampersand Lazy Susan

I have another lazy susan that I created for the brand new DecoArt Blog that will debut soon…

the-decoart-matallics-looks-like-brushed-metal

I am one of DecoArt’s Core Bloggers and will be sharing posts over there, (when the site launches) twice a month. As soon as this one goes live I will let you know, and you can learn how to make this beauty as well.

That’s it… I’m on a mission!  Every house needs to have a fabulous lazy susan!! Run out and grab one of your own, dress it up and then show off your photos on Facebook or Instagram and tag me so I can check them all out!!

Color Block // Bicycle Wheel Sneak Peek

5 · May 16, 2013 · 8 Comments

Color Block Bicycle Wheel // I have always loved finding quirky little treasures to add some character to my home. I seem to always have my eyes peeled looking for fun goodies to get my hands on.  A few years ago I was junking at a fabulous junk shop called Patina close to my Mom's house in Denver and found a wonderful old bicycle wheel. It made it's WhipperBerry debut in this post and was an instant hit!  For the last little while I thought it could work as a fabulous photo display, but it needed something a little extra to dress it up a bit.  So, I decided to give it a little color block treatment and I LOVE how it turned out!!

WhipperBerry Bicycle Wheel Photo Display

I have been obsessed with color blocking along with gold accents. You may have noticed… I've created several posts lately with all kinds of gold goodies. I have Dressed-up Dinnerware, Gold Accented Picture Frame & a Bowl Refashion to name a few. I've been going to town with Krylon's Metallic spray Paint and it's been getting a lot of use around my home as of late.

For this project, I used Krylon's Premium Metallic Gold Paint and their Indoor/Outdoor paint in Catalina Mist. The only other thing I used was some painters tape to create a clean line. I took the wheel which was already painted off white and distressed and hung it up in my back yard to paint.

Bicycle Wheel Before

Then I added one strip of painters tape  at two different spots on the wheel. For some reason I didn't get any photos of this, but you get the idea. No need to tape like crazy. As long as you spray carefully you won't really have any issues with it. The tape is really just to create a guide for where you want to spray. I sprayed two-thirds of the wheel with the Catalina Mist and then the bottom third, gold. 

Color Blocked Bicycle Wheel

Now, this is just a sneak peek, you'll have to wait until next week to see the finished project and how I use it to display my Instagram photos from Origrami. I can't wait to show it off… It's going to look sooooo cool!!

Have you found some cool and unusual ways to display photos? Leave a comment and share your fun ideas!

Gold Accent Picture Frame with DecoArt Dazzling Metallics

1 · Apr 30, 2013 · 4 Comments

Gold Accented Picture Frame with DecoArt // I have fallen in LOVE with gold accents! They seem to be all the rage right now, and I am totally jumping on  the trend bandwagon. Yesterday I had the opportunity to take DecoArt’s Dazzling Metallics for a test drive while I dressed-up an old picture frame…

DecoArt Dazzling Metallics Gold Accented Frame-3

I had this old frame from Target that I had spray painted blue (another new fav) but it needed a little extra love. Recently I had added some gold accents to an old wood bowl and thought it would be fun to dress-up the frame the same way. The lovely part of this project is that it was soooo easy! You know me, nothing too challenging here. I chose DecoArts Dazzling Metallics Champagne Gold for my paint and set to work…

DecoArt Dazzling Metallics Gold Accented Frame-1

The frame has flower like petal grooves that were carved out and would act as a perfect natural place for a gold petal accent. Carefully, I filled in the grooves with the metallic paint…

DecoArt Dazzling Metallics Gold Accented Frame-2

That’s all there was to it. I filled in all the grooves and let it dry and then added a second coat. After a few hours of drying time, my new frame was ready for display!

DecoArt Dazzling Metallics Gold Accented Frame-3

I added one of my favorite Instagram photos of my sweet Emily and her friend and put it on display with my gold accented bowl. They make a perfect pair!

Do you have anything laying around the house that could use a little gold pick me up? You’ll be surprised how much it can add to a room! And if you happen to have real gold items — maybe old jewelry or décor pieces — and you’re curious how much your gold is worth, you can use this scrap gold calculator to estimate its value before upcycling or repurposing it! Check out DecoArts full line of Dazzling Metallics for all kinds of inspiration.

  • « Go to Previous Page
  • Page 1
  • Interim pages omitted …
  • Page 12
  • Page 13
  • Page 14
  • Page 15
  • Page 16
  • Page 17
  • Go to Next Page »

Primary Sidebar

Heather from Whipperberry
Hello... my name is Heather and I'm the creator of WhipperBerry a creative lifestyle blog packed full of great recipes and creative ideas for your home and family. I find I am happiest when I'm living a creative life and I love to share what I've been up to along the way... Come explore, my hope is that you'll leave inspired!

Footer

  • Privacy Policy
  • Crafts
  • Food
  • Gifts
  • Holidays
  • Home
  • Mom Life
  • Recipes
  • Travel

Copyright © 2026 · Seasoned Pro