• Skip to primary navigation
  • Skip to main content
  • Skip to primary sidebar
  • Skip to footer

Whipperberry

WhipperBerry • Your Home For Creative Inspiration

  • Home
  • Recipes
    • Starters
    • Easy Weeknight Dinners
    • Main Dish
    • Salads
    • Side Dish
    • Soups & Stews
    • Desserts
    • Breakfast
    • Miscellaneous
  • Tutorials
    • Creative Crafts
    • DIY Decor
    • Fabric Crafts
    • Food How-To
    • Jewlery
    • Paint Projects
    • Paper Art
    • Party Styling
    • Photography and Graphic Design
    • Silhouette
  • Holidays
    • Easter
    • Mother’s Day
    • Father’s Day
    • 4th of July
    • Halloween
    • Thanksgiving
    • Christmas
    • Valentine’s Day
  • Gift Ideas
    • Gifts For Everyone
    • Gifts for Dad
    • Mother’s day
    • For The Girls
    • For The Kids
    • Teacher Gift Ideas
    • Christmas
  • Printables
    • Holiday
    • Gift Idea
    • LDS Primary
  • Travel
  • About
    • Terms
  • Contact
  • Nav Social Menu

    • Facebook
    • Instagram
    • Pinterest
    • RSS
    • Twitter

Paint

Creepy Halloween Taxidermy Plaques

9 · Sep 1, 2017 · Leave a Comment

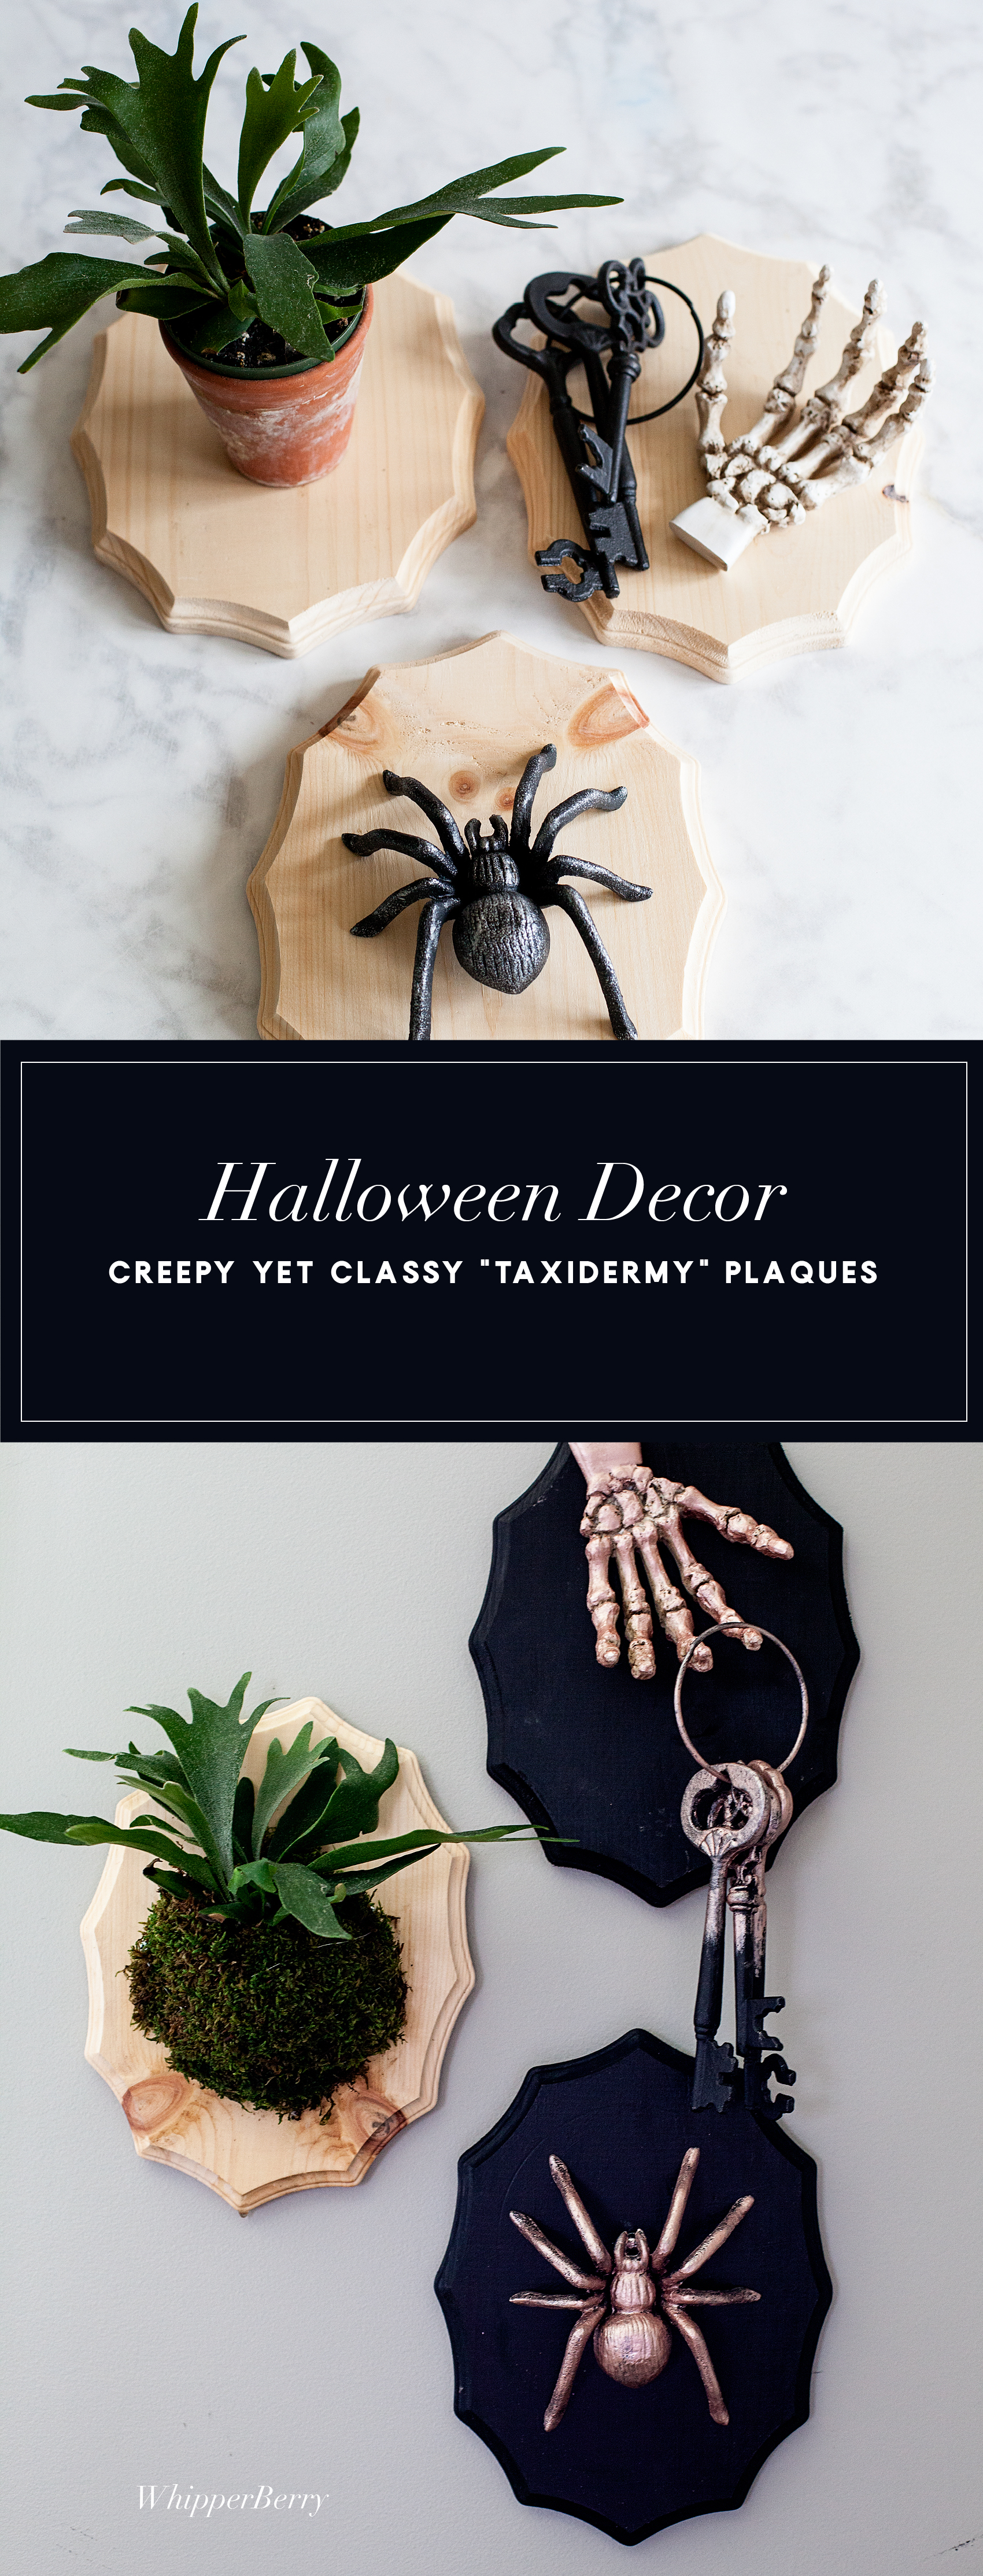
Add a little flair to your spooky Halloween decorations with taxidermy plaques! I used the DecoArt Metallic Lustre to turn  simple spooky objects into creepy yet classy home decor. Come check it out… If you dare!

Add a little flair to your spooky Halloween decor with DecoArt! I used their Metallic Lustre to turn simple spooky objects into creepy yet classy taxidermy plaques to decorate our entryway for Halloween.

{ disclaimer • I am a DecoArt Ambassador and they have sponsored this post. However, all thoughts, ideas and opinions are my very own.}


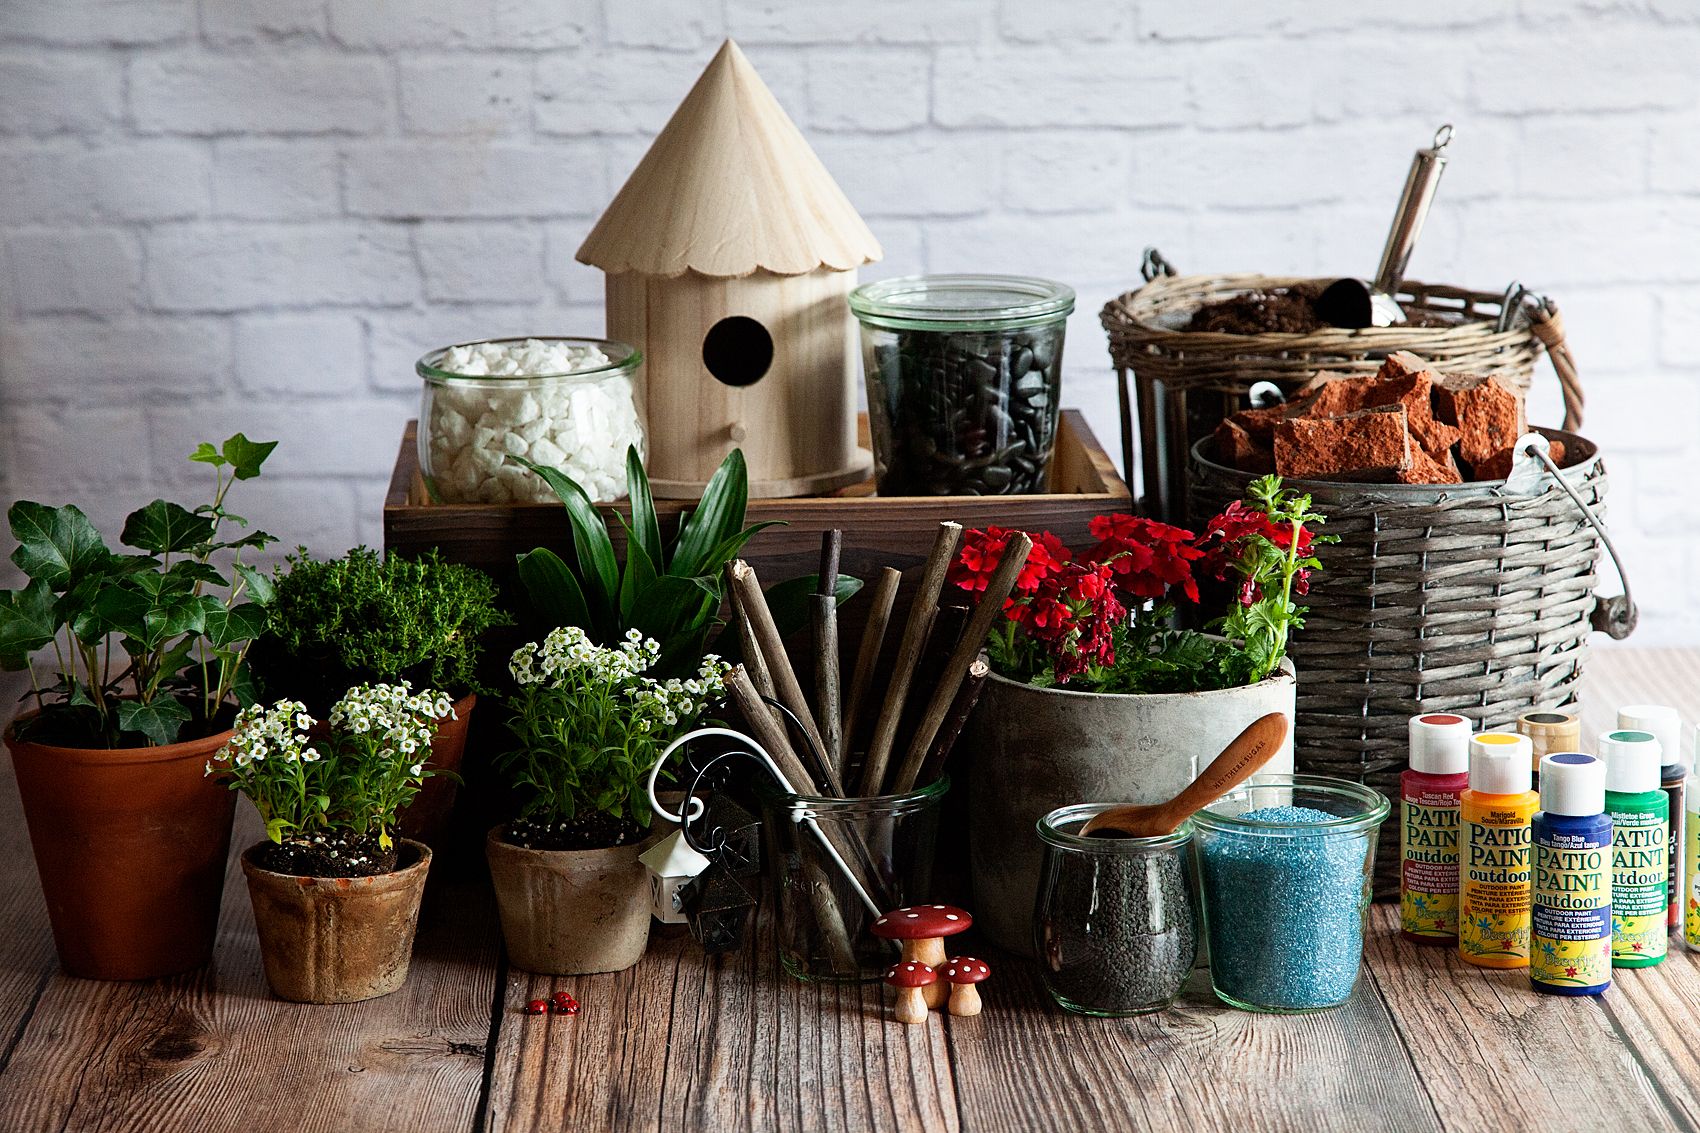
 O.K. guys… It’s never too early to start thinking about your Halloween decorations! Over the years I’ve become quite the fan of decorating for this creepy holiday. I used to hate it, but I’ve kind of fallen in love with what you can create for this spooky night. I wanted to create some new pieces to add to my collection for the new home and found myself wandering the isles at Michaels wondering what to make. Then it hit me… I wanted to make some “taxidermy” plaques to add some cringe worthy art to my front entry way. I wanted to keep it simple and still classy so I thought a little Rose Gold Metallic Lustre from DecoArt would do the trick! Here’s how you can make them.

Add a little flair to your spooky Halloween decor with DecoArt! I used their Metallic Lustre to turn simple spooky objects into creepy yet classy taxidermy home decor.

Taxidermy Plaques Supply List

Add a little flair to your spooky Halloween decor with DecoArt! I used their Metallic Lustre to turn simple spooky objects into creepy yet classy taxidermy home decor.

  • wood plaques
  • DecoArt Metallic Lustre – Rose Gold
  • Americana Curb Appeal – Black
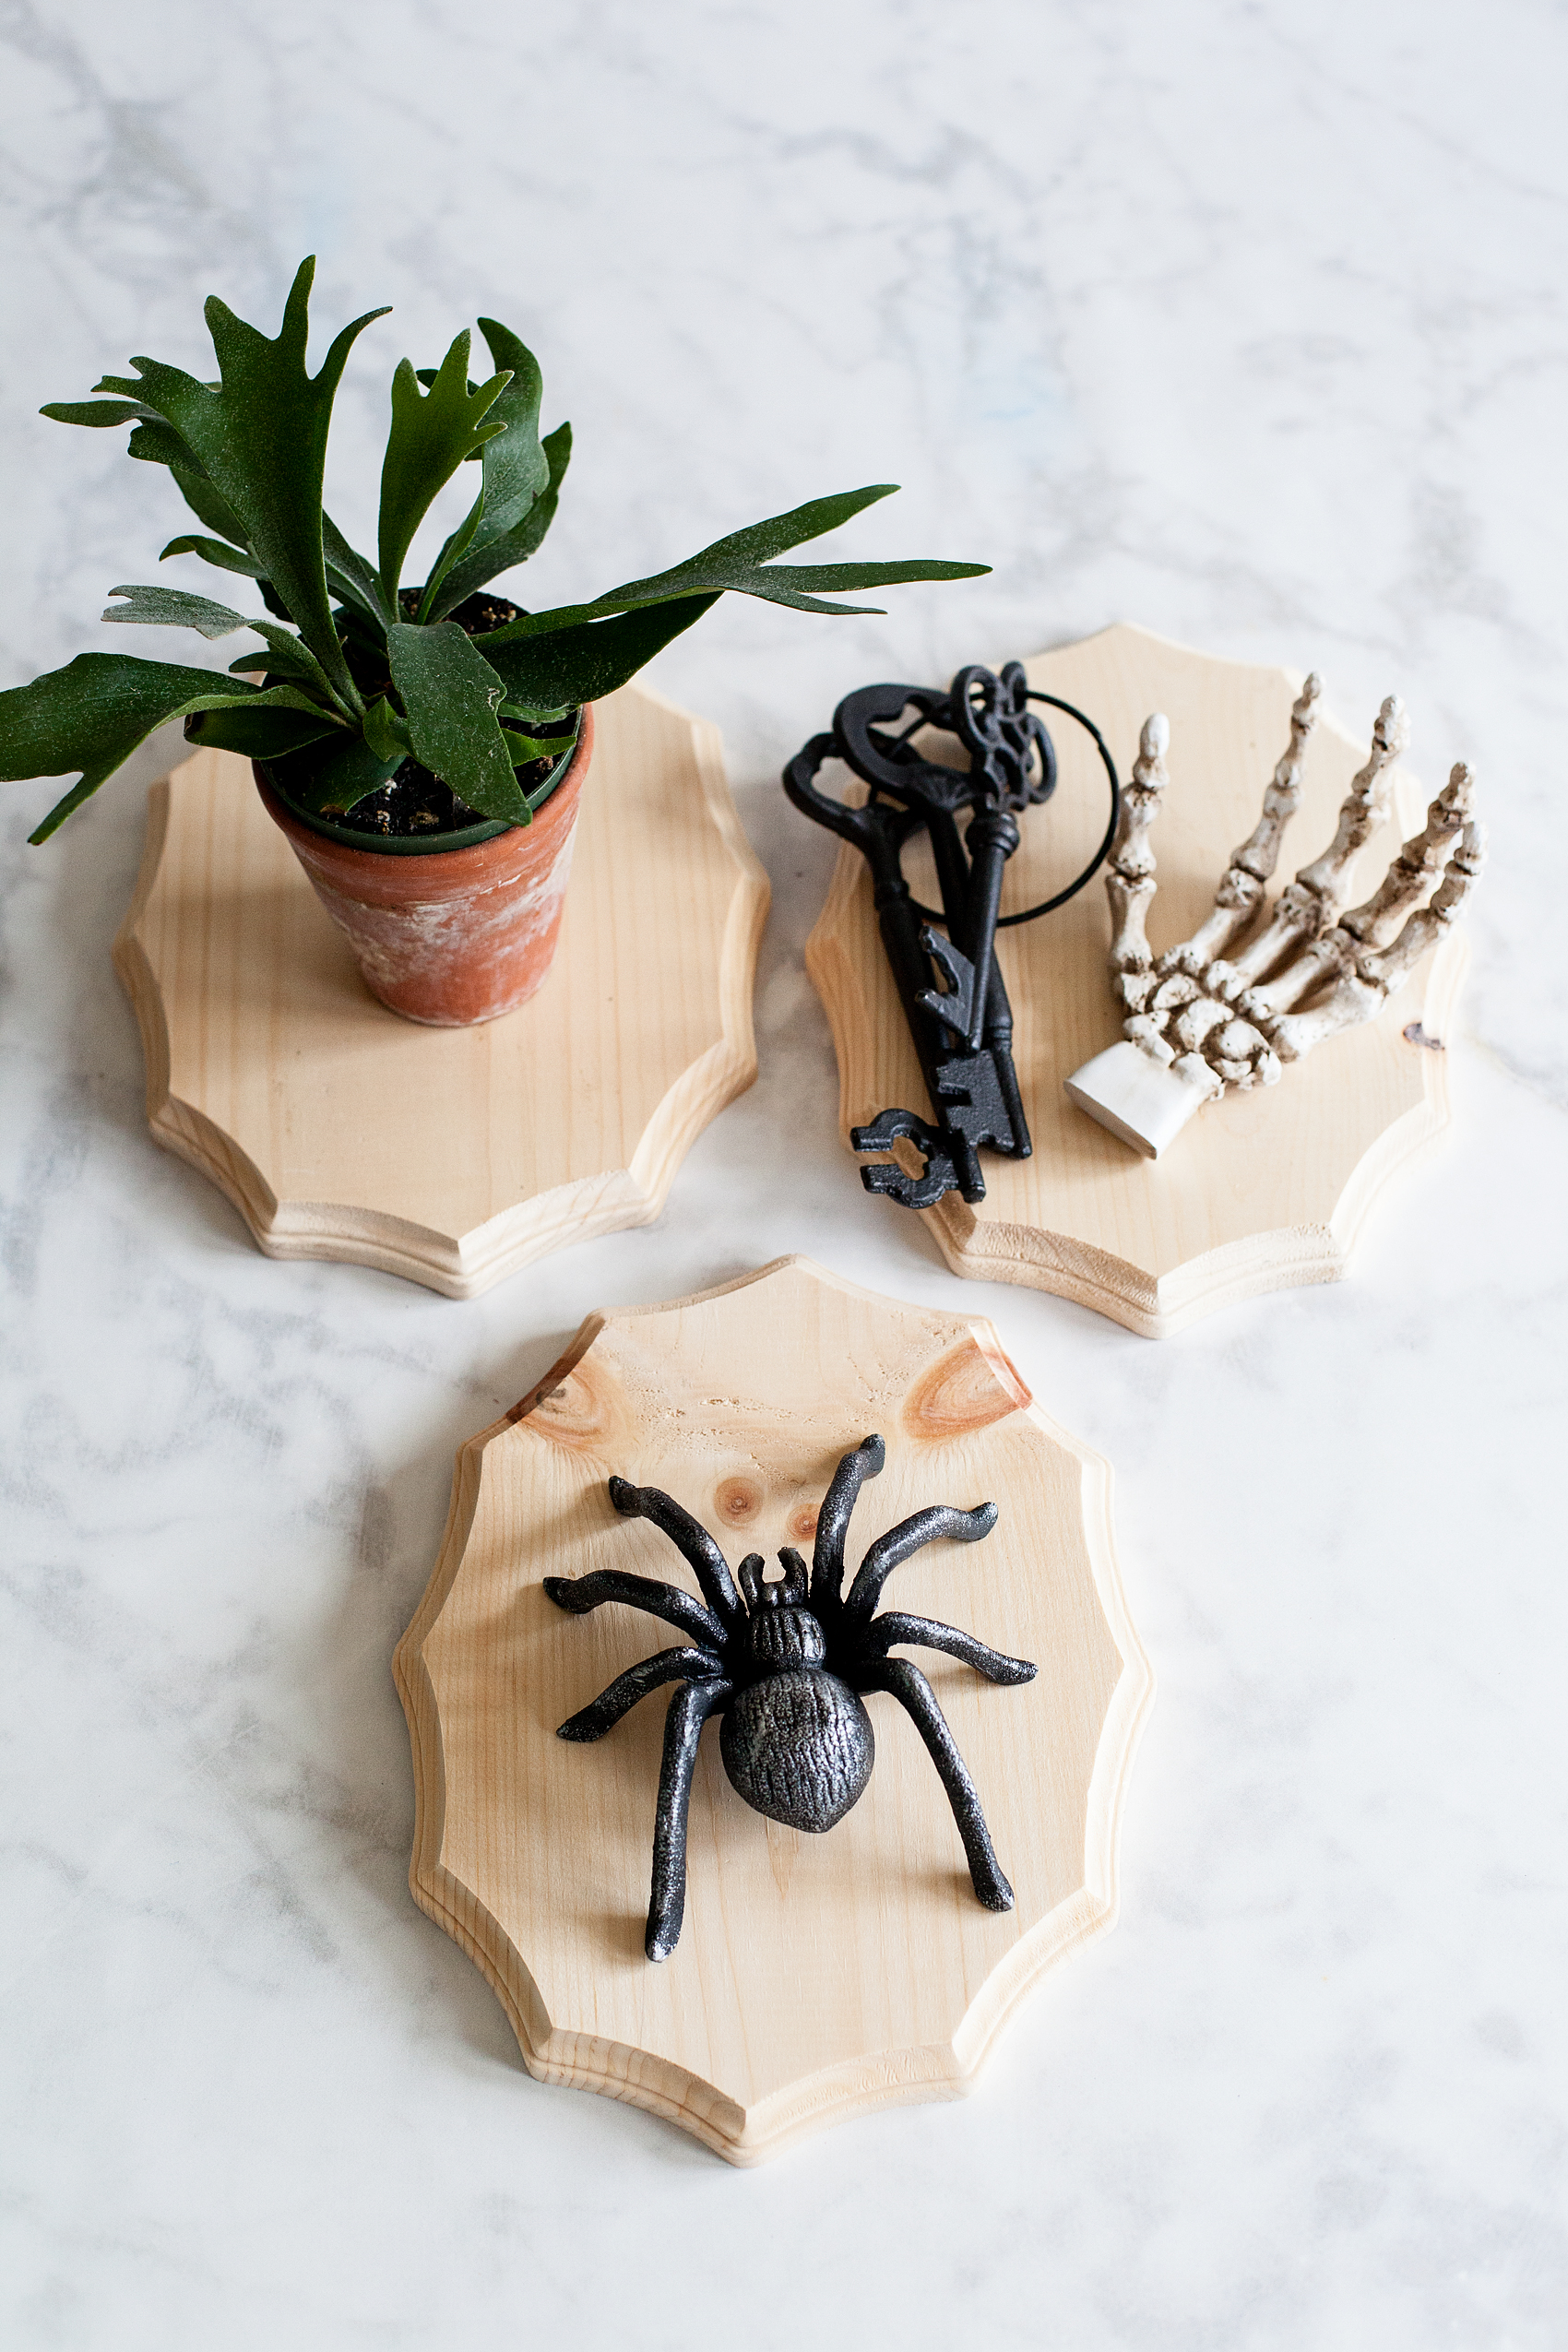
  • iron spider
  • iron keys
  • skeleton hand
  • small Staghorn Fern
  • paint brush
  • lint free cloth
  • drill
  • 8 screws
  • floral wire
  • moss
  • large bowl of water
  • baking sheet
  • drop cloth or something to protect your work surface

Instructions for Taxidermy Plaques

To begin, you will need to prep your work surface and cover it with a drop cloth or some type over covering to protect it.

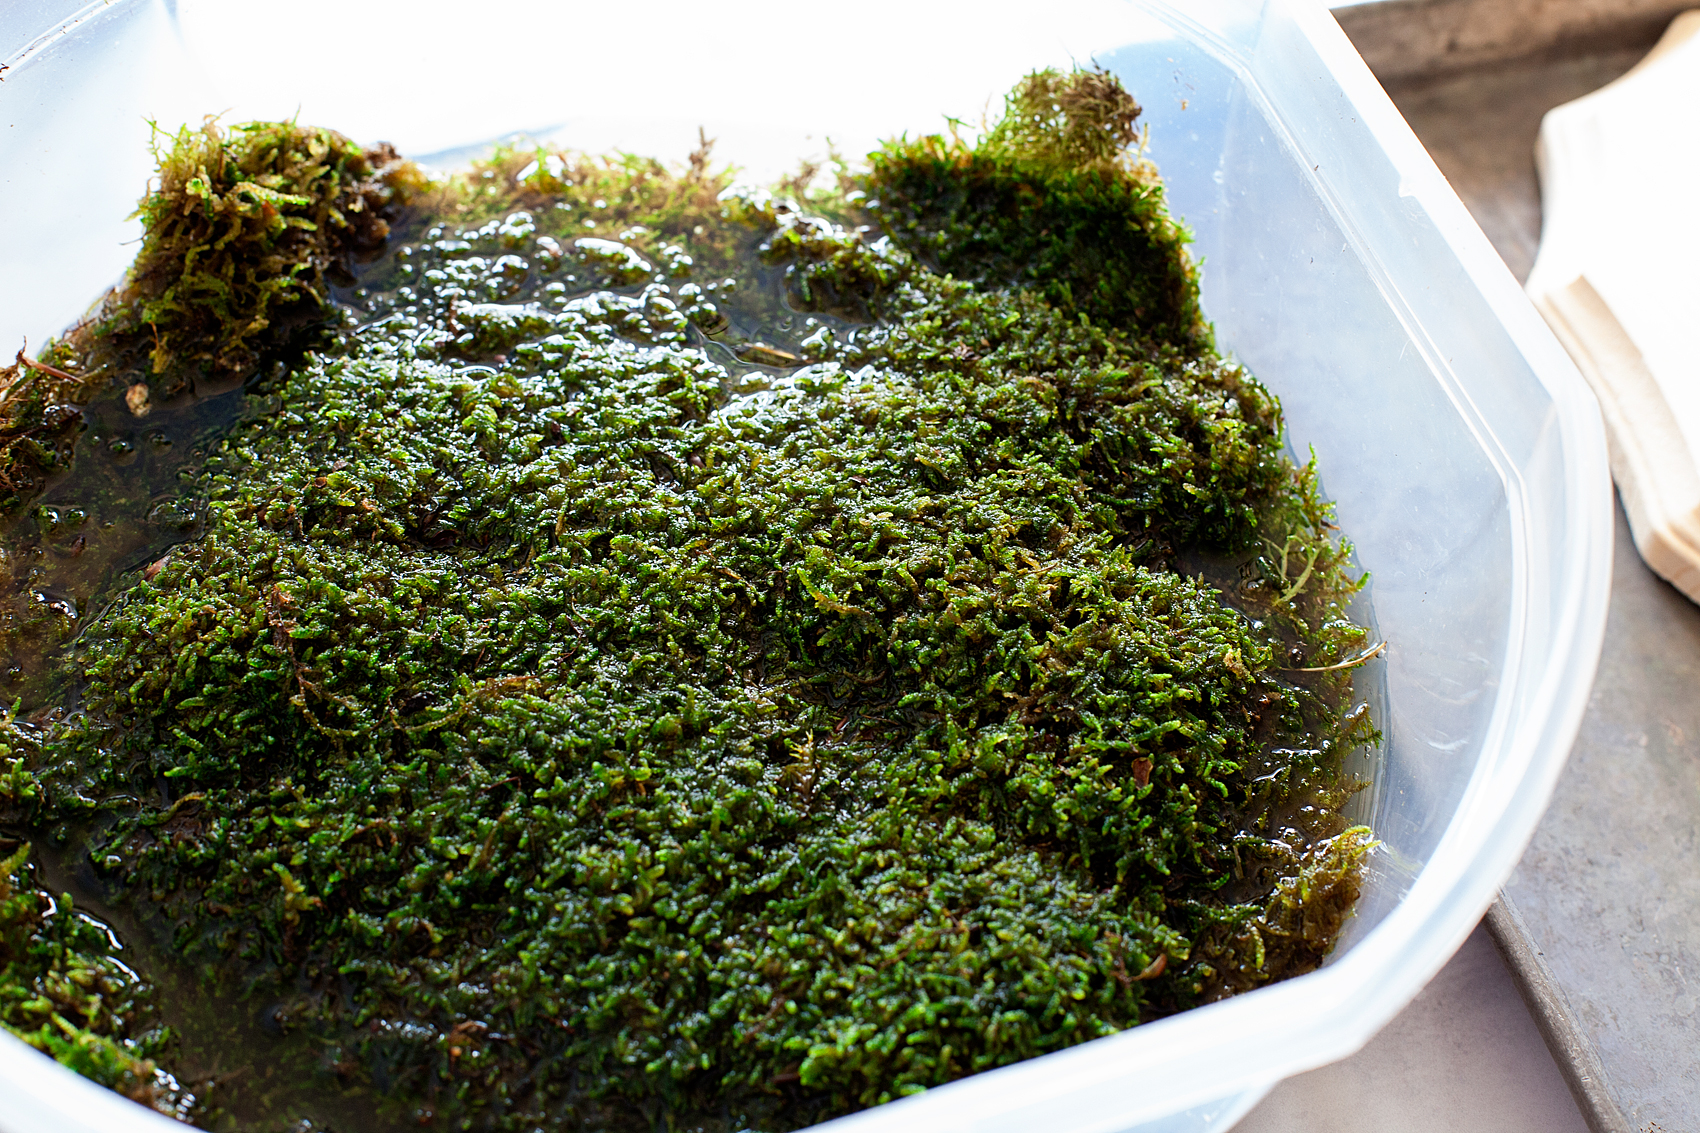
Next, place your moss into a large bowl of water so that it can soak while you are working with the other pieces. Set it aside.

Add a little flair to your spooky Halloween decor with DecoArt! I used their Metallic Lustre to turn simple spooky objects into creepy yet classy taxidermy plaques to decorate our entryway for Halloween.

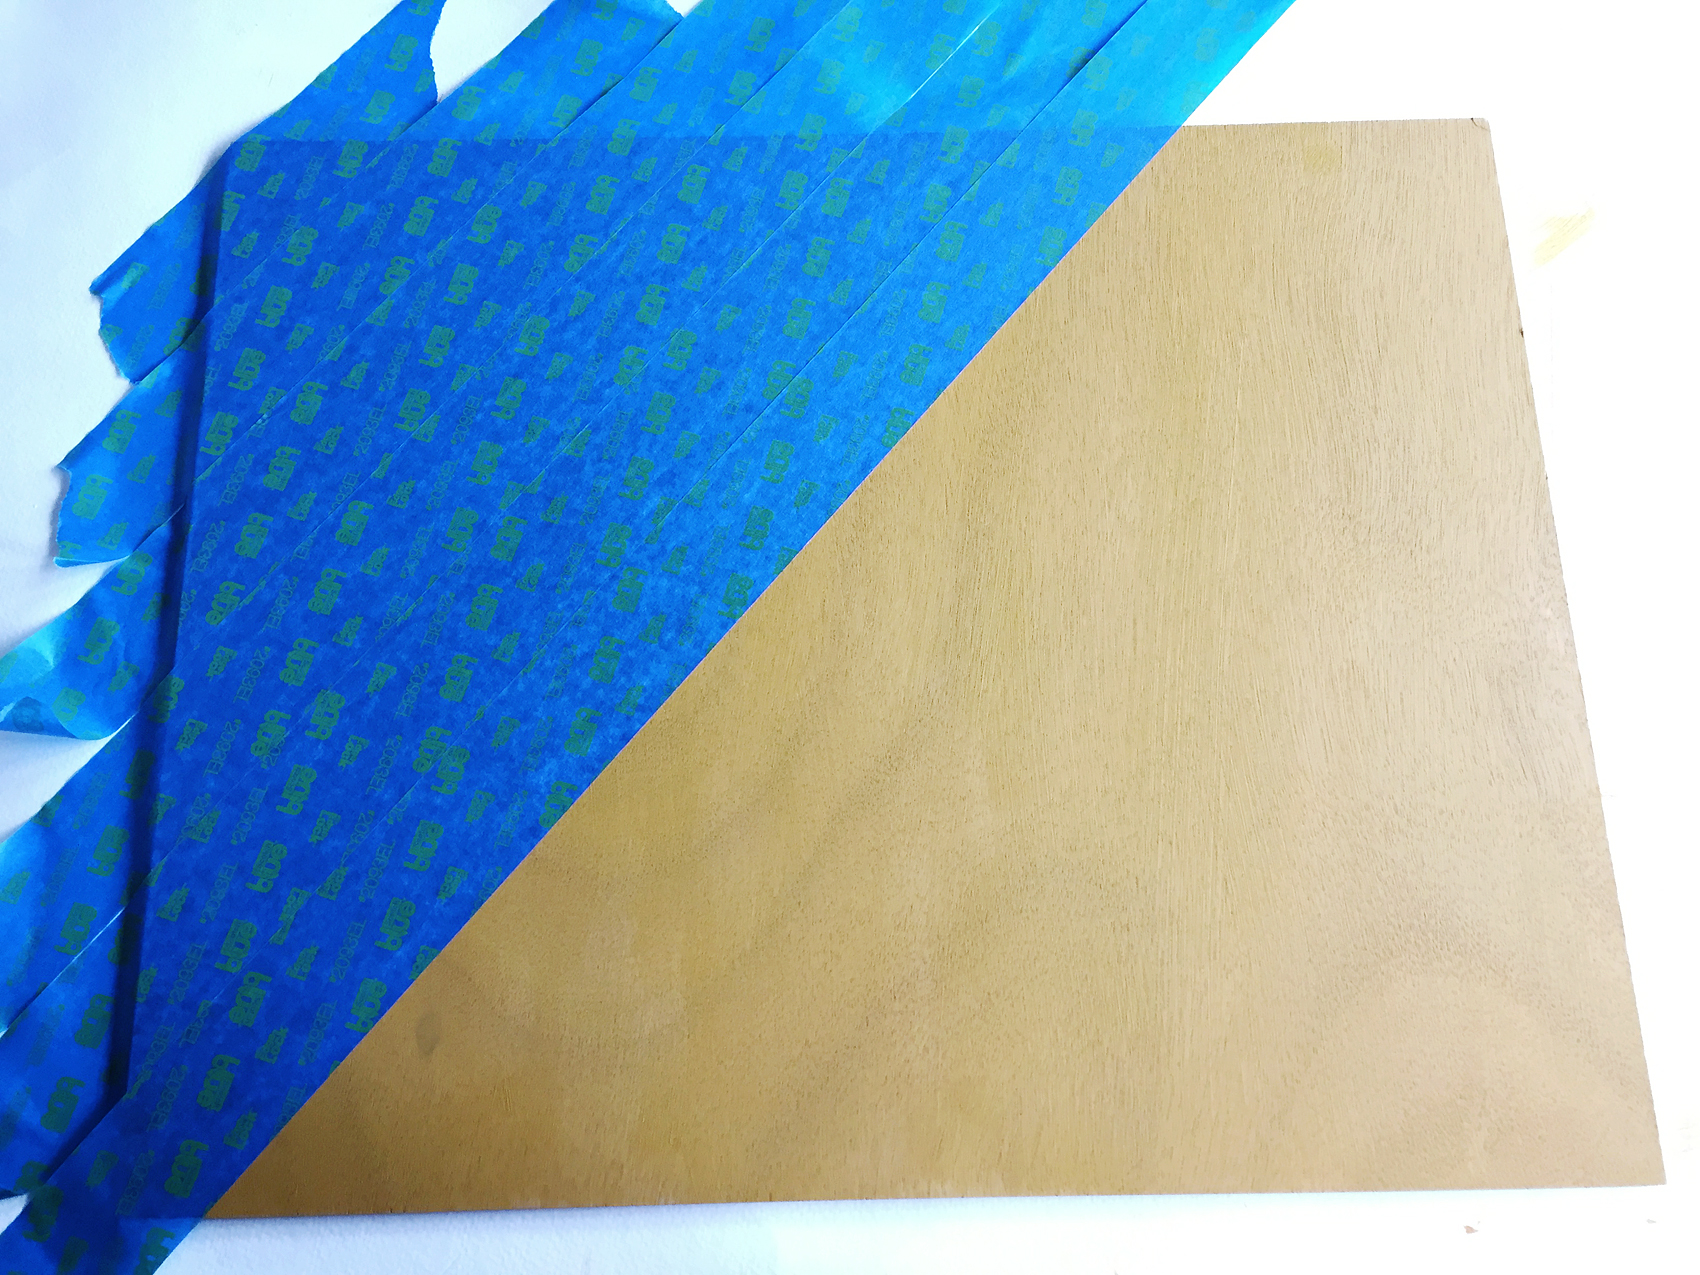
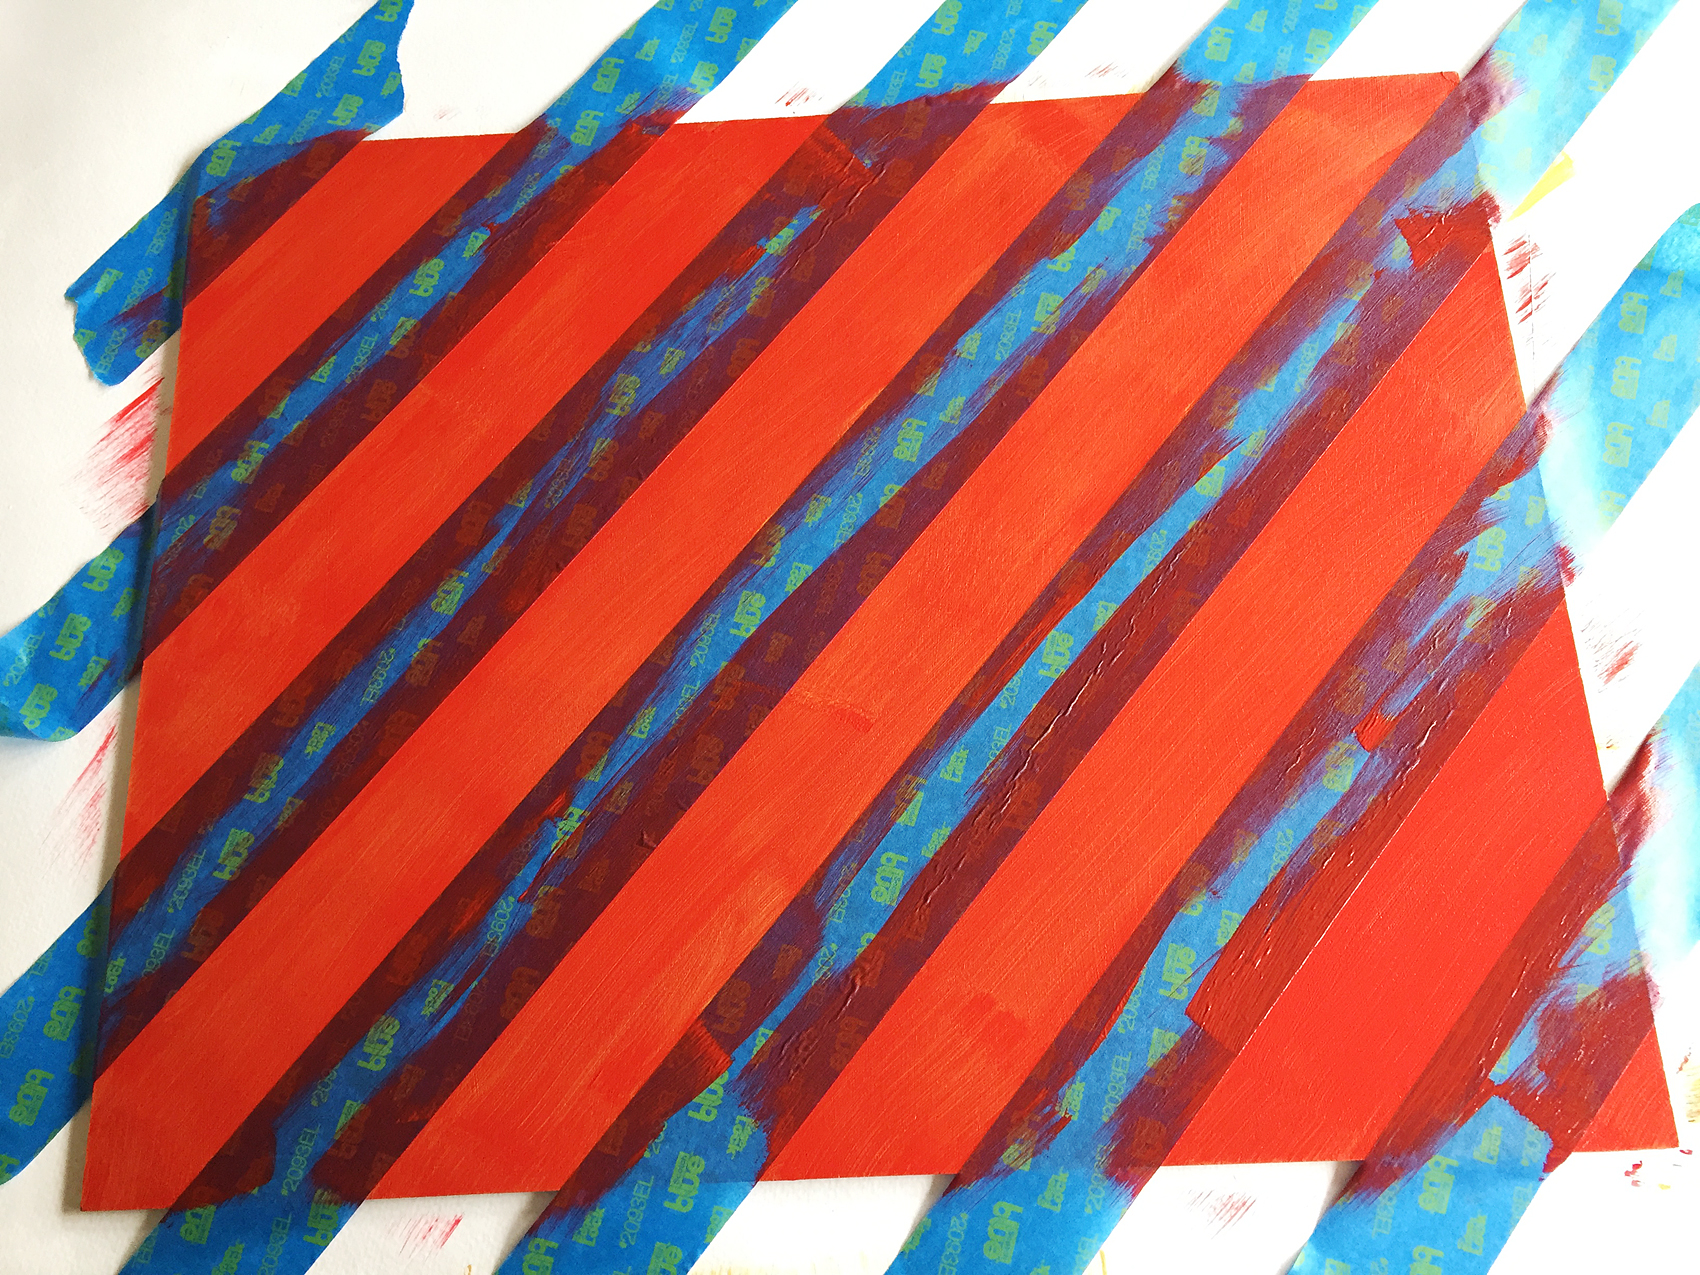
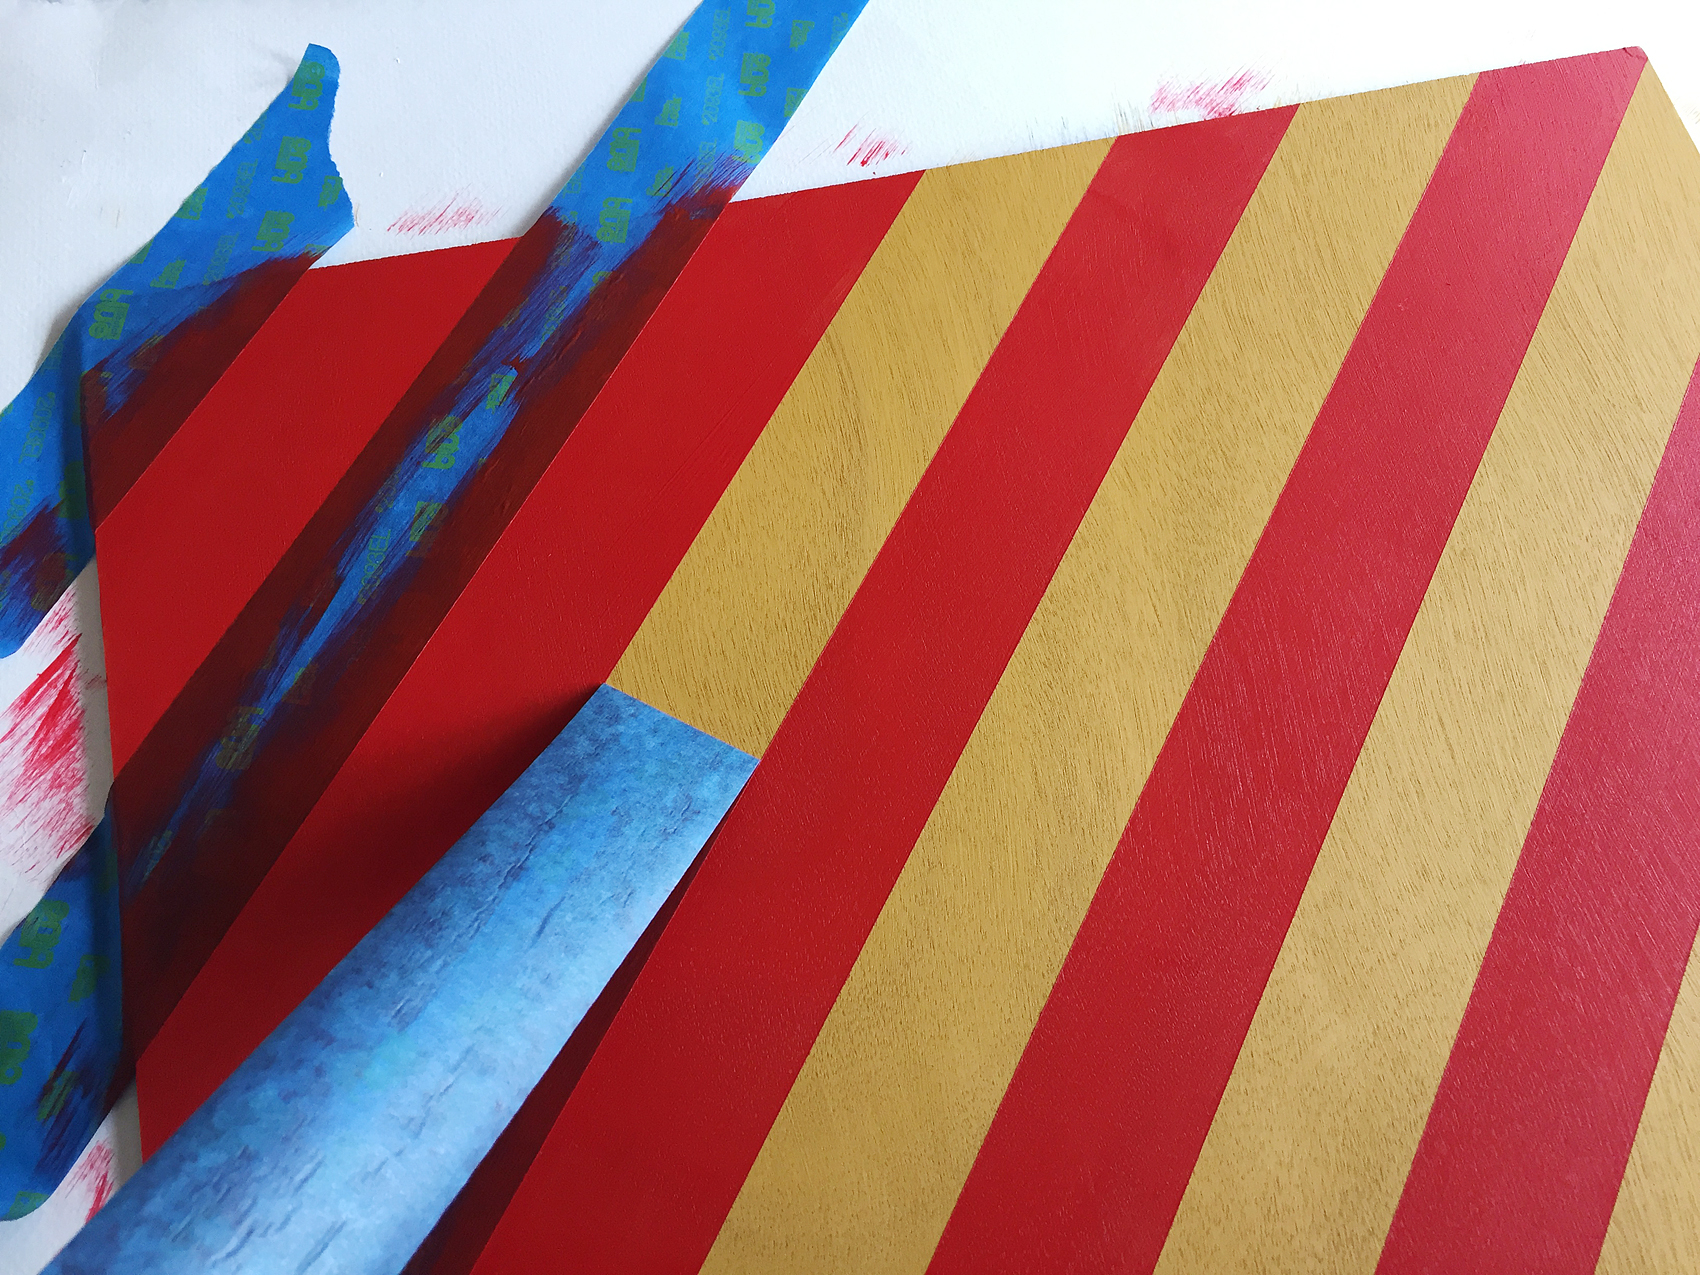
Then, grab your Americana Curb Appeal paint and paint 2 of your wood plaques. Keep one natural for your Staghorn Fern.

Add a little flair to your spooky Halloween decor with DecoArt! I used their Metallic Lustre to turn simple spooky objects into creepy yet classy taxidermy home decor.

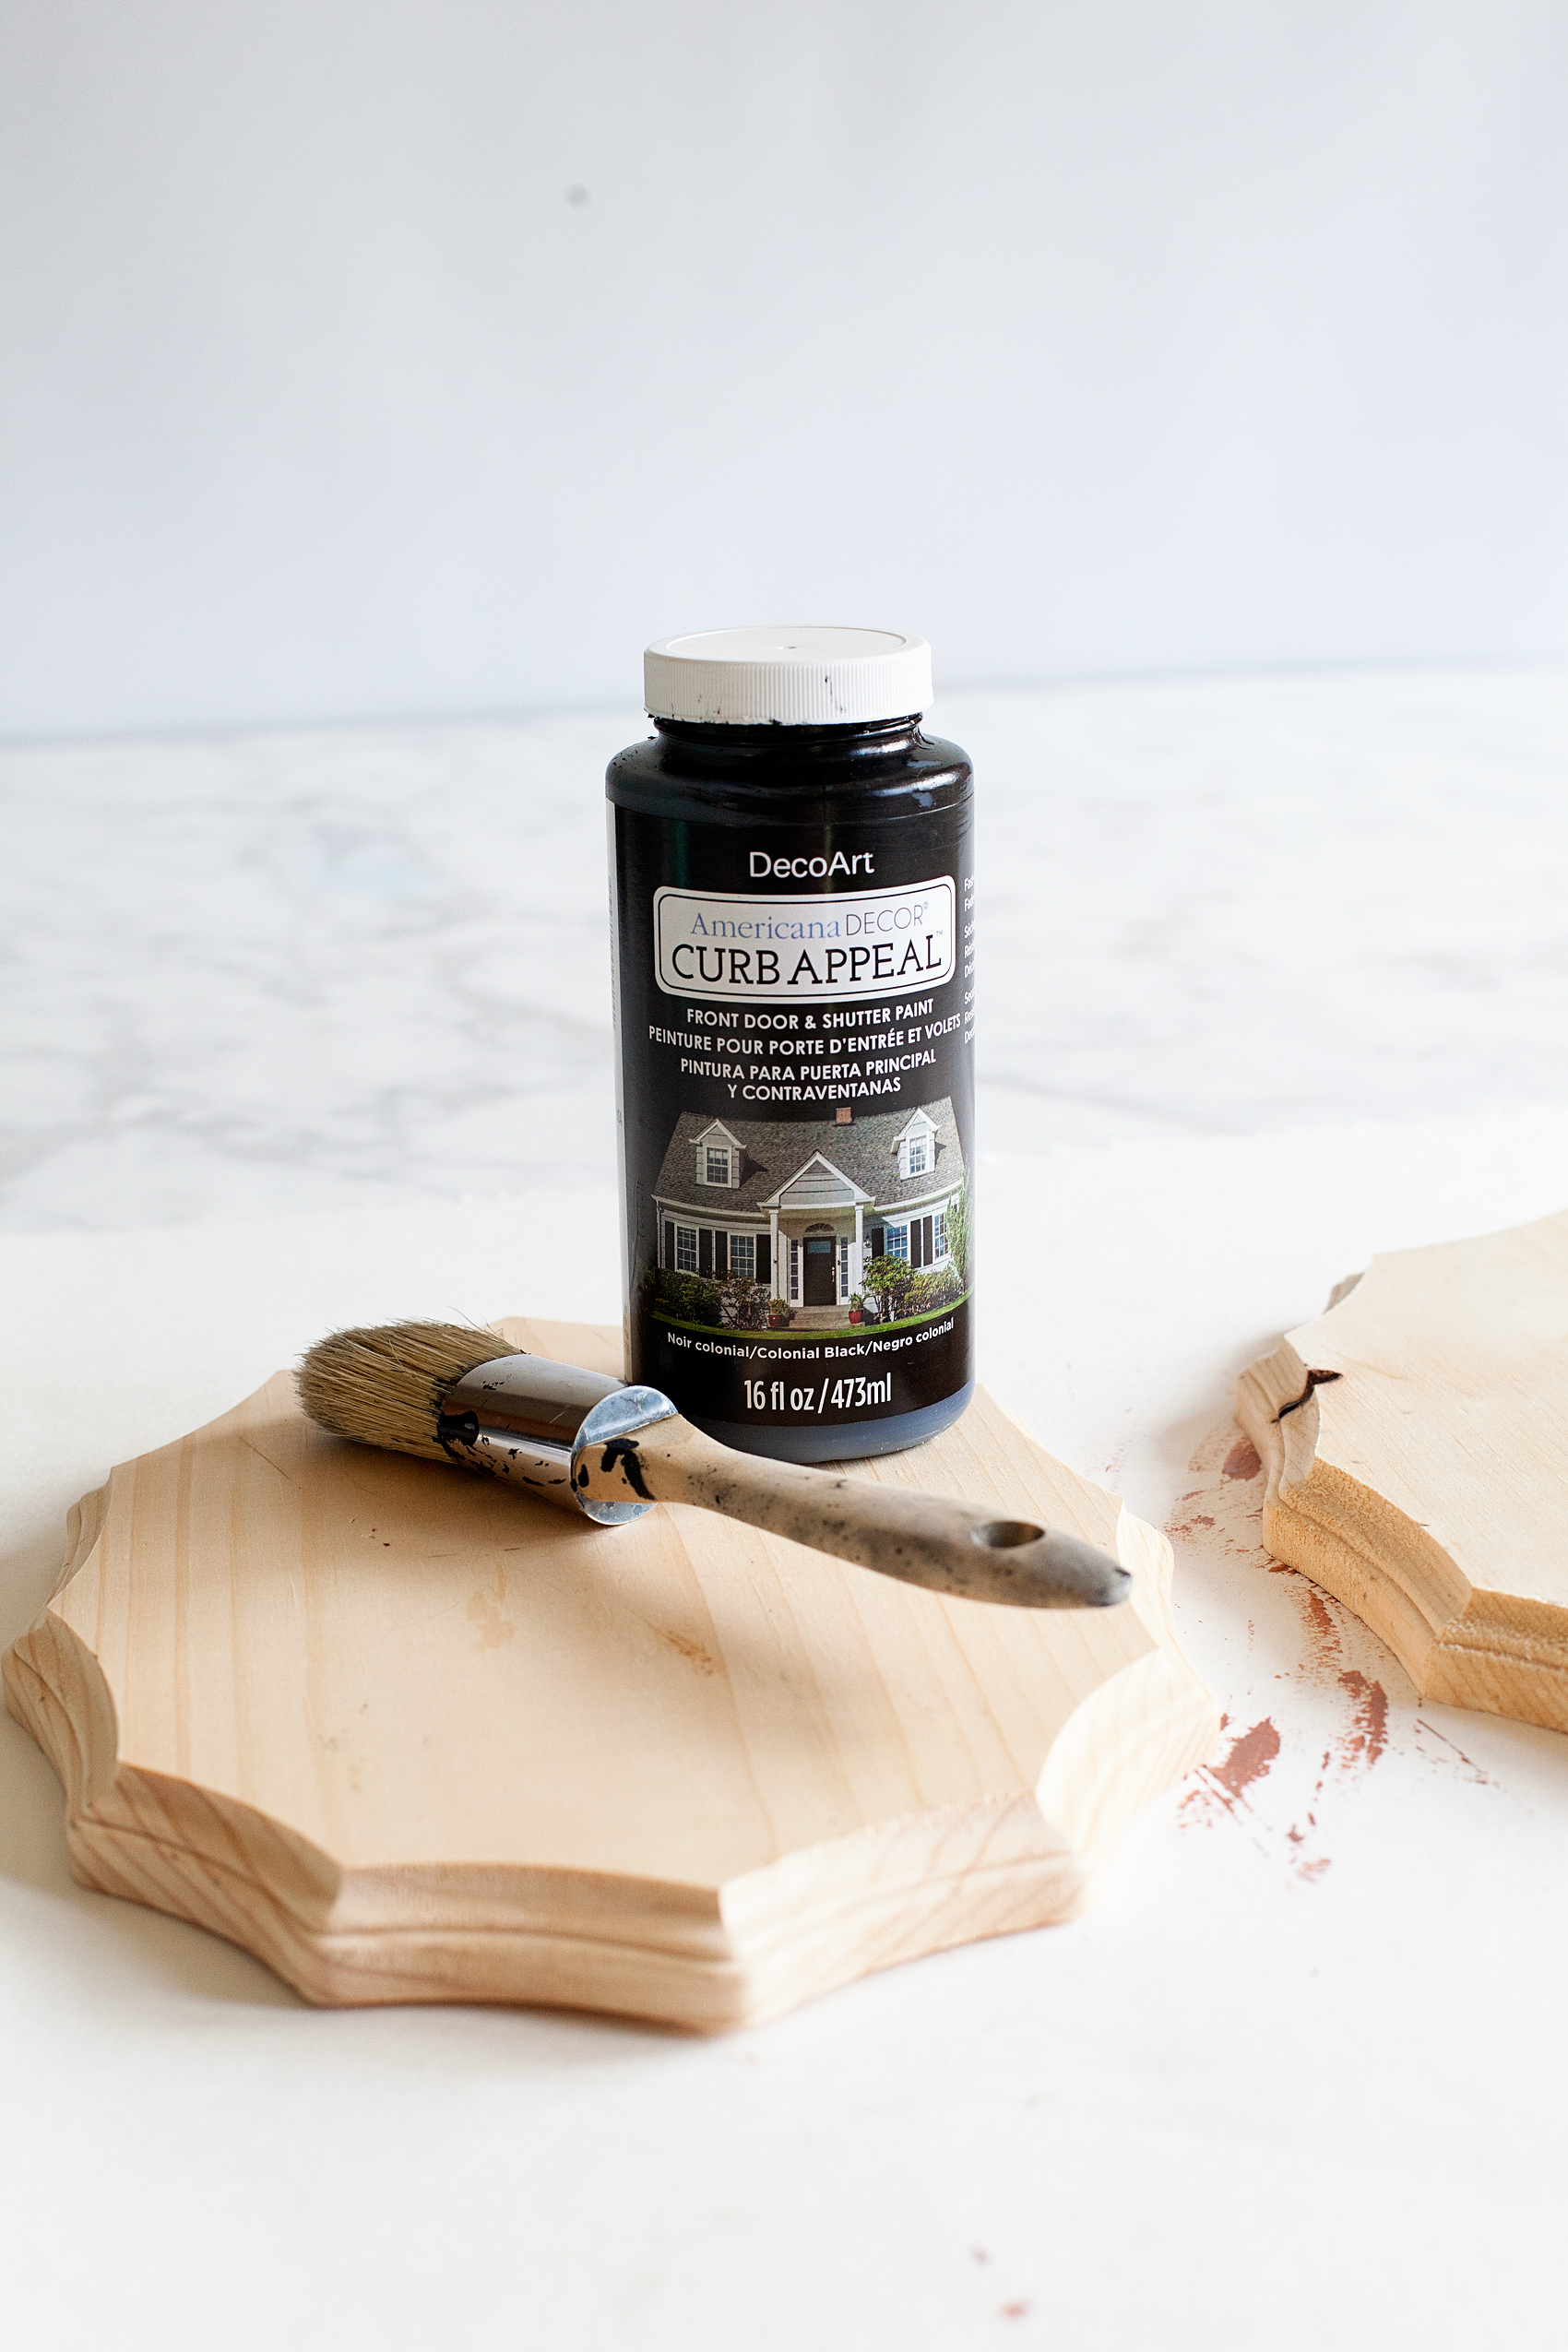
I really like the Americana Curb Appeal paint and traditionally it’s not really used for crafting, it’s used to paint door and shutters typically. I had some on hand and thought it would work just fine for the wood plaques for this project. PLUS… I have used that same paint for my doors, fireplace & banister therefore, my plaques would match the rest of my space. Not only that but, I really like the finish that it create on the wood. You won’t see brush strokes, the coverage is phenomenal and you’ll still see the wood grain through the paint. I really like that! I like to paint wood but, I don’t want it to look plastic… you know?

Add a little flair to your spooky Halloween decor with DecoArt! I used their Metallic Lustre to turn simple spooky objects into creepy yet classy taxidermy home decor.

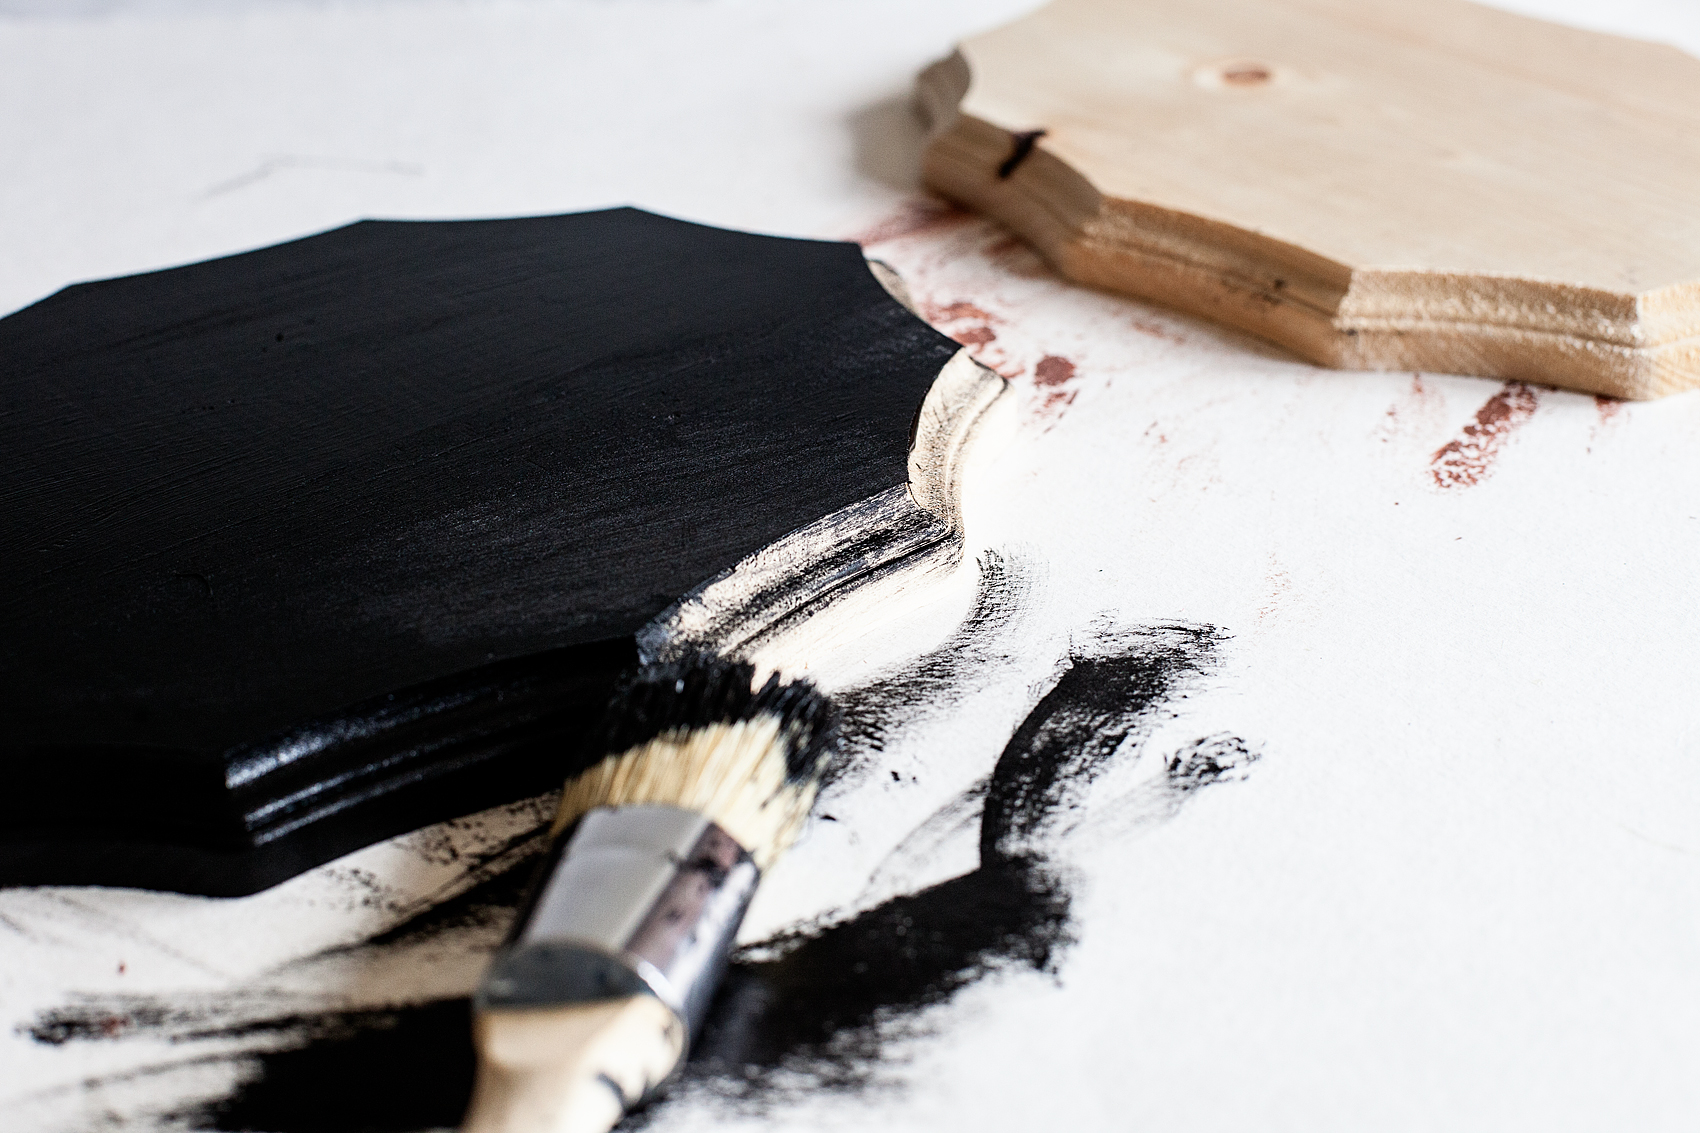
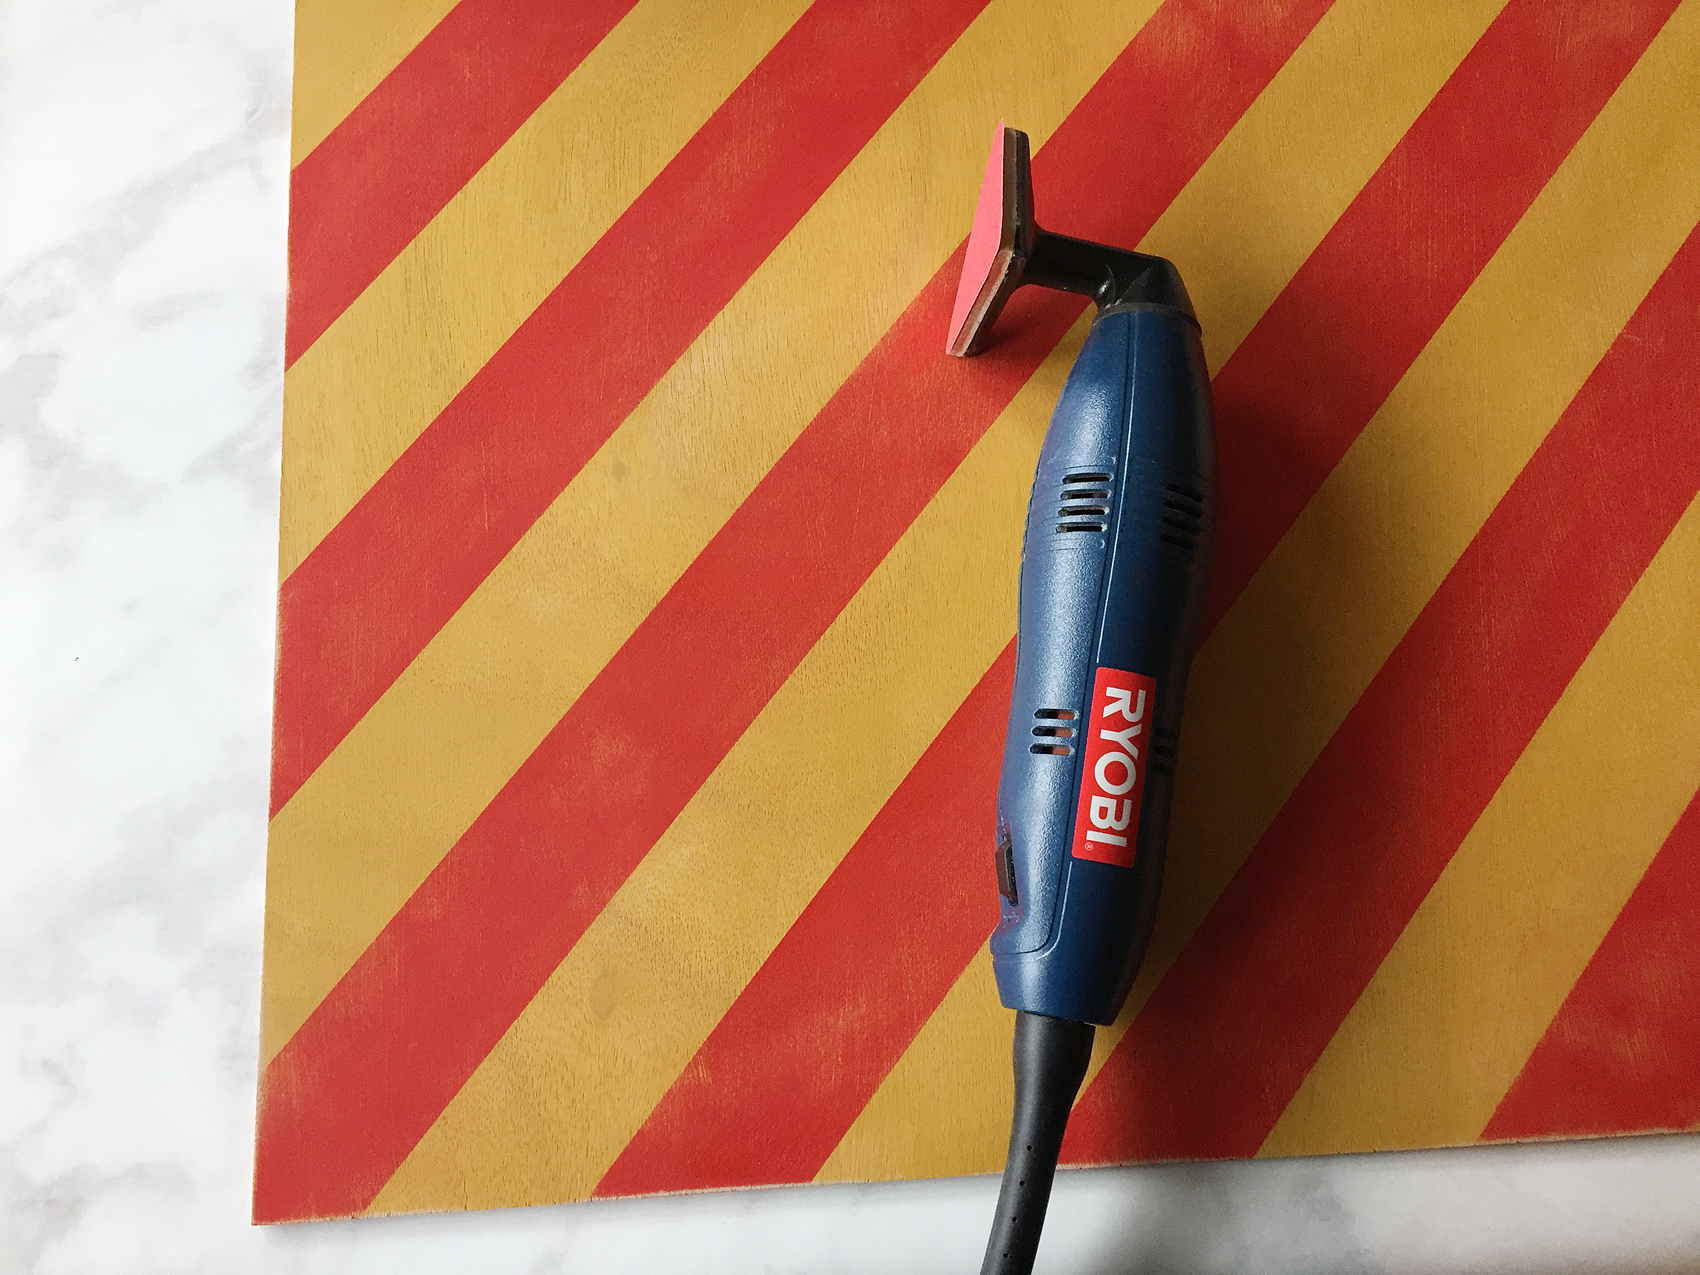
Once those are both painted, set them aside to dry. Don’t worry, they dry pretty quick.

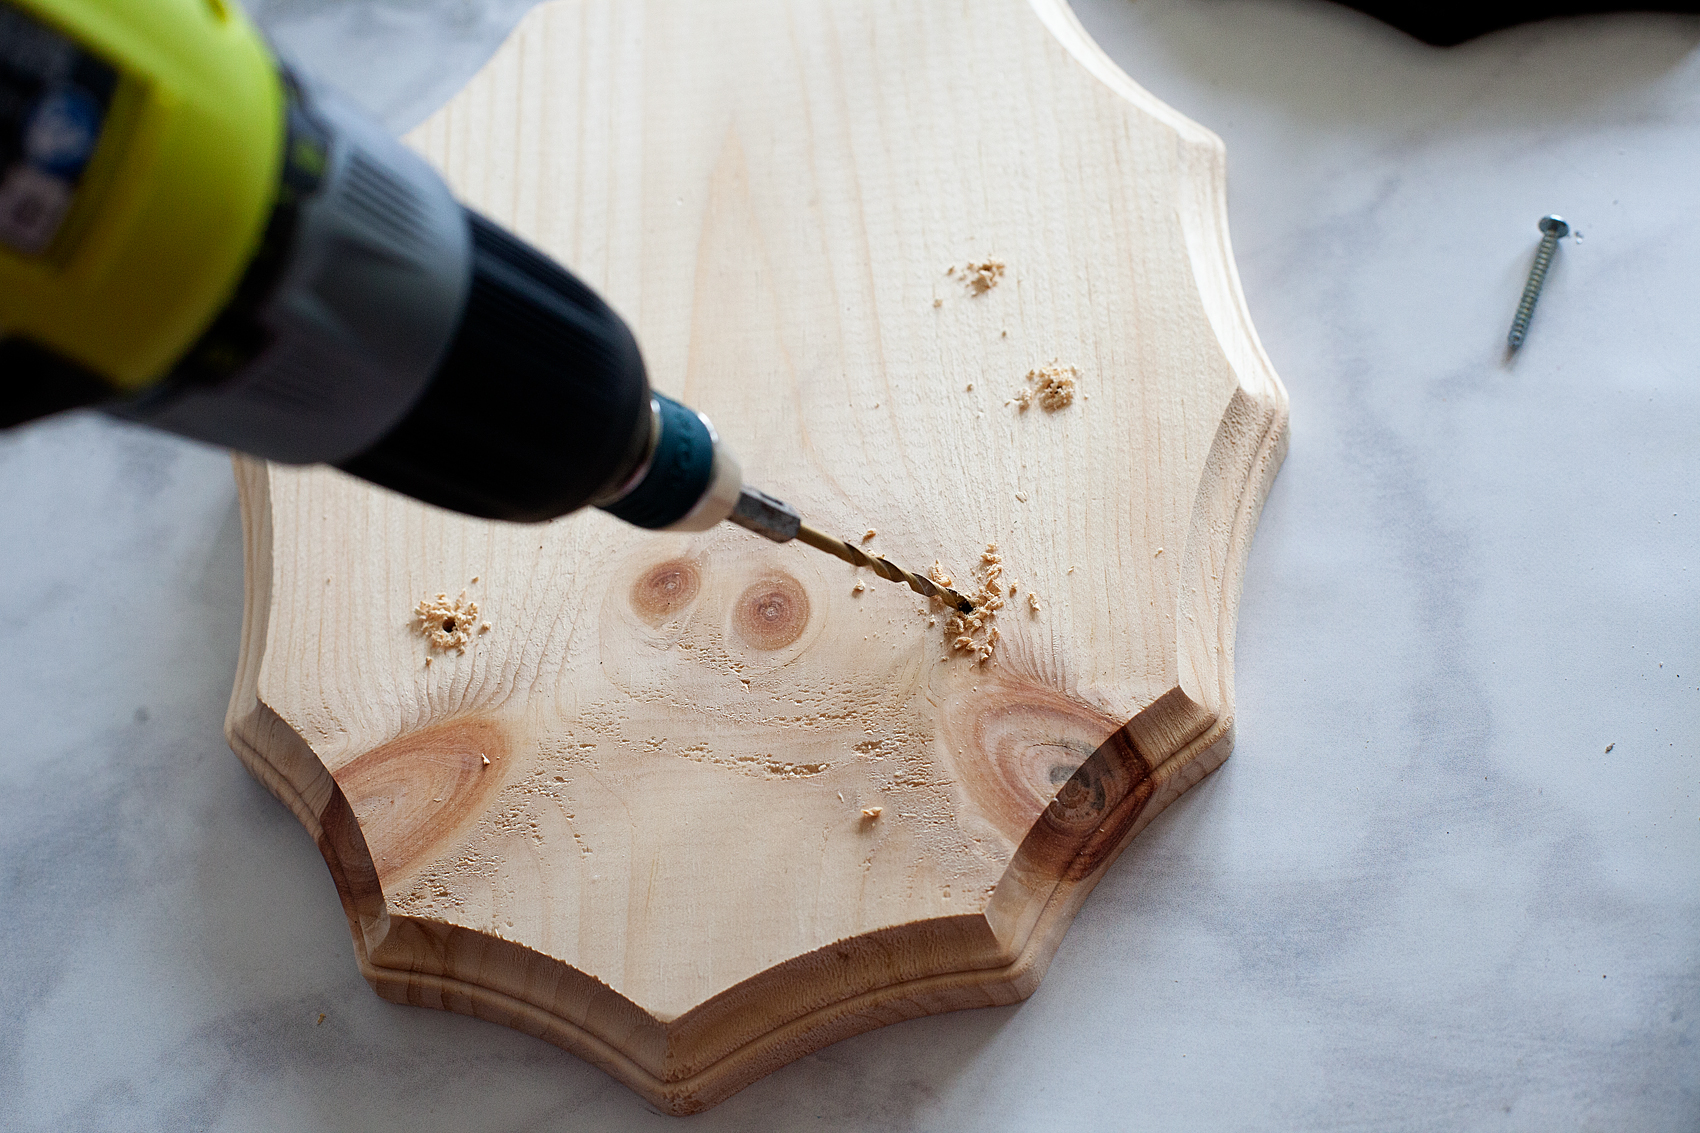
Next, let’s drill a hole into the skeleton hand before we add the DecoArt Metallic Lustre.

Add a little flair to your spooky Halloween decor with DecoArt! I used their Metallic Lustre to turn simple spooky objects into creepy yet classy taxidermy plaques to decorate our entryway for Halloween.

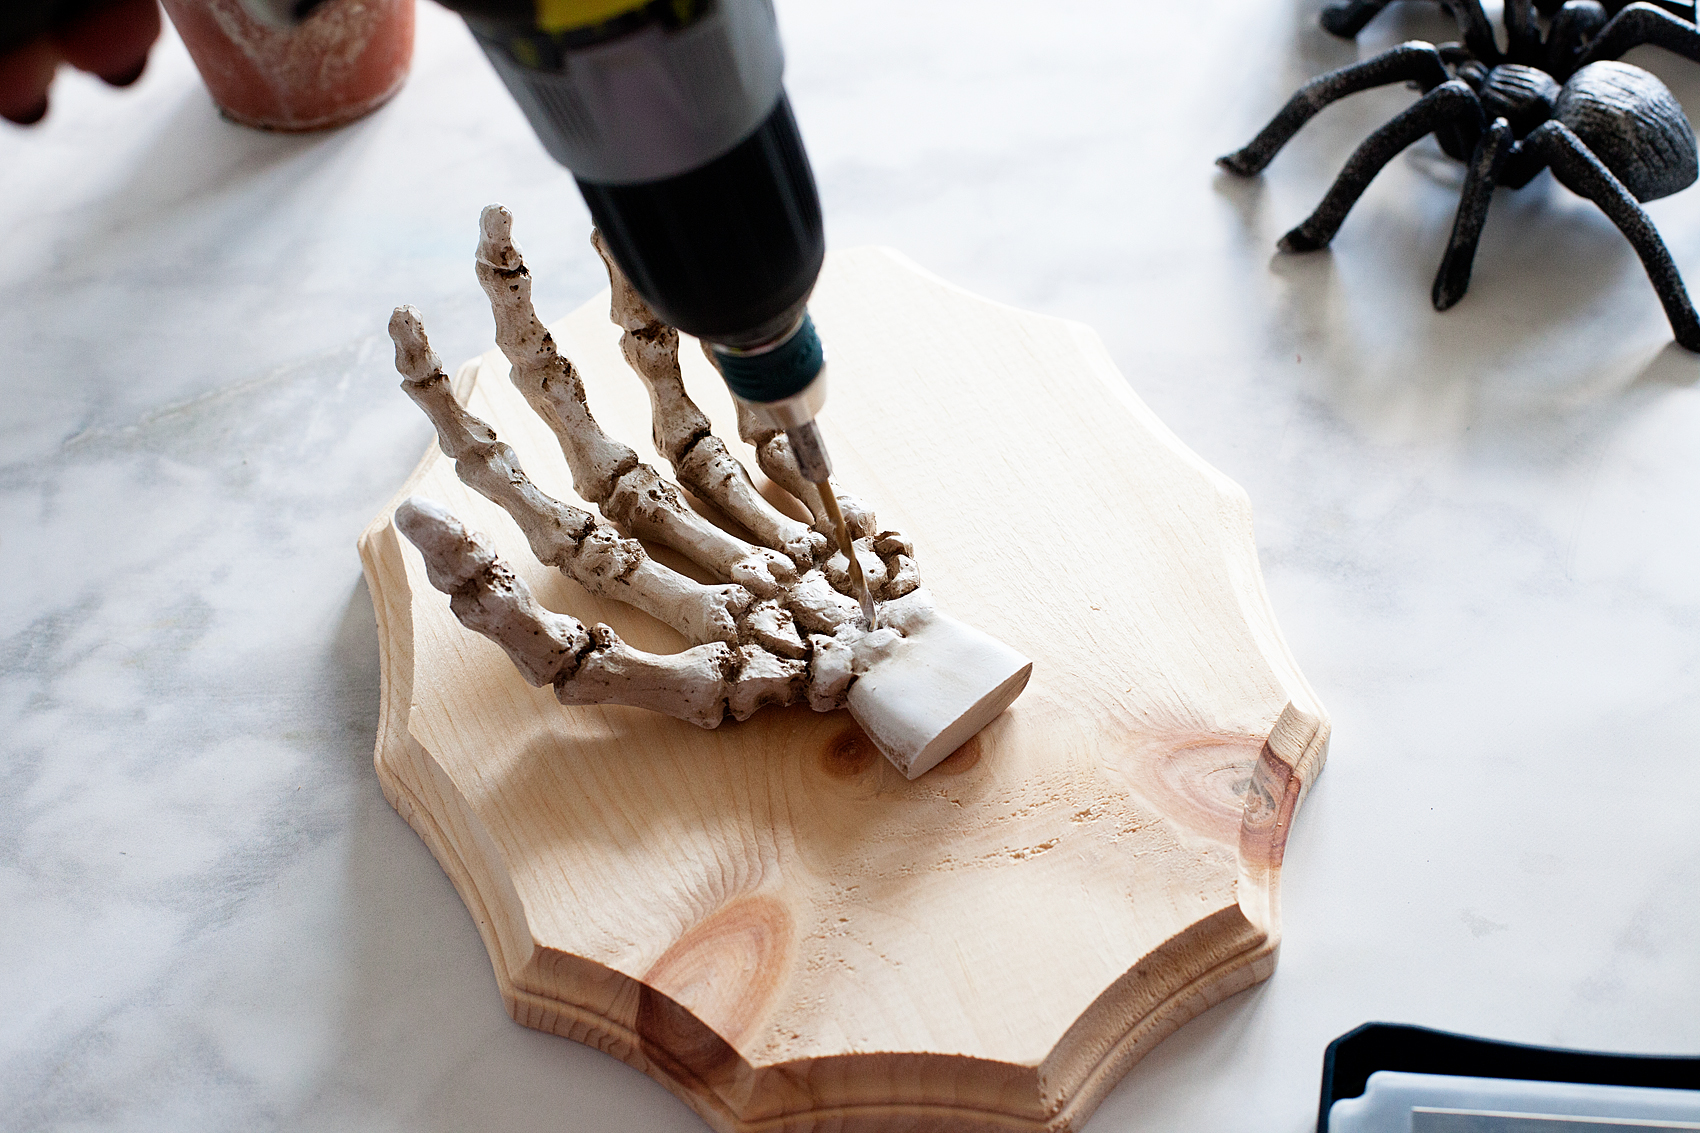
The hand is made out of a resin so it isn’t a problem to drill a hole into it. It  might be a little hard to start, but once you get the hole stared, it’s not a big deal.

Next, grab the skeleton hand, keys, spider, the rose gold Metallic Lustre and your lint free cloth (or paper towel if you are in a pinch. Just don’t rub too hard.)

Add a little flair to your spooky Halloween decor with DecoArt! I used their Metallic Lustre to turn simple spooky objects into creepy yet classy taxidermy plaques to decorate our entryway for Halloween.

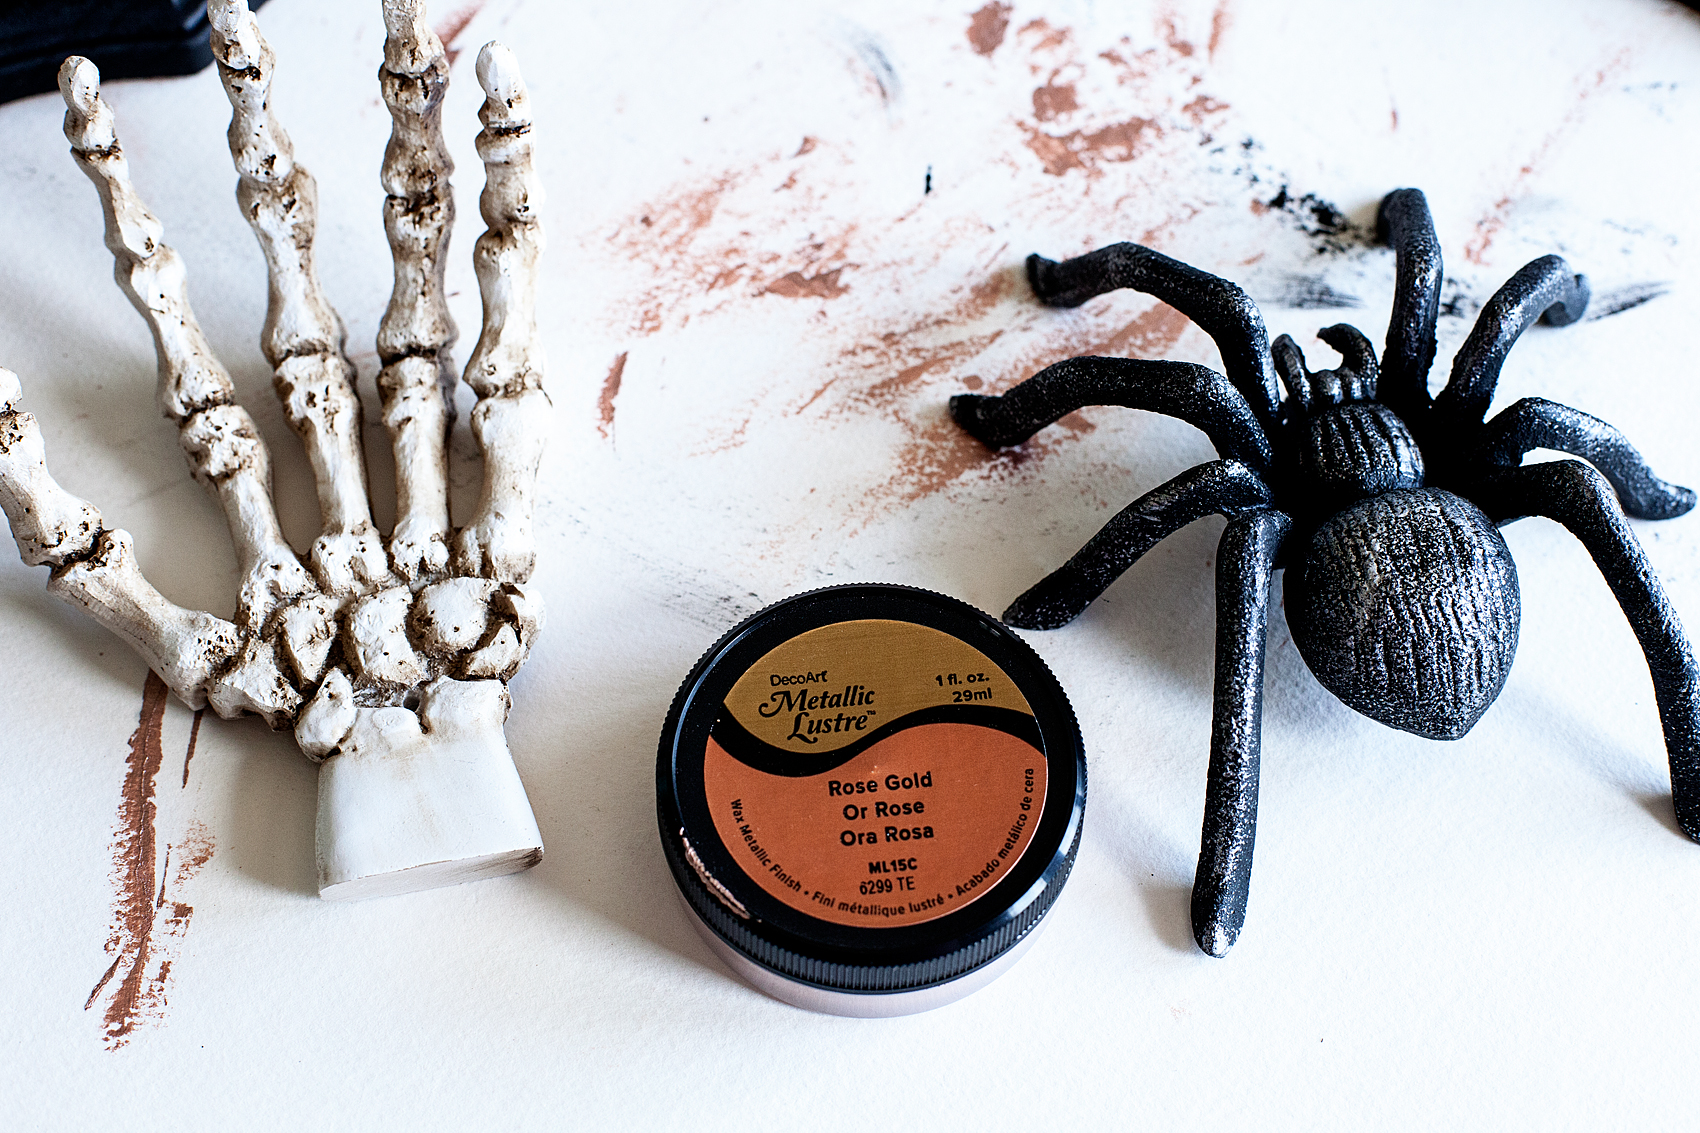
Now, the DecoArt Metallic Lustre is a wax finish, not paint. IT AWESOME!!  I love this stuff! I put a little onto my cloth like so…

Add a little flair to your spooky Halloween decor with DecoArt! I used their Metallic Lustre to turn simple spooky objects into creepy yet classy taxidermy plaques to decorate our entryway for Halloween.

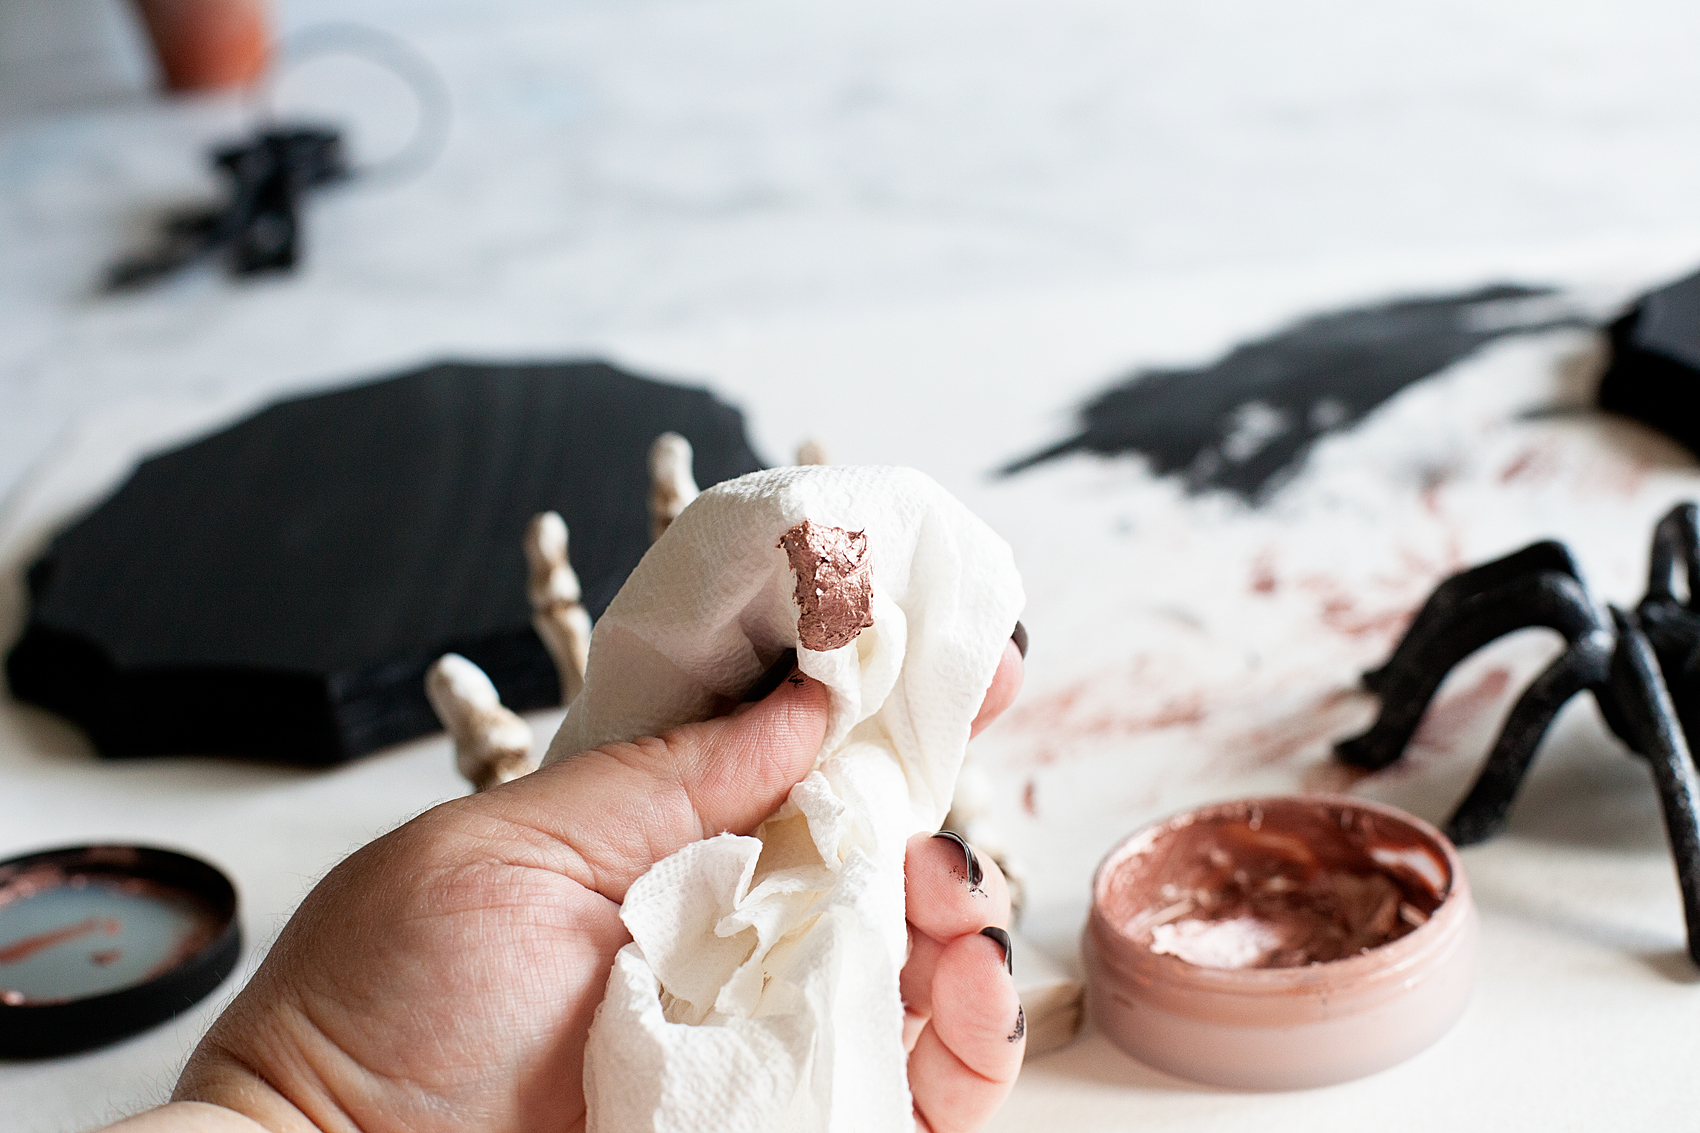
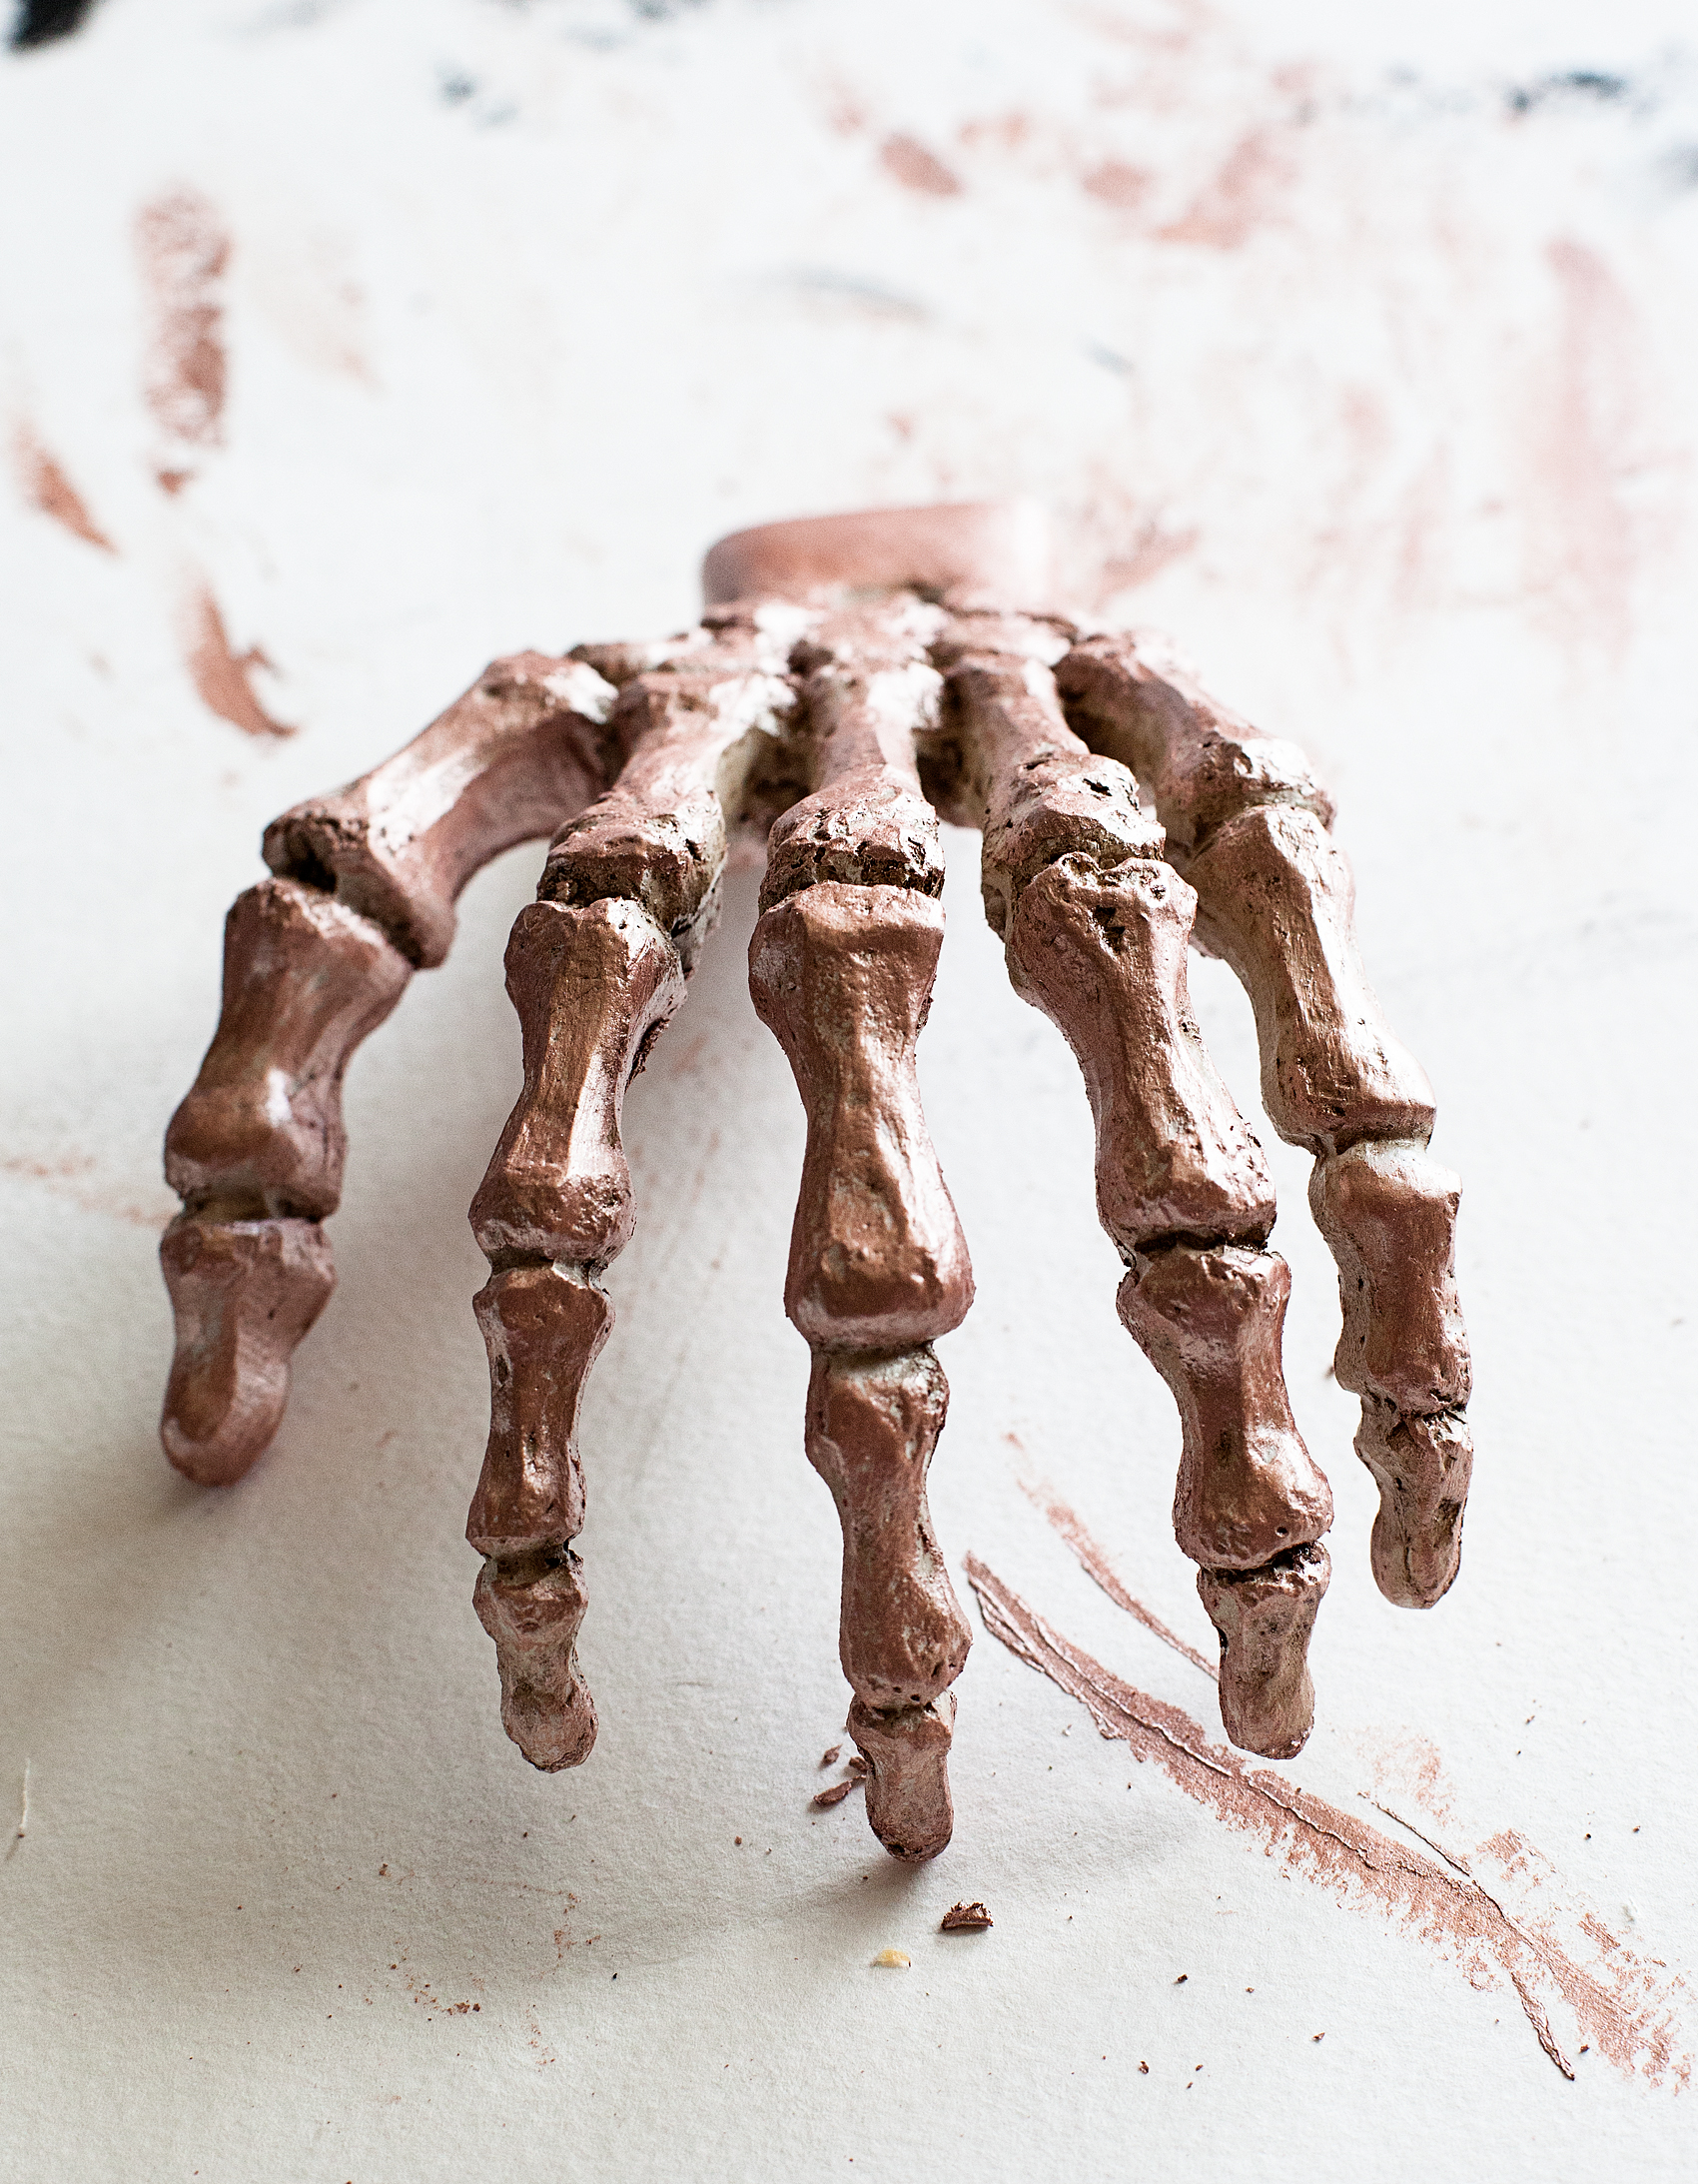
… And then, rub it all over your object that you are wanting to add a little flair to.

Add a little flair to your spooky Halloween decor with DecoArt! I used their Metallic Lustre to turn simple spooky objects into creepy yet classy taxidermy plaques to decorate our entryway for Halloween.

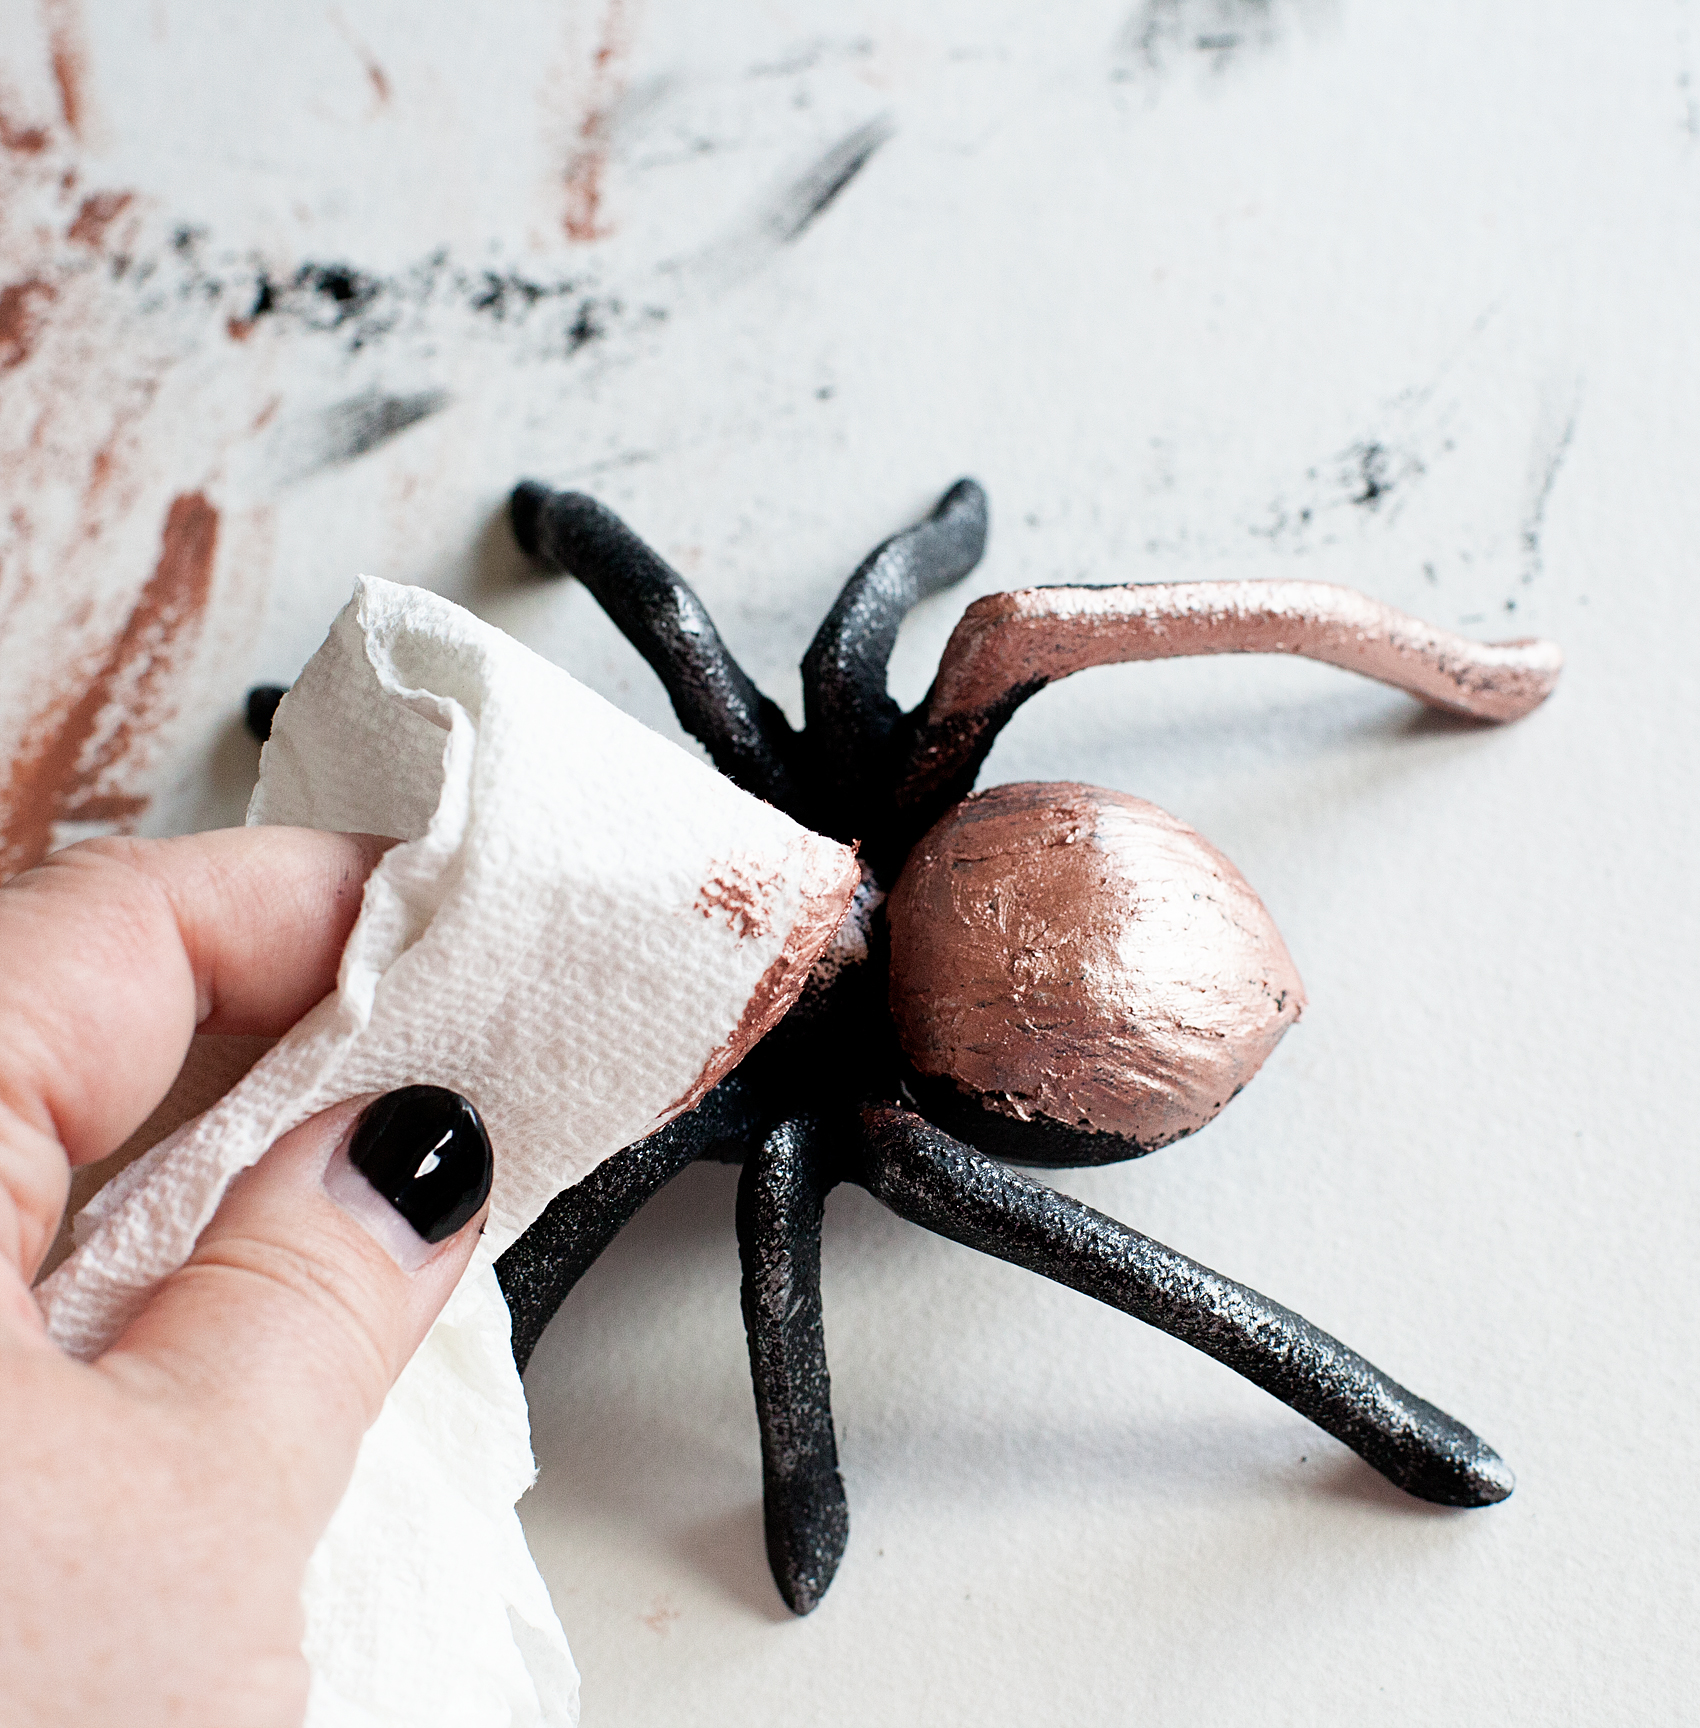
It cures really quick so, if you don’t want to have full coverage, make sure you work in small sections and work quick. With these pieces, I didn’t want full coverage, I still wanted them to look a little rough. As for the keys, I only wanted the rose gold at the top of the keys and then left the bottom black.

Add a little flair to your spooky Halloween decor with DecoArt! I used their Metallic Lustre to turn simple spooky objects into creepy yet classy taxidermy plaques to decorate our entryway for Halloween.

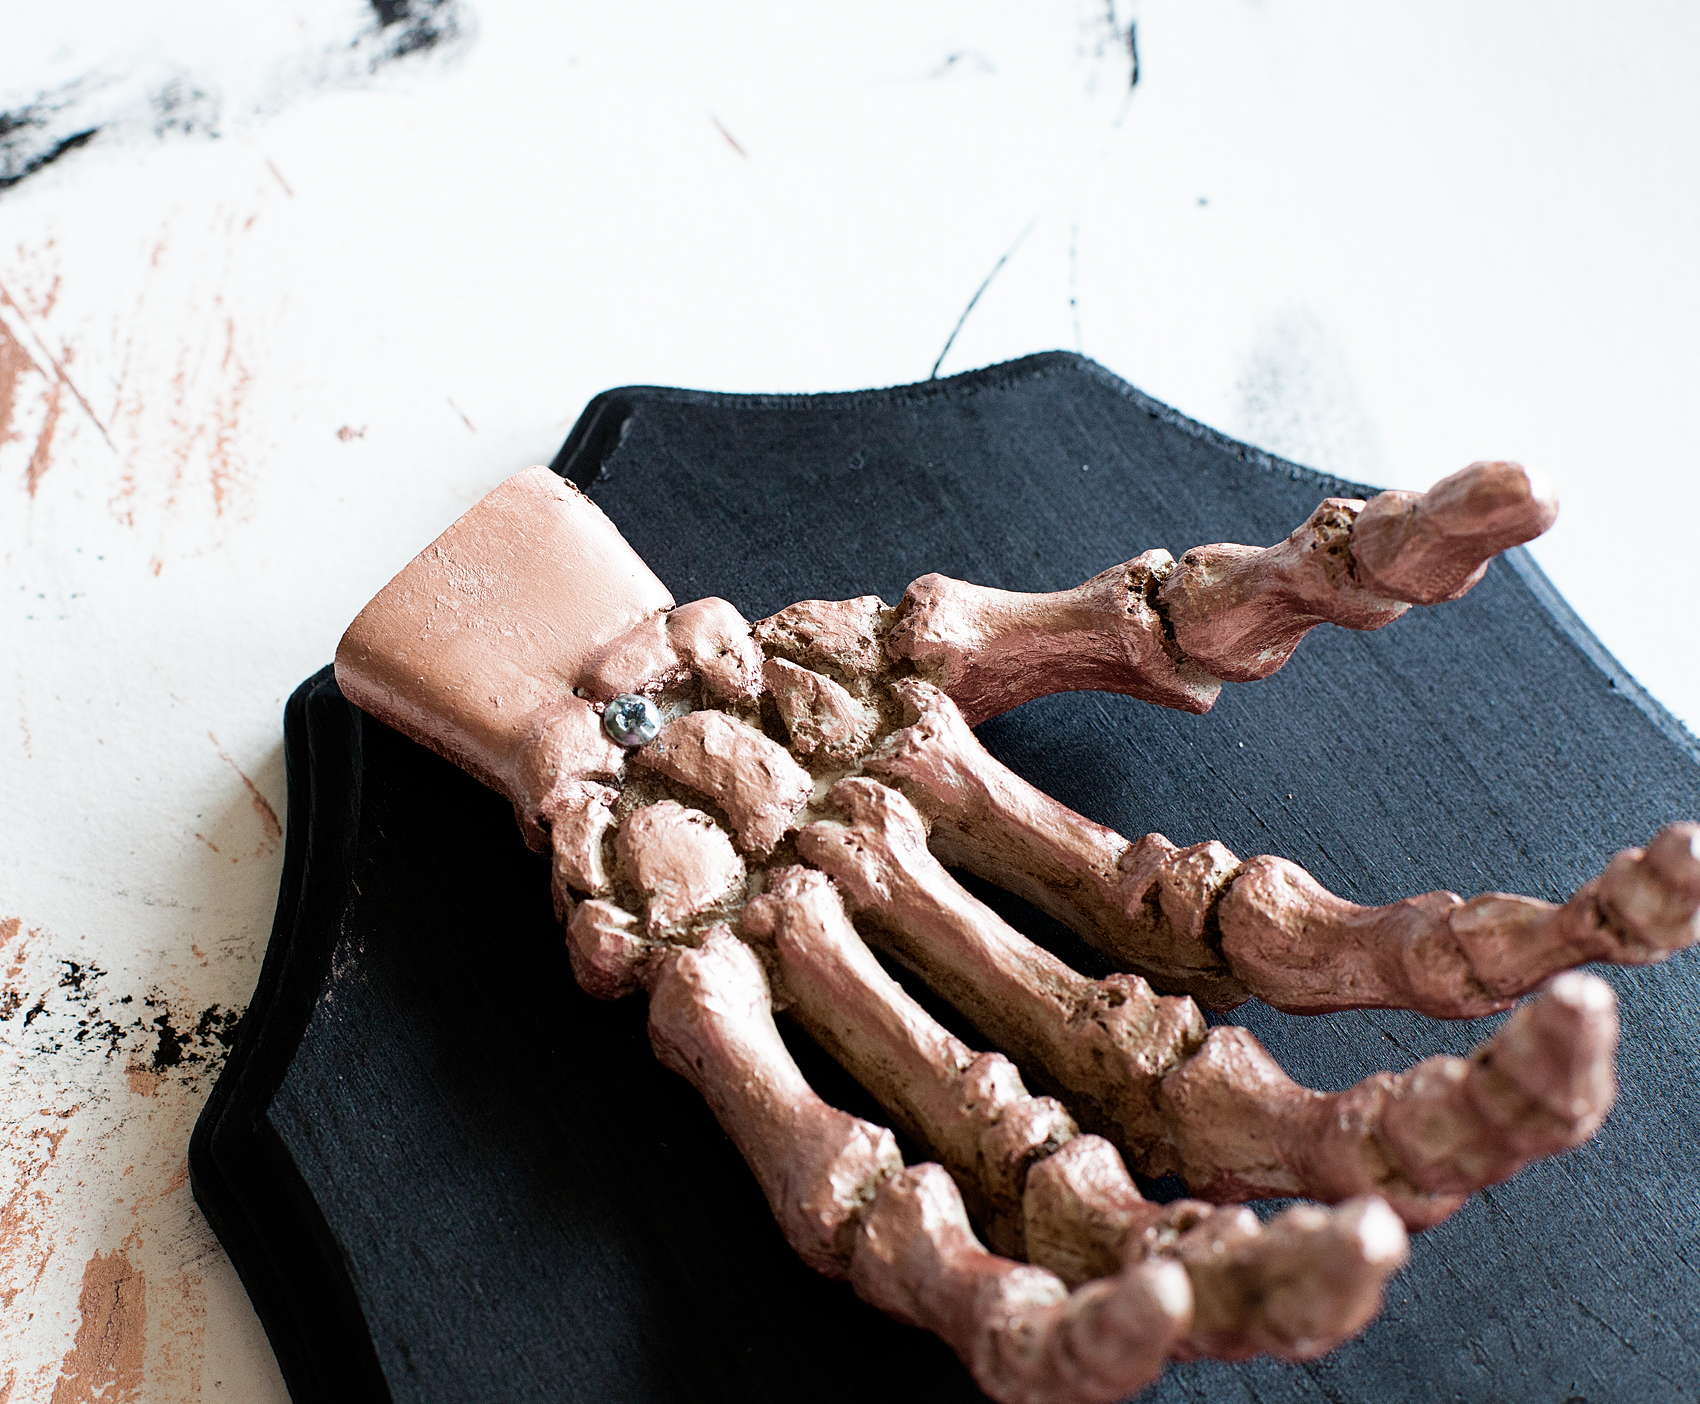
Once the paint on the plaques is dry and the Metallic Lustre has cured (it only takes a few minutes) you are ready to mount them on their plaques.

Add a little flair to your spooky Halloween decor with DecoArt! I used their Metallic Lustre to turn simple spooky objects into creepy yet classy taxidermy plaques to decorate our entryway for Halloween.

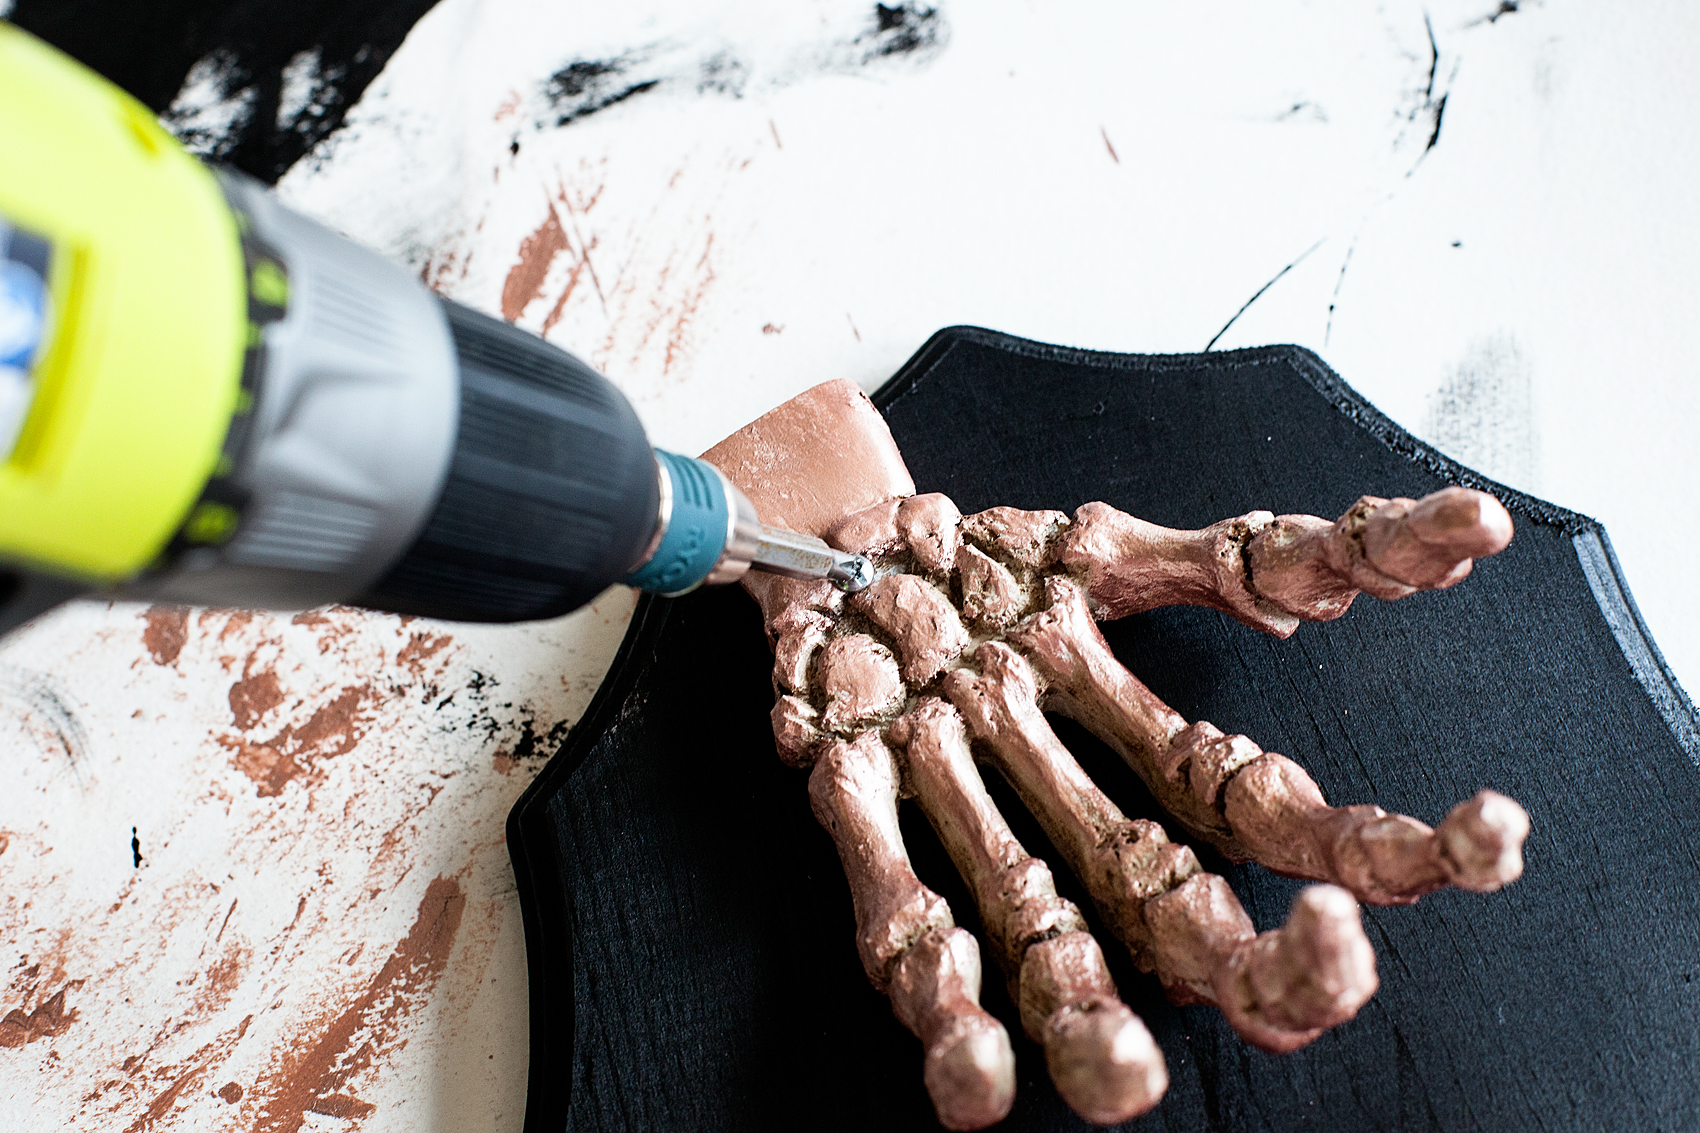
I just used a 1 1/2 inch screw to adhere the skeleton hand to the plaque. However, I did drill pilot holes into the hand and the plaque before to ensure a proper fit.

Now… I’m sure you’ve noticed that there is now a unsightly screw in the hand.

Add a little flair to your spooky Halloween decor with DecoArt! I used their Metallic Lustre to turn simple spooky objects into creepy yet classy taxidermy plaques to decorate our entryway for Halloween.

No worries!! I took a stick and roughly added more of the Metallic Lustre to cover the screw head.

Add a little flair to your spooky Halloween decor with DecoArt! I used their Metallic Lustre to turn simple spooky objects into creepy yet classy taxidermy plaques to decorate our entryway for Halloween.

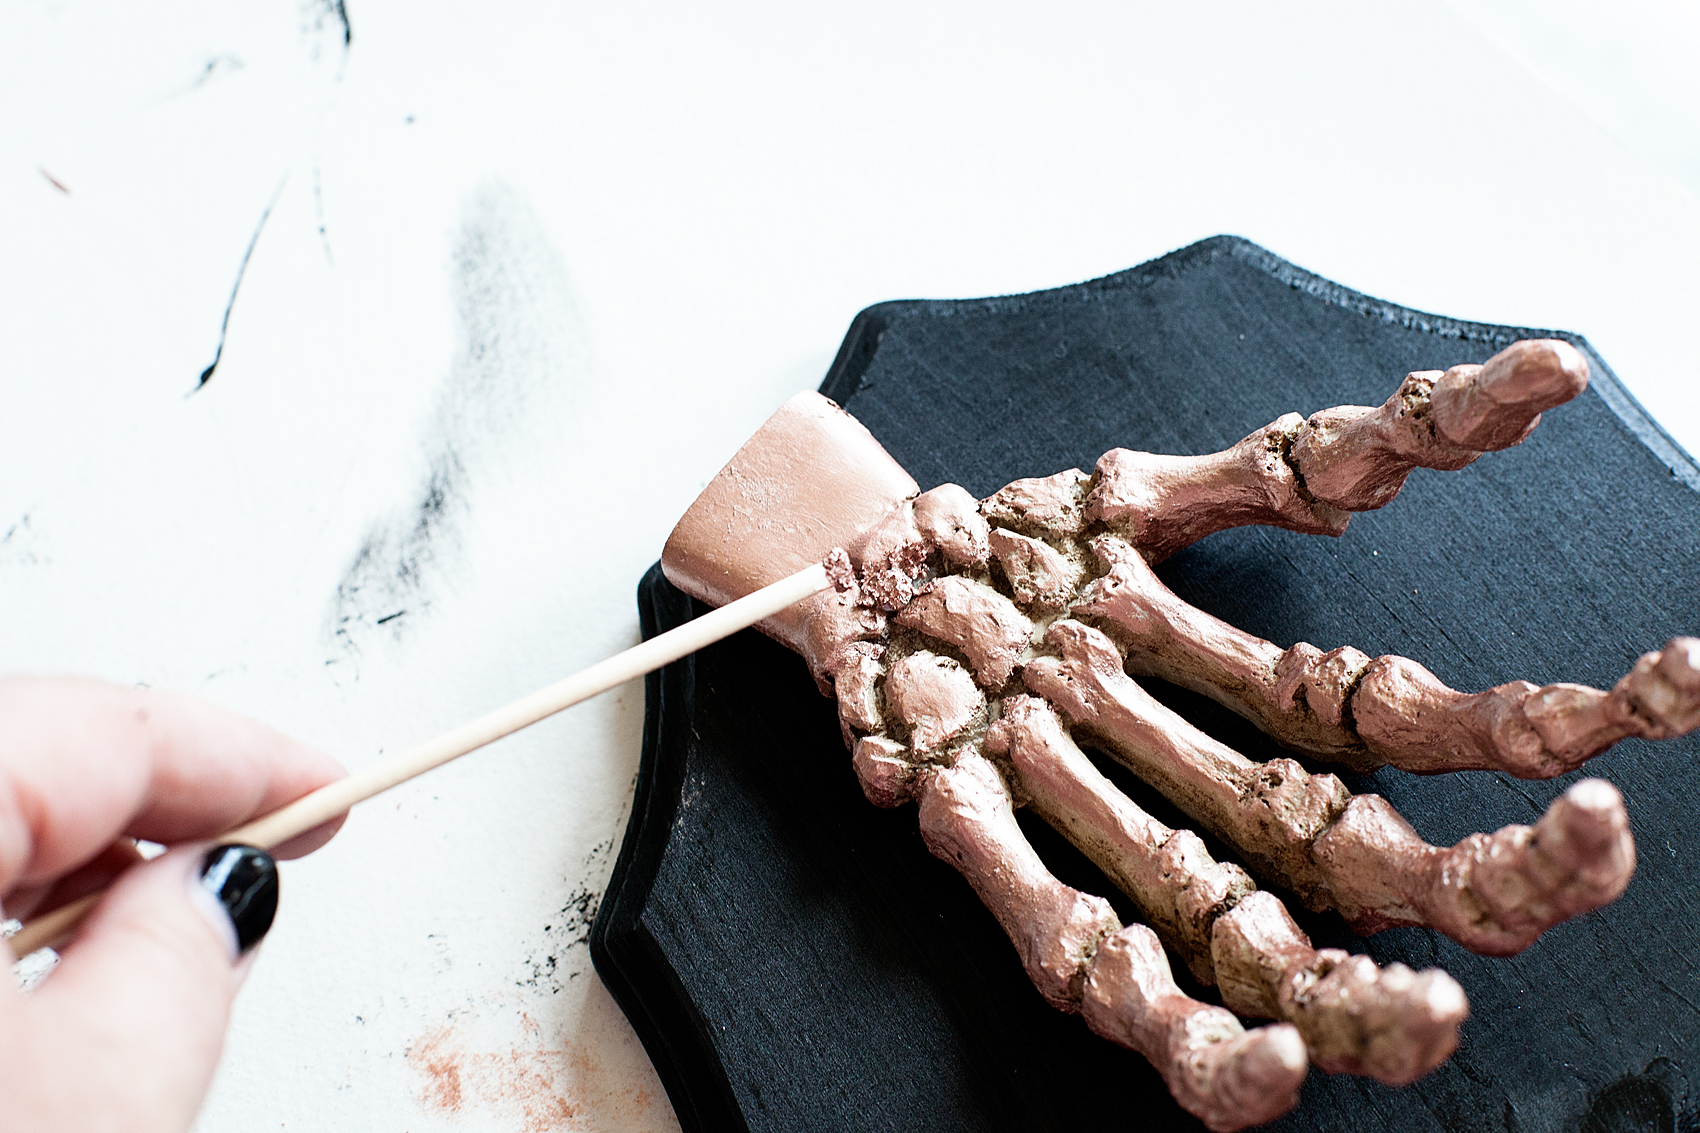
Once it cures, it’s hard and voilá… You can’t see the screw! Nice, huh?

For the spider, I placed a screw on the plaque and hung the spider on it. If you use the same spider that I used, it has a screw hanger on the back so it works perfect. I did add some of the Metallic Lustre to the screw to help it blend in.

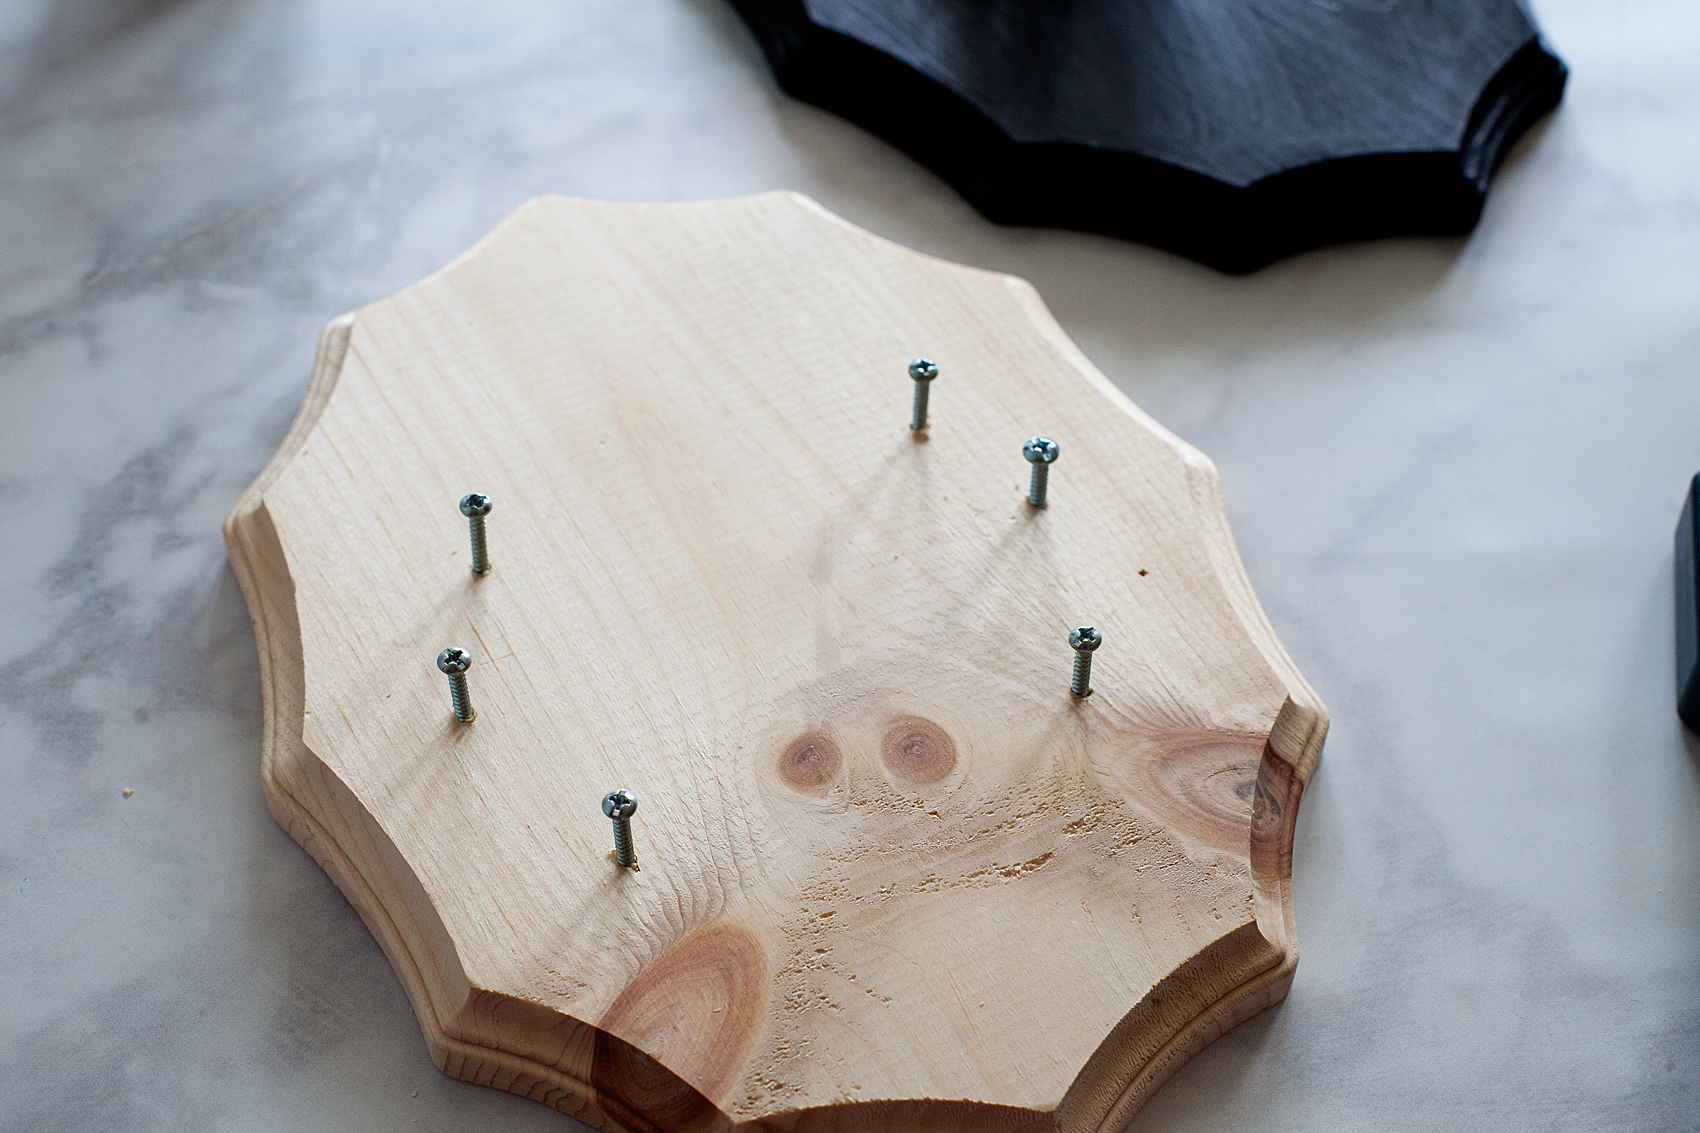
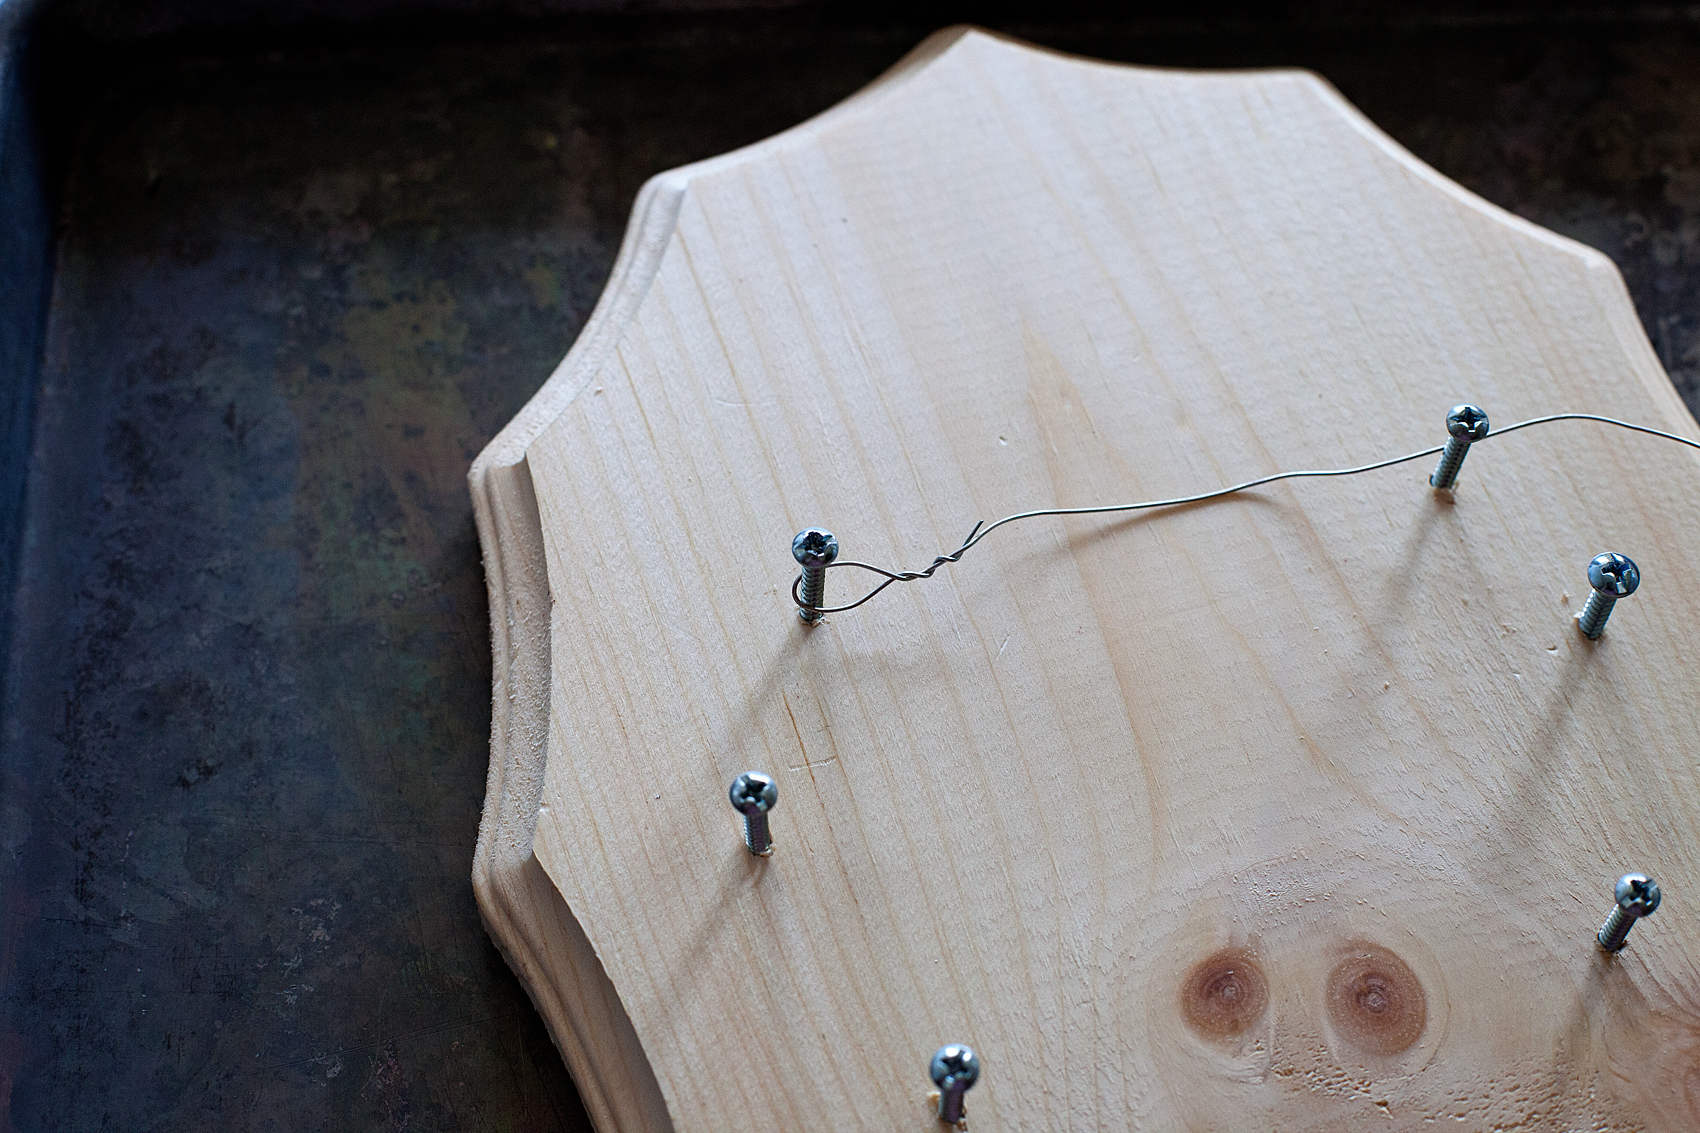
Now it’s time to mount your Staghorn Fern. Grab the plaque that you didn’t paint along with your drill and 6 1 1/2 inch screws and some floral wire.

First, I drill pilot holes into the plaque.

Add a little flair to your spooky Halloween decor with DecoArt! I used their Metallic Lustre to turn simple spooky objects into creepy yet classy taxidermy plaques to decorate our entryway for Halloween.

Three on each side about an inch away from the edge of the board. Then I add my screws but keep about an inch sticking up from the board.

Add a little flair to your spooky Halloween decor with DecoArt! I used their Metallic Lustre to turn simple spooky objects into creepy yet classy taxidermy plaques to decorate our entryway for Halloween.

At this point, I lay my plaque in a baking sheet. This part can get a little messy and the baking sheet will help contain the mess. Then I take the floral wire and make a little loop to help start the process and attach it to the top screw.

Add a little flair to your spooky Halloween decor with DecoArt! I used their Metallic Lustre to turn simple spooky objects into creepy yet classy taxidermy plaques to decorate our entryway for Halloween.

Then I wind it around the rest of the screws making sure to keep the wire close to the base of the screw close to the wood.

Add a little flair to your spooky Halloween decor with DecoArt! I used their Metallic Lustre to turn simple spooky objects into creepy yet classy taxidermy plaques to decorate our entryway for Halloween.

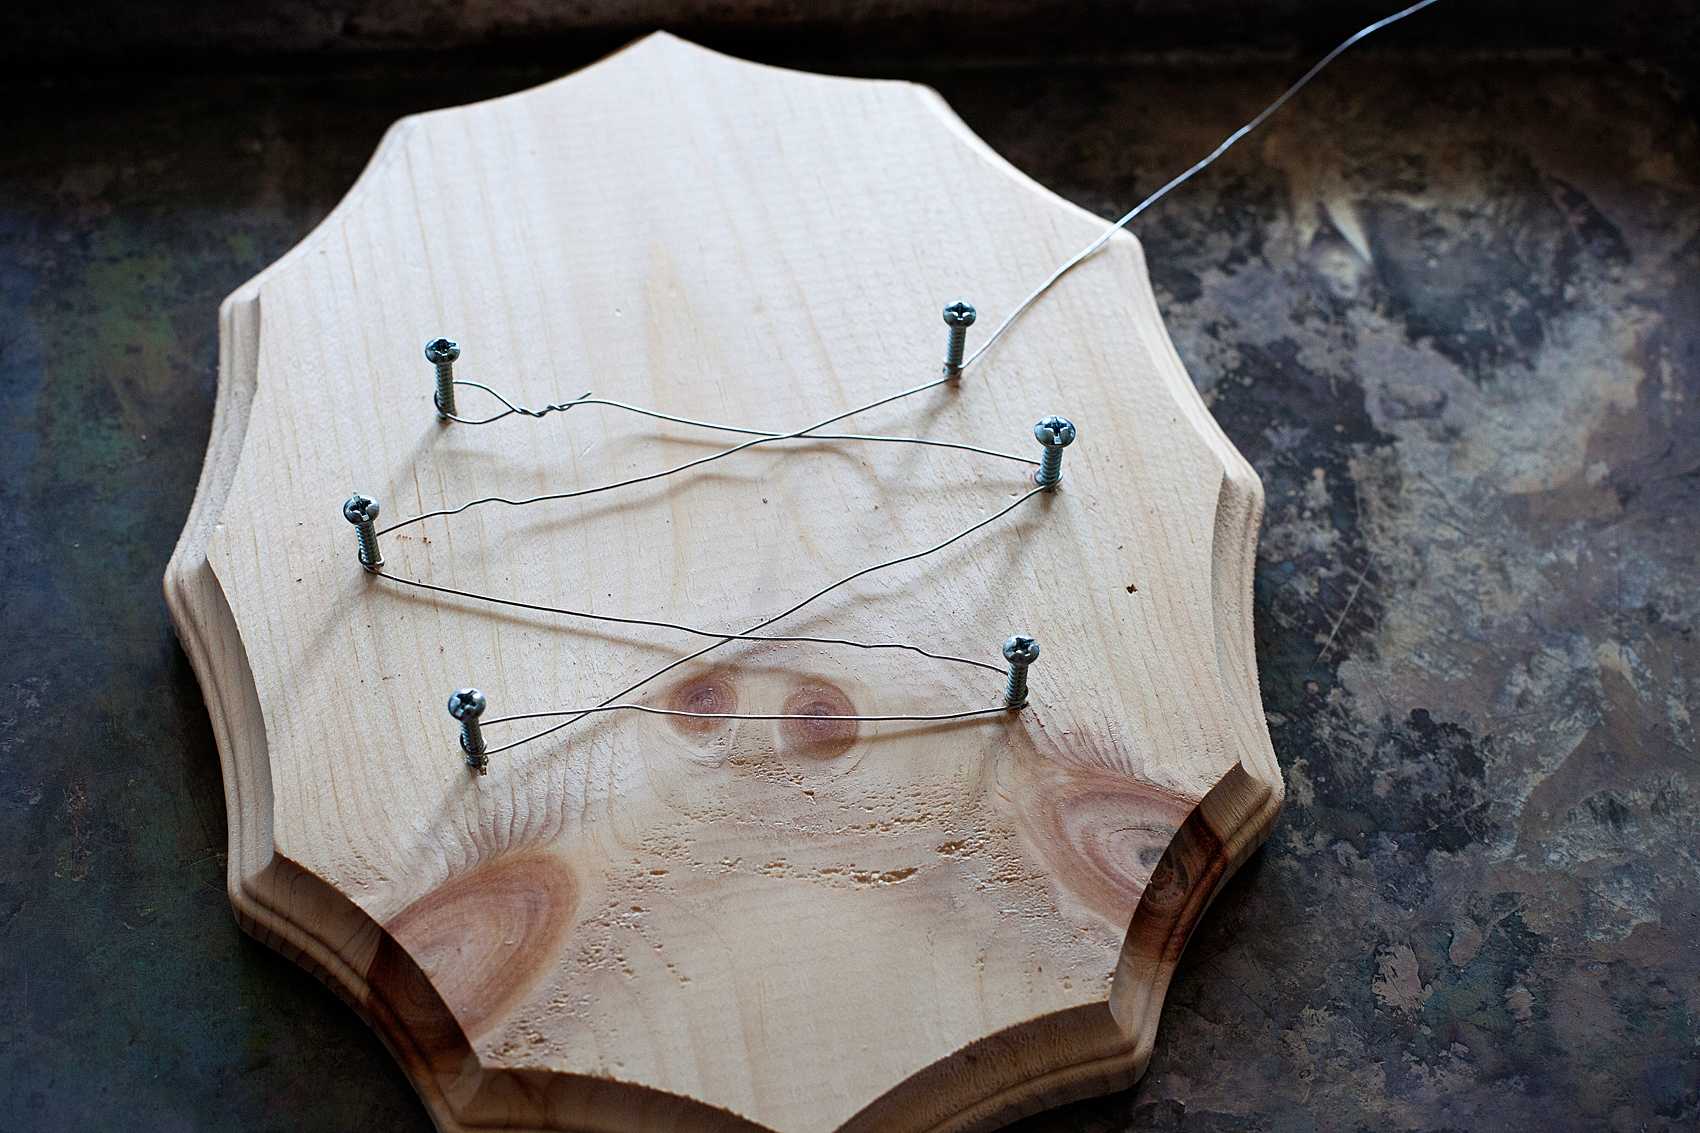
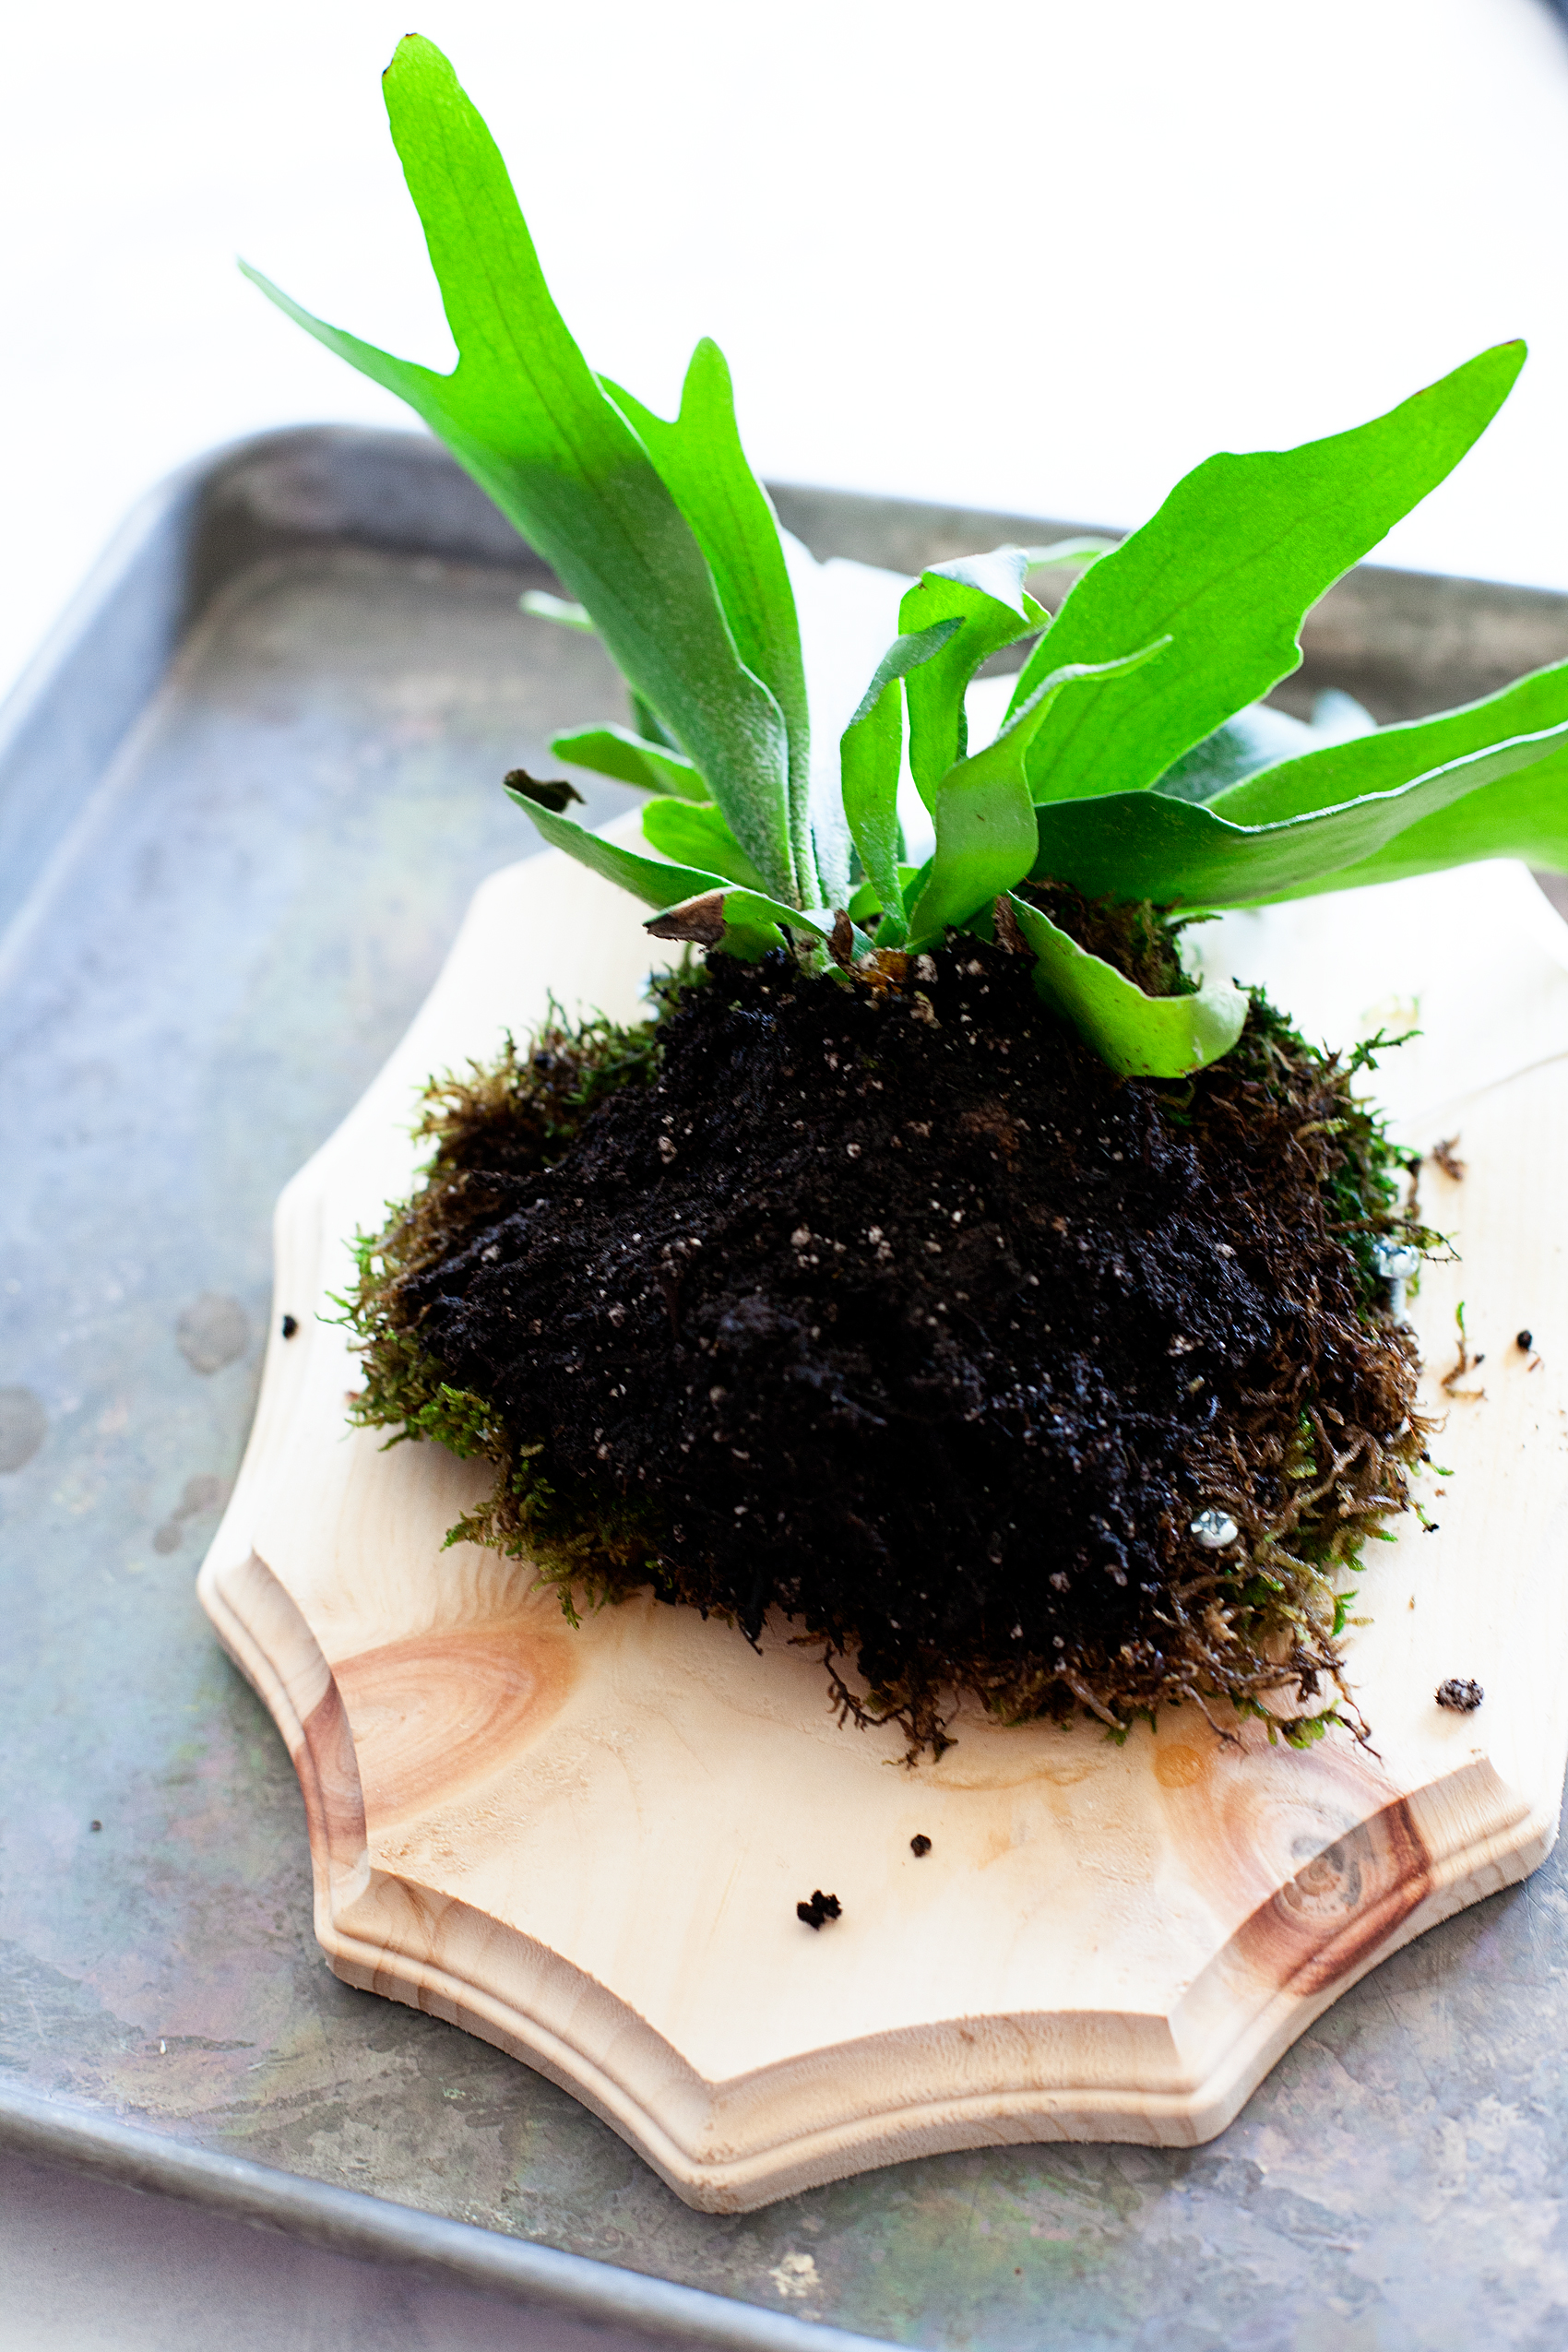
Do not cut the floral wire yet. Take some of your moss, gently wring it out a bit and lay it on top of the wire.

Add a little flair to your spooky Halloween decor with DecoArt! I used their Metallic Lustre to turn simple spooky objects into creepy yet classy taxidermy plaques to decorate our entryway for Halloween.

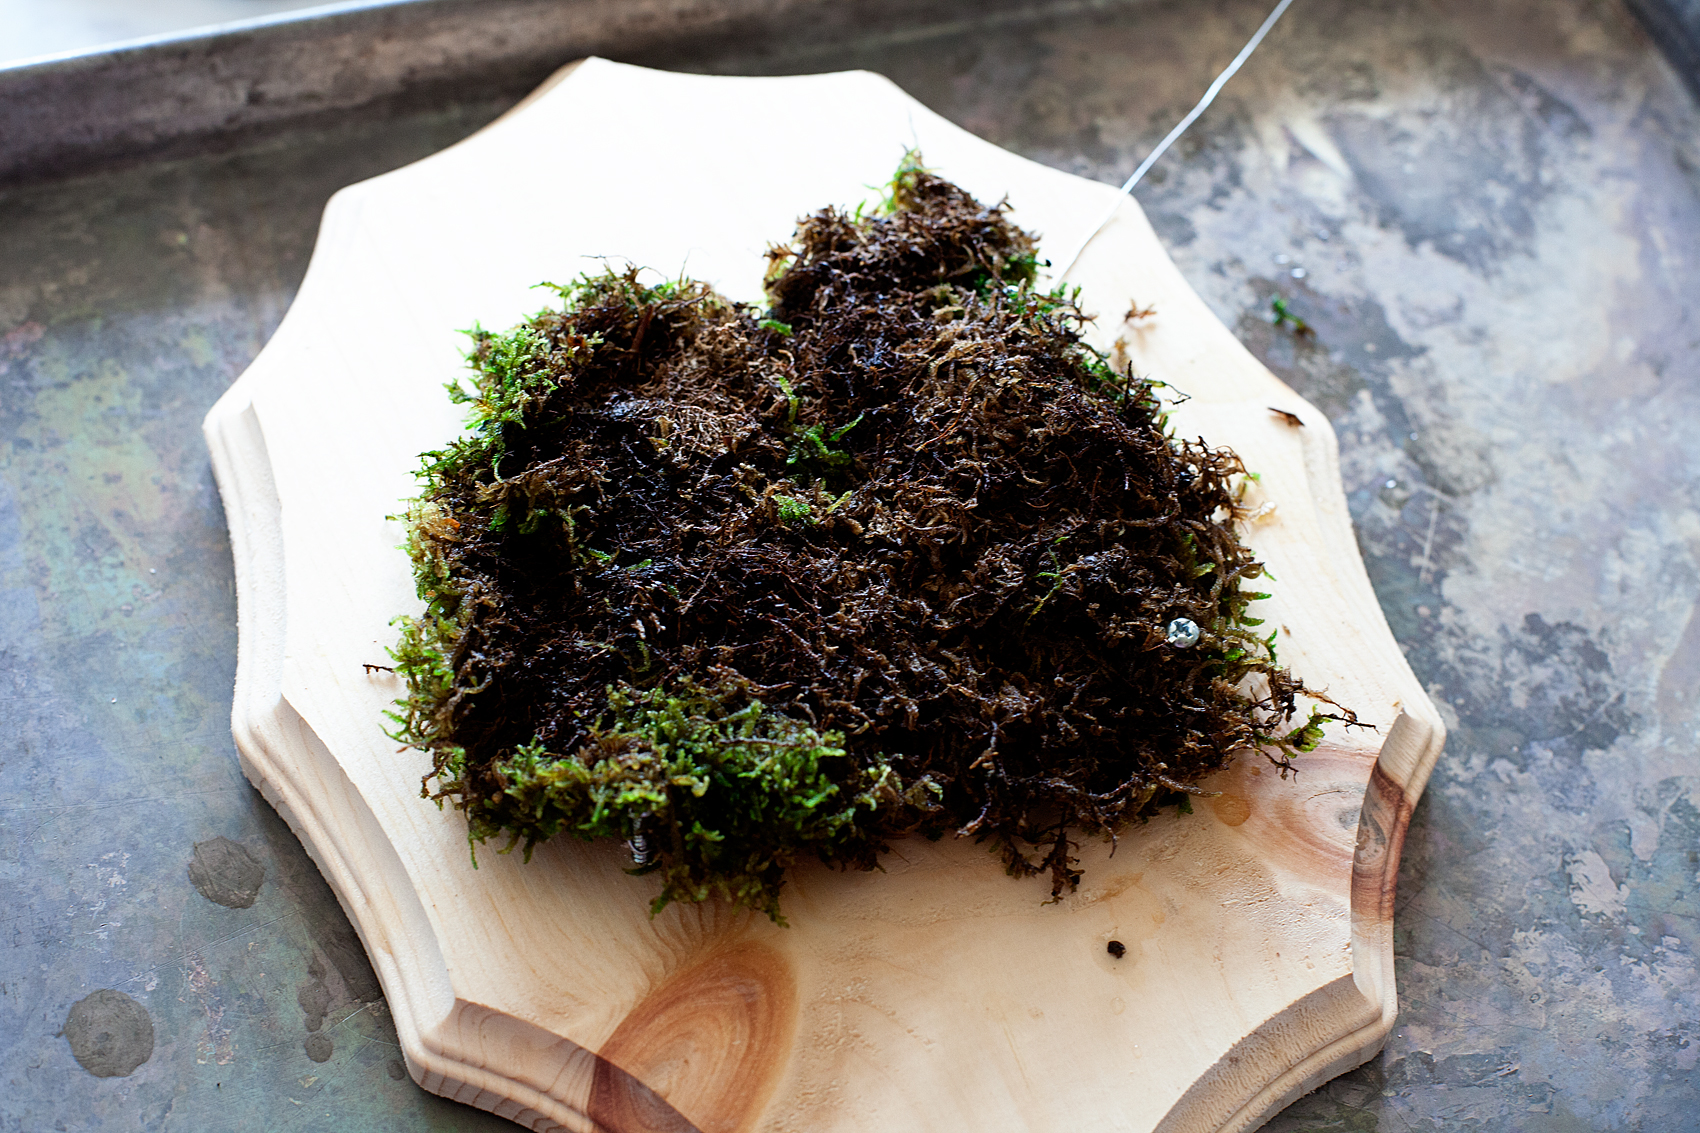
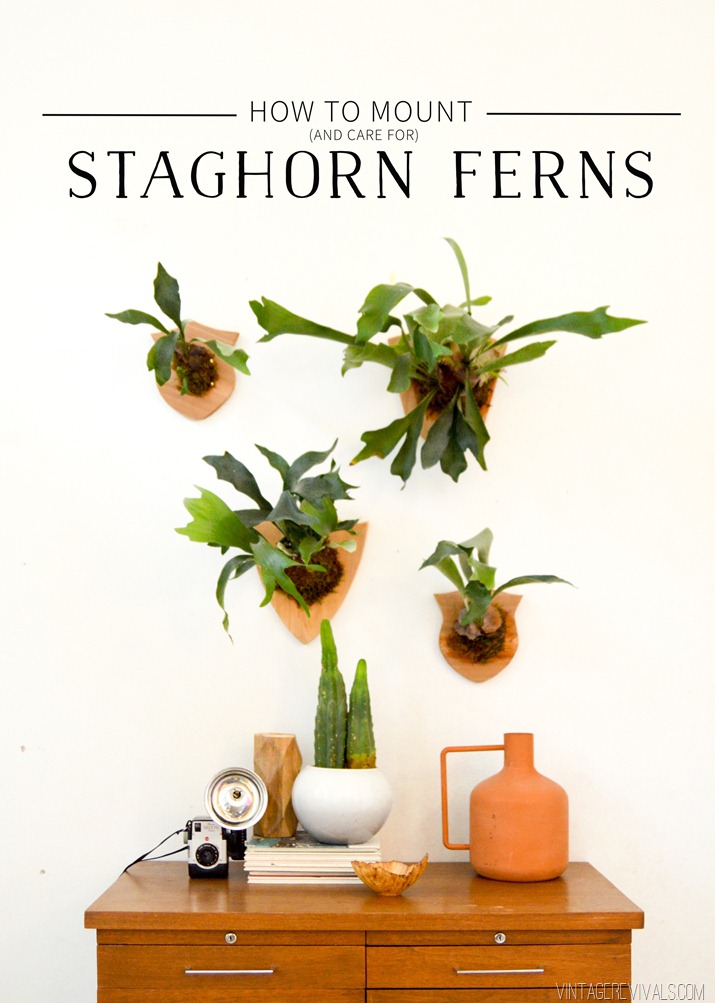
Then take your Staghorn Fern and gently take it out of the pot and remove as much dirt as possible. Staghorn Ferns are air plant so they really don’t need to live in soil. They get their nutrients from the air and the moisture on their frawns. For a really great post on Staghorn Ferns and how to mount and care for them, check out Vintage Revivals. Mandi has a real love for these plants.

HowtoMountandCareforStaghornFernscompletetutorialwithpictures

Once I’ve removed as much of the dirt as I am comfortable with, I lay it down on top of the moss.

Add a little flair to your spooky Halloween decor with DecoArt! I used their Metallic Lustre to turn simple spooky objects into creepy yet classy taxidermy plaques to decorate our entryway for Halloween.

Here’s a funny tip…

Staghorn Ferns love banana peels. Apparently, they provide the kind of nutrition that the plants really like. Before I cover the plant with moss, I add a little bit of banana peel.

Add a little flair to your spooky Halloween decor with DecoArt! I used their Metallic Lustre to turn simple spooky objects into creepy yet classy taxidermy plaques to decorate our entryway for Halloween.

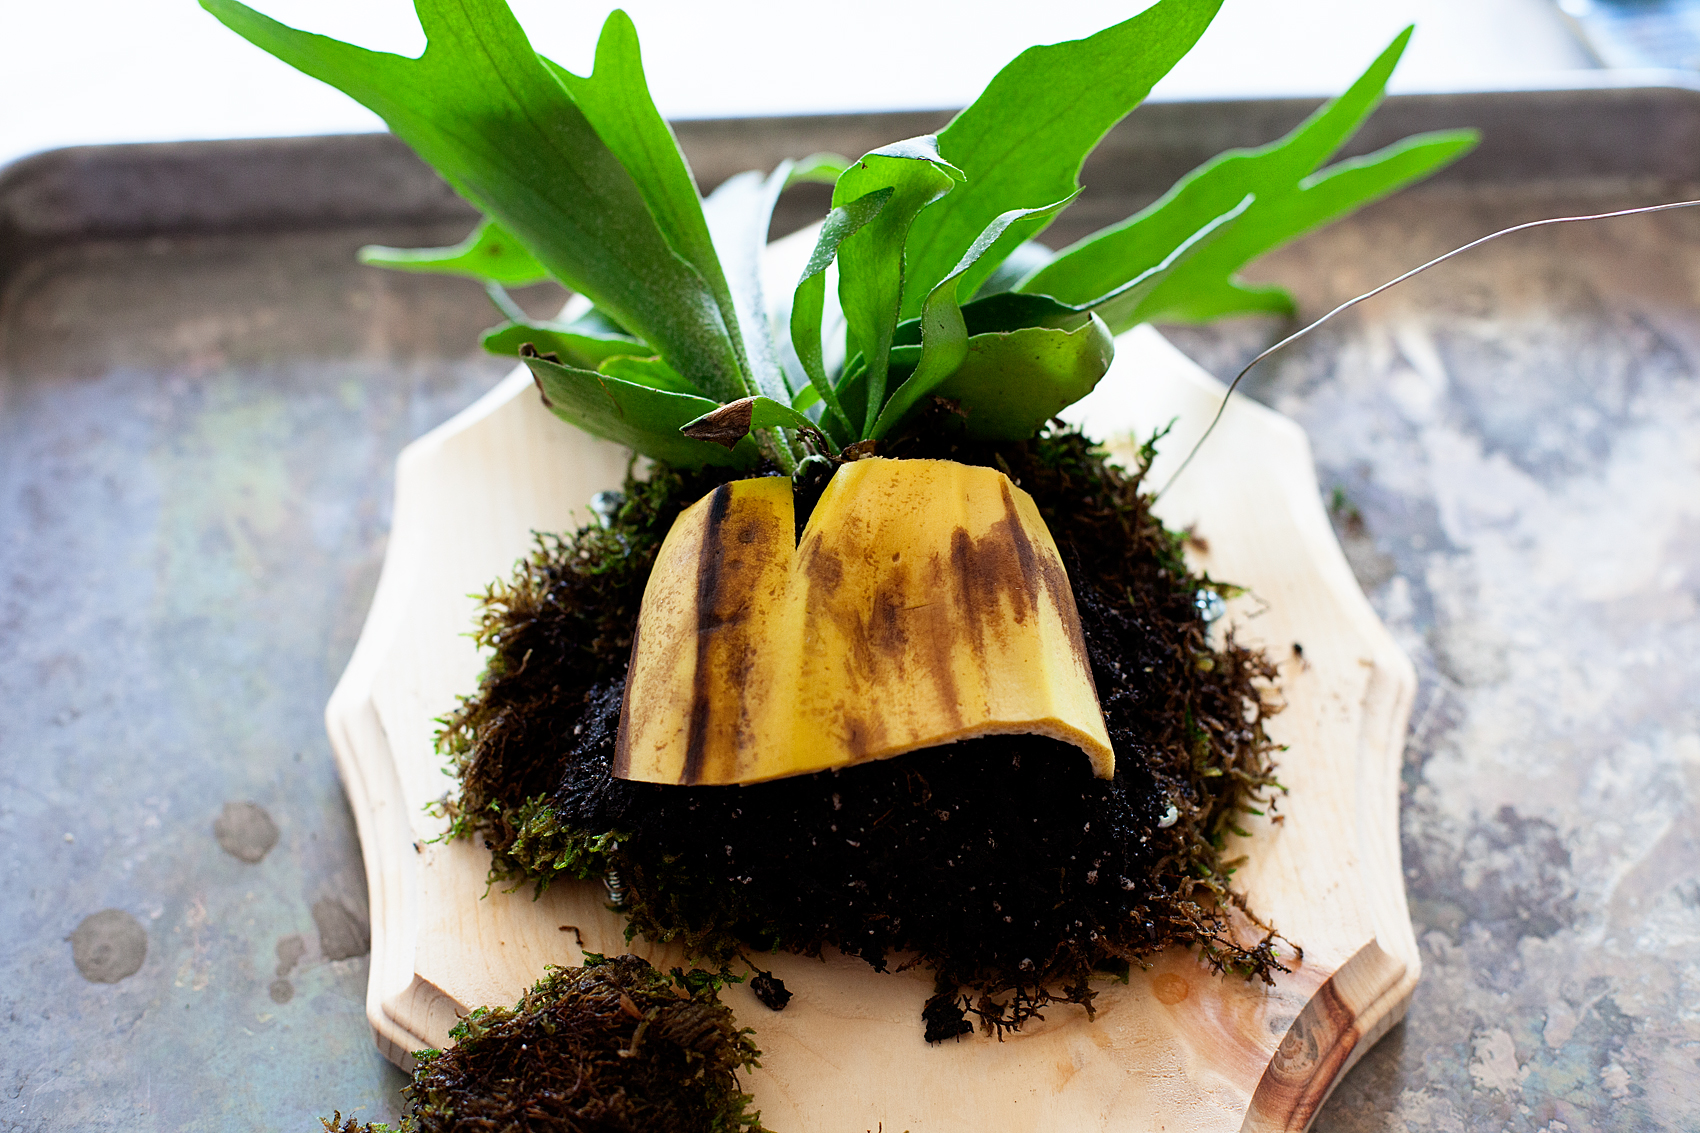
Next, cover it with more moss and then criss cross the wire over the whole mound like before, until it is secure. The wire actually melts right into the moss and you don’t see it at all.

Add a little flair to your spooky Halloween decor with DecoArt! I used their Metallic Lustre to turn simple spooky objects into creepy yet classy taxidermy plaques to decorate our entryway for Halloween.

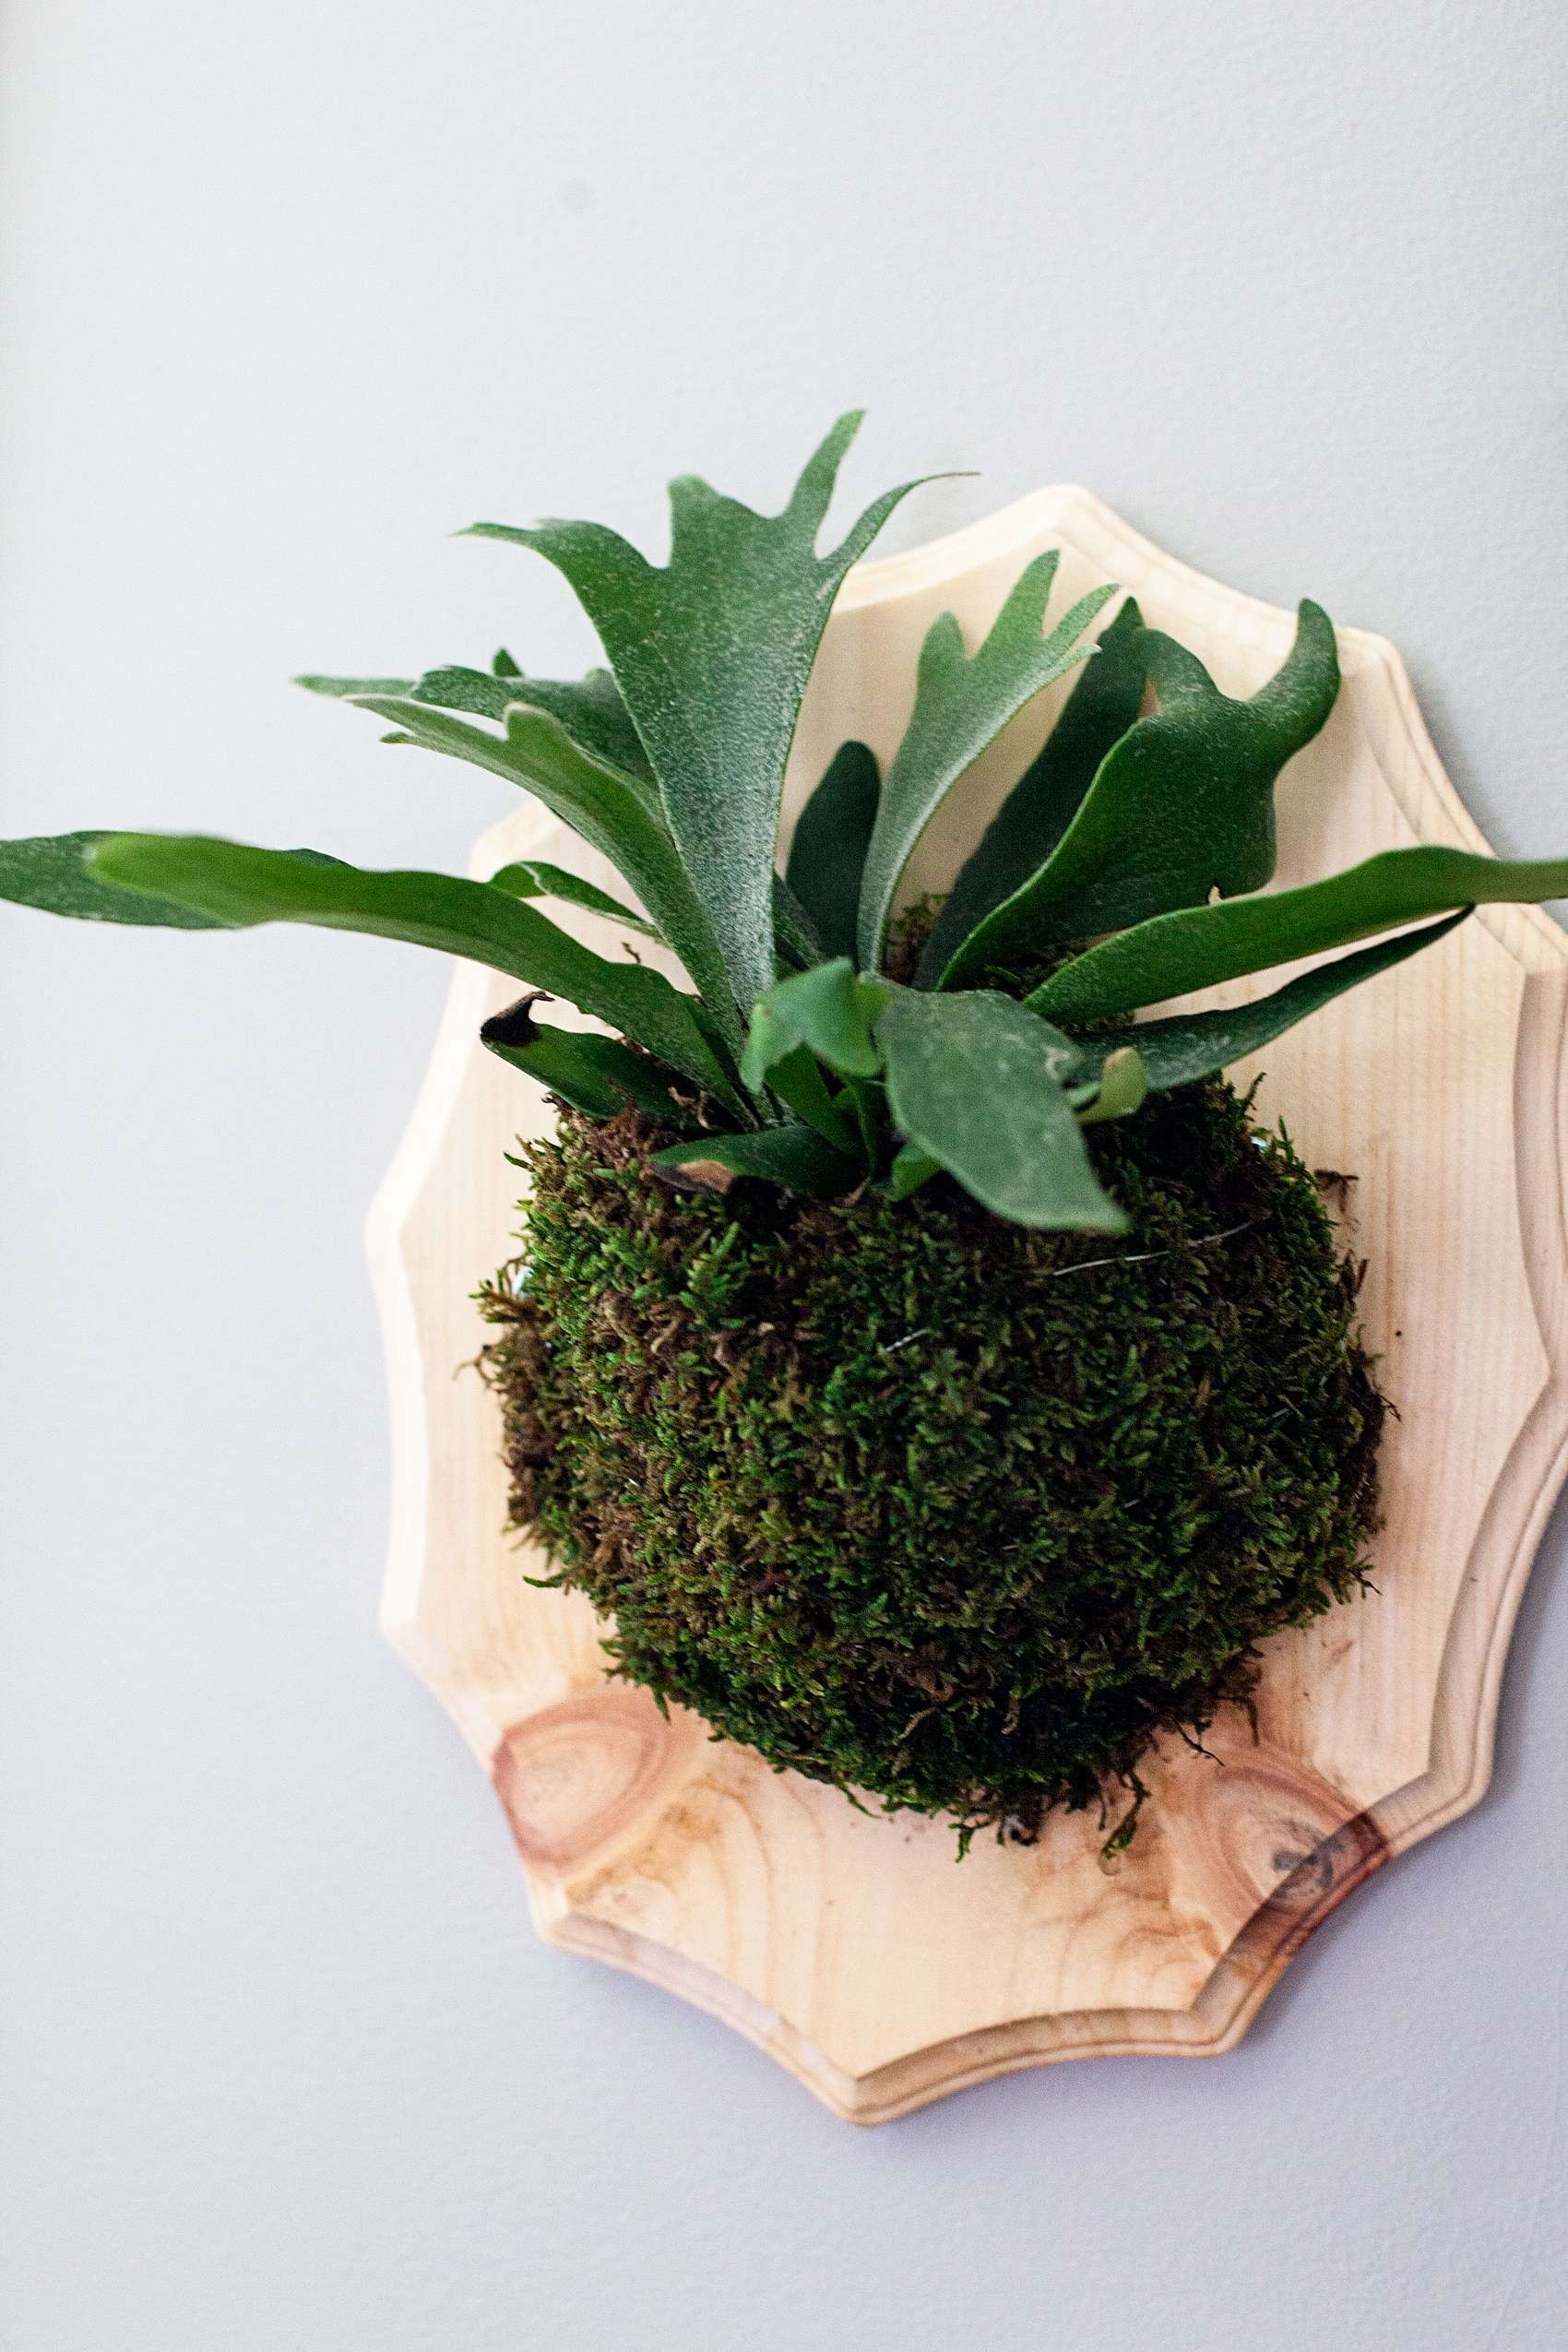
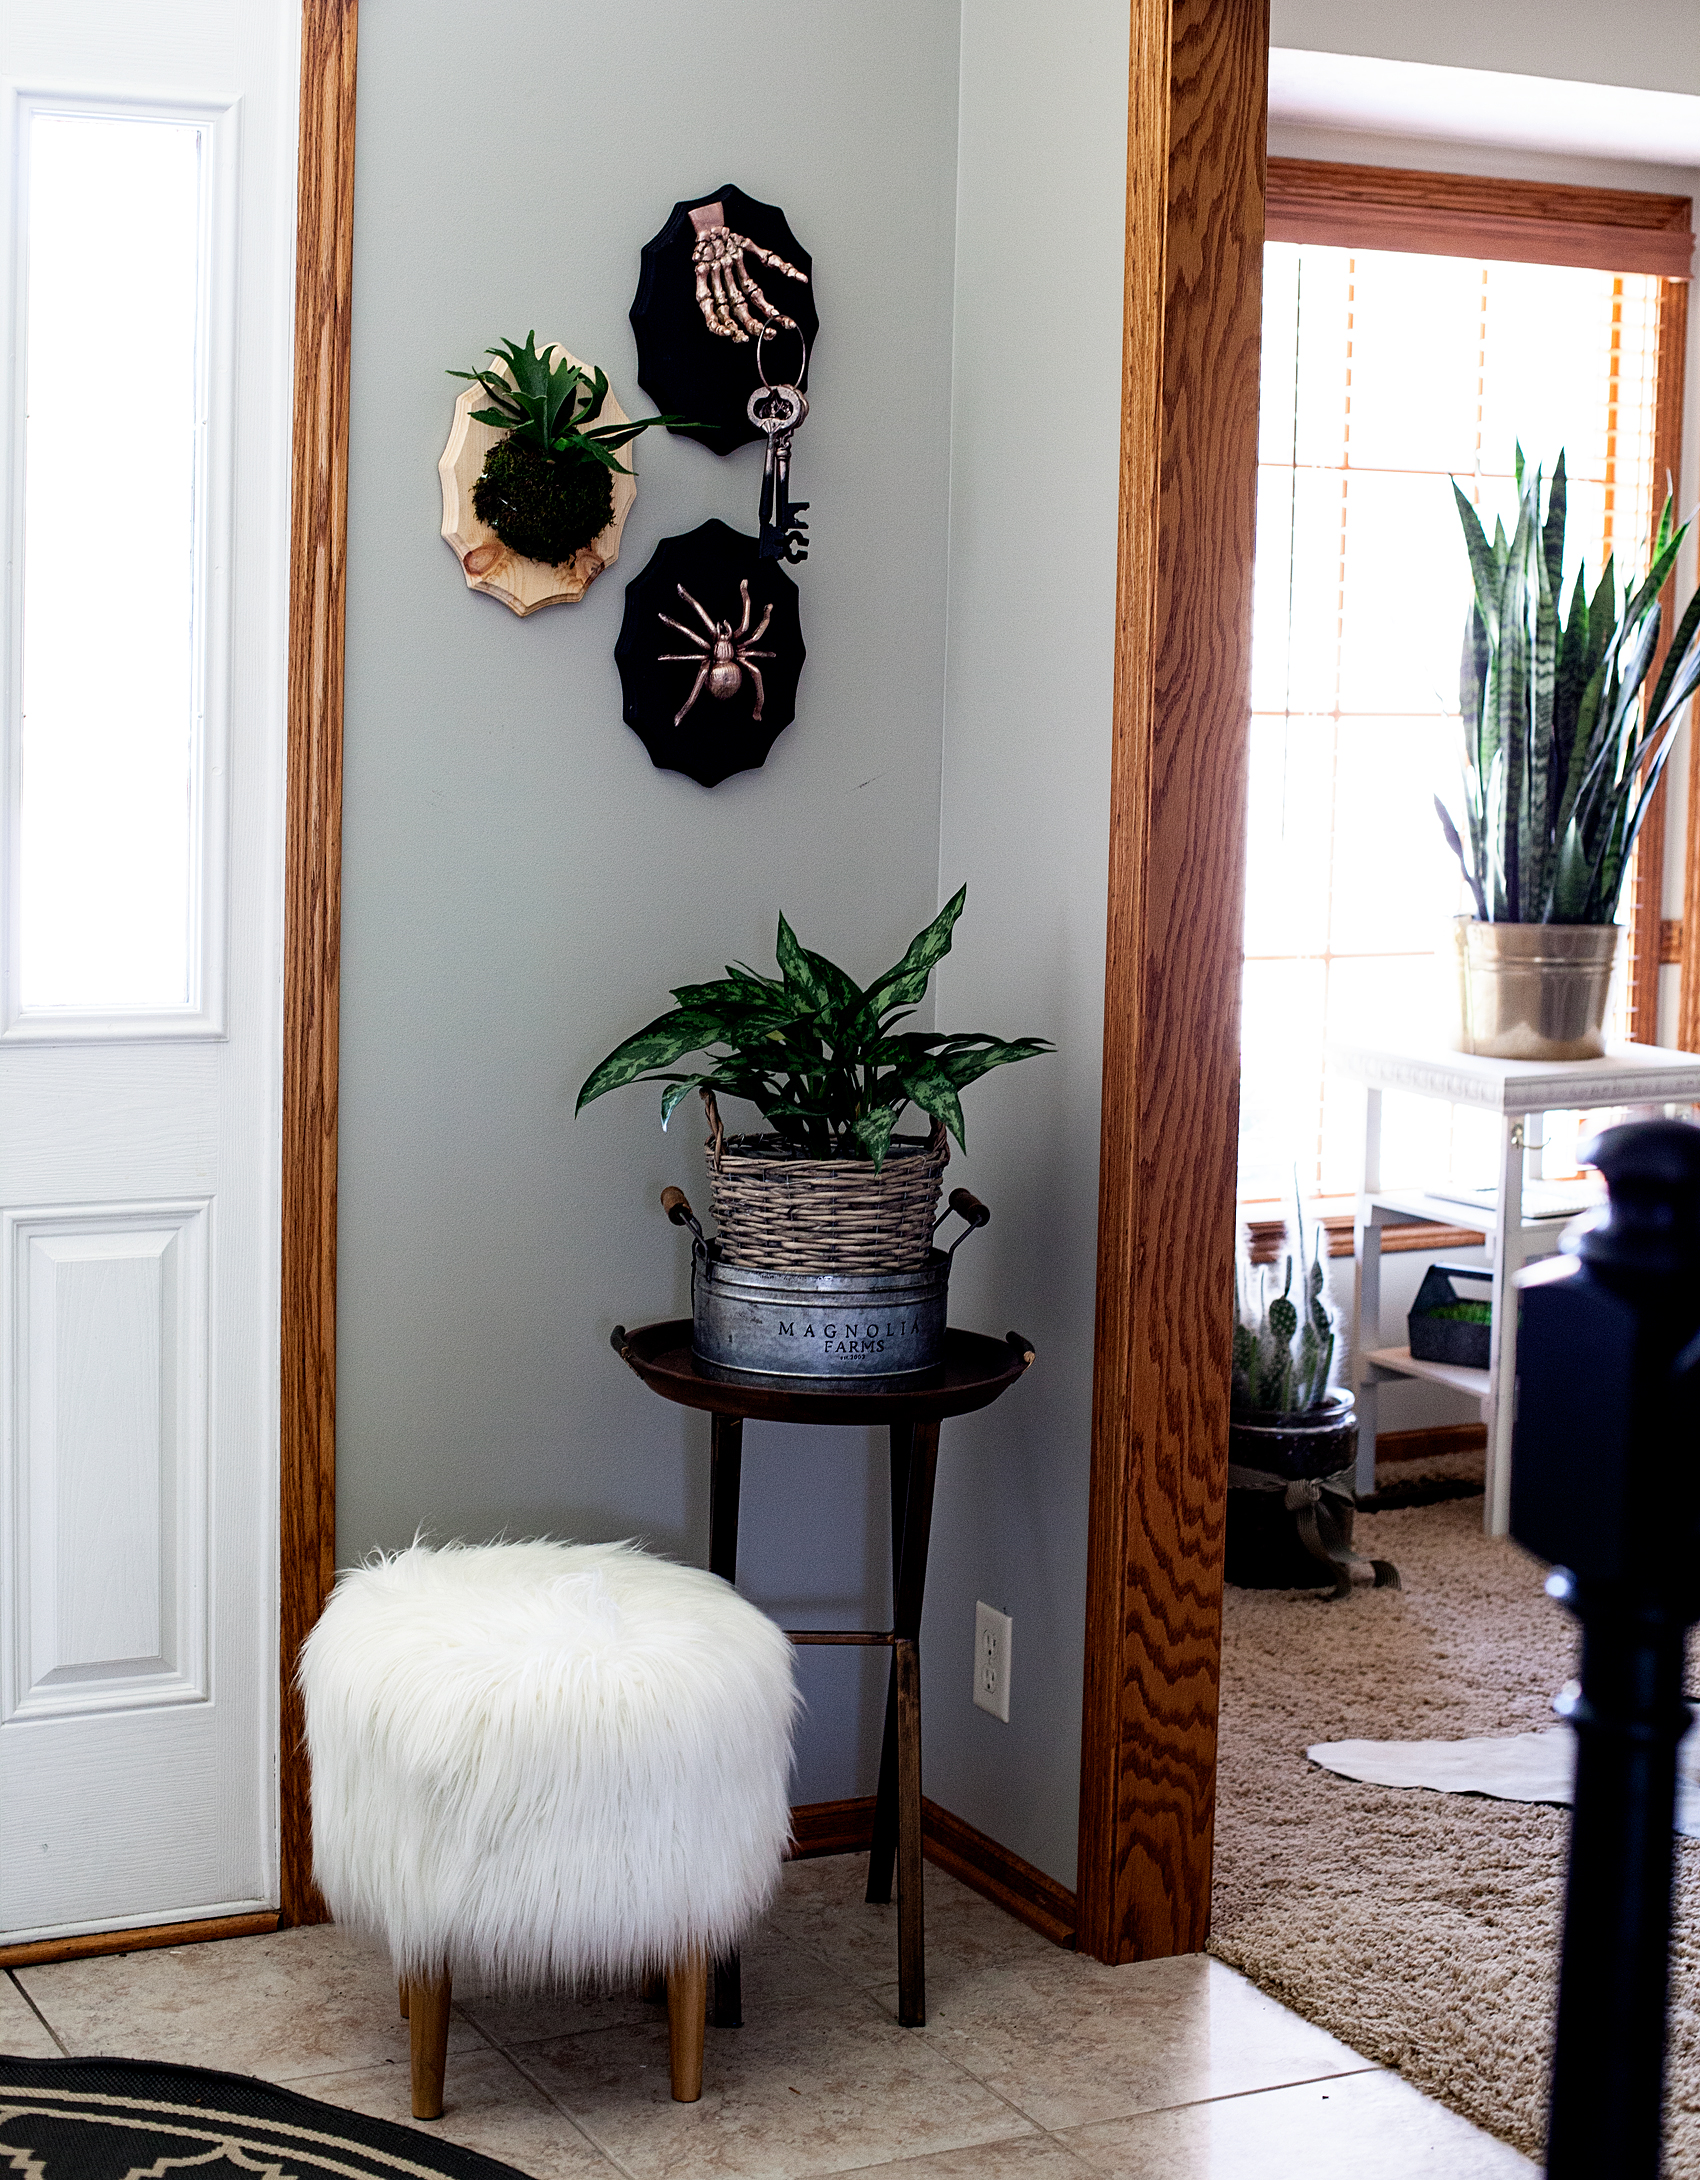
Check out Mandi’s post for tips on how to care for your new mounted Staghorn Fern. Now you’re all set to hang your macabre little scene on your walls.

Add a little flair to your spooky Halloween decor with DecoArt! I used their Metallic Lustre to turn simple spooky objects into creepy yet classy taxidermy plaques to decorate our entryway for Halloween.

Another little trick… I hung mine with those Command Strip Picture Hanging Strips. LOVE those babies!

Add a little flair to your spooky Halloween decor with DecoArt! I used their Metallic Lustre to turn simple spooky objects into creepy yet classy taxidermy home decor.

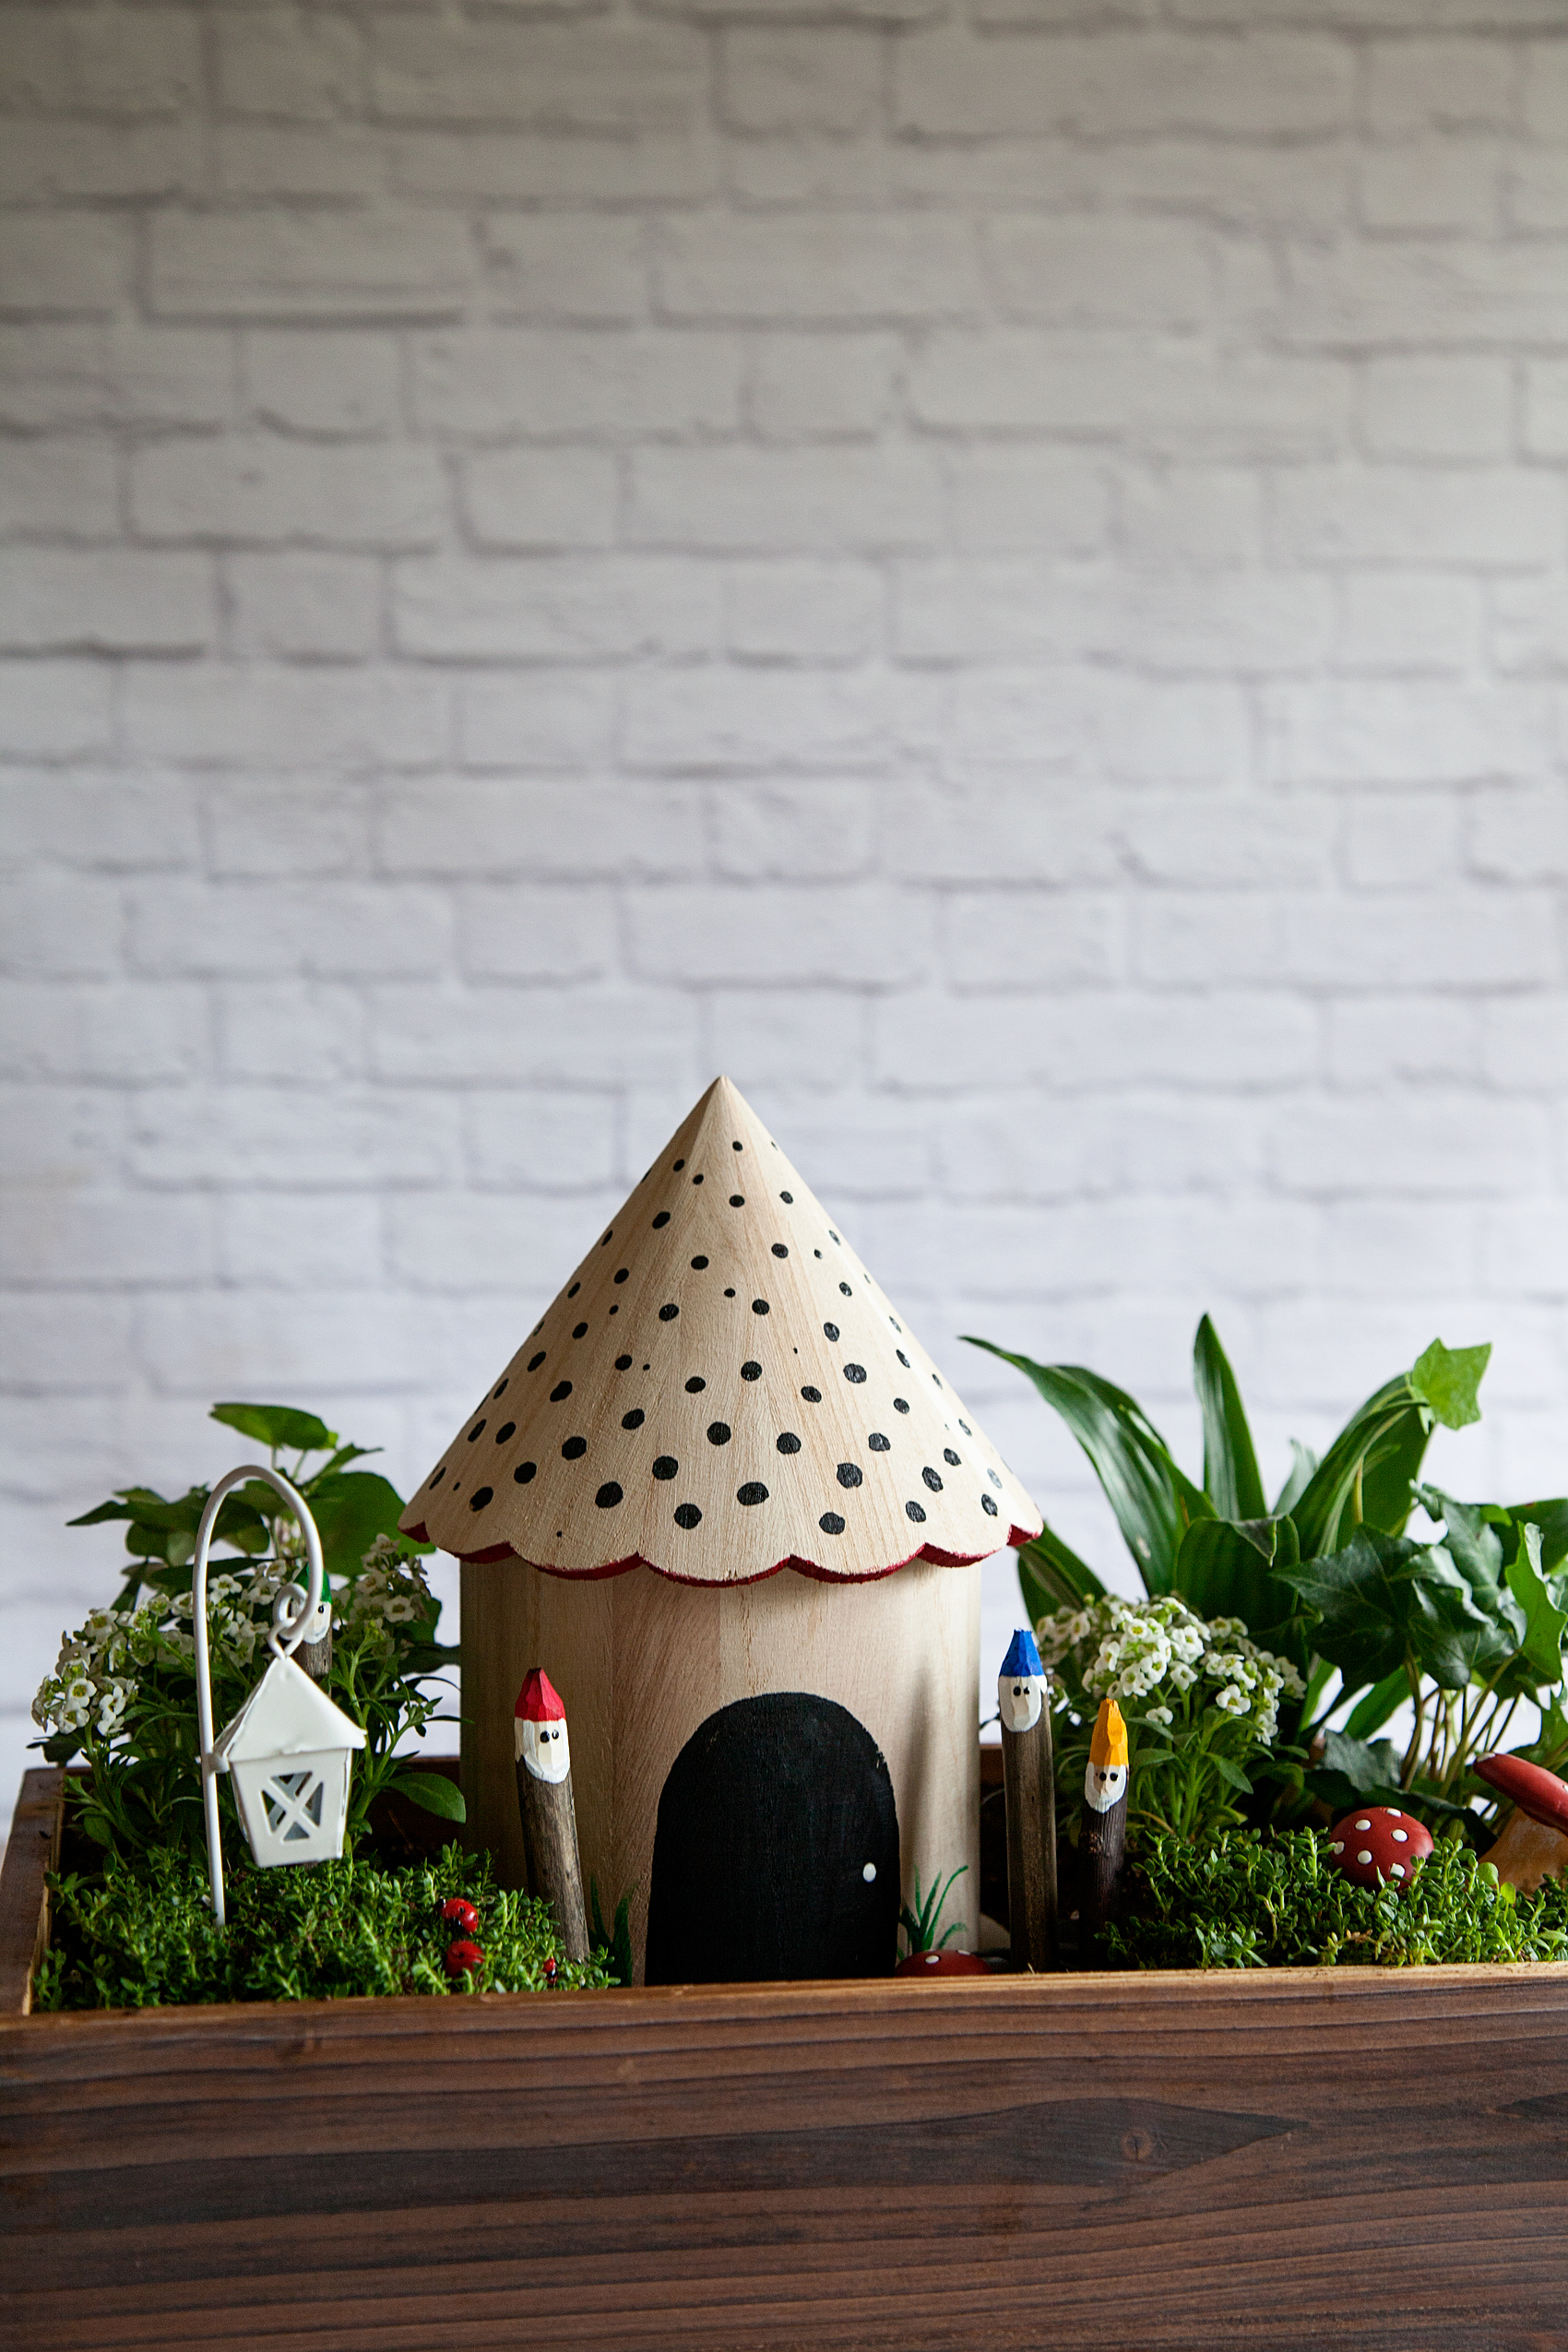
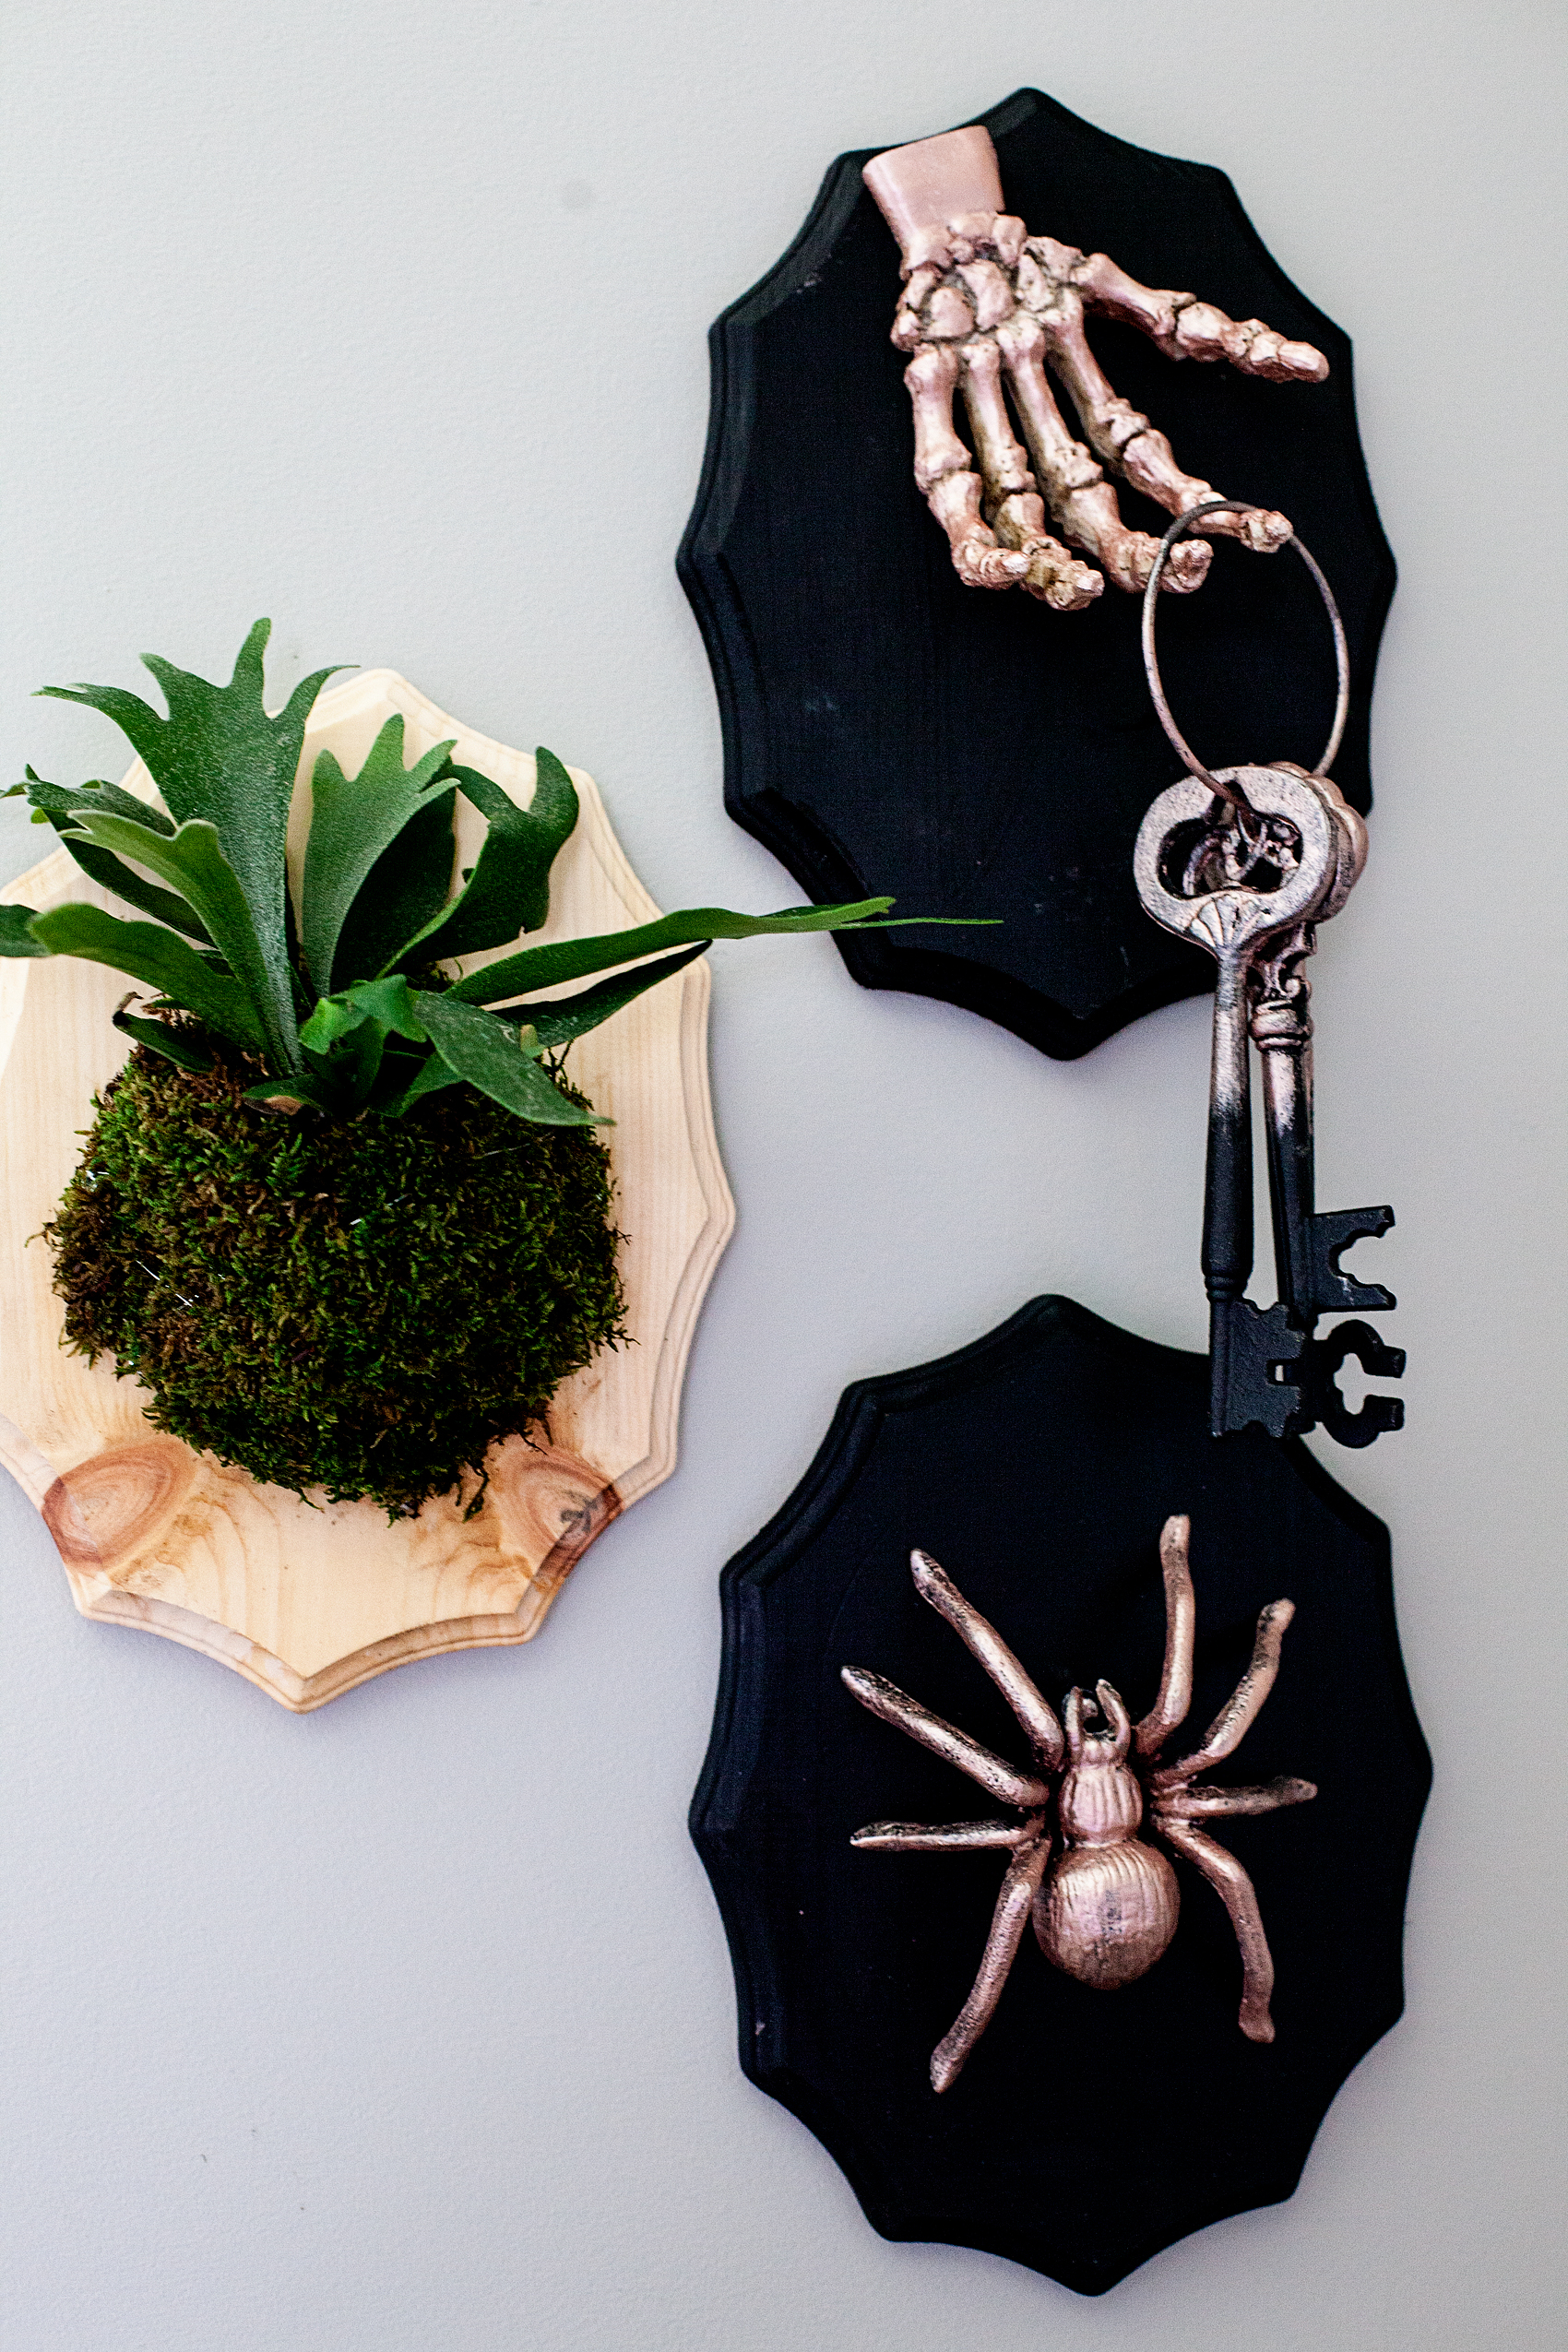
I love how these add a little creepy and yet class to my entryway if that’s even possible!

Painted Nautical Signal Flags for Boys Room Decor

7 · Jul 13, 2017 · Leave a Comment

Looking for a fun way to dress-up your boys room? Vintage Nautical is one of my favorite ways to decorate for my little guy. Come learn how I created these painted nautical signal flags for our little guy’s room…

Looking for a fun way to dress-up your boys room? Vintage Nautical is one of my favorite ways to decorate for my little guy. Come learn how I created these painted nautical signal flags for Gage's room... WhipperBerry

• This post brought to you by Michaels •

I’ve always been inspired by vintage nautical pieces. All of the fun gadgets and gizmos, the style of the ships, the anchors and I especially love vintage nautical signal flags.

Vintage nautical signal flags

One of my picker friends here in Nebraska does a fabulous job collecting vintage nautical items. Here are a few of Cody’s from The West Place, vintage nautical flags among other items.

Cody from the West Place

Aren’t they cool?! I purchased a flag from him about a year ago with the intention of using it for my little boy’s room in our new house. The one that I have is (if you look at the chart above) the letter “Z”. It’s colors are amazing! The perfect red, blue, mustard yellow and black. I’m using that as my inspiration for Gage’s room.

If you’re following along, Gage and I introduced you to Davy Jones, Gage’s new octopus wall art for his room…

Create this fun DIY Octopus Wall art for your favorite nautical themed room. This one is going into my son’s vintage nautical room and it’s going to look fabulous! Created by WhipperBerry via @decoArt

24137_SO_July_MarthaPaint_B

I thought it would be fun to create a few more nautical signal flags to go along with Davy Jones. I was thrilled to find out that the Michaels Maker challenge for July is craft paint! Of course this is a perfect opportunity to create these fun flags using a wood canvas that I found at Michaels and the NEW DecoArt Americana Premium Acrylic Paints.

DIY-Octopus-Wall-Art-3

If you don’t already know, Michaels has all kinds of new craft paints in-store now. You need to check it out! They have acrylics, milk paint, chalk paint… All kinds of specialty paints. Not to mention stencils, canvases, brushes and more. Painting with stencils makes things really easy so definitely pick those up. I actually just painted my front door with paint that I purchased at Michaels, the new DecoArt Curb Appeal paint. Who knew you could find that kind of paint at Michaels!

I’m also totally in love with these Art Wood Panels that you can find at Michaels. I wanted my flags to look vintage and a normal canvas wouldn’t be able to create the kind of look I was going for. Nor could I find wood that would look somewhat like a flag. Other wood options would add a lot more bulk and I didn’t want that. This wood canvas is perfect.

Gage and I talked it over and decided that we would create flags for the letters W-X-Y to go with our actual Z flag.

Looking for a fun way to dress-up your boys room? Vintage Nautical is one of my favorite ways to decorate for my little guy. Come learn how I created these painted nautical signal flags for Gage's room...

Supplies for the Painted Nautical Signal Flags

DecoArt Premium Acrylic Paint

  • Prussian Blue Hue
  • Yellow Oxide
  • Titanium White
  • Cadmium Red Hue

DecoArt Premium Medium • Matte

Artist Loft Art Wood Panel Value Pack

Painter tape

Sponge Brushes

Painted Nautical Signal Signs Instructions

Each flag is going to have a different process due to the designs of the signal flags. You will have to figure out how to best create the design for the letters you create. I’ll show you how I created the letter “Y” flag.

First, I painted the base layer in Yellow Oxide and let it dry. I only did one coat of paint because I was planning on distressing the sign so why make my job harder with an extra layer of paint.

Next, rather than busting out my mad math skills (of which I have none) I layed 2 inch painters tape diagonally across the entire board with the tape bumping right up to the base of the other tape.

Looking for a fun way to dress-up your boys room? Vintage Nautical is one of my favorite ways to decorate for my little guy. Come learn how I created these painted nautical signal flags for Gage's room...

Then, I removed every other strip of tape to then create perfect diagonal stripes. I then painted the red stripes on the board. For this stripe, I did paint two light layers of paint. I wanted a truly bold color even though I was still going to be distressing the board.

Looking for a fun way to dress-up your boys room? Vintage Nautical is one of my favorite ways to decorate for my little guy. Come learn how I created these painted nautical signal flags for Gage's room...

After the paint was dry, I pulled the tape to reveal the PERFECT stripes!

Looking for a fun way to dress-up your boys room? Vintage Nautical is one of my favorite ways to decorate for my little guy. Come learn how I created these painted nautical signal flags for Gage's room...

I love how you can still see the wood grain on these art boards. Not to mention, look at those beautiful bold colors. I love this paint! Next, I used my detail sander to distress the board a bit to give this faux flags the vintage look.

Looking for a fun way to dress-up your boys room? Vintage Nautical is one of my favorite ways to decorate for my little guy. Come learn how I created these painted nautical signal flags for Gage's room...

I LOVE how they turned out. I can’t wait to see how they look in Gage’s room when it’s finished.

Looking for more painting inspiration? Michaels has you covered. You can follow along on The Glue String (the Michaels blog) OR, checkout these other projects from the other Michaels Makers…

An InLinkz Link-up

DIY Octopus Wall Art

6 · Jul 10, 2017 · 2 Comments

Create a simple DIY octopus wall art piece with The NEW DecoArt Americana® Premium Artist Acrylics found at Michaels.

Create this fun DIY Octopus Wall art for your favorite nautical themed room. This one is going into my son’s vintage nautical room and it’s going to look fabulous! Created by WhipperBerry via @decoArt

•  This DIY Octopus Wall Art Post is brought to you by DecoArt  •

Back in December we purchased our PERFECT home! Perfect for everyone but our little guy Gage. His room was a rather bold pink and purple. This kiddo has spent 7 long years with only sisters. We have a soccer ball and a volleyball that he plays with and they are hand-me-downs from his sisters and they are, you guessed it… PINK. To say that the little guy is over all of the pink, is an understatement. This week we are starting his room transformation and we are going vintage nautical for the theme.

Now, any vintage nautical themed room NEEDS a cool piece of art. This year in Gage’s 1st grade class he worked on a really cool report on his favorite sea creature, the octopus. We decided he needed a cool octopus for his room and set to work to create “Davy Jones,” Gage new octopus friend.

Gage’s sister Jane helped to create this with me using the NEW DecoArt Americana Premium Artist Acrylics and Mediums.

Create this fun DIY Octopus Wall art for your favorite nautical themed room. This one is going into my son’s vintage nautical room and it’s going to look fabulous! Created by WhipperBerry via @decoArt

DIY Octopus Wall Art Supply List

  • DecoArt Americana® Premium Artist Acrylic Paint in Prussian Blue Hue, Dark Grey Value 3, Titanium White
  • DecoArt Americana® Premium Artist Acrylic Matte Medium
  • Art Wood Canvas (I found mine at Michaels)
  • Paint brushes
  • Paint rags
  • Jar of water
  • Pencil
  • eraser

Create this fun DIY Octopus Wall art for your favorite nautical themed room. This one is going into my son’s vintage nautical room and it’s going to look fabulous! Created by WhipperBerry via @decoArt

DIY Octopus Wall Art Instructions

The cool thing about this project is that you really don’t have to be an artist to create fun art for your home. With this type of vintage looking painting, perfection is NOT NEEDED. Whew! That’s my kind of painting!

First thing you need to to is to take your Titanium White and mix it with the Matte Medium.  Why would you mix the paint with a medium? Here is what the matte medium adds to the acrylic paint…

“Add Matte Medium to Americana Premium acrylics to create a matte finish, extend color, increase transparency, and enhance color blending. Can also be used as a clear coat for a matte finish. It is water-based and fast-drying.”

Pretty cool huh? Now if you don’t want the paint to dry too fast, you want to have more time to work with it, you may want to use and Extender Medium…

“Add Extender Medium to slow the drying time of Premium Acrylics. It can also be safely added to the other mediums in the line. Any time you want the paint or medium to have more working time add some Extender to it. Extender also allows you to perform oil techniques using acrylic paint.”

Once you have your white and matte medium mixed together, roughly paint on a white surface onto your boards. That reminds me… I used 2 of the 16×20 art boards to create a longer octopus to fill up more wall space. Because we all know… Davy Jones needs to be huge!

Create this fun DIY Octopus Wall art for your favorite nautical themed room. This one is going into my son’s vintage nautical room and it’s going to look fabulous! Created by WhipperBerry via @decoArt

I left a boarder around the edge leaving some of the raw wood. But, if you notice, it’s all really rough. We aren’t looking for perfect lines here.

Next, Hannah sketched the octopus onto the boards with a pencil. Again, we aren’t looking for perfect. She even traced the legs off of the white section to make them look like they were coming off the canvas. Don’t trust your sketching skills? No worries, Angie from The Country Chic Cottage shares a great tutorial on how to use transfer paper to create a good sketch for sign making on the DecoArt Blog. It’s PERFECT for those of us who are artistically challenged.

Again, we added the Americana® Premium Matte Medium to the Prussian Blue Hue Americana® Premium Artist Acrylic Paint and mixed it well.

Create this fun DIY Octopus Wall art for your favorite nautical themed room. This one is going into my son’s vintage nautical room and it’s going to look fabulous! Created by WhipperBerry via @decoArt

Then we set to work painting good ole’ Davy Jones the Octopus for Gage’s room…

Create this fun DIY Octopus Wall art for your favorite nautical themed room. This one is going into my son’s vintage nautical room and it’s going to look fabulous! Created by WhipperBerry via @decoArt

Create this fun DIY Octopus Wall art for your favorite nautical themed room. This one is going into my son’s vintage nautical room and it’s going to look fabulous! Created by WhipperBerry via @decoArt

I wanted as much texture as possible so we tried to create really rough brush strokes. I was really impressed with how fast the paint dried, it was so easy to use!

Next, we painted on rough circles for his tentacles and eyes. Again, we wanted things to look really rough. That’s why this type of project is so good for beginner artist. That leads me to the Americana® Premium Acrylic Paint, here’s why is it the perfect type of paint for this application…  Americana® Premium™ acrylics provide a medium-bodied formula for the hobbyist-artist at an affordable price point. Its satin-sheen formula was created to work well on canvas, and other artistic surfaces. Its simplicity of design and use takes the intimidation factor out of fine art painting. Use it alone or mix with mediums to create original pieces of art at a budget-friendly price. It’s the perfect, easy to use, budget friendly paint for this kind of home decor project.

Create this fun DIY Octopus Wall art for your favorite nautical themed room. This one is going into my son’s vintage nautical room and it’s going to look fabulous! Created by WhipperBerry via @decoArt

I’m even thinking of drilling some holes into the two boards and connecting them with rope. I think that will look really cool. I’ll let you know as we get started on Gage’s room. Davy Jones will for sure make a few more appearances!

Looking for more fun painting projects for the family here is another one from WhipperBerry that you might like…

Gnome Garden

Disclaimer • This post is sponsored by DecoArt. I receive product and payment to help create this fun project. Please remember, I will only share what I truly love and use all of the time.

Gnome Garden

4 · May 1, 2017 · 3 Comments

A Gnome Garden is the perfect project for the entire family! With a little imagination, a good container, plants, some sticks from your yard and a little DecoArt Patio Paint,  you can transform a simple garden into a gnome wonderland. Come learn how…Gnome Gardens are a fun trend that the whole family can participate in. Create your own Gnomes with some sticks and @decoart Patio Paint.

This Gnome Garden post brought to you by DecoArt

I have always been fascinated by gardening. Gardening is in my gene pool. I have a sister with a degree in horticulture & landscape design (gardening) and a mother who adores gardening. I SHOULD be an amazing gardener, right?

Well… I’m getting there. To be completely honest, that darn gardening gene is taking awhile to really kick into gear.  Every spring I bring home a new set of, what my husband likes to refer to as, “this years sacrifices!” What?

I’ve tried and tried for a few years to maintain some plants in my home and finally, I feel like I can mange some simple plant care. However, I am no expert. What I love to do is, create with my family and a gnome garden is PERFECT for that.

Gnome and Fairy Gardens are becoming all the rage these days. If you walk into Michaels right now, they have a whole section dedicated to these fun gardens with all kinds of gnomes and their accessories. I decided it would be fun to create a gnome garden together with the family using some budget friendly items like sticks from the backyard as our gnomes & a raw wood bird house that I found at Michaels as their cute home. Here’s what you’ll need to make one with your family…

Gnome Gardens are a fun trend that the whole family can participate in. Create your own Gnomes with some sticks and @decoart Patio Paint.

Gnome Garden Supply List

  • Garden container
  • rocks
  • soil
  • 7-8 small plants
  • 4-5 sticks roughly 6 inches tall
  • DecoArt Patio Paint
    • Suggested Colors
    • Tuscan Red
    • Marigold Yellow
    • Tango Blue
    • Mistletoe Green
    • Cloud White
    • Wrought Iron Black
  • Small round tip paint brush
  • Small flat tip paint brush
  • pencil
  • a sharp whittling knife
  • jar of water
  • paper towels
  • small decorative rocks
  • colored decorative sand
  • garden accessories

gnome-garden

Why Patio Paint is Perfect for Gardens

Not all paint is created equal. Some paint is more durable than others and that’s alright, every type of paint has it’s purpose. What you are looking for with this project is a highly durable paint that is non-toxic, water based and adheres nicely to things that will likely be outdoors or will endure repeated watering like this project. The DecoArt Patio Paint is PERFECT for this! Here are the specifics…

  • No sealer required for a durable, long-lasting finish
  • Weather-proof
  • Satin finish
  • Scuff-resistant
  • Superior coverage
  • Will not crack or peel
  • Water-based and non-toxic
  • Easy to clean
  • Made in the USA

How to Create a Gnome Garden

Here’s a quick video to show you how easy it is to create a special gnome garden of your own…

Gnome Garden from Heather Thoming on Vimeo.

Isn’t that easy and fun for the family? Here’s the step by step…

  1. Place rocks at the bottom of your container. This helps with drainage for your plants. Plants love water, but they typically don’t like to sit in it all of the time. You’ll need to make sure they have proper drainage.
  2. Pour in your potting soil. Fill your container about 3/4 full.
  3. Plant your plants in the container with the lower plants in front and the taller toward the back. Keep in mind, you are trying to set a scene. If you are wondering what plants to use and how to maintain them, here’s a good article from the Empress of Dirt.
  4. Paint your birdhouse. Keep it simple or go crazy… This is your design. I wanted to keep our simple. We painted the door on the back of the bird house and added dots to the roof with a nice red peek-a-boo trim around the scalloped edge of the roof. I used the tip of the brush handle to create the dots on the roof.
  5. ADULT TASK • Whittle the end of your branches into a tip like a pencil. The top portion of the tip will be your gnomes hat. Keep in mind this task either needs to be done by an adult OR supervised by an adult. Gnome Gardens are a fun trend that the whole family can participate in. Create your own Gnomes with some sticks and @decoart Patio Paint.
  6. On one side of your stick, whittle a “U” shaped section for the face of your gnome.Gnome Gardens are a fun trend that the whole family can participate in. Create your own Gnomes with some sticks and @decoart Patio Paint.
  7. Using the DecoArt Patio Paint and your small flat brush, paint on your gnomes hat and let dry.
  8. Take the white paint and paint on your gnome’s beard. Basically in a “U” shape following the line of the face that you whittle in before. Set aside and let dry. Refer to video for more details on how to paint your gnome.
  9. Using a sharped pencil, dip your pencil tip into the black paint and gently place one gnome eye. Reapply the paint to your pencil tip and create another eye. Dipping into the paint twice will help to create eyes that a similar in shape and size. Set aside and let dry.
  10. Once dry, name your cute little little gnomes! Ours are Max (red), Sven (yellow), Einar (green) & Ole (blue). Then place them into your gnome garden.Gnome Gardens are a fun trend that the whole family can participate in. Create your own Gnomes with some sticks and @decoart Patio Paint.
  11. Using the small rocks and colored sand, create a walkway in front of the house.

Gnome Gardens are a fun trend that the whole family can participate in. Create your own Gnomes with some sticks and @decoart Patio Paint.

  • « Go to Previous Page
  • Page 1
  • Interim pages omitted …
  • Page 5
  • Page 6
  • Page 7
  • Page 8
  • Page 9
  • Interim pages omitted …
  • Page 17
  • Go to Next Page »

Primary Sidebar

Heather from Whipperberry
Hello... my name is Heather and I'm the creator of WhipperBerry a creative lifestyle blog packed full of great recipes and creative ideas for your home and family. I find I am happiest when I'm living a creative life and I love to share what I've been up to along the way... Come explore, my hope is that you'll leave inspired!

Footer

  • Privacy Policy
  • Crafts
  • Food
  • Gifts
  • Holidays
  • Home
  • Mom Life
  • Recipes
  • Travel

Copyright © 2026 · Seasoned Pro