• Skip to primary navigation
  • Skip to main content
  • Skip to primary sidebar
  • Skip to footer

Whipperberry

WhipperBerry • Your Home For Creative Inspiration

  • Home
  • Recipes
    • Starters
    • Easy Weeknight Dinners
    • Main Dish
    • Salads
    • Side Dish
    • Soups & Stews
    • Desserts
    • Breakfast
    • Miscellaneous
  • Tutorials
    • Creative Crafts
    • DIY Decor
    • Fabric Crafts
    • Food How-To
    • Jewlery
    • Paint Projects
    • Paper Art
    • Party Styling
    • Photography and Graphic Design
    • Silhouette
  • Holidays
    • Easter
    • Mother’s Day
    • Father’s Day
    • 4th of July
    • Halloween
    • Thanksgiving
    • Christmas
    • Valentine’s Day
  • Gift Ideas
    • Gifts For Everyone
    • Gifts for Dad
    • Mother’s day
    • For The Girls
    • For The Kids
    • Teacher Gift Ideas
    • Christmas
  • Printables
    • Holiday
    • Gift Idea
    • LDS Primary
  • Travel
  • About
    • Terms
  • Contact
  • Nav Social Menu

    • Facebook
    • Instagram
    • Pinterest
    • RSS
    • Twitter

Paint

Farmhouse Decor Makeover with Americana Matte Metallic Paint

6 · Apr 24, 2018 · 1 Comment

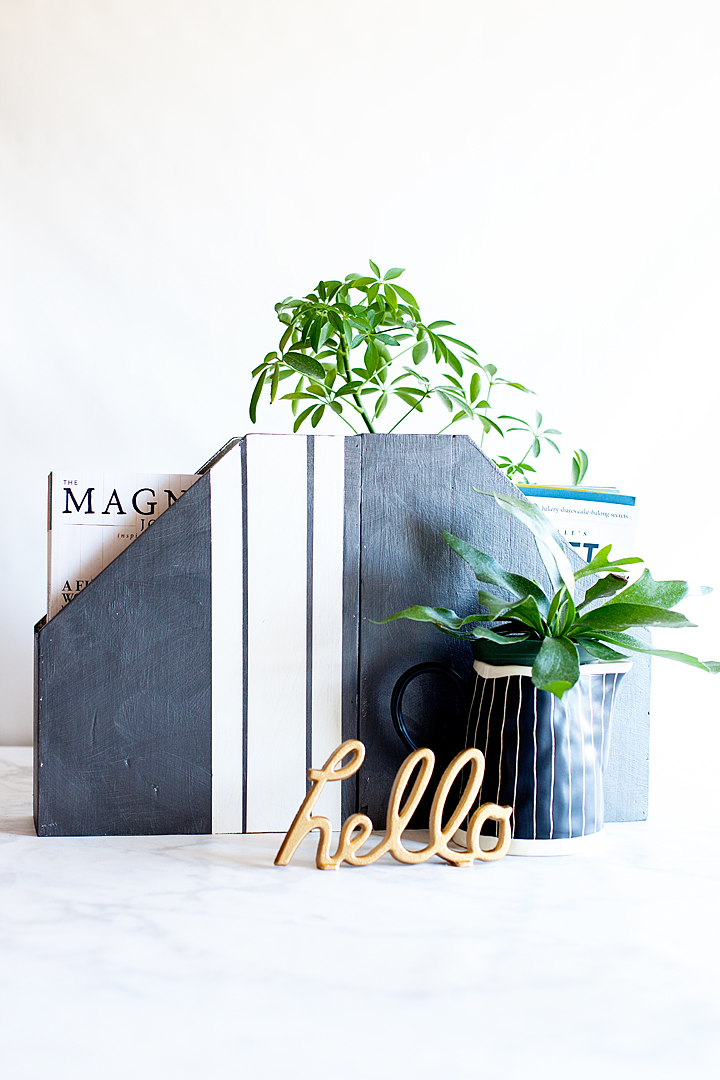
I know that you guys are right here with me… You have some old, outdated decor pieces that really play nice with today’s trends but, you still kind of like them. You like them enough to not get rid of them but, they need a little bit love. I have several pieces like that. I’ve had some wood magazine boxes that have been sitting around collecting dust so, when DecoArt introduced their AMERICANA DECOR® MATTE METALLICSâ„¢ PAINT I knew that I had a great way to update them a bit to fit my farmhouse/industrial style a little better.

+  This project is brought to you by DecoArt +
Makeover old decor with the @decoart AMERICANA DECOR® MATTE METALLICS™ PAINT

The Paint Makes the Project

It’s really true, the paint makes the project. I was a little wary of this project because I don’t typically lean towards the metallic side of the spectrum when it comes to painting. Don’t get me wrong, I do love a little glam but, typically not in my paint projects. But, this paint is magical! It’s a MATTE METALLIC and it’s fabulous. I actually worked the paint so that it looked like a brushed metal and I love it.

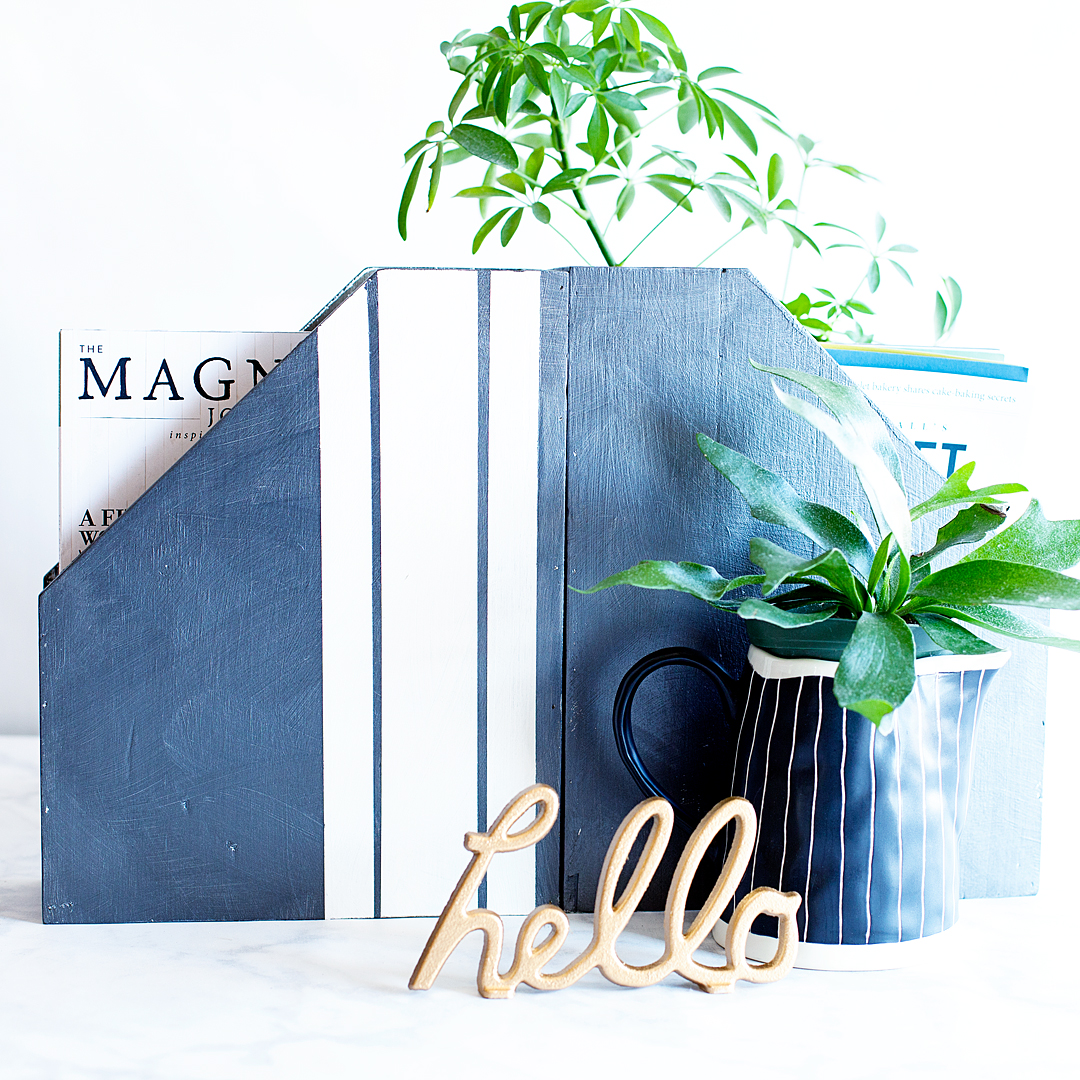
I decided to use the magazine boxes as more of a decorative spot for my shelves and decided to add some white stripes along with the Matte Metallic paint for more of a farmhouse look.

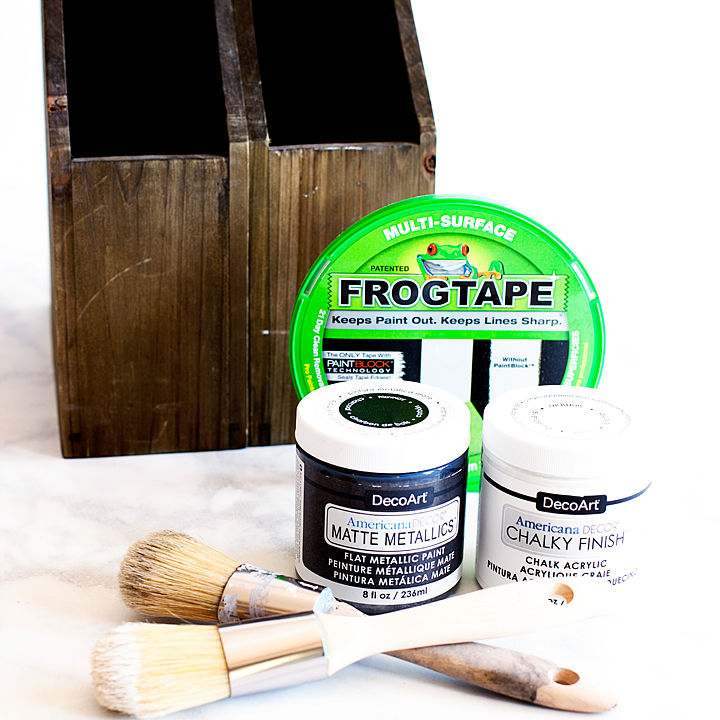
Supplies for Farmhouse Decor Makeover

Makeover old decor with the @decoart AMERICANA DECOR® MATTE METALLICS™ PAINT
  • DecoArt America Decor Matte Metallics – Charcol
  • DecoArt America Decor Chalky Finish – Everlasting
  • Paint Brushes
  • Frog Tape
  • A decor piece that needs a little love, like my worn-out magazine boxes

Instructions for Matte Metallic Paint Makeover

  1. Clean your decor item.
  2. Paint your base coat. When you’re painting with the Chalky Finish you want to paint in a cross-hatch pattern which helps give the nice chalky finish.
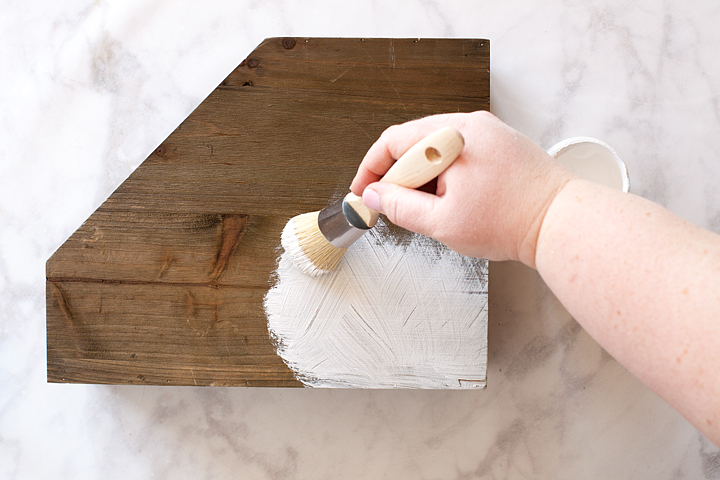
  3. Once you’ve finished with the white Chalky Finish coat, let it dry to the touch.
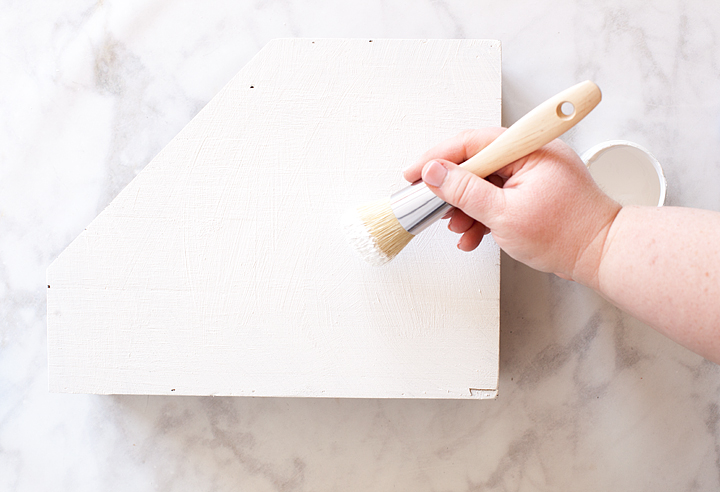
  4. Lightly sand your piece to smooth out the paint surface.
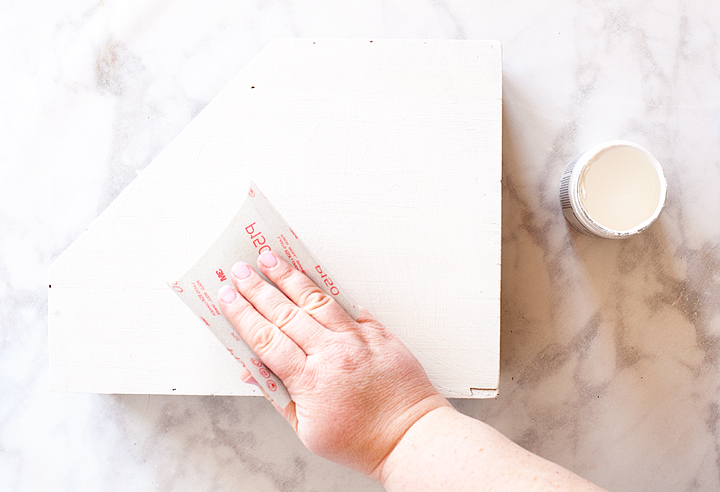
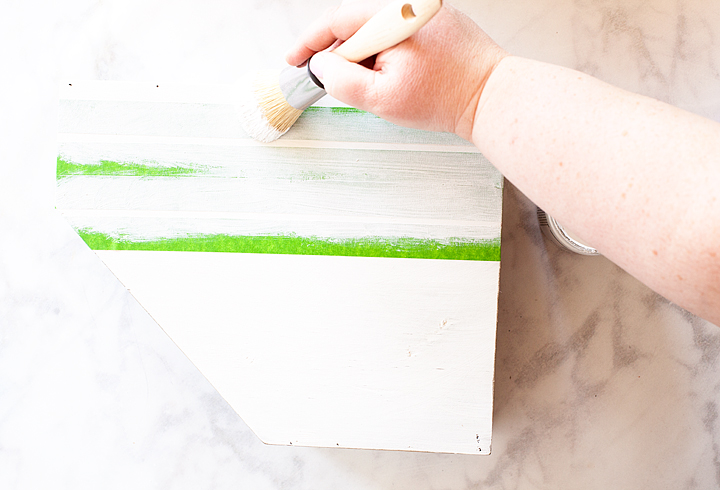
  5. Apply your Frog Tape in the stripe pattern that you like.
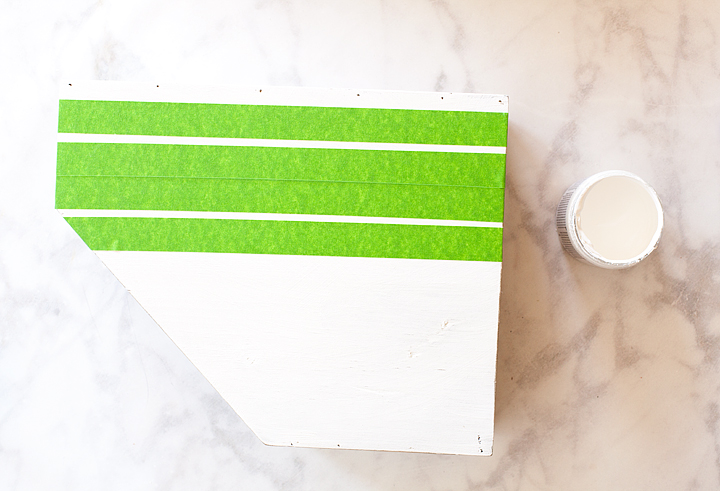
  6. To create a perfect line, cover the edges of the tape with the base white paint.
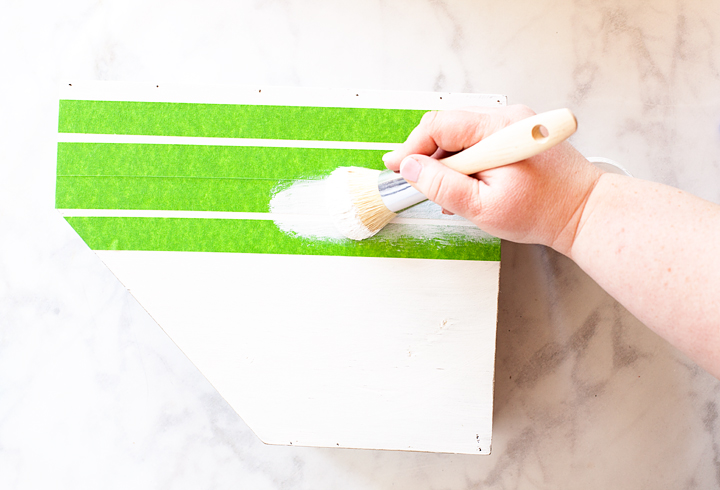
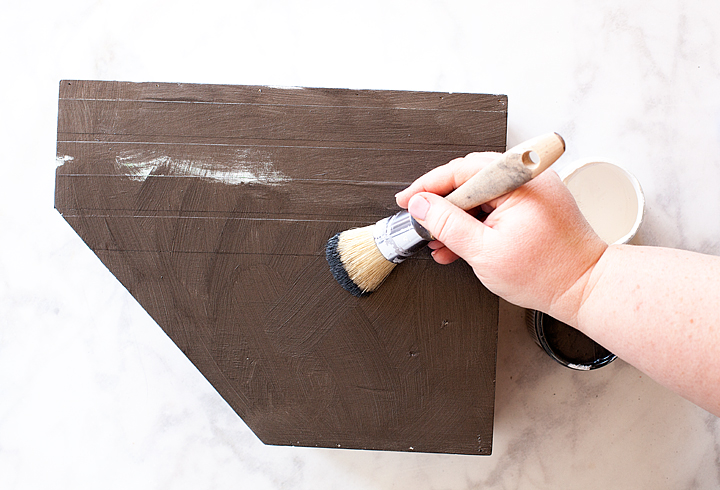
  7. Then, using the America Decor Matte Metallic paint, cover the surface of the decor piece.
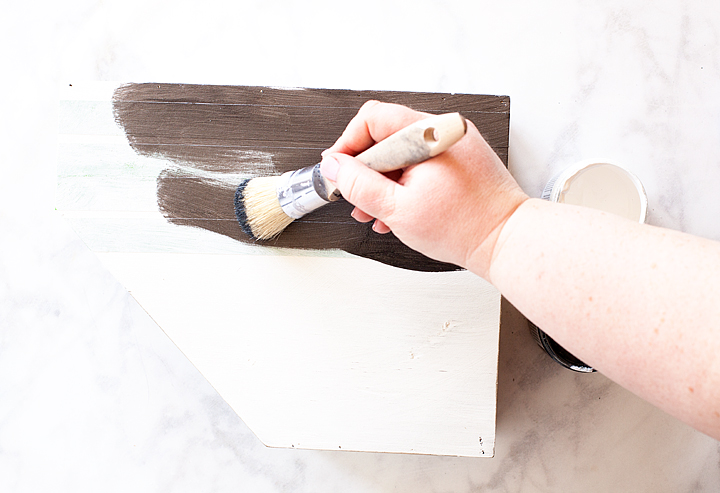
  8. Let the paint sit for a few minutes and then carefully pull the tape. It’s better to pull the tape when the paint is still slightly wet. That way you avoid possibly pulling dry paint up as well.
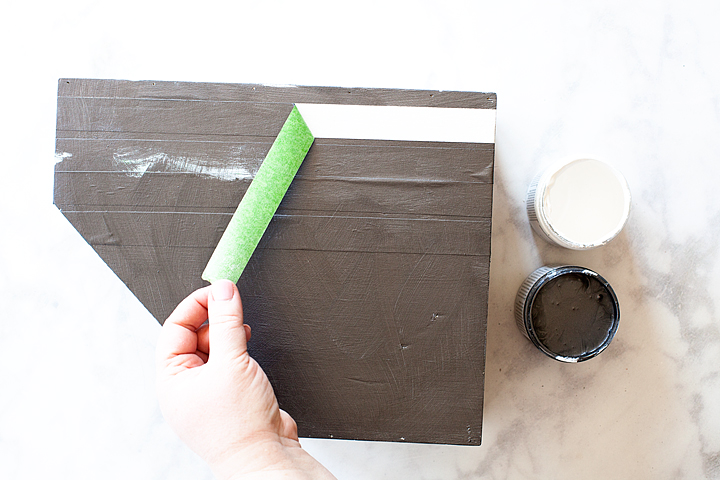
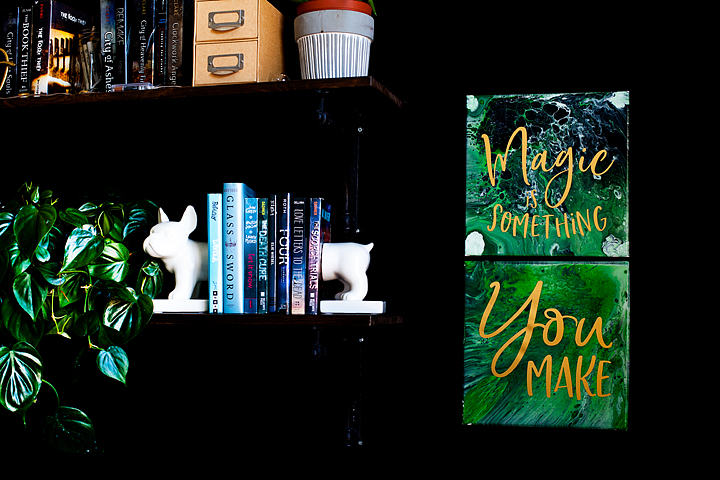
Now you’re all set with your new decor piece! I really like the look of the brushed metal that the Matte Metallic pant gives, it looks great! I’ve used my updated magazine boxes to store the collections of my favorite magazines that I like to keep around for inspiration. What would you like to update? For another great project idea… I’m over on the DecoArt Blog today, sharing my paint pouring project. I created a fun sign that is totally on trend for my daughters room. Come on over and see my video tutorial on how to make it! create signs out of canvas that has been transformed by paint pouring • whipperberry Disclaimer • I am a DecoArt Blogger and have received product and compensation for my time and efforts. All thoughts, ideas and opinions are my very own.    
Fox Storage Chest • DecoArt IKEA Moppe Challenge

18 · Jan 2, 2018 · 4 Comments

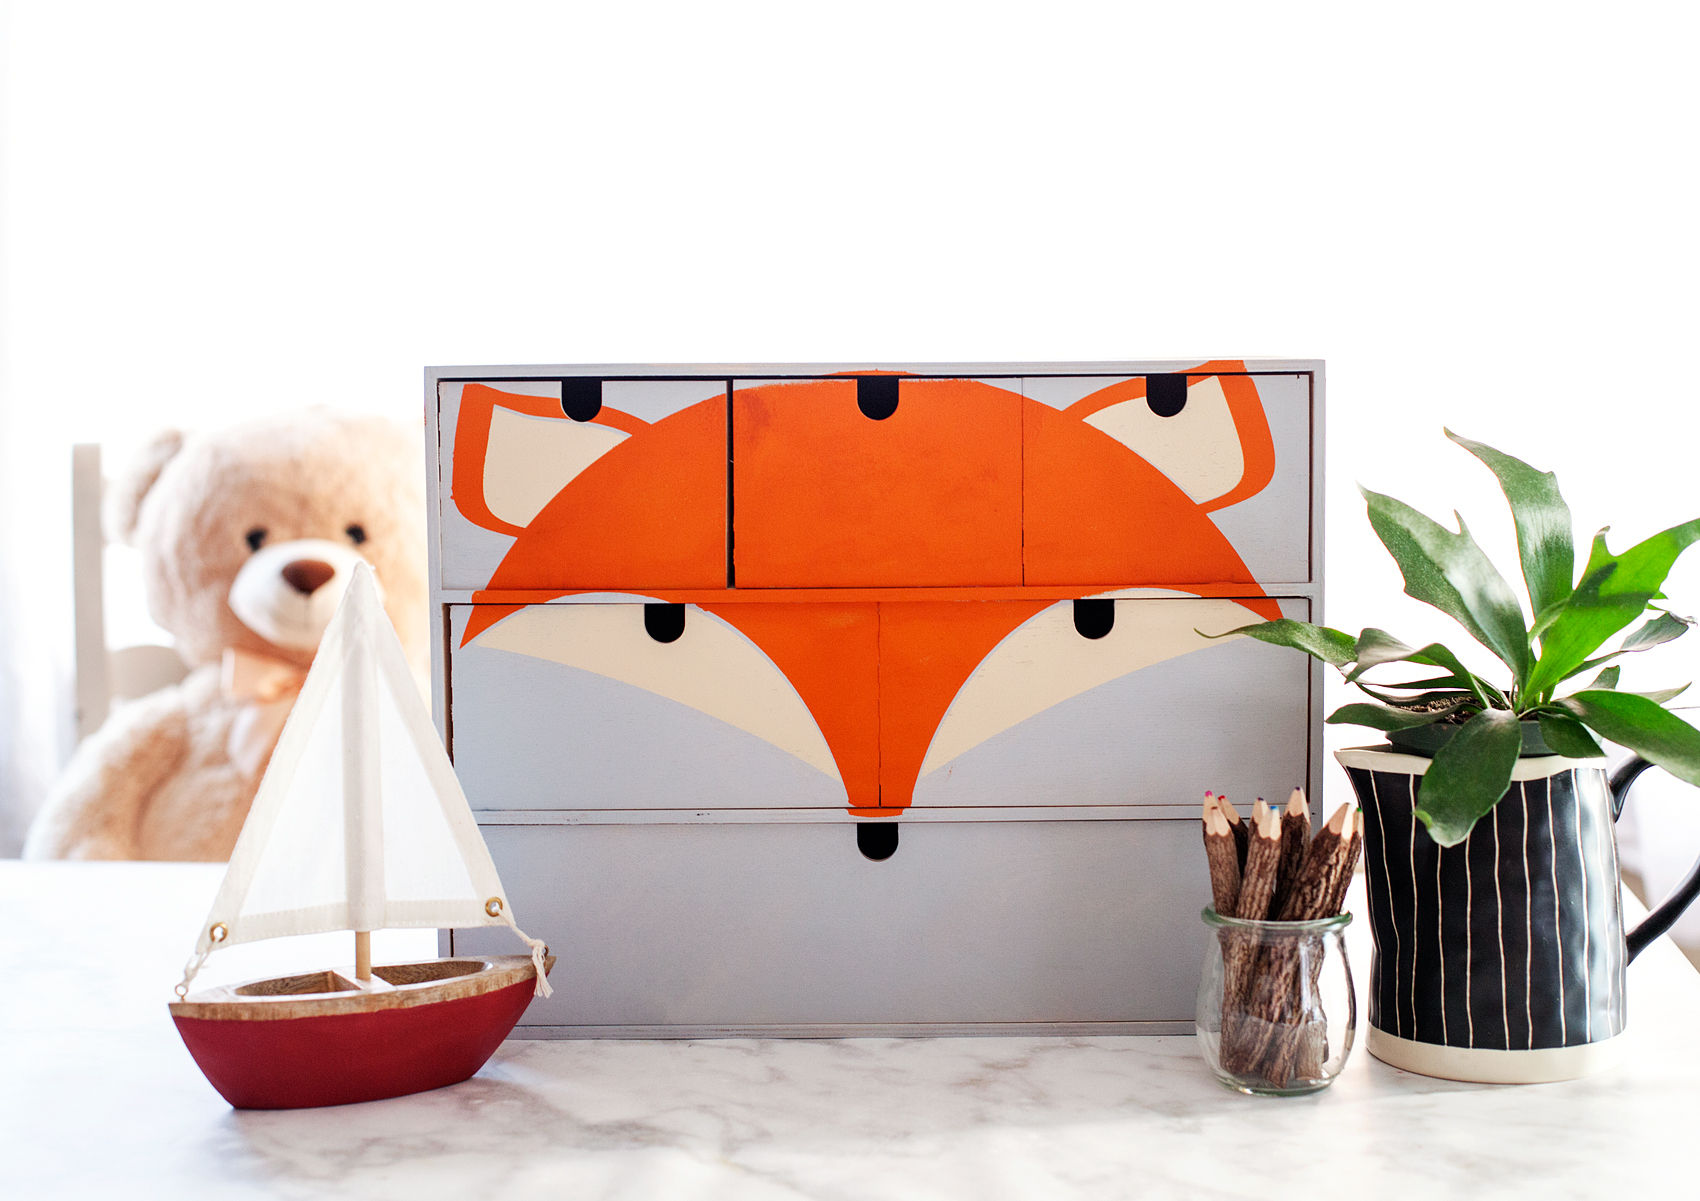
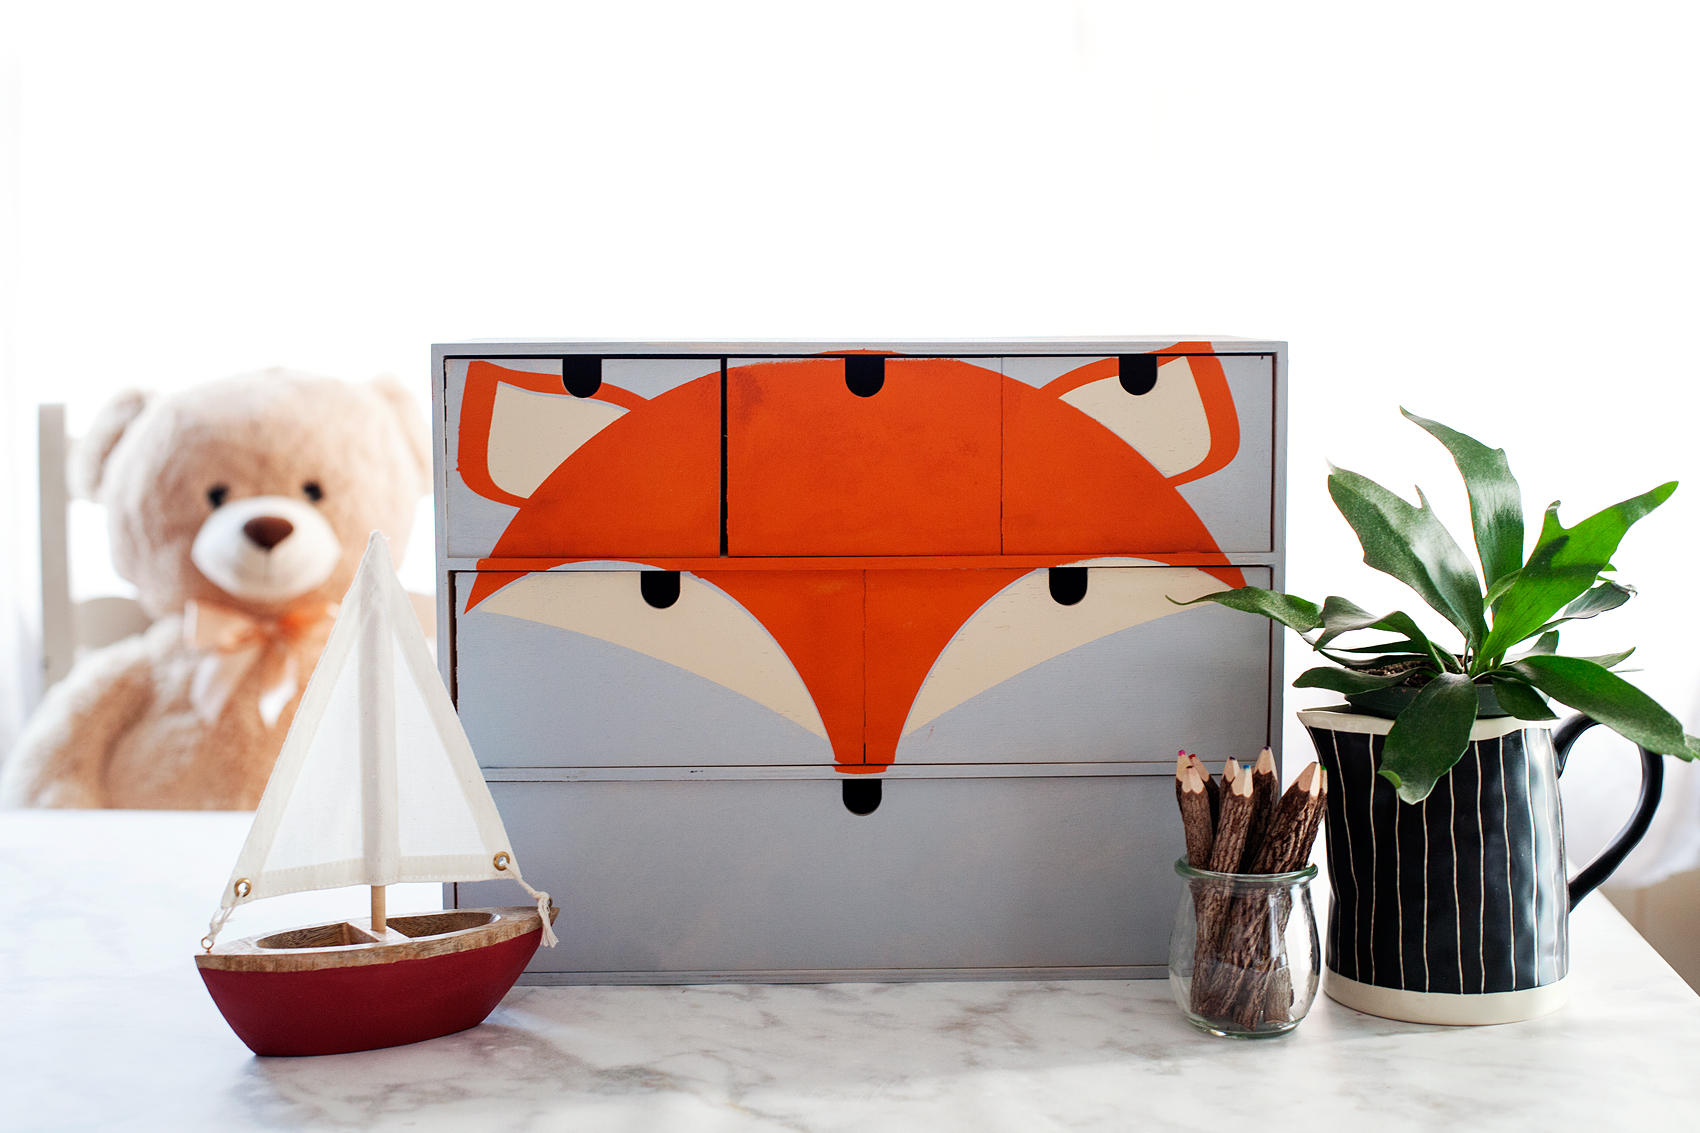
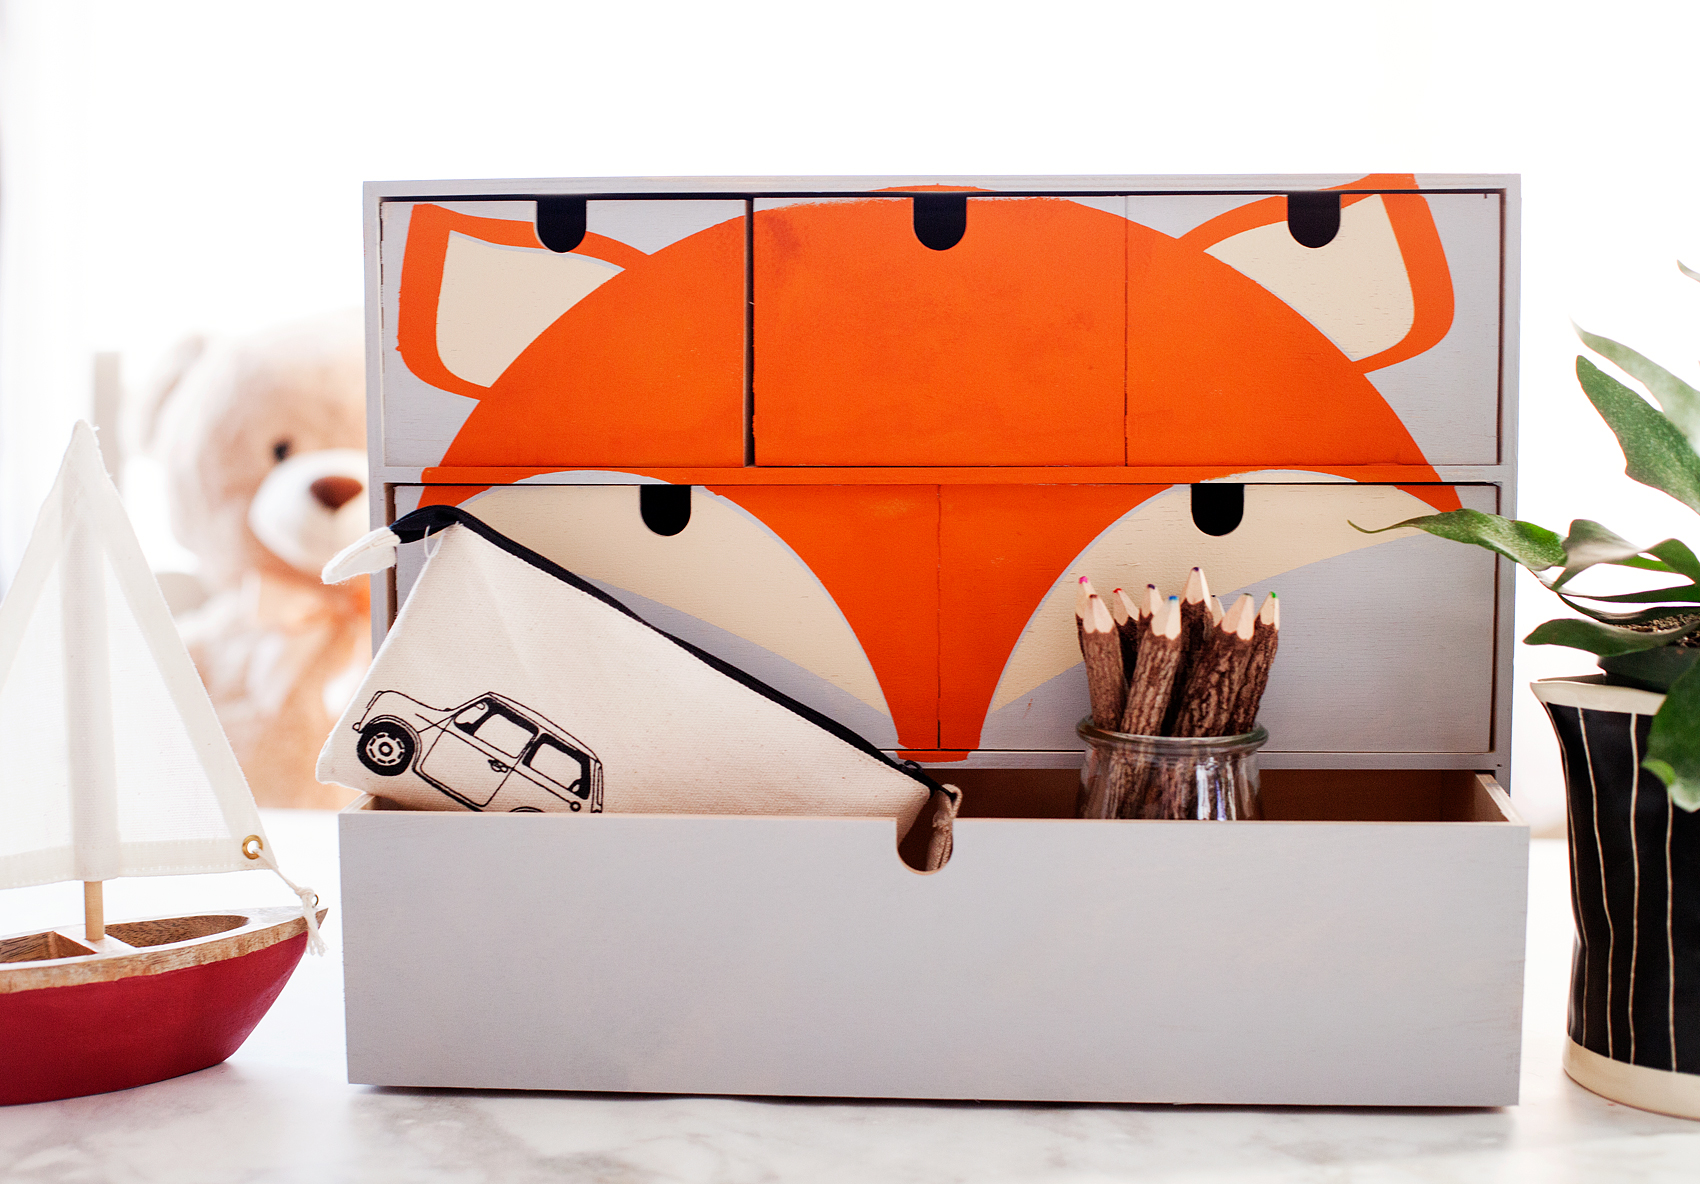
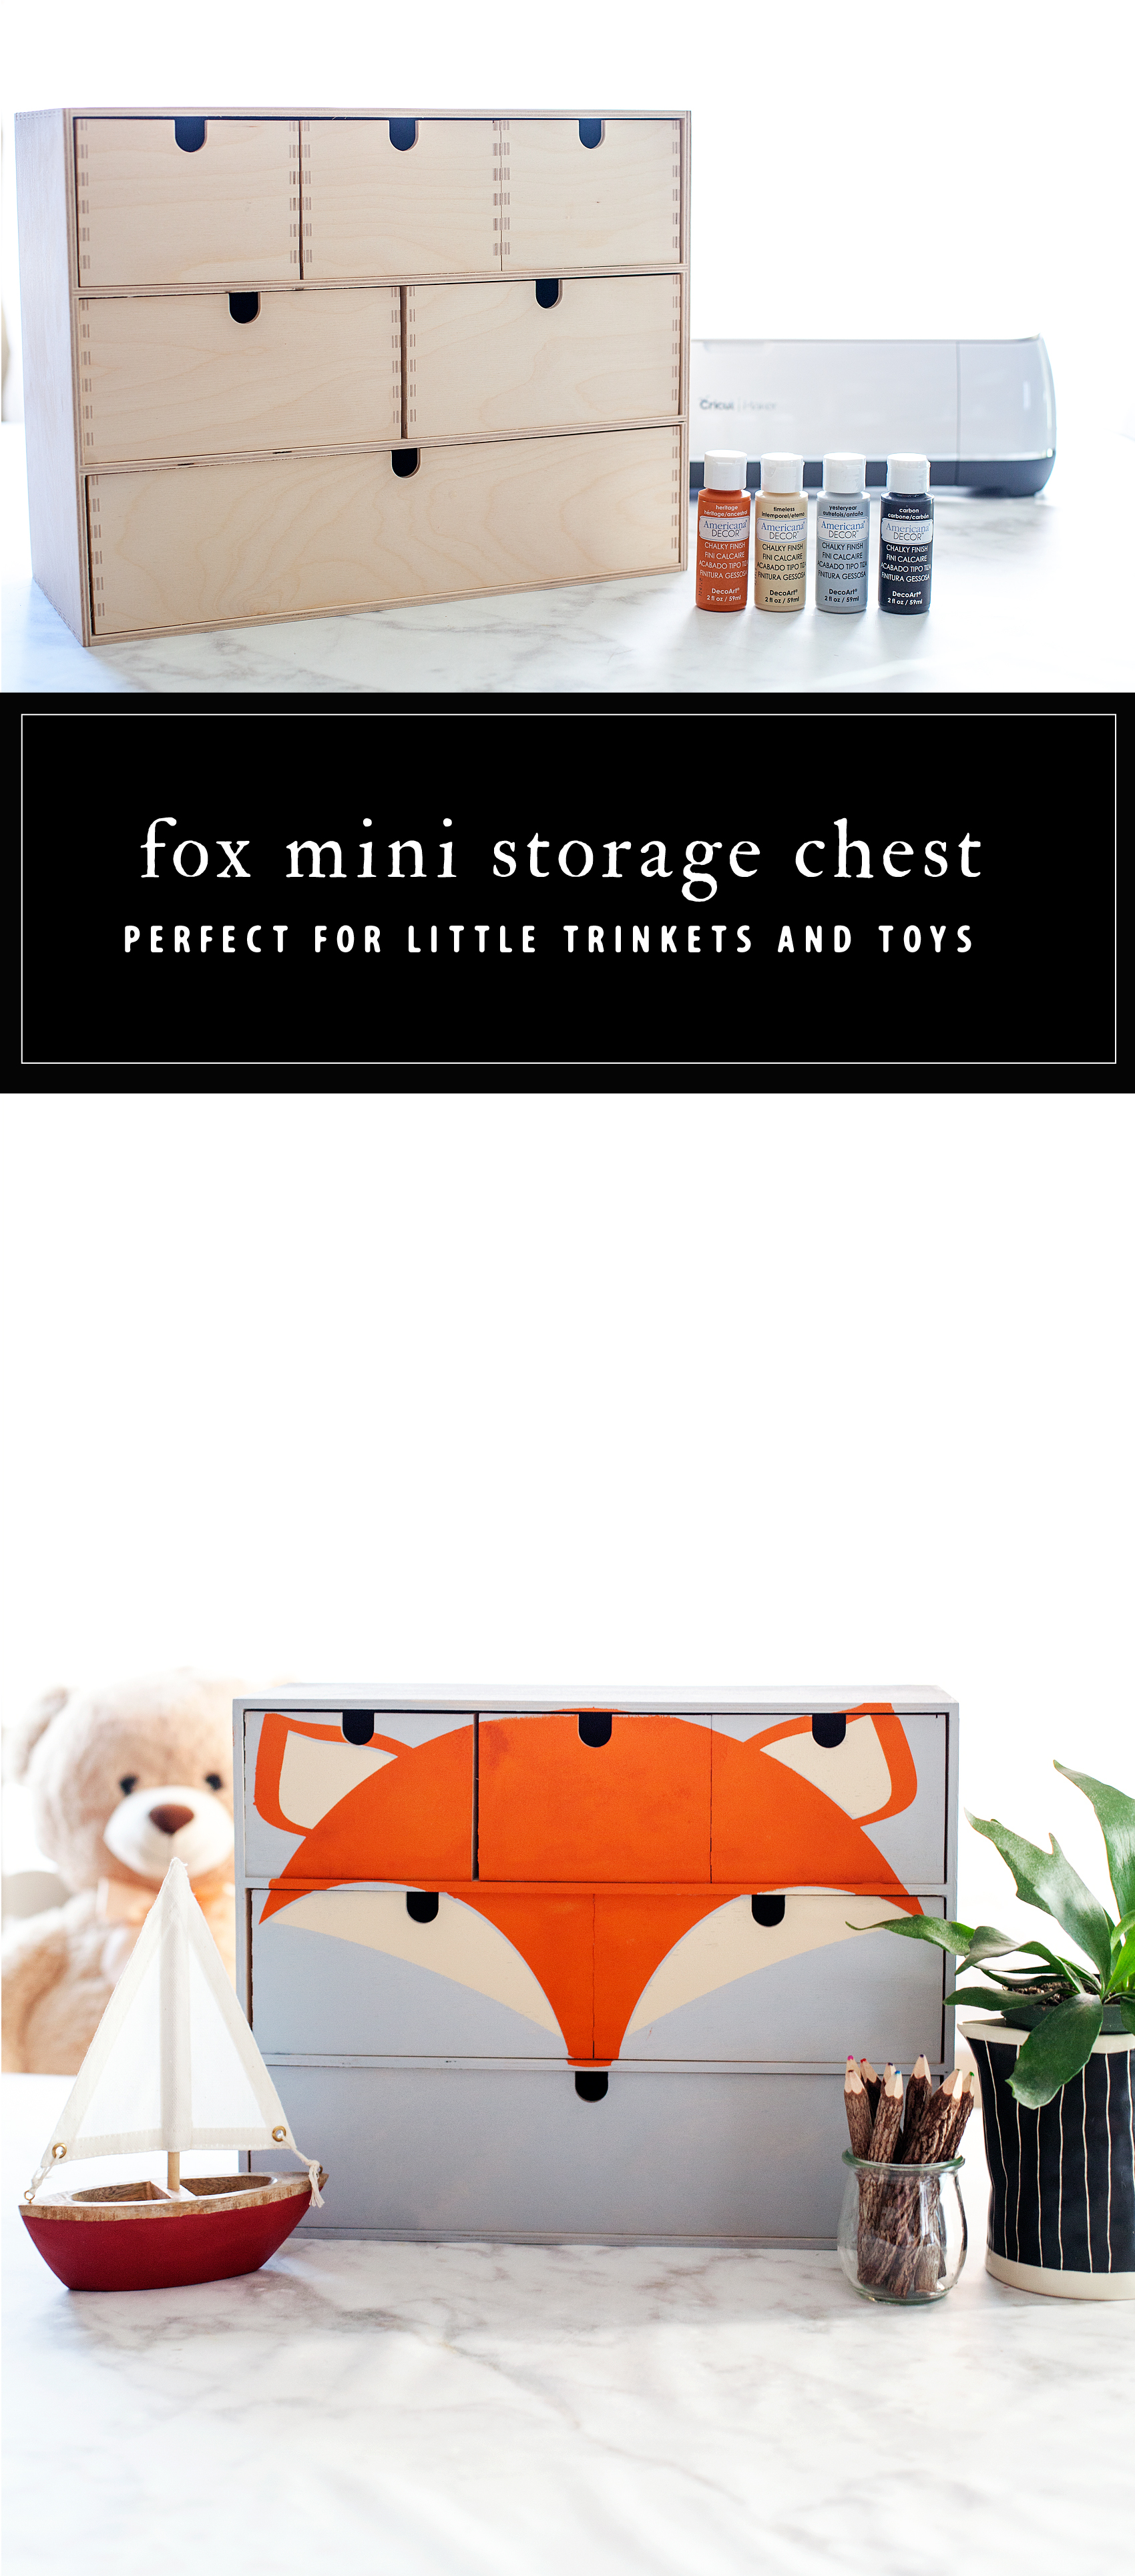
You guys, I’m so excited for today’s post! If you’ve been following along on my Instagram Stories, you’ll know that I’m in the process of making over my little guys room. I’m getting so close to being finished and I can’t wait to share what we’ve been working on. Today, I’m sharing one of the fun elements that we will be putting in his room to dress it up. It’s a cute Fox Storage Chest for all of his little trinkets and toys. You know all of the little bits and pieces that little boys tend to collect. The timing couldn’t be more perfect, DecoArt gave all of their bloggers a challenge for January. The challenge was to make over a mini storage chest from IKEA. The IKEA Moppe to be exact. It turned out so cute and I can’t wait to tell you all about it.

+ This post brought to you by DecoArt +Transform a simple mini storage chest from IKEA into this cute little fox storage chest for your little ones little toys and trinkets. I used some of the @decoart chalky finish paint along with my @cricut Maker to create this fun design for my little boys room • WhipperBerry

The Challenge

DecoArt sent out a challenge a little while back to transform this simple wood storage chest from IKEA any way that we would like. It may sound crazy but, I struggled coming up with a concept for the design. There were so many directions I could go; farmhouse, industrial, buffalo check, stripes… So many different ways I could take the design. This little chest sat in my craft room for weeks and I couldn’t figure out what I wanted to do. For some reason, the word challenge puts so much pressure on me and I freeze. Finally, I decided that before I could decide on a design, I needed to figure out what I wanted to do with the storage chest when I was finished. I am in the process of making over my little boys room and I decided this would be the perfect place for him to store his little things.

With that MAJOR decision made, I placed the storage chest on the table and looked at it for awhile. Again, paralyzed by all of the different directions I could go. Finally, you’re going to think I’m crazy, I was looking at the piece and all of a sudden, I saw a face looking back at me. A cute little fox face and that’s when I knew what I needed to do.

Transform a simple mini storage chest from IKEA into this cute little fox storage chest for your little ones little toys and trinkets. I used some of the @decoart chalky finish paint along with my @cricut Maker to create this fun design for my little boys room • WhipperBerry

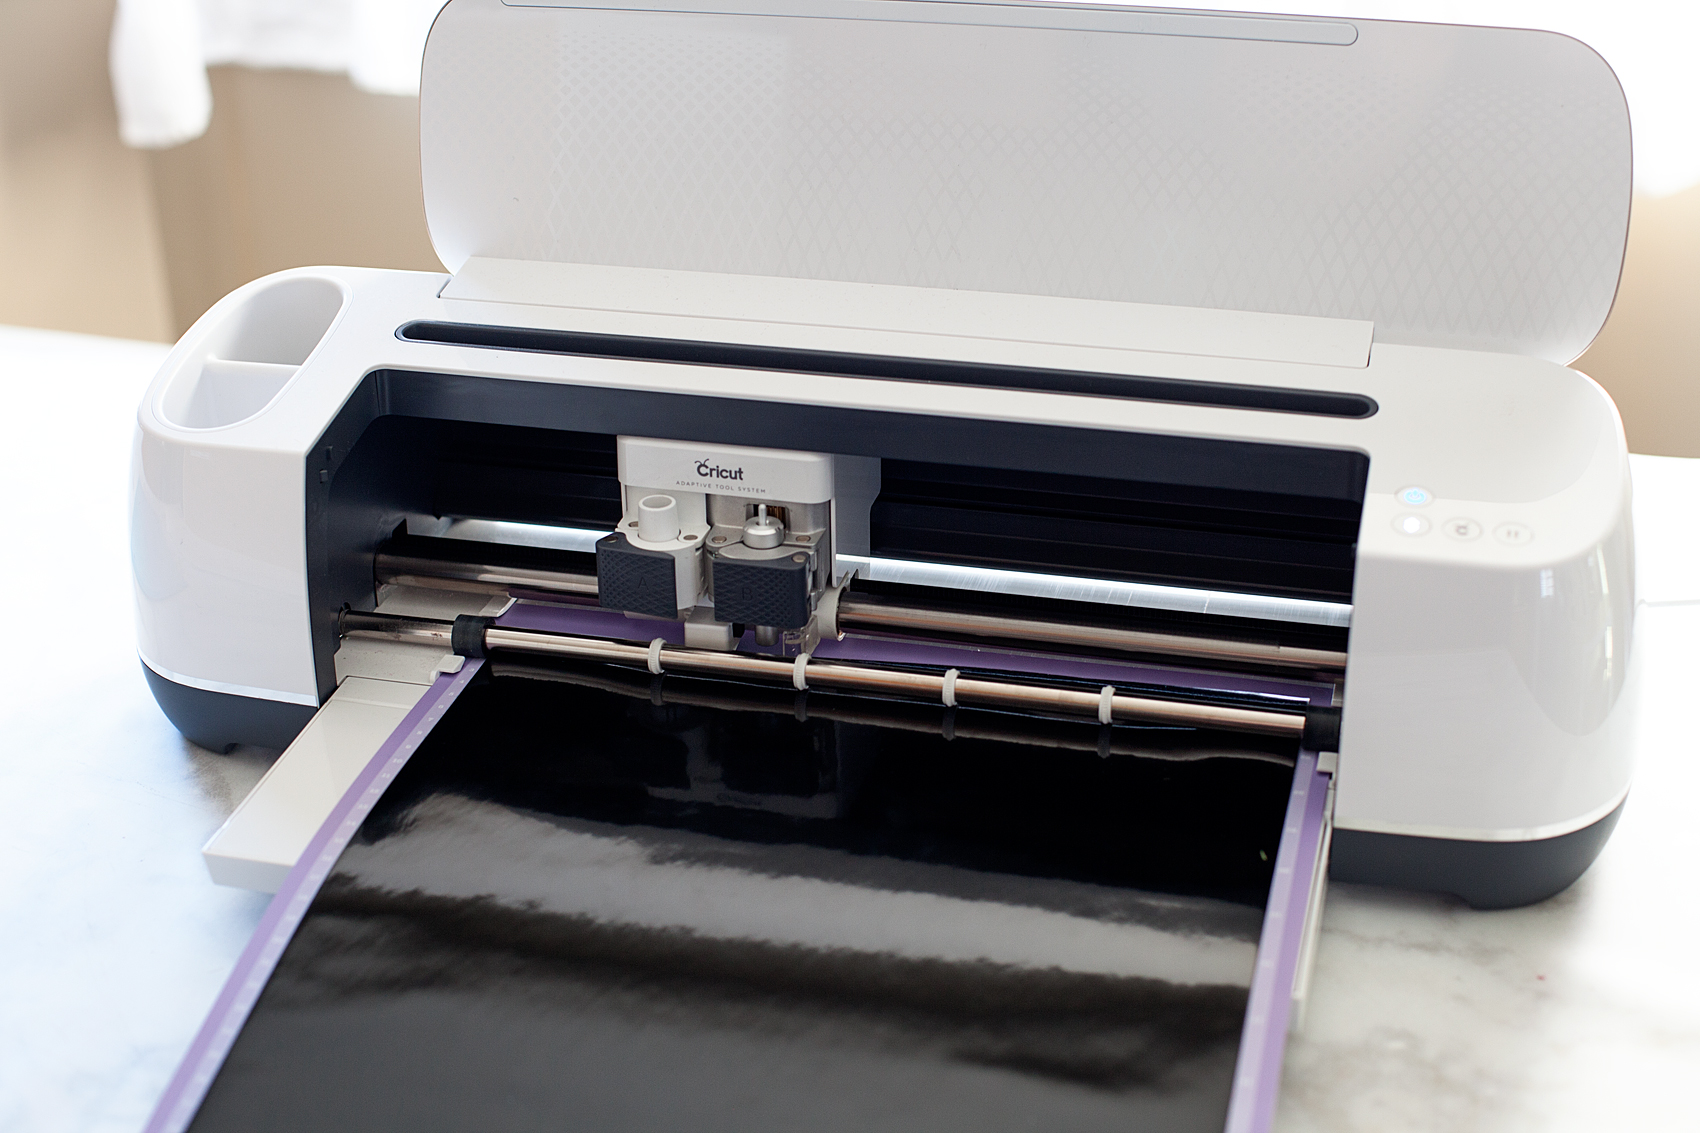
I set to work designing my fox and preparing it to cut on my Cricut Maker. As we have discussed before, I really have zero talent when it comes to freehand painting but, with the help of my Cricut, I can create some great stencils. I may not be able to freehand paint but, I have mad stenciling skills!

Supplies

I realize that this is a rather specific project but really, This stencil and the concept can work on all kinds of furniture or signs. So, don’t get discouraged if you don’t live close to an IKEA. You can find something that this will look super cute on. Here are the basic supplies.

  • Mini Storage Chest – We used the Moppe from IKEA
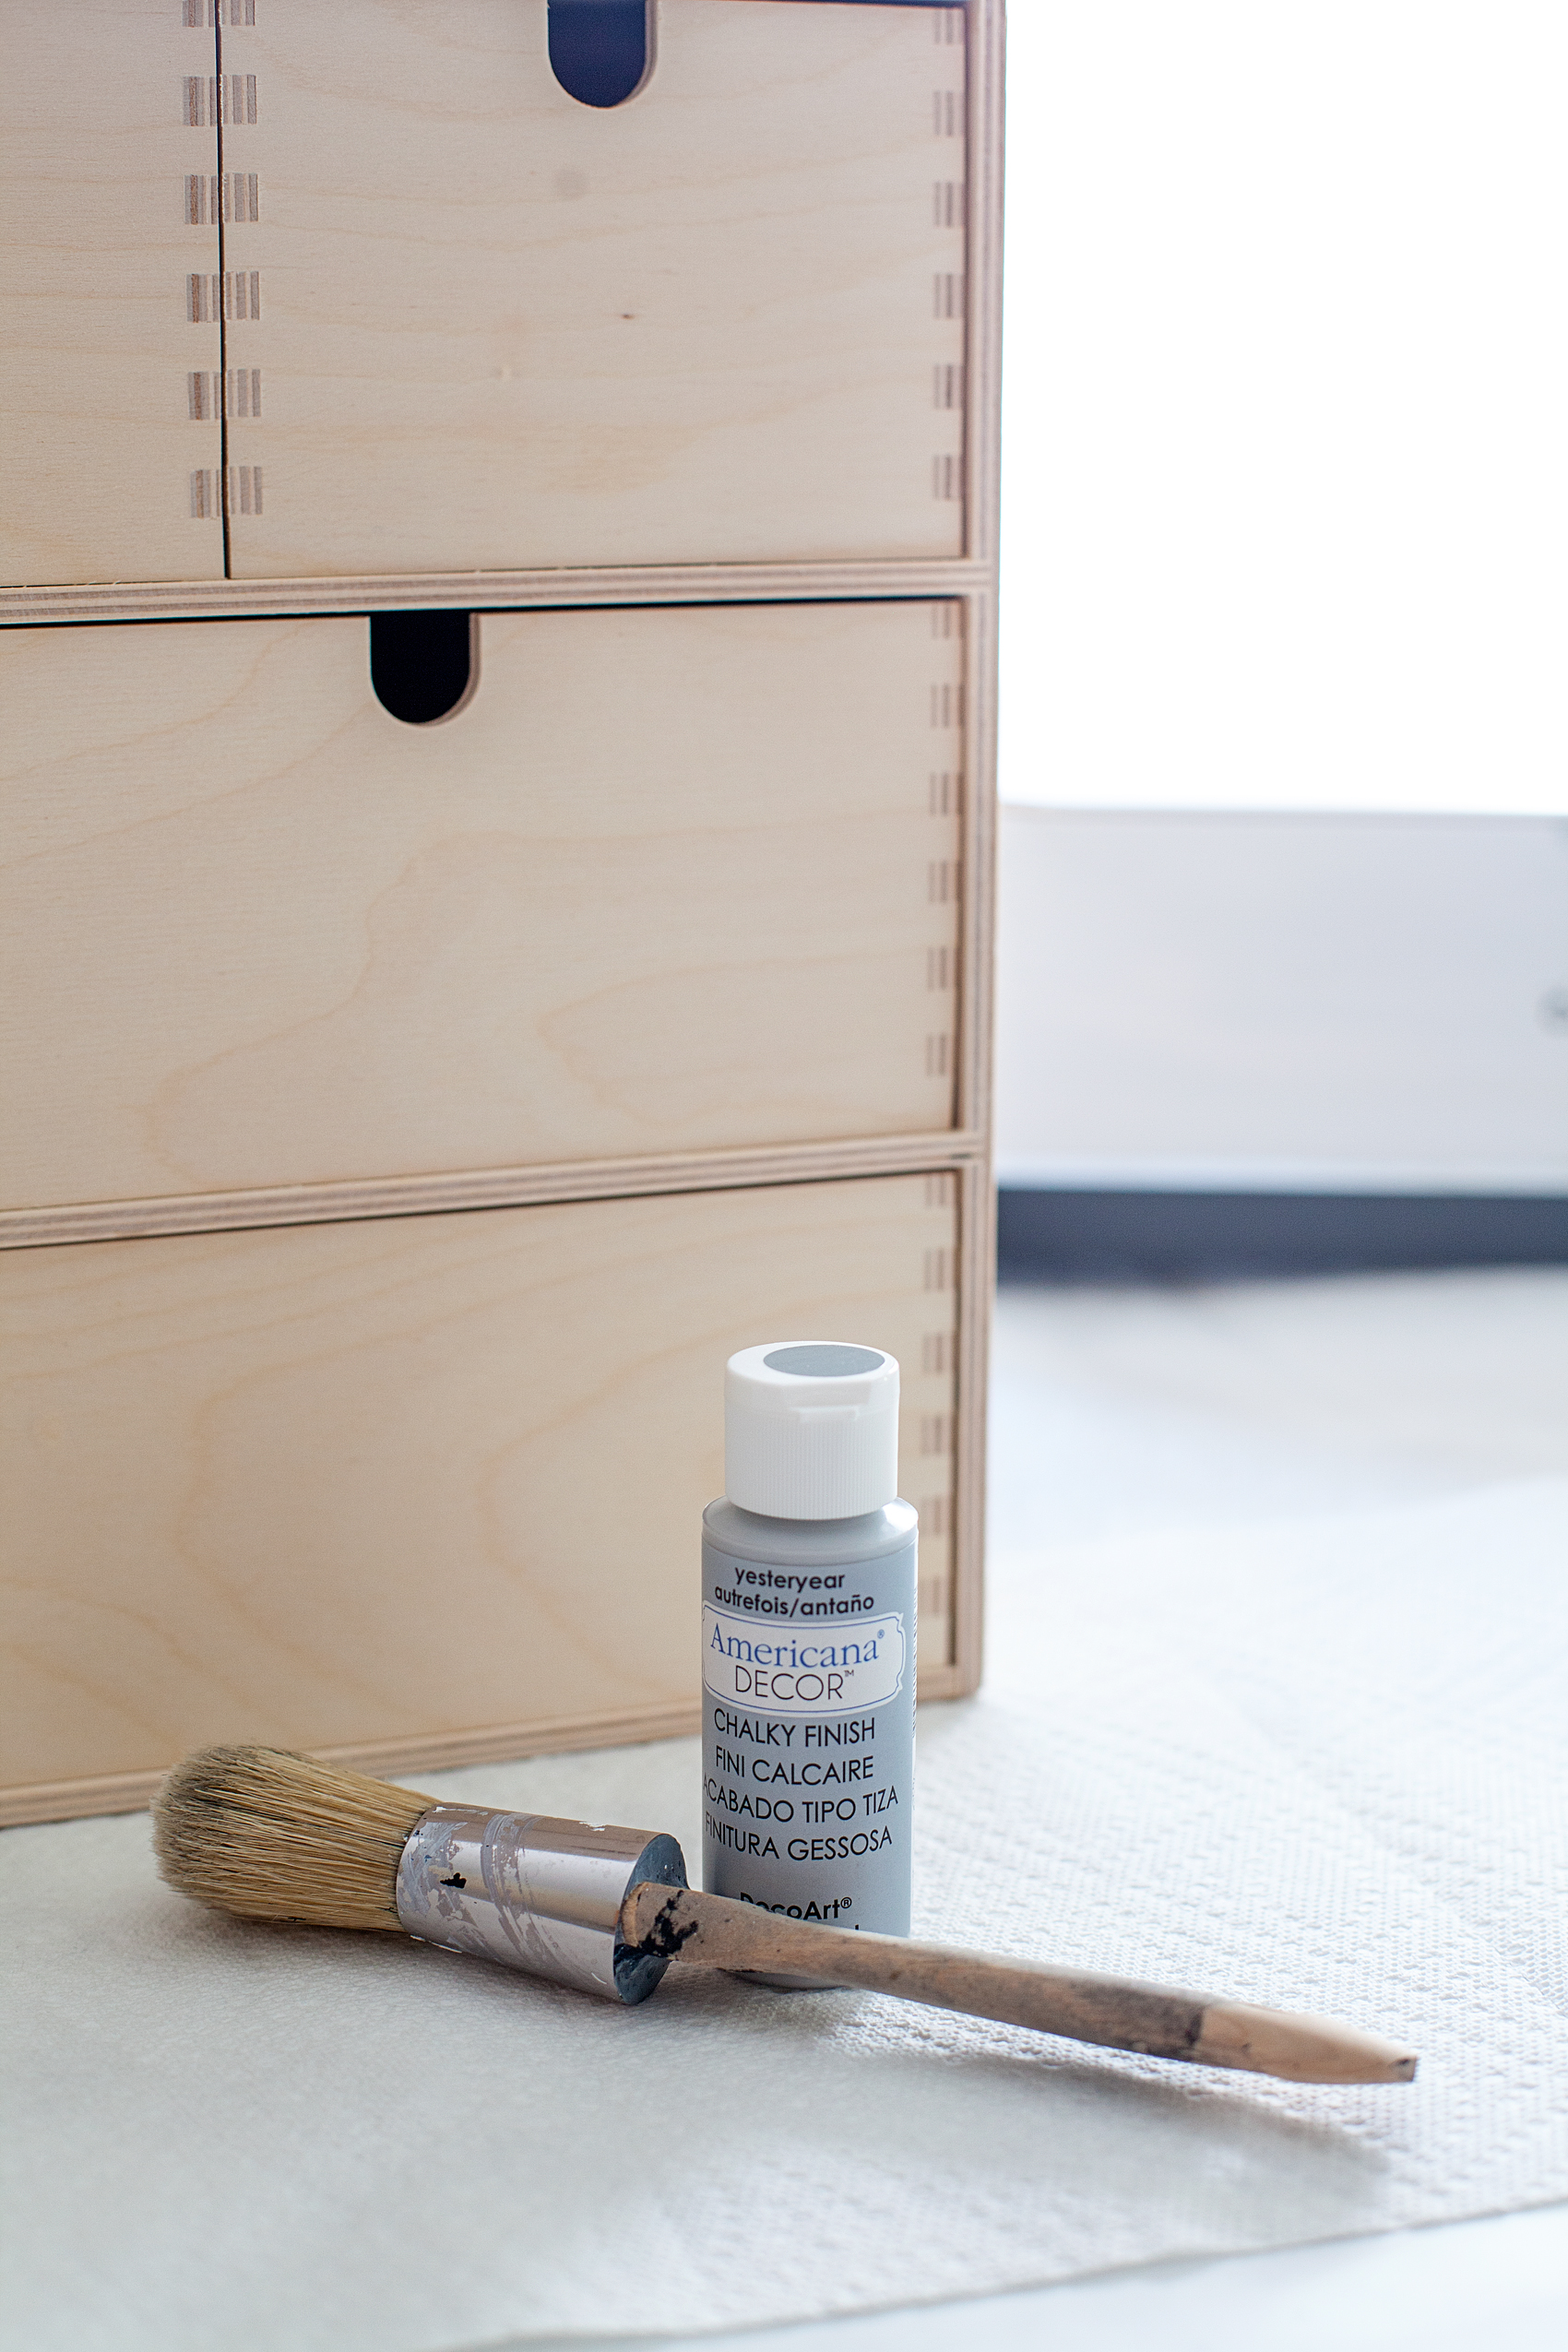
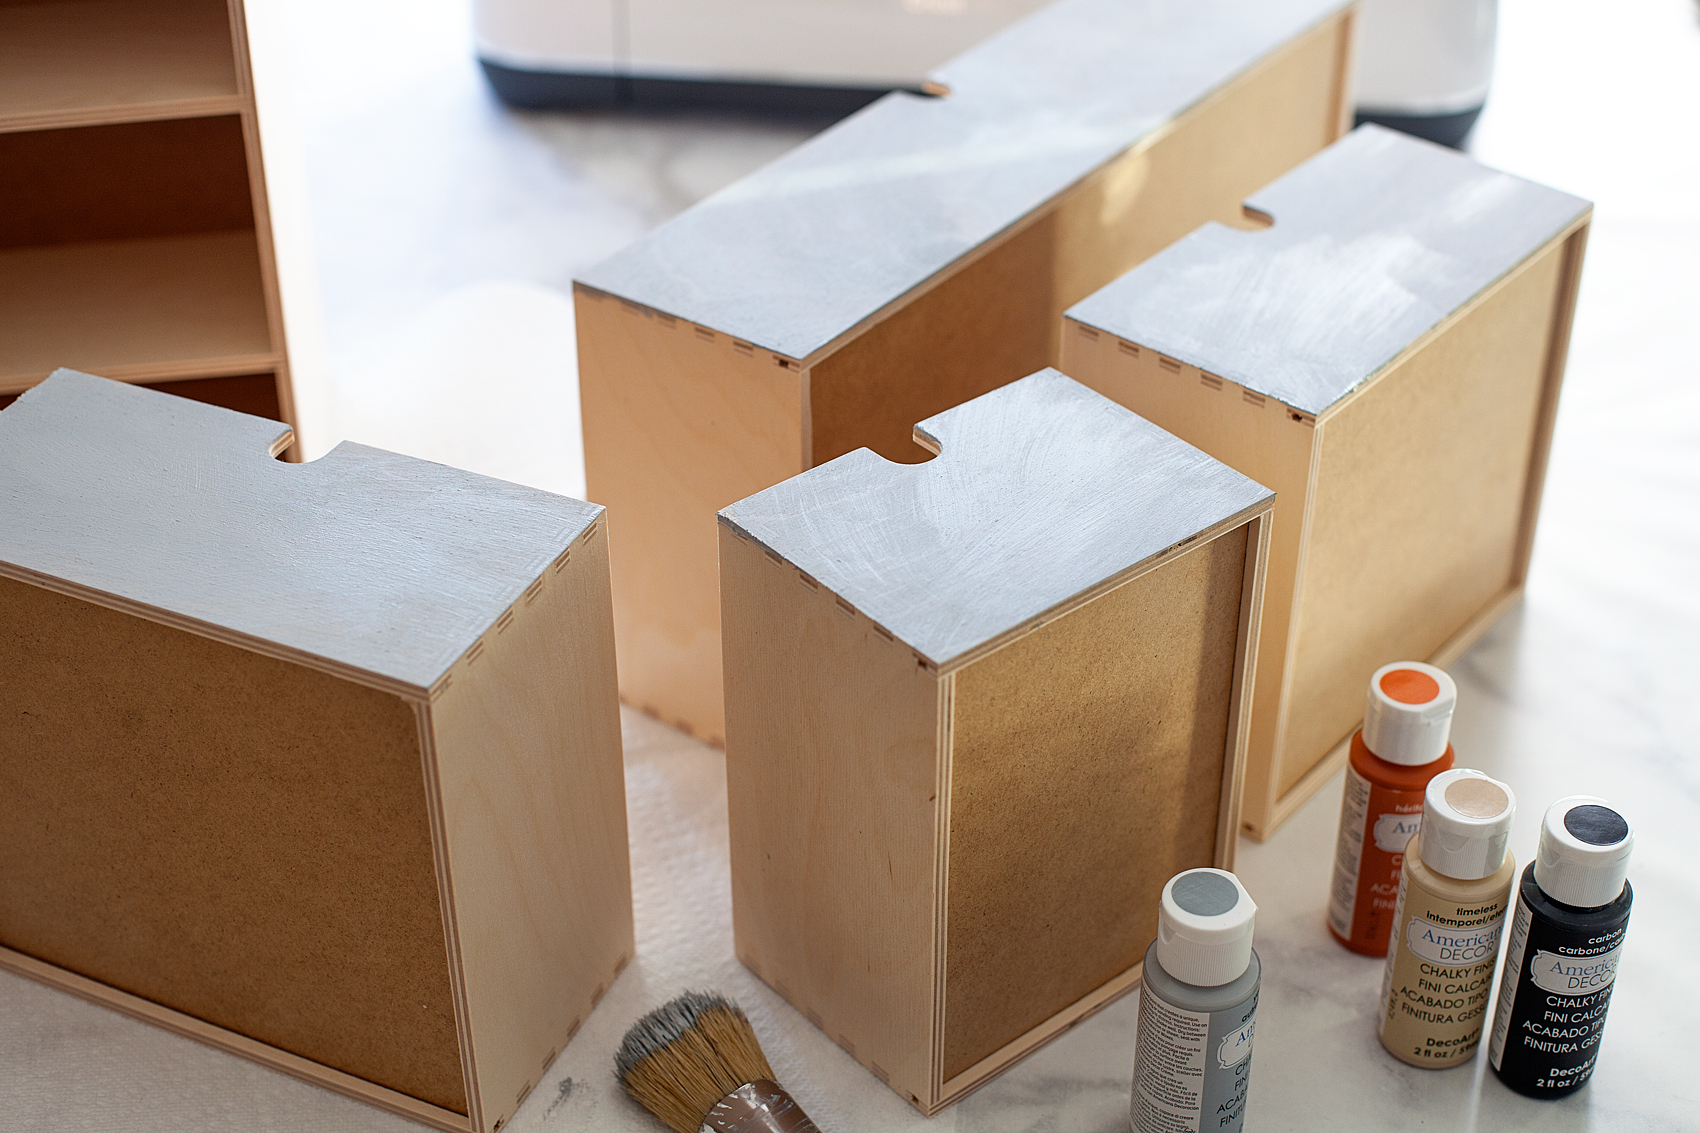
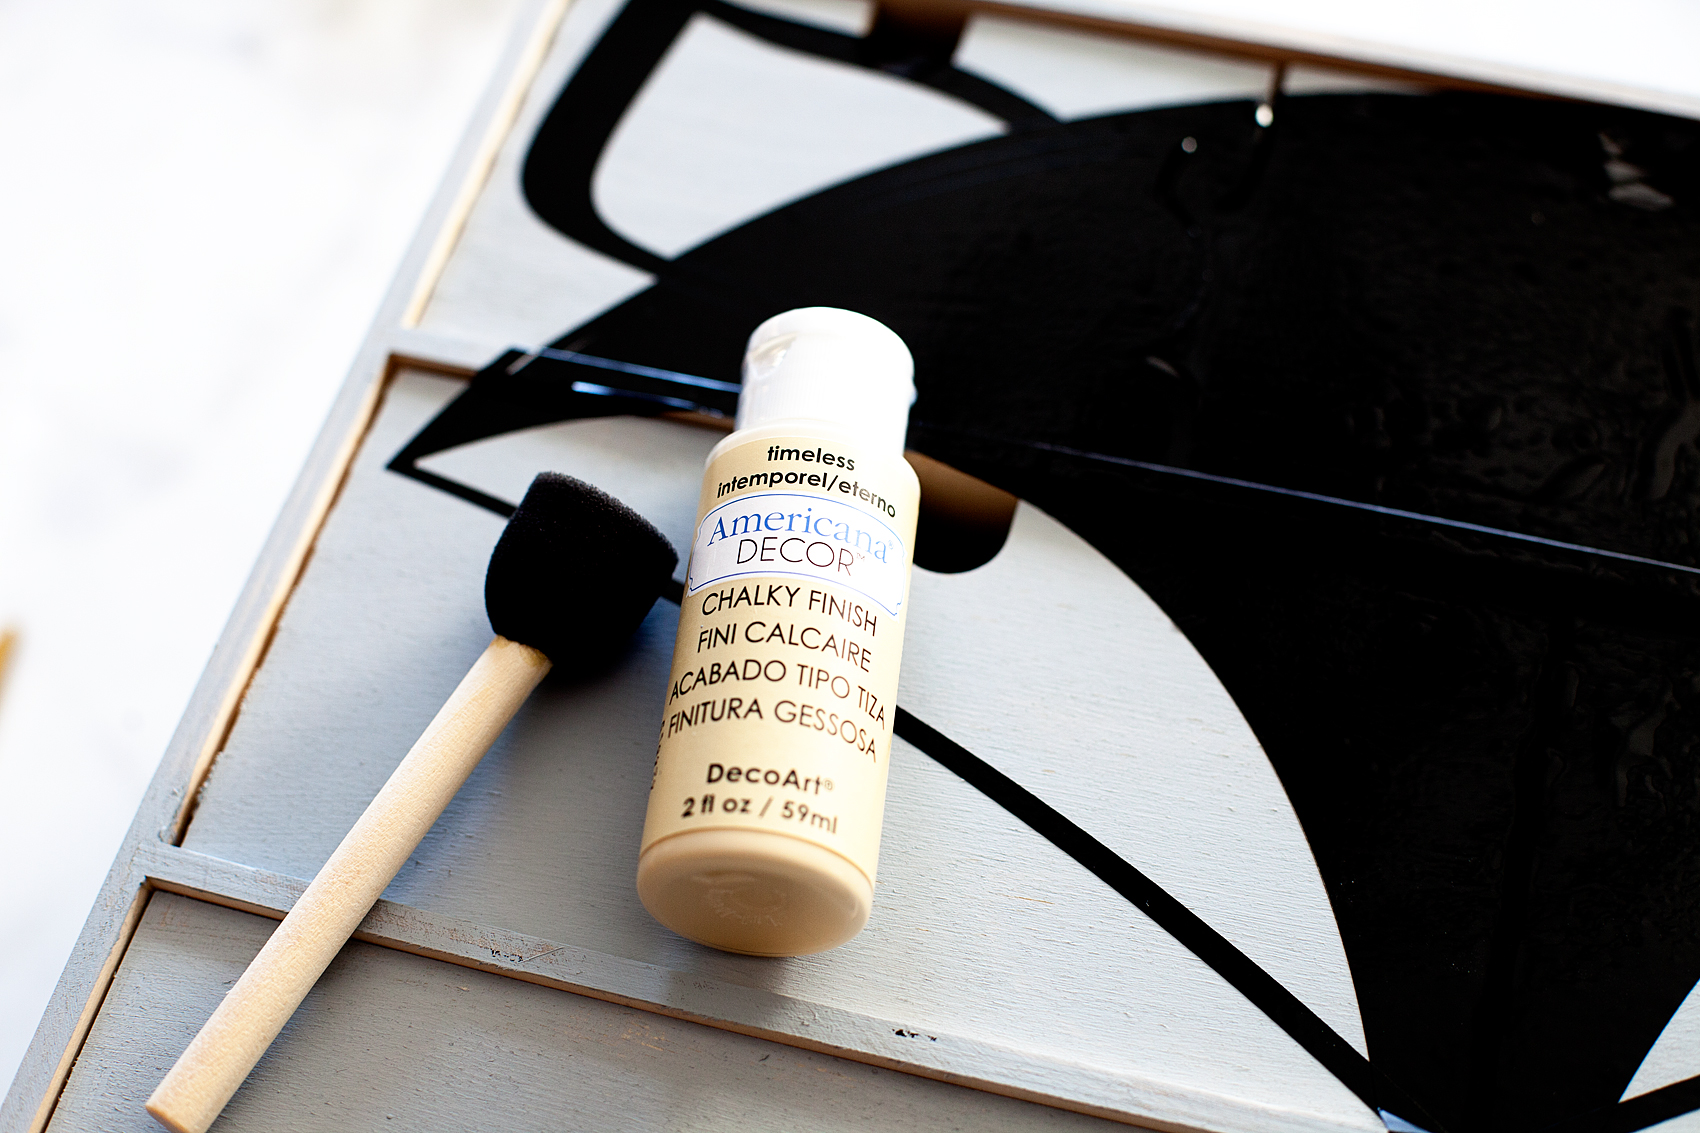
  • Americana Decor Chalky Finish Paint – colors; Yesteryear, Heritage & Timeless
  • foam stencil brush
  • small foam brush
  • Cricut machine
  • download my fox SVG file
  • vinyl
  • transfer tape

Instructions

The first thing you’ll want to do is paint your base coat of the Americana Decor Chalky Finish Paint in the Yesteryear color. The reason why I selected the Chalky finish is that I prefer the matte look rather than a satin or enamel type paint. Plus, I think it’s a little more forgiving.

Transform a simple mini storage chest from IKEA into this cute little fox storage chest for your little ones little toys and trinkets. I used some of the @decoart chalky finish paint along with my @cricut Maker to create this fun design for my little boys room • WhipperBerry

Transform a simple mini storage chest from IKEA into this cute little fox storage chest for your little ones little toys and trinkets. I used some of the @decoart chalky finish paint along with my @cricut Maker to create this fun design for my little boys room • WhipperBerry

Since this piece is raw wood, it really soaked up the paint and it dried super fast (which I LOVE!) This whole project, once I had the design finished, only took about an hour.

The Fox Stencil

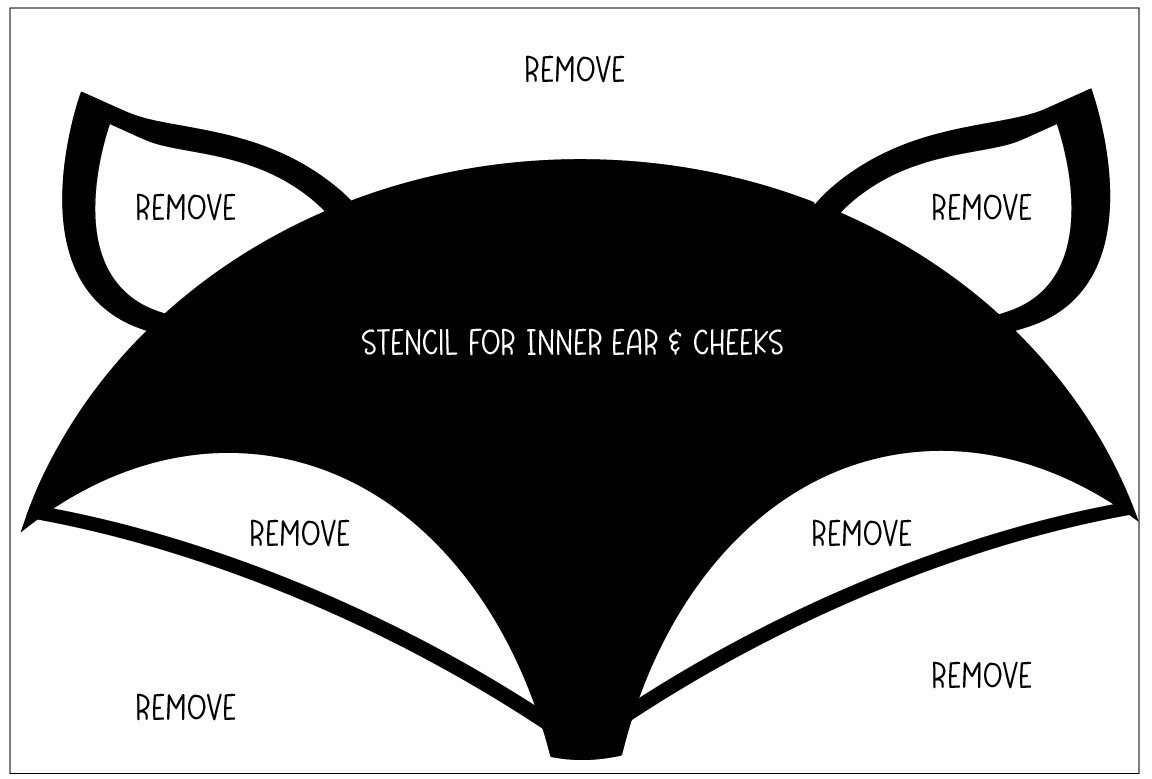
While I was waiting for the base coat to dry, I cut the first part of my fox stencil, you can download that HERE.

Transform a simple mini storage chest from IKEA into this cute little fox storage chest for your little ones little toys and trinkets. I used some of the @decoart chalky finish paint along with my @cricut Maker to create this fun design for my little boys room • WhipperBerry

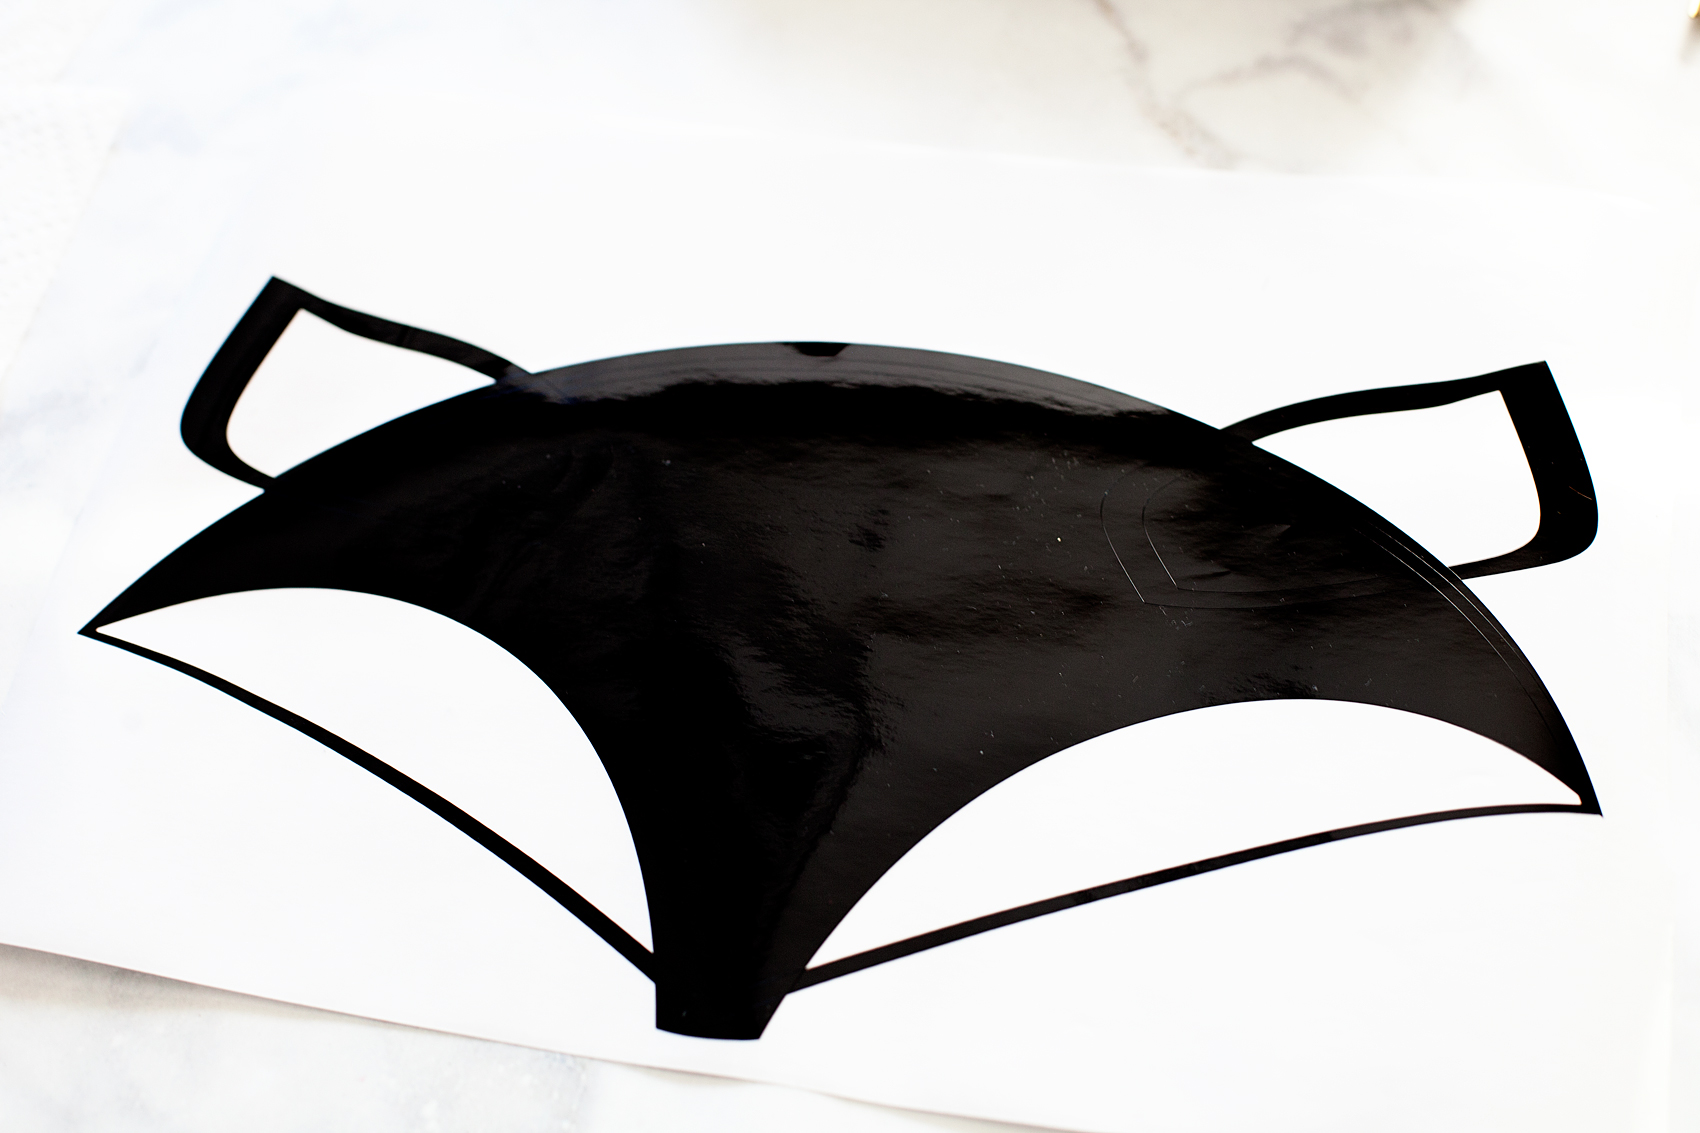
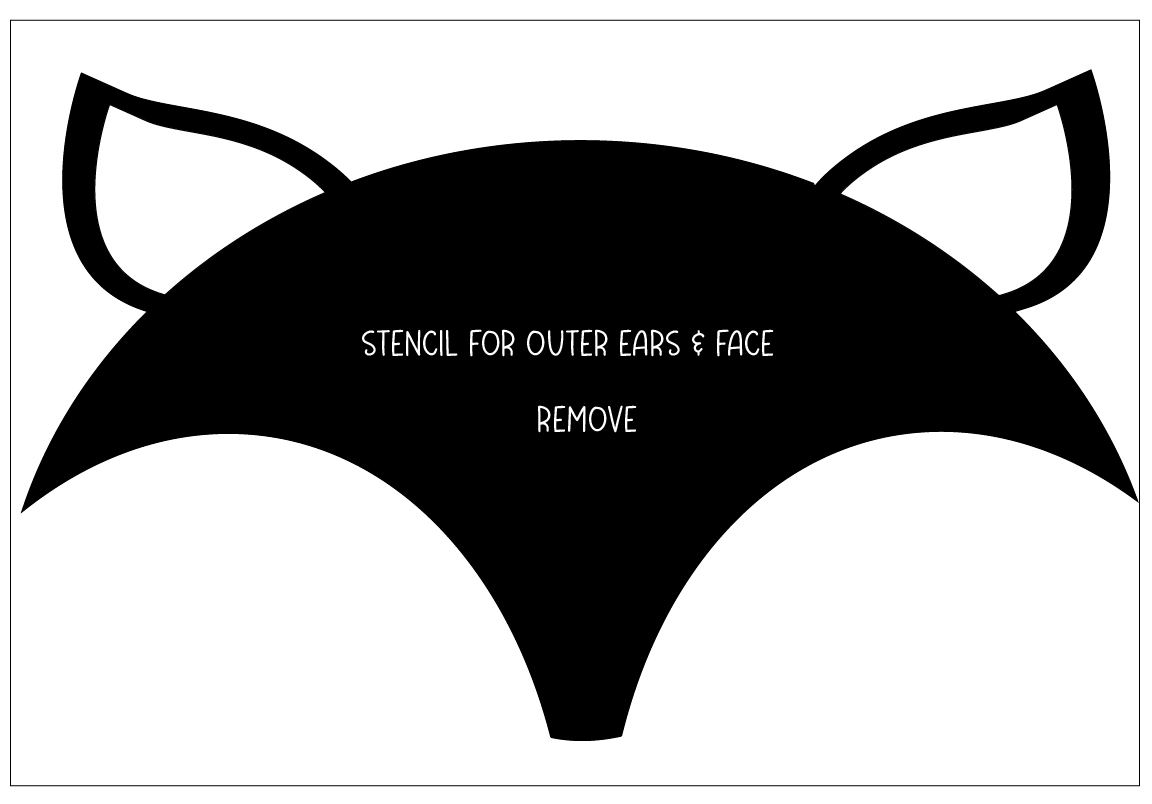
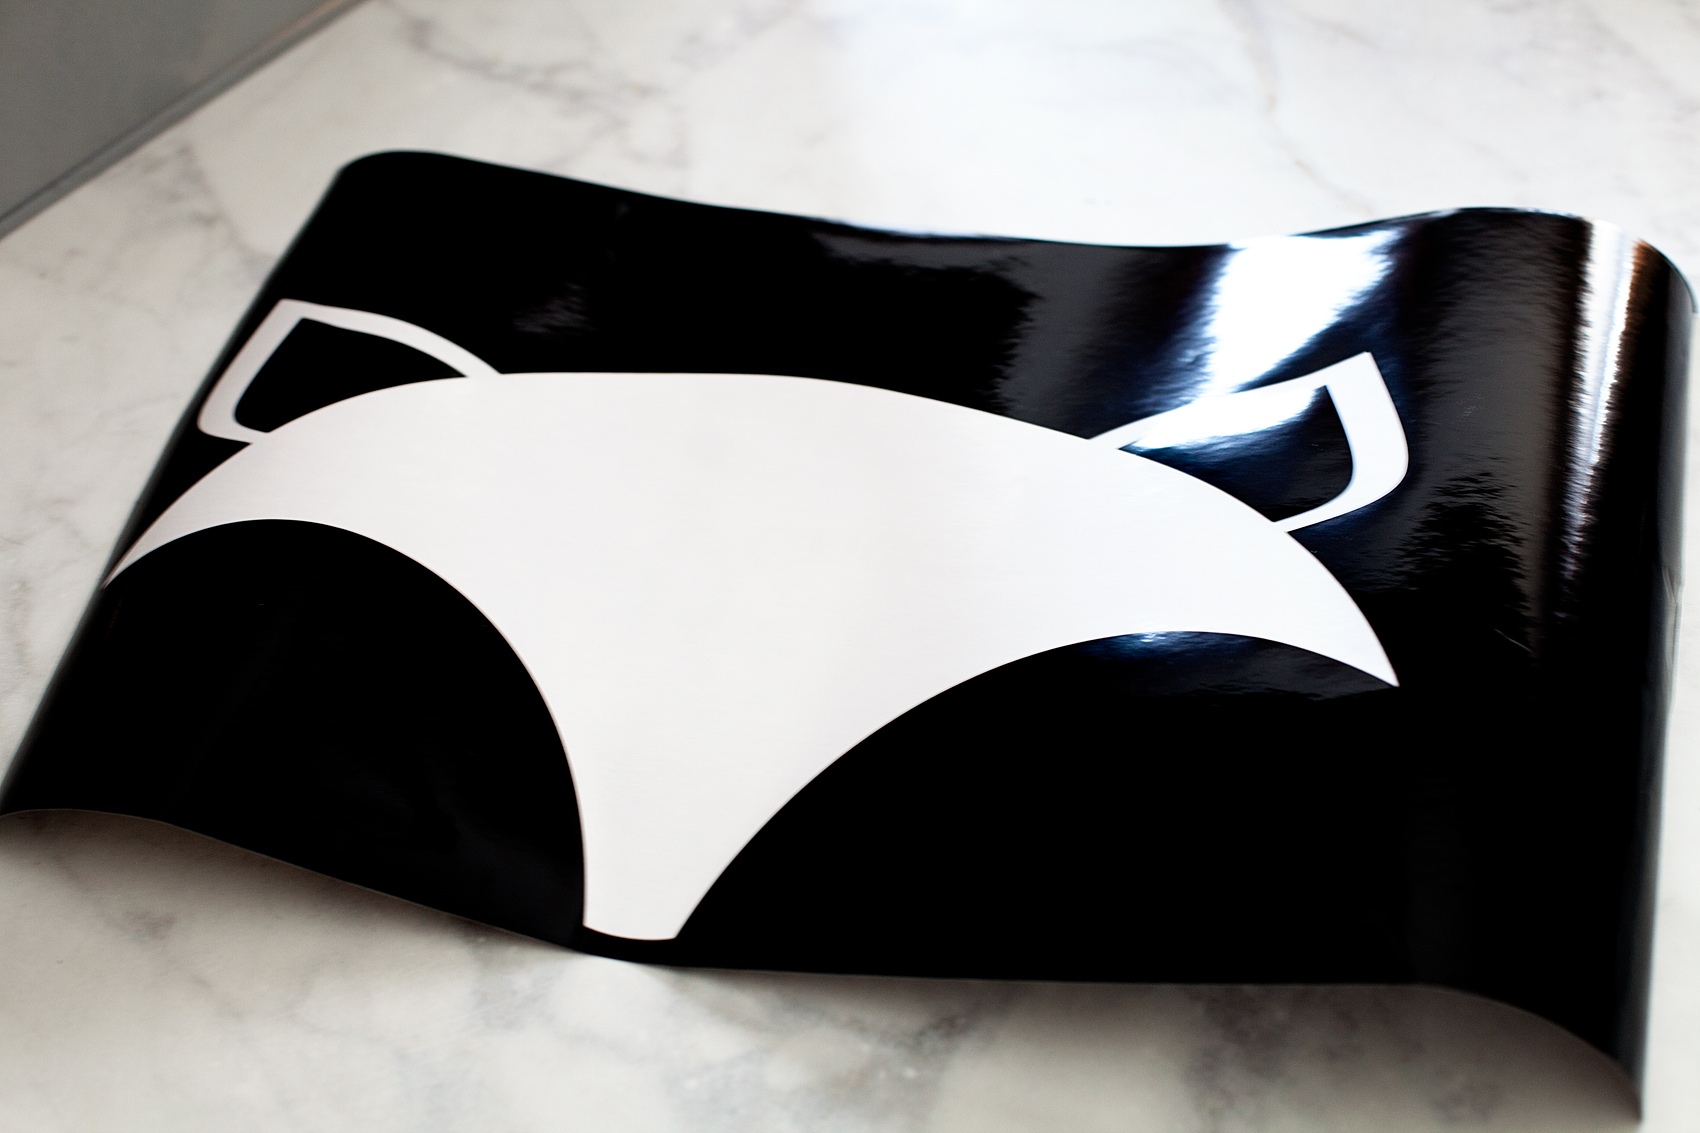
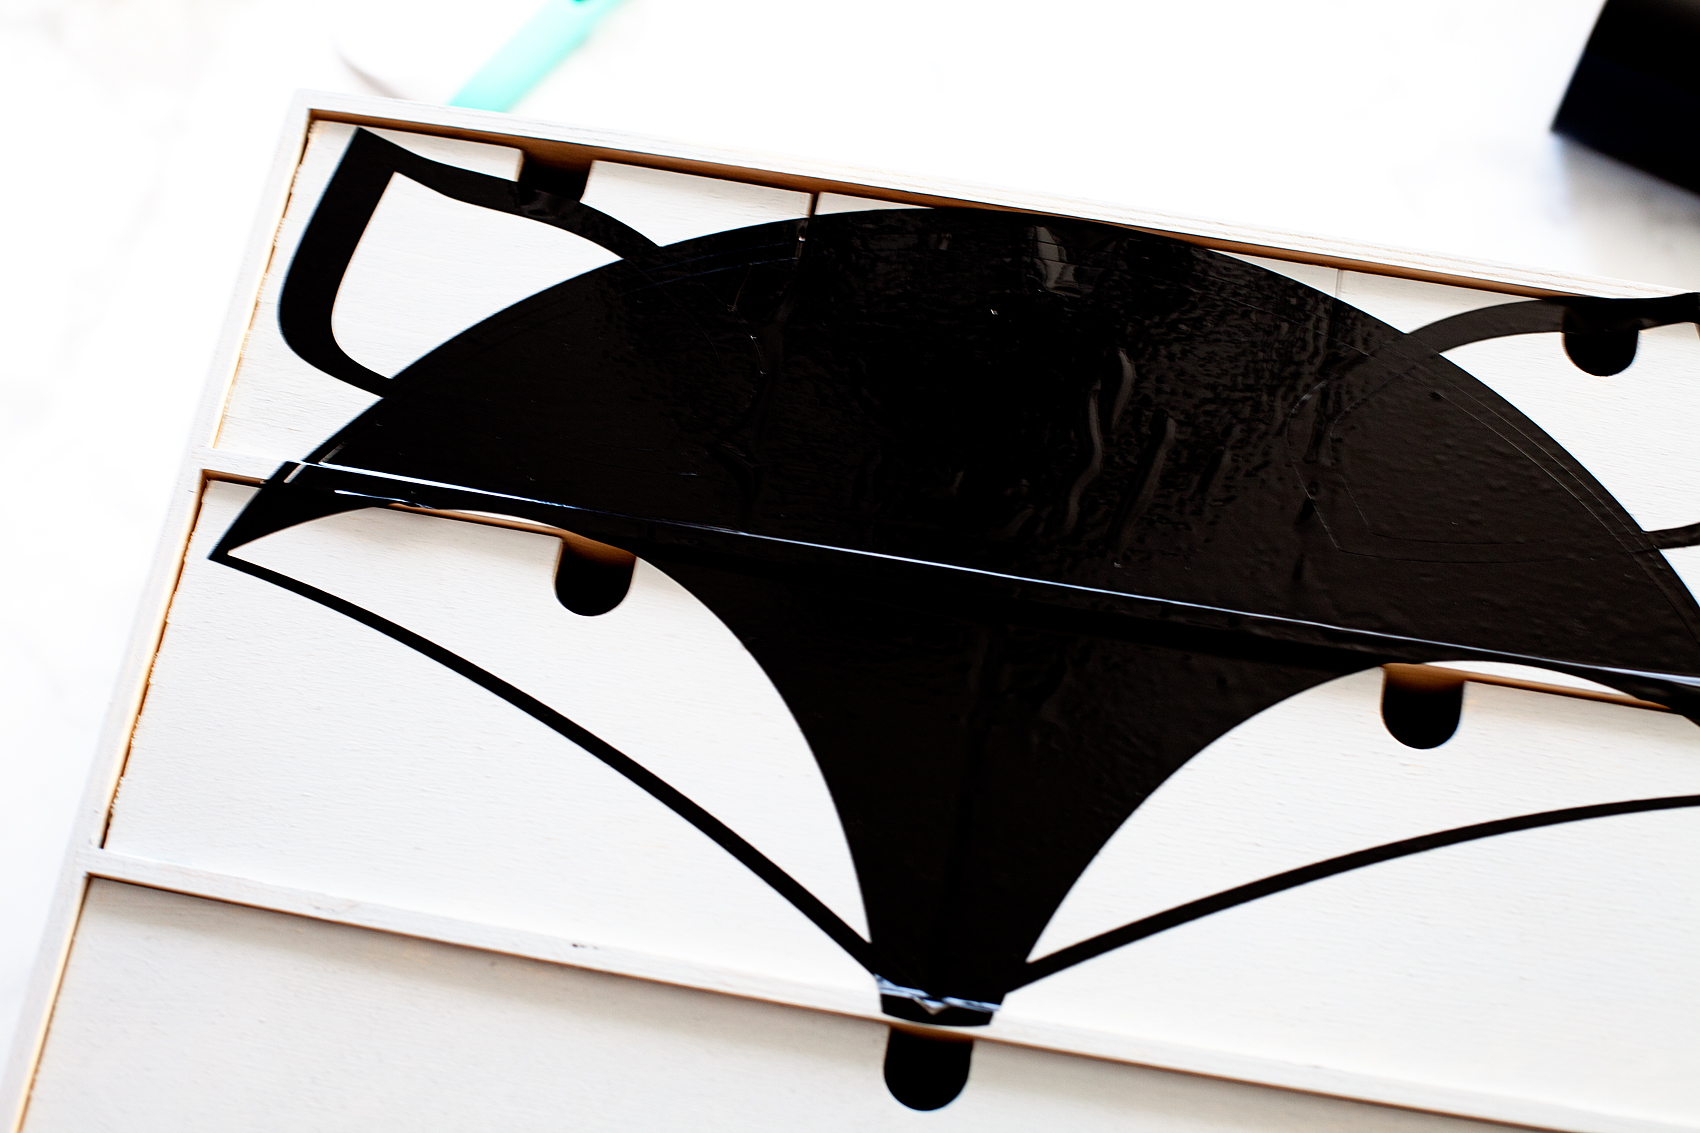
Because I was using two different colors for the fox, I had to create two different stencils. One for the inner part of the ears and cheeks, the second for the outer ears and face. Below, you will see how to weed the vinyl once you’ve cut the design.

Transform a simple mini storage chest from IKEA into this cute little fox storage chest for your little ones little toys and trinkets. I used some of the @decoart chalky finish paint along with my @cricut Maker to create this fun design for my little boys room • WhipperBerry

Painting

I really don’t think the order matters but, just in case, I stenciled the inner ears and cheeks first.

Transform a simple mini storage chest from IKEA into this cute little fox storage chest for your little ones little toys and trinkets. I used some of the @decoart chalky finish paint along with my @cricut Maker to create this fun design for my little boys room • WhipperBerry

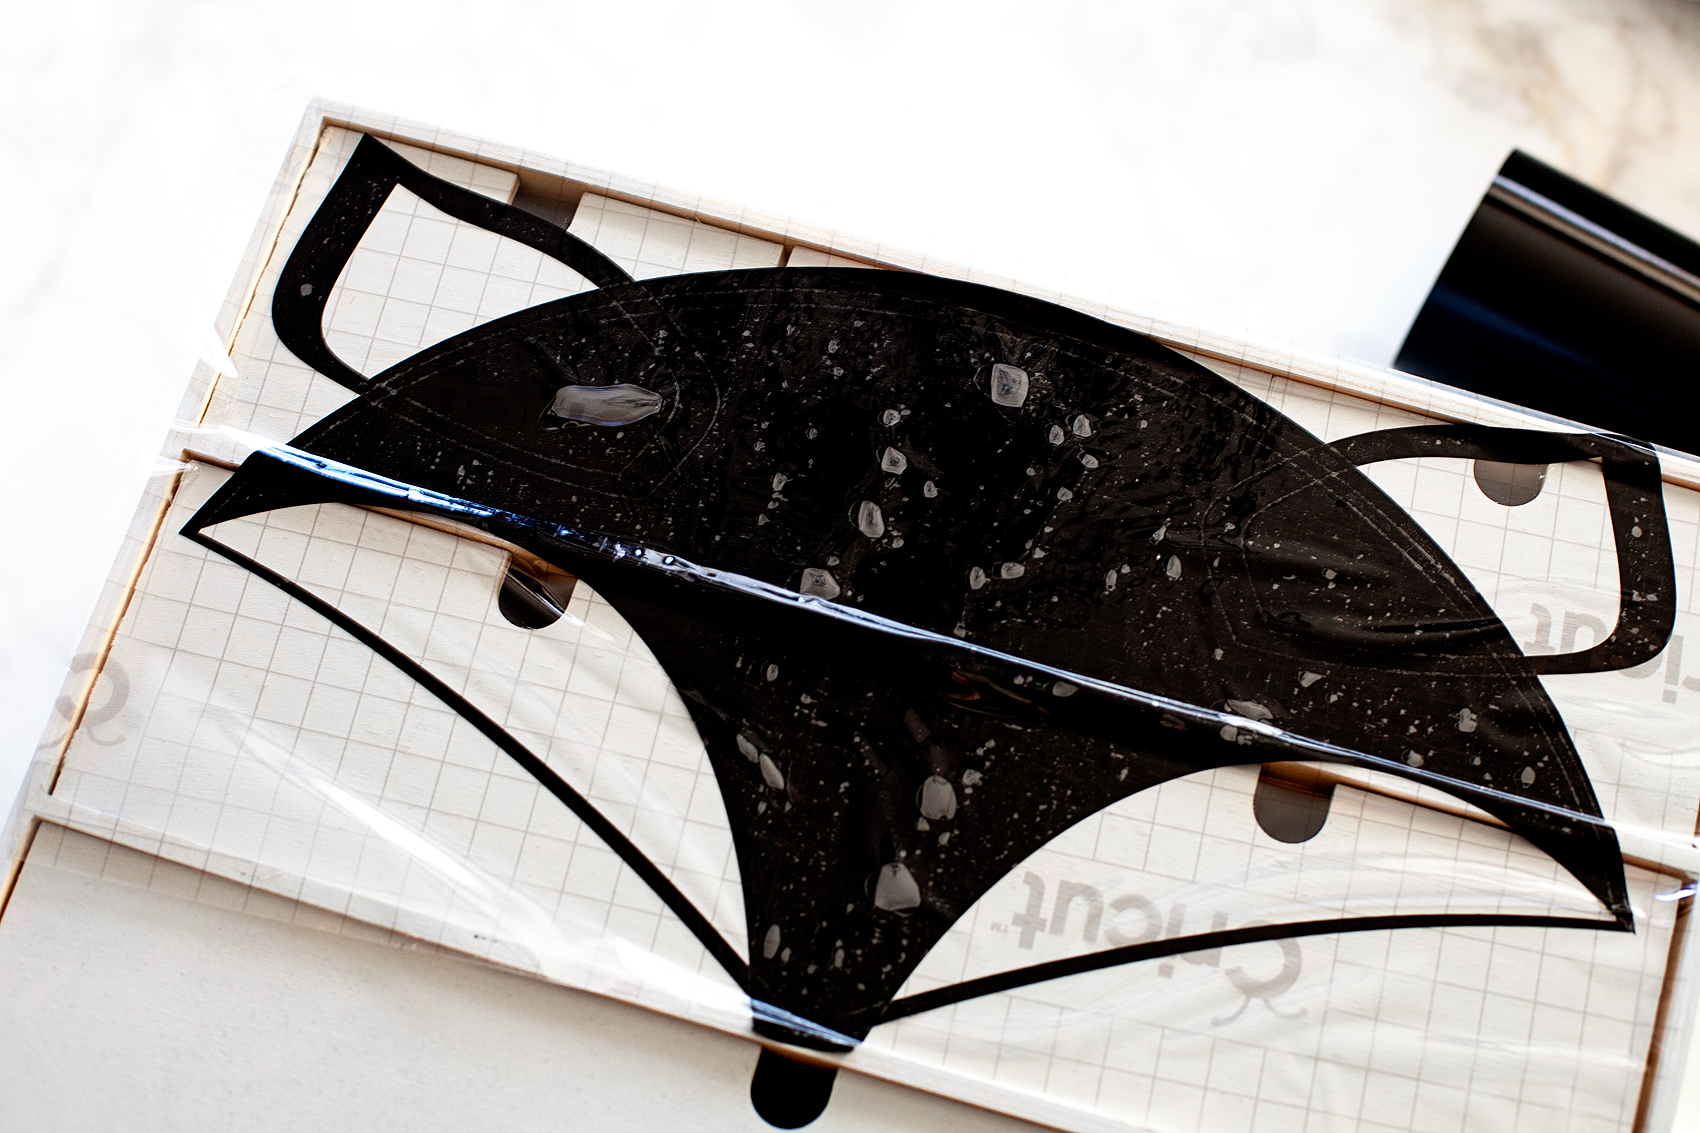
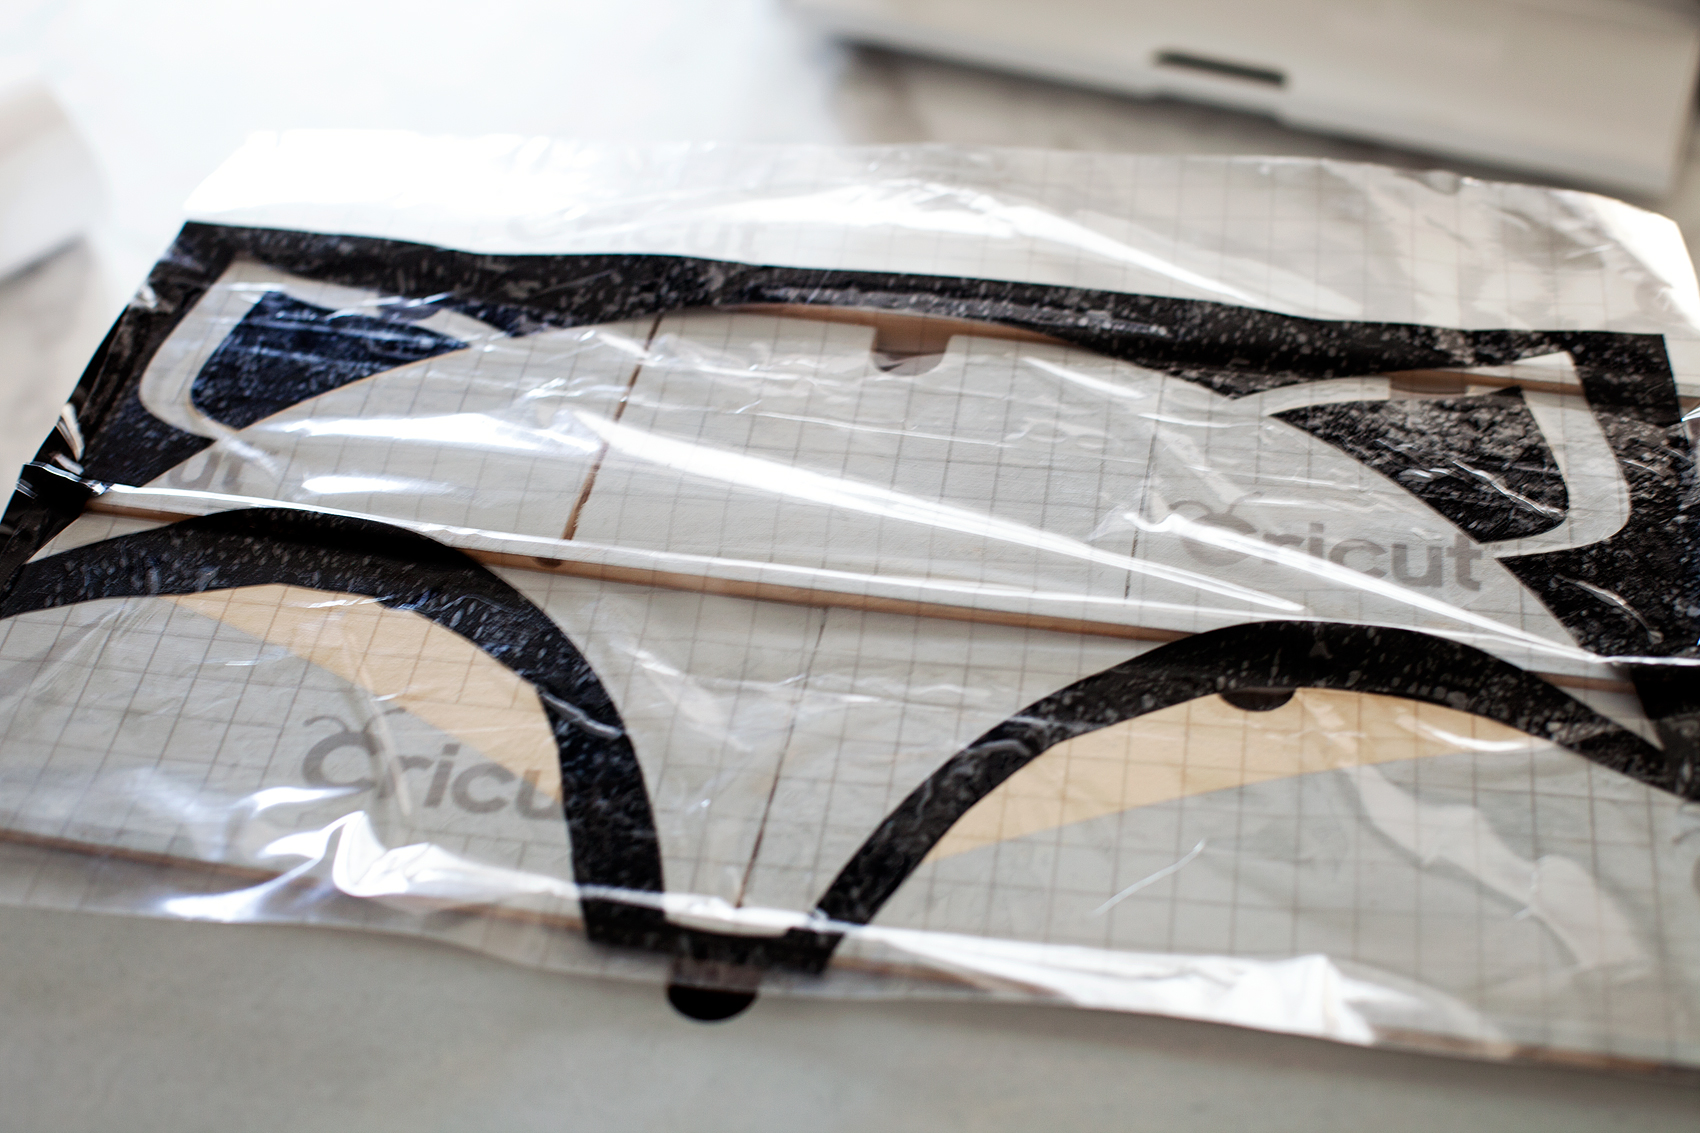
Once I weeded the excess vinyl, I covered the design with transfer tape to transfer the image onto the storage chest.

Transform a simple mini storage chest from IKEA into this cute little fox storage chest for your little ones little toys and trinkets. I used some of the @decoart chalky finish paint along with my @cricut Maker to create this fun design for my little boys room • WhipperBerry

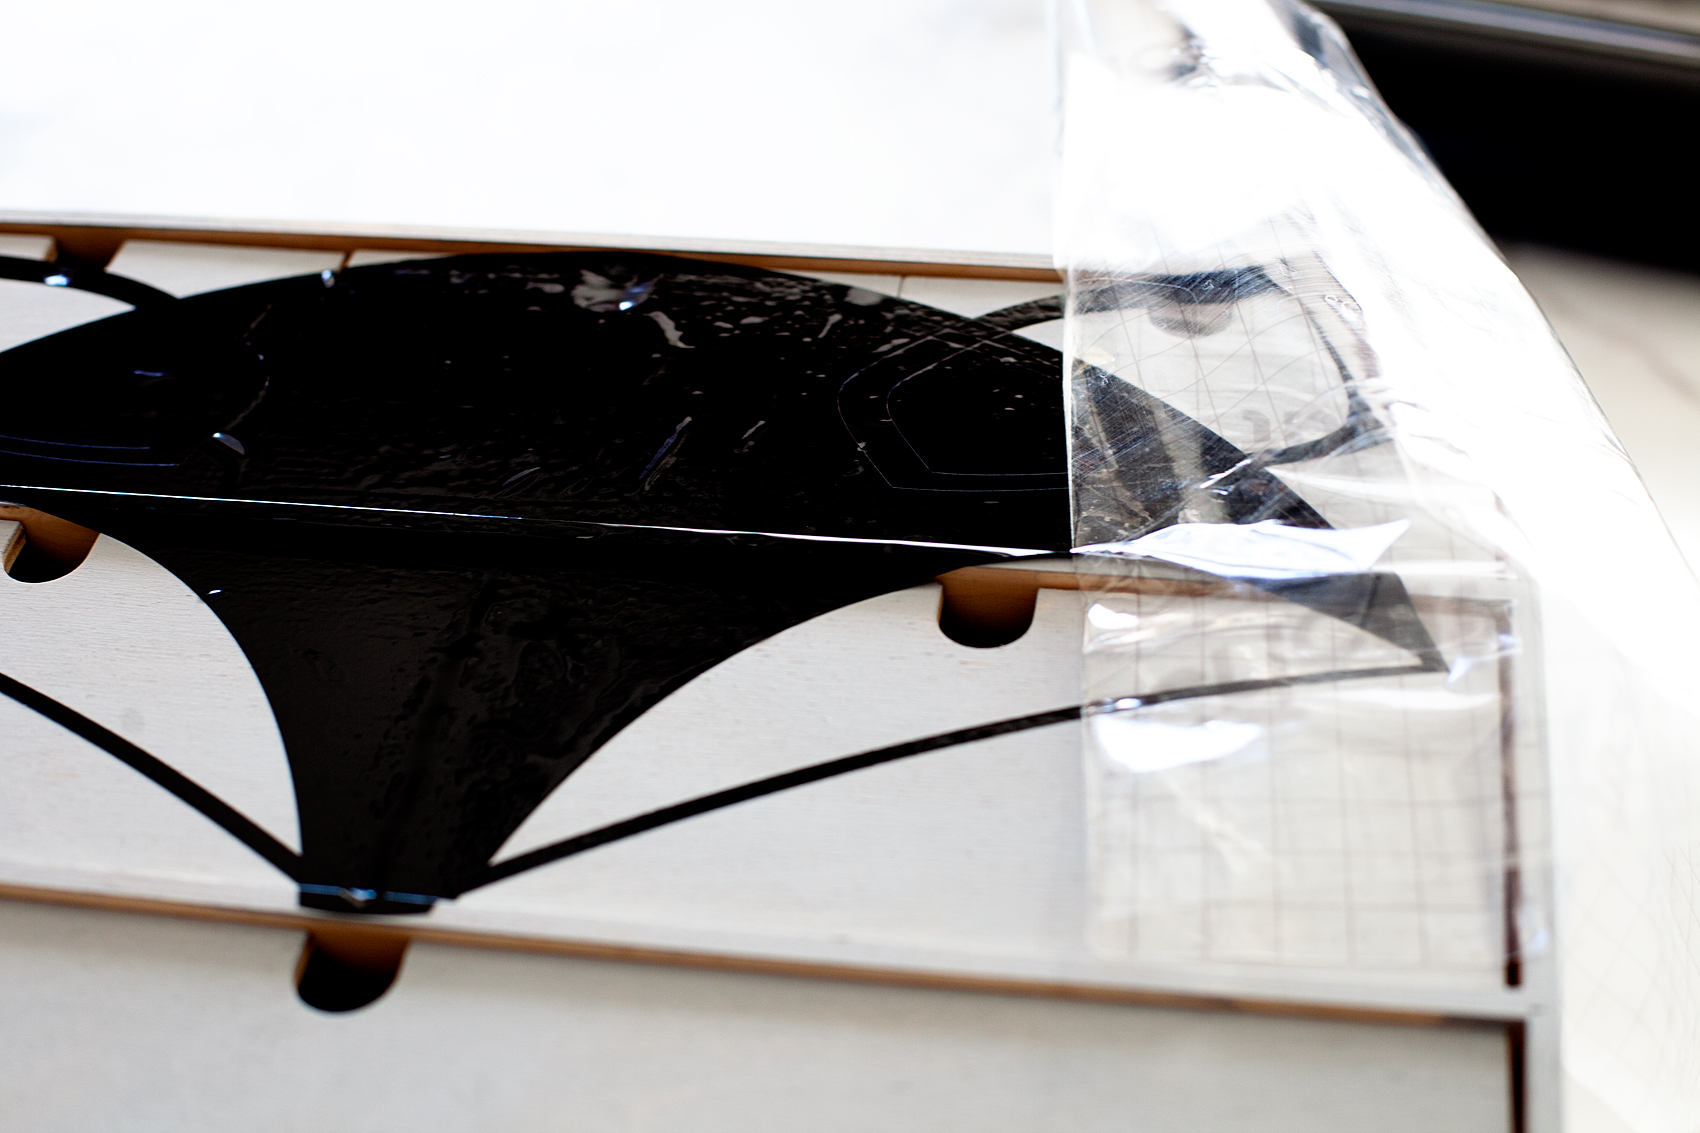
I used my scraper tool to press the vinyl down especially on the ridges of the chest. Then I carefully removed the transfer tape. Take your time here and move slowly if needed.

Transform a simple mini storage chest from IKEA into this cute little fox storage chest for your little ones little toys and trinkets. I used some of the @decoart chalky finish paint along with my @cricut Maker to create this fun design for my little boys room • WhipperBerry

Transform a simple mini storage chest from IKEA into this cute little fox storage chest for your little ones little toys and trinkets. I used some of the @decoart chalky finish paint along with my @cricut Maker to create this fun design for my little boys room • WhipperBerry

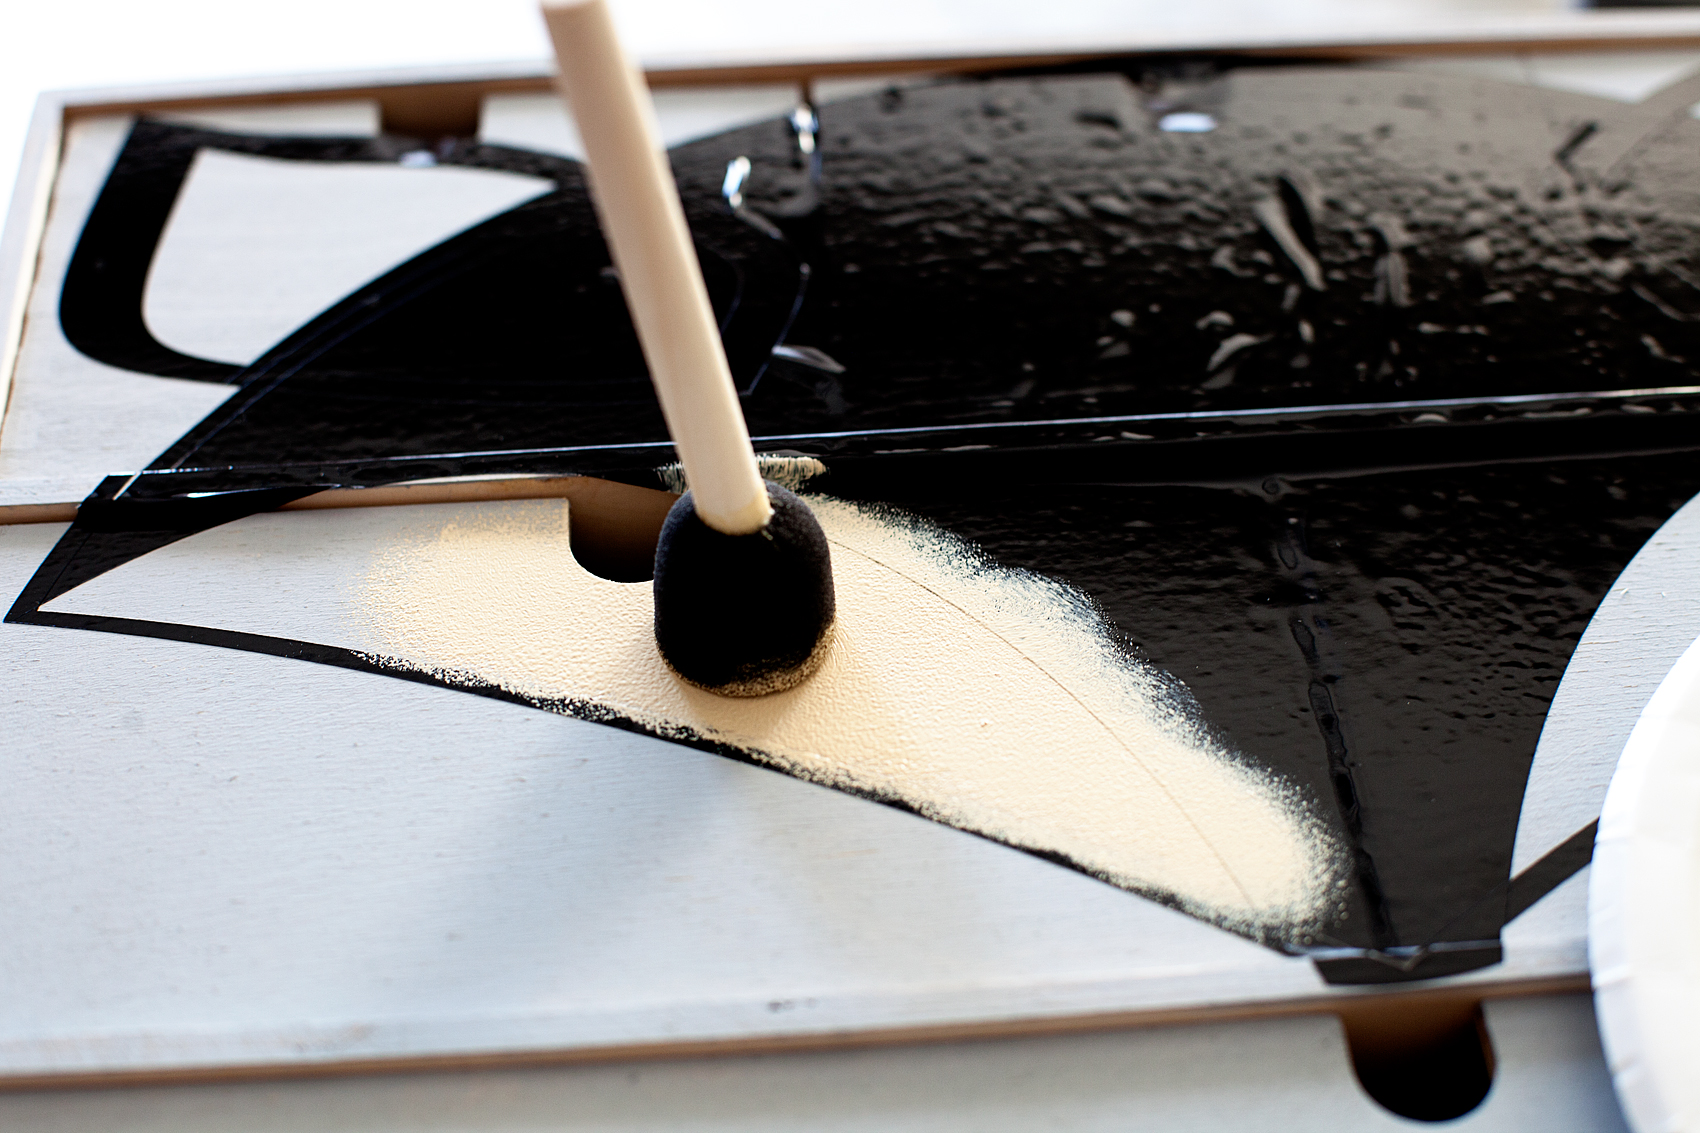
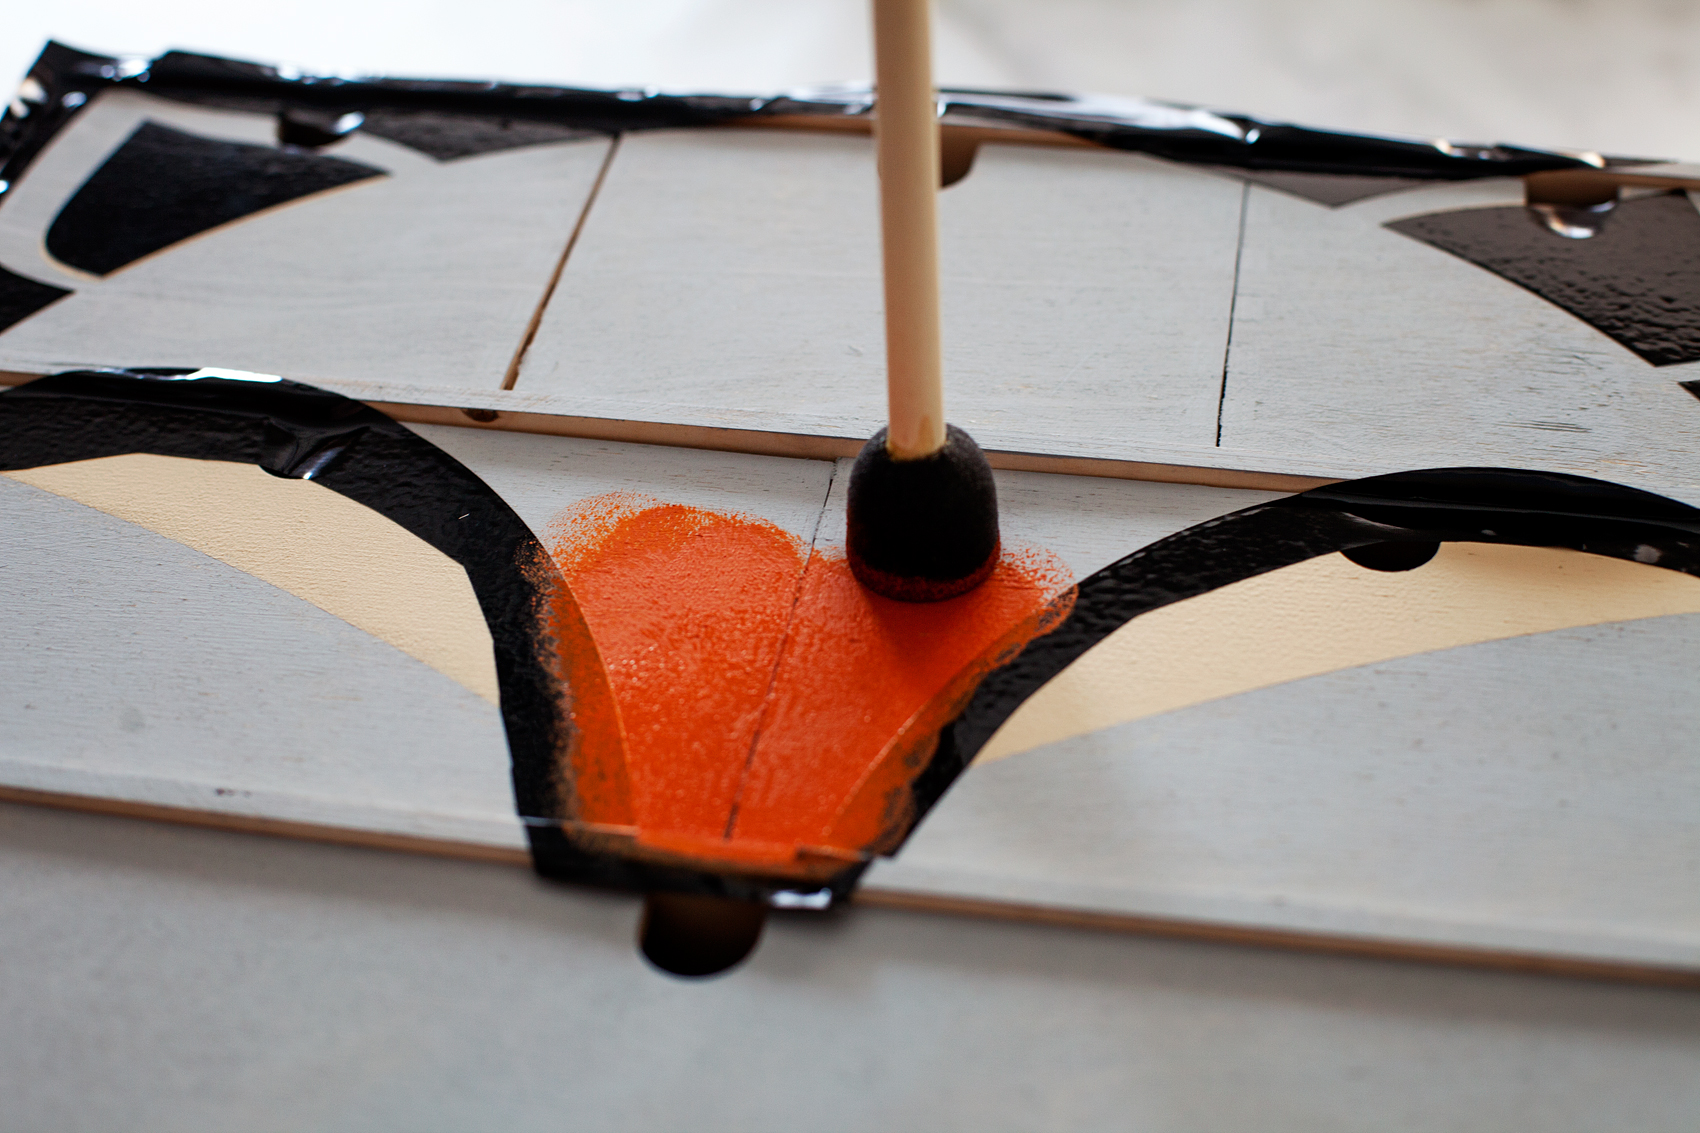
Using your finger go around the edges of the areas that you will be painting and make sure you have a good seal with the vinyl. With the Timeless color, I used a foam stencil brush to get started. With a light amount of paint on my brush, using a gentle up and down motion, I painted the inner ears and cheeks.

Transform a simple mini storage chest from IKEA into this cute little fox storage chest for your little ones little toys and trinkets. I used some of the @decoart chalky finish paint along with my @cricut Maker to create this fun design for my little boys room • WhipperBerry

Transform a simple mini storage chest from IKEA into this cute little fox storage chest for your little ones little toys and trinkets. I used some of the @decoart chalky finish paint along with my @cricut Maker to create this fun design for my little boys room • WhipperBerry

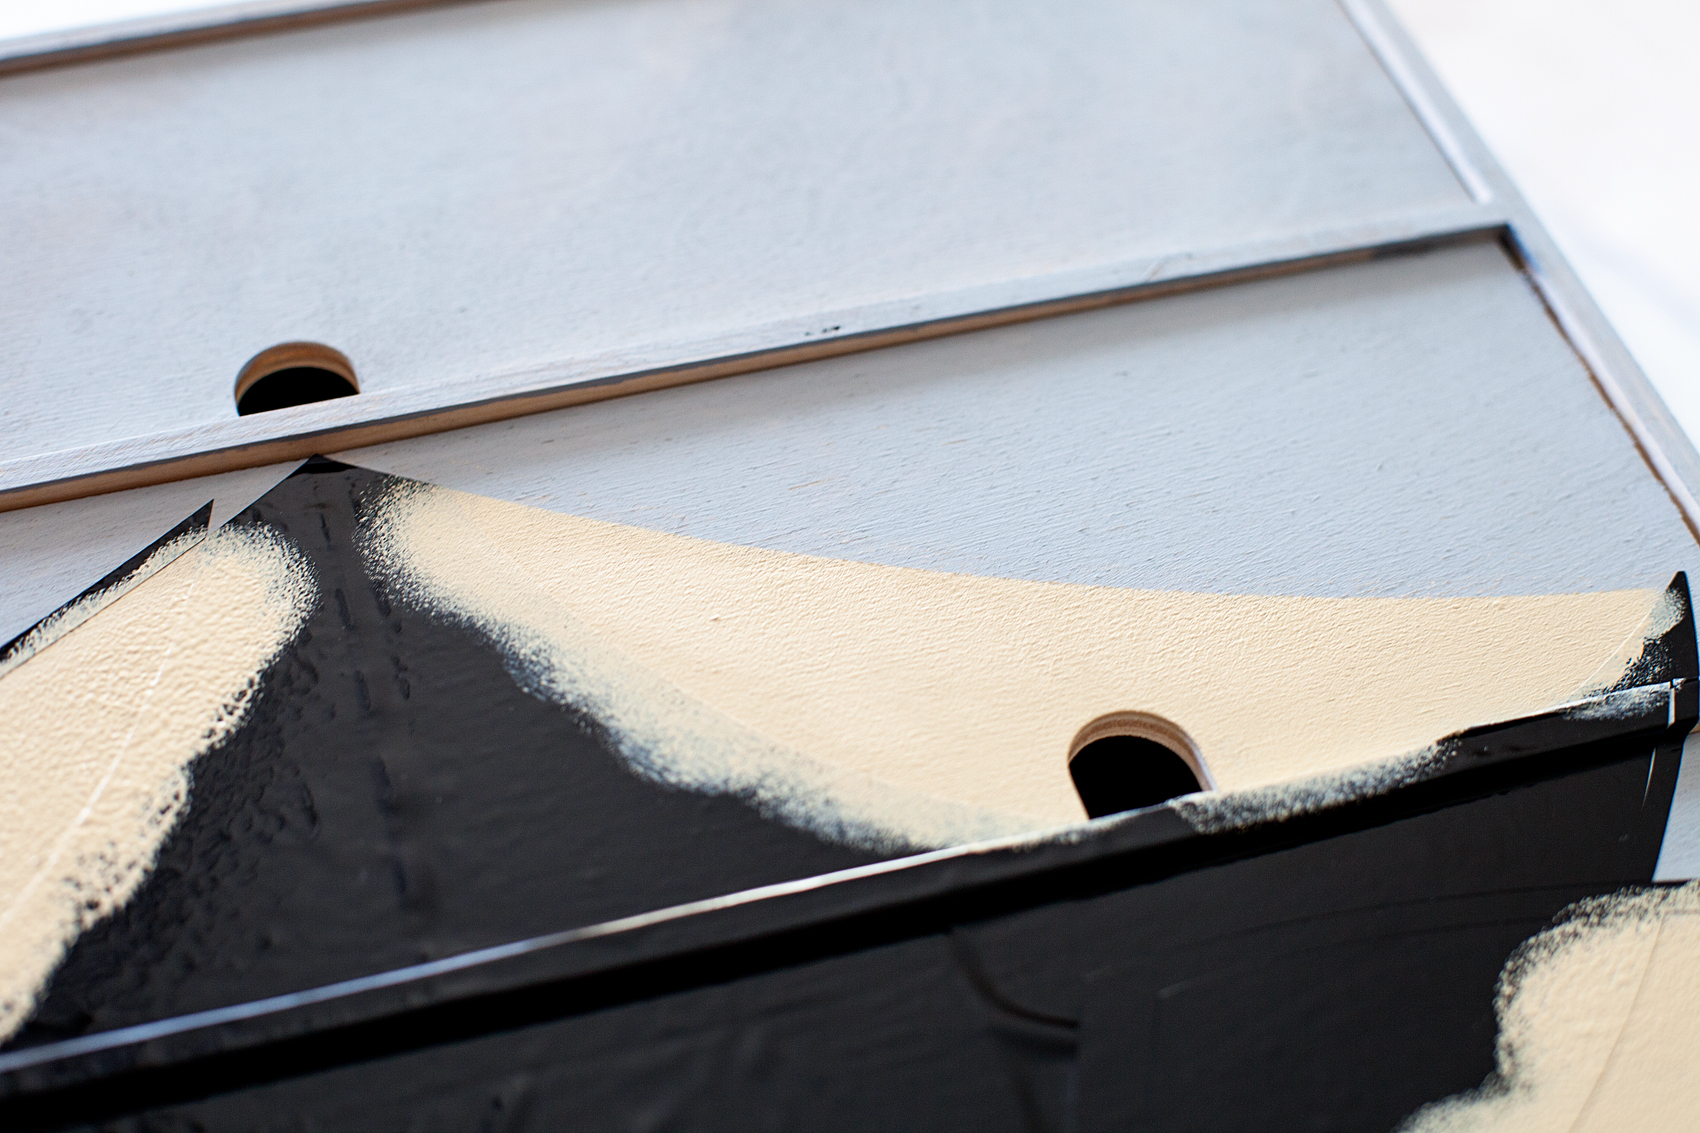
Once you’ve finished painting those sections, carefully remove the vinyl. I typically don’t really wait for the paint to completely dry, you just need to be careful when lifting and removing the vinyl so that you don’t mess up the paint.  If you’ve been careful and not used too much paint or pressure, you’ll have a beautiful line.

Transform a simple mini storage chest from IKEA into this cute little fox storage chest for your little ones little toys and trinkets. I used some of the @decoart chalky finish paint along with my @cricut Maker to create this fun design for my little boys room • WhipperBerry

Now, you’ll need the 2nd section of your stencil weeded like the image below.

Transform a simple mini storage chest from IKEA into this cute little fox storage chest for your little ones little toys and trinkets. I used some of the @decoart chalky finish paint along with my @cricut Maker to create this fun design for my little boys room • WhipperBerry

Transform a simple mini storage chest from IKEA into this cute little fox storage chest for your little ones little toys and trinkets. I used some of the @decoart chalky finish paint along with my @cricut Maker to create this fun design for my little boys room • WhipperBerry

Like before, use the transfer tape to place the stencil carefully on the storage chest. You’ll need to line-up the ears and cheeks but, with the Cricut clear transfer tape that’s not hard at all.

Transform a simple mini storage chest from IKEA into this cute little fox storage chest for your little ones little toys and trinkets. I used some of the @decoart chalky finish paint along with my @cricut Maker to create this fun design for my little boys room • WhipperBerry

Repeat the same painting technique with the Heritage color for the outer ear and face of the fox.

https://shop.cricut.com/en_us/cutting-materials/vinyl/transfer-paper/new-cricut-reg-transfer-tape.html

When you’re finished with that, remove the vinyl and let the paint fully dry. That will really only take 10 minutes or so. (That’s another reason why I love the chalky finish paint.)

You’re finished!

Transform a simple mini storage chest from IKEA into this cute little fox storage chest for your little ones little toys and trinkets. I used some of the @decoart chalky finish paint along with my @cricut Maker to create this fun design for my little boys room • WhipperBerry

How cute is that for a little guys room? You could even add some cute girly eyelashes and it would look super cute in a girls room as well. I just LOVE it!!

Transform a simple mini storage chest from IKEA into this cute little fox storage chest for your little ones little toys and trinkets. I used some of the @decoart chalky finish paint along with my @cricut Maker to create this fun design for my little boys room • WhipperBerry

Now, Gage will have the perfect spot for his little things. If you had a chance to do the mini storage chest challenge, what would you like to create? How would you like to use it? What DecoArt products would you use?

Disclaimer • I am a DecoArt Blogger and have received product and compensation for my time and efforts. All thoughts, ideas, and opinions are my very own.
Spa Inspired Holiday Survival Kit with Buffalo Check Jars

26 · Dec 5, 2017 · 1 Comment

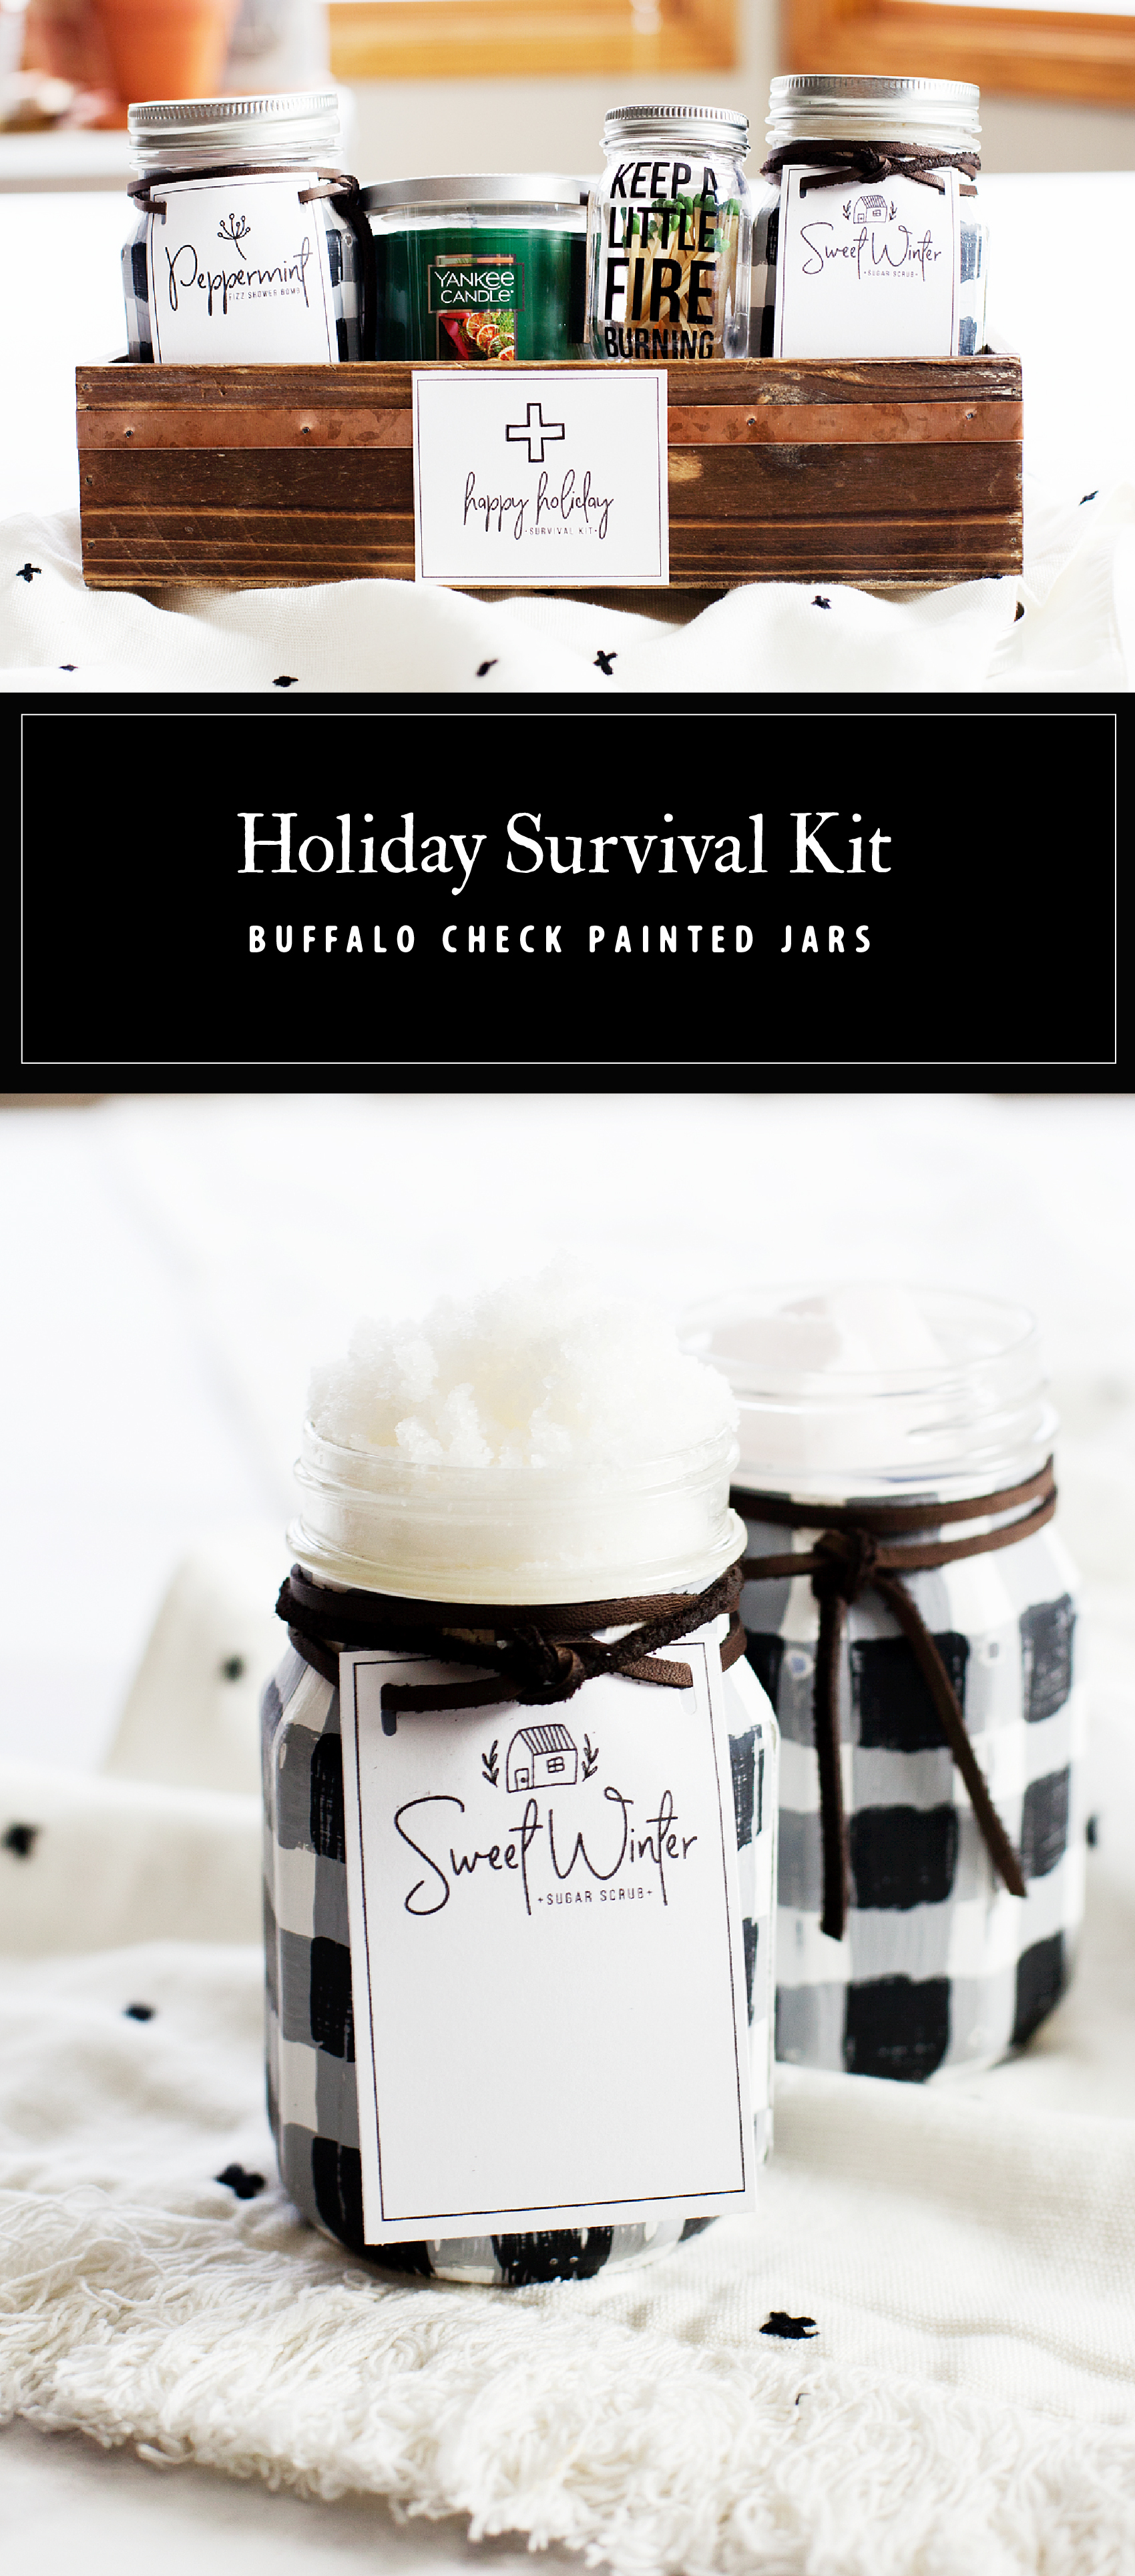
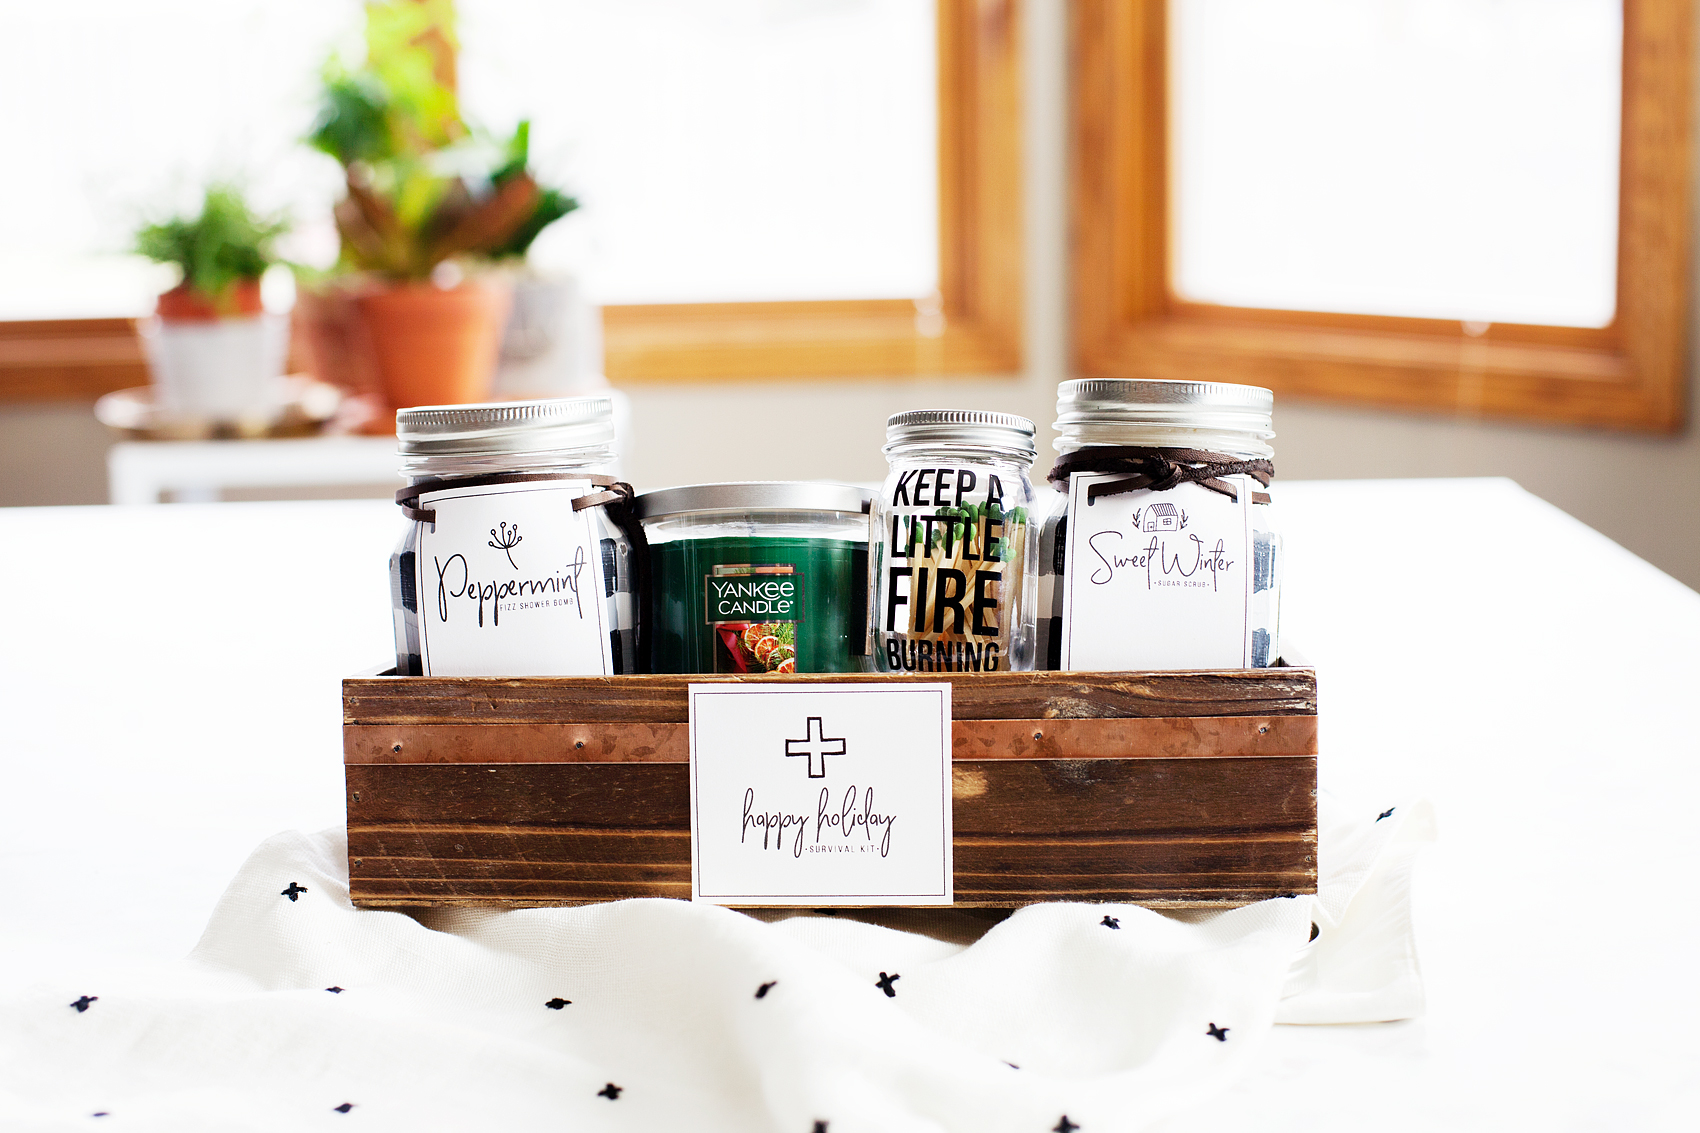
With the craziness of the Holidays, who couldn’t use a spa inspired holiday survival kit? It’s full of homemade sugar scrub, shower bombs in stylish Buffalo Check Ball Jars, one of my favorite Yankee Candles®, even a cute little Ball® jar filled with matches. It turned out so cute, come learn how to make some kits of your own to give give to friends and family this Christmas. You could even use it as a Secret Santa gift!

+ This post brought to you by the folks at Newell Brands, makers of Ball® Fresh Preserving Products + Create this fun and stylish spa inspired Holiday Survival Kit full of spa goodies in Buffalo Check Ball Jars, a Yankee Candle and the cutest little Ball match jar + free printable tags for each item in the kit created by WhipperBerry

I know when I’m working preparing all of the Holiday magic that comes this time of year, I can easily get a little run down. Nothing major, nothing a nice aromatic bath with some candles couldn’t cure. With that thought in mind, I thought it would be fun to put together this Holiday season to give to my friends, neighbors, teachers… Basically, anyone who could use a little pick-me-up as well.Create this fun and stylish spa inspired Holiday Survival Kit full of spa goodies in Buffalo Check Ball Jars, a Yankee Candle and the cutest little Ball match jar + free printable tags for each item in the kit created by WhipperBerry

Sharing Jars

I love the mission of the Ball® Sharing Jar. When you purchase the Sharing Jars your purchase will benefit Feeding America® – the nation’s largest domestic hunger-relief organization. For every package of Sharing Jars purchased, Newell Brands will donate 4 meals*! I LOVE it when I can help support a worthy cause when buying stuff I would normally buy any way.

*Newell Brands® will donate $0.36 per package of Sharing Jars sold, up to $150,000 provided to Feeding America®.  $1 helps provide 11 meals secured by Feeding America® on behalf of local member food banks.

Sugar Scrub Recipe

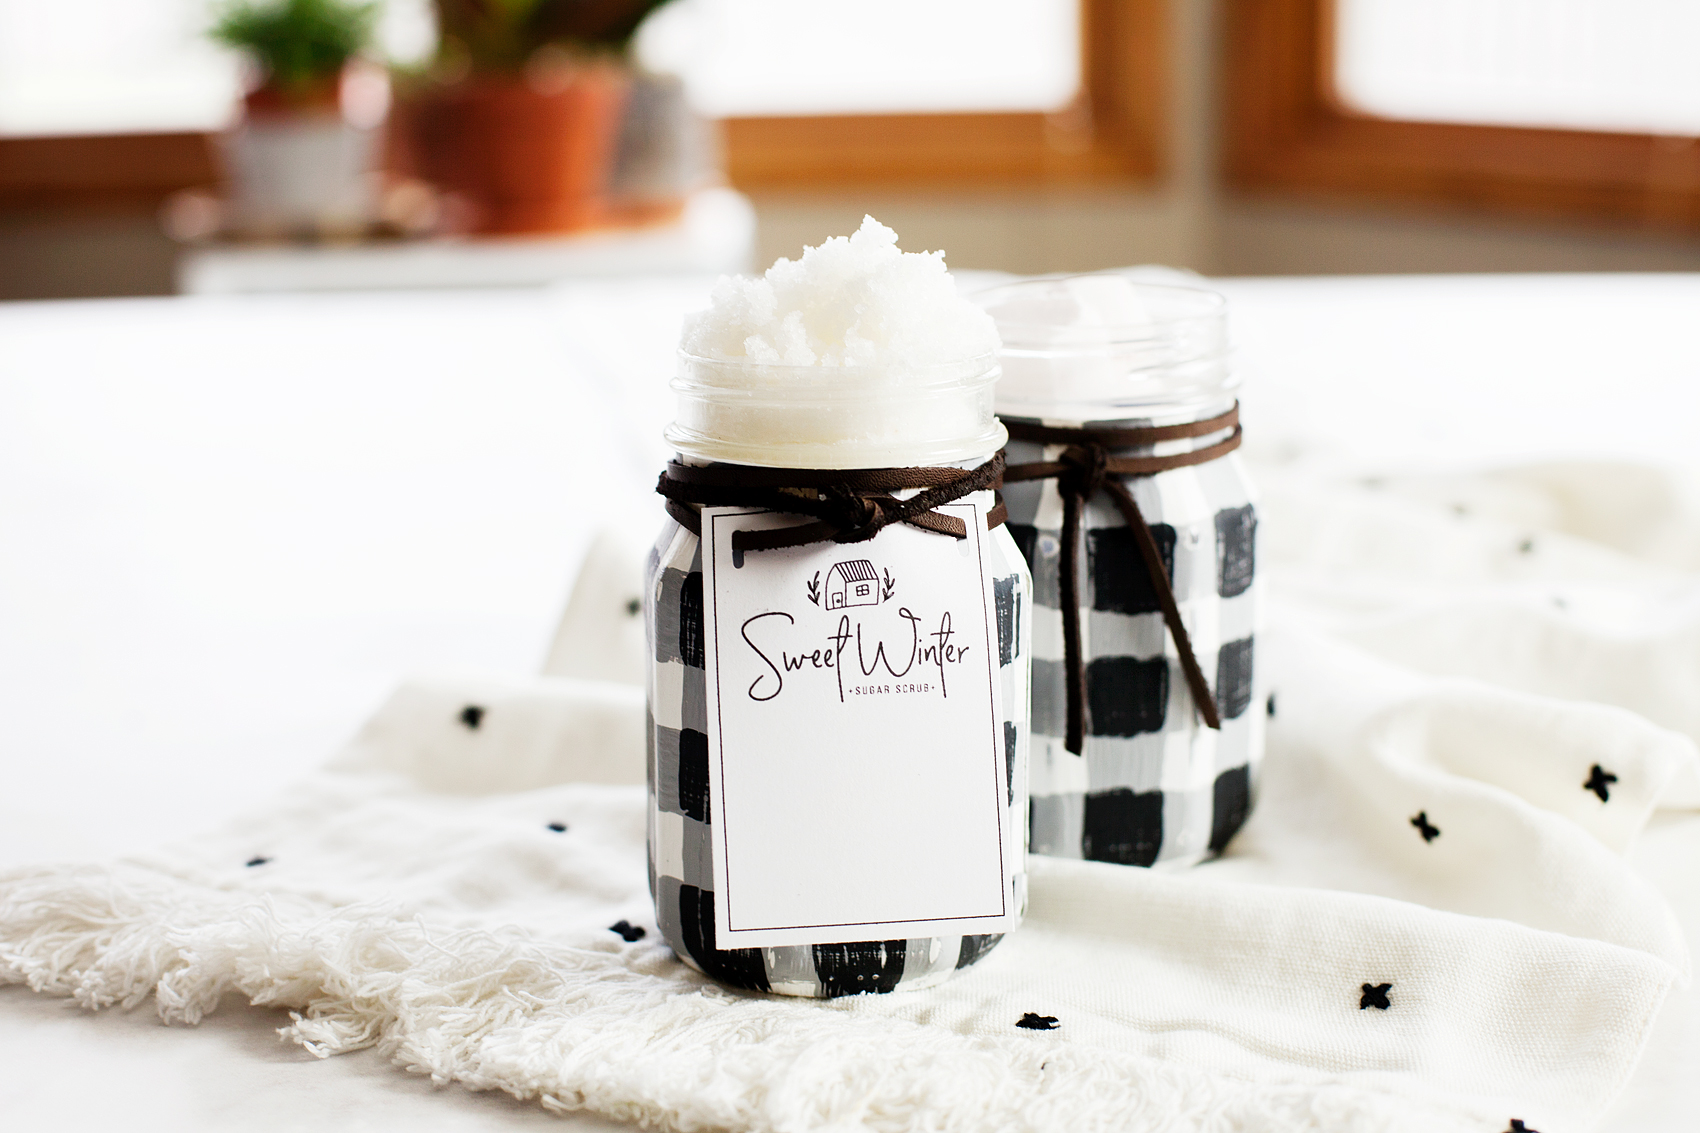
Before you can start assembling your Holiday Survival Kit, you’ll need to mix-up some simple sugar scrub. This couldn’t be any easier. You can mix this by hand or with a mixer. Either way is totally fine. Here’s what you’ll need.

  • 2 cups sugar
  • 1/4 cup coconut oil
  • 10 drops of peppermint essential oil

Add sugar to your mixing bowl and slowly add your coconut oil until you get the desired consistency. I don’t like to add any food coloring because I don’t like to add extra chemicals and keep things natural. Plus, you don’t want to accidentally spill on something and have the color transfer.

Finish up by adding the essential oils and package in your Ball® Sharing Jar.
Sweet Winter Sugar Scrub from WhipperBerry

Shower Bomb Recipe

The shower bombs take a little more patience. These little guys are very similar to the Snowball Bath Bombs I made the other day. They are made with baking soda and you want to make sure you don’t activate it while you are in the process of mixing up your shower bombs.

  • 1 cup baking soda
  • 1/2 cup citric acid
  • 1/2 cup corn starch
  • 2-3 tablespoons water
  • 3o drops peppermint essential oil

In the bowl of a stand mixer, add baking soda, citric acid and corn starch. Put water and essential oil into a small spray bottle and slowly spray dry mixture while mixing on low. Continue adding water/oil mixture until you achieve a nice wet sand consistency. DO NOT rush this process.

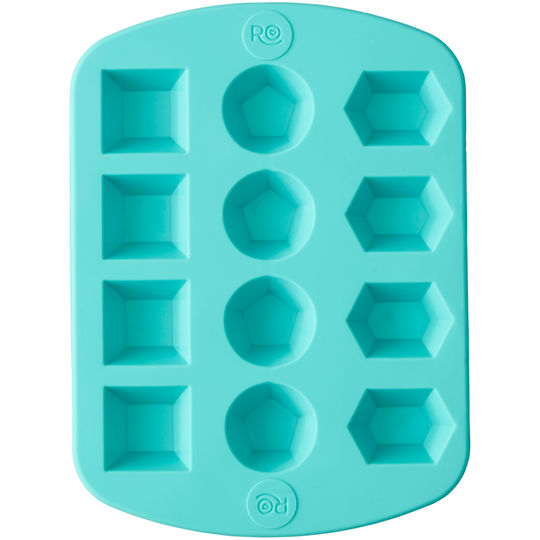
Add mixture to a silicon mold like the one below and press firmly.

10519856_2

Let mixture sit in mold for 4-5 minutes and then carefully unfold. Let the shower bombs sit on a flat surface overnight to dry.

Fill the other sharing jar with the shower bombs and attach printable tag to jar.

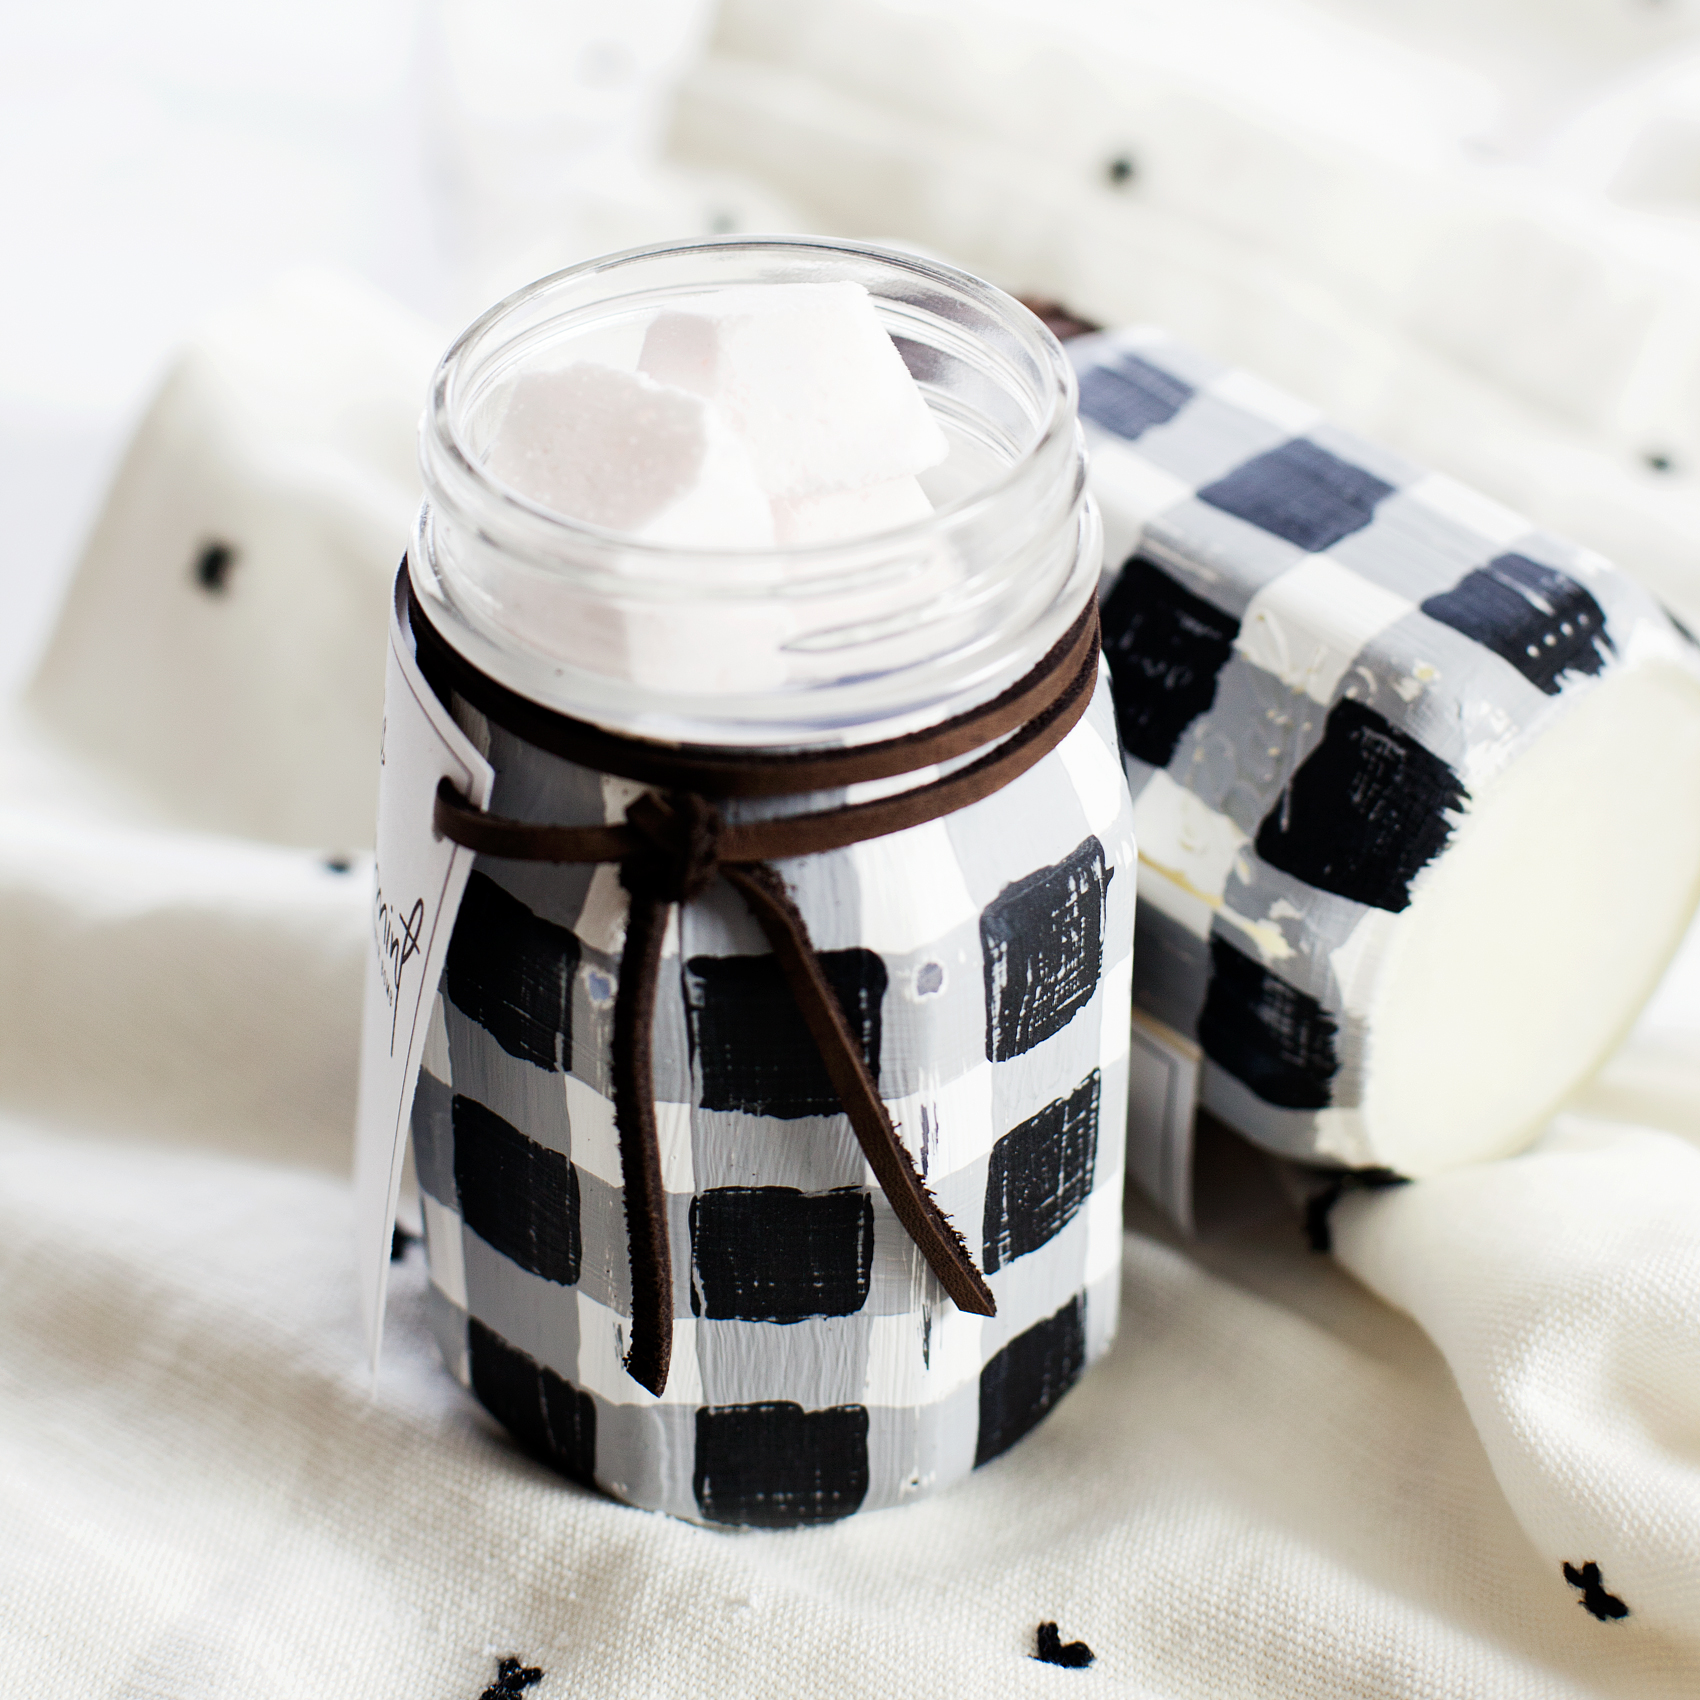
Love the Buffalo Check trend? Yep, me too! I thought it would be fun to use some of the Ball® Giving Jars to create some Buffalo Check Jars to use as gifts this Holiday Season. Here's how you can make some of your own.

Buffalo Check Jars

These buffalo check jars are a true gem! I have a feeling I’ll be using these year-round. Here is a quick post to show you how to make them.

Love the Buffalo Check trend? Yep, me too! I thought it would be fun to use some of the Ball® Giving Jars to create some Buffalo Check Jars to use as gifts this Holiday Season. Here's how you can make some of your own.

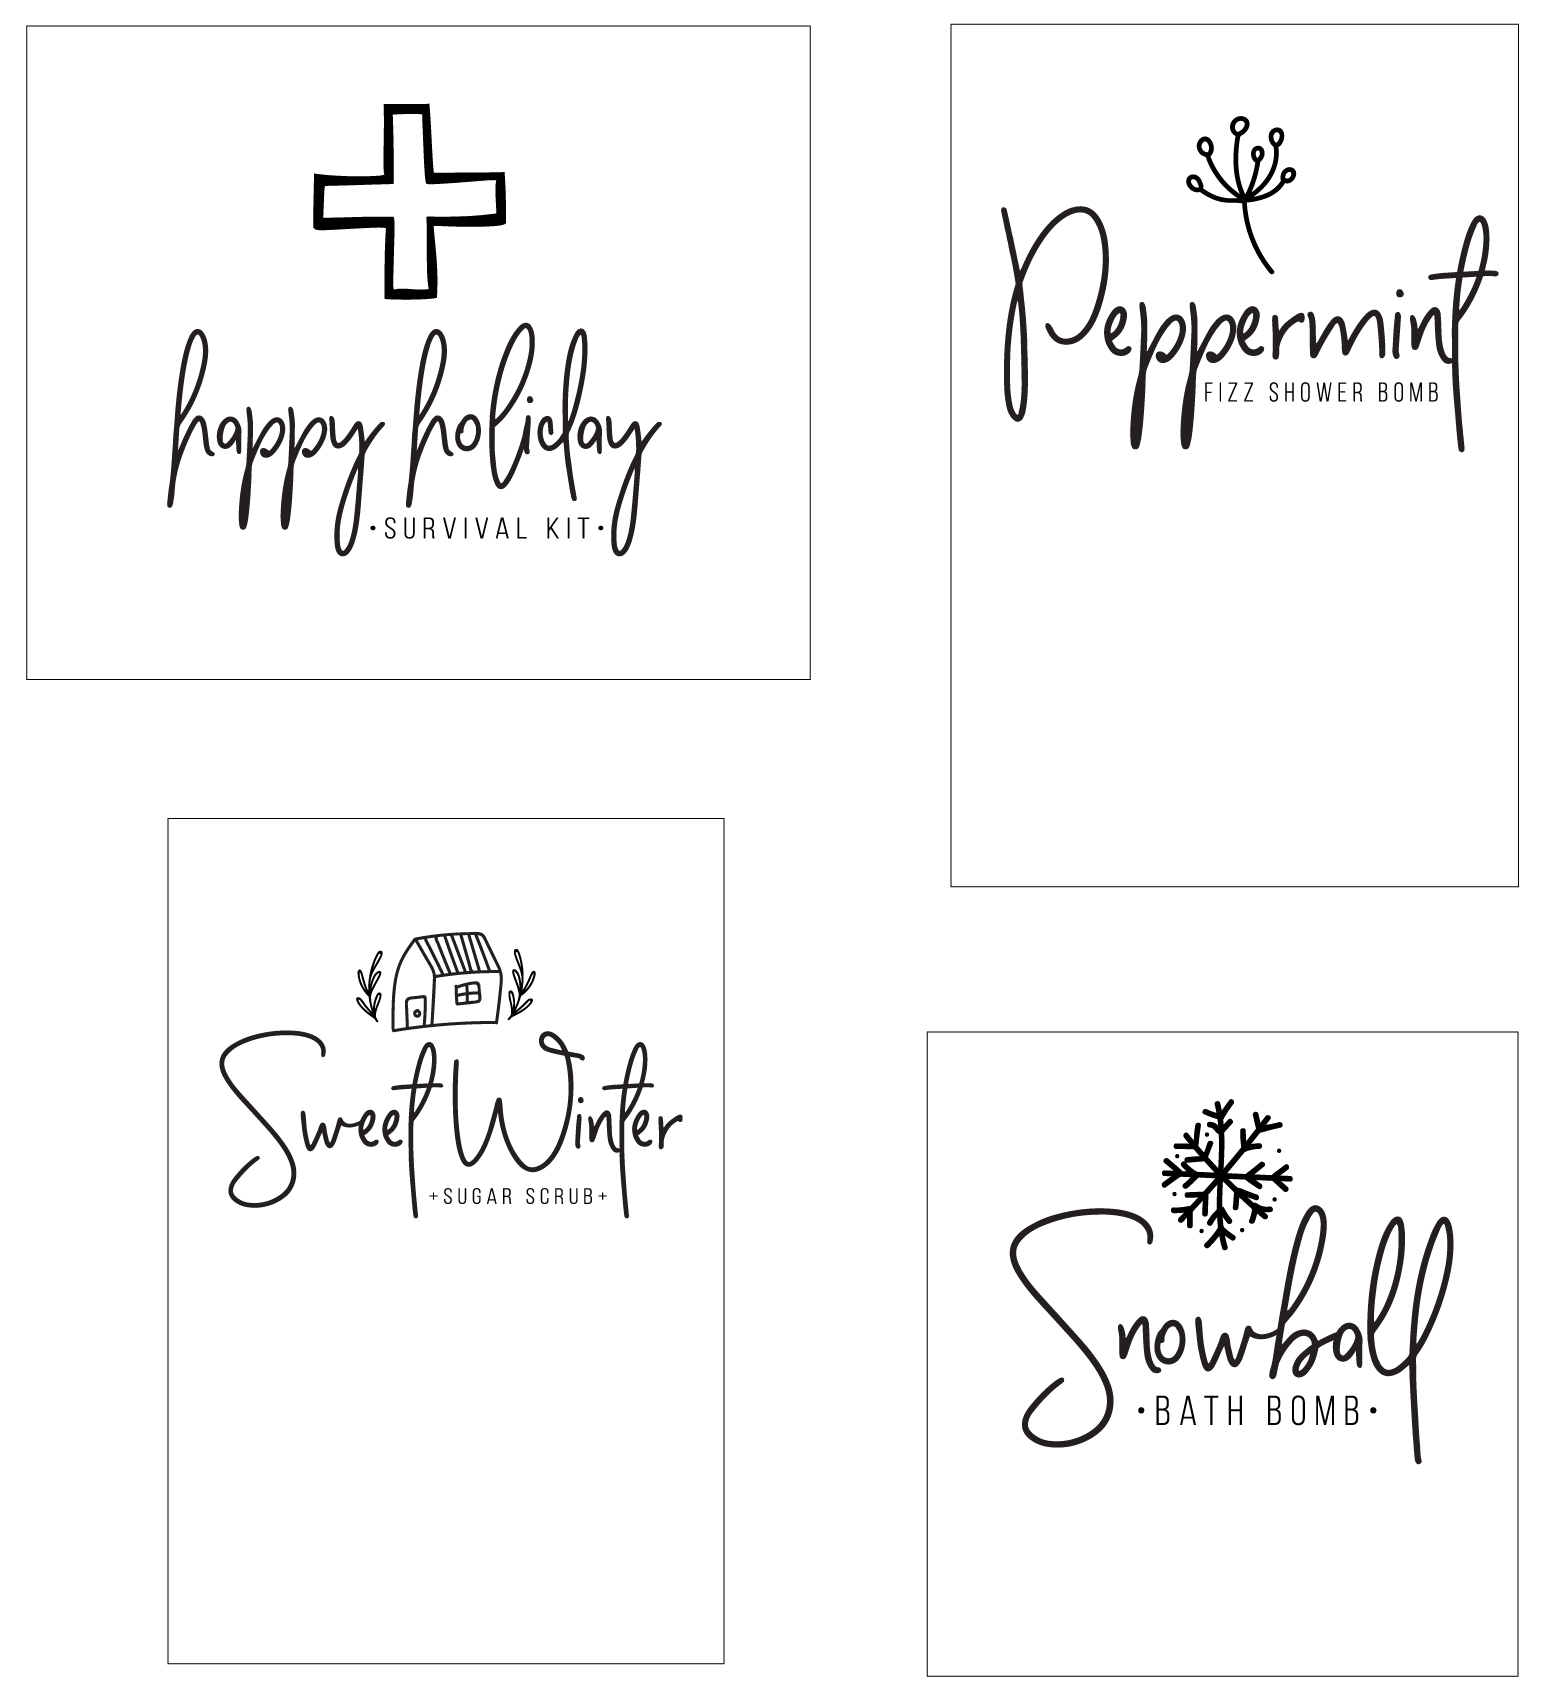
Printable Gift Tag

If you know me at all, you know I LOVE to design all kinds of printable. These may be some of my favorite thus far.holiday survival kit printable from whipperberry-100

You can download the tags HERE

Match Jar

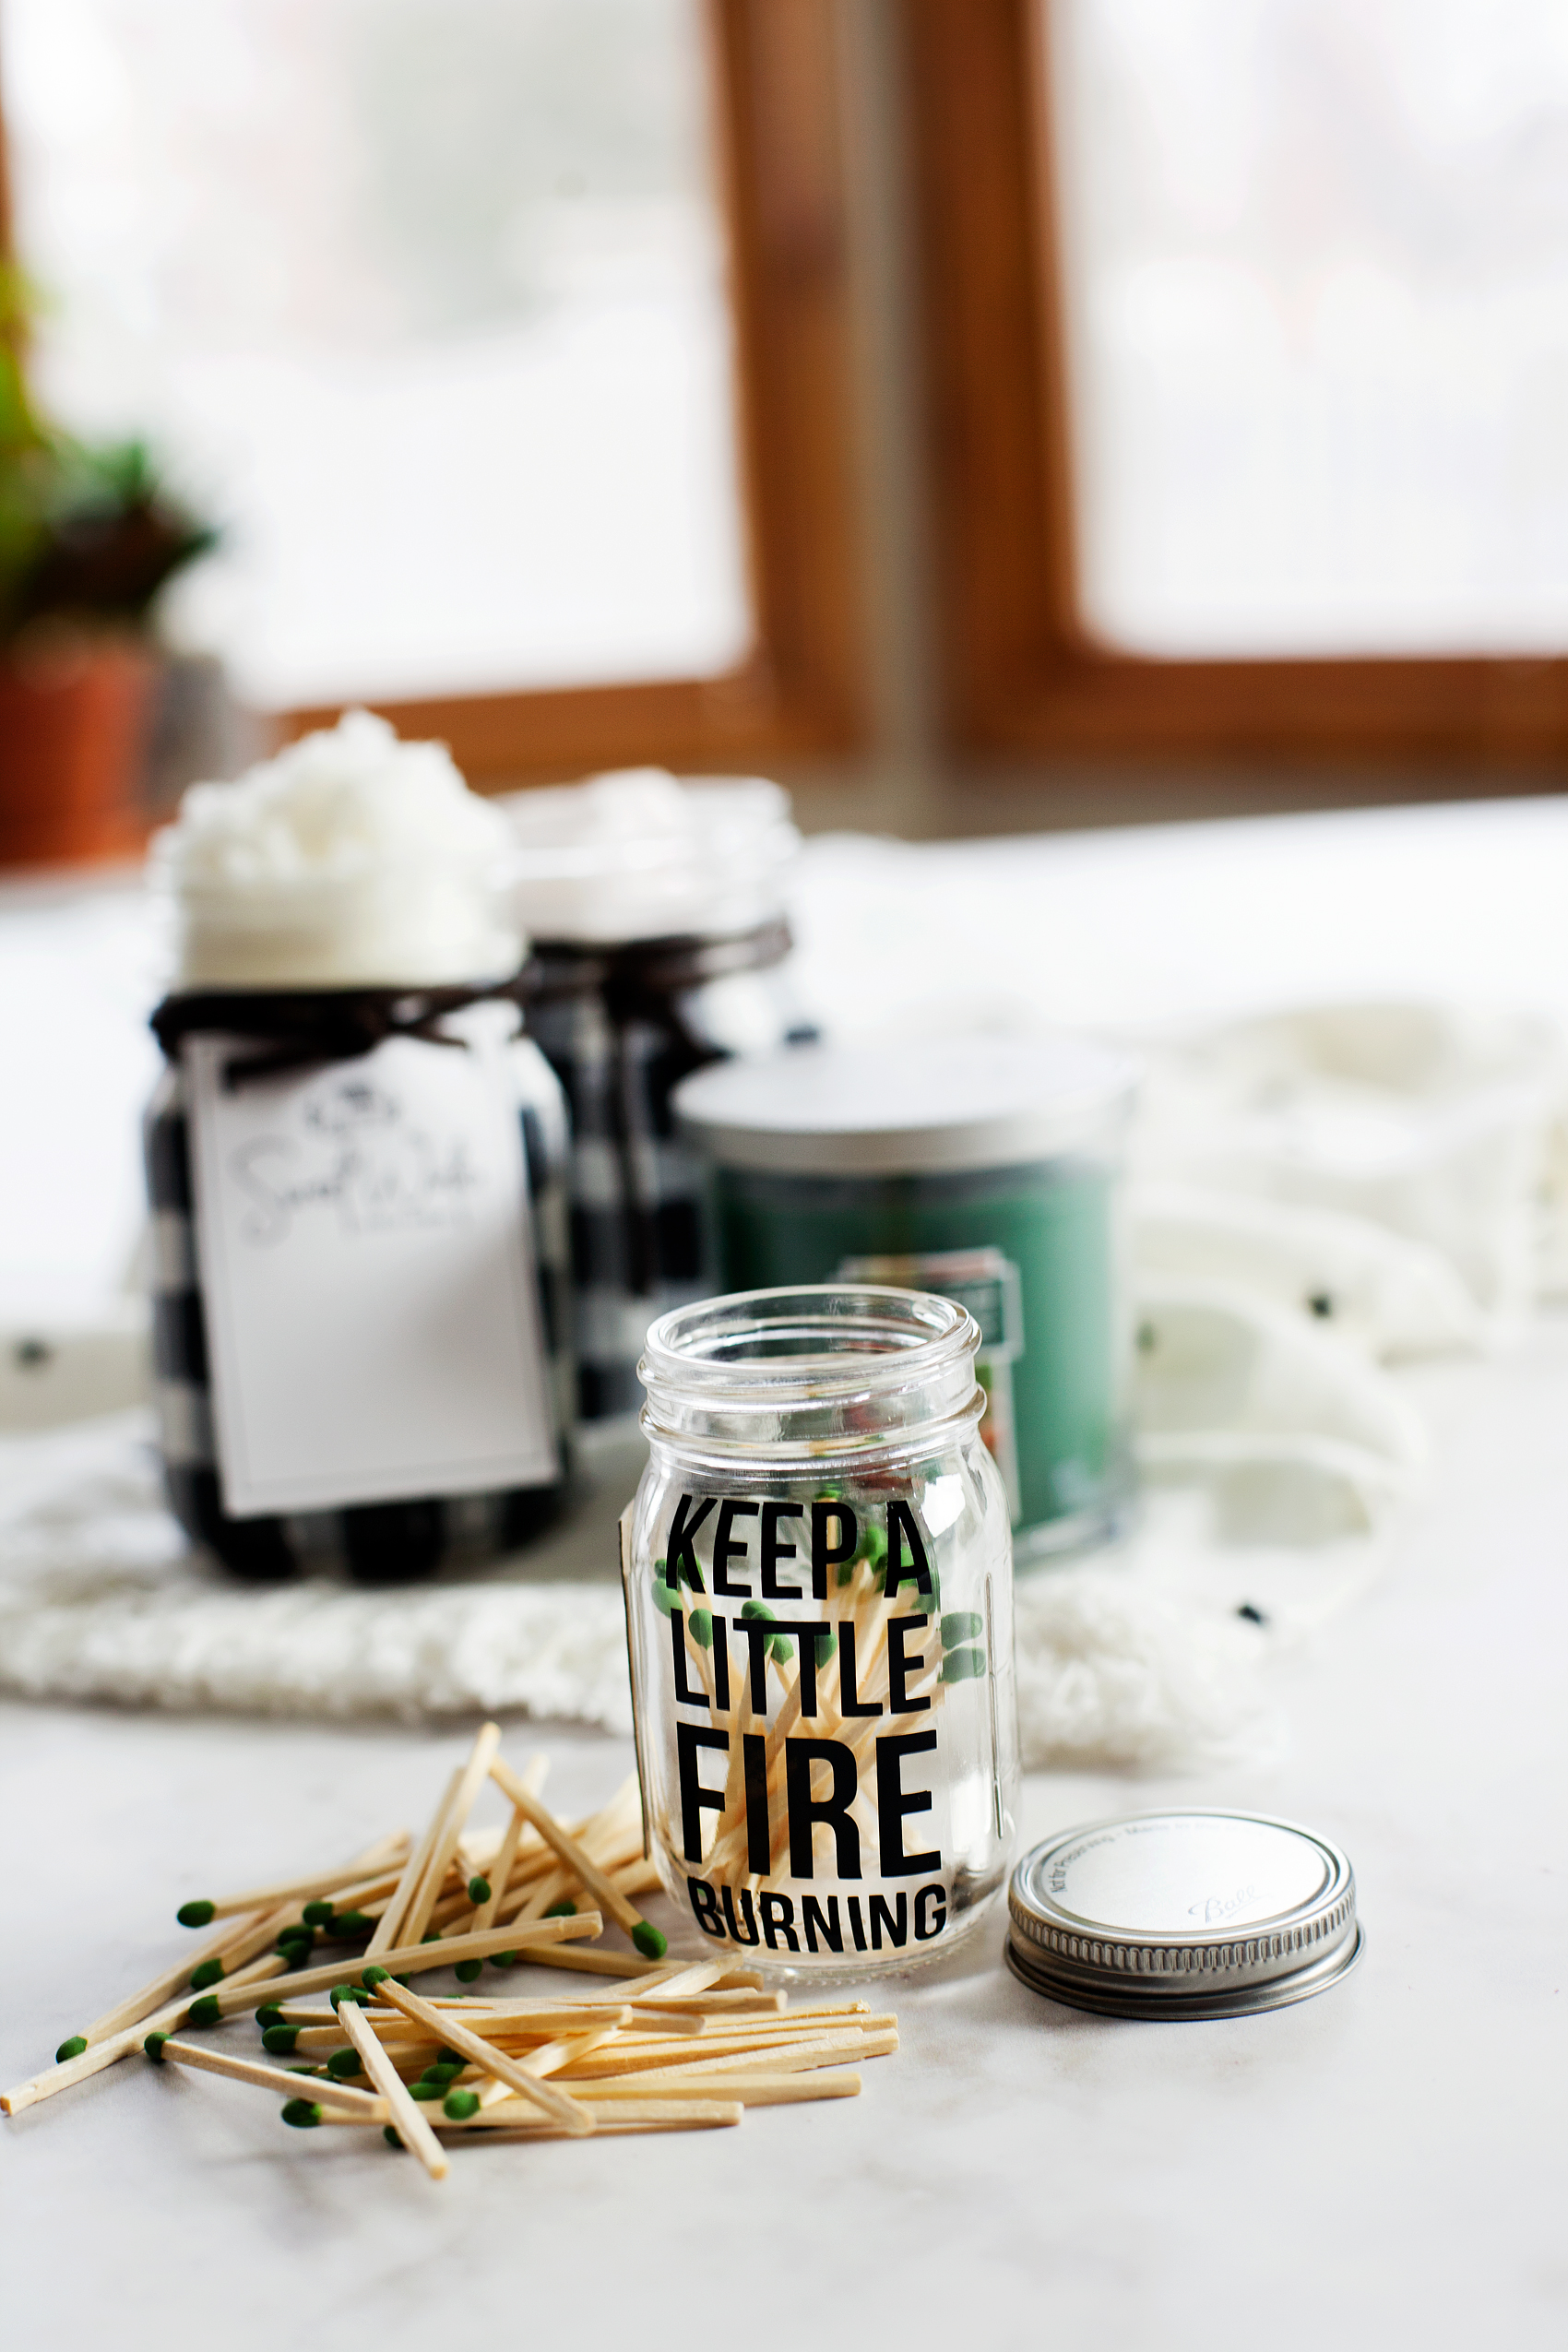
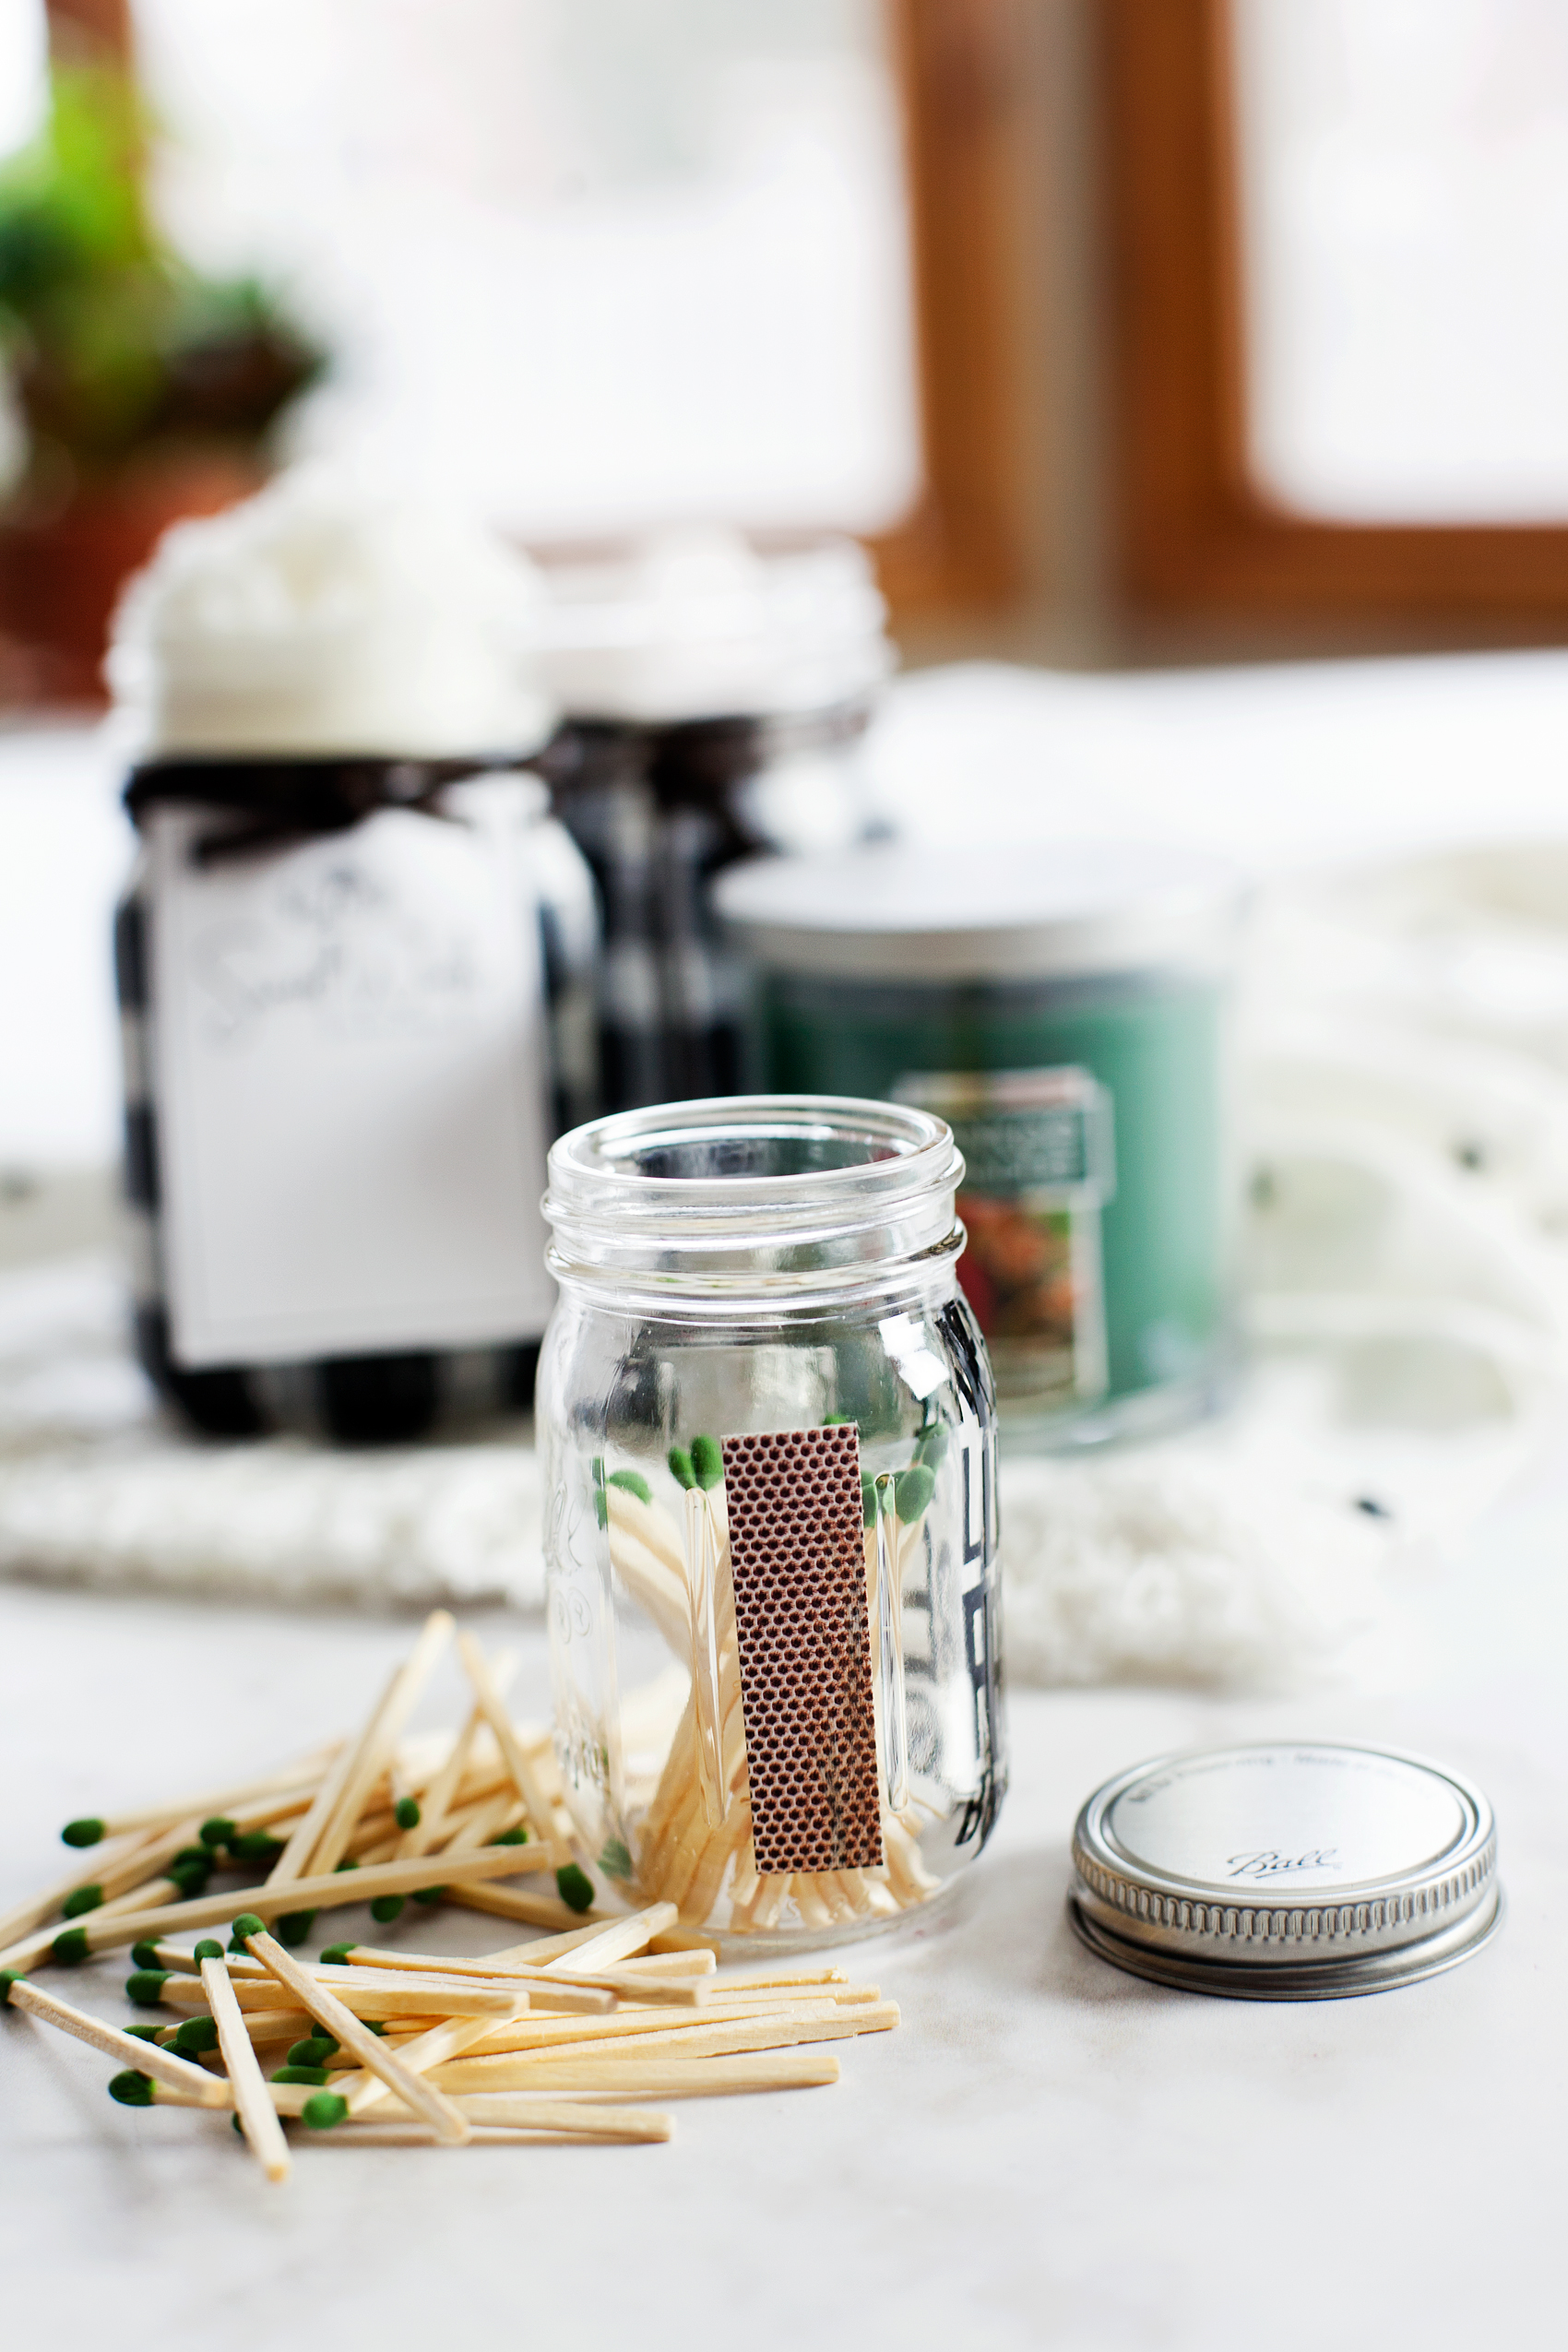
Alright, I am so in love with this little, itty-bitty Mini Ball® Storage Jars. They are only 4 oz. and they are just too darn cute!

cute little Ball Match Jar from WhipperBerry

They are the perfect size for a little match jar for your Holiday Survival Kit. I filled the jar with matches, thenI cut a strip of the matchbox striker and glue it to the side of the jar.

Ball-Buffalo-Plaid-Holiday-Survival-Kit-via-WhipperBerry-066

I also cut some vinyl on my Cricut that looks super fun on the jar…

keep a little fire burning match jar-100

You can download the cut file HERE

Holiday Survival Kit Assembly

Now, all you need to do is assemble your spa inspired Holiday Survival Kit…

Love the Buffalo Check trend? Yep, me too! I thought it would be fun to use some of the Ball® Giving Jars to create some Buffalo Check Jars to use as gifts this Holiday Season. Here's how you can make some of your own.

I grabbed a Yankee Candle® Small Tumbler Candle to go with my match jar and a little box and I assembled my Survival Kit with he printable tag glued on the front of the box. I also tied the gift tags on the jars with some leather that I bought at my local craft store. Now, it’s giving time!

Secret Santa

I am super excited this year to participate in the Ball® Home Canning Products Secret Santa Program! Their lovely crew assigned me to an amazing talented blogger, Almost Makes Perfect. I adore her style and was thrilled to send my Spa Inspired Survival Kit to her. I can’t wait to see what she thinks of it.

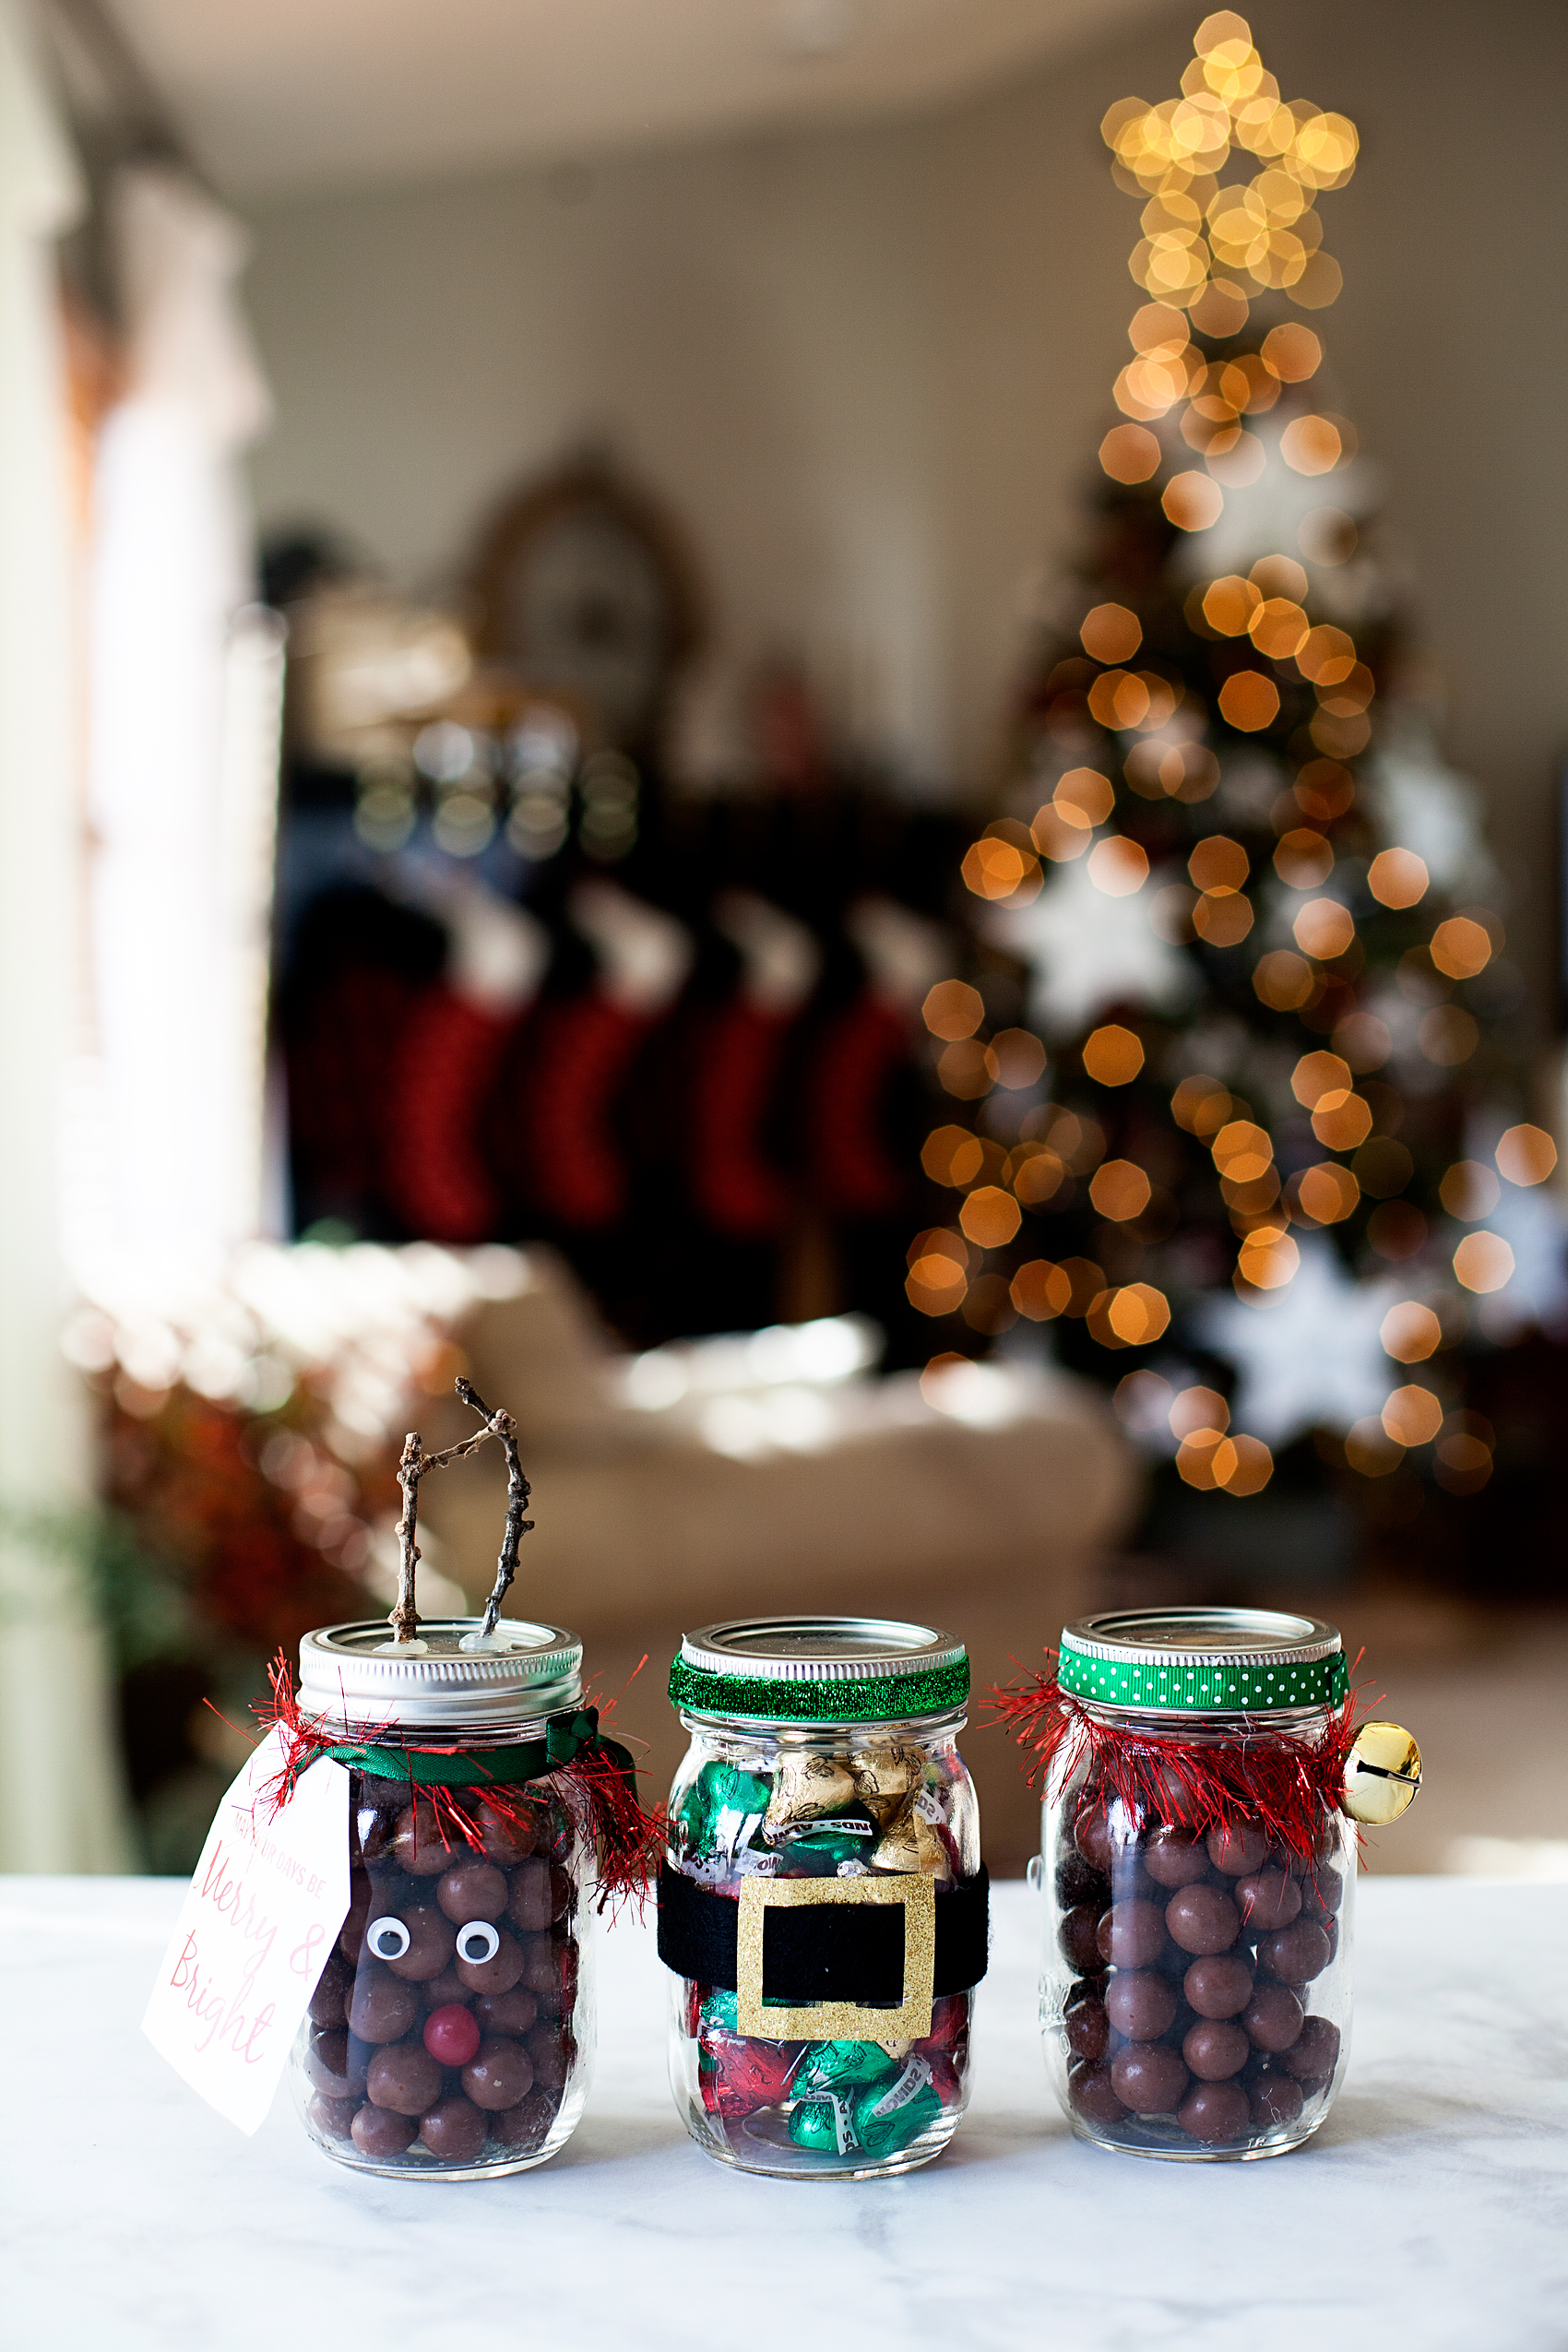
I was lucky enough to receive a Ball Secret Santa gift from Jamie of C.R.A.F.T. She sent me this cute little candy jar set…

Ball-Secret-Santa-Jars_

How fun is that? Adding some twigs as antlers and a belt to the jar to look like Santa. Honestly guys, creating with Ball® Canning Jars is so much fun! What can you guys think-up for this Holiday Season?

Disclosure +  I am a paid partner for Newell Brands, makers of Ball® Fresh Preserving Products. However, all thoughts and opinions expressed are entirely my own. 
How to Paint Buffalo Check Jars

3 · Dec 5, 2017 · Leave a Comment

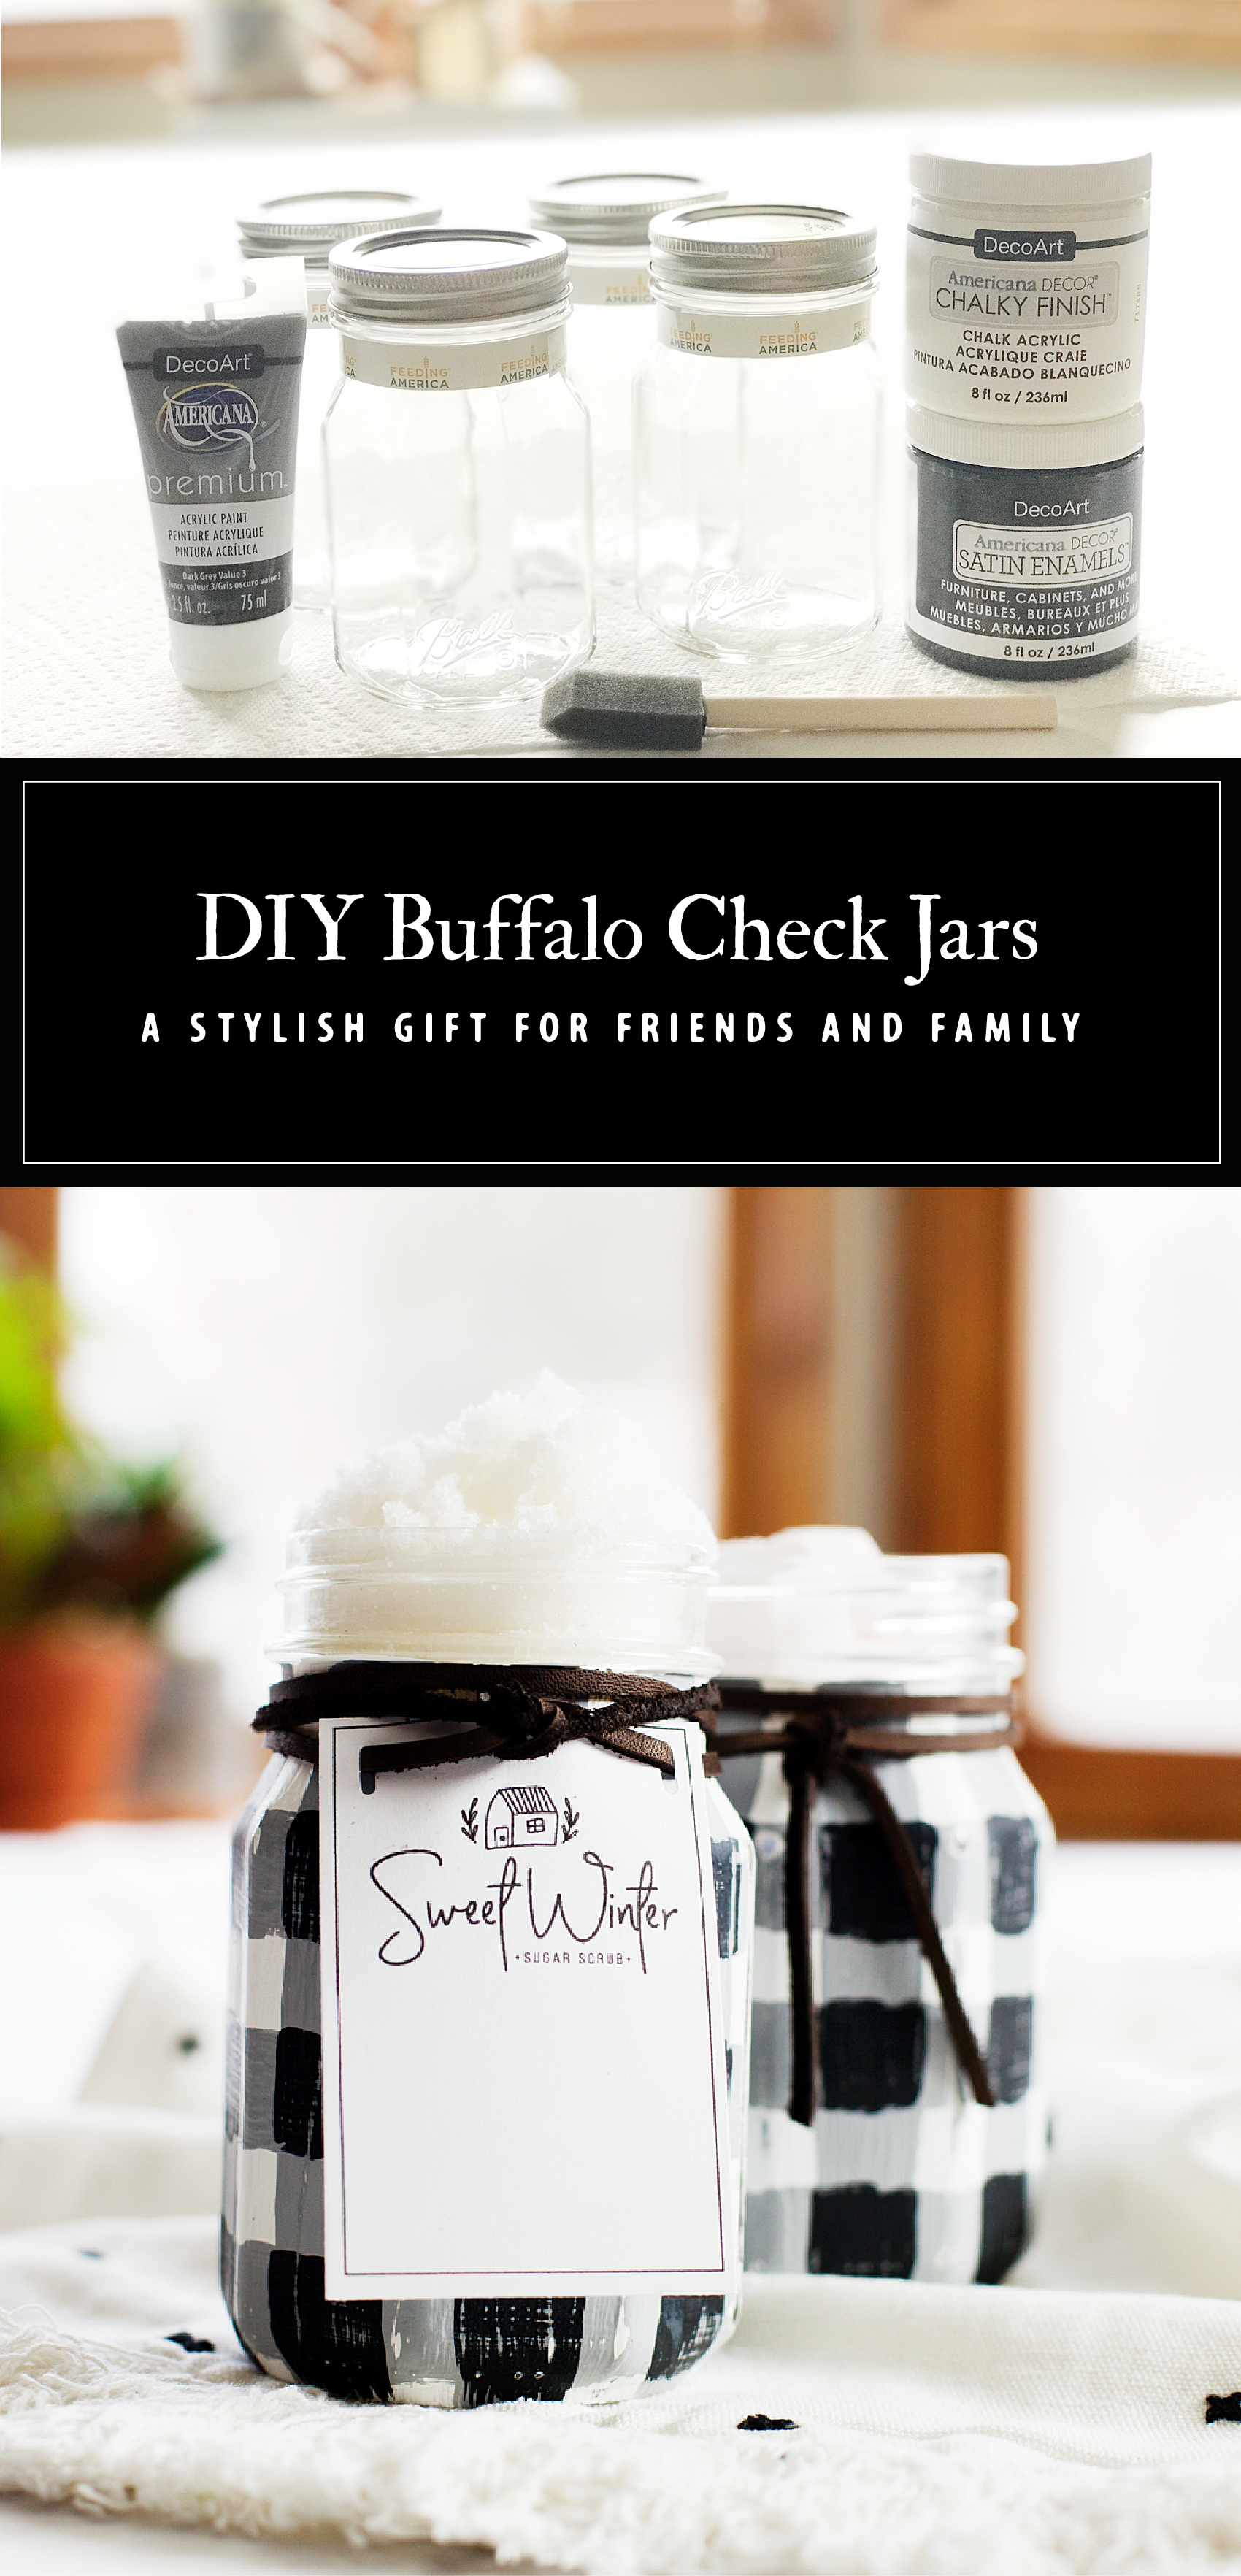
Love the Buffalo Check trend? Yep, me too! I thought it would be fun to use some of the Ball® Sharing Jars to create some Buffalo Check Jars to use as gifts this Holiday Season. Here’s how you can make some of your own.
+ This post brought to you by the folks at Newell Brands, makers of Ball® Fresh Preserving Products +

Love the Buffalo Check trend? Yep, me too! I thought it would be fun to use some of the Ball® Giving Jars to create some Buffalo Check Jars to use as gifts this Holiday Season. Here's how you can make some of your own.
Ball® Sharing Jars

This project looks a bit challenging, but truly it’s not! All you need are some of those fabulous Ball® Sharing Jars and some paint and you can create this trendy look for yourself.

I love the shape of the Sharing Jars and I love the mission. When you purchase the Sharing Jars your purchase will benefit Feeding America® – the nation’s largest domestic hunger-relief organization. For every package of Sharing Jars purchased, Newell Brands will donate 4 meals*! I LOVE it when I can help support a worthy cause when buying stuff I would normally buy any way.

* Newell Brands® will donate $0.36 per package of Sharing Jars sold, up to $150,000 provided to Feeding America®.  $1 helps provide 11 meals secured by Feeding America® on behalf of local member food banks.

Buffalo Check Jars

I’m a huge fan of the Buffalo Check trend and can’t get enough of it right now. Pretty much everyone I know feels the same way so, I thought a stylish Buffalo Check Jar would be the perfect gift for friends and family for Christmas this year. I’ve filled them with all kinds of stuff; candy, bath scrubs, shower bombs, soup starters, cookie kits, all kinds of stuff. Of course after the jars are painted, you can no longer preserve in them but, they’re great for everything else. Here’s how to make them.

Materials

  • Ball® Sharing Jars
  • Americana Decor Chalky Paint in Everlasting, Yesteryear & Carbon
  • sponge paint brush
  • 1/4″ flat head paint brush
  • 240 grit sandpaper
  • Americana Decor Clear Crème Wax
  • lint free cloth

Instructions

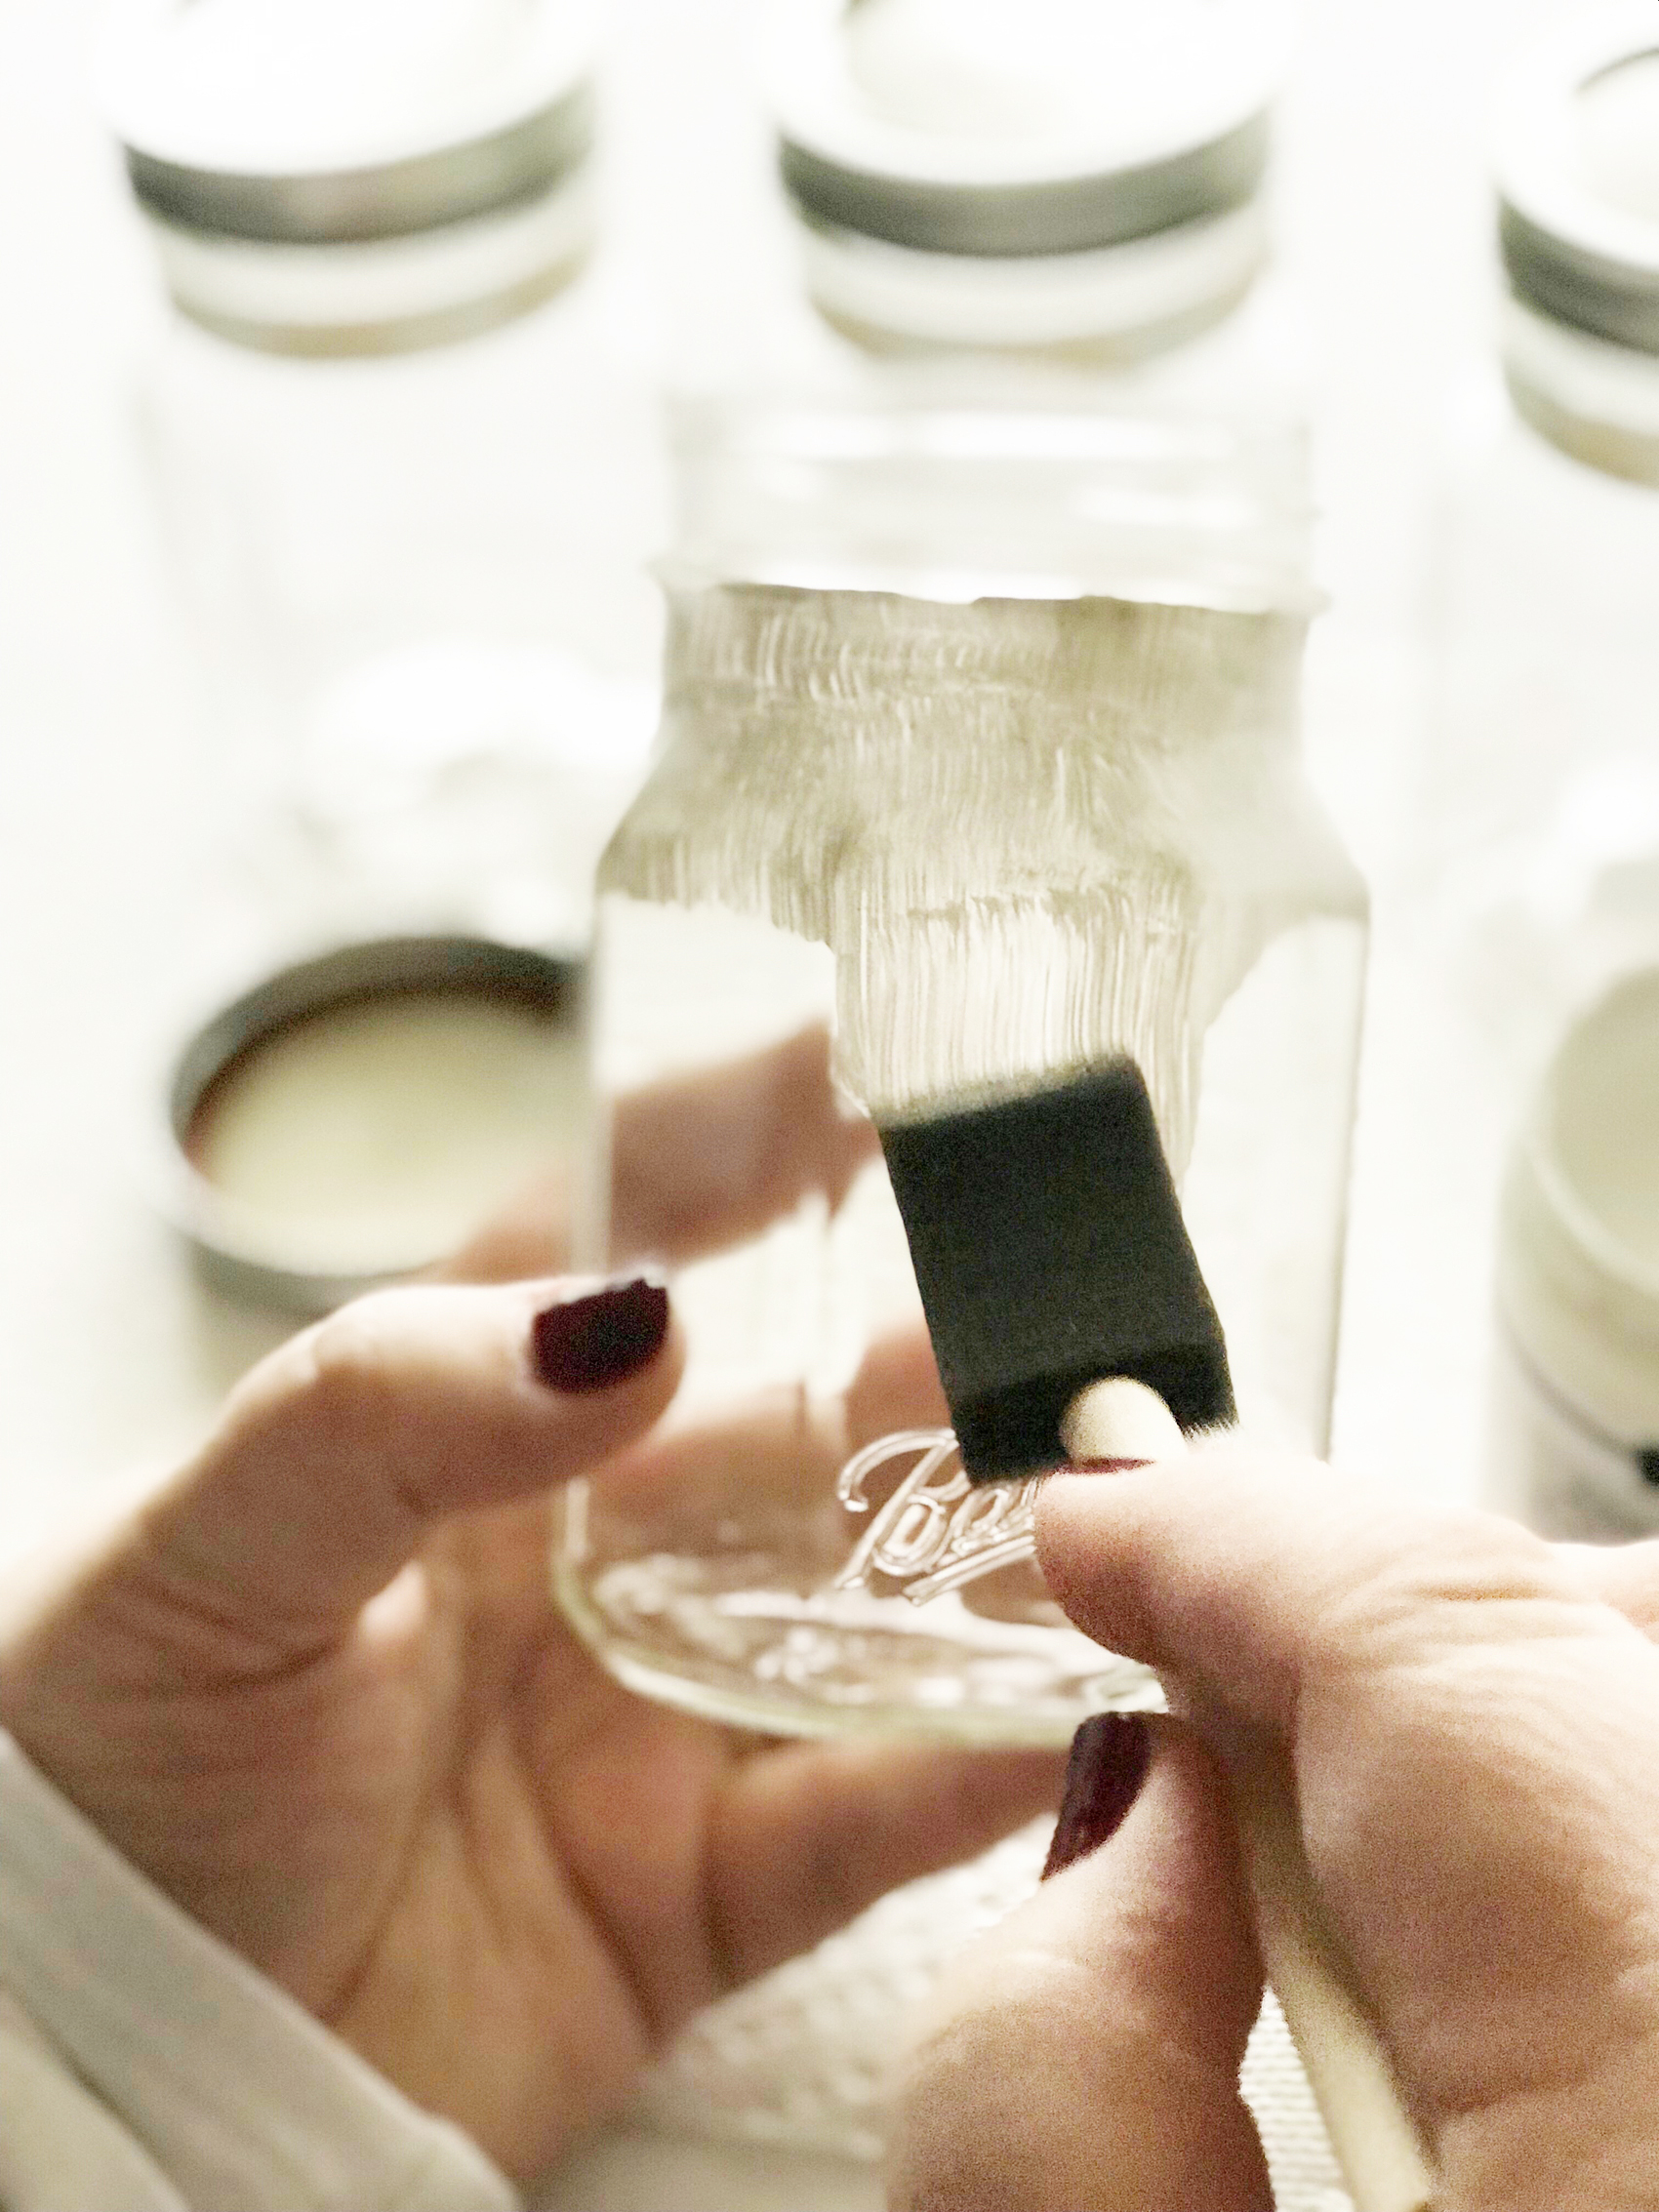
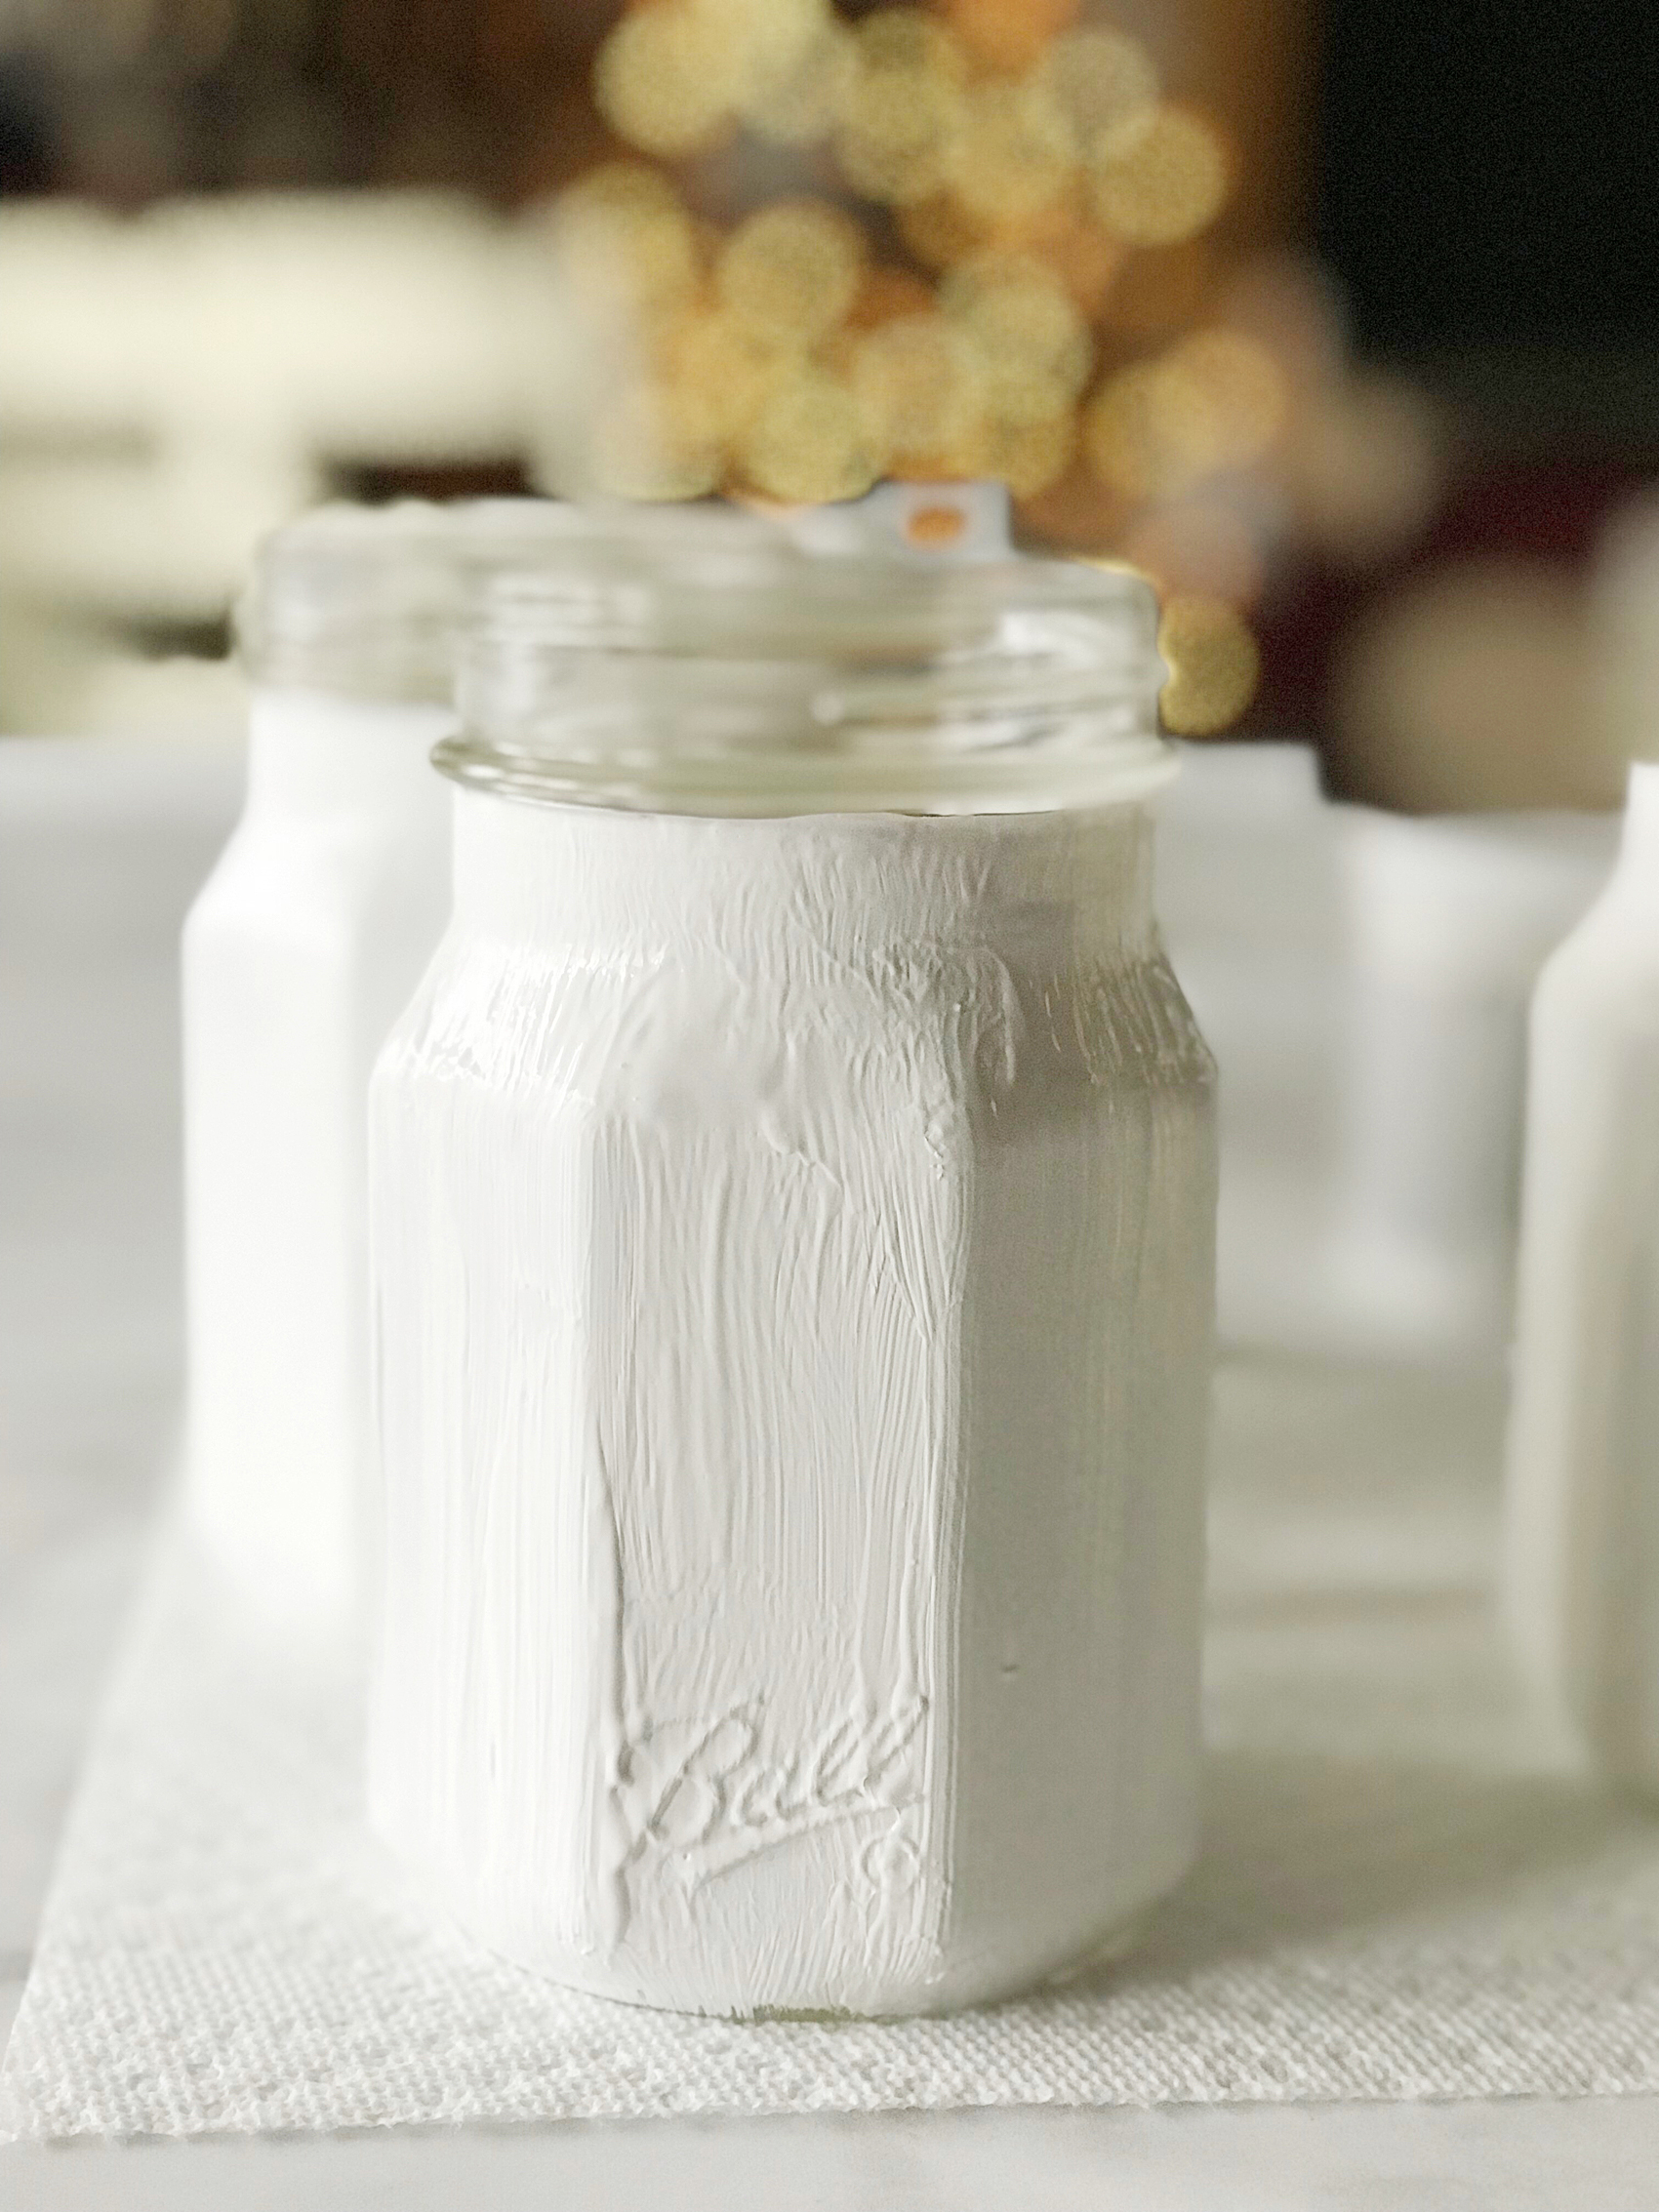
To begin, make sure you have washed and dried your jars. Then paint a couple of layers of the white (Everlasting) chalky paint onto the jar with the sponge brush. You can use your favorite kind of chalk paint here.

Love the Buffalo Check trend? Yep, me too! I thought it would be fun to use some of the Ball® Giving Jars to create some Buffalo Check Jars to use as gifts this Holiday Season. Here's how you can make some of your own.
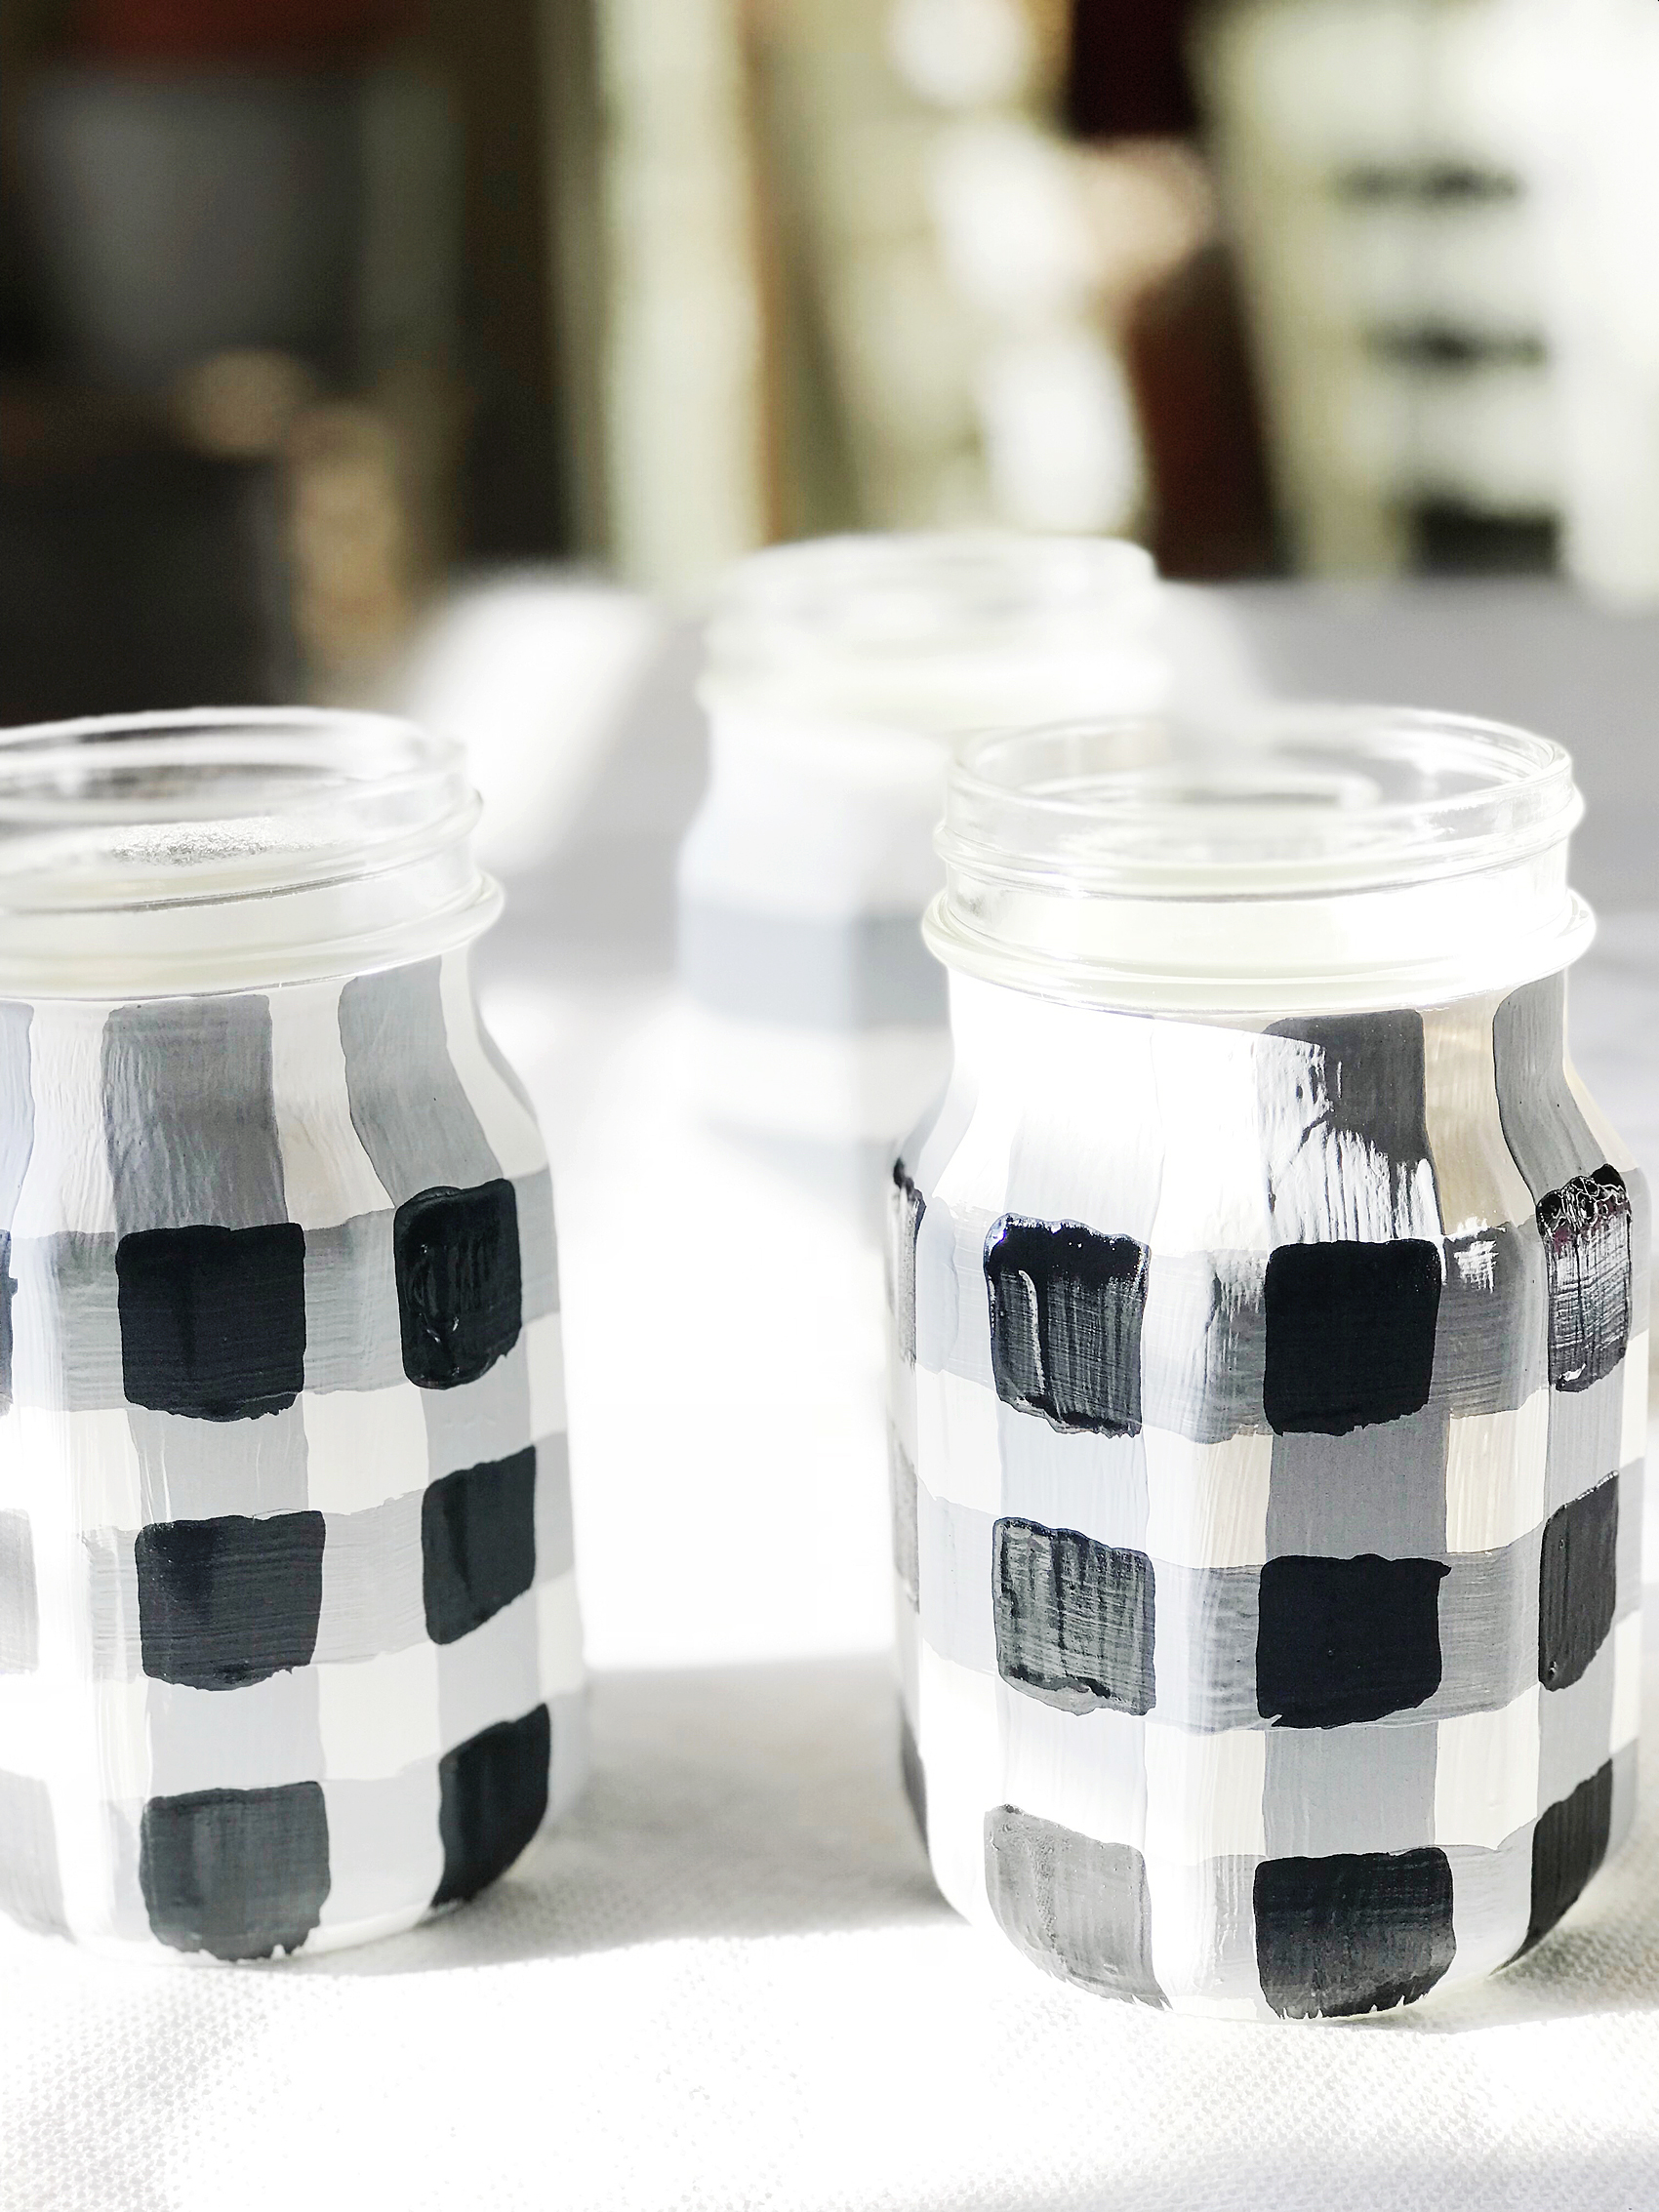
Love the Buffalo Check trend? Yep, me too! I thought it would be fun to use some of the Ball® Giving Jars to create some Buffalo Check Jars to use as gifts this Holiday Season. Here's how you can make some of your own.
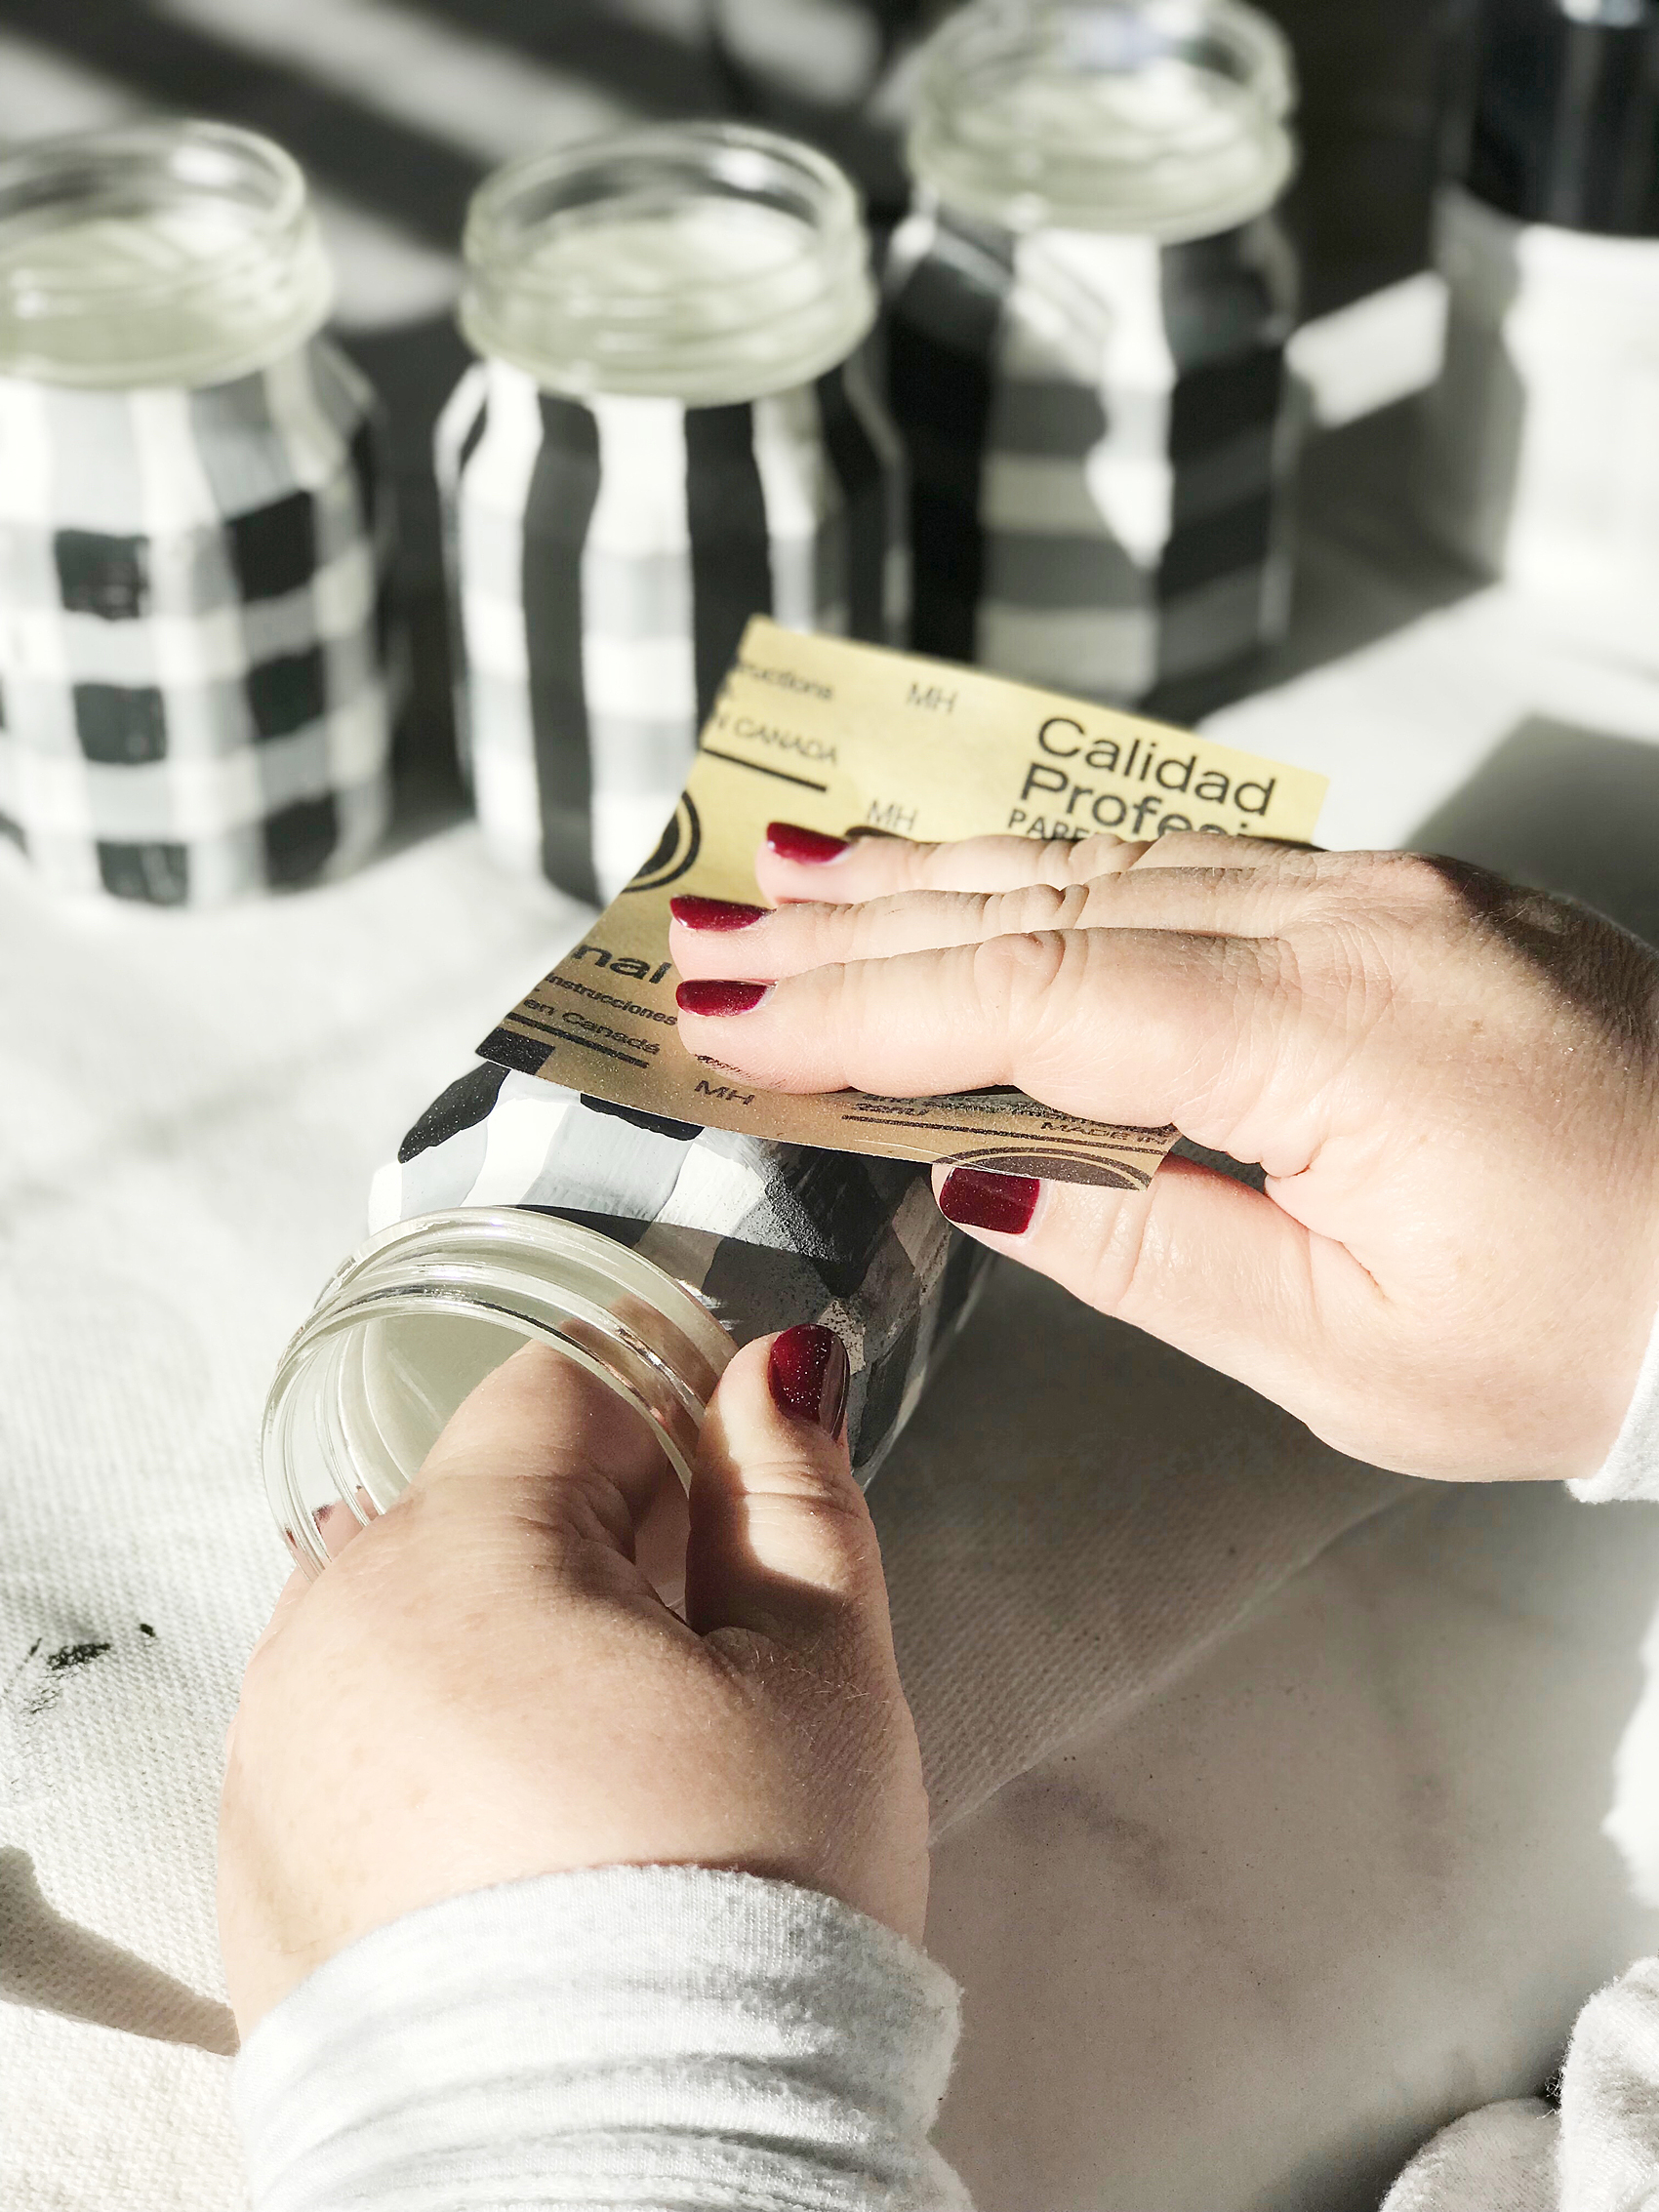
Don’t worry about brush strokes, they will get smoothed out in the finishing process at the end. Let dry, ideally for a few hours or overnight.

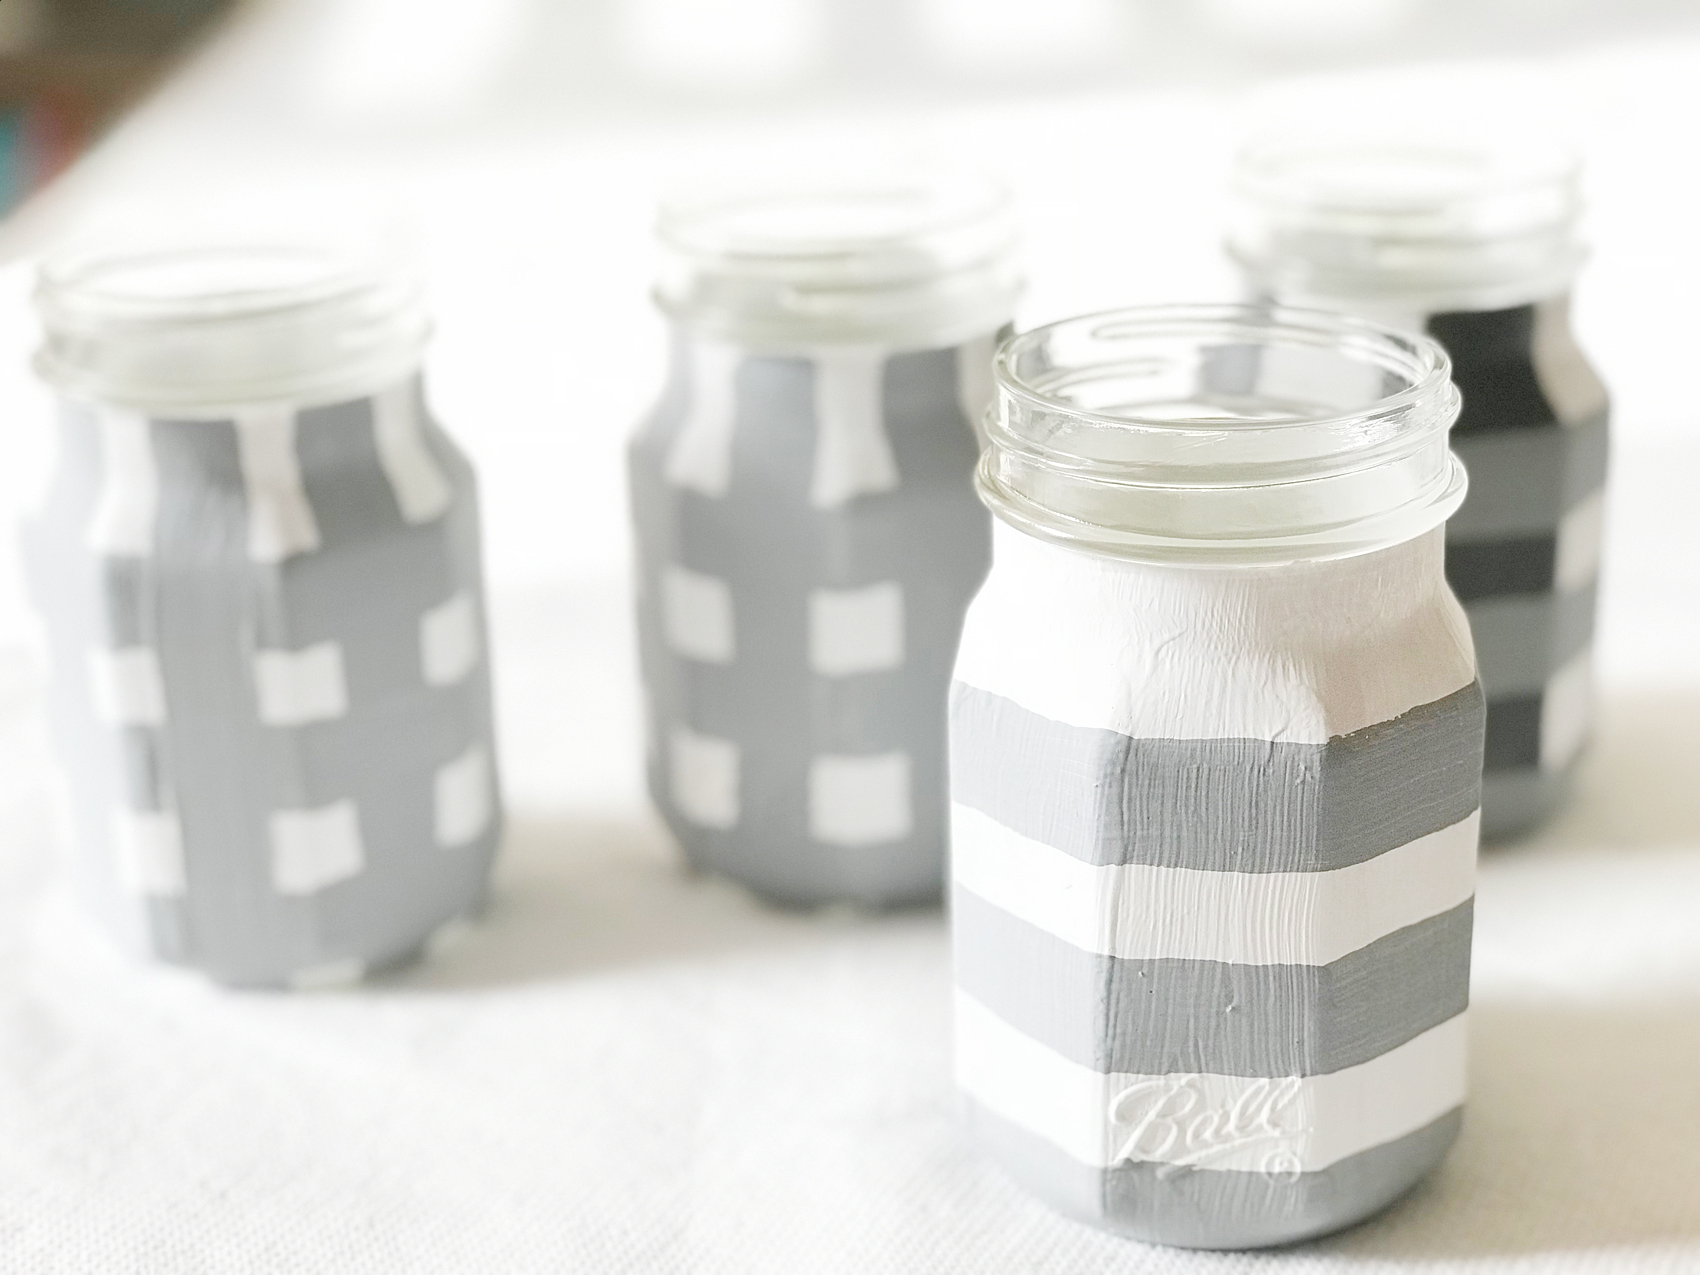
Next, you’ll use the 1/4″ flat paint brush to paint the gray (Yesteryear) stripes onto the jar.

Love the Buffalo Check trend? Yep, me too! I thought it would be fun to use some of the Ball® Giving Jars to create some Buffalo Check Jars to use as gifts this Holiday Season. Here's how you can make some of your own.

You will loosely use the lines on the jars as guides. I really didn’t want a precise looking check wanting it to look more free form or hand painted. I didn’t want this project to become to crazy with measuring every little detail and taping the jar to get perfect lines. This to me makes the project so much more enjoyable and I love the look.

Start at the top points of the lines in the Sharing Jar and use your 1/4 inch brush line to create the stripes. Three stripes around the jar and then a vertical stripe in the center of the flat sections of the sharing jar. Let dry completely.

Love the Buffalo Check trend? Yep, me too! I thought it would be fun to use some of the Ball® Giving Jars to create some Buffalo Check Jars to use as gifts this Holiday Season. Here's how you can make some of your own.

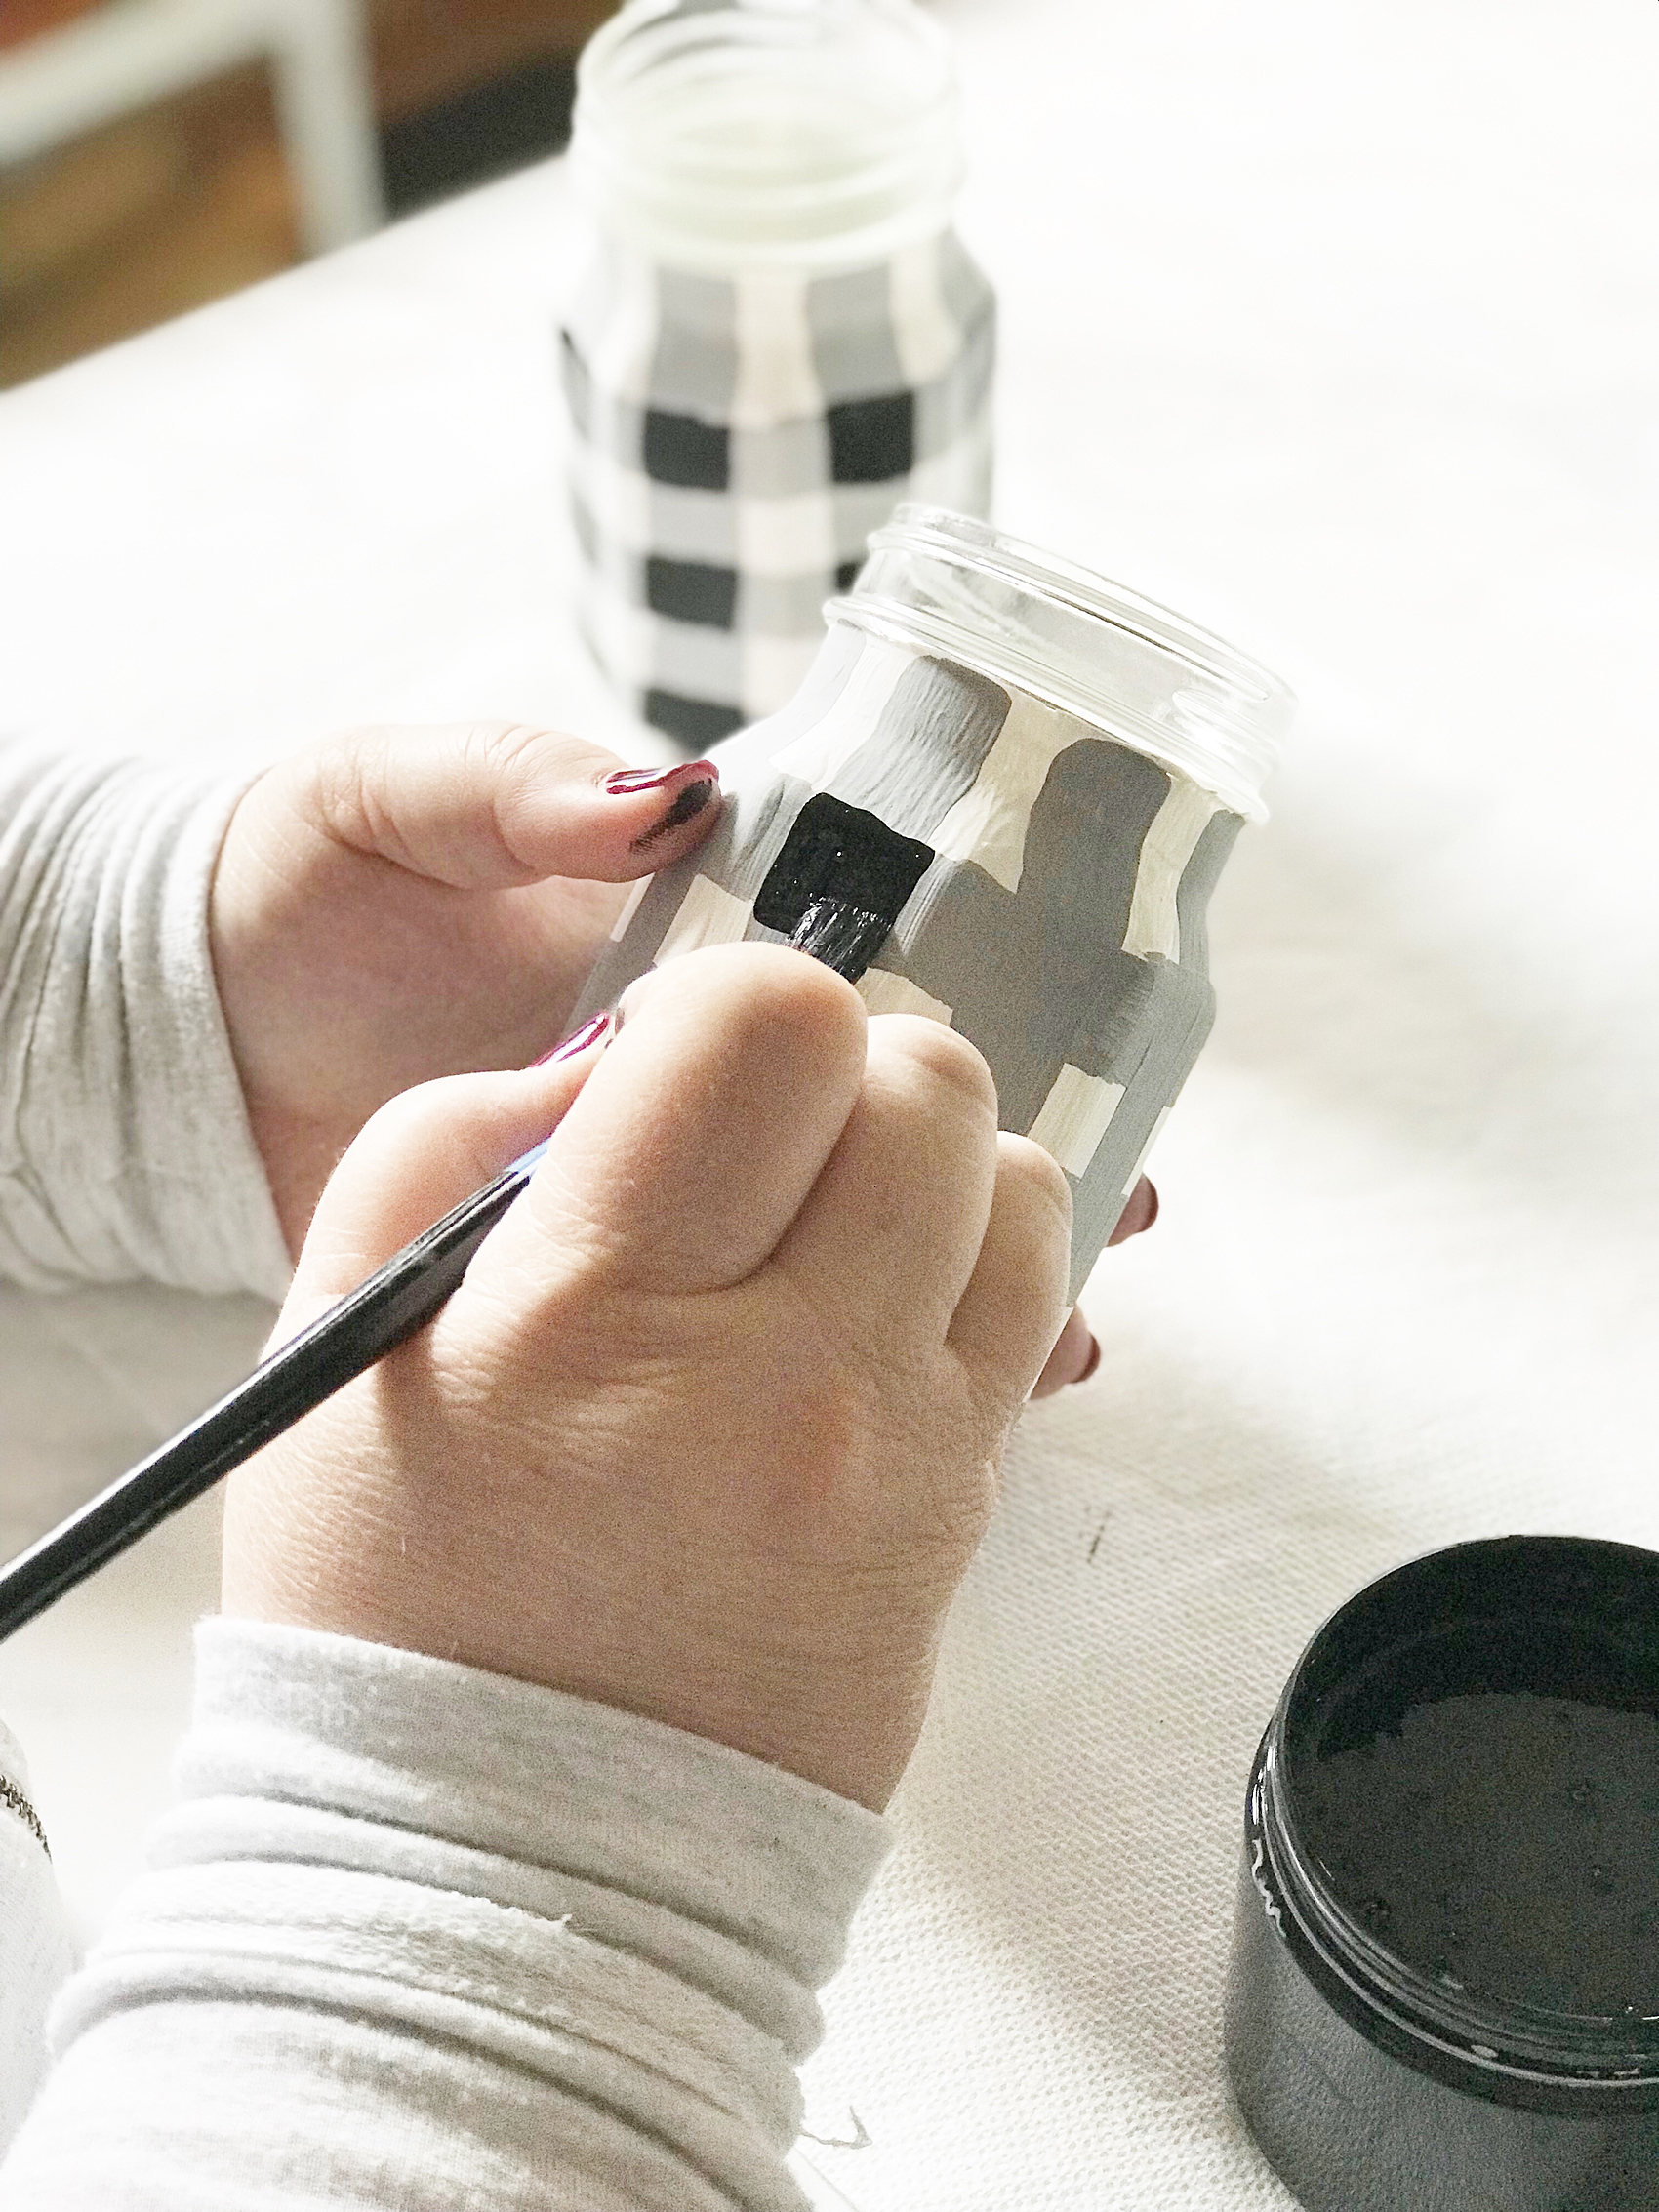
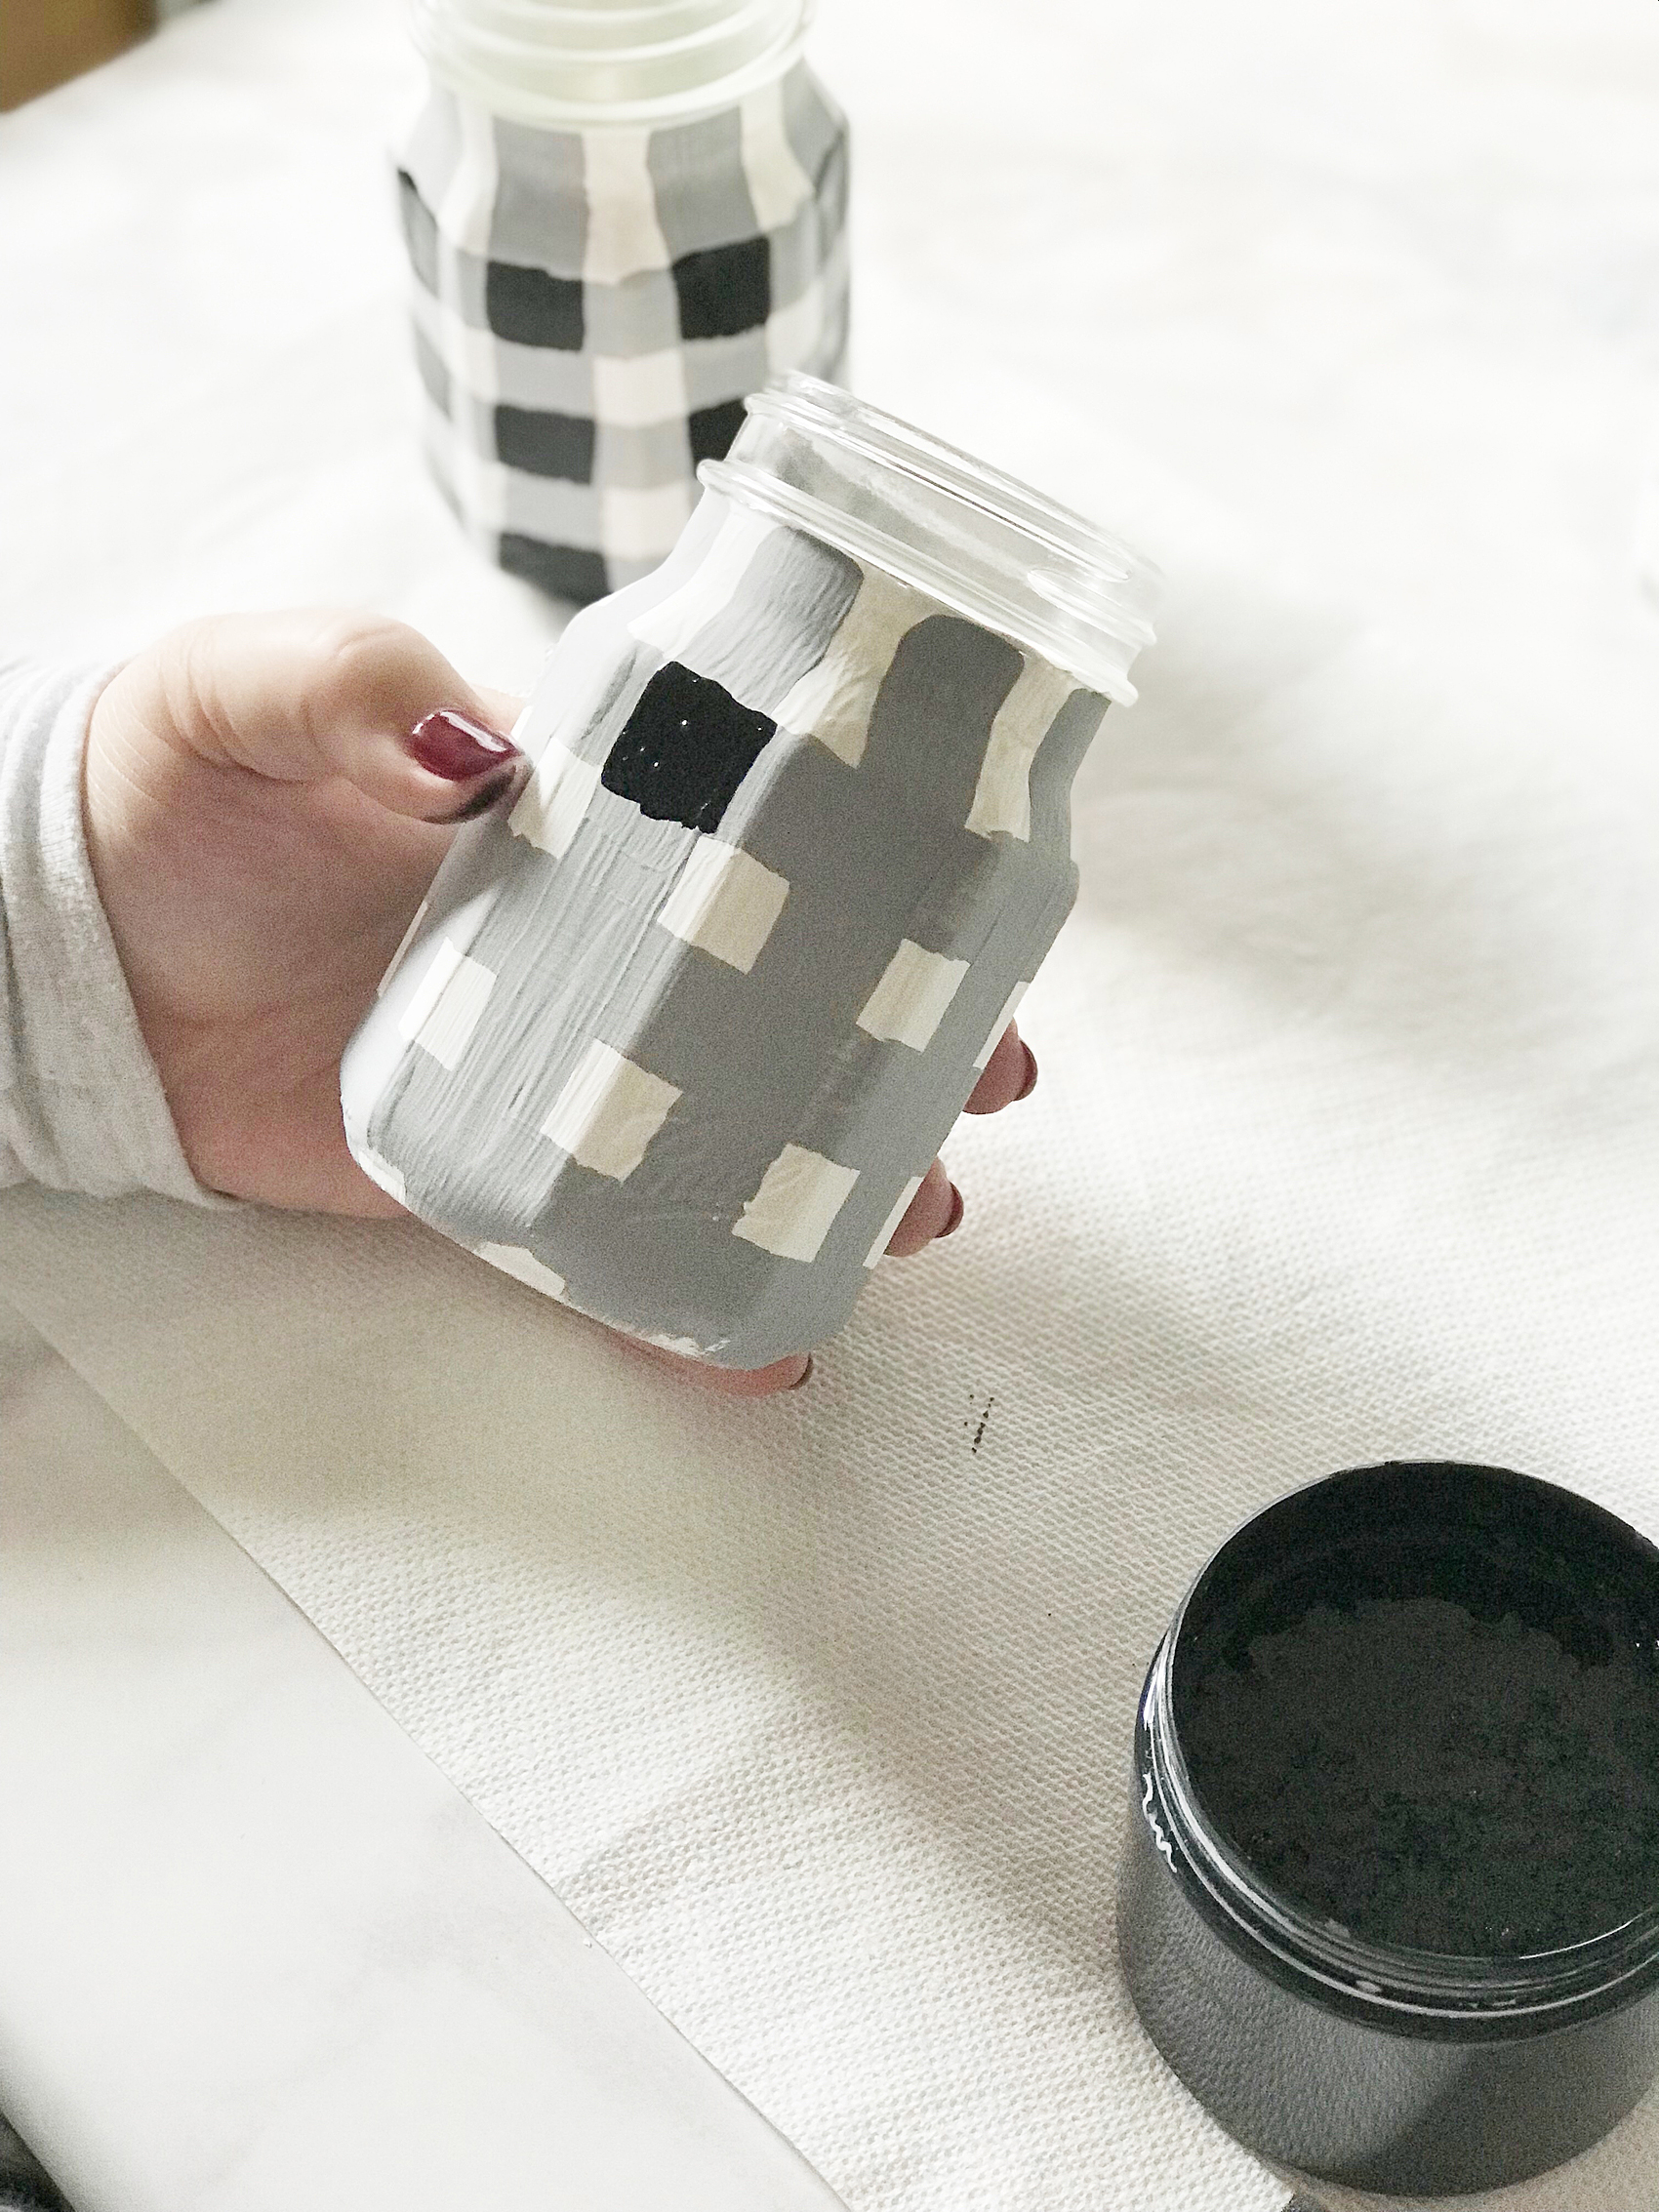
Now, you’ll use the black (Carbon) paint to paint on the black section of the check in the intersections of the gray stripes. Again, let paint dry completely. It would be best at this stage to let the paint cure overnight. It will help the paint adhere to the glass much better.

Love the Buffalo Check trend? Yep, me too! I thought it would be fun to use some of the Ball® Giving Jars to create some Buffalo Check Jars to use as gifts this Holiday Season. Here's how you can make some of your own.

Love the Buffalo Check trend? Yep, me too! I thought it would be fun to use some of the Ball® Giving Jars to create some Buffalo Check Jars to use as gifts this Holiday Season. Here's how you can make some of your own.

Once the paint is dry, you will use the sand paper to smooth and distress the paint. Be careful not to attach the jar with a little too much vigor. You don’t want to sand the paint right off the jar. Using a soft hand, smooth the dry paint, (this will remove the brush strokes) and then carefully distress the high points of the jar.

Love the Buffalo Check trend? Yep, me too! I thought it would be fun to use some of the Ball® Giving Jars to create some Buffalo Check Jars to use as gifts this Holiday Season. Here's how you can make some of your own.

Once this step is complete, you’ll want to wipe down the jars with a damp cloth to remove any of the remaining dust. Then you’ll use your lint free cloth to wipe on some of the wax to seal the paint onto the jar. Use the lint free cloth to then wipe off any excess wax and buff the wax.

Now, you’re finished! You have the cutest Buffalo Check Jars ready to fill with whatever you like.

Love the Buffalo Check trend? Yep, me too! I thought it would be fun to use some of the Ball® Giving Jars to create some Buffalo Check Jars to use as gifts this Holiday Season. Here's how you can make some of your own.

I created a fun Holiday Survival Kit and filled the jars with a homemade sugar scrub, some shower bombs and included a Yankee Candle® along with the cutest little match jar ever… You’ll have to check it out. It even comes with free printable gift tags.

Love the Buffalo Check trend? Yep, me too! I thought it would be fun to use some of the Ball® Giving Jars to create some Buffalo Check Jars to use as gifts this Holiday Season. Here's how you can make some of your own.

Disclosure +  I am a paid partner for Newell Brands, makers of Ball® Fresh Preserving Products. However, all thoughts and opinions expressed are entirely my own. 

  • « Go to Previous Page
  • Page 1
  • Interim pages omitted …
  • Page 3
  • Page 4
  • Page 5
  • Page 6
  • Page 7
  • Interim pages omitted …
  • Page 18
  • Go to Next Page »

Primary Sidebar

Heather from Whipperberry
Hello... my name is Heather and I'm the creator of WhipperBerry a creative lifestyle blog packed full of great recipes and creative ideas for your home and family. I find I am happiest when I'm living a creative life and I love to share what I've been up to along the way... Come explore, my hope is that you'll leave inspired!

Footer

  • Privacy Policy
  • Crafts
  • Food
  • Gifts
  • Holidays
  • Home
  • Mom Life
  • Recipes
  • Travel

Copyright © 2026 · Seasoned Pro