• Skip to primary navigation
  • Skip to main content
  • Skip to primary sidebar
  • Skip to footer

Whipperberry

WhipperBerry • Your Home For Creative Inspiration

  • Home
  • Recipes
    • Starters
    • Easy Weeknight Dinners
    • Main Dish
    • Salads
    • Side Dish
    • Soups & Stews
    • Desserts
    • Breakfast
    • Miscellaneous
  • Tutorials
    • Creative Crafts
    • DIY Decor
    • Fabric Crafts
    • Food How-To
    • Jewlery
    • Paint Projects
    • Paper Art
    • Party Styling
    • Photography and Graphic Design
    • Silhouette
  • Holidays
    • Easter
    • Mother’s Day
    • Father’s Day
    • 4th of July
    • Halloween
    • Thanksgiving
    • Christmas
    • Valentine’s Day
  • Gift Ideas
    • Gifts For Everyone
    • Gifts for Dad
    • Mother’s day
    • For The Girls
    • For The Kids
    • Teacher Gift Ideas
    • Christmas
  • Printables
    • Holiday
    • Gift Idea
    • LDS Primary
  • Travel
  • About
    • Terms
  • Contact
  • Nav Social Menu

    • Facebook
    • Instagram
    • Pinterest
    • RSS
    • Twitter

Paint

Linen Wedding Organizer Envelopes with a Little Flair

8 · Jul 23, 2018 · Leave a Comment

Wedding planning… I am DEEP into the planning of my first daughter’s wedding that is coming up in a little over a month. I have taken the approach of staying as organized as possible for this monster project. Really, that’s the only way you can prepare for a wedding and not lose your mind! I found some linen organizing envelopes at Target from the Hearth and Hand line created by Joanna Gains the other day and thought they would be perfect to keep things organized for the wedding. Of course, I needed to add some labels and in true WhipperBerry fashion, they needed to look classy. I turned to DecoArt for a little help with their Stylin’ paint perfect for home or fashion accessories of all kinds!

• This post is brought to you by DecoArt •Add some style to fabric or leather office supplies with @decoart Stylin' Paint | #paint #homedecor #officesupplies #wedding #weddingplanning

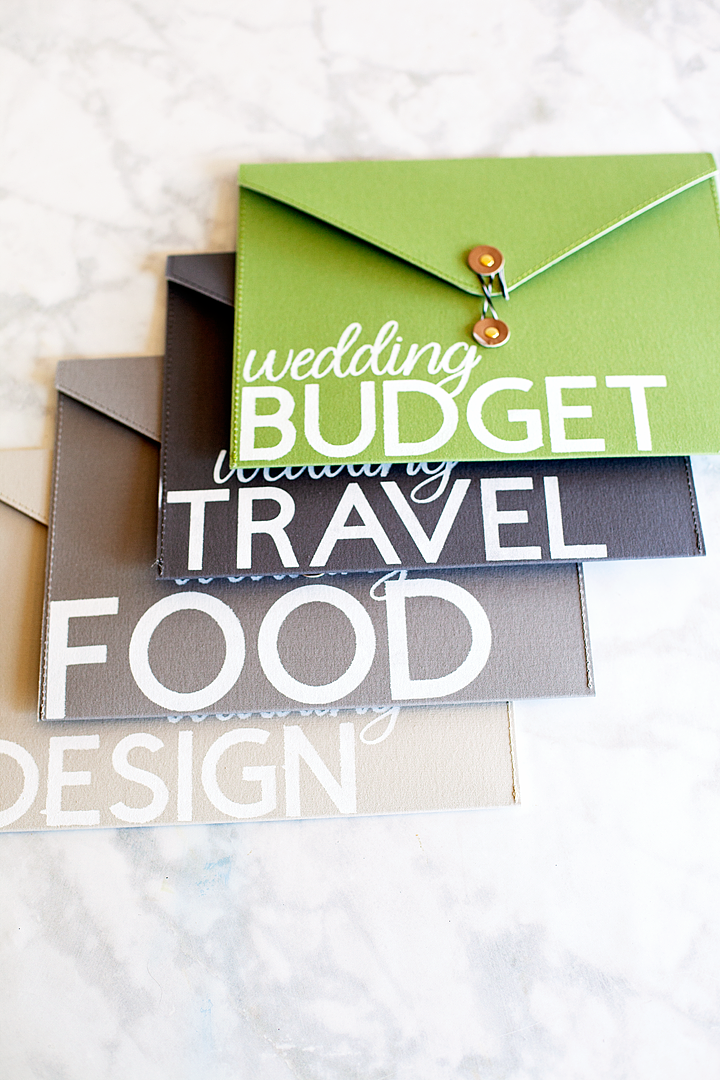
Wedding Organization

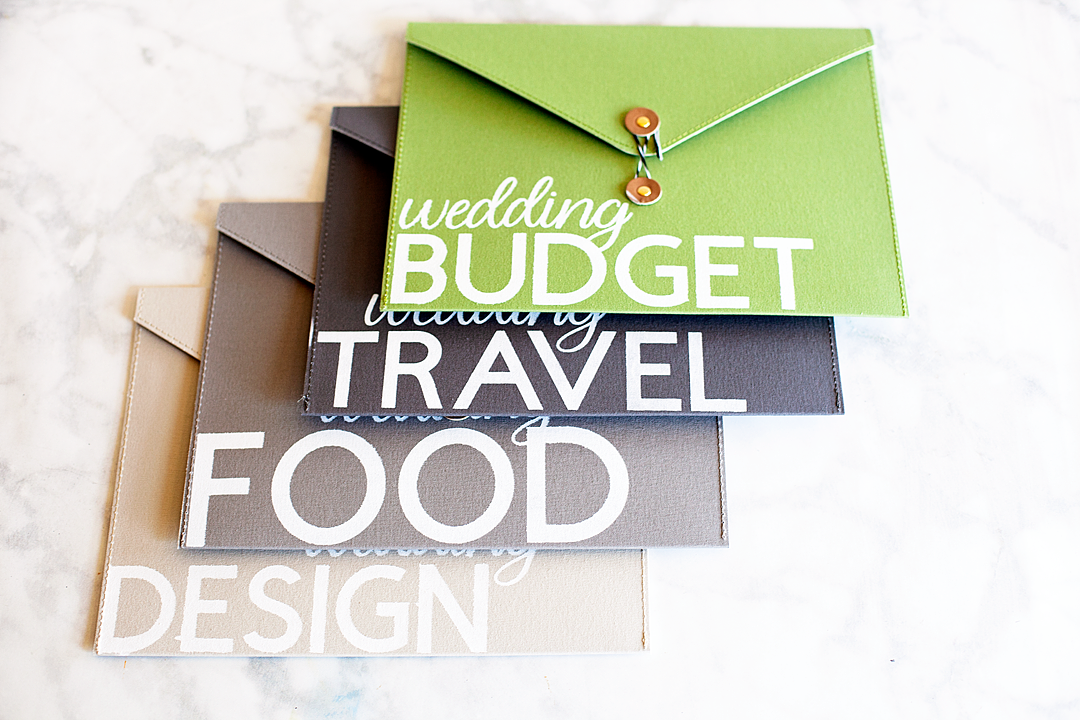
Wedding planning is NOT for the faint of heart. So many details, so many emotions, so much stuff! It really pays to be as organized as possible. Like I said before, I found some linen envelope organizers that I thought would be perfect to keep receipts, notes, menus and the like organized. I identified 4 areas that I thought would be good to have specific folders for,

  1. Budget
  2. Travel
  3. Food
  4. Design

Budget

This is where you can keep your notes as far as your budget goes along with receipts for everything purchased and paid for.
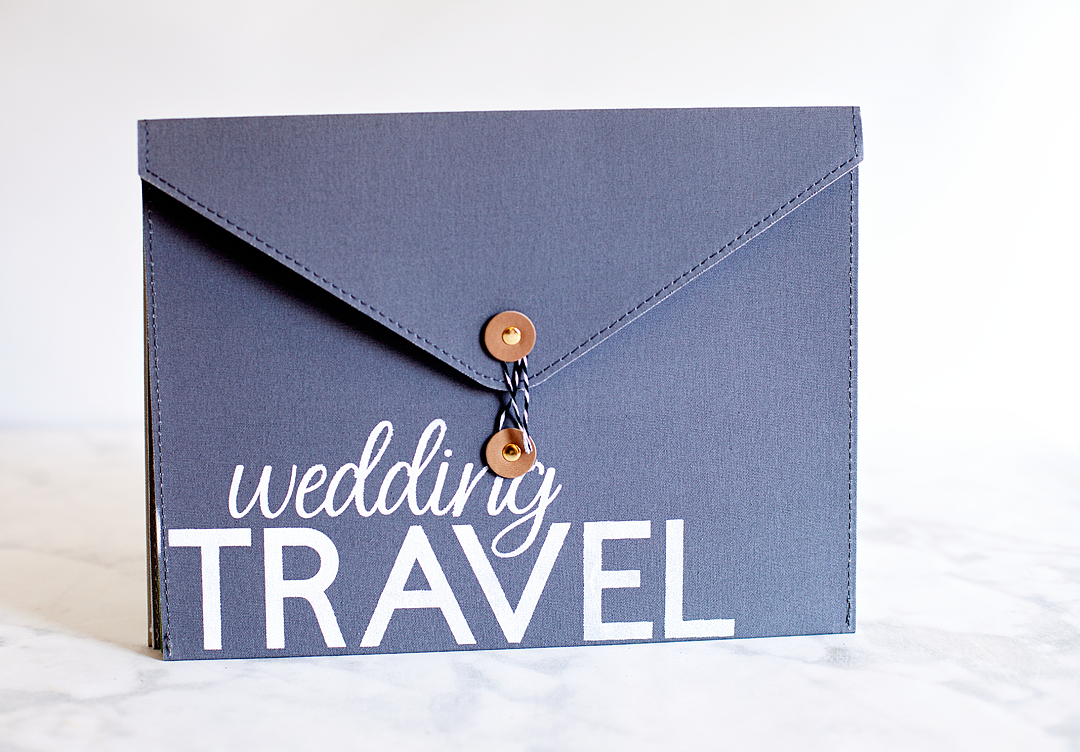
Travel

If your family is anything like ours, not everyone lives in the same place. Many family and friends will be traveling from elsewhere and this is a great way to keep track of those notes and itineraries.

Food

Food is one of the big elements to the reception. This is where you can keep track of proposals, budget, menu items, and such.

Design

You can think of this folder as your Pinterest hardcopy. Notes for your overall design of the event, different design elements, floral ideas, invitation ideas and so much more. Keep track of those ideas here along with any other pertinent information for the overall look of the event.

Linen Organizer Wedding Labels

There are a couple of different steps to this easy project and here’s a quick snippet of my Instagram Story to show a little more about how this works.
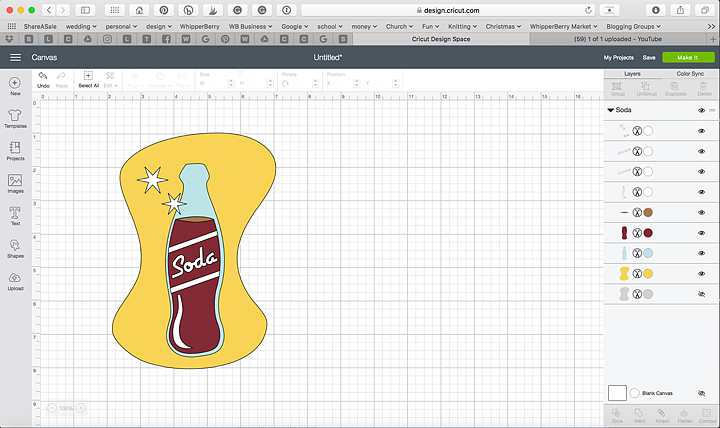
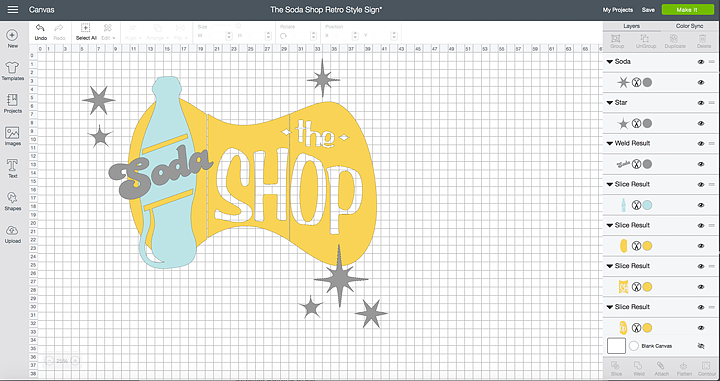
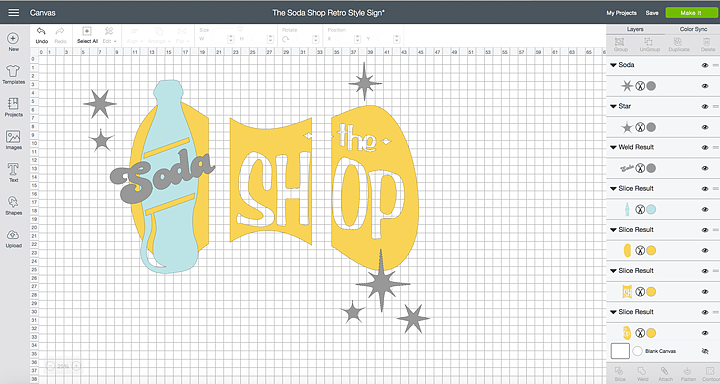
Label Design

I designed the labels in Cricut Design Space and used my Cricut Maker to cut out the vinyl for the project. I love making stencils with leftover vinyl and then using some DecoArt paint to create all kinds of projects. I’m thrilled to find that I can do the same with fabric, canvas, and leather now as well with DecoArt Stylin’. Here are some the key benefits to DecoArt Stylin’,

  • Flexible paint specially-formulated to prevent cracking or peeling
  • Bonds to surface to create a seamless finish
  • An ideal color palette for fashion décor
  • Water-based
  • Soap and water clean-up

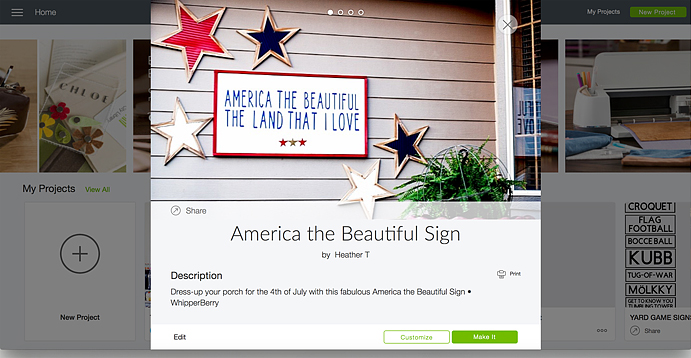
If you are a Cricut user (if not, I highly suggest that you should be, they go hand in hand with paint!) you can access my design in my Design Space profile.  If not, you can create your own stencils designs using other design software and use either a cutting machine or craft knife to cut your stencil out of vinyl or freezer paper.

Linen Wedding Organizer Envelope Supplies

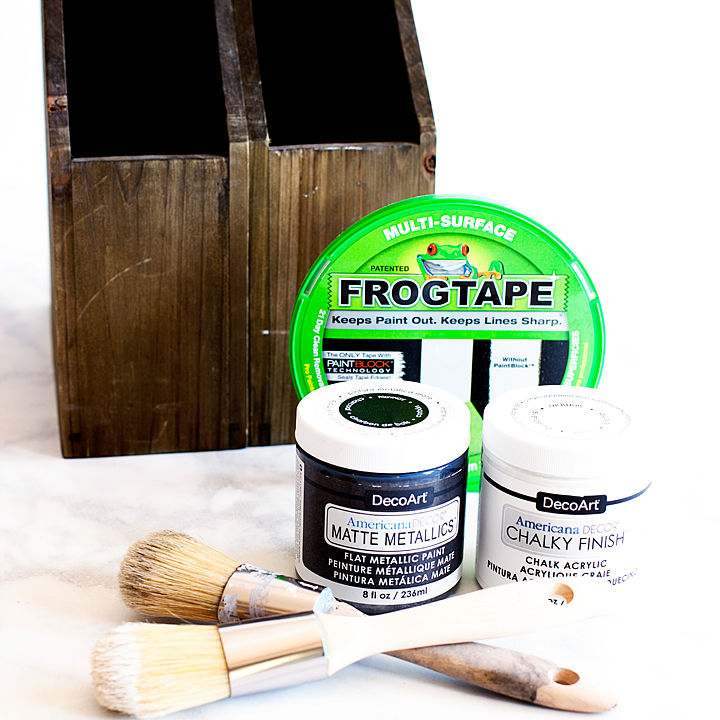
Here are the supplies you will need for your project.

  • linen or canvas folders
  • DecoArt Stylin’ Paint
  • vinyl, stencil vinyl
  • transfer tape
  • stencil sponge brush or a makeup sponge

Instructions

Add some style to fabric or leather office supplies with @decoart Stylin' Paint | #paint #homedecor #officesupplies #wedding #weddingplanning

  1. Cut out your stencil and weed the vinyl make sure to keep the negative side of the design. That just means that you’ll need to remove the letters from the vinyl and leave the rest of your vinyl as the stencil. Be careful that you keep a good eye on the middle sections of letters and those darn dots at the top of “i”.
  2. Cover your stencil in transfer tape and remove the back of the vinyl.
  3. Carefully place the stencil onto the fabric folder and press down with a brayer or scraper tool. Fabric typically has a texture that is going to make it a little tricky to get a truly clean line but, if you press your vinyl down well, you’ll have a pretty good seal.
  4. Remove the transfer tape carefully.
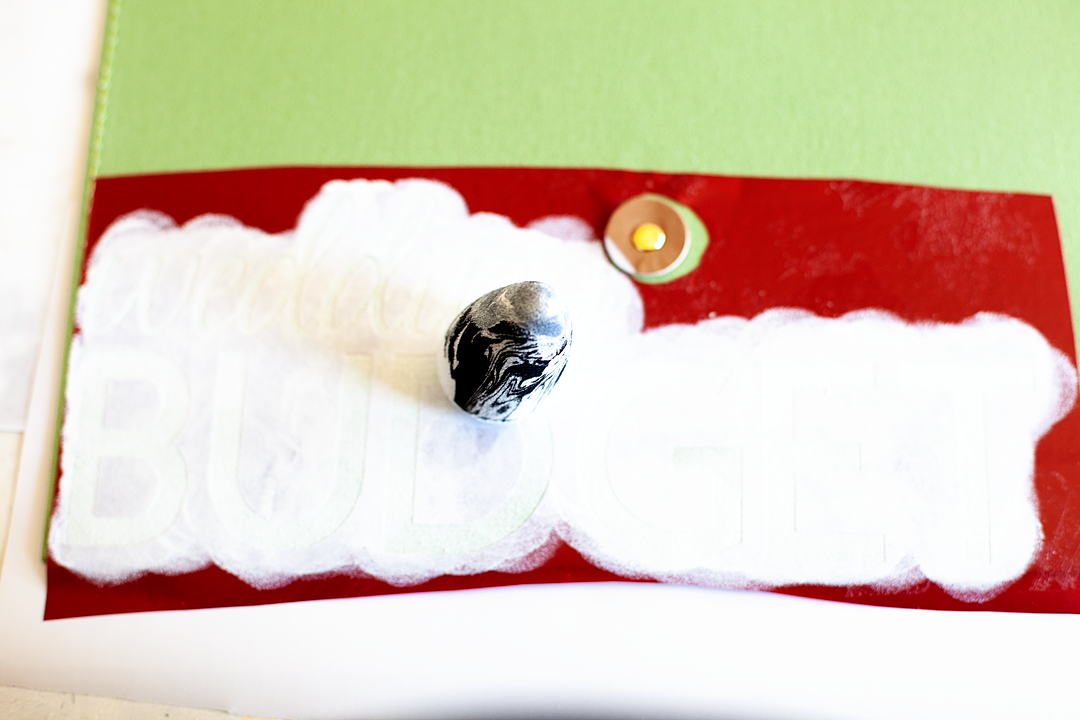
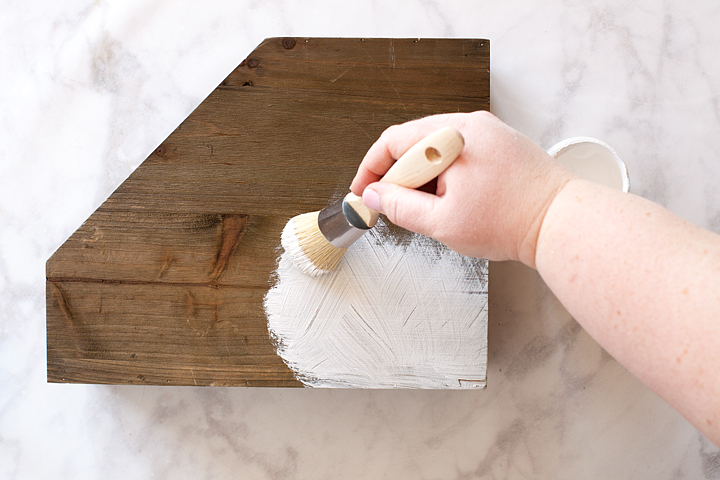
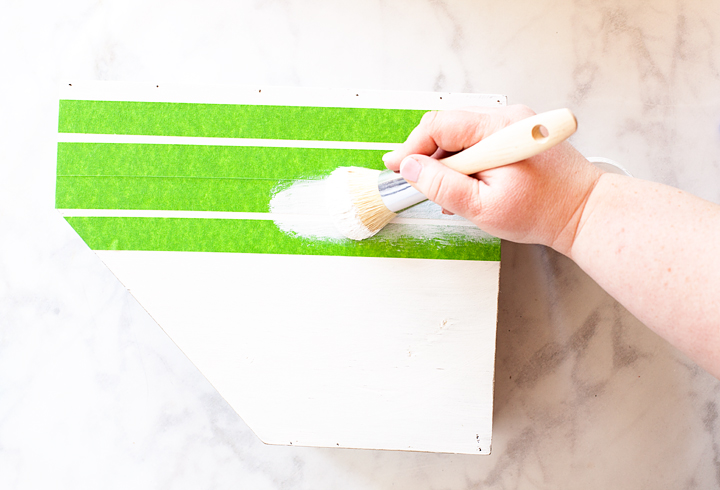
  5. Place a quarter size amount of paint onto a paper plate and use your sponge to lightly dab the paint onto the surface of your organizer. Add some style to fabric or leather office supplies with @decoart Stylin' Paint | #paint #homedecor #officesupplies #wedding #weddingplanning
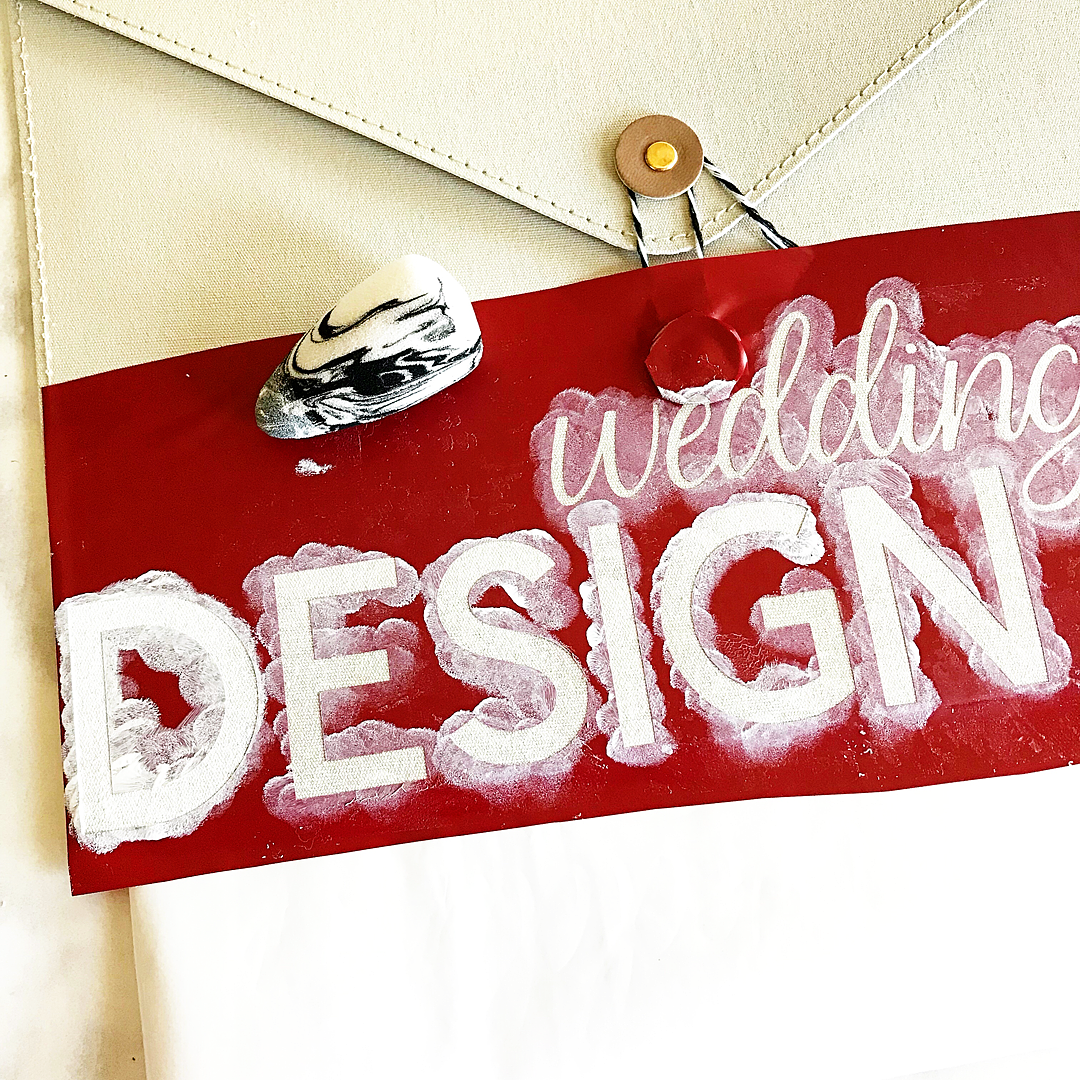
Keep the paint LIGHT to avoid any paint leaking under the stencil. It’s better to have several rounds with light paint than to have an unsightly leak area.
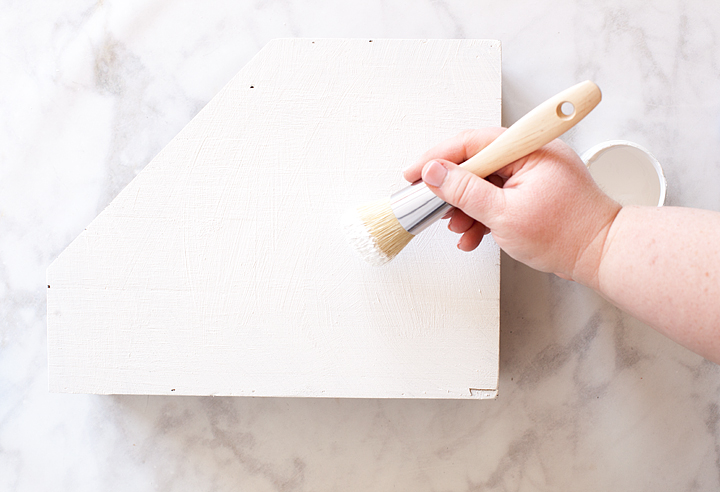
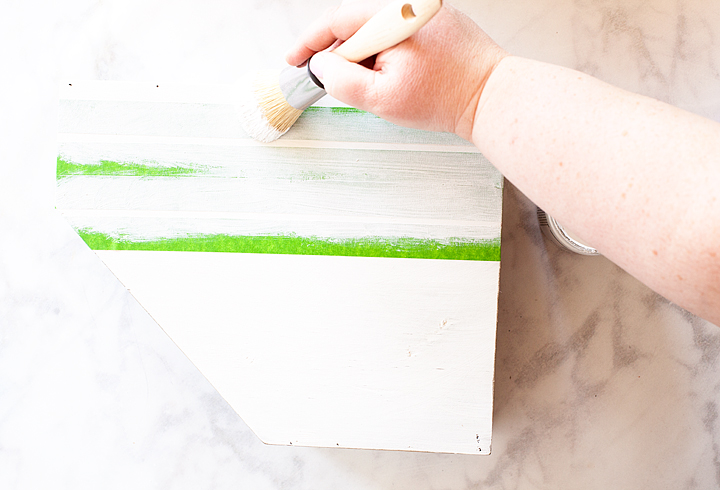
  6. Cover your stenciled image until you have the coverage you would like.Add some style to fabric or leather office supplies with @decoart Stylin' Paint | #paint #homedecor #officesupplies #wedding #weddingplanning
  7. Let dry.
  8. When the paint is dry, remove the stencil and get to work on that darn wedding!

Add some style to fabric or leather office supplies with @decoart Stylin' Paint | #paint #homedecor #officesupplies #wedding #weddingplanning

Disclaimer • This is a paid post with my friends at DecoArt. I am a member of the DecoArt Core Creator program and do receive payment and product to help facilitate these creative posts. However, keep in mind… I will NEVER share something I don’t truly love and use in my everyday life.

SaveSave

SaveSave

SaveSave

SaveSave

SaveSave

SaveSave

SaveSave

SaveSave

SaveSave

SaveSave

Soda Shop Wood Sign • The BEST 10 Tips for Working with the Cricut Knife Blade

39 · Jun 21, 2018 · 3 Comments

This my friends is one of the most exciting days of my crafting life! I have cut WOOD with my Cricut Maker using their new Cricut Knife Blade. All be it, thin wood but, it’s wood! My daughter Hannah graduated from High School and we made a simple soda bar for one of the elements of her Grad Party. Of course, our soda bar needed a soda shop sign and I thought it would be fun to create a retro style sign out of wood. Here’s how it turned out PLUS, the best 10 tips for working with the Cricut Knife Blade.

+ This post brought to you by the folks at Cricut +Come learn how to make this retro style soda shop sign made out of wood using the @cricut knife blade • whipperberry

When Hannah and I started working on her grad party one of the things she really wanted to have was a mini “soda shop.

Nothing too crazy or too expensive but, cute. I thought it would be fun to test out the Cricut Knife Blade and make a large scale sign out of Birchwood. Now Birch isn’t one of the officially approved woods that can be used with the Cricut Maker. However, I thought I would give it a go and see how it turned out.  It turned out beautiful! It took a little time so, I wouldn’t take on a project of this nature if you were in a hurry. Here is a quick little video along with my best 10 tips for working with the Cricut Knife Blade…

The Soda Shop Sign Design

The inspiration for the design was classic retro style soda shop signs. Hannah is a bit of a retro type girl herself so I thought this was fitting. I found a retro looking soda bottle design in Cricut Design Space and thought it would be perfect to use as the base for my project.

Come learn how to make this retro style soda shop sign made out of wood using the @cricut knife blade • whipperberry

I used some of the elements of this design and then made a few tweaks here and there and this is what I eventually came up with…

Come learn how to make this retro style soda shop sign made out of wood using the @cricut knife blade • whipperberry

That’s what’s so cool about Cricut Design Space, you can play around with almost anything and make it your own. Do feel like you are stuck with whatever they have. Be creative and learn how to use the tools that Cricut provides for you to make your own style.

For this sign, I wanted it to be a rather large scale and knowing that with my Cricut Maker, I’m limited to 12 x24 inches I did a little creative troubleshooting. I used the slice tool to slice up my sign so that I could make it as big as I wanted it to be.

Come learn how to make this retro style soda shop sign made out of wood using the @cricut knife blade • whipperberry

I sized the sign to the desired size and then broke it down into thirds by creatively using the square tool along with the Slice Tool. With that, each section of the yellow part of the sign would fit on a 12 x 24 cutting mat and would allow for a much larger sign. Here is how I did that.

How to Create Sections Using the Slice Tool in Cricut Design Space

Cutting the Wood Sign on the Cricut Maker

Like I alluded to in the tips video, working with the knife blade takes more time and patience. However, it is soooo fun to work with (if you know how to use it right) so, don’t let that discourage you from using it. It is WELL WORTH IT!

I did have some frustration when making my sign at times because it wasn’t cutting through my wood at the beginning. After a little grumbling, I figured out that you really do need to calibrate your machine EACH TIME you start a cut with the knife blade. I cut the first section with the basic settings for Basswood and then had to hit the continue cut several more times to get it fully through the Birchwood. You just check each time the Maker finishes a pass (DO NOT REMOVE THE MAT FROM THE MAKER), lift up on the wood to see if it has completely cut through the wood. If it hasn’t, press the cut button and it will take another pass at the design, each time adding more pressure to go deeper through your material. Therefore, you need to keep an eye on things so that you don’t accidentally cut through your mat.

Make sure you watch my 10 tips video above for the rest of my tips for working with the knife blade. They’re pretty handy! You may also want to visit the Cricut blog to learn even more great tips for working with the new Cricut Knife Blade.

Painting and Hanging The Soda Shop Sign

Once the sign was cut, it was time to paint it and get it all dolled up for the party. I wanted to make sure that the wood grain could still be seen through the paint so, I created a wash with some DecoArt Americana Acrylics. All you have to do is add a little water to the paint to create a color wash. You may want to have a rag on hand to wipe off the color wash, almost like you are staining the wood instead of painting it. With this technique, the sign will dry pretty fast and be ready to hang soon after painting.

Come learn how to make this retro style soda shop sign made out of wood using the @cricut knife blade • whipperberry

Hanging the Sign

I wanted the sign to have a bit of a 3D effect and not lay flat on the wall. Typically I use Command Strips but they get pretty pricey so, I opted for some removable mounting putty from 3M to mount the sign on the wall. I could use the putty to create the 3D effects by using more putty to build up the layers. It worked like a charm!

Come learn how to make this retro style soda shop sign made out of wood using the @cricut knife blade • whipperberry

One word of advice… If you have small little pieces of a wood sign, like the center of an “O” for example. Use some painters tape to tape them to the back of the sign so that you don’t lose them in transit. Becuase, that would be a crying shame!

The party turned out great. We had a ball celebrating Hannah and all of her accomplishments. Mom brag time, she graduated a year early! Yea, high school in 3 years! Nice job Hannah.

I’m holding onto the sign to use for her sister Haley’s wedding coming up in September. It just so happens that she is going to have a soda bar as well! Stay tuned… I’m going to have all kinds of Cricut projects coming up this summer for the wedding. You won’t want to miss out!

What do you want to make with a Cricut Maker and the new Cricut knife blade?


SaveSave

SaveSave

SaveSave

SaveSave

SaveSave

SaveSave

SaveSave

SaveSave

SaveSave

This is a sponsored conversation written by me on behalf of Cricut. The opinions and text are all mine.

SaveSave

SaveSave

America The Beautiful Porch Sign

9 · Jun 8, 2018 · 3 Comments

Dressing-up the front porch at my house has become one of my favorite things to do each season. Summer is always my time to show a little love for the good ol’e USA. I host a huge 4th of July party each year and I always try to dress things up extra special for that event. This year I created a new America The Beautiful porch sign to the mix and I jazzed it up with some great stars from Michaels!

+ This post is brought to you by the fine folks at Michaels +Patriotic front porch design for the 4th of July • Let's Flamingle Sign • Sign Making 101 • WhipperBerry

Shopping at Michaels Online

Michaels has all your red, white & blue needs this summer! And it’s now easier than ever to get all your supplies with Michael’s new buy online and pick up in store feature! Simply place your order online, select your store and your items will be ready and waiting for you there! I saved a ton of time by shopping online and then running in to my local michaels store to pick-up my order. I’m LOVING this option. No more wandering the isles with kiddos in tow. I can virtually wander the isles with my kiddos happy at home. So much less stress. Then I run in and grab my order when it’s ready… Super Slick! Have you tried this out at Michaels yet?

Supplies for the America the Beautiful Porch Sign Look

Here is what I ordered for this fun patriotic look…

  • Red Stars
  • Blue Stars
  • White Stars
  • Red Star Pillow
  • Blue Star Pillow
  • 24×48 canvas
  • red spray paint
  • 3M Command Strips
  • Cricut SportFlex – Midnight Blue • This one I did have to order online via Michaels
  • Cricut Iron-On Glitter – Red
  • Cricut Foil Iron-On – Gold
  • Cricut Easy Press or personal iron
  • Cricut Design Space File
  • Let’s Flamingal Sign

How to Put This Look Together

America the Beautiful Porch Sign • WhipperBerry

Now, this look has several different elements. We have the sign and the stars on the garden wall. This was using my new tried and tested method of using the Cricut Maker to cut Iron-On Vinyl and then affixing it to a canvas using the Cricut Easy Press. This is my new favorite sign making technique. You can learn how to do everything from start-to-finish in my Sign Making 101 post.

Then all you need to do is visit Cricut Design Space with the link above in the supply list and you’ll have access to my cut files that you can re-size to your desired sign size then, cut on your Cricut Machine for your sign.

America the Beautiful Porch Sign • WhipperBerry

Once your sign is finished then it’s time to hang everything. I’ve found that the 3M Strips are BRILLIANT even on outdoor walls.

Patriotic front porch design for the 4th of July • Let's Flamingle Sign • Sign Making 101 • WhipperBerry

I hand new signs each season on my brick wall with my Command Strips. They have withstood strong winter storms without a problem at all and, let me tell you… Nebraska is no joke when it comes to strong winds and crazy storms. I have yet to have a sign fall using my Command Strips on Brick.

Hygge Canvas Sign • Sign Making 101 • WhipperBerry

I used the Command Strips to hang the large 24×48 America The Beautiful porch sign on the garden wall. With the size of the sign, I did need to use a fair number of the Command Strips to make sure the sign was secure. Then I used the command strips to hang the stars as well.

America the Beautiful Porch Sign • WhipperBerry

I kind of have a love affair with Command Strips if you can’t tell! Patriotic front porch design for the 4th of July • Let's Flamingle Sign • Sign Making 101 • WhipperBerry

I also hung one of the stars on the front door to tie the two areas together and added the great star pillows from Michaels on my old chair. Add a few plants and the look is complete. It’s perfect for your 4th of July gatherings for sure!

What are you going to order from Michaels and pick-up at your local store this week? They have some amazing sales going on right now!!


SaveSave

SaveSave

SaveSave

SaveSave

SaveSave

SaveSave

Farmhouse Decor Makeover with Americana Matte Metallic Paint

6 · Apr 24, 2018 · 1 Comment

I know that you guys are right here with me… You have some old, outdated decor pieces that really play nice with today’s trends but, you still kind of like them. You like them enough to not get rid of them but, they need a little bit love. I have several pieces like that. I’ve had some wood magazine boxes that have been sitting around collecting dust so, when DecoArt introduced their AMERICANA DECOR® MATTE METALLICS™ PAINT I knew that I had a great way to update them a bit to fit my farmhouse/industrial style a little better.

+  This project is brought to you by DecoArt +

Makeover old decor with the @decoart AMERICANA DECOR® MATTE METALLICS™ PAINT

The Paint Makes the Project

It’s really true, the paint makes the project. I was a little wary of this project because I don’t typically lean towards the metallic side of the spectrum when it comes to painting. Don’t get me wrong, I do love a little glam but, typically not in my paint projects. But, this paint is magical! It’s a MATTE METALLIC and it’s fabulous. I actually worked the paint so that it looked like a brushed metal and I love it.

I decided to use the magazine boxes as more of a decorative spot for my shelves and decided to add some white stripes along with the Matte Metallic paint for more of a farmhouse look.

Supplies for Farmhouse Decor Makeover

Makeover old decor with the @decoart AMERICANA DECOR® MATTE METALLICS™ PAINT
  • DecoArt America Decor Matte Metallics – Charcol
  • DecoArt America Decor Chalky Finish – Everlasting
  • Paint Brushes
  • Frog Tape
  • A decor piece that needs a little love, like my worn-out magazine boxes

Instructions for Matte Metallic Paint Makeover

  1. Clean your decor item.
  2. Paint your base coat. When you’re painting with the Chalky Finish you want to paint in a cross-hatch pattern which helps give the nice chalky finish.
  3. Once you’ve finished with the white Chalky Finish coat, let it dry to the touch.
  4. Lightly sand your piece to smooth out the paint surface.
  5. Apply your Frog Tape in the stripe pattern that you like.
  6. To create a perfect line, cover the edges of the tape with the base white paint.
  7. Then, using the America Decor Matte Metallic paint, cover the surface of the decor piece.
  8. Let the paint sit for a few minutes and then carefully pull the tape. It’s better to pull the tape when the paint is still slightly wet. That way you avoid possibly pulling dry paint up as well.
Now you’re all set with your new decor piece! I really like the look of the brushed metal that the Matte Metallic pant gives, it looks great! I’ve used my updated magazine boxes to store the collections of my favorite magazines that I like to keep around for inspiration. What would you like to update? For another great project idea… I’m over on the DecoArt Blog today, sharing my paint pouring project. I created a fun sign that is totally on trend for my daughters room. Come on over and see my video tutorial on how to make it! create signs out of canvas that has been transformed by paint pouring • whipperberry 
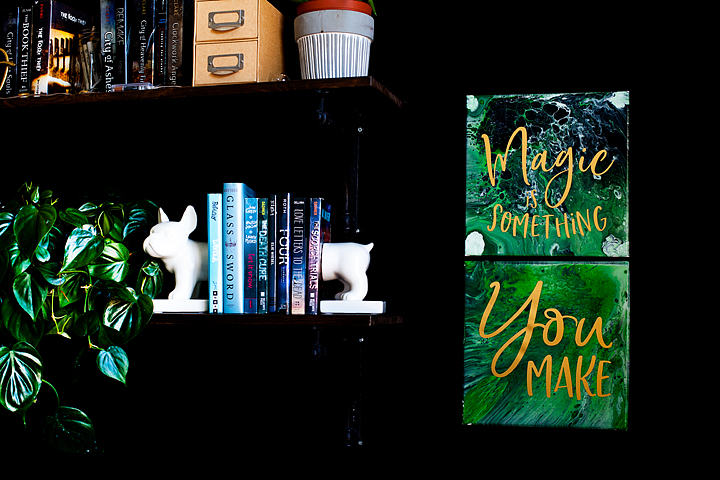
Disclaimer • I am a DecoArt Blogger and have received product and compensation for my time and efforts. All thoughts, ideas and opinions are my very own.    
  • « Go to Previous Page
  • Page 1
  • Page 2
  • Page 3
  • Page 4
  • Page 5
  • Page 6
  • Interim pages omitted …
  • Page 17
  • Go to Next Page »

Primary Sidebar

Heather from Whipperberry
Hello... my name is Heather and I'm the creator of WhipperBerry a creative lifestyle blog packed full of great recipes and creative ideas for your home and family. I find I am happiest when I'm living a creative life and I love to share what I've been up to along the way... Come explore, my hope is that you'll leave inspired!

Footer

  • Privacy Policy
  • Crafts
  • Food
  • Gifts
  • Holidays
  • Home
  • Mom Life
  • Recipes
  • Travel

Copyright © 2026 · Seasoned Pro