• Skip to primary navigation
  • Skip to main content
  • Skip to primary sidebar
  • Skip to footer

Whipperberry

WhipperBerry • Your Home For Creative Inspiration

  • Home
  • Recipes
    • Starters
    • Easy Weeknight Dinners
    • Main Dish
    • Salads
    • Side Dish
    • Soups & Stews
    • Desserts
    • Breakfast
    • Miscellaneous
  • Tutorials
    • Creative Crafts
    • DIY Decor
    • Fabric Crafts
    • Food How-To
    • Jewlery
    • Paint Projects
    • Paper Art
    • Party Styling
    • Photography and Graphic Design
    • Silhouette
  • Holidays
    • Easter
    • Mother’s Day
    • Father’s Day
    • 4th of July
    • Halloween
    • Thanksgiving
    • Christmas
    • Valentine’s Day
  • Gift Ideas
    • Gifts For Everyone
    • Gifts for Dad
    • Mother’s day
    • For The Girls
    • For The Kids
    • Teacher Gift Ideas
    • Christmas
  • Printables
    • Holiday
    • Gift Idea
    • LDS Primary
  • Travel
  • About
    • Terms
  • Contact
  • Nav Social Menu

    • Facebook
    • Instagram
    • Pinterest
    • RSS
    • Twitter

sign

DIY Octopus Wall Art

6 · Jul 10, 2017 · 2 Comments

Create a simple DIY octopus wall art piece with The NEW DecoArt Americana® Premium Artist Acrylics found at Michaels.

Create this fun DIY Octopus Wall art for your favorite nautical themed room. This one is going into my son’s vintage nautical room and it’s going to look fabulous! Created by WhipperBerry via @decoArt

•  This DIY Octopus Wall Art Post is brought to you by DecoArt  •

Back in December we purchased our PERFECT home! Perfect for everyone but our little guy Gage. His room was a rather bold pink and purple. This kiddo has spent 7 long years with only sisters. We have a soccer ball and a volleyball that he plays with and they are hand-me-downs from his sisters and they are, you guessed it… PINK. To say that the little guy is over all of the pink, is an understatement. This week we are starting his room transformation and we are going vintage nautical for the theme.

Now, any vintage nautical themed room NEEDS a cool piece of art. This year in Gage’s 1st grade class he worked on a really cool report on his favorite sea creature, the octopus. We decided he needed a cool octopus for his room and set to work to create “Davy Jones,” Gage new octopus friend.

Gage’s sister Jane helped to create this with me using the NEW DecoArt Americana Premium Artist Acrylics and Mediums.

Create this fun DIY Octopus Wall art for your favorite nautical themed room. This one is going into my son’s vintage nautical room and it’s going to look fabulous! Created by WhipperBerry via @decoArt

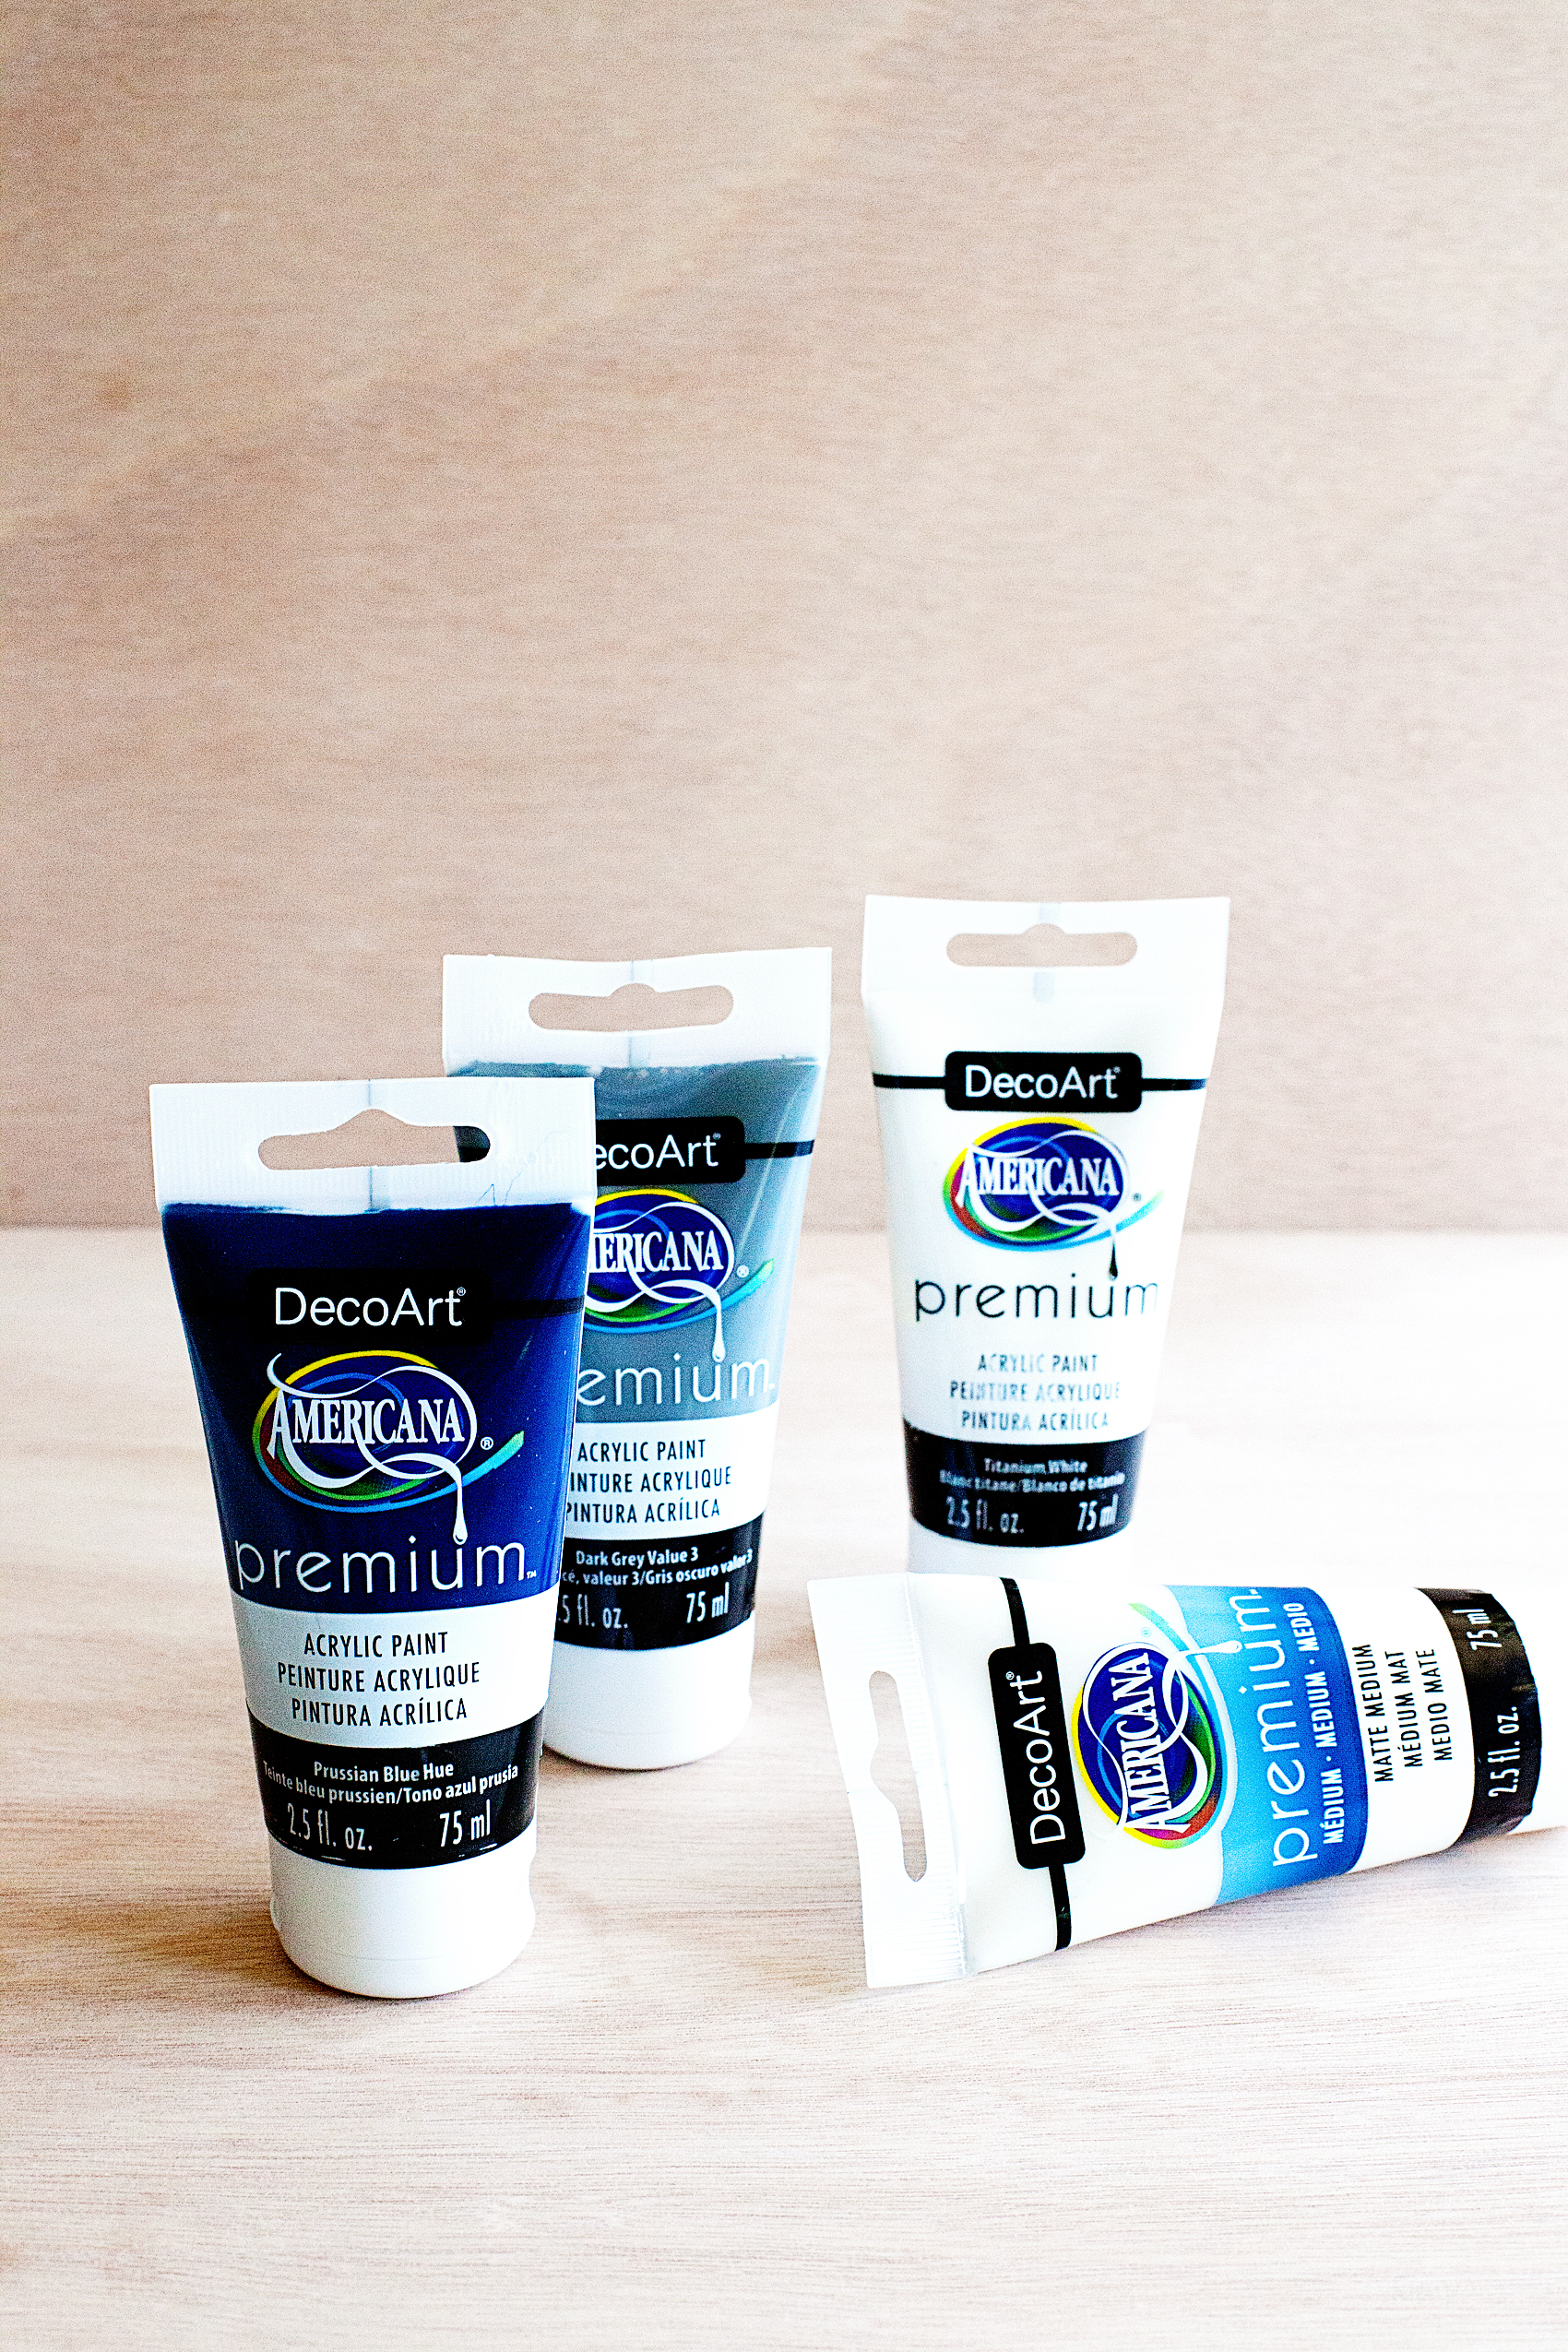
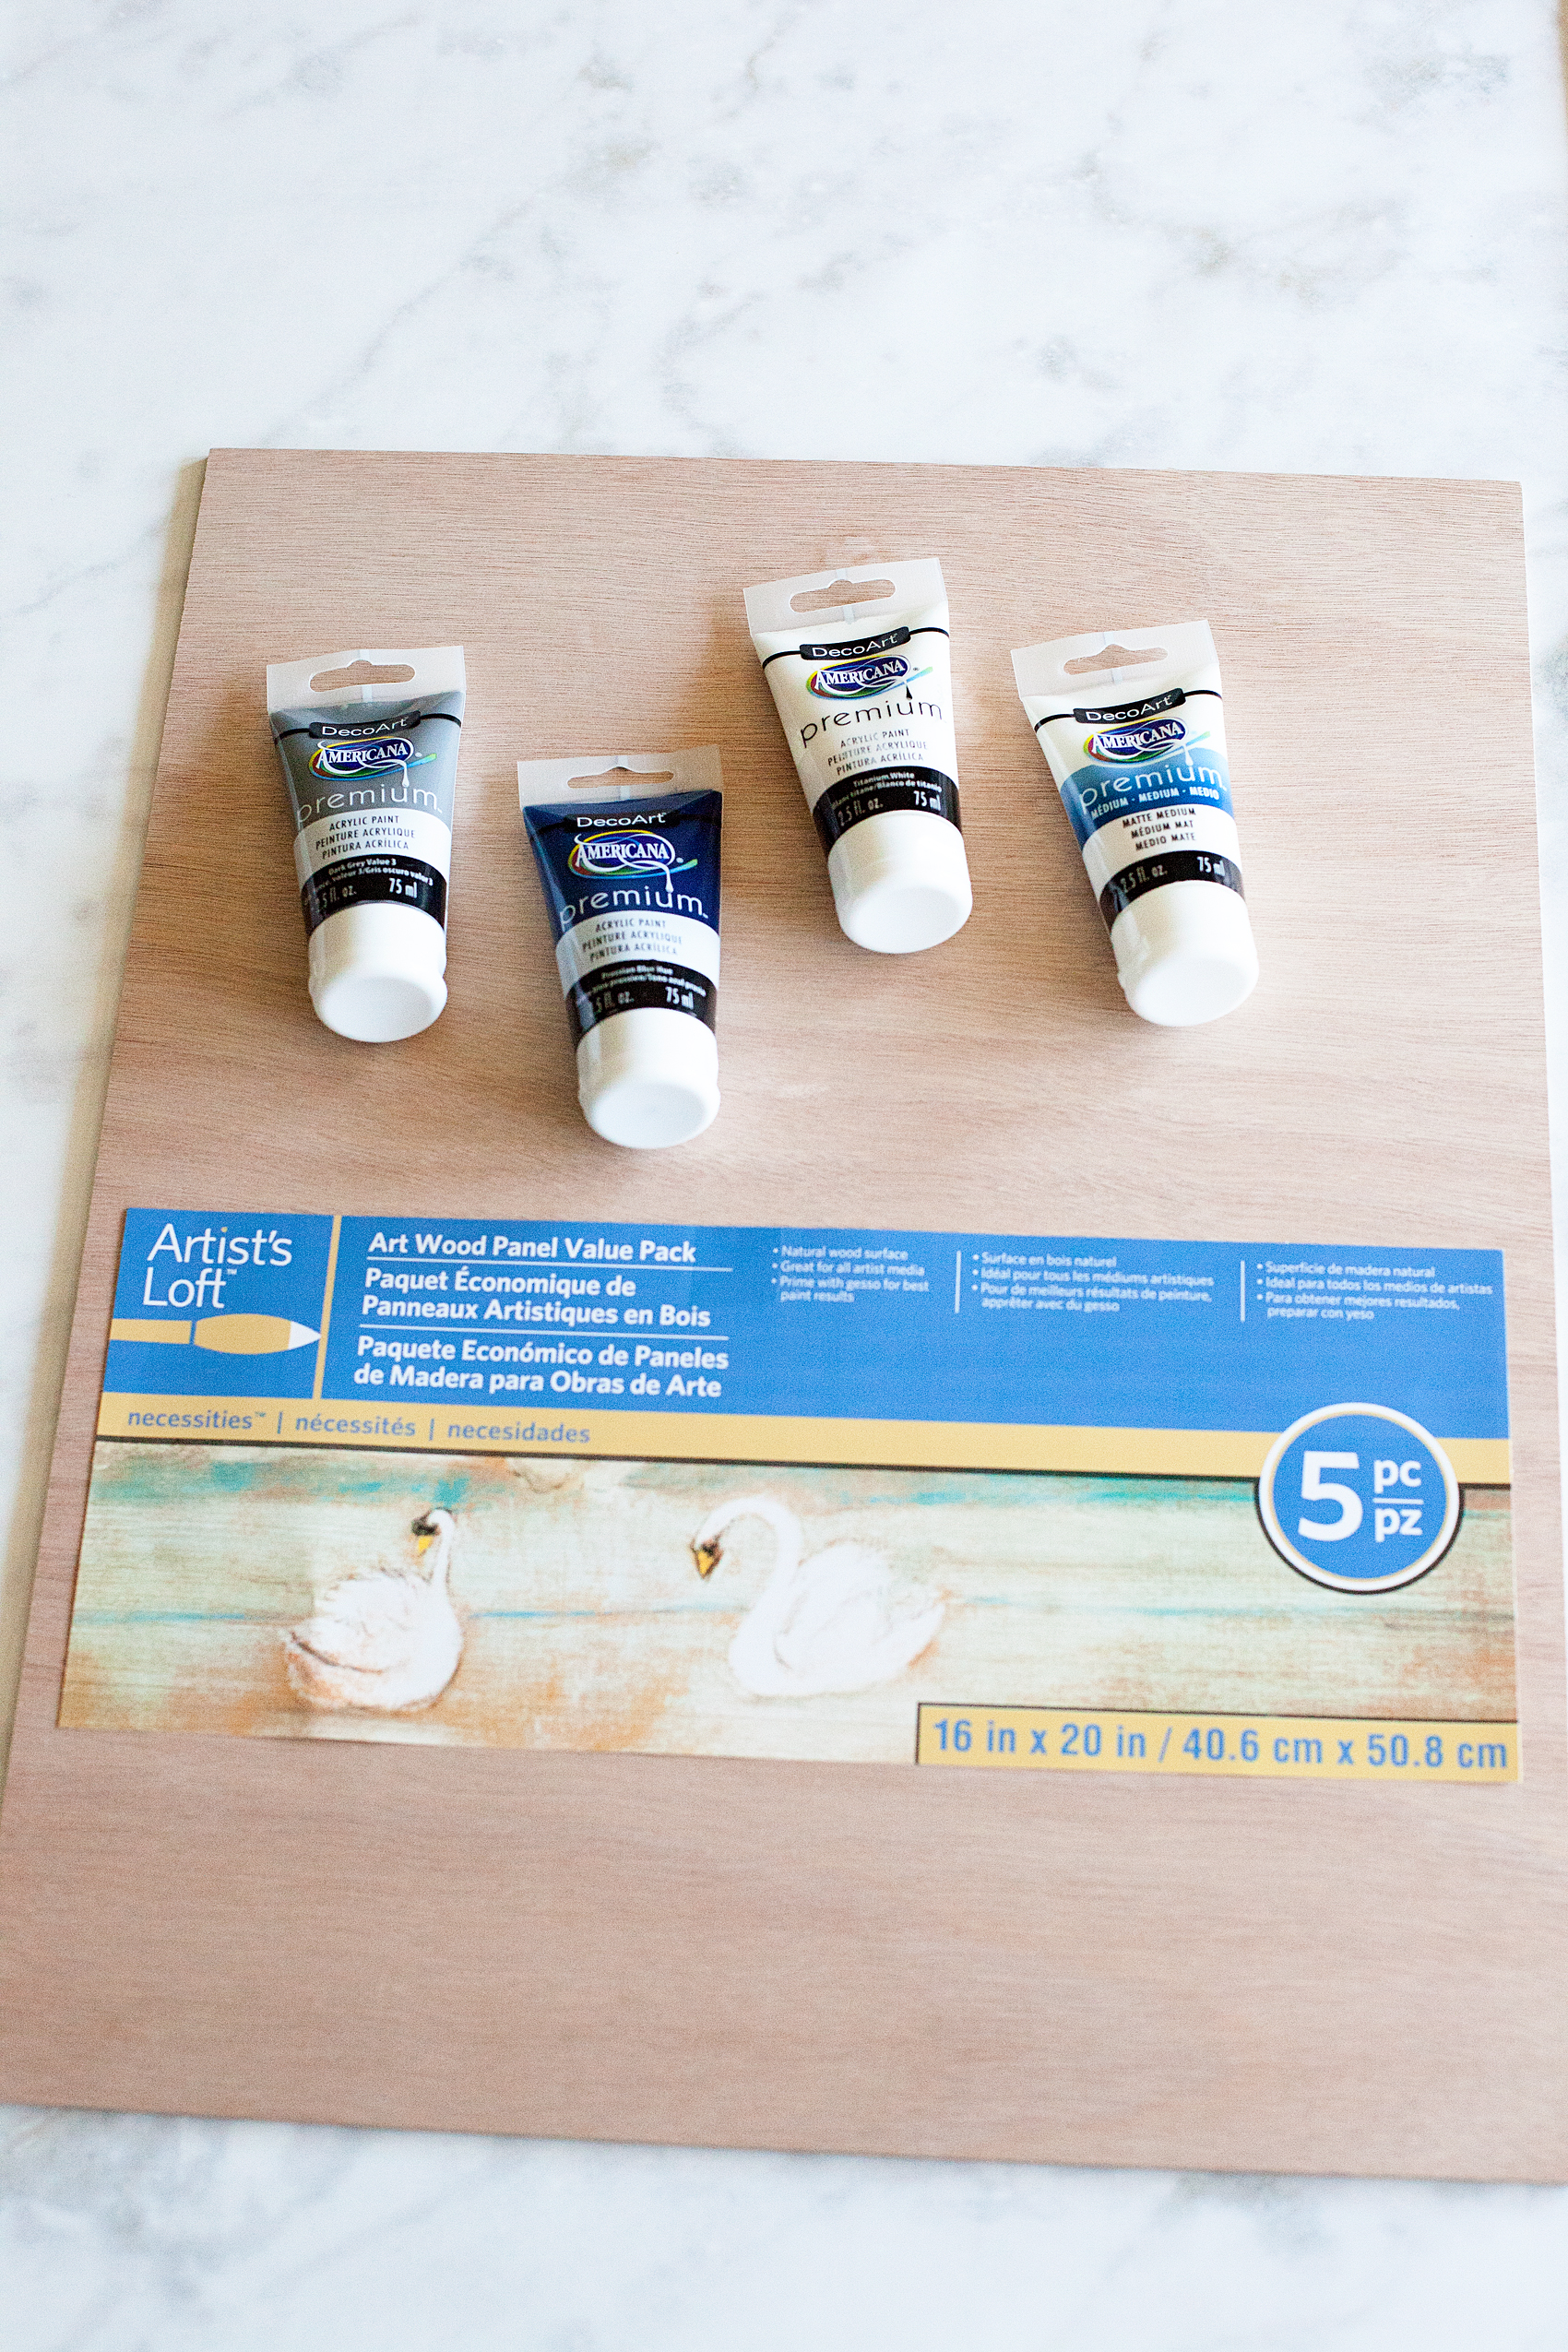
DIY Octopus Wall Art Supply List

  • DecoArt Americana® Premium Artist Acrylic Paint in Prussian Blue Hue, Dark Grey Value 3, Titanium White
  • DecoArt Americana® Premium Artist Acrylic Matte Medium
  • Art Wood Canvas (I found mine at Michaels)
  • Paint brushes
  • Paint rags
  • Jar of water
  • Pencil
  • eraser

Create this fun DIY Octopus Wall art for your favorite nautical themed room. This one is going into my son’s vintage nautical room and it’s going to look fabulous! Created by WhipperBerry via @decoArt

DIY Octopus Wall Art Instructions

The cool thing about this project is that you really don’t have to be an artist to create fun art for your home. With this type of vintage looking painting, perfection is NOT NEEDED. Whew! That’s my kind of painting!

First thing you need to to is to take your Titanium White and mix it with the Matte Medium.  Why would you mix the paint with a medium? Here is what the matte medium adds to the acrylic paint…

“Add Matte Medium to Americana Premium acrylics to create a matte finish, extend color, increase transparency, and enhance color blending. Can also be used as a clear coat for a matte finish. It is water-based and fast-drying.”

Pretty cool huh? Now if you don’t want the paint to dry too fast, you want to have more time to work with it, you may want to use and Extender Medium…

“Add Extender Medium to slow the drying time of Premium Acrylics. It can also be safely added to the other mediums in the line. Any time you want the paint or medium to have more working time add some Extender to it. Extender also allows you to perform oil techniques using acrylic paint.”

Once you have your white and matte medium mixed together, roughly paint on a white surface onto your boards. That reminds me… I used 2 of the 16×20 art boards to create a longer octopus to fill up more wall space. Because we all know… Davy Jones needs to be huge!

Create this fun DIY Octopus Wall art for your favorite nautical themed room. This one is going into my son’s vintage nautical room and it’s going to look fabulous! Created by WhipperBerry via @decoArt

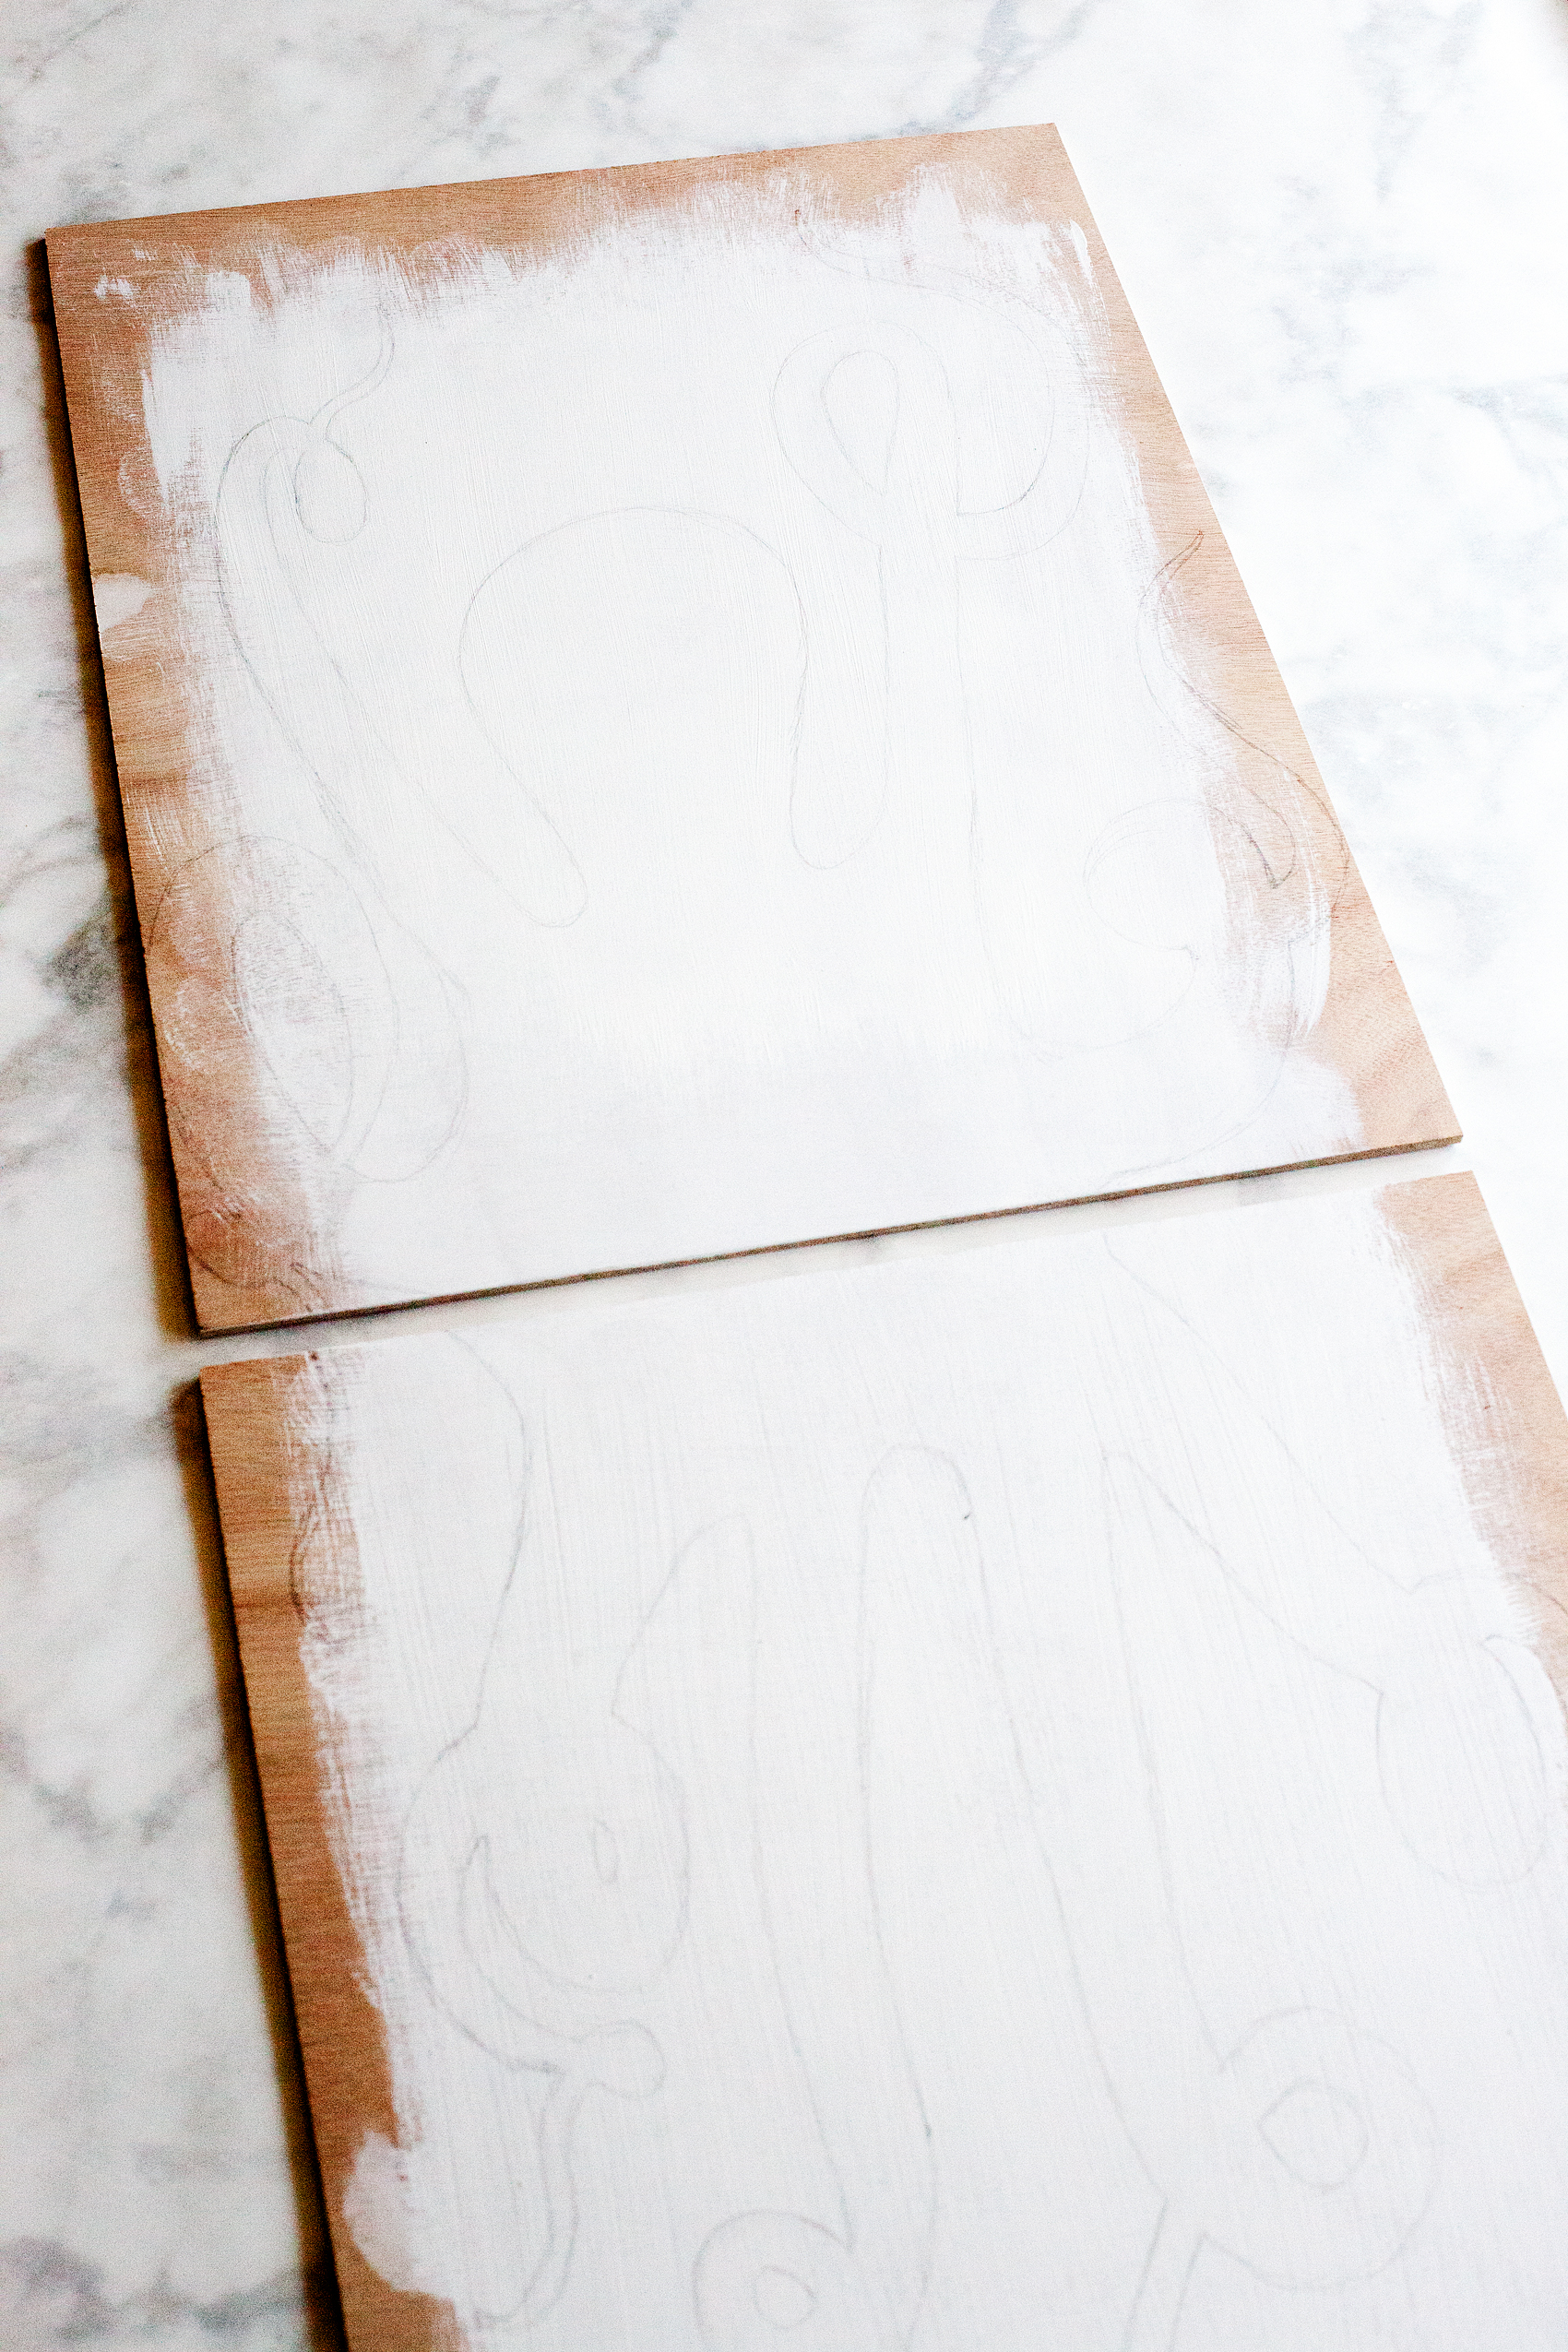
I left a boarder around the edge leaving some of the raw wood. But, if you notice, it’s all really rough. We aren’t looking for perfect lines here.

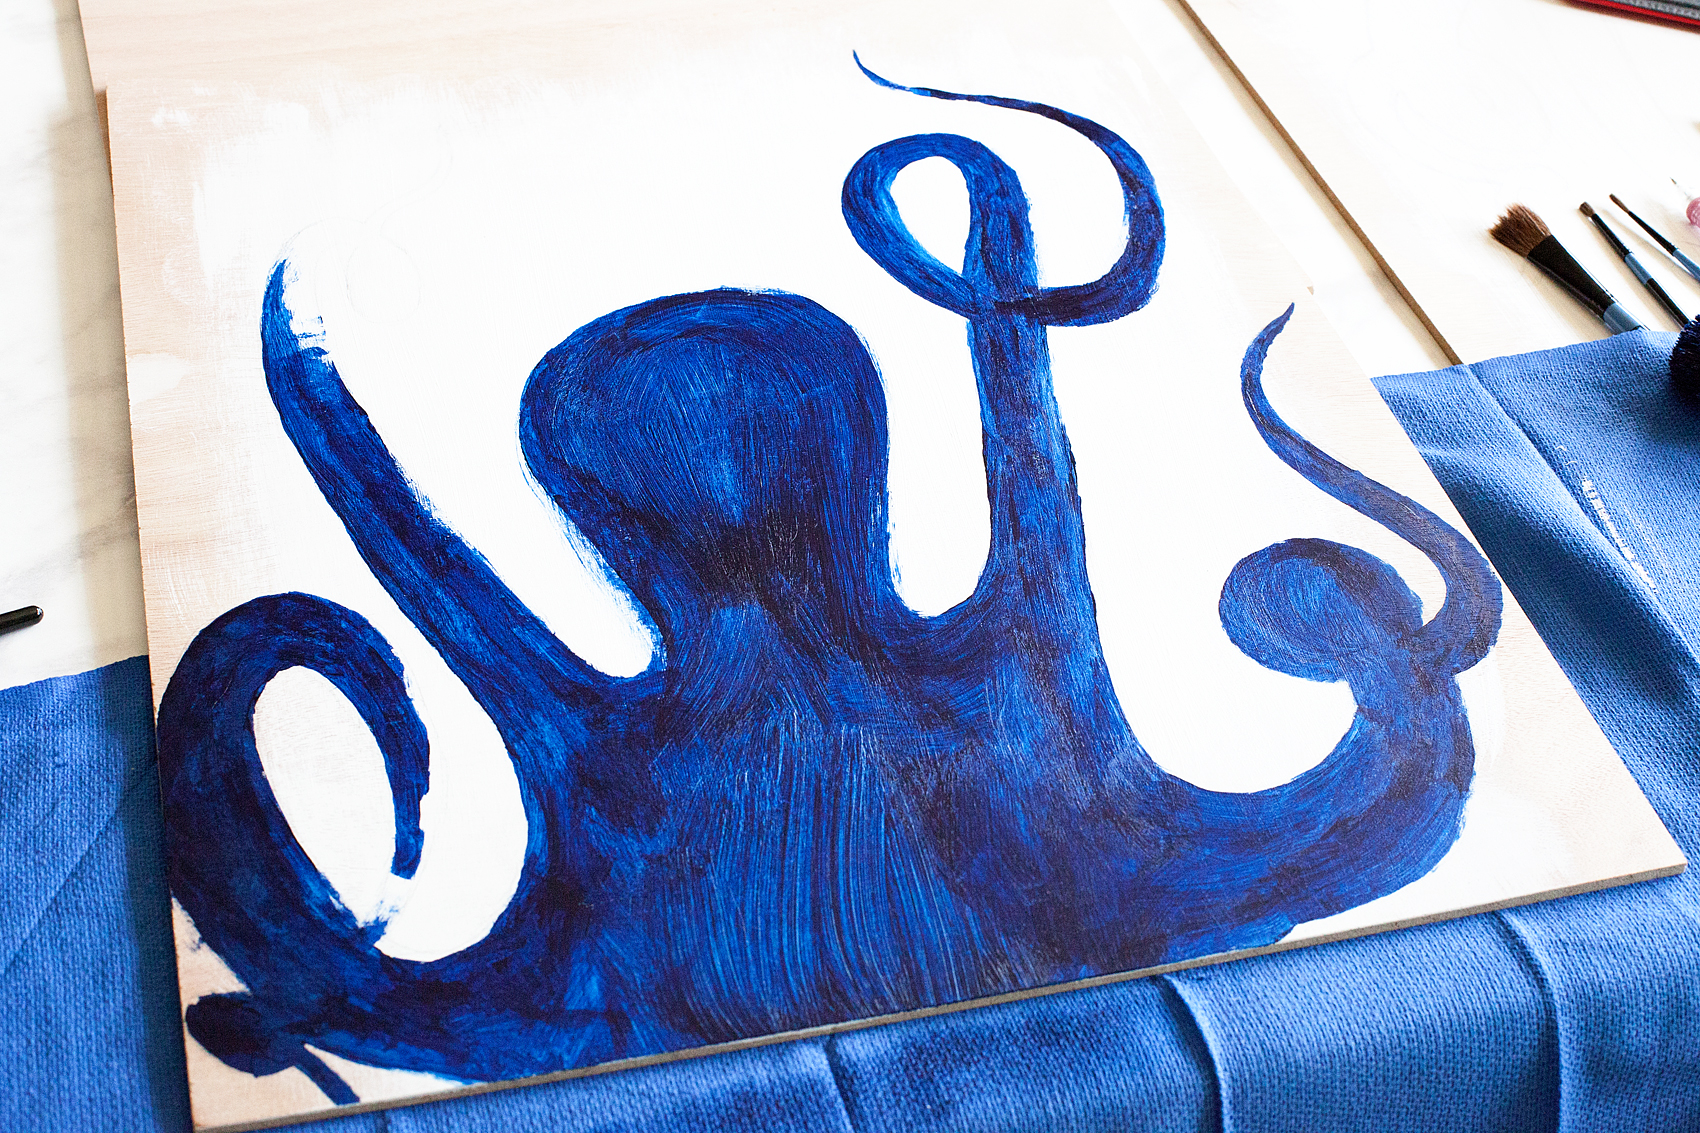
Next, Hannah sketched the octopus onto the boards with a pencil. Again, we aren’t looking for perfect. She even traced the legs off of the white section to make them look like they were coming off the canvas. Don’t trust your sketching skills? No worries, Angie from The Country Chic Cottage shares a great tutorial on how to use transfer paper to create a good sketch for sign making on the DecoArt Blog. It’s PERFECT for those of us who are artistically challenged.

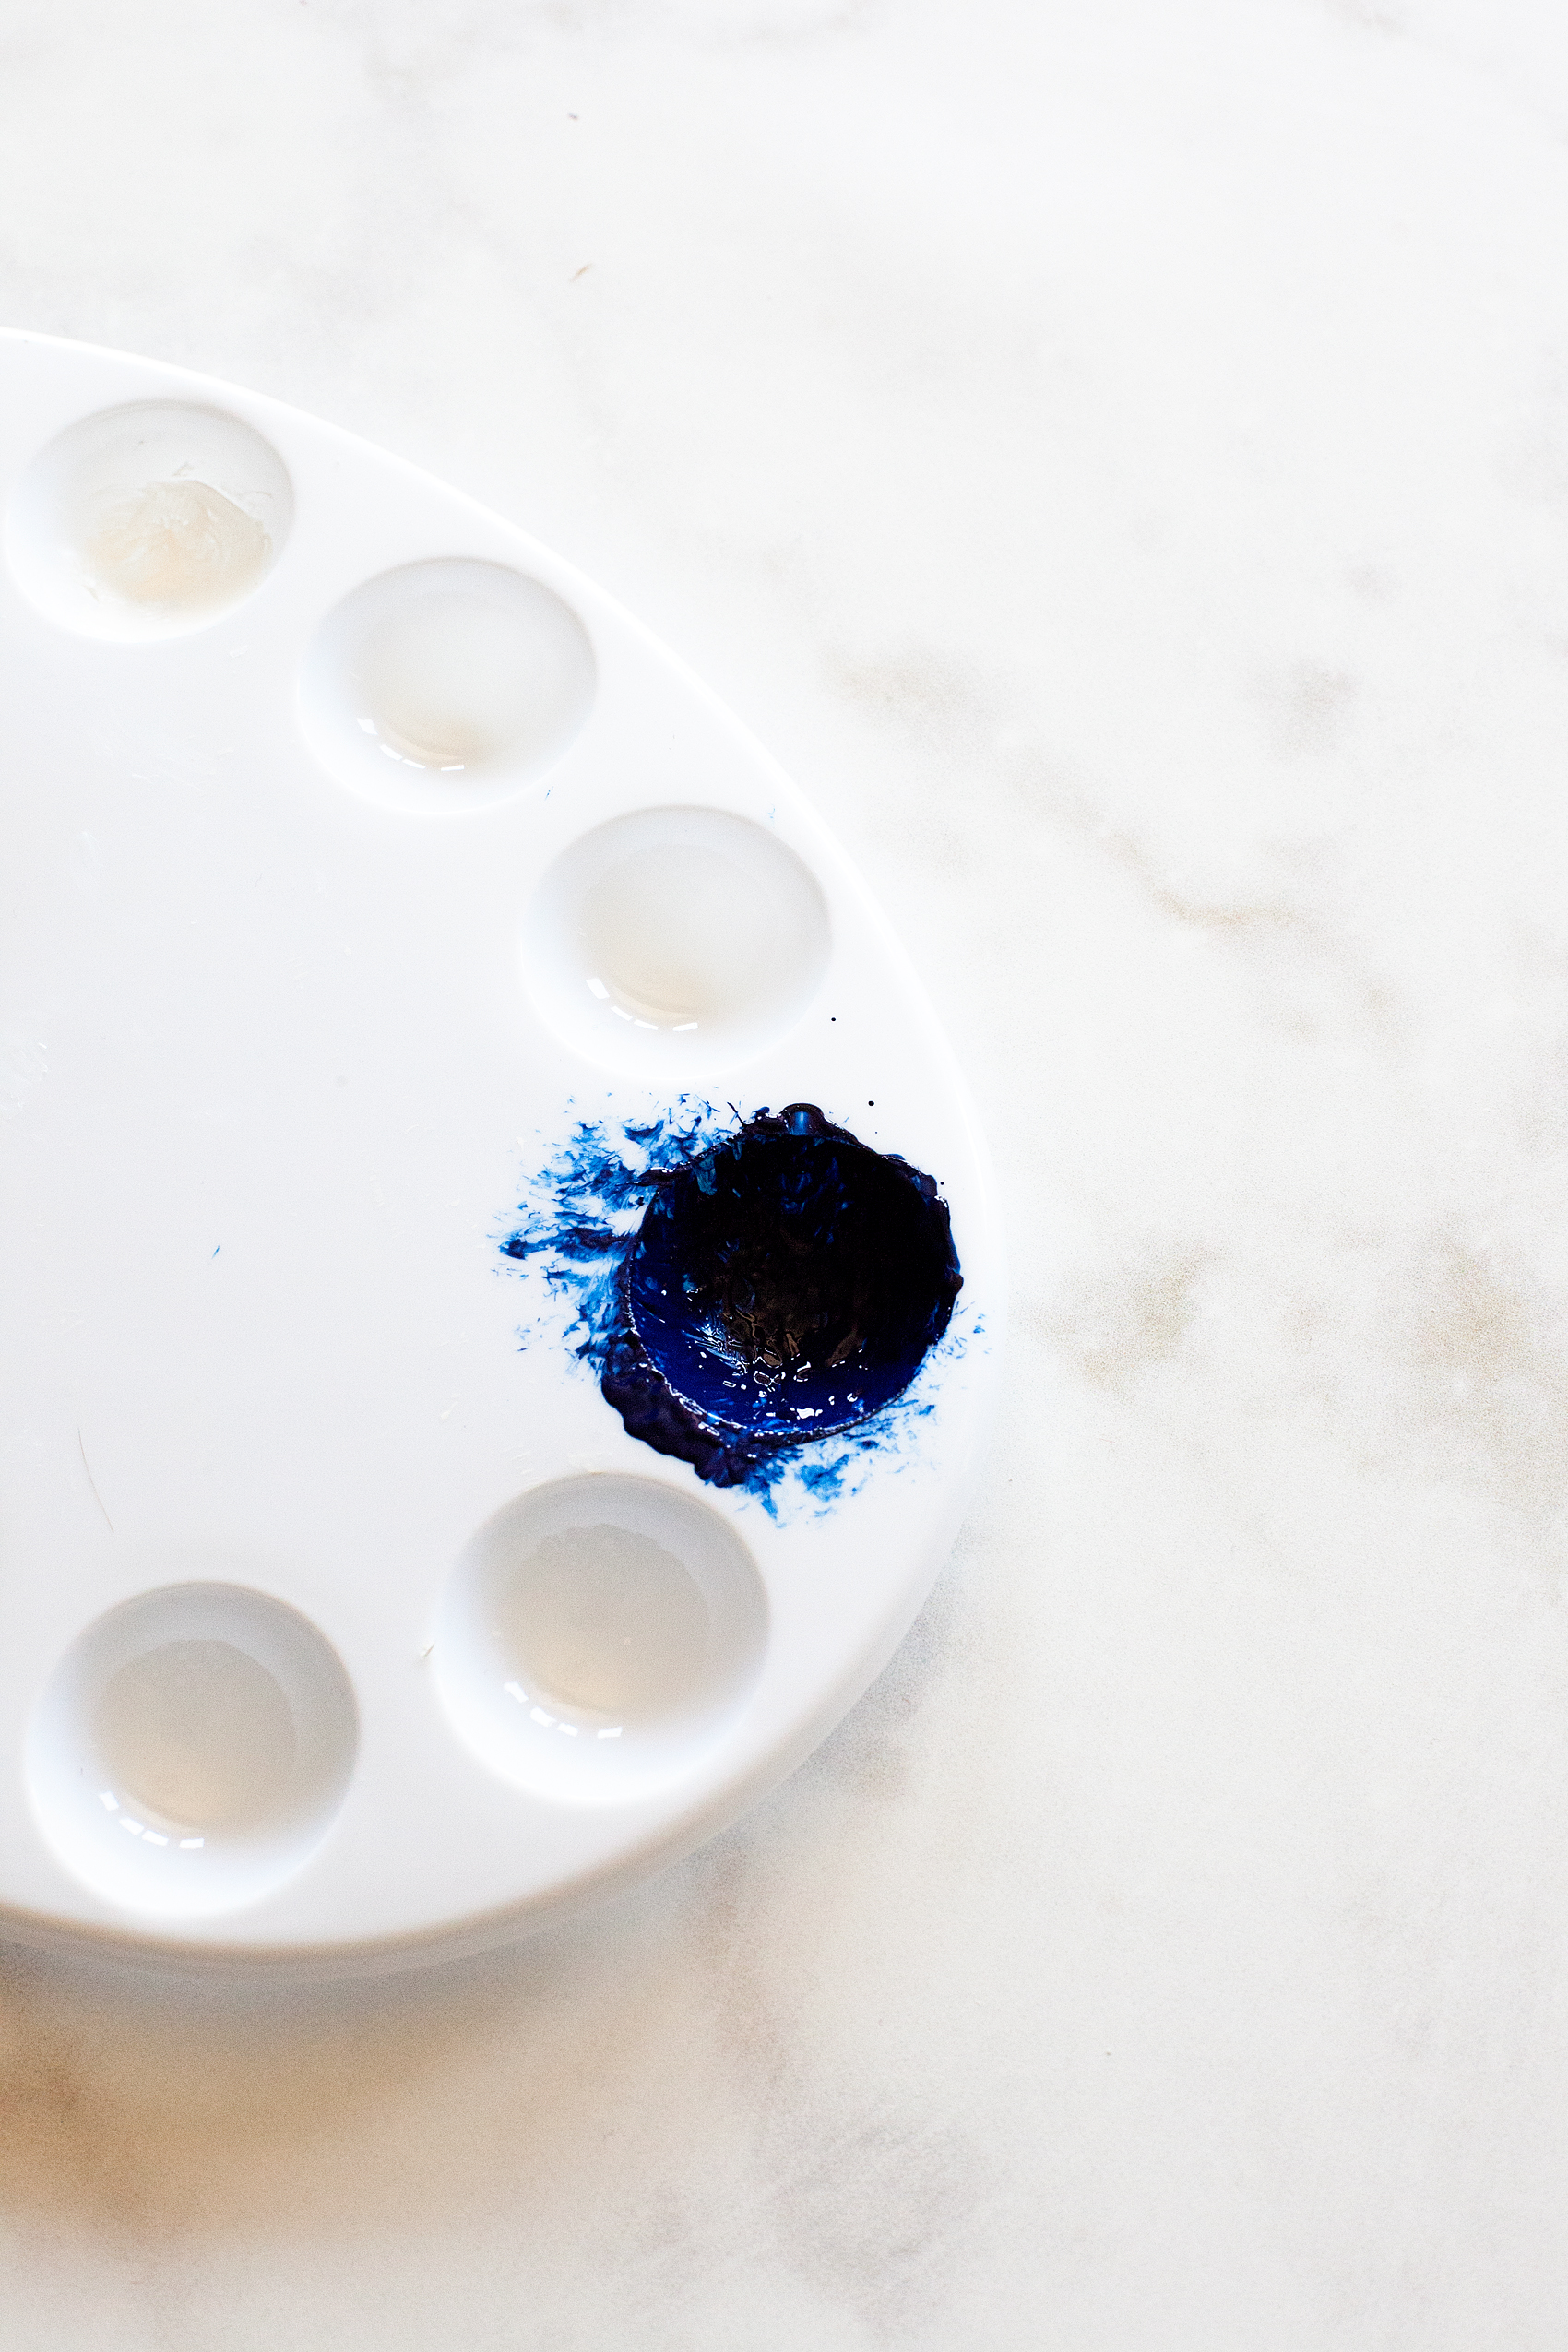
Again, we added the Americana® Premium Matte Medium to the Prussian Blue Hue Americana® Premium Artist Acrylic Paint and mixed it well.

Create this fun DIY Octopus Wall art for your favorite nautical themed room. This one is going into my son’s vintage nautical room and it’s going to look fabulous! Created by WhipperBerry via @decoArt

Then we set to work painting good ole’ Davy Jones the Octopus for Gage’s room…

Create this fun DIY Octopus Wall art for your favorite nautical themed room. This one is going into my son’s vintage nautical room and it’s going to look fabulous! Created by WhipperBerry via @decoArt

Create this fun DIY Octopus Wall art for your favorite nautical themed room. This one is going into my son’s vintage nautical room and it’s going to look fabulous! Created by WhipperBerry via @decoArt

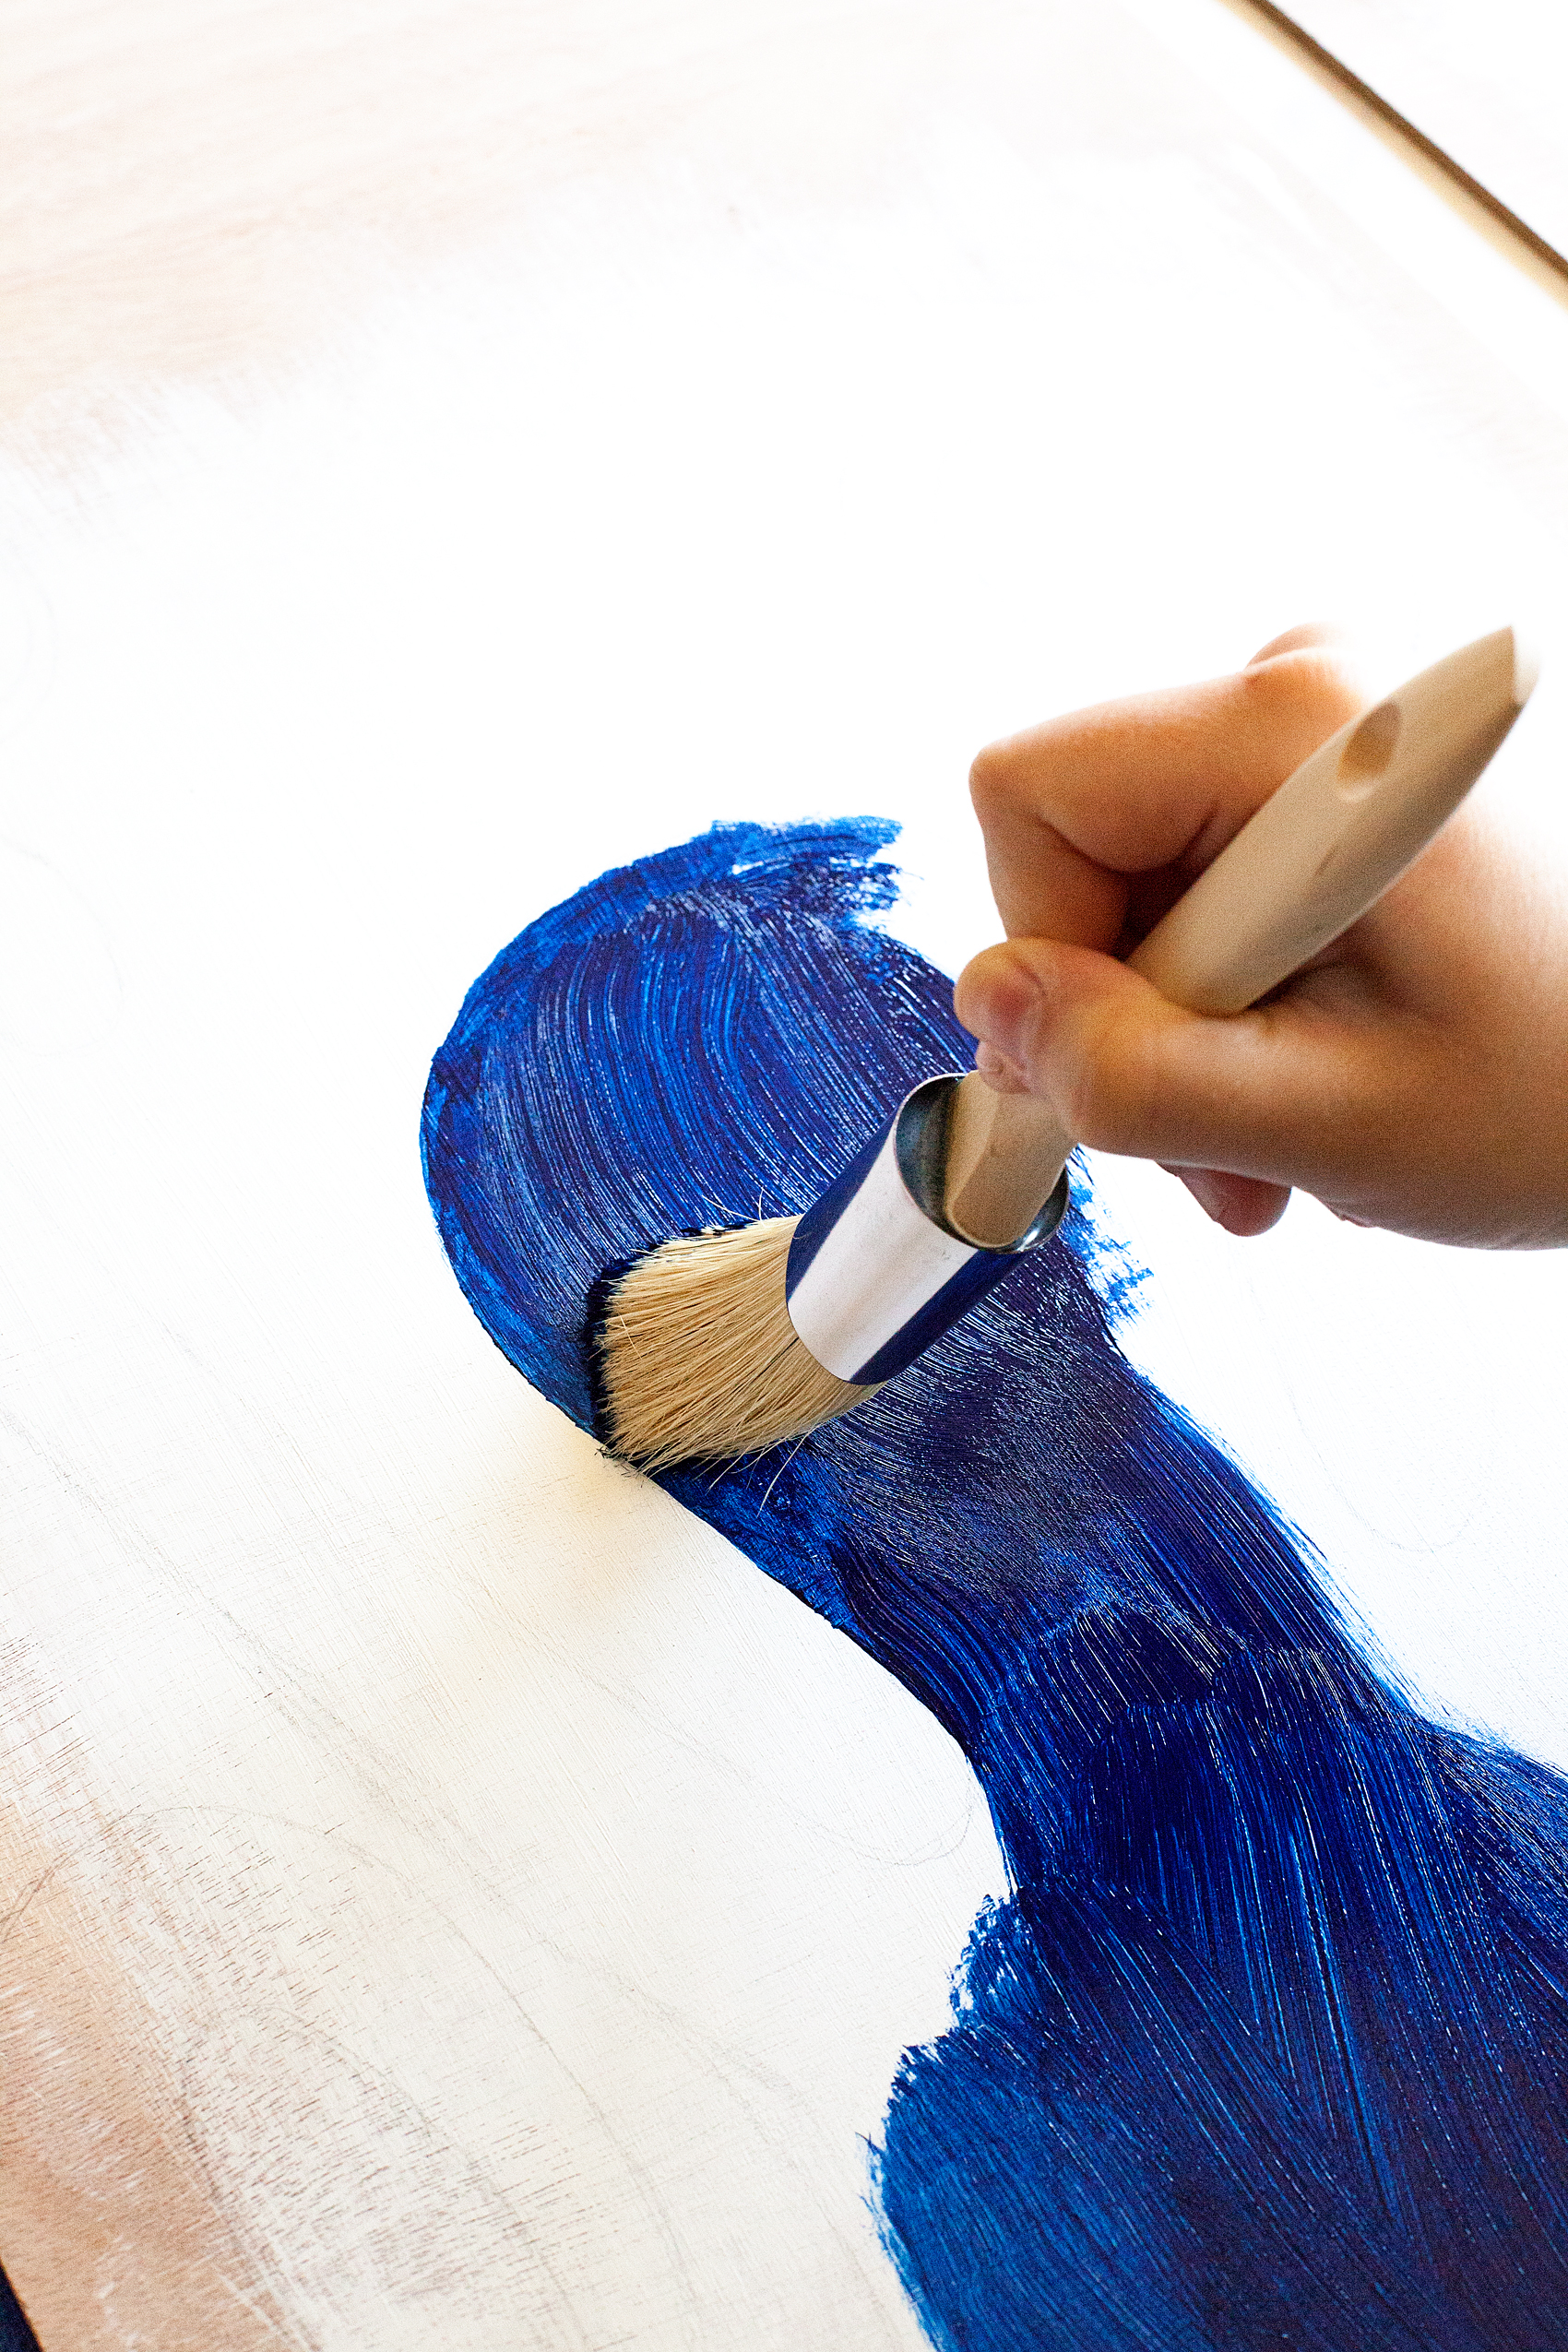
I wanted as much texture as possible so we tried to create really rough brush strokes. I was really impressed with how fast the paint dried, it was so easy to use!

Next, we painted on rough circles for his tentacles and eyes. Again, we wanted things to look really rough. That’s why this type of project is so good for beginner artist. That leads me to the Americana® Premium Acrylic Paint, here’s why is it the perfect type of paint for this application…  Americana® Premium™ acrylics provide a medium-bodied formula for the hobbyist-artist at an affordable price point. Its satin-sheen formula was created to work well on canvas, and other artistic surfaces. Its simplicity of design and use takes the intimidation factor out of fine art painting. Use it alone or mix with mediums to create original pieces of art at a budget-friendly price. It’s the perfect, easy to use, budget friendly paint for this kind of home decor project.

Create this fun DIY Octopus Wall art for your favorite nautical themed room. This one is going into my son’s vintage nautical room and it’s going to look fabulous! Created by WhipperBerry via @decoArt

I’m even thinking of drilling some holes into the two boards and connecting them with rope. I think that will look really cool. I’ll let you know as we get started on Gage’s room. Davy Jones will for sure make a few more appearances!

Looking for more fun painting projects for the family here is another one from WhipperBerry that you might like…

Gnome Garden

Disclaimer • This post is sponsored by DecoArt. I receive product and payment to help create this fun project. Please remember, I will only share what I truly love and use all of the time.

How to Apply Vinyl Tutorial + New Kitchen Sign Design

5 · May 9, 2017 · 2 Comments

Have you always wanted to create beautiful vinyl signs but, can’t quite get the hang of applying vinyl? Look no further, I’m sharing my pro tips for how to apply vinyl to create beautiful vinyl signs.

How to Apply Vinyl Have you always wanted to create beautiful vinyl signs but, can’t quite get the hang of applying vinyl? Look no further, I’m sharing my pro tips for how to apply vinyl to create beautiful vinyl signs.

how to transfer vinyl tutorial • brought to you by Cricut

Recently, we moved to our new forever home and I have been madly creating all kinds of fun things to make the space my own. I LOVE creating word art whether it be for vinyl signs, painted signs, or for printables, for some reason that kind of decor always speaks to me. (No pun intended!) I love typography and everything that comes with creating with words and letters. I love watching trends come and go and adding my version to the fray.

Right now, with the popularity of the show Fixer-Upper, word art is hot. I have all kinds of farmhouse/industrial signs all over my house. I found a fun, blank chalkboard stand at Michaels in their decor section and thought it would be fun to create a new “The Kitchen is Now Open” Sign for my counters. After a little bit of playing around, this is the design that I settled on…

How to Apply Vinyl Have you always wanted to create beautiful vinyl signs but, can’t quite get the hang of applying vinyl? Look no further, I’m sharing my pro tips for how to apply vinyl to create beautiful vinyl signs like this, "The Kitchen is Now Open Sign" with menu from WhipperBerry.

Download Kitchen Sign for Free

It has a little bit of farmhouse flair that so many of us are in love with right now. Now, this sign could be a little intimidating with all of the little letters but, don’t let it be intimidating. YOU CAN DO THIS! All you need is a little patience. So many people try and rush through a project and they get easily frustrated and then their project fails. That is so SAD! Step back, grab a Diet Coke (or, whatever it is that makes you happy), and ENJOY the process of creating.

For today, I’m focusing on just the vinyl transfer part of sign making. I’m working on a few more tutorials on how to create your sign in the NEW Cricut Design Space that was launched in BETA mode a week ago. It’s fabulous! I’ve been having a ball getting to know the new, faster & more user-friendly Design Space. I’m sure you’re going to love it too! It’s so easy to create your own designs within the Design Space or you can create in other programs like Photoshop or Illustrator and import your PNG files directly into Design Space and create that way as well. I’ll be working on more tutorials for both of those options soon.

I’m also working on a video tutorial on how to weed your vinyl. That’s the process of removing the negative part of your design in the vinyl. It’s really not hard, but I have a few tricks up my sleeve that will make it a little easier. Today, I’m just going to focus on how to apply vinyl. Here’s a quick video to show you how to apply vinyl to any type of smooth surface.

Video Tutorial for How to Apply Vinyl

How to Apply Vinyl by WhipperBerry from Heather Thoming on Vimeo.

See, isn’t that simple! Honestly, the trickiest part is making sure that the design is centered onto your surface. As long as you stick with these simple tips, you can become a vinyl sign PRO!

Pro Tips for Applying Vinyl

How to Apply Vinyl Have you always wanted to create beautiful vinyl signs but, can’t quite get the hang of applying vinyl? Look no further, I’m sharing my pro tips for how to apply vinyl to create beautiful vinyl signs like this, "The Kitchen is Now Open Sign" with menu from WhipperBerry.

  • Take your time – like I said before, don’t rush. If some of the vinyl lifts while you are transferring it to either the transfer tape or your sign… Don’t stress out. Lay that section back down and press on the vinyl with your finger and then try again. You’ll get it, just don’t rush.
  • Make sure your surface is clean – Now think about this, if you try and place a sticker on a surface covered in dust, dirt, sand, or general grime, what will happen? The sticker won’t stick. Same thing with adhesive vinyl. Whatever you are adhering it to needs to be clean. Nothing is more frustrating than laying down some vinyl and then finding a little piece of dirt stuck under the vinyl image making an unsightly bump. Take the time to make sure everything is clean.
  • Trim excess vinyl backing – Again, vinyl is just one big sticker. Stickers are placed on backing to keep the adhesive side sticky. The same applies to vinyl. Once you have cut your design on your Cricut machine, you’ll weed your vinyl and then you’ll want to cut away the excess vinyl backing. This will help when laying down your design and making sure it is placed the way you would like it.
  • Create a hinge – Several years ago, when the Cricut cutting machines made cutting your own vinyl possible, a good friend of mine, who owned a large-scale sign-making company, taught me her tricks for applying vinyl. Each of these tricks, I still use them every time. One of them is to use the transfer tape to create a “hinge” at the top of your design. Check out the video and you’ll see what I mean.
  • Pull transfer tape low, slow, and diagonally – My sign-making friend also taught me this years ago. When removing the transfer tape, pull low, slow and diagonally. What I mean by low is, that you are essentially folding the non-sticky side over on itself as you are pulling as close to your surface as possible. When do that along with pulling diagonally, you’ll be less likely to pull the vinyl back up as you remove the transfer tape.

A Quick Note on Materials

Here we have it… Not all vinyl and transfer tapes are created equal!! I have tried many brands of both vinyl and transfer tape. I’ve used what the professionals use and basic crafters vinyl. I LOVE the Cricut Transfer Tape!! It’s clear and so easy to use. I’ve also been very happy with the Cricut Vinyl. I have exclusively used the Premium Outdoor Vinyl for most of my projects and have been thrilled with the results. I made some travel mugs with the Premium Vinyl and have run them through the dishwasher many, many times and have yet to have any issues with the vinyl coming off. I LOVE that!

Stay tuned for more Cricut tutorials and projects coming to WhipperBerry! By the way… If you have any questions, feel free to leave a comment here. I would be happy to help!

How to Apply Vinyl Have you always wanted to create beautiful vinyl signs but, can’t quite get the hang of applying vinyl? Look no further, I’m sharing my pro tips for how to apply vinyl to create beautiful vinyl signs like this, "The Kitchen is Now Open Sign" with menu from WhipperBerry.

Disclaimer // I am a Cricut Ambassador and receive  product and payment to help with my projects. As always, I will NEVER promote a product that I don’t truly believe in!

Wash and Dry Sign • Iron-On Vinyl on Black Canvas

11 · Apr 28, 2017 · 3 Comments

Every laundry room or bathroom for that matter, needs a Wash and Dry sign, right? Let me show you how to make a simple Fixer-Upper inspired sign with Cricut Iron-On Vinyl and a black canvas. Fixer-Upper inspired Wash and Dry Sign created by WhipperBerry • Create this easy to make sign using your @cricut® machine and their Iron-On Vinyl •  Download the digital design file at WhipperBerry.com

• This post is brought to you by Cricut •

A few weeks ago, I had the wonderful experience of traveling to Austin, Texas for the Indulge Conference (which was fabulous by the way!) On the last day of the conference, we hopped onto a bus and made our way to Mecca, I mean Magnolia Market a.k.a The Silos in Waco, Texas. To say that my heart was full that day would be an understatement. I came home with all kinds of goodies AND inspiration as well. They have a laundry room Wash and Dry sign at the Magnolia Market that I’ve been eyeing for awhile and I wanted to create something similar for my laundry room.

Prdctmgnl_1_of_8_1024x1024

Magnolia Market  •  Wash and Dry Sign

The WhipperBerry Wash and Dry Sign Design

I set to work to create a Wash and Dry sign that fit my style and this is what I came up with…

Fixer-Upper inspired Wash and Dry Sign created by WhipperBerry • Create this easy to make sign using your @cricut® machine and their Iron-On Vinyl •  Download the digital design file at WhipperBerry.com

It has a little of JoJo’s vibe with more of a modern flair I would say. I kind of love it! For those of you who would like to download this sign design, click HERE for the PNG file. Shortly, I will have a full tutorial on how to use a PNG file in the NEW Cricut Design Space. It’s sooooo cool, so stay tuned!

How to create the Wash and Dry Sign

Once I had the design created, I needed to find the easiest way to create a nice looking sign. I decided that a black canvas with Cricut’s Iron-On Vinyl would be the best and easiest way to accomplish my mission. I grabbed a black canvas at Michaels and set to work… Here’s what you’ll need.

Wash and Dry Sign Supplies

  • Black Canvas 18×24
  • Cricut Machine { I use the Cricut Explore Air 2 }
  • Cricut Design Space { I don’t want to knock your socks off BUT… The new Cricut Design Space has launched in BETA. That is a link to the new, awesome software!! No more Flash, which means… No more lag time! }
  • Computer / Tablet / Phone { You guys… They all work WIRELESSLY with the Cricut Explore Air 2 }
  • White Cricut Iron-On Lite
  • Cricut 12×24 Light Grip Cutting Mat
  • Light cotton tea towel { flower sack material is great } OR Parchment paper

Fixer-Upper inspired Wash and Dry Sign created by WhipperBerry • Create this easy to make sign using your @cricut® machine and their Iron-On Vinyl •  Download the digital design file at WhipperBerry.com

Ok, before we get started on the project, here’s a quick time lapse that shows how I made the sign…

Wash & Dry Sign by WhipperBerry from Heather Thoming on Vimeo.

Seriously, to quote Ina Garten… “How easy was that?” Let’s go into it in a little more detail starting with my tips and tricks for a successful project.

Fixer-Upper inspired Wash and Dry Sign created by WhipperBerry • Create this easy to make sign using your @cricut® machine and their Iron-On Vinyl •  Download the digital design file at WhipperBerry.com

First tip, take your time. Many people try and rush through their projects and get frustrated when they don’t turn out right. SLOW DOWN! Especially if this is your first time working with the heat transfer vinyl. You want to love your project, take the time to do it right.

Cutting out the Iron-On Lite Material

First thing you need to do is, cut your file on the Iron-On Lite material via your Cricut machine. When working with Iron-On lite, you’ll want to place the material with the shiny protective film down and the matte side facing up. Yep, I’ve messed that up a few times so, don’t beat yourself up if you do as well!

Another key item, make sure that you select the iron-on button when setting up your design in Design Space. This will mirror your image so that it will work with the iron-on vinyl.

Fixer-Upper inspired Wash and Dry Sign created by WhipperBerry • Create this easy to make sign using your @cricut® machine and their Iron-On Vinyl •  Download the digital design file at WhipperBerry.com

Next step, weeding your Iron-On Lite vinyl. This is my favorite part and if you don’t believe me, watch my Instagram story from yesterday. You’ll see why I love it and, you’ll get to see more of the project!

Wash and Dry Instagram Story @whipperberry from Heather Thoming on Vimeo.

Adhering your Iron-On Lite Vinyl to Your Canvas

Now, working with traditional stretched canvas rather than your fabric does provide for a few little obstacles. Namely, the canvas is stretched on a wood frame which makes it hard to “iron-on” something to it. To get a good transfer of the vinyl you need to apply pressure on a hard surface and the raised nature of the canvas makes that a challenge. To solve this problem, I put some books under the canvas to provide that firm surface that I needed.

Fixer-Upper inspired Wash and Dry Sign created by WhipperBerry • Create this easy to make sign using your @cricut® machine and their Iron-On Vinyl •  Download the digital design file at WhipperBerry.com

I also placed a heat mat on top of the books to protect them from the heat of the iron. I found this portable heat mat at Target in the laundry section.

Fixer-Upper inspired Wash and Dry Sign created by WhipperBerry • Create this easy to make sign using your @cricut® machine and their Iron-On Vinyl •  Download the digital design file at WhipperBerry.com

You’ll lay down your design onto the surface of your canvas with the protective film on top. That protective film is your friend at this point. It’s a bit sticky so it holds your design in place for you.

Fixer-Upper inspired Wash and Dry Sign created by WhipperBerry • Create this easy to make sign using your @cricut® machine and their Iron-On Vinyl •  Download the digital design file at WhipperBerry.com

Fixer-Upper inspired Wash and Dry Sign created by WhipperBerry • Create this easy to make sign using your @cricut® machine and their Iron-On Vinyl •  Download the digital design file at WhipperBerry.com

Cover your design with a light cotton cloth or some parchment paper. Set your iron to it’s hottest setting and then start to iron-on your design.

Now… This is not like ironing a shirt. You don’t want to use steam and it’s going to take a little time. You are basically wanting the vinyl to melt into the canvas and that takes a little time. DO NOT iron directly on the protective film OR place your iron on a section and just leave it there. Keep the iron moving and firmly press down on the canvas. This will help adhere the heat transfer vinyl to the canvas.

After a few minutes, check to see how things are sticking. Look at the protective film and you’ll kind of be able to see that the vinyl is pulling away from it and sticking to the canvas. You may find a few spots that need a little more time. Replace the cloth and continue to iron. Once you feel good about the adhesion, pull the protective film away and admire your sign.

At this point, I actually replace the cloth and do another light pass with the iron to make sure the vinyl is good and set. You could even flip your canvas over and iron on the back side with the protective film still in place to again make sure the vinyl is set.

Now, all you have to do is step back and admire your work! It’s so EASY and it looks AAAAMAZING!

Fixer-Upper inspired Wash and Dry Sign created by WhipperBerry • Create this easy to make sign using your @cricut® machine and their Iron-On Vinyl •  Download the digital design file at WhipperBerry.com

Disclaimer // I am a Cricut Ambassador and receive  product and payment to help with my projects. As always, I will NEVER promote a product that I don’t truly believe in!

Mistletoe Christmas Sign + Silhouette CAMEO GIVEAWAY

1 · Nov 22, 2015 · 259 Comments

+ This Silhouette CAMEO GIVEAWAY brought to you by Silhouette +

giveaway

Let’s get real…

 Christmas is right around the corner and we ALL want something nice in our stockings this year!

Frankly, I’m a gadgets girl. I love all kinds of tools that make my life easier or more creative.  My ALL-TIME FAVORITE creative tool is my Silhouette CAMEO. Seriously, hands-down, without a doubt, what would you take to a creative desert island (with power of course)… My CAMEO!!!

I will admit, that I have been blessed when it comes to these types of machines. I’ve extensively used both the Silhouette and Cricut cutting machines. I have met with the CEOs and their executive teams for both companies. I have learned about their visions for their companies and the new directions each company has in the works. I respect them both but, time and time again, I use my Silhouette CAMEO without a 2nd thought. It’s my go-to tool when I start any project. I LOVE my CAMEO. I love the creative capabilities that the Silhouette Studio has to offer. I love what’s available in the Silhouette Store and I love what I can create within the software. My hands don’t feel tied in any way with Silhouette. I can’t say the same for the other company’s software.

This Christmas I’ve created a fun new sign with my Silhouette CAMEO that I’m super excited to share with you guys.

WhipperBerry-White-Christmas-Mistletoe-Sign

This sign was painted with BB Frösch Chalk Paint Powder using my Faux Stain technique and then I stenciled this design onto the wood. There is NO WAY I could have made that sign without my Silhouette CAMEO.

For years before I had learned about any kind of cutting machine, I yearned to make projects like this and couldn’t. I don’t have the talent to hand letters nor the patients to trace and cut out a design with a craft knife. When I learned about the Silhouette Cutting Machine 5 years ago my heart skipped a beat. This was the creative tool I had been waiting for my whole life!

I bought one on their Black Friday deal back in 2011 and I’ve been in love ever since! So many products have come out since and as much as I love the companies, I always go back to… “I can make that with my Silhouette, why would I need to buy anything else.”

So here’s the deal… I’m going to be sharing my cut files for this Mistletoe sign on December 1st on Tatertots & Jello. If you don’t have a Silhouette yet, now’s the time to get one. This week, at Midnight on Wednesday, Silhouette is starting their Black Friday Sale. This sale is epic every year! They offer the best discounts on Black Friday, this is for sure the time to grab one and stock up and all kinds of Silhouette goodies. I’ll have all the details on the sales event right at Midnight on Wednesday… BUT, while we anxiously await, the amazing folks at Silhouette have given me a CAMEO to give away to one of you!!!

All you need to do is follow the directions in the Rafflecopter box below and you’ll be entered to win the Silhouette CAMEO of your dreams!

I’ll announce the winner on Thanksgiving morning. Don’t forget to come back that night to take advantage of the Silhouette deals. They sell out quickly so you don’t want to miss out.

a Rafflecopter giveaway

  • « Go to Previous Page
  • Page 1
  • Interim pages omitted …
  • Page 3
  • Page 4
  • Page 5
  • Page 6
  • Page 7
  • Go to Next Page »

Primary Sidebar

Heather from Whipperberry
Hello... my name is Heather and I'm the creator of WhipperBerry a creative lifestyle blog packed full of great recipes and creative ideas for your home and family. I find I am happiest when I'm living a creative life and I love to share what I've been up to along the way... Come explore, my hope is that you'll leave inspired!

Footer

  • Privacy Policy
  • Crafts
  • Food
  • Gifts
  • Holidays
  • Home
  • Mom Life
  • Recipes
  • Travel

Copyright © 2026 · Seasoned Pro