• Skip to primary navigation
  • Skip to main content
  • Skip to primary sidebar
  • Skip to footer

Whipperberry

WhipperBerry • Your Home For Creative Inspiration

  • Home
  • Recipes
    • Starters
    • Easy Weeknight Dinners
    • Main Dish
    • Salads
    • Side Dish
    • Soups & Stews
    • Desserts
    • Breakfast
    • Miscellaneous
  • Tutorials
    • Creative Crafts
    • DIY Decor
    • Fabric Crafts
    • Food How-To
    • Jewlery
    • Paint Projects
    • Paper Art
    • Party Styling
    • Photography and Graphic Design
    • Silhouette
  • Holidays
    • Easter
    • Mother’s Day
    • Father’s Day
    • 4th of July
    • Halloween
    • Thanksgiving
    • Christmas
    • Valentine’s Day
  • Gift Ideas
    • Gifts For Everyone
    • Gifts for Dad
    • Mother’s day
    • For The Girls
    • For The Kids
    • Teacher Gift Ideas
    • Christmas
  • Printables
    • Holiday
    • Gift Idea
    • LDS Primary
  • Travel
  • About
    • Terms
  • Contact
  • Nav Social Menu

    • Facebook
    • Instagram
    • Pinterest
    • RSS
    • Twitter

Silhouette

Mistletoe Christmas Sign + Silhouette CAMEO GIVEAWAY

1 · Nov 22, 2015 · 259 Comments

+ This Silhouette CAMEO GIVEAWAY brought to you by Silhouette +

giveaway

Let’s get real…

 Christmas is right around the corner and we ALL want something nice in our stockings this year!

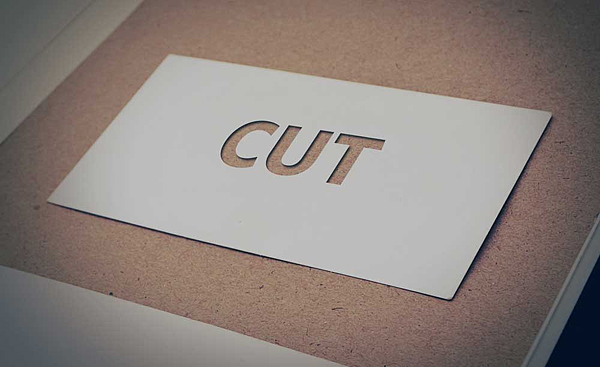
Frankly, I’m a gadgets girl. I love all kinds of tools that make my life easier or more creative.  My ALL-TIME FAVORITE creative tool is my Silhouette CAMEO. Seriously, hands-down, without a doubt, what would you take to a creative desert island (with power of course)… My CAMEO!!!

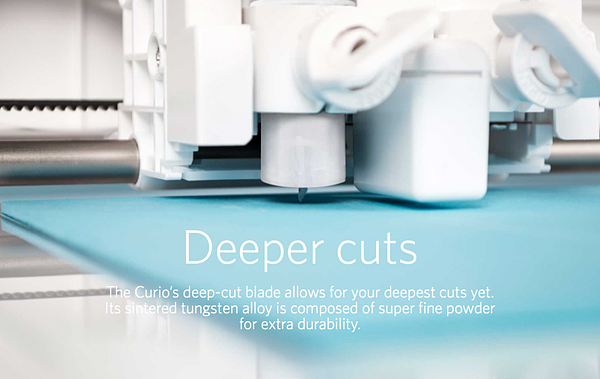
I will admit, that I have been blessed when it comes to these types of machines. I’ve extensively used both the Silhouette and Cricut cutting machines. I have met with the CEOs and their executive teams for both companies. I have learned about their visions for their companies and the new directions each company has in the works. I respect them both but, time and time again, I use my Silhouette CAMEO without a 2nd thought. It’s my go-to tool when I start any project. I LOVE my CAMEO. I love the creative capabilities that the Silhouette Studio has to offer. I love what’s available in the Silhouette Store and I love what I can create within the software. My hands don’t feel tied in any way with Silhouette. I can’t say the same for the other company’s software.

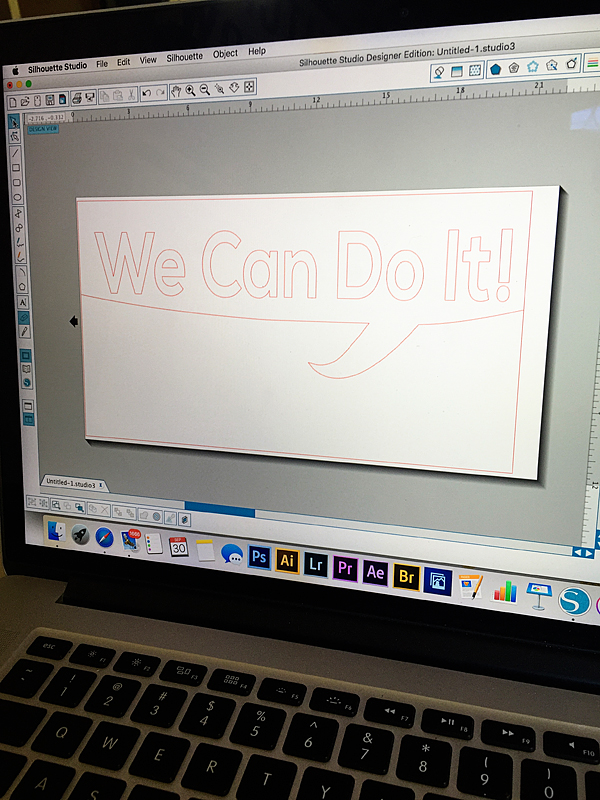
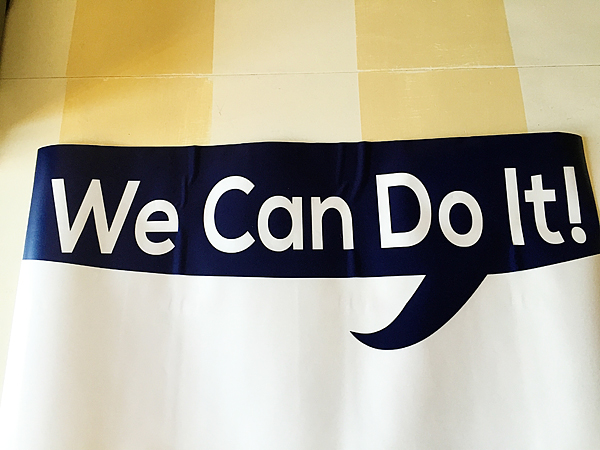
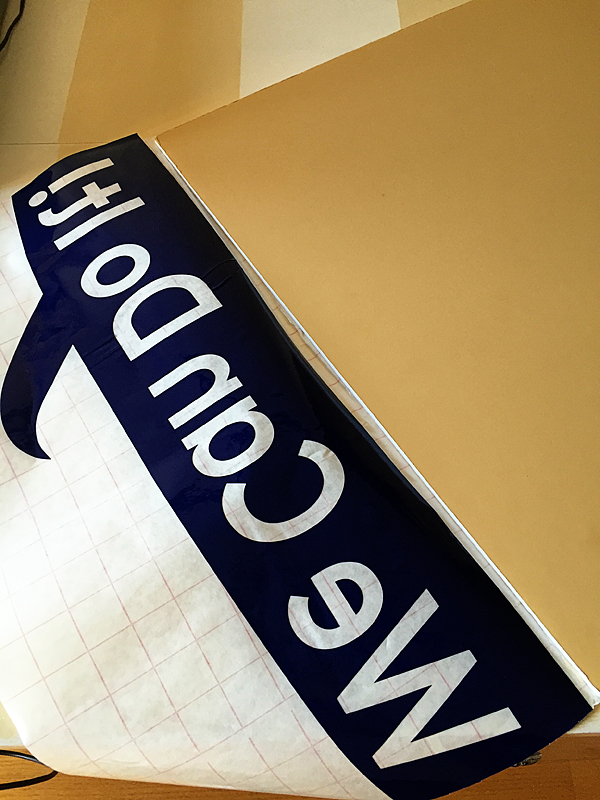
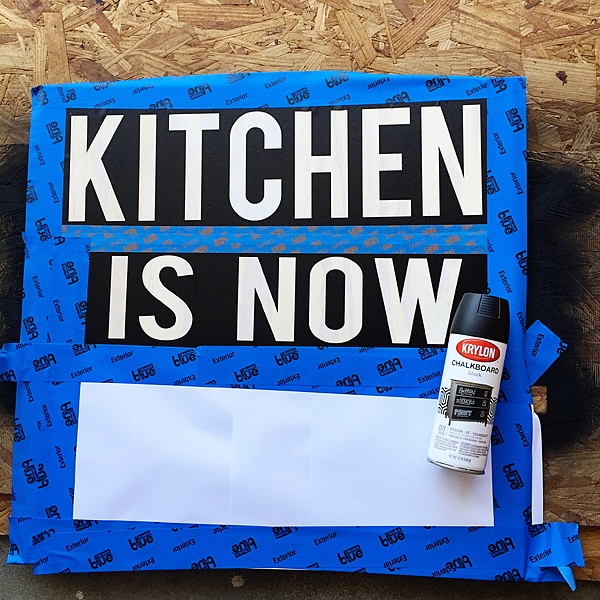
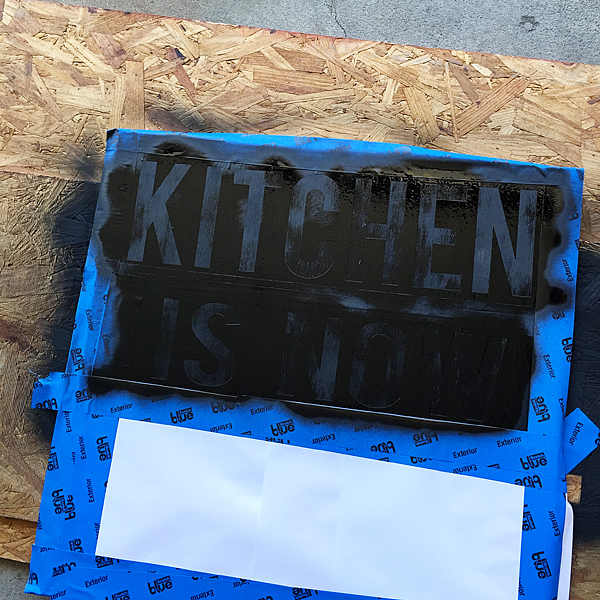
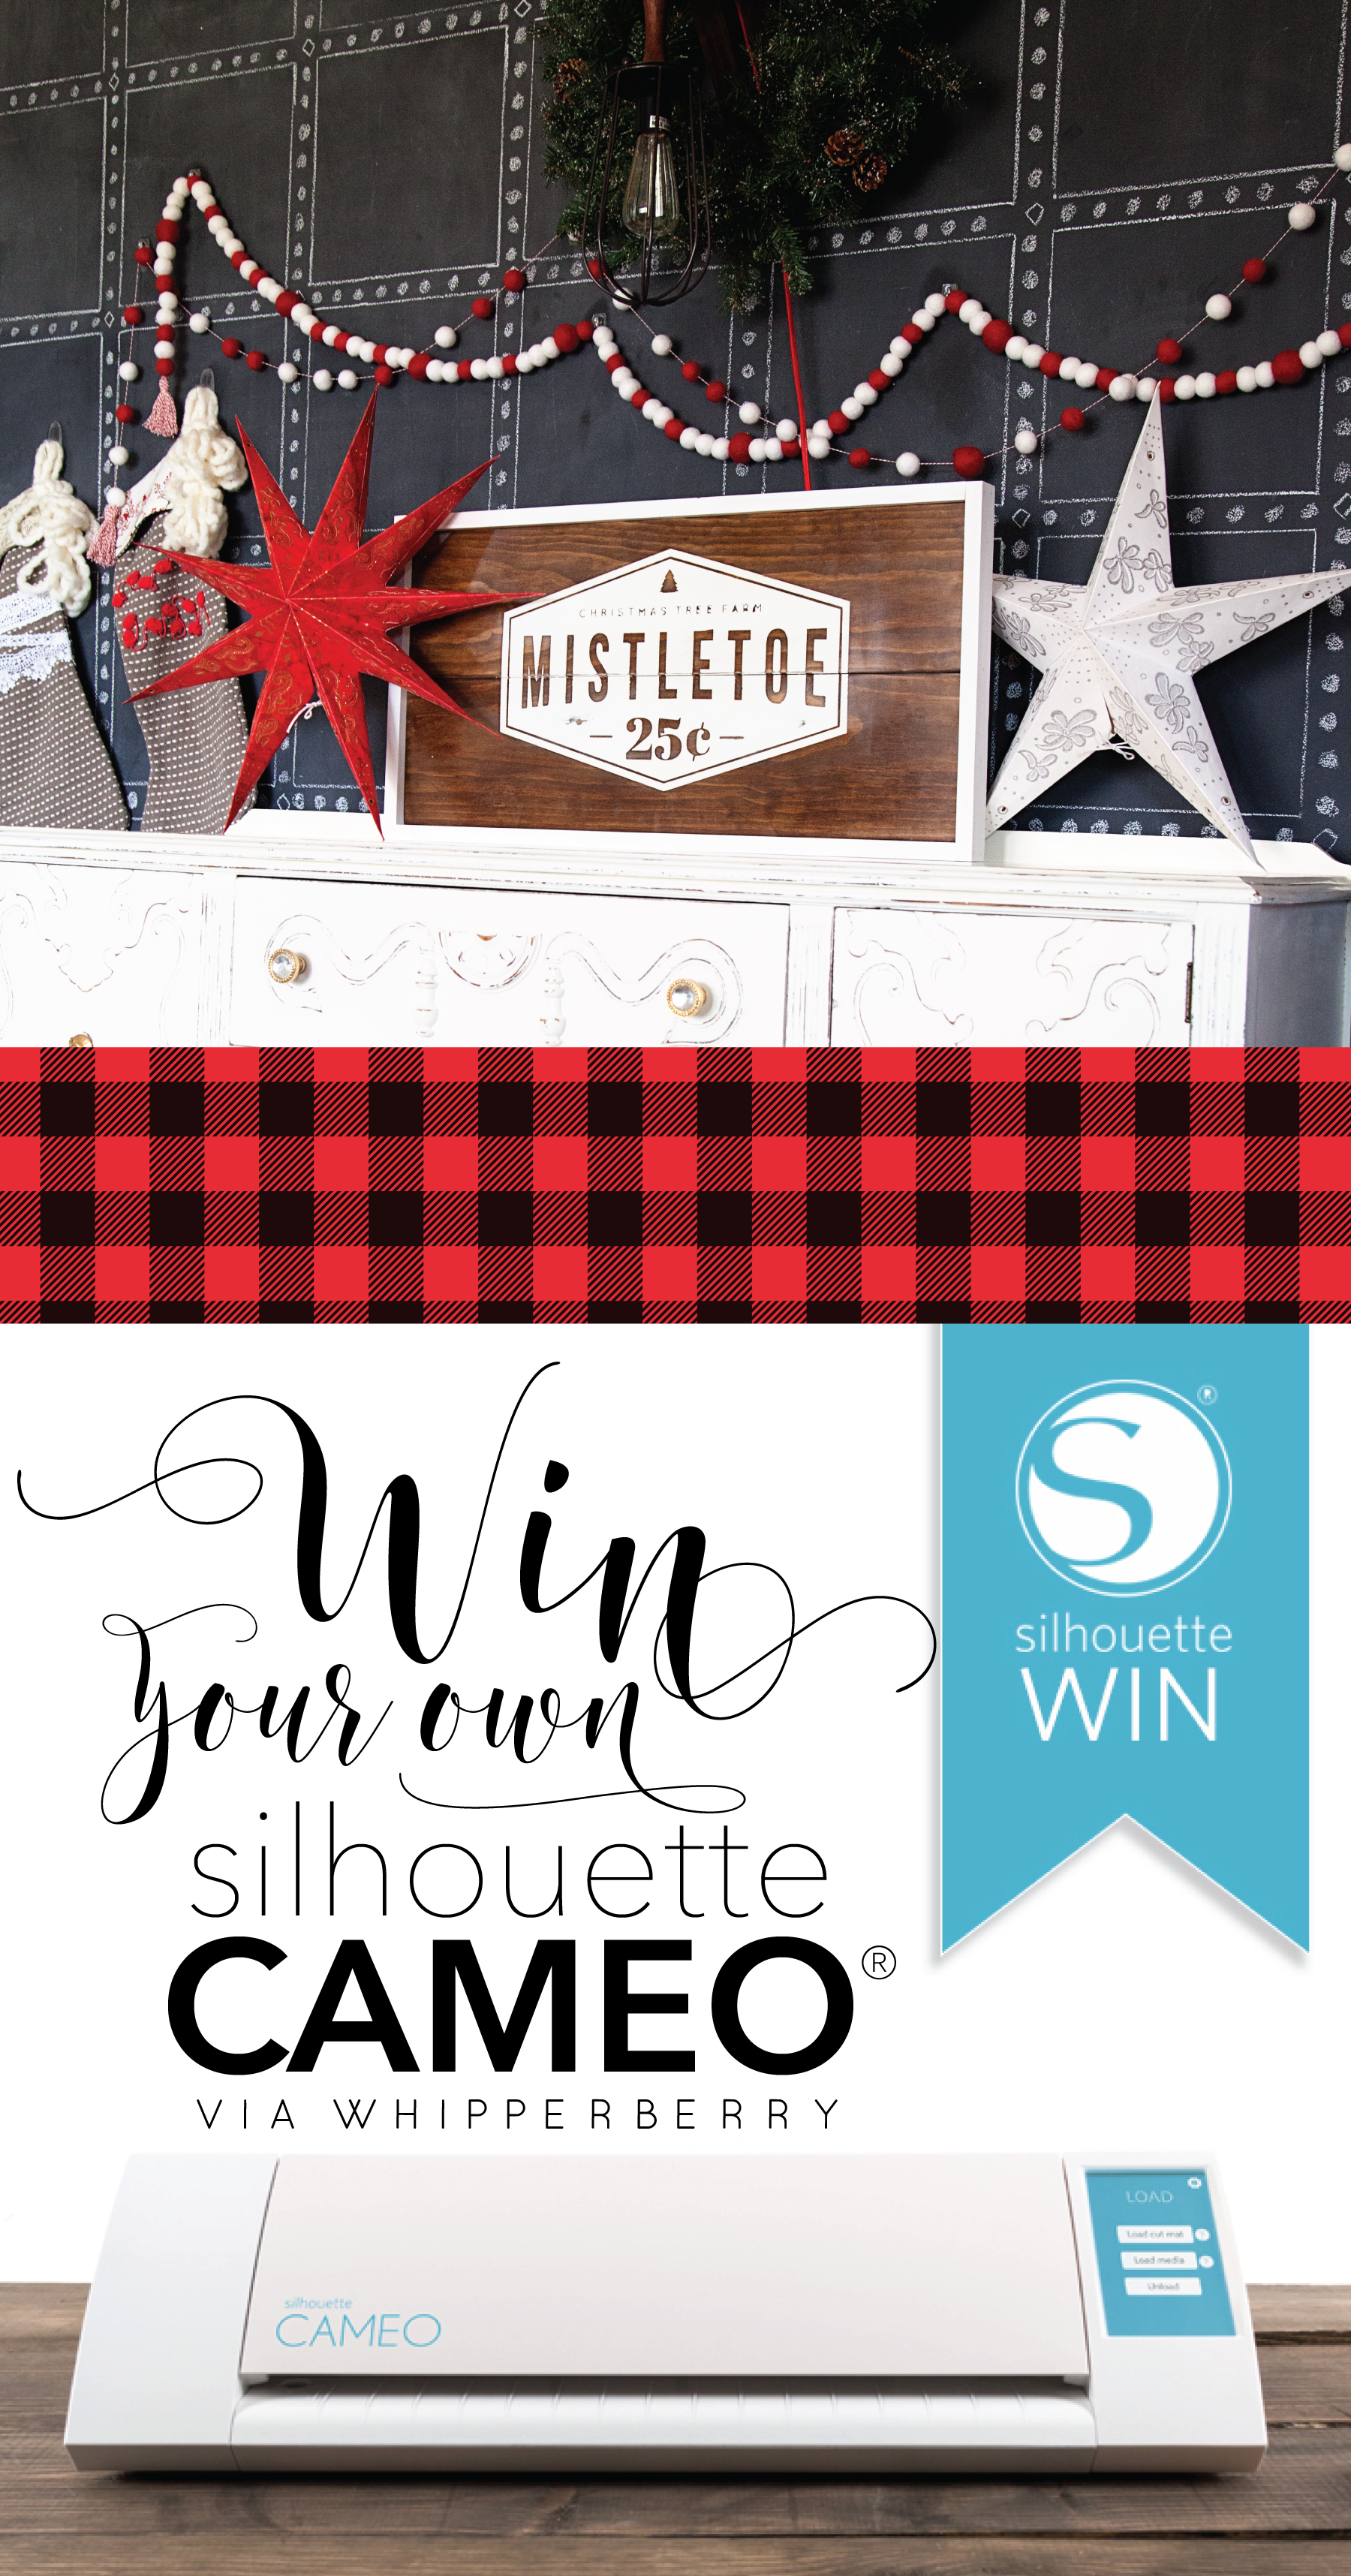
This Christmas I’ve created a fun new sign with my Silhouette CAMEO that I’m super excited to share with you guys.

WhipperBerry-White-Christmas-Mistletoe-Sign

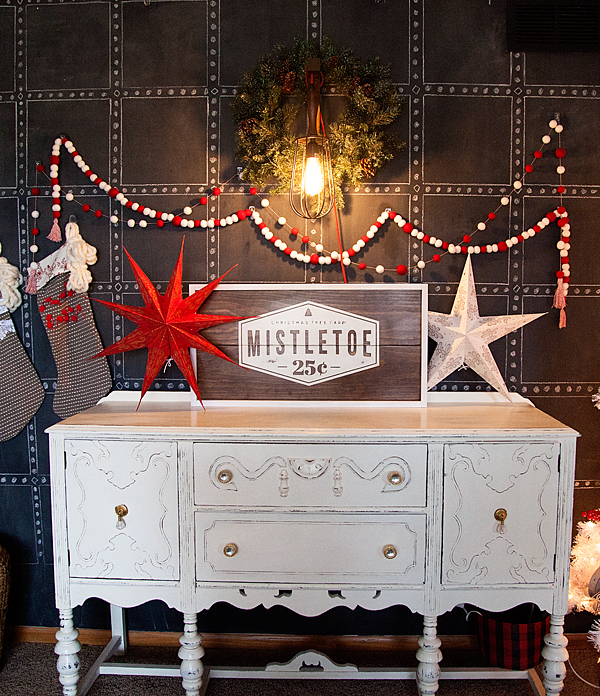
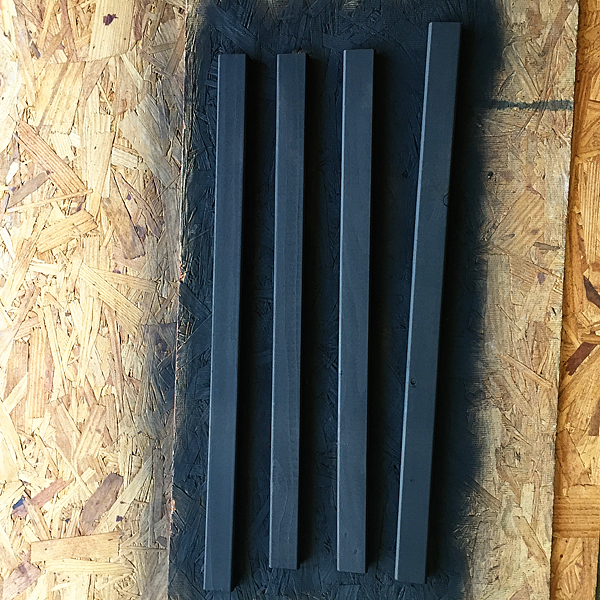
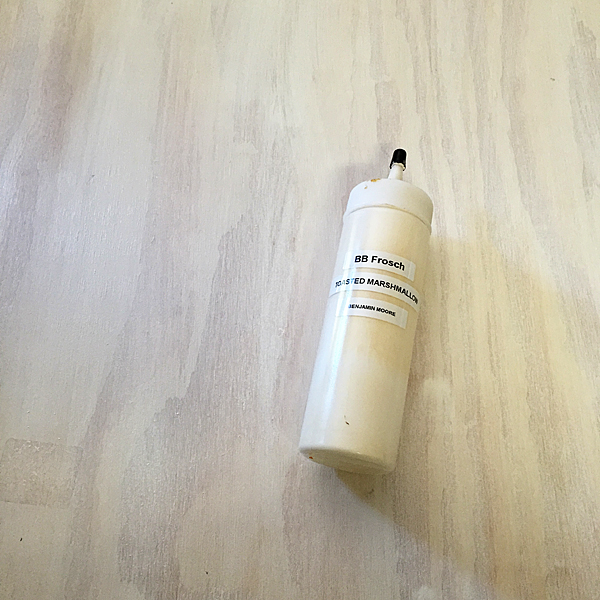
This sign was painted with BB Frösch Chalk Paint Powder using my Faux Stain technique and then I stenciled this design onto the wood. There is NO WAY I could have made that sign without my Silhouette CAMEO.

For years before I had learned about any kind of cutting machine, I yearned to make projects like this and couldn’t. I don’t have the talent to hand letters nor the patients to trace and cut out a design with a craft knife. When I learned about the Silhouette Cutting Machine 5 years ago my heart skipped a beat. This was the creative tool I had been waiting for my whole life!

I bought one on their Black Friday deal back in 2011 and I’ve been in love ever since! So many products have come out since and as much as I love the companies, I always go back to… “I can make that with my Silhouette, why would I need to buy anything else.”

So here’s the deal… I’m going to be sharing my cut files for this Mistletoe sign on December 1st on Tatertots & Jello. If you don’t have a Silhouette yet, now’s the time to get one. This week, at Midnight on Wednesday, Silhouette is starting their Black Friday Sale. This sale is epic every year! They offer the best discounts on Black Friday, this is for sure the time to grab one and stock up and all kinds of Silhouette goodies. I’ll have all the details on the sales event right at Midnight on Wednesday… BUT, while we anxiously await, the amazing folks at Silhouette have given me a CAMEO to give away to one of you!!!

All you need to do is follow the directions in the Rafflecopter box below and you’ll be entered to win the Silhouette CAMEO of your dreams!

I’ll announce the winner on Thanksgiving morning. Don’t forget to come back that night to take advantage of the Silhouette deals. They sell out quickly so you don’t want to miss out.

a Rafflecopter giveaway

Rosie the Riveter Costume

28 · Oct 1, 2015 · 6 Comments

+ This Rosie the Riveter Costume Post brought to you my Michaels Craft Stores +

Rosie-the-Riveter-Costume-from-WhipperBerry-2

You guys, I’m so excited… Halloween is right around the corner!!

I have a love/hate relationship with Halloween. I’m not a fan of the macabre scene, full of blood and gore, but I do love all of the fun creative ways to dress-up for the holiday. I love coming up with fun ideas for costumes with the family. I like to keep things simple, I don’t want to spend a ton of time or money on costumes for sure.

This months Michaels Maker’s Challenge was to create a simple DIY Halloween Costume.

_01190_MAKERS_0929_l

My daughter and I thought it would be fun to put together a quick costume with the iconic Rosie the Riveter as our muse. I have always LOVED this graphic.

rosie-the-riveter-poster-s

Rosie the Riveter Costume Materials

Here’s what you will need to make this simple costume.

Supplies-for-Rosie-the-Riviter-Costume

  • Elmer’s foam core board
  • Red and white polka dot fabric – available in store at Michaels, not online
  • Blue vinyl
  • 1 1/2 inch navy ribbon
  • Utility knife
  • Silhouette CAMEO – Not a deal breaker, but nice.
  • Blue button down shirt

Instructions

This is one of those costumes that really takes minutes if you have a Silhouette cutting machine. If not, NO WORRIES. It will take a little bit longer but you can still do it. With the silhouette all you need is to download this file that I created, and you can cut the image out of vinyl for your poster.

We-Can-Do-It-Poster-for-Silhouette-CAMEO-or-Portrait

The poster board is 20×30 and this will fit perfect to the top of the board.

We-Can-Do-It-poster

You will need to weed your vinyl, than place some transfer tape on top of it. I used the transfer tape to hinge the top of the vinyl transfer to the top of the board. Then I pulled the backing off the vinyl and with the hinge, laid the vinyl down right in the perfect spot.

Rosie-the-Riveter-Poster-from-WhipperBerry

Now, hindsight being 20/20… I would have either laid down some white vinyl or spray painted the top of the board white first. That would make the letters white, but I’m not too worried about that.

Rosie-the-Riveter-Costume-from-WhipperBerry-3

Next, I used a utility knife to cut some slits into the board right where I wanted to place the ribbon to create a kind of backpack effect. That way she could wear the board on her back with ease. I used navy ribbon so that it would blend in with the shirt and just tied it in cute bows on the back of the board.

Rosie-the-Riveter-Costume-from-WhipperBerry-5

It works perfect! Now all you have to do it tie-up your hair with the red & white polka dot fabric and you’re all set!!

Rosie-the-Riveter-Costume-from-WhipperBerry-4

It’s SUPER simple and so fun! What are your Halloween costume plans? Need some fun ideas? The rest of the 49 other Michaels Makers have been hard at work creating some fun ideas for you. You can check them out here!

An InLinkz Link-up


Disclaimer // I am a member of the Michaels Makers Crew and received store credit in order to create my project.

The Silhouette Curio is HERE

0 · Aug 27, 2015 · Leave a Comment

Silhouette-Curio

Guys… The new Silhouette Curio is HERE!!

I have a special discount just for you guys at the end of this post!!

Back in May, I had the chance to travel to Hawaii for the Silhouette Summit where they announced a TON of new products.

Silhouette-Summit

Linda from Craftaholics Anonymous and I with the CEO of Silhouette

All kinds of new consumable products, new software and software functions and TWO new members of the Silhouette family of crafting machines. The Curio and the Mint.

The Mint is a super fun little machine where you can create your own custom stamps and that will debut later this year.

Today, the Curio has launched. What’s special about the Curio you ask? Will this replace the CAMEO and Portrait?

The answer is no, it’s not meant to replace either machine. It is a new companion for your CAMEO or Portrait. It has all kinds of new features that the other machines do not have. For example…

Silhouette Curio Stippling

Stippling – Not familiar with Stippling? It’s SUPER cool!! You create with little dots. Create stippled ink projects with Silhouette felt tip pens or even stipple foils and metals.

Silhouette-Curo-New-Possibilities

Silhouette-Curio-Stippling-2

How fun is that? The world of creating with metal has just opened even wider!

Next on the list of new features…

Silhouette-Curo-Etch

You can etch on metal now as well. Create beautifully etched metal with the Curio’s etching tool to customize jewelry, charms, home décor, mixed media art, and more.

Silhouette-Curo-Emboss

The Curio can Emboss with a new embossing tool!

Silhouette-Curio-Double-your-creativity

The Curio has a dual carriage for double the fun!

Silhouette-Curo-Sketch

You can still Sketch, you can do with TWO Silhouette felt tipped pens now.

Silhouette-Curo-Cut

With the Curio you can still Cut, but you can cut even deeper!

Silhouette-Curo-Deeper-Cuts

The Curio has an improved blade and more clearance which means more options. The Curio’s 5mm clearance allows you to etch, sketch, or cut on new project palettes. Think wood, foil, leather, foam, and even metal.

I can go on and on… You’ll have to go over to Silhouette and check it out for yourself.

I will be working on all kinds of projects here on WhipperBerry with the new Curio and would love for you to join me.

The price for a Curio is $249.99

The folks at Silhouette are giving you guys $15 off a new Curio if you use the code WHIPPER at checkout.

Click the link HERE to get the $15 discount

I can’t wait to start creating with the Curio, what about you? Head on over to their site to check out all of the new products and software options. The Silhouette brand of machines are truly my favorite crafting tool. I use them more than any other tool that I have in my creative tool box!

Disclaimer – I am a member of the Silhouette Makers Affiliate Program.

Kitchen Marquee Sign with Heidi Swapp

0 · Jul 31, 2015 · 3 Comments

+ Kitchen Marquee Sign post brought to you by Michaels Craft Stores +

kitchen-marquee-sign-with-heidi-swapp-by-whipperberry

I am obsessed with marquee signs… I truly am.

It started with this post back in July of 2013, my Designer Marquee Letters.

designer-marquee-letters-by-whipperberry

Back in the day when marquee letters were rather elusive. Your options were to either pay a fortune for the real deal, or find a way to DIY a set of your own. I went the DIY route which was great, the sign still lives in my kitchen and I love it, however… it was a tad challenging, still expensive and quite frankly it still looked a little wonkey with all kinds of wiring to contend with.

The day that Heidi Swapp released her Marquee Love, was a DREAM! Seriously, I’m not sure if I’ve ever been that excited about a product release in a long time. It’s BRILLIANT! Truly, I’m always kind of excited to see what Heidi has up her sleeve. She is taking the crafting world by storm these days with not only her Marquee Letters but her Minc Foil Applicator is GENIUS as well. One of my favorite crafting tools right now!

Heidi is one of those individuals who is amazingly innovative but someone who is truly genuine. She’s everyone’s cheerleader. We have connected a bit over social media and had a chance to chat at SNAP this last year. She is one lady who I truly admire and look up to. She’s brilliant and a go getter. She’s one of those ladies who dreams up a crazy idea like the Minc and just MAKES IT HAPPEN! I love that!

I had a ball this week creating with my favorite Heidi Swapp Marquee Love letters to celebrate Michaels Big Brand Sale Starting Sunday, August 2nd.

 Kitchen Marquee Sign

Kitchen-is-now-open-Heidi-Swapp-Marquee-Sign-from-WhipperBerry-1-2

I decided to take Heidi Swapp’s Marquee Love letters to the next level and add them to a wood sign, rather than just having them sit on a shelf. I have fallen in love with all kinds of fun typography signs for the kitchen floating around like this one from Gina of Shabby Creek Cottage

small-kitchen

BUT… I thought, how fun would it be to have a marquee element to it. Why not do a sign saying, “Kitchen is Now OPEN” with the OPEN in marquee letters showing that when the sign is alight, the kitchen is open, when it’s off, the kitchen is CLOSED. Fun, right! Here’s how to make it…

Materials Needed

  1. 24×24 plywood board
  2. 4 – 25 inch 1 1/2 x 1/2 inch boards for the frame
  3.  Heidi Swapp Marquee Love letters O,P,E,N
  4. Krylon Chalk Board Spray Paint
  5. White Chalk Paint – I used BB Frösch Chalk Paint Powder
  6. Silhouette or Cricut cutting machine OR Stencil Letters
  7. Vinyl
  8. Scrap paper
  9. painters tape
  10. Hot glue
  11. Brad nails
  12. Glue dots

Directions

Heidi-Swapp-Marquee-Sign-from-WhipperBerry-10

Gather your materials and prepare them to paint. I decided to use Krylon Black Chalkboard Paint because I love the deep black and the matte finish.

First, I spray painted my letters and the frame for the sign.

Heidi-Swapp-Marquee-Sign-from-WhipperBerry-9

Heidi-Swapp-Marquee-Sign-from-WhipperBerry-7

Then I used BB Frösch Chalk Paint to white wash the sign base. I chose that technique rather than just straight paint because I still wanted to see the wood grain.

Heidi-Swapp-Marquee-Sign-from-WhipperBerry-8

To white wash your board, all you need to do is use watered-down chalk paint and then lightly wipe-off the paint to reveal the grain of the wood. This is a great way to add a little color, keep the wood look and it also dries really quick!

Heidi-Swapp-Marquee-Sign-from-WhipperBerry-5

Next, I cut my vinyl with my Silhouette CAMEO using the Bebas font. Love that font!

I laid down my vinyl and then taped the rest of the board with painters tape and some scrap paper to mask the rest of the board while I spray painted the letters.

Heidi-Swapp-Marquee-Sign-from-WhipperBerry-4

Once the paint was dry, I placed my marquee letters and drilled holes to feed the lights through. Now, keep in mind, you need to think through the pavement of the holes and how you are going to arrange the lights in the letters. You want the battery packs sitting on the bottom frame of the sign and you need to place the drilled holes accordingly.

Heidi-Swapp-Marquee-Sign-from-WhipperBerry-6

Heidi-Swapp-Marquee-Sign-from-WhipperBerry-3

Then, I assembled my marquee letters and hot glued them to the board.

Next, I hot glued the frame to the sign base and then secured it with some brad nails.

Heidi-Swapp-Marquee-Sign-from-WhipperBerry-1

On the back of the board, I used a few glue dots to secure the battery packs for the letters to the back of the board.

Heidi-Swapp-Marquee-Sign-from-WhipperBerry

And that was it… your Kitchen Marquee Sign is finished!

Kitchen-is-now-open-Heidi-Swapp-Marquee-Sign-from-WhipperBerry-2

The cool thing it looks great with the lights ON or OFF!

Kitchen-is-now-open-Heidi-Swapp-Marquee-Sign-from-WhipperBerry-3

I found the cutest sign on The Diary of Dave’s Wife not to long ago…

Lunch-now-being-served

Of course had to make one of my own, I thought it look great placed right under my Kitchen is Now Open sign…

Kitchen-is-now-open-Heidi-Swapp-Marquee-Sign-from-WhipperBerry-4

How fun is that! I used some 3M Command Picture Hanging Strips that are velcro so I can easily interchange my breakfast, lunch & dinner signs for fun! LOVE IT!!

Don’t forget this next week is the perfect time to stock-up on all your favorite brands at Michaels Big Brand Sale!!

Disclaimer // This post is sponsored by Michaels Craft Stores. I am Michaels Maker this year and will be posting all kinds of goodies from Michaels Craft Stores. I do receive free product to create with.

  • « Go to Previous Page
  • Page 1
  • Page 2
  • Page 3
  • Page 4
  • Interim pages omitted …
  • Page 9
  • Go to Next Page »

Primary Sidebar

Heather from Whipperberry
Hello... my name is Heather and I'm the creator of WhipperBerry a creative lifestyle blog packed full of great recipes and creative ideas for your home and family. I find I am happiest when I'm living a creative life and I love to share what I've been up to along the way... Come explore, my hope is that you'll leave inspired!

Footer

  • Privacy Policy
  • Crafts
  • Food
  • Gifts
  • Holidays
  • Home
  • Mom Life
  • Recipes
  • Travel

Copyright © 2026 · Seasoned Pro